Breakfast Burritos Recipe Flavorsome and Simple Dish
![- 4 large eggs - 1/4 cup milk - 1 cup black beans - 1 small red bell pepper, diced - 1 small green bell pepper, diced - 1/2 cup corn kernels - 1/2 teaspoon ground cumin - 1/4 teaspoon smoked paprika - 1 cup shredded sharp cheddar cheese - 1 ripe avocado, sliced - Salsa and fresh cilantro To create a flavorful breakfast burrito, start with the essential ingredients. The eggs bring richness, while milk makes them fluffy. Black beans add protein and heartiness. The red and green bell peppers provide a sweet crunch. You can also add some optional ingredients for extra flavor. Corn gives sweetness, while cumin and smoked paprika add warmth. Feel free to play with these options. For toppings and sides, shredded cheddar cheese is a must. It melts beautifully and enhances flavor. Add slices of ripe avocado for creaminess. Salsa brings zest, and fresh cilantro adds a pop of freshness. This combination makes for a delicious meal that is simple to prepare. For the full recipe, check out the Sunrise Breakfast Burritos. Start by cracking 4 large eggs into a bowl. Add 1/4 cup of milk. Whisk them together well until they are smooth. You want the mixture to look frothy. Next, add a pinch of salt and freshly cracked black pepper. Stir it all together to mix in the seasoning. Heat a non-stick skillet on medium heat. Once hot, add the diced red and green bell peppers. Sauté them for about 3-4 minutes. You want them to soften and smell great. Then, add 1 cup of rinsed black beans and 1/2 cup of corn kernels to the skillet. Sprinkle in 1/2 teaspoon of ground cumin and 1/4 teaspoon of smoked paprika. Stir well and cook for another 2 minutes. This will warm everything up and blend the flavors. Now, pour the egg mixture into the skillet with the veggies. Cook gently while stirring. You want the eggs to become fluffy but not dry. This should take around 3-5 minutes. While the eggs cook, warm your tortillas in another skillet or microwave for a few seconds. Once the eggs are done, take a warm tortilla and place some of the egg and veggie mix in the center. Top it with shredded cheddar cheese and a few slices of avocado. To wrap the burrito, fold the sides in first. Then, roll it from the bottom up tightly. This will keep all the yummy fillings inside. Serve your burritos warm with salsa on the side. Enjoy your Sunrise Breakfast Burritos with a sprinkle of fresh cilantro if you like! You can find the full recipe [here]. To make fluffy scrambled eggs, whisk the eggs and milk well. Use a non-stick skillet for even cooking. Cook over medium heat and stir gently. This helps keep the eggs soft. Avoid overcooking eggs by removing them from heat when they look slightly moist. They will finish cooking off the heat. Keep an eye on them, and don’t rush the process. Warm tortillas by placing them in a dry skillet over low heat. You can also microwave them for a few seconds. This makes them soft and easy to wrap. For cutting and plating, slice burritos in half diagonally. This not only looks nice but makes them easy to eat. Arrange them on a plate for a tidy display. Use garnishes like avocado slices or fresh cilantro. These add color and freshness to your dish. A small bowl of salsa on the side makes it even more appealing. For dairy-free options, use almond or soy milk in the egg mixture. You can also replace cheddar cheese with a dairy-free version. This keeps the dish tasty for everyone. Consider different vegetables and proteins. Swap bell peppers for zucchini or spinach. You can add proteins like bacon, sausage, or even tofu for variety. This adds new flavors and textures to your breakfast burritos. {{image_4}} You can change your breakfast burrito in many ways. Adding different proteins is a great start. You might love crispy bacon or savory sausage. If you prefer a meatless option, try tofu. Each choice adds unique flavors and textures. You can also adjust the spice levels. If you like heat, add jalapeños or a dash of hot sauce. They give your burrito a nice kick. Just remember to start with a little and taste as you go. You can always add more spice! If you want a fun twist, try a breakfast burrito bowl. Here, you keep all the good stuff but skip the wrap. Start with a base of rice or quinoa. Then, add the egg and vegetable mix on top. It’s a hearty meal that still feels fresh. You can layer in toppings like avocado and cheese. You might also add salsa on top for extra flavor. This bowl version is great for meal prep too. Just pack the ingredients in separate containers for easy meals. For those who want plant-based meals, you have options. Substitute eggs with scrambled tofu or chickpea flour. Both options give you protein and a nice texture. You can also use nutritional yeast instead of cheese. It adds a cheesy flavor without dairy. You can mix in your favorite vegetables too. Spinach, mushrooms, or zucchini work well. This way, you can enjoy a tasty breakfast without animal products. Plus, it’s a great way to sneak in more veggies! To keep your leftover burritos fresh, wrap them in plastic wrap or foil. Place them in an airtight container. This helps prevent drying and keeps flavors intact. Leftover burritos last about 3 to 4 days in the fridge. Always check for any signs of spoilage before eating. To freeze burritos, first, let them cool completely. Wrap each burrito tightly in plastic wrap. Then, place them in a freezer-safe bag or container. Make sure to label the bag with the date. Frozen burritos can last for up to 3 months. When ready to eat, you can reheat them straight from the freezer. For the best taste, use an oven or microwave. Heat them in the oven at 350°F for about 20 minutes or microwave for 2-3 minutes. Enjoy your burritos warm and tasty! Meal prep can save you time on busy mornings. Chop your vegetables the night before and store them in the fridge. You can also cook the egg mixture ahead of time. Just cool it and store it in a container. For a simple breakfast, warm some tortillas, fill them, and roll them up. Burritos freeze well, so make a batch for later. They are perfect for quick meals during the week. Making breakfast burritos is simple. First, whisk eggs with milk in a bowl. Next, cook diced bell peppers in a skillet until soft. Then, add black beans and corn, cooking until warm. Pour the egg mix into the skillet and scramble until fluffy. Warm tortillas in another pan or microwave. Place the egg mixture in each tortilla, add cheese and avocado, and roll them up. You can find the full recipe in the article. Yes, you can prepare breakfast burritos ahead of time. Cook the egg and vegetable mix, then cool it down. You can store this filling in the fridge for up to three days. When ready to eat, warm the filling, and wrap it in a heated tortilla. You can also freeze burritos. Wrap them tightly in foil and keep them in the freezer for up to a month. Just reheat in the oven or microwave when you want to enjoy them. The best tortillas are large and sturdy. Flour tortillas are soft and chewy, making them popular for burritos. Whole wheat tortillas add fiber and a nutty flavor. Corn tortillas work too but may break more easily. Choose the one that suits your taste. You can also try spinach or tomato tortillas for fun colors and flavors. To make breakfast burritos healthier, focus on fresh ingredients. Use egg whites instead of whole eggs for fewer calories. Swap regular cheese for a low-fat version or skip it altogether. Add more veggies like spinach or zucchini for extra nutrients. You can also use whole grain tortillas for added fiber. These simple swaps make a big difference without losing flavor. Breakfast burritos pair well with many sides. Fresh fruit like berries or melon adds sweetness. A simple green salad offers a fresh contrast. You can also serve crunchy tortilla chips with salsa or guacamole for extra flavor. For a drink, try a smoothie or fresh juice. These sides help create a balanced meal that’s full of color and taste. You can create delicious breakfast burritos with simple ingredients and easy steps. We covered essential items like eggs and peppers, along with tasty toppings. I offered tips for cooking, presentation, and storage. You can even customize your burrito with different flavors or make bowls. Remember, meal prep can save time. Enjoy making your perfect burrito that fits your taste. With these tips, you can impress family or friends at any meal!](https://roastedflavors.com/wp-content/uploads/2025/06/f5aa9a64-710a-43fd-9baf-2e0e67eb1f05.webp)
Ready to wake up your mornings with a tasty twist? My Breakfast Burritos Recipe is both flavorsome and simple. Packed with eggs, beans, and peppers, these burritos are perfect for …
Ready to wake up your mornings with a tasty twist? My Breakfast Burritos Recipe is both flavorsome and simple. Packed with eggs, beans, and peppers, these burritos are perfect for …
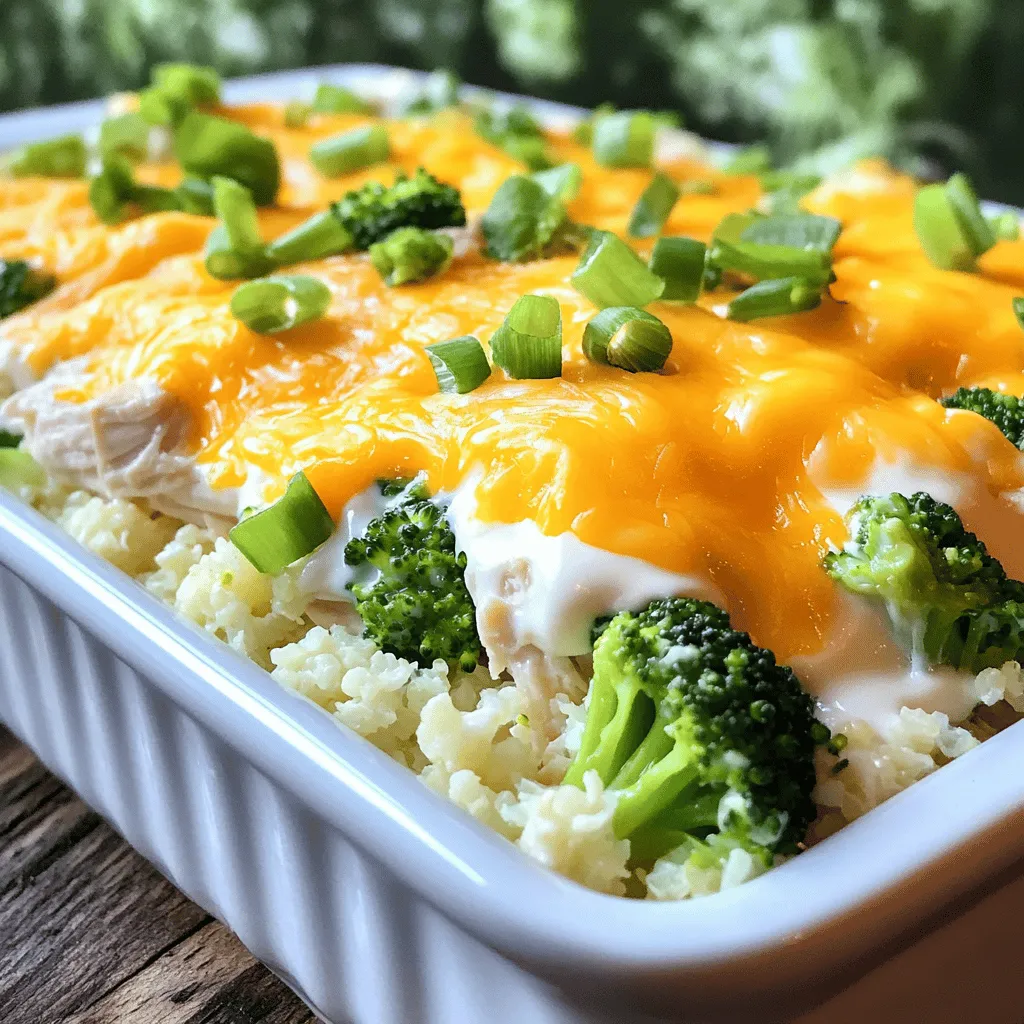
Looking for a quick and healthy meal the whole family will love? This Easy Low Carb Chicken Casserole is your answer! Packed with tender chicken, fresh veggies, and creamy cheese, …
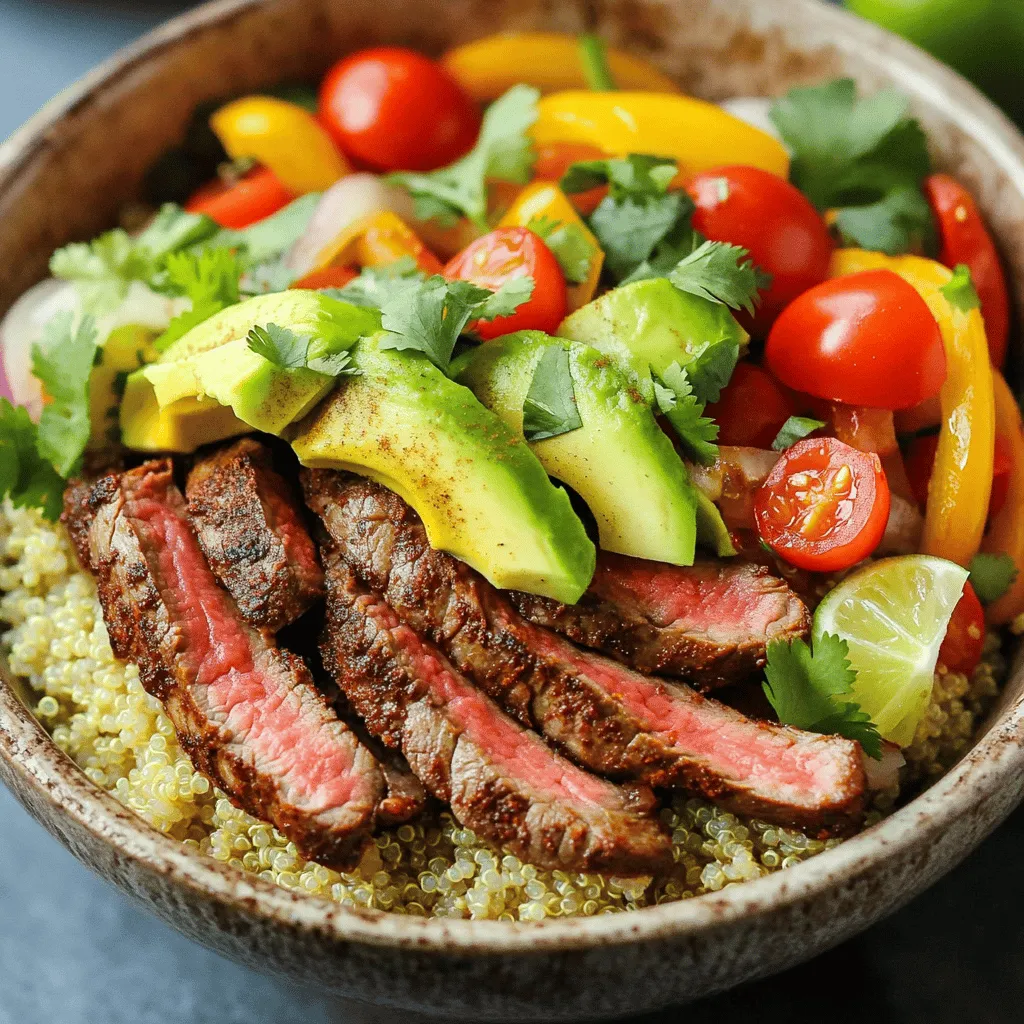
Are you craving a hearty meal that’s both tasty and packed with protein? Look no further! My High Protein Steak Fajita Bowl is the ultimate solution. With tender flank steak, …

Ready to elevate your breakfast game? This Overnight French Toast Casserole is simple, tasty, and perfect for any morning. With soft bread, creamy eggs, and fresh berries, every bite will …
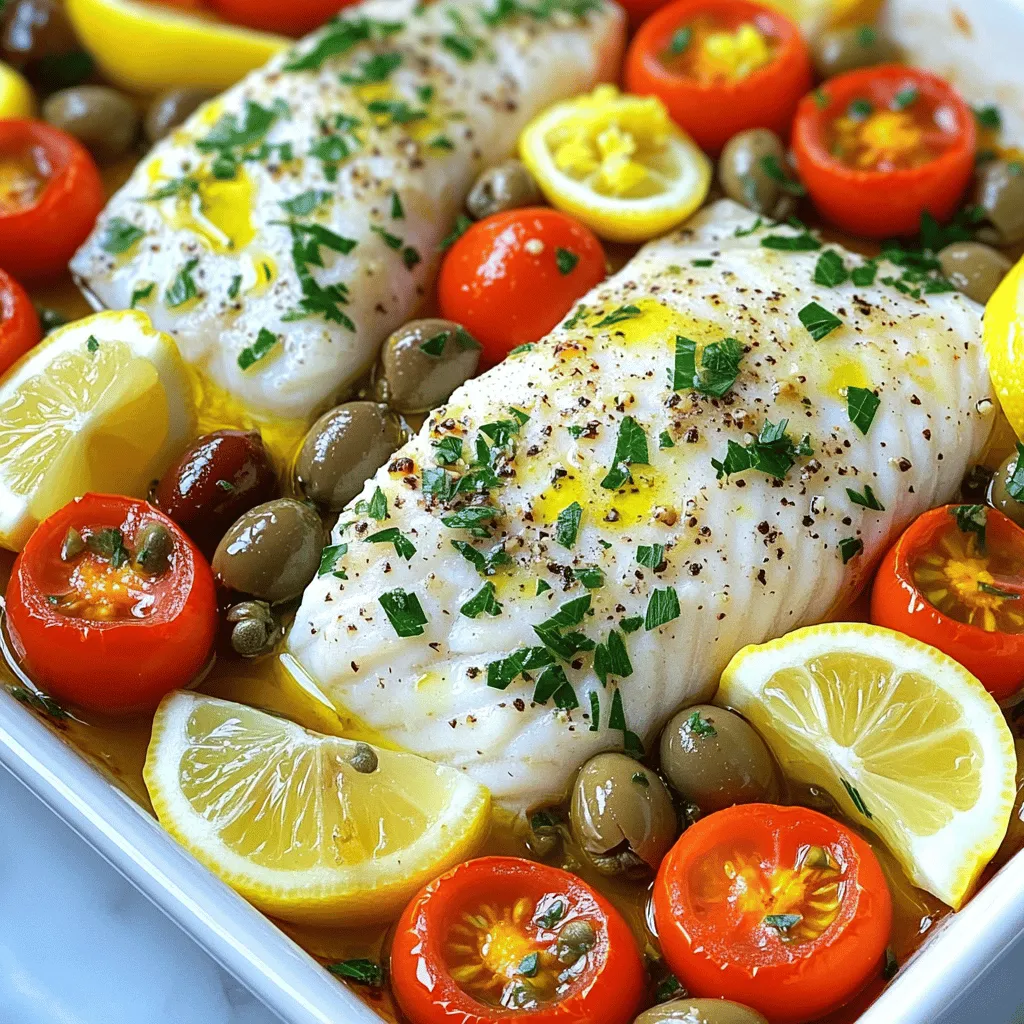
Are you ready to impress your taste buds with a bold and zesty dish? In my quest for the Best Mediterranean Baked Fish, I’ve uncovered a flavorful delight that combines …
![- 1 pound lean ground turkey or chicken - 1 cup whole wheat or gluten-free pasta Lean ground turkey or chicken adds protein and keeps the dish light. I love using turkey for its mild flavor. If you prefer beef, that works too. For the pasta, whole wheat gives more fiber. Gluten-free pasta is a great option for those with dietary needs. - 1 medium onion, finely chopped - 3 cloves garlic, minced - 1 carrot, diced - 2 celery stalks, diced - Fresh basil or parsley for garnish Onion, garlic, carrot, and celery build a tasty base. I always start with onion for its sweetness. Garlic adds depth, while carrot and celery give texture. Fresh herbs like basil or parsley brighten the dish and add color. - 1 can (28 oz) crushed tomatoes - 4 cups low-sodium chicken or vegetable broth Crushed tomatoes create a rich and hearty soup. I choose low-sodium broth to control the salt level. This combination makes the soup flavorful and satisfying. You can find the full recipe to guide you through this delicious process. Start by heating a splash of olive oil in a large pot over medium heat. Add your finely chopped onion. Cook it until it becomes translucent, which takes about 3 to 5 minutes. This step builds a great base for your soup. The onion releases its sweet flavor, adding depth. Next, incorporate minced garlic, diced carrot, and diced celery into the pot. Stir these for about 5 minutes until they soften and smell great. After that, add 1 pound of lean ground turkey or chicken. Use a spoon to break it into small pieces. Cook until the meat is browned and cooked through, which should take about 6 to 8 minutes. Stir occasionally to prevent sticking. Now it’s time to add the crushed tomatoes and low-sodium broth. Pour in one can (28 oz) of crushed tomatoes and 4 cups of broth. Stir in 2 teaspoons of dried Italian herbs and, if you like heat, add 1 teaspoon of red pepper flakes. Let the mixture come to a gentle simmer. This will meld all the flavors together nicely. Once the soup simmers, add your broken whole wheat or gluten-free pasta. Follow the package instructions for cooking time, usually around 8 to 10 minutes. Stir occasionally to keep the pasta from clumping. You want that pasta to be al dente for the best texture in your soup. While the soup cooks, mix ricotta cheese with a pinch of salt and cracked black pepper in a separate bowl. This will boost the flavor of the cheese. Once the soup is ready, ladle it into bowls. Top each with a generous spoonful of the ricotta mixture and sprinkle shredded mozzarella on top. The heat will melt the cheese perfectly. Finally, add freshly chopped basil or parsley for a beautiful and tasty finish. Enjoy your flavorful High Protein Lasagna Soup! For the Full Recipe, check the earlier section. To get the best flavor in your High Protein Lasagna Soup, start by sautéing the onions. Use a splash of olive oil and cook until they turn soft and clear. This usually takes about 3 to 5 minutes. Next, add garlic, carrots, and celery. Let these cook for another 5 minutes. This step builds a rich base for your soup. Season with salt and pepper as you cook. This simple technique brings out the flavors. Cooking the pasta just right is key. You want it to be al dente, which means firm to the bite. To avoid clumping, stir the pasta as it cooks. Add the broken pieces of lasagna noodles to the soup while it simmers. Follow the package instructions for cooking time, usually around 8 to 10 minutes. If you stir often, it helps keep the pasta from sticking together. For the cheese, make sure to mix the ricotta with a pinch of salt and pepper first. This adds flavor. When you serve the soup, add a spoonful of the ricotta mixture on top. Then sprinkle mozzarella over it. The heat from the soup will melt the cheese nicely. This gives you a creamy texture that makes every bite special. Enjoy this delicious dish with fresh herbs for added taste. For the complete recipe, check out the [Full Recipe]. {{image_4}} You can switch the lean ground turkey or chicken for beef or plant-based proteins. Ground beef adds a rich flavor. If you prefer plant-based options, try lentils or crumbled tofu. Both work well in this soup. Each protein brings its own taste and texture. For those with gluten intolerance, use gluten-free pasta. You can find various brands that taste great. Another option is to skip the pasta altogether. Instead, add more vegetables like zucchini or spinach. This keeps the soup hearty and satisfying without the gluten. To boost the flavor, try adding extra spices and herbs. Fresh basil or parsley can brighten the dish. You can also use thyme, oregano, or rosemary. A splash of balsamic vinegar adds depth. Consider adding a bit of lemon zest for a fresh twist. Each of these enhancements makes the soup more exciting. To store leftovers safely, let the soup cool first. Then, transfer it to an airtight container. You can keep it in the fridge for up to four days. Make sure to label the container with the date. This helps you track freshness. If you want to freeze the soup, use freezer-safe containers. Leave some space at the top since liquids expand when frozen. The soup can last up to three months in the freezer. For best taste, freeze it without the cheese. Add fresh cheese when you reheat. To reheat, use the stove or microwave. If using the stove, place the soup in a pot over medium heat. Stir often to avoid burning. If using a microwave, heat in 30-second intervals. This helps keep the flavor intact. Add a splash of broth or water if it seems thick. Enjoy your warm and hearty High Protein Lasagna Soup! For the full recipe, check out the earlier sections. Yes, you can prepare this soup ahead. Cook the soup and let it cool. Store it in airtight containers in your fridge. It stays fresh for up to three days. You can also freeze it for longer storage. Just make sure to leave some space in the container, as soup expands when frozen. When you are ready to serve, thaw it in the fridge overnight. Then, reheat it on low heat until warmed through. This makes it easy for busy days. You can easily make this soup your own. Here are some ideas: - Add different vegetables like spinach, bell peppers, or zucchini. - Change the protein to ground beef or a plant-based meat. - Use different pasta shapes, such as shells or rotini. - Experiment with spices like cumin, paprika, or smoked paprika for a twist. - Top it with different cheeses, like gouda or parmesan, for unique flavors. If you don't have ricotta, here are some good swaps: - Cottage cheese offers a similar texture but is less creamy. - Cream cheese can provide a rich flavor but may be thicker. - Greek yogurt gives a tangy taste and adds protein. - Silken tofu is a great dairy-free option that blends well. Each option will change the flavor a bit, so choose what you like best. This soup has moderate carbs due to the pasta and tomatoes. If you want a lower-carb version, try these tips: - Use zucchini noodles or spaghetti squash instead of pasta. - Reduce the amount of crushed tomatoes, as they have natural sugars. - Add more protein and veggies to fill you up without many carbs. With these changes, you can enjoy a hearty soup that fits a low-carb diet. This High Protein Lasagna Soup offers a blend of flavors and healthy ingredients. You can use lean meats, fresh veggies, and rich herbs. Follow the step-by-step guide to prepare and serve with melty cheese. Remember, you can customize the recipe easily with different proteins or spices. Store leftovers wisely to keep them fresh for later enjoyment. With these tips and variations, you can make a delicious meal that fits your needs. Enjoy cooking and savor the flavors of your creation!](https://roastedflavors.com/wp-content/uploads/2025/06/9241de5b-55fc-4f8b-b4e9-308c11773ee8.webp)
Are you ready for a warm, cozy dish that packs a protein punch? High Protein Lasagna Soup is not just tasty; it’s also filling and easy to make. With lean …
![- Ground beef or turkey - Breadcrumbs - Green onions - Garlic and ginger - Soy sauce - Sesame oil - Brown sugar - Gochujang - Black pepper - Mayonnaise - Sriracha - Optional garnishes (sesame seeds, chopped green onions) Gather all these ingredients for a tasty dish. The ground beef or turkey is the base. Breadcrumbs add texture. Green onions give a fresh taste. Garlic and ginger boost flavor. Soy sauce adds saltiness, while sesame oil gives a nutty touch. Brown sugar balances the heat from gochujang, the Korean chili paste. Black pepper adds warmth. For the dip, mix mayonnaise and sriracha. This combo creates a creamy and spicy flavor. You can add sesame seeds or chopped green onions for a nice touch. This simple dip pairs perfectly with the meatballs. If you want a complete guide, check out the Full Recipe. - Preheat your oven to 400°F (200°C). Line a baking sheet with parchment paper to keep things easy. - In a large mixing bowl, combine: - 1 lb (450g) ground beef (or turkey) - 1/4 cup breadcrumbs - 1/4 cup finely chopped green onions - 2 cloves minced garlic - 1 tablespoon grated fresh ginger - 2 tablespoons soy sauce - 1 tablespoon sesame oil - 1 tablespoon brown sugar - 1 tablespoon gochujang - 1 teaspoon black pepper Mix all the ingredients gently. You want everything combined, but don’t overmix. This keeps the meatballs tender. - Shape the mixture into small meatballs. Each should be about 1 inch in diameter. Place them on your baking sheet, leaving space between each one. - Bake them in the oven for 15-20 minutes. To check for doneness, use a meat thermometer. They should reach an internal temperature of 160°F (70°C). You want them golden brown outside and cooked through inside. - In a small bowl, mix together: - 1/2 cup mayonnaise - 2 tablespoons sriracha This dip is simple yet flavorful. Taste it and adjust the sriracha to match your heat preference. If you love spice, add more! Once the meatballs are done, serve them warm. Garnish with sesame seeds and extra chopped green onions. Enjoy them with your spicy mayo dip! For the full recipe, check out the details above. To make your meatballs tender, avoid overmixing the meat. Mix just until the ingredients come together. This keeps them soft and juicy. When forming the meatballs, aim for about one inch in size. This helps them cook evenly. Place them on the baking sheet with space between each ball. This allows hot air to flow and cook them perfectly. Bake at 400°F for 15-20 minutes. Use a meat thermometer to check for doneness. The internal temperature should reach 160°F. To adjust the heat of your spicy mayo dip, start with one tablespoon of sriracha. Mix it in with the mayonnaise. Taste it and decide if you want more heat. If you like a sweeter dip, add a little honey. For more depth, stir in a splash of soy sauce or rice vinegar. You can also add garlic powder or lime juice for a fresh twist. Experiment with these flavors to find your perfect mix. For fun, try adding chopped herbs like cilantro or parsley for extra freshness. {{image_4}} You can switch the ground beef for ground chicken or turkey. This change gives a leaner option. If you're looking for a vegetarian choice, use lentils or chickpeas. You can mash them and mix them with the same ingredients. This works well for meatballs too. For breadcrumbs, consider using gluten-free options. Crushed rice crackers or ground oats are good choices. They create the same texture. If you want more crunch, try panko breadcrumbs. They add extra crispiness to your meatballs. Adding different spices can change the taste of your meatballs. You might try garlic powder or onion powder for more flavor. Fresh herbs like cilantro or basil can add a pop of freshness. You can even mix in sesame seeds for added crunch. For dipping sauces, the spicy mayo dip is great, but try other options too. A sweet soy sauce dip works well. You can also use a tangy kimchi mayo. Each sauce gives a unique twist and keeps it exciting. Explore different flavors to find your favorite! For the complete recipe, check out the [Full Recipe]. To keep your meatballs fresh, place them in an airtight container. This helps avoid moisture loss. You can store them in the fridge for up to three days. If you want them to last longer, consider freezing them. They can stay in the freezer for about three months. When reheating, use the oven for the best texture. Preheat it to 350°F (175°C). Place the meatballs on a baking sheet and cover them with foil. Heat for about 10-15 minutes until warm. This helps keep them juicy and prevents drying out. You can also microwave them if you're in a hurry. Just be careful not to overheat them. Store the spicy mayo dip in a sealed container in the fridge. It can stay fresh for about one week. If you notice any change in smell or texture, it’s best to toss it out. To keep the dip as fresh as possible, try to minimize exposure to air. When using it, scoop out only what you need. This way, the rest stays sealed. You can also make a larger batch and keep it in smaller jars for easy use. It's a great way to enjoy this tasty dip multiple times! For the full recipe, check out the earlier section. To make Korean BBQ meatballs spicier, add more gochujang. You can also mix in chopped fresh chili peppers. Another option is to increase the sriracha in the spicy mayo dip. Adjust each to your taste. Yes, you can freeze Korean BBQ meatballs. After baking, let them cool completely. Place them in an airtight container or a freezer bag. They can last up to three months in the freezer. Gochujang is a Korean chili paste. It adds heat and depth of flavor. If you don’t have it, you can use a mix of red pepper flakes and a bit of sugar. It won’t taste the same, but it works in a pinch. These meatballs last about three to four days in the fridge. Store them in an airtight container for the best results. Make sure to reheat them thoroughly before serving. Yes, you can make this recipe ahead of time. Prepare the meatballs and place them on a baking sheet. Cover and refrigerate for up to 24 hours. Bake them just before serving for the best taste. For the full recipe, check the detailed instructions above. This blog post covered making Korean BBQ meatballs and a spicy mayo dip. We discussed the key ingredients, instructions, helpful tips, and variations. I shared storage advice to keep your meatballs tasty. You can create a flavorful dish that pleases everyone. Experiment with different proteins and spices. With these tips, you can enjoy delicious meatballs anytime. Happy cooking!](https://roastedflavors.com/wp-content/uploads/2025/06/78ca4d0e-f6e6-4aed-ae68-1124432f9a4c.webp)
Craving a delicious, fun dish? You’re in the right place! Korean BBQ Meatballs with Spicy Mayo Dip are a game-changer for your meals. These tasty meatballs blend savory flavors with …
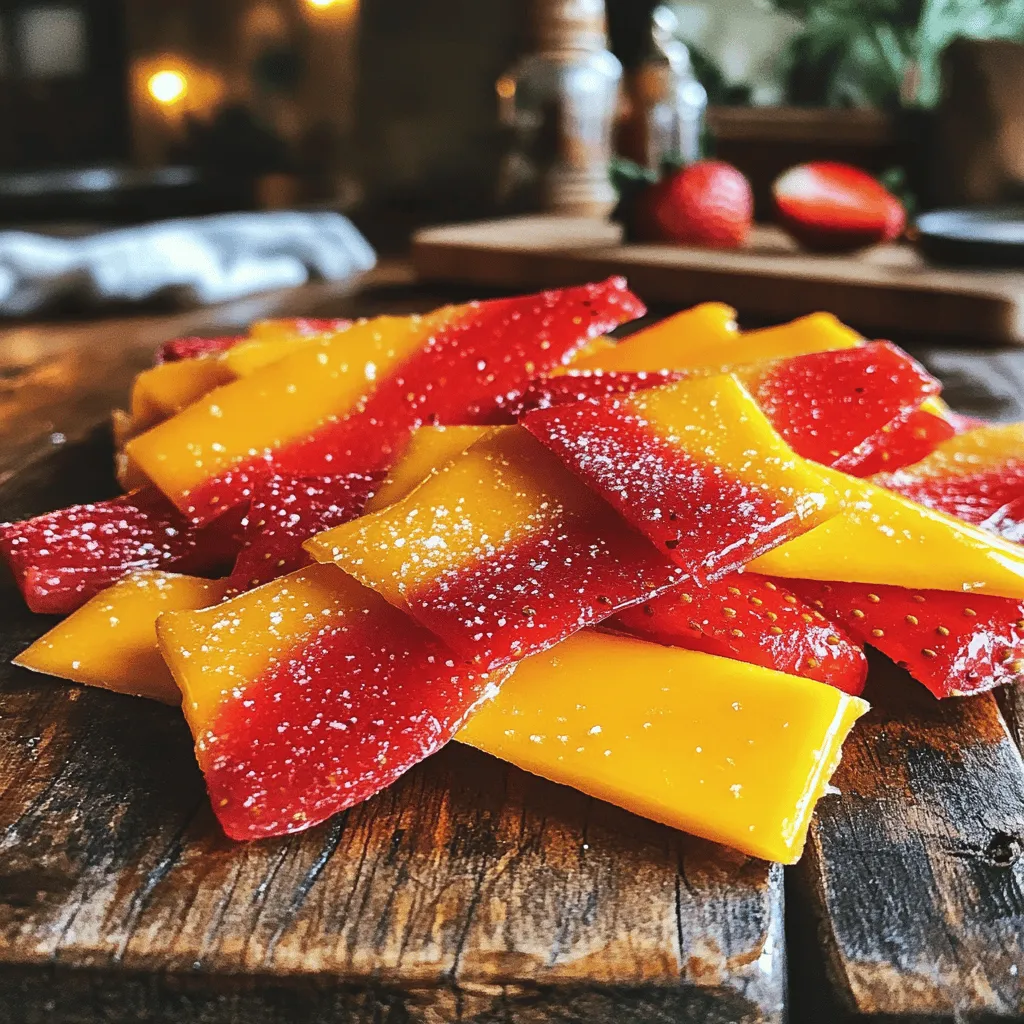
Looking for a simple, tasty snack? You’re in the right place! In this post, I’ll show you how to make delicious 3-ingredient fruit leather. It’s an easy recipe that lets …
![- 2 large cucumbers, thinly sliced - 1 cup carrots, julienned - 1 red bell pepper, thinly sliced - Rice vinegar, soy sauce, honey or maple syrup - Sesame oil, ginger, and garlic - Fresh cilantro, green onions, toasted sesame seeds To create a bright and refreshing Asian cucumber salad, you need fresh ingredients and a tasty dressing. The main ingredients bring crunch and color to the dish. The cucumbers provide a crisp base. Carrots add sweetness and extra crunch. Red bell peppers offer a pop of color and flavor. For the dressing, rice vinegar gives a tangy kick. Soy sauce adds a savory depth. Honey or maple syrup balances the tanginess with sweetness. Sesame oil brings a rich, nutty flavor. Fresh ginger and garlic add zing to the mix. Together, these ingredients create a dressing that enhances the salad. To finish, you sprinkle fresh cilantro and green onions on top. They add a burst of freshness. Toasted sesame seeds bring a delightful crunch. This salad is not only light but also full of flavor, making it a perfect side dish or snack. If you want the full recipe, check out the Crisp Asian Cucumber Delight. To get the crispiest cucumbers, start by slicing them thin. I like to sprinkle salt on the slices. This draws out moisture, making them crunchy. Let them sit in a colander for about 15 minutes. After that, rinse the cucumbers under cold water. This will remove excess salt. Finally, pat them dry with a paper towel. Next, let’s prep the other veggies. For carrots, use a sharp knife to cut them into thin strips. This method is called julienning. It gives nice texture and looks great. For the red bell pepper, cut off the top and bottom. Remove the seeds and slice it thinly. You want all the pieces to be about the same size. Now, let’s make the dressing. In a small bowl, combine rice vinegar, soy sauce, honey, sesame oil, ginger, and minced garlic. Use a whisk to mix everything well. This is key for a balanced flavor. Whisk until the mixture is smooth. A good dressing should slightly emulsify, meaning it blends well and doesn’t separate. With all the ingredients ready, it’s time to combine. In a large bowl, add the cucumbers, carrots, bell pepper, green onions, and cilantro. Drizzle the dressing over the salad. Gently toss everything together. Make sure every piece is coated in the dressing. Let the salad rest for at least 10 minutes. This helps all the flavors mix together. Just before serving, toss it again lightly. This ensures a fresh and vibrant dish. For the full recipe, check out [Full Recipe]. To make your Asian cucumber salad pop, add more spice or sweetness. For spice, include a pinch of red pepper flakes or a drizzle of sriracha. You can also add a dash of chili oil for a warm kick. If you like it sweeter, try adding more honey or maple syrup. Adjusting salt and acidity is key. Start with a small amount of salt. Taste as you mix. If it feels flat, add more vinegar. Rice vinegar gives a nice tang. You want a balance between sweet and sour. A beautiful salad is all about how you serve it. Use a clear glass bowl. This lets the colors shine through. Layer your ingredients for a more inviting look. Garnishes can elevate your dish. Fresh cilantro adds vibrant green. A sprinkle of sesame seeds brings a nice crunch. You may even add thinly sliced red chili for a splash of color. Chopping veggies can take time. Use a sharp knife for easy slicing. For cucumbers, try a mandoline. It helps you get thin, even slices quickly. To keep cucumbers fresh, store them in water. This helps maintain their crunch. If you salt them before mixing, let them sit for a bit. Rinse and dry before adding to your salad. For the full recipe, check out the Crisp Asian Cucumber Delight. {{image_4}} You can easily change up the ingredients in this salad. To keep it gluten-free, use tamari instead of soy sauce. This option provides the same rich flavor without the gluten. For added protein, consider adding shrimp or tofu. Both options make this salad more filling and satisfying. Shrimp brings a sweet flavor, while tofu offers a nice, soft texture. You can adapt this salad based on the seasons. In the summer, add fresh tomatoes or radishes for extra crunch. In fall, try roasted butternut squash. Each season brings unique flavors that can enhance your salad. You can also adjust the recipe based on your flavor likes. Adding fruits like mango or citrus can create a bright, fresh taste. The dressing is where you can really get creative. While the original recipe is tasty, try different dressings for a new twist. You can use peanut sauce or a spicy sesame dressing. Adding herbs like mint or basil gives the salad a fresh, bright flavor. Spices like chili flakes can bring heat if you like a kick. Each change adds a new layer of flavor to your dish. For the full recipe, check the link provided. To keep your Asian cucumber salad fresh, store it in the fridge. Use an airtight container. This prevents moisture loss and keeps the salad crisp. Avoid metal containers, as they can react with the vinegar. Instead, opt for glass or BPA-free plastic. Make sure to seal the lid tightly. This helps maintain the salad's bright flavors. Asian cucumber salad will stay fresh for about 3 days in the fridge. After that, it may lose its crunch. Look for signs of spoilage. If the cucumbers become slimy or the colors fade, it’s time to toss it. Always trust your senses. A sour smell also means it’s no longer good. You can prepare this salad ahead for quick meals. Chop the vegetables and store them separately in the fridge. Mix them with the dressing just before serving. This keeps everything fresh and crunchy. You may want to adjust the salt and acidity when you prepare it ahead. Taste the salad again after mixing. This allows the flavors to shine through. For this salad, I recommend using English cucumbers. They are long and thin, with a smooth skin. Their seeds are smaller, making them less bitter. Regular cucumbers, on the other hand, have a thicker skin and larger seeds. This can make them taste more bitter and watery. If you want a crisp bite, stick with English cucumbers. They add a nice crunch and freshness to your salad. Yes, you can make this salad in advance. Prepare it a few hours before serving for the best flavor. Store the salad in the fridge in an airtight container. If you want to keep it fresh, add the dressing just before serving. This prevents the salad from getting soggy. It tastes even better after the flavors mingle for a bit. This salad pairs well with many dishes. You can serve it with grilled chicken or shrimp for protein. It also goes nicely with rice or noodles. For a light meal, try it with tofu or vegetable stir-fry. You can create a full meal by adding some spring rolls on the side too. The salad adds a refreshing crunch to any meal. You can easily customize this recipe. Try adding sliced radishes for more crunch. If you like heat, add some chopped chili peppers. For a sweeter taste, include mango or pineapple chunks. You can also swap out the vegetables. Use bell peppers or snap peas for variety. Feel free to play with the dressing, too. Add lime juice for a zesty kick or swap honey for agave syrup. Yes, you can make the dressing vegan. Instead of honey, use maple syrup or agave nectar. Both options keep the sweetness without using animal products. You can also add a splash of lemon juice for extra freshness. This keeps the flavors bright and delicious. Your salad will still taste great with these changes. Enjoy your light and crunchy delight! This cucumber salad is simple and fresh. You learned about key ingredients, dressing, and enhancements. I covered preparation steps and tips for good results. You can try variations and customize it to your taste. Store it well and enjoy it for days. This salad is a healthy addition to any meal. With a bit of creativity, you can make it your own. Enjoy your cooking journey!](https://roastedflavors.com/wp-content/uploads/2025/06/57f3eb63-e052-47e7-9487-c095a6e655f6.webp)
Looking for a light and refreshing dish that bursts with flavor? This Asian Cucumber Salad is your perfect solution! With crunchy cucumbers, colorful bell peppers, and a zesty dressing, it’s …
![To make honey pineapple salmon, gather these fresh ingredients: - 4 salmon fillets - 1 cup fresh pineapple, diced into small pieces - 1/4 cup honey - 2 tablespoons soy sauce - 2 tablespoons extra virgin olive oil - 2 cloves garlic, finely minced - 1 teaspoon fresh ginger, finely grated - Sea salt and freshly cracked black pepper to taste - Fresh cilantro leaves, for garnish - Lime wedges, for serving Each ingredient brings something special to your dish. Here’s how they help: - Salmon: Packed with omega-3 fatty acids, salmon supports heart health and brain function. - Pineapple: This sweet fruit is rich in vitamin C, aiding digestion and boosting immunity. - Honey: A natural sweetener, honey has antioxidants and can soothe a sore throat. - Soy Sauce: It adds umami flavor and is low in calories, enhancing taste without extra fat. - Olive Oil: A great source of healthy fats, olive oil supports skin health and cholesterol levels. - Garlic: Known for its immune-boosting properties, garlic can reduce blood pressure and cholesterol. - Ginger: This spice helps with digestion and can reduce nausea. - Cilantro: Rich in vitamins A and K, cilantro adds flavor and may help detoxify the body. - Lime: A good source of vitamin C, lime adds brightness and aids in iron absorption. If you need to swap ingredients, here are some options: - Salmon: Use trout or tilapia for a different fish experience. - Pineapple: Try mango or peaches for a sweet twist. - Honey: Maple syrup or agave nectar works well for a vegan option. - Soy Sauce: Coconut aminos can be a gluten-free alternative. - Olive Oil: Avocado oil can substitute for a higher smoke point. - Garlic: Garlic powder can be used if you don’t have fresh garlic. - Ginger: Dried ginger works, but use less than fresh. - Cilantro: Parsley can replace cilantro if you prefer a milder taste. - Lime: Lemon juice can stand in for lime for a similar tang. This dish is easy to make and full of flavor. You can find the full recipe for honey pineapple salmon above! To create a tasty Honey Pineapple Salmon, you need to follow some clear steps. Start by preheating your oven to 400°F (200°C). This helps cook the salmon evenly. Next, mix your marinade. In a medium bowl, combine fresh pineapple, honey, soy sauce, olive oil, minced garlic, and grated ginger. Whisk them well until they blend nicely. This marinade gives your salmon a sweet and tangy flavor. Now, let’s prepare the salmon. Pat each salmon fillet dry with a paper towel. This helps the marinade stick better. Season both sides of the fillets with sea salt and freshly cracked black pepper. This adds a nice flavor base. After seasoning, place the salmon fillets in a baking dish. Pour the marinade over the top, making sure to coat each fillet evenly. It’s great to let the salmon marinate for 15-20 minutes at room temperature. This allows the flavors to soak in well. For a fun twist, sprinkle some extra diced pineapple on top of each fillet just before baking. Next, bake the salmon in your preheated oven for 15-20 minutes. You want the salmon to be opaque and flake easily with a fork. Keep an eye on it. You don’t want to overcook it, as that can make it dry. Once done, take it out and let it rest for a minute. Garnish with freshly chopped cilantro for a pop of color. Serve with lime wedges on the side for a zesty kick. You can find the complete steps in the Full Recipe. Enjoy your delicious, homemade Honey Pineapple Salmon! To get the best flavor from your Honey Pineapple Salmon, focus on the marinade. The mix of honey, soy sauce, and fresh pineapple gives a sweet and savory taste. Let the salmon marinate for at least 15 minutes. This time helps the salmon soak in all that goodness. Also, don’t skip the garlic and ginger; they add depth to the dish. For a twist, you can add a pinch of chili flakes for a slight kick. One common mistake is overcooking the salmon. Keep an eye on it while it bakes. Salmon should be opaque and flake easily with a fork. Another mistake is not seasoning enough. A good amount of salt and pepper is key for great taste. Lastly, don’t rush the marinating process. Skipping this step means missing out on fantastic flavors. Pairing your Honey Pineapple Salmon with the right sides is crucial. Here are some tasty options: - Steamed rice or quinoa for a hearty base - Fresh green salad with a light vinaigrette - Roasted vegetables like asparagus or broccoli to complement the salmon - A refreshing cucumber salad to balance the sweetness These combinations not only enhance the meal but also add color to your plate. Check out the Full Recipe for more ideas! {{image_4}} You can switch up the flavors in this dish easily. Try using other fruits like mango or peach instead of pineapple. They bring a sweet tang that pairs well with salmon. For a different sauce, use maple syrup instead of honey. It gives a richer taste. Soy sauce can also be swapped for teriyaki sauce for a sweet and savory mix. If you want a kick, add red pepper flakes or fresh chili to the marinade. When serving Honey Pineapple Salmon, think about sides that balance the flavors. Here are some ideas: - Steamed jasmine rice - Quinoa with herbs - Grilled asparagus - Roasted sweet potatoes You can also serve a fresh salad with lime vinaigrette. This adds brightness and freshness to your meal. For a festive touch, garnish with extra pineapple chunks and fresh cilantro. You can cook this salmon in several ways. Grilling adds a smoky flavor that enhances the dish. To grill, just preheat your grill to medium-high heat. Cook the salmon for about 6-8 minutes per side. For pan-searing, heat a skillet over medium heat with olive oil. Sear each side for about 4-5 minutes until golden brown. Baking is the easiest method and keeps the salmon moist. Each method brings out different tastes, so feel free to experiment! For the full recipe, check out the [Full Recipe]. To store leftover honey pineapple salmon, first let it cool. Place the salmon in an airtight container. Make sure to cover it well to keep it fresh. Store the container in the fridge. It will last for about 3 days. Keep an eye on the salmon. If it smells off, it’s best to discard it. When reheating your salmon, use the oven for the best taste. Preheat the oven to 350°F (175°C). Place the salmon on a baking sheet. Cover it loosely with foil to keep it moist. Heat for about 10 minutes or until warm. Avoid using the microwave, as it can dry out the fish. If you want to freeze honey pineapple salmon, wrap it tightly in plastic wrap. Then, place it in a freezer-safe bag. Label the bag with the date. You can freeze it for up to 3 months. When ready to eat, thaw it in the fridge overnight. Reheat as mentioned above for the best flavor. You can add heat to Honey Pineapple Salmon by mixing in red pepper flakes or sriracha. A teaspoon of either will give it a nice kick. You can also add jalapeños to the marinade or sprinkle some on top before cooking. Just remember to adjust the amount based on your spice level. Yes, you can use frozen salmon for this recipe. Just make sure to thaw it properly first. The best way to thaw salmon is to leave it in the fridge overnight. If you're short on time, you can place it in a sealed bag and submerge it in cold water for 30 minutes. Thawed salmon works well with the marinade. To check if salmon is cooked, look for a few signs. The fish should turn opaque and flake easily with a fork. You can also use a food thermometer. Salmon is done when it reaches an internal temperature of 145°F (63°C). This ensures a safe and tasty meal. Honey Pineapple Salmon lasts about 3 to 4 days in the fridge. Make sure to store it in an airtight container to keep it fresh. If you want it to last longer, consider freezing it. Properly frozen salmon can last up to 3 months. Just remember to thaw it before reheating. This post explored making Honey Pineapple Salmon. We covered key ingredients and their benefits. I provided detailed cooking steps and important tips for great flavor. You learned about variations and how to store leftovers. In summary, you can make this dish your own. Feel free to tweak ingredients and methods. Enjoy trying this recipe and sharing it with friends!](https://roastedflavors.com/wp-content/uploads/2025/06/4e027fba-52ed-4424-8b28-ccaace65a1bd.webp)
Are you ready to impress your taste buds with a delightful twist on classic salmon? In this blog post, I’ll share my easy Honey Pineapple Salmon recipe that brings together …