Skip to content
Roasted Flavors
  • Home
  • Appetizers
  • Desserts
  • Salads
  • Breakfast
  • Dinner
  • Privacy Policy
  • Contact
  • About

Chef Remy

Slow Cooker Garlic Butter Beef Bites Flavorful Delight

June 18, 2025 by Chef Remy
- 1.5 lbs beef sirloin or tenderloin - 1/2 cup unsalted butter - 4 cloves garlic - 1 teaspoon dried thyme - 1 teaspoon smoked paprika - 1 tablespoon soy sauce - 1 teaspoon freshly ground black pepper - Salt to taste - Fresh parsley for garnishing - Slow cooker - Large skillet - Slotted spoon - Serving platter To make Slow Cooker Garlic Butter Beef Bites, you need a few key ingredients. First, the beef is the star. I use 1.5 lbs of beef sirloin or tenderloin, cut into bite-sized pieces. This cut cooks tender and juicy in the slow cooker. Next, butter is vital for flavor. You will need 1/2 cup of unsalted butter. It melts nicely and helps the garlic blend well. Speaking of garlic, you will add 4 cloves, finely minced. Garlic gives this dish its rich, bold taste. For herbs, use 1 teaspoon of dried thyme. This adds a lovely earthiness. Smoked paprika is another must-have. It adds depth and a hint of smokiness. You will want 1 teaspoon of this spice. Now, let’s talk about seasonings and add-ins. You will need 1 tablespoon of soy sauce for a savory kick. I also recommend 1 teaspoon of freshly ground black pepper to enhance the flavors. Don’t forget salt to taste. Finally, fresh parsley adds color and freshness when you serve. For tools, make sure you have a slow cooker. A large skillet is also necessary to melt the butter and sauté the garlic. You will want a slotted spoon for serving, and a platter to display your tasty beef bites. For the full recipe, check out the details mentioned above. - Melt butter in a skillet. - Sauté minced garlic until fragrant. - Combine seasonings with garlic butter. Start by melting the unsalted butter in a large skillet over medium heat. This step is key to making the sauce rich and flavorful. Once the butter melts, add in the minced garlic. Sauté the garlic for about 1-2 minutes. You want it to be fragrant, but be careful not to let it burn. Next, add the dried thyme, smoked paprika, soy sauce, black pepper, and salt into the skillet. Stir the mixture well to combine all the flavors. This garlic butter mixture is what gives the beef bites their amazing taste. - Layer beef pieces evenly in slow cooker. - Pour garlic butter mixture over beef. - Stir to coat beef evenly. In your slow cooker, arrange the bite-sized beef pieces in a single layer. This helps them cook evenly. Carefully pour the garlic butter mixture over the beef. Make sure every piece gets some of that delicious sauce. Now, gently stir the beef and sauce together. You want every piece coated well. This step ensures that each bite is packed with flavor. - Cover and select cooking setting (low/high). - Cooking durations for tenderness. - Checking for doneness. Cover the slow cooker with its lid. Now, choose your cooking setting. You can cook on low for 6 hours or high for 3 hours. The low setting gives the beef a tender texture. To check for doneness, simply use a fork. The beef should be tender and easy to shred. When it’s done, use a slotted spoon to transfer the beef bites to a serving platter. Drizzle some of the remaining garlic butter sauce over the top. Finish with a sprinkle of fresh parsley for color and flavor. For the full recipe, check out the complete instructions! To get that rich garlic taste, use fresh garlic. I recommend four cloves, but you can add more. If you want a milder flavor, you can reduce the garlic. Adjust the salt and pepper to your liking. These small changes can make a big difference in taste. Marinating the beef in the garlic butter for a few hours can enhance the flavor even more. These beef bites pair well with mashed potatoes and steamed vegetables. You can also serve them with crusty bread to soak up the sauce. For a fun touch, use toothpicks for easy serving. Drizzle leftover garlic butter on top for added flavor. If you have any leftovers, you can add them to a salad or wrap them in a tortilla. One mistake is overcooking the beef. Check it often; it should be tender but not dry. Another error is not sautéing the garlic correctly. Sauté it until it smells great, but do not burn it. Lastly, be sure to stir the beef and sauce well in the slow cooker. This step ensures every bite is full of flavor. {{image_4}} To make this dish gluten-free, you can swap soy sauce for coconut aminos. Coconut aminos give a sweet, savory flavor. This change keeps your meal tasty while meeting dietary needs. You can add many vegetables to the slow cooker. Consider using: - Carrots - Bell peppers - Mushrooms - Zucchini These veggies add color and nutrition. Cut them into bite-sized pieces to cook evenly. You can place them at the bottom of the slow cooker. Add the beef and sauce on top. This method helps the veggies soak up flavors. Feel free to get creative with spices! You can try: - Cumin - Oregano - Chili powder These spices bring new tastes to your beef bites. Fresh herbs like rosemary or basil also enhance the flavor. Just add them toward the end of cooking to keep their bright taste. After enjoying your Slow Cooker Garlic Butter Beef Bites, let the leftovers cool. Use airtight containers to keep them fresh. Make sure to store the beef bites in the fridge. They will stay good for about three to four days. If you want to keep the beef bites longer, freezing is a great option. First, let the beef bites cool completely. Next, place them in freezer-safe bags. Try to remove as much air as possible before sealing. They can last up to three months in the freezer. When it's time to enjoy them again, thaw the beef bites in the fridge overnight. Reheating can bring the beef bites back to life. You can use a microwave or an oven. For the microwave, place the bites in a bowl and cover it loosely. Heat on low power to keep them tender. In the oven, set it to 350°F (175°C). Place the bites on a baking sheet, and cover with foil to keep them moist. This way, they stay flavorful and soft. Enjoy your meal! For the full recipe, check out the details above. Cooking beef bites in a slow cooker takes about 6 hours on low or 3 hours on high. The low setting allows the beef to become very tender. If you are short on time, use the high setting. Just keep an eye on the beef to ensure it stays juicy and flavorful. Yes, you can use frozen beef, but it will change the cooking time. Frozen beef takes longer to cook because it needs to thaw first. If you use frozen beef, add about an hour to the low setting and 30 minutes to the high setting. This will help ensure that the meat cooks evenly and absorbs all the delicious garlic butter flavor. You have many great options for sides! Here are some ideas: - Steamed broccoli or green beans - Mashed potatoes or rice - A fresh salad with vinaigrette - Crusty bread to soak up the sauce - Roasted vegetables for a colorful plate These sides will complement the rich flavors of the beef bites. For the full recipe, check out the details provided earlier! In this blog post, we covered how to make delicious garlic butter beef bites in a slow cooker. You learned about the main ingredients, tools needed, and step-by-step instructions. We also shared tips, variations, and storage info to enhance your cooking. Remember, pay attention to seasoning and cooking times for the best flavor. Enjoy this easy dish with your favorite sides and make it your own. Now, get cooking and savor every bite!

Get ready to savor every bite with my Slow Cooker Garlic Butter Beef Bites! This dish offers tender, juicy, and flavorful beef, all cooked to perfection in your slow cooker. …

Read more

Categories Appetizers

Pineapple Zucchini Bread Flavorful and Easy Recipe

June 18, 2025 by Chef Remy
To make Pineapple Zucchini Bread, you need the following ingredients: - 1 medium zucchini, finely grated - 1 cup crushed pineapple, well-drained - 1/3 cup vegetable oil (or melted coconut oil for added flavor) - 1 large egg, at room temperature - 1 teaspoon pure vanilla extract - 1 ½ cups all-purpose flour - 1 teaspoon baking powder - 1 teaspoon baking soda - 1/2 teaspoon salt - 1 teaspoon ground cinnamon - 1/2 teaspoon ground nutmeg - 3/4 cup granulated sugar You can boost the flavor of your bread with these optional ingredients: - 1/2 cup chopped walnuts (for crunch) - 1/4 cup shredded coconut (for extra tropical flair) Having the right tools makes cooking easier. Here are some tools I recommend: - Mixing bowls (large and medium) - Whisk or fork - Measuring cups and spoons - Spatula or wooden spoon - 9x5 inch loaf pan - Wire rack for cooling This list covers everything you need to create a delicious Pineapple Zucchini Bread. For the full recipe, follow along with the preparation instructions. Start by preheating your oven to 350°F (175°C). Grab a 9x5 inch loaf pan. Grease it with butter or oil. Dust it with flour to keep the bread from sticking. In a large bowl, mix the grated zucchini, crushed pineapple, and vegetable oil. Add one large egg and pure vanilla extract. Use a whisk or fork to blend these well. Make sure there are no lumps. In a new bowl, whisk together the all-purpose flour, baking powder, baking soda, salt, ground cinnamon, and ground nutmeg. This step is key for even rising and flavor in your bread. Now, slowly add the dry mix to the wet ingredients. Stir gently with a spatula or wooden spoon. Do not overmix; this keeps the bread light and fluffy. Then, fold in the sugar, walnuts, and coconut if you choose. Pour the batter into the loaf pan, smoothing the top. Bake for 55-60 minutes. Check with a toothpick; it should come out clean or with a few moist crumbs. Let the bread cool in the pan for about 10 minutes. Then, move it to a wire rack to cool fully. Slice the bread warm and add a pat of butter on each slice. For a fun twist, you can top it with shredded coconut or a slice of fresh pineapple. Enjoy the bright, tropical flavors! To keep your pineapple zucchini bread moist, focus on two key factors. First, always use fresh zucchini. Squeeze out excess water from it before mixing. Second, make sure to drain the crushed pineapple well. Too much liquid can make the bread soggy. A good trick is to place the pineapple in a fine mesh strainer while you prep the other ingredients. This simple step ensures your bread stays fluffy and soft. One common mistake is overmixing the batter. This can make your bread dense and tough. Mix just until the dry and wet ingredients combine. Another mistake is not checking the oven temperature. An oven that is too hot can burn the top while the inside stays raw. Use an oven thermometer to ensure accuracy. Lastly, don’t skip the cooling step. Letting the bread cool helps the flavors develop and improves texture. You can easily boost the flavor of your bread. Adding spices like ginger or cloves can give it a warm kick. For a crunch, mix in some chopped nuts or seeds. Walnuts add a nice texture, and sunflower seeds bring a lovely nutty flavor. Want more tropical vibes? Toss in some shredded coconut. This gives the bread a sweet, chewy touch that pairs perfectly with pineapple. Check out the Full Recipe for all the details to make your bread even better! {{image_4}} You can easily make this bread gluten-free. Substitute all-purpose flour with a 1:1 gluten-free blend. Look for blends that include xanthan gum. This helps with texture and rise. For a vegan option, replace the egg with a flax egg. To make a flax egg, mix one tablespoon of ground flaxseed with three tablespoons of water. Let it sit for a few minutes until it thickens. You can also use applesauce as a substitute for oil. Use 1/3 cup of unsweetened applesauce instead of oil. To boost flavor, try adding spices like ginger or cloves. You can also mix in dried fruits like raisins or cranberries. For extra crunch, toss in chopped pecans or almonds. If you love coconut, consider adding more shredded coconut. Each of these choices can add a unique twist to your Pineapple Zucchini Bread. For the complete method to bake this tasty bread, check the Full Recipe. To keep your pineapple zucchini bread fresh, let it cool completely. Wrap it tightly in plastic wrap or aluminum foil. You can also store it in an airtight container. This method keeps moisture in and prevents it from drying out. Place the bread in a cool, dry place. It will stay fresh for about three days. If you want to save some for later, freezing is easy. First, slice the bread into pieces. Wrap each slice in plastic wrap. Then, place the wrapped slices in a freezer bag. Make sure to remove as much air as possible. This helps prevent freezer burn. You can freeze the bread for up to three months. When ready to eat, just thaw it in the fridge overnight. To enjoy your leftover bread, you can reheat it easily. Preheat your oven to 350°F (175°C). Place the slices on a baking sheet. Heat them for about 10 minutes. If you prefer the microwave, place a slice on a plate and heat for 15-20 seconds. Enjoy warm with butter or your favorite spread! For the full recipe, refer to the earlier instructions. Yes, you can use fresh pineapple. Just chop it finely. Make sure to drain excess juice. This keeps the bread from getting too wet. Fresh pineapple adds a bright flavor. You can check the bread with a toothpick. Insert it into the center of the loaf. If it comes out clean or with a few crumbs, it’s ready. The top should be golden brown and firm to the touch. If you don’t have zucchini, try using grated carrots or apples. Both add moisture and sweetness. They work well in this recipe. Just remember to adjust the amount based on your choice. Absolutely! This bread is a great choice for breakfast. It’s sweet, moist, and packed with flavor. You can enjoy it plain or with a bit of butter. It also pairs well with coffee or tea. To avoid dense bread, do not overmix the batter. Mix just until combined. Also, make sure to measure your flour correctly. Too much flour can make the bread heavy. Using the right amount of baking powder and soda helps too. For more details, check the Full Recipe. Now you know the key ingredients and steps to make Pineapple Zucchini Bread. You have details on flavors, tools, and tips for perfect texture. Remember, avoid common mistakes to get the best loaf. Feel free to try gluten-free or vegan options for variety. Store leftovers correctly to enjoy this treat later. With these tips, you’ll bake a delicious bread every time. Get started and impress your friends!

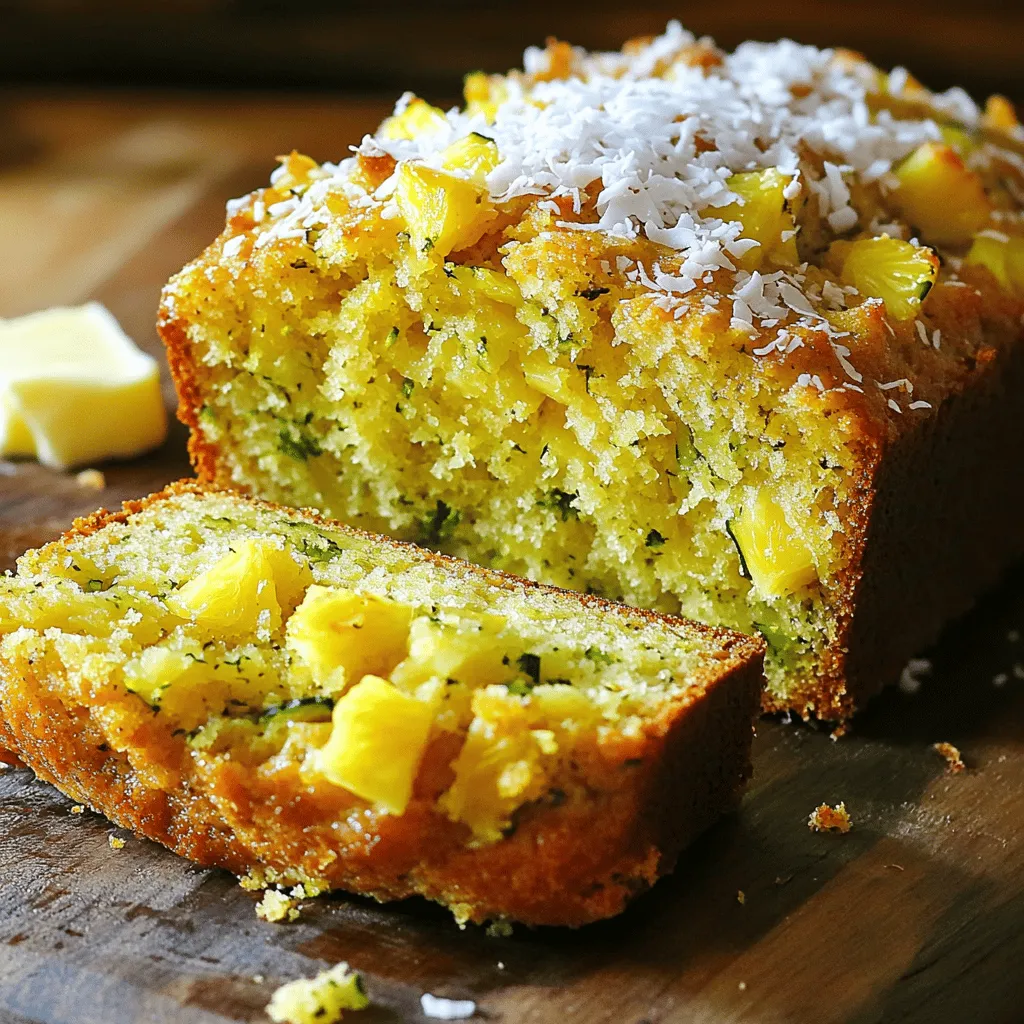
If you’re looking for a moist and tasty treat, pineapple zucchini bread is a must-try. This simple recipe combines sweet flavors with healthy veggies, making it a favorite for both …

Read more

Categories Desserts

Street Corn Chicken Rice Bowl Flavorful and Simple Dish

June 18, 2025 by Chef Remy
- 1 cup cooked jasmine rice - 2 grilled chicken breasts, sliced into strips - 1 cup sweet corn kernels (either fresh off the cob or canned) - 1/2 cup feta cheese, crumbled - 1/4 cup mayonnaise - 1 tablespoon freshly squeezed lime juice - 1 teaspoon chili powder - 1/2 teaspoon garlic powder - 2 tablespoons fresh cilantro, finely chopped - Salt and pepper to taste - Lime wedges, for garnish To create the Street Corn Chicken Rice Bowl, you need simple yet fresh ingredients. Start with jasmine rice. It has a soft texture and sweet flavor. Next, grab some grilled chicken breasts. They should be juicy and flavorful. If using fresh corn, you can grill it for a smoky taste. If not, canned corn works great too. Feta cheese adds a salty creaminess. Mayonnaise, lime juice, chili powder, and garlic powder create a zesty sauce. Cilantro gives a fresh kick. Lastly, salt and pepper balance the flavors. Each ingredient plays a key role in making this dish tasty. When combined, they create a colorful and satisfying meal. Check out the Full Recipe for all the steps to make your bowl shine! To get perfect corn, start by grilling fresh corn. Grill the ears over medium-high heat for about 5-7 minutes. Turn them often until the kernels turn dark and soft. Let the corn cool, then slice off the kernels. If you prefer canned corn, just drain it and set it aside for later. Now, let's make a creamy sauce. Grab a small bowl and mix mayonnaise, lime juice, chili powder, garlic powder, and a pinch of salt and pepper. Stir it well until everything blends together. Taste it! Adjust the seasoning as needed. This sauce adds a rich flavor to your bowl. Start building your rice bowl. Add a good layer of jasmine rice to the bottom. Next, place sliced grilled chicken on top of the rice. Then, sprinkle sweet corn kernels evenly over the chicken. This makes your bowl colorful and inviting. Drizzle the creamy sauce over the chicken and corn. For extra flavor, sprinkle crumbled feta cheese and chopped cilantro on top. These ingredients balance the flavors and make the dish pop visually. Finish off your bowl by adding a lime wedge on the side. When you're ready to eat, squeeze the lime over the top. This boosts the dish's freshness and makes it even tastier. For the full recipe, refer to the earlier sections for detailed ingredient lists and instructions. Enjoy your cooking experience! Grilling chicken can be simple. Use a medium-high heat on your grill. Marinate your chicken for at least 30 minutes. This adds flavor and keeps it juicy. Cook until it reaches 165°F. Let it rest before slicing. This helps keep the juices inside. To keep rice fluffy, rinse jasmine rice before cooking. This removes excess starch. Use a ratio of 1 cup rice to 1.5 cups water. Bring it to a boil, then cover and reduce to low heat. Cook for 15 minutes, then let it sit. Fluff it with a fork before serving. Adjusting spice levels is easy. Start with a small amount of chili powder. Taste as you go. Add more only if you want heat. You can also mix in fresh lime juice for a zesty kick. Fresh herbs can greatly improve taste. I love using cilantro in this dish. It adds brightness and freshness. You can also try fresh parsley or green onions for a different flavor. For a visually appealing serving, layer your rice, chicken, and corn neatly. Use a large bowl to give it space. This makes it look more inviting. Use colorful ingredients to create a feast for the eyes. The bright yellow corn and green cilantro contrast well. Crumbled feta adds a nice white touch. A lime wedge on the side adds a pop of color and freshness. Explore the [Full Recipe] for a complete guide and enjoy your meal! {{image_4}} You can easily switch chicken for tofu or tempeh. Tofu is soft and absorbs flavors well. Tempeh has a nutty taste and adds texture. Cut either into bite-sized pieces and grill or sauté until golden. For the sauce, replace mayonnaise with vegan mayo. This keeps it creamy and plant-based. Want to add some heat? Toss in jalapeños or a splash of hot sauce. You can mix diced jalapeños into the corn or sprinkle them on top. For the dressing, increase the chili powder to kick up the flavor. This adds a zesty punch that many will love. If jasmine rice isn’t your thing, try brown rice or quinoa. Brown rice has a chewy texture and more fiber. Quinoa is light and packed with protein. Cook brown rice as per package instructions. For quinoa, use a 2:1 water-to-quinoa ratio and simmer until fluffy. Each grain brings a unique taste, making your bowl special. You can find the full recipe here to guide you in making a delicious Street Corn Chicken Rice Bowl. Store leftovers in the fridge right away. Use airtight containers to keep them fresh. Glass or plastic containers work well. Make sure to cool the rice bowl before sealing it. This helps prevent moisture buildup. To freeze the rice bowl, pack it tightly in a freezer-safe container. Leave some space at the top for expansion. Label it with the date, so you know when to use it. When ready to eat, move it to the fridge to defrost overnight. For faster results, you can use the microwave. Heat it gently to maintain texture. In the fridge, the Street Corn Chicken Rice Bowl lasts about 3 days. In the freezer, it can last up to 3 months. Always check for signs of spoilage. Look for off smells or changes in color. If you see any of these signs, it’s best to throw it away. A Street Corn Chicken Rice Bowl is a fun and tasty dish. It blends grilled chicken, sweet corn, and creamy sauce over jasmine rice. The bright flavors come from fresh ingredients like lime, cilantro, and feta cheese. Main Ingredients: - Cooked jasmine rice - Grilled chicken breasts - Sweet corn kernels - Feta cheese - Mayonnaise - Lime juice - Chili powder - Garlic powder - Fresh cilantro - Salt and pepper This dish is colorful and easy to make. You can serve it warm or cold, making it perfect for any meal. To make this dish gluten-free, focus on your ingredients. Use gluten-free mayonnaise. Most spices are gluten-free, but check the labels. Jasmine rice is naturally gluten-free, so you can use it without worry. Yes, you can meal prep the Street Corn Chicken Rice Bowl! Cook the rice and chicken in advance. Store them in separate containers. You can add corn and sauce when ready to eat. This keeps everything fresh and tasty. You can serve simple sides with this dish. Try tortilla chips for crunch. A light salad pairs well too. You might enjoy guacamole or salsa for added flavor. To make this bowl healthier, swap out the mayo for Greek yogurt. You can also use less cheese or choose a low-fat version. Add more veggies like bell peppers or spinach for extra nutrients. These swaps keep the dish delicious while boosting its health benefits. For the full recipe, check the main article! This blog post covered a tasty Street Corn Chicken Rice Bowl. You learned about the key ingredients, the step-by-step method, and some helpful tips to enhance flavor. We also explored variations for different diets and how to store leftovers properly. In closing, this dish is easy to customize and fun to make. Try it out for a meal that brings joy to your table. Enjoy your cooking adventure!

Craving a dish that bursts with flavor and is easy to make? The Street Corn Chicken Rice Bowl is just what you need! Packed with grilled chicken, sweet corn, creamy …

Read more

Categories Dinner

Homemade Big Mac Wraps Tasty and Simple Recipe

June 18, 2025 by Chef Remy
To make these wraps, gather the following items: - 1 lb ground beef - 1 tablespoon onion powder - 1 tablespoon garlic powder - 1 tablespoon Worcestershire sauce - Salt and pepper, to taste - 4 large flour tortillas - 1 cup shredded lettuce - 1 cup diced tomatoes - 1 cup shredded cheddar cheese - ½ cup pickles, sliced - ½ cup Big Mac sauce (store-bought or homemade) These ingredients create the classic Big Mac flavor you love. You can add extra ingredients for more taste. Consider these: - Sliced jalapeños for heat - Avocado slices for creaminess - Sriracha or hot sauce for a kick These ingredients can make your wraps even more exciting. Adding fresh items can enhance the wraps. Try these options: - Fresh cilantro for a pop of flavor - Red onion slices for crunch - Spinach leaves for added nutrition These fresh additions keep your wraps vibrant and tasty. Don't forget to check the Full Recipe for more details! To start, heat a large skillet over medium heat. Add 1 pound of ground beef to the skillet. Cook it until it is browned and cooked through. This should take about 5 to 7 minutes. Use a spatula to break the beef apart as it cooks. Once browned, stir in 1 tablespoon each of onion powder and garlic powder. Add 1 tablespoon of Worcestershire sauce, along with salt and pepper to taste. Mix well and let it cook for another 2 to 3 minutes. This will blend the flavors nicely. After that, remove the skillet from heat and let the mixture cool slightly. Now, grab a large flour tortilla. Lay it flat on a clean surface. Spoon about ¼ cup of the beef mixture into the center of the tortilla. Spread it out evenly so you get flavor in every bite. Next, add a handful of shredded lettuce, a sprinkle of diced tomatoes, and a good amount of shredded cheddar cheese. Don’t forget the pickles! Place a few slices on top for that classic crunch. Finally, drizzle about 1 tablespoon of Big Mac sauce over the toppings. This adds that special Big Mac taste. To make the wraps crispy, place them seam-side down in a preheated skillet over medium heat. Cook for about 1 to 2 minutes on each side. You want them to be golden brown and slightly toasted. Once done, take them out and slice each wrap in half diagonally. Serve them right away with a small bowl of extra Big Mac sauce for dipping. This extra touch makes the meal even more enjoyable! To make the best wraps, start with a large tortilla. Place it flat on your surface. Use about ¼ cup of beef in the center. Spread it out evenly. This helps the flavors mix well in every bite. Add a handful of lettuce, some diced tomatoes, and cheese on top. Lay pickles on for extra crunch. When you fold, tuck the sides in first. Then, roll it from the bottom up. Press gently to keep the filling in. This step makes a big difference in keeping everything together. You can change up the ingredients to fit your taste. Want more spice? Add jalapeños or hot sauce. If you prefer a milder flavor, skip the pickles. You can even switch the cheese to pepper jack for a kick. Try using turkey or chicken if you want a lighter option. The options are endless! Just remember to keep the main flavors of the Big Mac in mind. Big Mac sauce is the heart of this dish. You can use store-bought sauce for ease. If you want to make it yourself, mix mayo, ketchup, and mustard. Add a splash of vinegar and a few pickles. Don’t forget a pinch of onion powder and garlic powder. This combo gives it that classic taste. Adjust the amounts based on your taste. A good sauce can elevate your wrap. It ties all the flavors together beautifully. For the full recipe, check the complete instructions. {{image_4}} For a tasty vegetarian option, swap the ground beef for black beans or lentils. Cook them with onion powder and garlic powder to add flavor. You can also use a plant-based meat substitute. This change keeps the wrap hearty without meat. Add your favorite veggies for crunch, like bell peppers or cucumbers. While Big Mac sauce is a classic, feel free to get creative. Try ranch dressing, spicy mayo, or barbecue sauce. Each option gives a new twist to the wrap. You can mix sauces too. A blend of ranch and hot sauce adds a nice kick. If you want a low-carb version, use lettuce leaves instead of tortillas. Butter lettuce or romaine works best. Just fill the leaves with your beef mixture and toppings. Skip the Big Mac sauce or use a low-carb version to keep it keto-friendly. This way, you enjoy all the flavors without the extra carbs. For the complete Homemade Big Mac Wraps recipe, check out the [Full Recipe]. To keep your leftover wraps fresh, place them in an airtight container. You can also wrap each one in plastic wrap or aluminum foil. This method helps prevent them from drying out. Store them in the fridge for up to three days. When you want to eat them, just pull out as many as you need. If you want to save some wraps for later, freezing works great. Wrap each Big Mac wrap tightly in plastic wrap or foil. Then, place them in a freezer-safe bag. You can freeze them for up to three months. Just remember to label the bag with the date. This way, you know how long they’ve been in the freezer. When it’s time to reheat, you want your wraps to stay crispy. Heat a skillet over medium heat and place the wrap seam-side down. Cook for about 2-3 minutes on each side until they are warm and golden. Avoid using the microwave, as it can make your wraps soggy. For best results, enjoy them fresh or reheated in a skillet. The main ingredients are simple and tasty. You need: - 1 lb ground beef - 1 tablespoon onion powder - 1 tablespoon garlic powder - 1 tablespoon Worcestershire sauce - Salt and pepper, to taste - 4 large flour tortillas - 1 cup shredded lettuce - 1 cup diced tomatoes - 1 cup shredded cheddar cheese - ½ cup pickles, sliced - ½ cup Big Mac sauce (store-bought or homemade) These ingredients create that classic Big Mac flavor wrapped up in a fun tortilla. The ground beef forms the base, while the spices add depth. Fresh veggies give it crunch, and the sauce ties it all together. To make a healthier Big Mac Wrap, swap the ground beef for lean turkey or chicken. You can also use whole wheat tortillas for added fiber. Load up on fresh veggies like spinach and cucumbers. Use Greek yogurt instead of Big Mac sauce for a creamy, lower-fat option. This way, you keep the taste but cut down on calories. Yes, you can make Big Mac sauce at home! Combine: - ½ cup mayo - 2 tablespoons ketchup - 1 tablespoon yellow mustard - 1 tablespoon sweet pickle relish - 1 teaspoon onion powder - 1 teaspoon garlic powder - Salt and pepper to taste Mix everything in a bowl. This homemade sauce will taste just like the original and can enhance your wrap’s flavor. This guide lays out how to make homemade Big Mac Wraps. You learned the key ingredients and optional flavors to enhance taste. I shared step-by-step instructions for easy preparation and cooking. With useful tips and fun variations, you can customize your wraps to fit your diet. Remember, whether it’s freezing leftovers or making a healthier sauce, you have many options. Now, get in the kitchen and enjoy your delicious Big Mac Wraps!

Craving the taste of a classic Big Mac but want a twist? Homemade Big Mac Wraps are the perfect solution! In this simple recipe, I’ll guide you through making delicious, …

Read more

Categories Dinner

Lemon Zucchini Bread Flavorful and Easy Recipe

June 17, 2025 by Chef Remy
- 1 cup grated zucchini (approximately 1 medium zucchini) - 1 cup granulated sugar - 1/2 cup unsalted butter, softened - 2 large eggs - 1 teaspoon vanilla extract - 1 tablespoon lemon zest - 1/4 cup lemon juice - 1 and 1/2 cups all-purpose flour - 1 teaspoon baking powder - 1/2 teaspoon baking soda - 1/4 teaspoon salt - 1/2 teaspoon ground cinnamon (optional) - 1/2 cup chopped walnuts or pecans (optional) Lemon zucchini bread is flavorful and moist. The key is using fresh zucchini. When you grate it, it adds a nice texture and moisture. You don’t need to peel the zucchini; just wash it well. Lemon juice and lemon zest bring bright flavor to the bread. This balance of sweet and tart makes every bite special. The sugar gives the bread its sweetness. If you want less sugar, try reducing it a bit. Butter adds richness and helps with the texture. Use softened butter for the best mix. The eggs help bind everything together. They also add moisture and richness to the bread. Baking powder and baking soda help the bread rise. They create a light and fluffy texture. The salt enhances all the flavors in the bread. Ground cinnamon is optional but adds a warm note. If you like nuts, the chopped walnuts or pecans give a crunchy contrast. Using these ingredients, you can create a delicious lemon zucchini bread. The full recipe provides clear steps to guide you. Enjoy baking! - Preheat the oven to 350°F (175°C). - Grease a 9x5 inch loaf pan or line it with parchment paper. - In a large bowl, cream the butter and sugar together. - Add the eggs, one at a time. Mix well after each. - Stir in the vanilla extract, lemon zest, and lemon juice. - In another bowl, whisk the flour, baking powder, baking soda, salt, and cinnamon. - Slowly add this dry mix to the wet mixture. Stir gently until blended. - Fold the grated zucchini and nuts into the batter gently. - Pour the batter into the prepared pan and smooth the top. - Bake for 50-60 minutes. A toothpick should come out clean when done. Enjoy the full recipe as you create this delightful treat! - Avoid overmixing for a lighter texture. This keeps your bread fluffy. - Check for doneness using a toothpick. Insert it in the center; it should come out clean. - Substitute applesauce for butter for a healthier version. This cuts down on fat. - Use almond flour for a gluten-free option. It adds a nice nutty flavor. - Dust with powdered sugar before serving. This adds a lovely touch. - Serve with whipped cream for added flair. It makes each slice feel special. {{image_4}} You can elevate your lemon zucchini bread with fun flavors. Consider adding poppy seeds for a nice crunch. This tiny seed pairs well with lemon. It adds texture and a subtle nutty taste. You can also mix in dried fruits like cranberries or raisins. They give a sweet burst in every bite. Both options bring a new twist to this classic recipe. If you love lemon, try Lemon Blueberry Zucchini Bread. This version combines juicy blueberries with the zesty lemon flavor. The berries add sweetness and color. Another option is Lemon Poppy Seed Muffins. These muffins are easy to grab and go. They pack the same bright taste in a smaller form. Each alternative offers a fresh take on lemon and zucchini, keeping your baking exciting. For the original recipe, check out the Full Recipe. To keep your lemon zucchini bread fresh, store it in an airtight container. This method keeps the moisture in and prevents it from drying out. You can enjoy your bread for up to 3 days at room temperature. If you want to save some for later, freezing works great! Wrap the bread tightly in plastic wrap and then in foil. This protects it from freezer burn. You can freeze it for up to 3 months. When you're ready to enjoy it again, thaw it properly. The best way is to place it in the refrigerator overnight. If you're in a hurry, you can leave it at room temperature for several hours. This keeps it moist and tasty! Yes, yellow squash can be substituted for zucchini in this recipe. They have a similar texture and taste, so your bread will still be delicious. Just grate the yellow squash as you would the zucchini. This recipe is not vegan; however, you can substitute eggs with flax eggs or applesauce. To make a flax egg, mix one tablespoon of ground flaxseed with three tablespoons of water. Let it sit for a few minutes until it thickens. The bread is done when a toothpick inserted in the center comes out clean. If it has wet batter on it, bake for a few more minutes. Keep an eye on it to avoid overbaking. Yes, it contains zucchini, which provides vitamins; however, the sugar content should be moderated. Zucchini adds moisture and nutrients, making the bread a bit healthier. Just watch the sugar if you want a lighter treat. It pairs well with cream cheese frosting, butter, or fresh fruit. A slice with cream cheese adds a nice creamy touch. Fresh fruit can brighten the flavors even more. Lemon zucchini bread is a treat that blends zest with soft, moist goodness. This recipe is simple and fun. You start with fresh zucchini, which adds moisture and nutrition. The lemon brings bright flavor, making every bite refreshing. Ingredients: - 1 cup grated zucchini (approximately 1 medium zucchini) - 1 cup granulated sugar - 1/2 cup unsalted butter, softened to room temperature - 2 large eggs - 1 teaspoon pure vanilla extract - 1 tablespoon lemon zest (from about 1 lemon) - 1/4 cup freshly squeezed lemon juice - 1 and 1/2 cups all-purpose flour - 1 teaspoon baking powder - 1/2 teaspoon baking soda - 1/4 teaspoon salt - 1/2 teaspoon ground cinnamon (optional, for added warmth) - 1/2 cup chopped walnuts or pecans (optional, for crunch) Start by preheating your oven to 350°F (175°C). Grease a 9x5 inch loaf pan. You can also line it with parchment paper to help with easy removal later. In a large bowl, cream together the softened butter and sugar. Use an electric mixer for about 3-5 minutes. The mix should turn light in color and fluffy. Next, add the eggs one at a time. Mix well. Then, stir in the vanilla, lemon zest, and lemon juice until smooth. In a separate bowl, whisk together the flour, baking powder, baking soda, salt, and cinnamon if you want. This step ensures that all the dry ingredients mix well. Now, slowly add the dry mix to the wet ingredients. Stir gently using a spatula until just combined. It’s important to avoid overmixing, which can make the bread dense. Gently fold in the grated zucchini and chopped nuts if you choose. This step adds great texture and flavor without overworking the batter. Pour the batter into your prepared loaf pan. Use a spatula to smooth the top for even baking. Place the pan in the oven and bake for 50-60 minutes. Check for doneness by inserting a toothpick into the center. If it comes out clean, the bread is done. Let the loaf cool in the pan for about 10 minutes. After that, transfer it to a wire rack to cool completely before slicing. For a special touch, dust the top with powdered sugar or serve slices with whipped cream. Enjoy your flavorful Lemon Zucchini Delight! This blog shares a simple recipe for Lemon Zucchini Bread. You learned about ingredients, step-by-step mixing methods, baking tips, and storage options. Plus, I offered variations for added flavor and healthy swaps. Remember, this tasty bread is easy to make and can suit many diets with simple changes. Whether for a snack or dessert, it’s a delightful treat. Be creative and enjoy your baking journey!

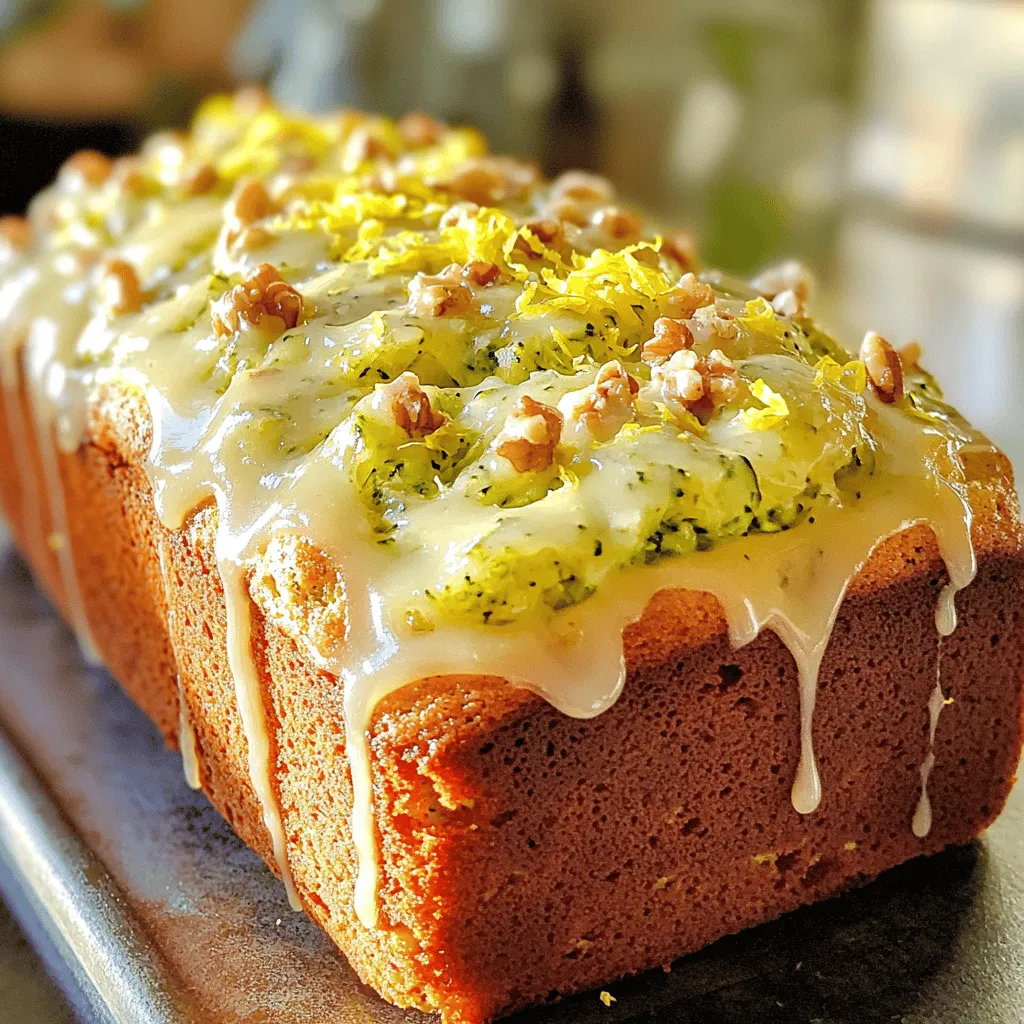
Are you ready to bring a burst of flavor into your kitchen? This Lemon Zucchini Bread recipe is both simple and delightful. With just a few fresh ingredients, you can …

Read more

Categories Desserts

Creamy Avocado Grilled Cheese Irresistible Delight

June 17, 2025 by Chef Remy
- 2 slices of whole-grain bread - 1 ripe avocado - 1 cup shredded sharp cheddar cheese - 1/4 cup cream cheese - 1 tablespoon fresh lemon juice - 1 tablespoon extra virgin olive oil - 1/2 teaspoon garlic powder - Salt and freshly cracked pepper - Fresh herbs for garnish (optional) When I make my creamy avocado grilled cheese, I start with the main ingredients. Whole-grain bread gives a nice, hearty base. I use one ripe avocado, perfectly mashed, which adds a creamy texture. Shredded sharp cheddar cheese melts beautifully and gives great flavor. Next, I mix in some additional ingredients. A quarter cup of cream cheese adds richness. Fresh lemon juice brightens the dish. I also use extra virgin olive oil for cooking, which enhances the taste and helps achieve that golden crust. Seasoning is key! I use garlic powder for a savory kick. A pinch of salt and freshly cracked pepper brings everything together. Optionally, I add fresh herbs on top for color and flavor. These simple ingredients create a delightful sandwich that is hard to resist! For the full recipe, check out the complete guide. To make the avocado spread, start with a ripe avocado. Mash it well in a medium bowl. Then, add 1/4 cup of softened cream cheese. This gives the spread a rich texture. Next, pour in 1 tablespoon of fresh lemon juice. This adds brightness and helps keep the avocado green. Add 1/2 teaspoon of garlic powder, salt, and pepper to taste. Stir until smooth. You want a creamy, flavorful mixture. Now, take two slices of whole-grain bread. Spread the avocado mixture on one side of each slice. Make sure to cover it well for full flavor. On one uncoated side, layer 1 cup of shredded sharp cheddar cheese. It should be an even layer. This cheese is key to the gooey goodness you want! Heat 1 tablespoon of extra virgin olive oil in a skillet over medium heat. Once it shimmers, carefully place the sandwich in the skillet. Cook each side for about 3-4 minutes. You want a lovely golden brown color. After the first side is done, flip the sandwich with care. Keep cooking for another 3-4 minutes until the cheese is melted. Once cooked, take the sandwich out and let it rest for a minute. This helps the cheese set. Then, slice it in half diagonally. It makes for a nice look when serving. For an extra touch, consider adding some fresh herbs on top. Enjoy this creamy avocado grilled cheese delight! Don’t forget to check the Full Recipe for more details. To make the best creamy avocado grilled cheese, use a heavy skillet. A heavy skillet helps cook the sandwich evenly. It gives that nice, golden crust we all love. Here are some tips to keep your sandwich crispy: - Use fresh bread for the best texture. - Spread a thin layer of olive oil on the bread. - Avoid pressing down too hard with the spatula. You can boost the flavor of your sandwich with spices. Try adding: - A sprinkle of paprika for a smoky touch. - A dash of red pepper flakes for heat. - Fresh herbs like cilantro or basil for brightness. For side dishes, consider serving: - A simple salad for freshness. - Tomato soup for a classic combo. - Crunchy pickles to add texture. To make your sandwich look gourmet, follow these tips: - Cut the sandwich in half diagonally for a nice look. - Serve it on a rustic wooden board or a colorful plate. - Garnish with fresh herbs for color. For dipping sauces, try: - A tangy balsamic glaze for sweetness. - A zesty aioli for creaminess. - A simple marinara for a fun twist. Check out the Full Recipe for more details on crafting your perfect creamy avocado grilled cheese! {{image_4}} If you want to switch up the cheese, try different options. Mozzarella gives a nice stretch. Gouda adds a smoky flavor. Or, use pepper jack for a spicy kick. Mixing cheeses can enhance taste. Combine sharp cheddar with creamy havarti for depth. You can add more flavor to the avocado spread. Fresh herbs like basil or cilantro brighten the dish. A pinch of chili powder can introduce a kick. You might even mix in some diced tomatoes. For protein, consider adding cooked bacon or chicken. These add texture and make the sandwich heartier. Choosing the right bread is key. Sourdough offers a tangy flavor and crisp crust. Whole-grain is hearty and nutritious. For gluten-free options, try gluten-free bread or rice cakes. Each choice creates a unique grilled cheese experience. To keep your grilled cheese fresh, store it in an airtight container. This helps prevent moisture loss and keeps the bread from getting soggy. Place a paper towel in the container to absorb any extra moisture. It’s best to eat your sandwich within two days for optimal taste. For reheating, the skillet works best. Heat it on low and add a little oil. Place the sandwich in the skillet and cover it with a lid. This helps the cheese melt without burning the bread. If you use a microwave, your sandwich may get soggy. The microwave is quick but loses the crispy texture. Yes, you can freeze grilled cheese sandwiches. Wrap them tightly in plastic wrap, then place in a freezer bag. This prevents freezer burn. When ready to eat, thaw in the fridge overnight. To reheat, use a skillet for the best results. Enjoy your creamy avocado grilled cheese even after saving it! For the full recipe, check out the details above. You can enjoy this tasty sandwich with many sides. Here are some ideas: - A simple salad with mixed greens. - Tomato soup for a classic combo. - Crunchy pickles for a tangy bite. - Sweet potato fries for a fun twist. - Fresh fruit like apple slices or berries. To make a vegan version, swap out dairy items. Use these substitutes: - Replace cream cheese with vegan cream cheese. - Use plant-based cheese instead of sharp cheddar. - Choose a vegan butter or oil for grilling. Yes, you can make the avocado spread ahead of time. Here are some tips: - Store it in an airtight container. - Add lemon juice to keep it fresh longer. - Use within one day to avoid browning. The creaminess comes from key ingredients: - Ripe avocado provides a smooth texture. - Cream cheese adds richness and tang. - Sharp cheddar melts beautifully, enhancing the creaminess. Making this sandwich is quick and easy: - Prep time is about 10 minutes. - Cooking time takes around 5-8 minutes. - Total, it takes just 15 minutes to enjoy. You can customize this recipe easily. Here are some fun ideas: - Add spicy pepper jack cheese for heat. - Mix in chopped herbs like basil or cilantro. - Layer in sliced tomatoes or spinach for freshness. - Try different breads, like sourdough or rye, for a twist. For the full recipe, check out the earlier sections! The creamy avocado grilled cheese is a delightful mix of flavors. We covered the main ingredients, like whole-grain bread and sharp cheddar. The cooking process and tips help you make it perfectly golden. You can create unique versions with different cheeses or add veggies. Proper storage and reheating ensure you enjoy leftovers. This recipe is easy, tasty, and great for all ages. Try it today and impress everyone with this simple comfort food. Enjoy your new favorite sandwich experience!

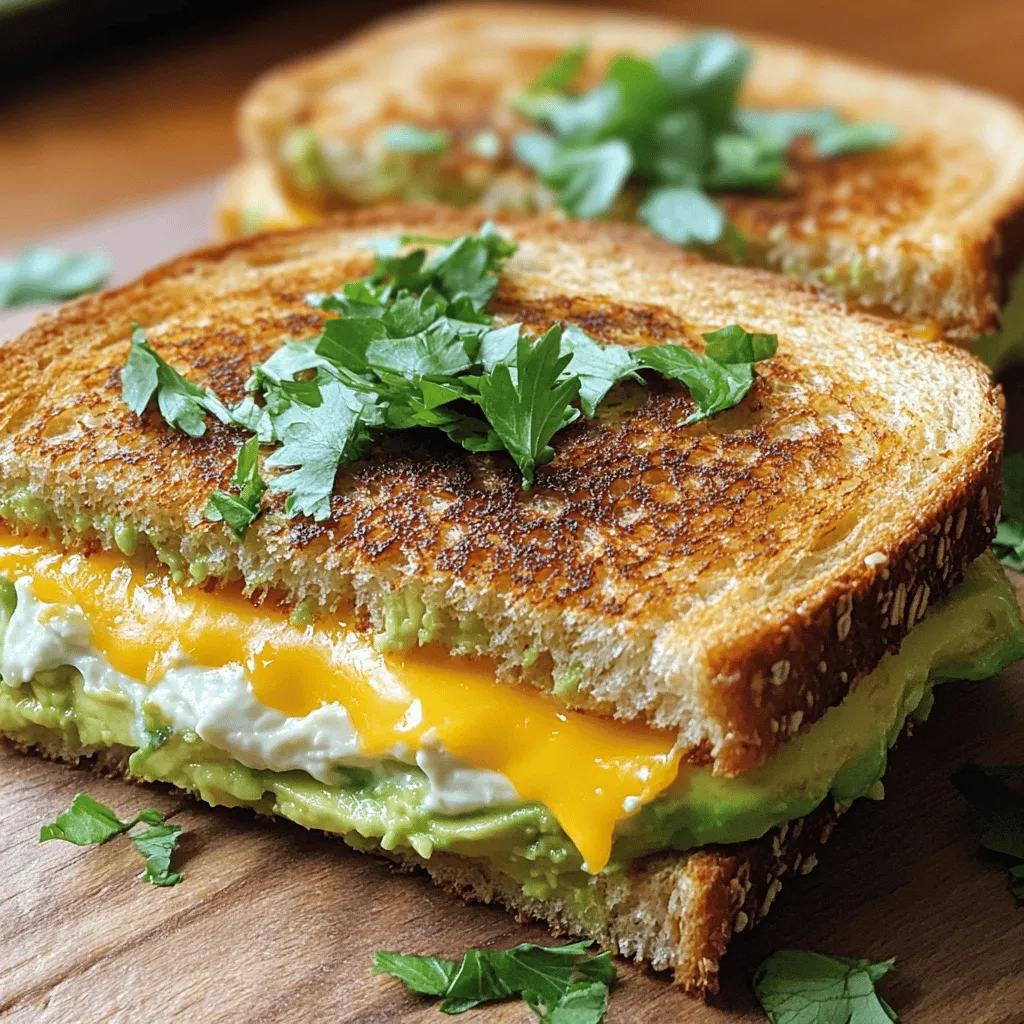
Get ready to elevate your grilled cheese game with a creamy avocado twist! This Creamy Avocado Grilled Cheese is a quick, delicious meal you can whip up in no time. …

Read more

Categories Dinner

Cheesy Potato Burritos Flavorful and Satisfying Meal

June 17, 2025 by Chef Remy
- 4 medium-sized potatoes, peeled and diced into 1-inch cubes - 1 cup of sharp shredded cheddar cheese - 1/2 cup of tangy sour cream I start with medium-sized potatoes. These potatoes create a creamy filling. Next, I add sharp shredded cheddar cheese. This cheese gives the burritos a rich, cheesy flavor. Finally, I mix in sour cream. The sour cream adds a nice tang and makes the filling smooth. - 1/4 cup of fresh green onions, finely chopped - 1 teaspoon of aromatic garlic powder - 1 teaspoon of smoky paprika For more flavor, I use fresh green onions. They add a fresh crunch. Garlic powder brings a warm taste and complements the potatoes well. Smoky paprika adds depth and a hint of smokiness. Together, these ingredients make the filling exciting. - 4 large, soft flour tortillas - 1 cup of canned black beans, rinsed and drained - 1 tablespoon of extra virgin olive oil I choose large flour tortillas for wrapping. They hold the fillings well. Canned black beans offer a hearty protein boost. I rinse and drain them for freshness. Lastly, I heat extra virgin olive oil in a skillet. This oil helps warm the beans and adds flavor. For the full recipe, check out the details provided earlier. - Boiling the potatoes: Start by filling a large pot with water. Add a pinch of salt and bring it to a boil. Once boiling, add the diced potatoes. Cook them for about 15 minutes, or until they are soft enough to pierce with a fork. - Draining and cooling: After boiling, carefully drain the potatoes in a colander. Let them cool for a few minutes in the pot. This helps them firm up a bit and makes mashing easier. - Mashing the potatoes: Transfer the cooled potatoes to a mixing bowl. Use a fork or potato masher to mash them until they're smooth and creamy. - Mixing in other ingredients: Add shredded cheddar cheese, sour cream, chopped green onions, garlic powder, and paprika to the bowl. Season with salt and pepper. Mix everything well until it’s all combined and creamy. - Heating the oil in a skillet: In a skillet, heat extra virgin olive oil over medium heat. Let the oil warm for a minute. - Seasoning the beans: Add the rinsed black beans to the skillet. Cook them for 3-4 minutes, stirring often, until they’re hot. Season them with a pinch of salt and pepper to bring out their flavor. - Placing the filling in tortillas: Lay one tortilla flat on your work surface. Scoop a generous amount of the cheesy potato filling into the center of the tortilla. Add a tablespoon of the warmed black beans on top. - Rolling technique: Fold the sides of the tortilla over the filling. Start rolling it from the bottom up. Make sure the filling stays inside as you roll. Repeat with the other tortillas and filling until all are done. - Preheating the skillet: For extra crunch, preheat a skillet over medium heat. This will help brown the burritos nicely. - Grilling for added texture: Place the rolled burritos seam-side down in the skillet. Grill each side for 2-3 minutes or until they turn golden brown and crispy. This step gives your burritos a delightful texture. Enjoy the process, and savor the delicious flavors of these cheesy potato burritos! For the full recipe, check out the instructions above. To make your cheesy potato burritos truly creamy, start with the right potatoes. I prefer Yukon Gold potatoes. They are creamy and have a great flavor. Cut them into 1-inch cubes for even cooking. When mashing, use a potato masher or a fork. Mash until smooth, but do not overmix. Overmixing can make the potatoes starchy. You want a nice, fluffy texture for the filling. Adding heat to your burritos can elevate the flavor. I recommend using your favorite hot sauce, like Sriracha or Tabasco. Just a few drops can bring a wonderful kick. You can also add spices for extra flavor. Try cumin or chili powder to enhance the taste. Garlic powder and smoky paprika are already in the recipe, but feel free to experiment. A pinch of cayenne can also add a nice touch. Rolling your burritos properly ensures they stay together. Start by placing the filling in the center of the tortilla. Do not overload it; too much will break the tortilla. Fold in the sides first, then roll tightly from the bottom up. This technique keeps everything secure inside. Common mistakes include rolling too loosely or filling too much. If you do this, your burrito may fall apart when you eat it. For more tips, check out the Full Recipe for detailed steps. Enjoy making your cheesy potato burritos! {{image_4}} You can easily make these burritos more veggie-packed. Try adding bell peppers, zucchini, or corn. These bright veggies boost flavor and nutrition. Simply sauté them before mixing with the cheesy filling. You can also swap black beans for lentils. Cook the lentils in water or broth until tender. This swap gives a twist to the texture and flavor. Plus, lentils are packed with protein and fiber, making them a great choice. If you like heat, add jalapeños to your filling. Chop them finely and mix them in with the potatoes. This adds a nice kick to every bite. You can also use spicy cheese alternatives. Look for pepper jack cheese or spicy cheddar. These cheeses bring bold flavors that make your burritos stand out. Making burritos ahead of time is a smart move. Prepare the filling and assemble the burritos. Wrap them tightly in foil or plastic wrap. Freezing is a great option for meal prep. Place the wrapped burritos in a freezer bag. When you want one, just take it out and reheat. To reheat, unwrap and microwave or bake until hot. This keeps them tasty and fresh! For the full recipe, check out the Full Recipe section. To keep your cheesy potato burritos fresh, use airtight containers. Glass or plastic containers work well. Make sure to seal them tightly to keep out air. Place the burritos in the fridge. They can stay fresh for about three to four days. To freeze your burritos, wrap each one in plastic wrap or foil. This keeps them safe from freezer burn. Place the wrapped burritos in a freezer bag. Be sure to remove as much air as possible. They can last up to three months in the freezer. When you're ready to eat, take one out and thaw it in the fridge overnight. You can reheat it in the microwave or oven until warm. In the fridge, these burritos last about four days. If you notice any bad smells or changes in texture, it's time to toss them. Look for mold or any signs of spoilage. If you see any, don't eat them. Always check before enjoying your leftovers. For the full recipe of these scrumptious Cheesy Potato Burritos, check the link provided. I love using sharp cheddar cheese. It melts well and adds great taste. You can also use Monterey Jack or pepper jack for a kick. Mixing cheeses gives depth to the flavor. Yes, you can prepare them in advance! Just make the filling and store it in the fridge. When ready to eat, fill the tortillas, roll them up, and heat. This makes meal prep easy. To make gluten-free burritos, choose corn tortillas instead of flour. Check the labels to ensure they are certified gluten-free. This way, everyone can enjoy these tasty burritos. You can swap regular potatoes for sweet potatoes. They add more fiber and nutrients. Use Greek yogurt instead of sour cream for a lighter option. You can also choose low-fat cheese for fewer calories. Absolutely! Sweet potatoes work great in these burritos. They add a natural sweetness and a beautiful orange color. Just peel and dice them like regular potatoes before cooking. You now know how to make cheesy potato burritos, packed with flavor. Start with tender potatoes and sharp cheddar, then add some heat with garlic and paprika. Roll them tight in soft tortillas and enjoy! Feeling creative? Try different veggies or spice levels for your own twist. Store leftovers properly, so they stay fresh. Whether for a quick meal or a fun gathering, these burritos are sure to please. Get cooking and let each bite bring you joy!

Are you ready to enjoy a comforting, cheesy meal that’s packed with flavor? Cheesy potato burritos are not only delicious but also simple to make. With creamy potatoes, sharp cheese, …

Read more

Categories Dinner

Amazing Low Sugar Zucchini Bread Perfectly Delicious Recipe

June 17, 2025 by Chef Remy
- Zucchini: Using finely grated zucchini keeps the bread moist. It blends well into the batter. This veggie also adds nutrients without a strong flavor. - Flour options: Almond flour gives a nutty taste and is low in carbs. Whole wheat flour adds fiber and a hearty texture. You can mix both for a balanced loaf. - Sweeteners: Natural sweeteners like maple syrup or applesauce work best. They add moisture and flavor without being too sweet. Opt for pure maple syrup for the best taste. - Nuts: Chopped walnuts or pecans add crunch and healthy fats. They make the bread more filling and enhance the flavor. - Raisins: Adding raisins brings a hint of extra sweetness. They also add chewiness and depth to the bread's texture. - Gluten-free alternatives: If you need a gluten-free option, use only almond flour or a gluten-free flour blend. Adjust the baking time slightly to ensure it cooks through. - Egg alternatives for vegan options: Substitute eggs with flaxseed meal or chia seeds mixed with water. This keeps the bread moist and binds the ingredients well. First, you need to prepare the zucchini. Start by washing and trimming the ends of your zucchinis. Use a grater to finely grate them. You want about two cups of zucchini, which is around two medium zucchinis. Make sure to squeeze out the extra moisture using a clean kitchen towel. This will keep your bread from being too wet. Next, measure out your other ingredients. Gather almond flour, whole wheat flour, baking soda, baking powder, sea salt, cinnamon, and nutmeg. You will also need your sweeteners: maple syrup or honey, and unsweetened applesauce. Do not forget the eggs, vanilla extract, and any nuts or raisins you want to add. Prepare your loaf pan by greasing it lightly with cooking spray. You can also line it with parchment paper for easy removal after baking. This step is key to prevent sticking. In a medium bowl, add your grated zucchini. Pour in the maple syrup or honey, applesauce, eggs, and vanilla extract. Use a whisk to mix these wet ingredients together until they look smooth. In a large bowl, sift together the dry ingredients: almond flour, whole wheat flour, baking soda, baking powder, sea salt, ground cinnamon, and ground nutmeg. Sifting helps to aerate the flour. This will make your bread light and fluffy. Now, carefully pour the wet mixture into the bowl with the dry ingredients. Use a spatula to gently fold the two together. Be careful not to overmix. Overmixing can make your bread tough instead of light. Once combined, add in your chopped walnuts or pecans and raisins if you choose. Fold these into the batter until they are evenly spread. Transfer the batter into your prepared loaf pan. Use the back of your spatula to smooth the top. This will help it bake evenly. Now you are ready to bake! Follow the [Full Recipe] for detailed baking instructions and enjoy the delightful aroma filling your kitchen. To get the best texture, avoid overmixing the batter. When you mix too much, the bread can turn out tough. Mix just until the dry and wet ingredients blend together. This keeps your zucchini bread nice and soft. For perfectly grated zucchini, use a box grater. Grate the zucchini finely, but leave the skin on. The skin adds color and nutrients. After grating, place the zucchini in a clean cloth. Squeeze out excess moisture. This step helps prevent a soggy loaf. You can customize the spices to fit your taste. Add more cinnamon for warmth or cardamom for a floral note. A pinch of ginger can give a nice kick too. Experiment with flavors to find your perfect blend. Using different nuts can change the taste as well. Walnuts add a rich, earthy flavor. Pecans give a sweet, buttery touch. Try adding almonds or hazelnuts for a unique twist. If your bread is too dense, it might be due to too much flour. Spoon flour into your measuring cup instead of scooping it. This prevents packing down the flour, which can lead to heaviness. To avoid sogginess, ensure the zucchini is well-drained. Too much moisture can make the bread wet. Also, bake your bread until a toothpick comes out clean. This means it is fully cooked and ready to enjoy. For the complete recipe, refer to the Full Recipe section. {{image_4}} You can easily make this low sugar zucchini bread your own. Adding citrus zest brings a bright and fresh twist. Lime or lemon zest works great. It gives a lovely aroma and a hint of tang. Incorporating chocolate chips is another fun option. Use dark chocolate chips for a rich flavor. They add sweetness without too much sugar. A handful will make your bread a sweet treat everyone will love. If you're looking for low-carb adaptations, you can swap out some ingredients. Try using only almond flour. This keeps your bread light and fluffy. You can also add in protein powder for an extra boost. For those who need vegan options, replace the eggs with flax eggs. Mix one tablespoon of ground flaxseed with three tablespoons of water. Let it sit for a few minutes to thicken. This simple swap works well in this recipe. Summer is the perfect time to enjoy zucchini bread. You can add fresh herbs like basil or mint for a unique taste. These herbs make this dish refreshing and bright. In the fall, try adding pumpkin puree. It gives a warm flavor and moist texture. You can also use other veggies like grated carrots or apples. They add unique sweetness and moisture. This makes your zucchini bread even more exciting to eat. For the full recipe, check out the amazing low sugar zucchini bread instructions. To keep your zucchini bread fresh, store it at room temperature. Wrap it in plastic wrap or place it in an airtight container. This way, it stays moist and tasty. If you live in a warm area, refrigerate it after a few days. This helps it last longer. Freezing is a great option for long-term storage. You can freeze either slices or the whole loaf. Wrap the bread tightly in plastic wrap and then in aluminum foil. This keeps out air and prevents freezer burn. When you want to enjoy it, thaw it in the fridge overnight or let it sit at room temperature for a few hours. For the best texture, toast slices lightly before eating. Your low sugar zucchini bread can stay fresh for about a week at room temperature. If refrigerated, it can last up to two weeks. Always check for signs of spoilage. If you see mold or smell something off, it’s time to throw it away. Enjoy your baking adventure with this delightful low sugar zucchini bread! For the full recipe, check out the link. You can tell if the zucchini bread is done by looking for a few signs. First, the edges should pull away from the sides of the pan. Second, the top should be golden brown. Lastly, use a toothpick—insert it into the center. If it comes out clean, your bread is ready. This toothpick test is a reliable way to check doneness. Remember, over-baking can dry it out, so keep an eye on the time. Yes, you can make this recipe gluten-free! Use almond flour for the full amount or mix it with coconut flour. If you use coconut flour, reduce the amount to about 1/3 cup. This helps keep the bread moist and fluffy. You can also try gluten-free all-purpose flour, following package instructions for ratios. If you want to replace eggs, there are several options. Common choices include applesauce, mashed banana, or flaxseed meal. Use 1/4 cup of applesauce or mashed banana for each egg. For flaxseed, mix 1 tablespoon of flaxseed meal with 2.5 tablespoons of water and let it sit. These replacements may change the texture a bit, making it denser or sweeter, but they work well. When serving zucchini bread, slice it into thick pieces. Arrange the slices on a wooden board for a rustic look. For a fun twist, offer cream cheese or Greek yogurt in a small dish for spreading. This bread is tasty warm or at room temperature. Pair it with a cup of coffee or tea for a delightful treat. In summary, this blog post covers how to make zucchini bread, focusing on key ingredients, detailed steps, and helpful tips. You learned about important elements like finely grated zucchini and flour choices. You also discovered optional ingredients that boost flavor and how to customize the recipe. Remember, careful mixing is crucial for great texture. Experiment with flavors and seasonal ingredients to make it your own. With these insights, you can confidently bake delicious zucchini bread that suits your taste and diet. Enjoy your baking journey!

Looking for a tasty treat that won’t spike your sugar levels? Try my amazing low sugar zucchini bread! This perfectly delicious recipe uses natural sweeteners and nutritious ingredients, making it …

Read more

Categories Desserts

Cheesy Garlic Chicken Wraps Flavorful and Easy Meal

June 17, 2025 by Chef Remy
- 2 cups cooked chicken, shredded - 1 cup shredded mozzarella cheese - 1/2 cup cream cheese, softened to room temperature - 3 cloves garlic, minced - 1 tablespoon olive oil - 1/2 teaspoon garlic powder - 1/2 teaspoon smoked paprika - 4 large flour tortillas - 1 cup fresh spinach leaves, washed and dried - Salt and pepper to taste - Chopped fresh parsley for garnish (optional) Each ingredient in cheesy garlic chicken wraps plays a key role. The cooked chicken adds protein and heartiness. Mozzarella cheese gives a creamy, melty texture. Cream cheese adds richness and binds the mix. Garlic boosts flavor, giving it a tasty kick. Olive oil adds moisture and helps blend the ingredients. Garlic powder enhances the garlic taste without extra work. Smoked paprika adds a touch of warmth and color. Flour tortillas hold everything together and add chewiness. Fresh spinach adds freshness and color. Salt and pepper elevate all the flavors. Parsley, while optional, adds a nice pop of green and freshness. You can easily swap some ingredients if needed. Use rotisserie chicken instead of cooking your own. For cheese, try cheddar or pepper jack for a different flavor. Greek yogurt can replace cream cheese for a lighter option. If you don’t have garlic, onion powder works in a pinch. Whole wheat tortillas can replace regular ones for a healthier choice. You can also use lettuce wraps for a low-carb option. If you want a vegan version, use chickpeas instead of chicken and vegan cheese. To make Cheesy Garlic Chicken Wraps, start with a large bowl. 1. Mix the Ingredients: In this bowl, combine 2 cups of cooked chicken, 1 cup of shredded mozzarella cheese, 1/2 cup of softened cream cheese, and 3 cloves of minced garlic. Add 1 tablespoon of olive oil, 1/2 teaspoon of garlic powder, and 1/2 teaspoon of smoked paprika. Season with salt and pepper. Use a spatula to mix well until creamy. 2. Prepare the Tortillas: Lay one large flour tortilla flat on a clean surface. Add a handful of fresh spinach leaves in the center. 3. Add the Filling: Spoon a generous amount of the cheesy chicken mixture over the spinach. Spread it slightly towards the edges, leaving space to fold. 4. Wrap It Up: Fold the sides of the tortilla toward the center. Then roll it tightly from the bottom to the top to secure the filling. Repeat this with the rest. 5. Cook the Wraps: Heat a non-stick skillet over medium heat. Place the wraps seam-side down in the skillet. Cook for about 3-4 minutes or until golden brown. Flip and cook for another 3-4 minutes. 6. Serve: Once done, take the wraps out and let them cool for a couple of minutes. Use a sharp knife to slice each wrap in half diagonally. - Mix Well: Ensure the chicken and cheese blend well. This makes the filling creamy and easy to spread. - Temperature Control: Cook on medium heat. This keeps the wraps from burning while ensuring they turn crispy. - Neat Wrapping: Fold tightly to prevent filling from leaking out. This keeps all the cheesy goodness inside. If you want a visual guide, look for a video that shows these steps. Watching someone else can make it easier to understand the process. You might find tips and tricks that help you, too! Check the Full Recipe for more details and a tasty meal experience. To make your cheesy wraps shine, start with great chicken. Use leftover roasted chicken or rotisserie chicken. This saves time and adds flavor. Mix the cheeses well. Cream cheese keeps the filling creamy, while mozzarella gives that perfect melt. Don’t skip the garlic! Fresh garlic adds a punch. If you want more flavor, add a dash of hot sauce. One mistake is overfilling the wraps. Too much filling makes them hard to roll. Leave space at the edges. Another mistake is not cooking the wraps long enough. You want them golden brown and crispy. If they are too soft, they won’t hold together. Lastly, avoid skipping the spinach. It adds freshness and color. You don’t need fancy gear for these wraps. A large mixing bowl is key for blending the filling. Use a spatula to mix well. A non-stick skillet ensures that your wraps cook evenly. A sharp knife helps you cut the wraps neatly. A colorful platter makes for a nice presentation. For the full recipe, check it out [here](#). {{image_4}} You can swap the chicken for many proteins. Try shredded turkey for a lighter option. Cooked shrimp can add a fun twist. Ground beef or pork works well too. Each protein brings its own unique taste. You can also use rotisserie chicken for an easy shortcut. This change keeps your meal exciting and fresh. If you want a vegetarian option, use beans or lentils. They provide great protein and texture. For a vegan choice, replace cheese with cashew cream or tofu. You can add grilled veggies like bell peppers and zucchini. These options are tasty and satisfying. You can still enjoy that cheesy goodness without the dairy. Adding spices can take your wraps to the next level. Try cumin or chili powder for a kick. Fresh herbs like basil or cilantro can brighten the flavors. A squeeze of lemon adds a fresh zing. You can also play with smoked paprika for a deeper taste. Mixing spices gives you a chance to create your own signature wrap. To keep your cheesy garlic chicken wraps fresh, store them in an airtight container. This keeps moisture out and avoids sogginess. Let the wraps cool down before sealing them. If you use foil or plastic wrap, make sure it is tight. Refrigerate the wraps and eat them within 3 days for the best taste. Reheating your wraps is easy! You can use a skillet or microwave. For a skillet, heat it on low. Place the wraps in the skillet for about 2-3 minutes on each side. This helps them stay crispy. If you use a microwave, wrap them in a damp paper towel. Heat them for 30 seconds at a time until they are warm. Check often to avoid making them too soft. If you want to freeze your wraps, first wrap them tightly in foil or plastic wrap. Then place them in a freezer bag. Be sure to remove as much air as possible. These wraps can last up to 2 months in the freezer. When you're ready to eat, thaw them overnight in the fridge. Reheat as mentioned above for best results. This makes meal prep easy and tasty! For the full recipe, check out the details above. You can make these wraps healthier by using whole grain or low-carb tortillas. Swap out cream cheese for Greek yogurt. Add more fresh veggies, like bell peppers or cucumbers, for crunch and nutrition. You can also use grilled chicken instead of fried for a leaner option. Yes, you can prepare the wraps in advance. Wrap them tightly in plastic wrap or foil. Store them in the fridge for up to a day. When you're ready to eat, just heat them in a skillet or microwave. This makes for a quick and easy meal. These wraps taste great with a range of dips. Ranch dressing adds a nice, creamy touch. You can also try garlic aioli for a bold flavor. Salsa or guacamole brings a fresh twist, too. Each dip complements the cheesy, garlicky goodness of the wraps. For the full recipe, check the section above. We covered all the key elements for making Cheesy Garlic Chicken Wraps. First, we looked at the important ingredients and their roles. Next, I shared step-by-step instructions for perfect cooking. I provided tips and tricks to avoid common mistakes. We also explored tasty variations for everyone. Lastly, I offered useful storage info and answers to common questions. With this guide, you can create amazing wraps. Enjoy trying new flavors, and don’t hesitate to get creative!

If you’re looking for a tasty and quick meal, you’ve come to the right place! Cheesy Garlic Chicken Wraps offer a burst of flavor and are super easy to make. …

Read more

Categories Dinner

Cheesy Ranch Potatoes Irresistible and Easy Recipe

June 17, 2025 by Chef Remy
To make these cheesy ranch potatoes, gather the following ingredients: - 2 pounds baby potatoes, halved - 1 cup freshly shredded sharp cheddar cheese - 1/2 cup creamy sour cream - 2 tablespoons ranch seasoning mix - 3 tablespoons extra virgin olive oil - 1 teaspoon garlic powder - 1/2 teaspoon onion powder - Salt and freshly ground black pepper, to taste - 1/4 cup chopped green onions (scallions) for garnish These ingredients blend to create a dish that is creamy, cheesy, and full of flavor. When picking potatoes, look for small, firm, and smooth ones. Baby potatoes have a nice texture and cook quickly. Make sure there are no blemishes or sprouts. The best choices are often red or yellow baby potatoes. These types add a hint of sweetness and hold their shape well. Freshness matters, so buy them from a local market if you can. You can easily make swaps based on your needs. If you need a dairy-free option, use a dairy-free cheese and sour cream. For a lower-carb choice, try cauliflower instead of potatoes. If you want it spicy, add some diced jalapeños or hot sauce. These changes keep the dish tasty while fitting your diet. For the full recipe, check out the Cheesy Ranch Potatoes Delight. Start by washing your baby potatoes well. Scrub them gently to remove any dirt. After that, cut each potato in half. This helps them cook evenly and absorb all the tasty flavors. Place the halved potatoes in a large bowl. Drizzle them with olive oil, making sure each piece gets coated. Toss them gently until they shine with oil. This step is key for crispy skin! Now it's time to add flavor! Sprinkle garlic powder, onion powder, and ranch seasoning over the potatoes. These spices bring a bold taste that makes every bite pop. Don’t forget to add salt and pepper! Toss everything together again. Ensure each potato piece is covered in the tasty mix. This helps ensure every bite is full of flavor. Spread the seasoned potatoes on a baking sheet lined with parchment paper. Make sure they’re in a single layer. This allows them to roast evenly and get crispy. Bake them in a preheated oven at 400°F (200°C) for 25-30 minutes. When they’re golden brown and fork-tender, they’re ready for the next step. After that, sprinkle the cheese on top and return them to the oven. Bake until the cheese melts and bubbles. This creates a gooey, cheesy delight you won’t want to miss! For the full recipe, check the earlier section. Enjoy your cheesy ranch potatoes! To get that cheese just right, use fresh shredded cheese. It melts better than pre-shredded cheese. When you sprinkle it on hot potatoes, the heat helps it melt quickly. Make sure to return the potatoes to the oven after adding the cheese. This will help it get bubbly and gooey. For the best results, bake them for 5-7 minutes. Watch closely to avoid burning. One big mistake is not cutting the potatoes evenly. If they are different sizes, some will cook faster than others. Always try to cut them in halves or quarters that are similar. Another mistake is not seasoning enough. Salt and pepper enhance the taste of the ranch and cheese. Lastly, don’t skip the sour cream. It adds creaminess and balances the flavors. You can boost flavors by adding herbs and spices. Fresh parsley or dill can brighten up the dish. A sprinkle of paprika adds a nice kick. You might also try some crushed red pepper for heat. If you want a twist, add some Italian seasoning for a different flavor profile. Don't be afraid to experiment! Each addition can make your cheesy ranch potatoes even better. For the full recipe, check out the detailed instructions above. {{image_4}} You can change up the cheese for different flavors. Try using pepper jack cheese for a spicy kick. Or go with mozzarella for a milder taste. Each cheese adds its own twist to the dish. Mixing cheeses can also create a rich flavor profile. Experimenting with cheese can make your cheesy ranch potatoes unique. If you want a vegan option, use plant-based cheese. Look for brands that melt well for the best results. You can swap sour cream with cashew cream or coconut yogurt. These alternatives keep the dish creamy without dairy. Your taste buds won't even miss the dairy! You can make this dish into a full meal by adding proteins. Cooked chicken, bacon bits, or sausage mix well with ranch flavors. For a vegetarian option, add black beans or chickpeas. This way, you enjoy a hearty dish packed with flavor and nutrition. You can customize the meal to fit your needs and taste. To store your cheesy ranch potatoes, let them cool first. Place them in an airtight container. This keeps them fresh and tasty. You can layer them in the container, but avoid stacking too high. This helps prevent any squishing. If you plan to eat them within a few days, the fridge works great. When you want to enjoy leftovers, reheating is key. I recommend using an oven for the best results. Preheat your oven to 350°F (175°C). Spread the potatoes on a baking sheet. Heat them for about 10-15 minutes until they are warm. If you want the cheese melty again, cover them with foil. You can also use a microwave if you're short on time. Heat in short bursts, stirring in between to avoid cold spots. Cheesy ranch potatoes can last about 3-4 days in the fridge. Make sure they are stored properly in an airtight container. After that time, they might lose their flavor and texture. You can also freeze them for up to 3 months. Just remember to use a freezer-safe container. When you are ready, thaw them overnight in the fridge before reheating. Enjoy your cheesy ranch potatoes again! Yes, you can use regular potatoes. Just cut them into smaller pieces. This helps them cook evenly. Baby potatoes are great because they stay tender and creamy inside. However, any potato you like will work. Just remember to adjust the cooking time based on size. Yes, you can make Cheesy Ranch Potatoes ahead. Prepare the potatoes and season them. Place them in the fridge before baking. You can store them for up to 24 hours. When ready to eat, just bake them as directed. This saves time when you need a quick side dish. You can serve Cheesy Ranch Potatoes with many dishes. They pair well with grilled chicken or steak. They also go great with roasted vegetables or a fresh salad. These potatoes add a creamy and cheesy touch to any meal. Try them with your favorite main dish for a tasty combo. - Full Recipe: Cheesy Ranch Potatoes Delight 🥔 This blog post covered all you need for Cheesy Ranch Potatoes. We discussed key ingredients and how to pick the best potatoes. You learned step-by-step how to prep, mix, and bake them perfectly. Plus, tips to melt cheese and boost flavor with herbs. Think about different cheese options and even vegan swaps. Remember to store leftovers properly and reheat for flavor. Enjoy your Cheesy Ranch Potatoes, and share them with friends! Cooking can be fun, so get creative and make it your own.

Are you ready to whip up a dish that everyone will love? Cheesy Ranch Potatoes are not just tasty; they’re simple to make! With a few ingredients and clear steps, …

Read more

Categories Appetizers
Older posts
Newer posts
← Previous Page1 … Page88 Page89 Page90 … Page130 Next →

ROASTED RECIPES

Where bold flavors meet everyday meals. Warm, vibrant, and made to share. 🔥🥗🍴

PAGES

Home About Contact Privacy Policy Terms & Conditions Cookie Policy GDPR Policy Copyright Policy Disclaimer

CATEGORIES

Appetizers Desserts Salads Breakfast Dinner

Contact

  • Pinterest
  • Mail
Copyright © 2025 Roasted Flavors. All rights reserved.