Skip to content
Roasted Flavors
  • Home
  • Appetizers
  • Desserts
  • Salads
  • Breakfast
  • Dinner
  • Privacy Policy
  • Contact
  • About

Chef Remy

20-Minute Quick Pickled Onions Simple Flavor Boost

June 23, 2025 by Chef Remy
- 1 large red onion, thinly sliced - 1 cup apple cider vinegar - 1 cup water - 2 tablespoons granulated sugar - 1 tablespoon sea salt - 1 teaspoon whole black peppercorns - 1/2 teaspoon red pepper flakes (optional) - Fresh herbs (such as dill or thyme, optional) To make quick pickled onions, gather your ingredients first. The red onion gives a sweet, tangy taste. Apple cider vinegar adds a nice zing. Water helps balance the flavors. Sugar adds sweetness, while salt enhances the taste. Black peppercorns bring warmth, and red pepper flakes can add spice if you want. Fresh herbs like dill or thyme provide a lovely aroma and taste, boosting the flavor even more. Using fresh ingredients makes a big difference. You can find red onions at any grocery store. Apple cider vinegar is a great choice for pickling because of its mild flavor. If you want to experiment, feel free to swap in other vinegars, but this recipe shines with apple cider vinegar. Remember, the quality of your ingredients matters. When fresh, your pickled onions will taste amazing and add zest to many dishes. For the full recipe, check out the recipe section for instructions on making these flavorful pickled onions! Slice the red onion thinly. Use a sharp knife to make clean cuts. Place the slices into a clean, heatproof jar or a mixing bowl. Ensure your container is large enough to hold all the onion slices comfortably. This step is key for proper pickling. In a medium saucepan, combine: - 1 cup apple cider vinegar - 1 cup water - 2 tablespoons granulated sugar - 1 tablespoon sea salt - 1 teaspoon whole black peppercorns - 1/2 teaspoon red pepper flakes (optional) Stir the mixture well to mix the ingredients. Set the saucepan on medium heat. Stir it occasionally to help the sugar and salt dissolve. Heat the mixture until it gently simmers, but do not let it boil. This keeps the flavors balanced. Carefully remove the saucepan from the heat. Pour the hot brine over the sliced onions in your jar or bowl. Make sure all the onions are fully submerged in the brine. If you desire, add fresh herbs like dill or thyme for extra flavor. Let the mixture cool to room temperature for about 10-15 minutes. After it cools, seal the jar or cover the bowl with plastic wrap. For the best taste, refrigerate the pickled onions for at least 15 minutes. They can stay fresh in the fridge for up to a week. The flavors will deepen over time. Find the full recipe for these quick and zesty pickled onions to enhance your dishes. To get the best taste from your quick pickled onions, adjust the sweetness and spice. If you like a sweeter bite, add more sugar. For extra heat, increase the red pepper flakes. Start with small changes and taste as you go. Fresh herbs can elevate your pickled onions. I love adding dill or thyme. These herbs give a nice twist to the flavor. Just toss them in when you pour the brine over the onions. Want to speed up the brining process? After pouring the hot brine over the onions, cover the jar with a lid. This traps heat and helps them pickle faster. You can also place the jar in a cold water bath. This helps cool it down quickly. To keep your onions crisp, make sure not to overcook the brine. Heat just enough to dissolve the sugar and salt. This way, your onions stay crunchy and fresh. When serving pickled onions, make them pop! Use them as toppings for tacos or fresh salads. They add a bright color and a zesty flavor. Garnish with extra herbs for a nice touch. These onions pair well with many dishes. Try them on sandwiches, burgers, or grain bowls. Their sharp taste complements rich foods nicely. You can also use them to brighten up a simple dish. For the full recipe, check out the details above. {{image_4}} You can switch the vinegar for a new taste. White vinegar gives a sharper flavor. Rice vinegar offers a milder and sweeter option. Both work well, just remember to adjust the sugar if needed. Each vinegar brings its own charm, so feel free to experiment! Why not add more colors and flavors? Carrots, jalapeños, or radishes can join the onions. Slice the carrots thinly or cut the jalapeños into rings. These veggies add crunch and spice. Mixing different vegetables makes your pickles even more fun. It’s a great way to use what you have at home. Use seasonal fruits or herbs to change things up. In spring, try adding fresh herbs like basil or mint. In summer, fruit like peaches or mangoes can add a sweet twist. In fall, pumpkin or apples could be delightful. Adapting your pickles keeps them fresh and exciting. You can find new flavors all year round! For the full recipe, check out the Quick & Zesty Pickled Onions section. Pickled onions stay fresh in the fridge for about a week. After you make them, the flavor deepens over time. You can enjoy them for up to seven days, but they taste best within the first few days. If you notice any off smells or changes in color, it's best to toss them. Use a clean glass jar with a tight lid for storage. This helps keep air out and maintains crispness. Avoid plastic containers, as they can absorb flavors. - Recommended Containers: - Glass jars with tight seals - Mason jars To prevent spoilage, always ensure the onions are fully submerged in the brine. If you see any air pockets, push the onions down gently. Don’t throw away that leftover brine! It’s packed with flavor and can be used in many ways. Here are some ideas: - Use it to pickle other vegetables like carrots or cucumbers. - Add it to salad dressings for an extra zing. - Mix it into marinades for meats or tofu. - Use it in soups or stews for added depth. This brine is a treasure trove of flavor that enhances many dishes! The whole process takes just 20 minutes. First, you slice the red onion. This step only takes about five minutes. Next, you make the brine by heating vinegar, water, sugar, and salt. This part takes about ten minutes. Finally, you pour the brine over the onions and let them cool for a few minutes. After 15 minutes in the fridge, they are ready to eat! Yes, you can make pickled onions ahead of time! They store well in the fridge for up to a week. Just keep the onions in a sealed jar or bowl. The flavors get better the longer they sit. If you want to save them for later, just make sure they stay in the fridge. Pickled onions can be healthy! They are low in calories and packed with nutrients. Onions contain vitamins C and B6, which help your body stay strong. The vinegar in the brine may aid digestion too. Just watch out for too much salt if you have health concerns. Overall, they make a tasty and nutritious addition to your meals. Enjoy them with tacos, salads, or sandwiches for a flavor boost! Pickling onions is simple and fun. We covered the essential ingredients and step-by-step instructions. You learned how to make tasty brine and perfect your flavors. We also discussed variations and storage tips. Pickled onions add zest to many dishes and store well. Try making them your way for extra flavor. Happy pickling!

Looking to add a fresh zing to your meals? My 20-Minute Quick Pickled Onions recipe is your answer! This simple guide makes flavorful pickled onions in just a few minutes. …
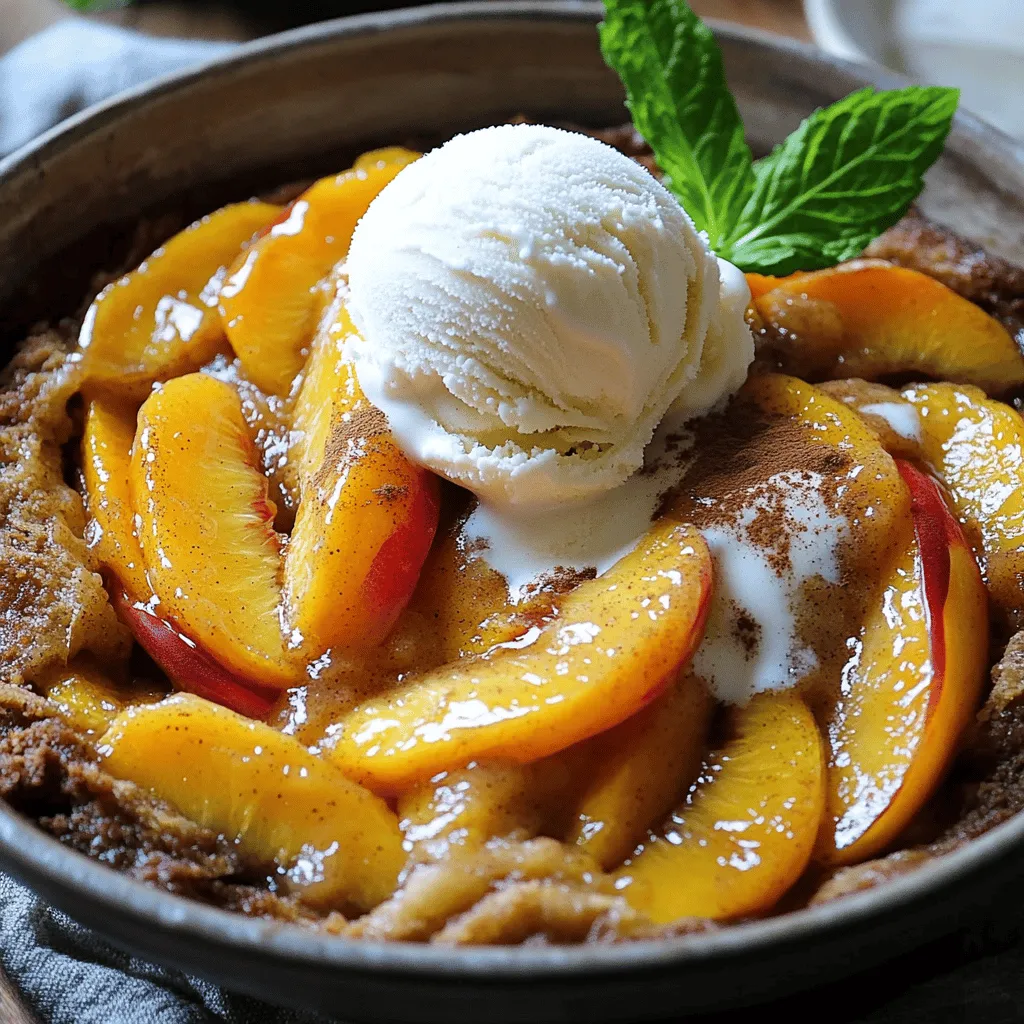
Read more

Categories Appetizers

Easy Peach Cobbler Simple and Tasty Dessert Recipe

June 23, 2025 by Chef Remy
To make this easy peach cobbler, you will need: - 4 ripe peaches, peeled and sliced into thin wedges - 1 cup granulated sugar, divided into two equal parts - 1 teaspoon ground cinnamon - 1 tablespoon freshly squeezed lemon juice - 1 cup all-purpose flour - 1 tablespoon baking powder - 1/2 teaspoon fine salt - 1 cup whole milk - 1/2 cup unsalted butter, melted and slightly cooled - 1 teaspoon pure vanilla extract - Ice cream or whipped cream, for serving (optional) These ingredients combine to create a sweet and comforting dessert. The peaches add natural sweetness, while the sugar and cinnamon enhance their flavor. You will need some basic tools to make this peach cobbler: - A large mixing bowl - A separate bowl for dry ingredients - A whisk for mixing - A 9x13 inch baking dish - A spatula for spreading - An oven to bake your cobbler These tools help you mix and bake the cobbler with ease. Choosing ripe peaches is key. Here are tips to pick the best ones: - Look for peaches that are slightly soft to the touch. - Check for a sweet aroma; this means they are ripe. - Choose peaches with a rich, golden color. - Avoid any that have bruises or dark spots. Fresh, ripe peaches make all the difference in flavor. Enjoy the process of selecting your fruit, as it sets the stage for a delightful dessert. Start by washing and peeling your peaches. Use a sharp knife to slice them into thin wedges. In a large mixing bowl, add the sliced peaches. Pour in half a cup of sugar, a teaspoon of ground cinnamon, and a tablespoon of freshly squeezed lemon juice. Gently fold the mixture to coat the peaches. Let them sit for about 15 minutes. This time helps the flavors blend and softens the peaches. In another bowl, whisk together one cup of all-purpose flour, one tablespoon of baking powder, half a teaspoon of fine salt, and the remaining half cup of sugar. Ensure all the dry ingredients mix well. This step is key for a good rise in your cobbler. Now, in a different bowl, whisk together one cup of whole milk, half a cup of melted unsalted butter, and one teaspoon of pure vanilla extract. Once it's smooth, gradually add this mixture to the dry ingredients. Stir gently until just combined. It’s okay if the batter is a bit lumpy. Overmixing can make it tough. Grease a 9x13 inch baking dish with butter or cooking spray. Pour the batter into the dish, spreading it evenly across the bottom. Next, gently spoon the prepared peaches and their juices over the batter. Be careful not to stir; we want the layers to stay separate. Bake in a preheated oven at 350°F (175°C) for 40-45 minutes. The cobbler should be bubbling and golden brown. A toothpick inserted into the center should come out clean. Let it cool for about 10 minutes before serving. Enjoy this delicious peach cobbler warm with ice cream or whipped cream for a special treat. To make the best peach cobbler, use ripe peaches. Look for peaches that are firm but slightly soft to touch. They should smell sweet. Fresh peaches give the best flavor and texture. Make sure to slice them thinly. This helps them cook evenly. Always let the peach mixture sit for about 15 minutes after mixing. This allows the sugar to draw out the juices. It enhances flavor and makes the peaches tender. Another tip is to not overmix your batter. A few lumps are fine. Overmixing can make the cobbler tough. A fluffy cobbler is all about the batter. First, use fresh baking powder for the best rise. Check the expiration date on your baking powder. If it’s old, it won’t work well. Next, mix the wet and dry ingredients just until combined. If you see lumps, that’s okay. This will keep your cobbler light and airy. Lastly, pour the batter into a greased dish first. Then, gently spoon the peaches on top. This helps create that classic cobbler texture. When serving your peach cobbler, do it warm. It tastes best this way. Use individual bowls for a nice touch. Top each serving with ice cream or whipped cream. This adds creaminess that pairs well with the warm cobbler. A sprinkle of cinnamon on top makes it look fancy. For an extra pop, add fresh mint leaves as a garnish. This makes your dessert even more inviting. For the full recipe, check out the details above. Enjoy your delicious creation! {{image_4}} You can easily switch up the flavor of peach cobbler by adding other fruits. Blueberries, raspberries, or blackberries pair well with peaches. Just mix them in with the peaches. You want to keep the total fruit amount about the same. This way, you get a tasty blend without changing the texture. If you need a gluten-free version, swap out the all-purpose flour. Use a 1-to-1 gluten-free blend instead. Many brands work great in desserts. Just check the label to ensure it includes xanthan gum for the best texture. This lets you enjoy a delicious cobbler without the gluten. To make your cobbler even better, you can add spices or extracts. Try adding nutmeg or cardamom for a warm flavor. A splash of almond extract can add a lovely depth too. Just a little goes a long way. These simple tweaks can transform your peach cobbler into a unique treat. For more tips and a full recipe, check out the [Full Recipe]. To keep your leftover peach cobbler fresh, let it cool completely. Then, cover it tightly with plastic wrap or aluminum foil. You can also use an airtight container. This helps prevent moisture loss and keeps the cobbler soft. Store it in the fridge for up to 3 days. If you want to enjoy it later, freezing is a good option. Reheating peach cobbler is easy. You can use the oven or microwave. For the oven, preheat it to 350°F (175°C). Place the cobbler in an oven-safe dish and cover it with foil. Heat for about 15-20 minutes. If you prefer the microwave, put a slice on a microwave-safe plate. Heat it for about 30-45 seconds. This method warms it quickly without drying it out. To freeze peach cobbler, first let it cool. Then, cut it into slices and wrap each piece in plastic wrap. Place the wrapped slices in a freezer-safe bag. Label the bag with the date, and store it in the freezer for up to 3 months. When you are ready to eat it, thaw it in the fridge overnight. Then, reheat as mentioned above. This keeps the flavors fresh and tasty. For the full recipe, refer back to the detailed instructions. Yes, you can use canned peaches! They are a great time-saver. Drain them well to remove extra juice. This keeps your cobbler from being too soggy. You can also use frozen peaches. If you go this route, thaw and drain them first. Canned or frozen peaches can still give you a tasty dessert. You can tell the cobbler is done by looking for a golden brown top. The edges should be bubbling, and a toothpick should come out clean. I usually check around 40 minutes. If it still looks wet, let it bake a bit longer. Trust your eyes and the toothpick test for the best results. Serving suggestions can make your dessert even better. Here are some ideas: - Ice cream (vanilla is a favorite) - Whipped cream - Fresh mint leaves for a pop of color - A sprinkle of cinnamon for extra flavor Each of these adds a nice touch to your peach cobbler. Enjoy the mix of warm cobbler with cold toppings! Easy peach cobbler is simple to make and enjoy. You need fresh peaches and basic tools. Start by prepping your peaches, mix dry and wet ingredients, and assemble. Use tips for a fluffy texture and tasty serving ideas. Don’t forget to explore fruit variations and gluten-free options to please everyone. Store leftovers properly to enjoy later. Remember, making this dessert is fun and rewarding. Enjoy your delicious peach cobbler, and share the joy with friends and family!

Craving something sweet and fruity? My Easy Peach Cobbler recipe is simple and delicious! With just a few fresh peaches and common kitchen tools, you can create a warm, buttery …

Read more

Categories Desserts

Quick Pickled Red Onions for Fresh Flavor Boost

June 23, 2025 by Chef Remy
- 2 medium red onions, thinly sliced - 1 cup apple cider vinegar - 1 cup water - 2 tablespoons granulated sugar - 1 teaspoon fine sea salt - 1 teaspoon whole black peppercorns - 1/2 teaspoon cumin seeds - 1/2 teaspoon crushed red pepper flakes (optional) Quick pickled red onions start with fresh, crisp ingredients. The red onions brighten any dish with color and flavor. The apple cider vinegar adds a tangy kick. Water balances the acidity. Granulated sugar rounds it all out, making the onions sweet and sour. For seasonings, fine sea salt enhances the flavor. Whole black peppercorns add depth. Cumin seeds bring warmth, while crushed red pepper flakes give a spicy touch. You can skip the red pepper if you prefer a milder taste. Use the Full Recipe for step-by-step guidance. To start, grab a medium saucepan. In this pan, combine the apple cider vinegar, water, granulated sugar, fine sea salt, whole black peppercorns, cumin seeds, and crushed red pepper flakes if you want some heat. Place the saucepan over medium heat. This is where the magic begins! Bring the mixture to a gentle simmer. Stir it now and then until the sugar and salt dissolve completely. This process is key for a balanced flavor. Once the mixture simmers, remove it from the heat. Let the pickling liquid cool for about 5 to 10 minutes. Cooling it helps keep the onions crisp. While it cools, take your thinly sliced red onions and place them into a clean, heatproof jar or container. Make sure the jar is ready to hold all those vibrant slices! Next, carefully pour the cooled pickling liquid over the onions. Ensure they are completely submerged in that zesty bath. If any onions float, use the back of a spoon to press them down gently. Seal the jar tightly with a lid and allow it to cool to room temperature. After it cools, move it to the refrigerator. The pickled onions will be tasty after about an hour, but let them sit longer for even better flavor. For the complete recipe, check out the Full Recipe section. - Allow for longer pickling time: If you want strong flavor, let your onions pickle longer. One hour works, but overnight is best. The longer they sit, the tastier they get. This extra time allows the onions to soak up the vinegar and spices. - Keep onions submerged for best flavor: Ensure your onions stay fully covered in the pickling liquid. If they float, they won't pickle evenly. Use a spoon to press them down if needed. This keeps them crunchy and flavorful. - Use as a topping for tacos, salads, or sandwiches: These pickled onions add a zesty kick. They brighten up any dish. Try them on tacos for a fresh twist. Add them to salads for a crunch. Layer them on sandwiches to enhance flavor. - Showcase in clear glass jars for an attractive presentation: Use clear jars to display your pickled onions. Their bright color catches the eye. It makes a lovely centerpiece on your table. Guests will admire both the look and taste. {{image_4}} You can make quick pickled red onions even better by adding new flavors. Garlic adds a rich taste. Try adding a few crushed cloves. Dill also gives a bright, fresh taste. Just toss in some fresh dill or dried dill weed. You can also switch up the vinegar. Apple cider vinegar is great, but white wine vinegar gives a different twist. Each vinegar has its own flavor, so feel free to experiment. Want to spice things up? Add more heat with red pepper flakes or fresh jalapeños. This will make your pickled onions really pop. If you want, you can also add herbs like thyme or oregano. Both herbs add depth and a new layer of flavor. These variations make your pickled onions unique. They can enhance any dish you serve. For the Full Recipe, check out the steps to create this flavorful treat. To keep your quick pickled red onions fresh, store them in an airtight container. This helps prevent any odors from mixing in your fridge. Make sure to keep them refrigerated. The cool temperature slows down spoilage and keeps the onions crisp. You can expect your pickled onions to last about 2-4 weeks. It’s smart to check for any signs of spoilage before using them. Look for changes in color, texture, or smell. If anything seems off, it’s best to toss them. Enjoy your zesty quick pickled red onions for a fresh flavor boost in many dishes! If you want to know how to make them, check out the Full Recipe. Quick pickled red onions last about 2 to 4 weeks in the fridge. Store them in an airtight jar. Always check for signs of spoilage before using. Yes! You can use yellow or white onions for pickling. Both types offer a milder flavor and work well in this recipe. Each onion type gives a unique taste. Experiment to find your favorite. Pickled red onions shine in many dishes. Try them on tacos, salads, or sandwiches. They also add a nice pop to burgers and grain bowls. Their tangy flavor brightens up any meal. No, you do not need to can quick pickled red onions. Quick pickling is different from canning. Quick pickling uses a simple brine, while canning involves sealing jars for long-term storage. Quick pickling allows for fast enjoyment. You can find the Full Recipe for zesty quick pickled red onions in this article. It includes all the steps and tips to make your own at home. Enjoy making these tasty onions! Pickled red onions bring zest and color to dishes. We discussed ingredients, steps, tips, and variations to perfect your pickles. Remember, patience is key for the best flavor. Don't hesitate to try new spices or types of vinegar. Store them right, and enjoy their crunch in your meals. With careful prep, your pickles can last and make any dish shine. Get started today and savor the fresh kick of pickled onions. Happy pickling!

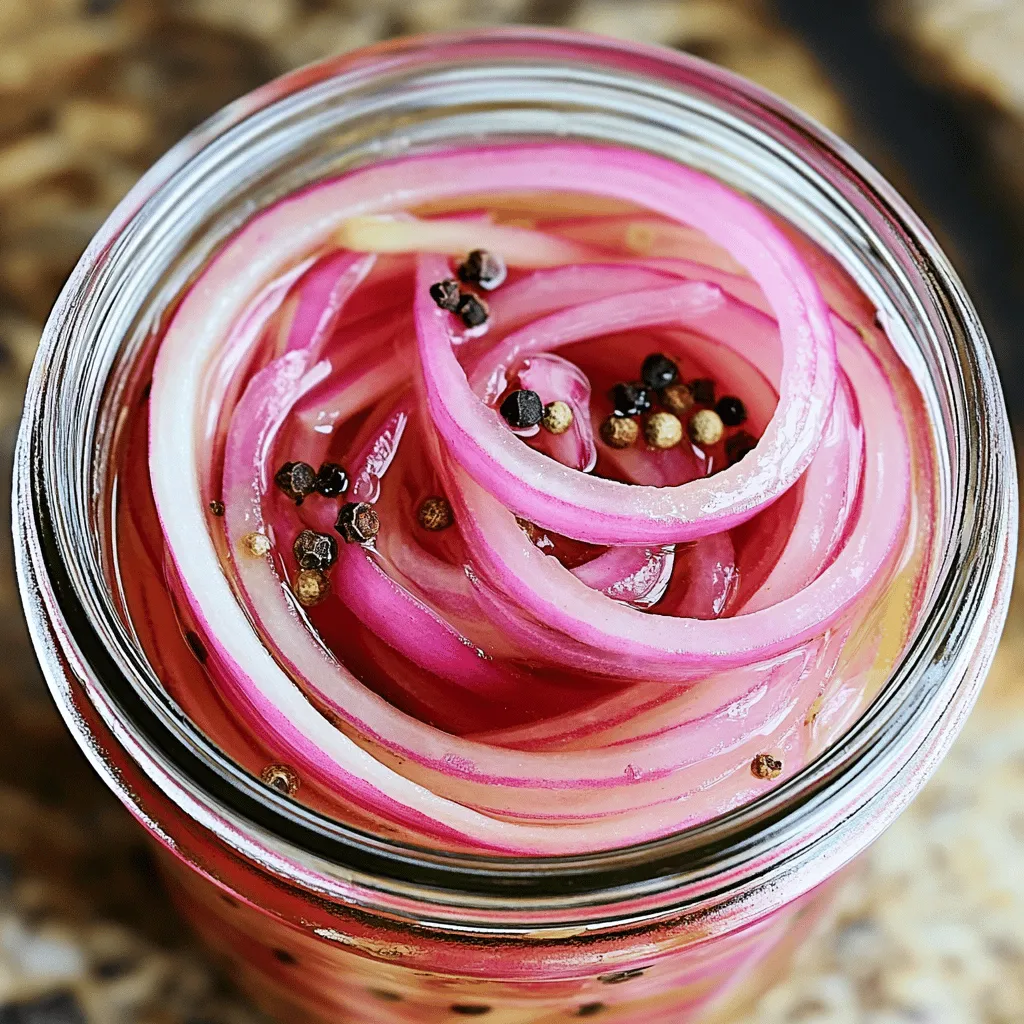
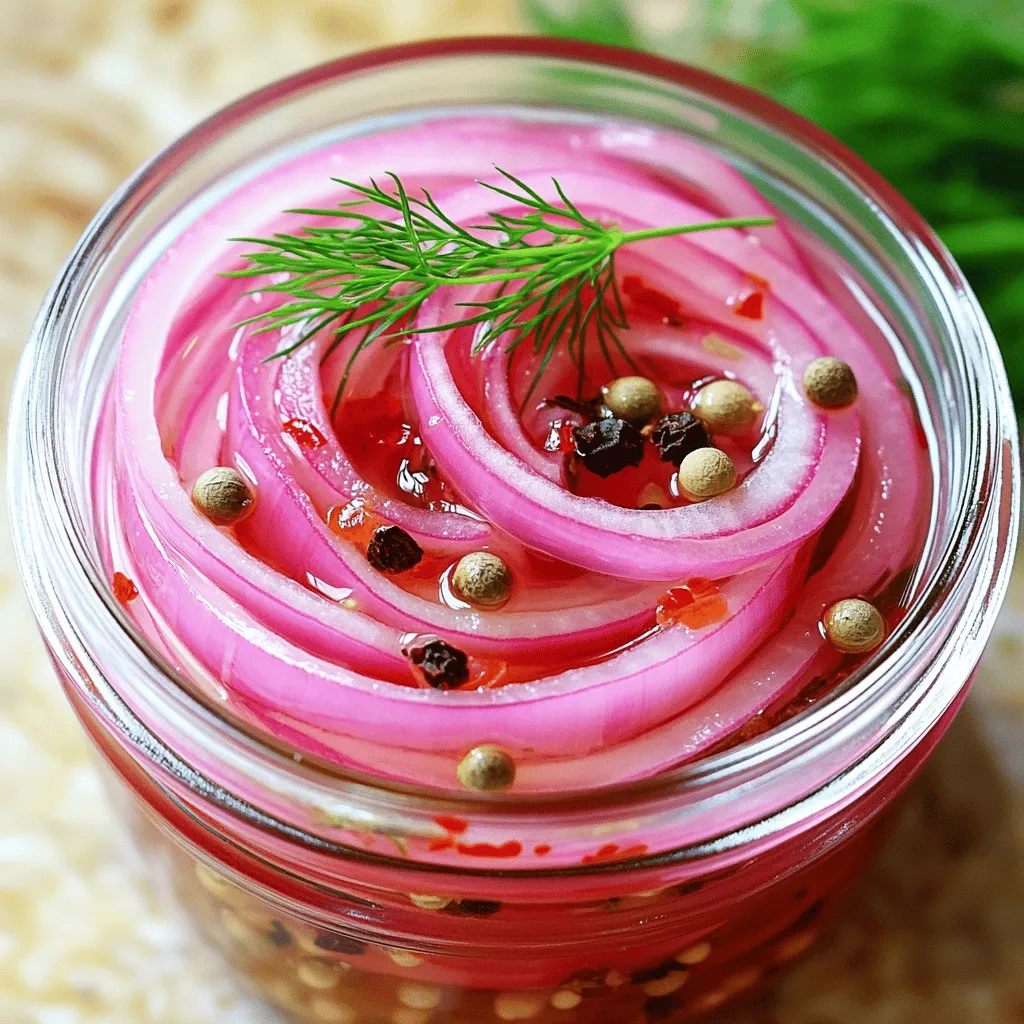
Looking for a fresh way to elevate your meals? Quick pickled red onions are the answer! They’re easy to make and add a bright, tangy flavor to any dish. In …

Read more

Categories Appetizers

Bang Bang Chicken Crispy Delightful Flavor Bomb

June 23, 2025 by Chef Remy
To make Bang Bang Chicken, gather these main ingredients: - 2 boneless, skinless chicken breasts - 1 cup buttermilk (or regular milk mixed with a splash of lemon juice) - 1 cup all-purpose flour - 1/2 cup cornstarch - 1 teaspoon garlic powder - 1 teaspoon onion powder - 1 teaspoon paprika - Salt and pepper to taste - Oil for frying The chicken is the star here. Buttermilk helps tenderize it and adds flavor. The mix of flour and cornstarch creates a perfect crispy coating. Next, let's make the Bang Bang Sauce. You will need: - 1/2 cup mayonnaise - 2 tablespoons sweet chili sauce - 1 tablespoon Sriracha (adjust according to your spice preference) - 1 tablespoon honey - 1 teaspoon freshly squeezed lime juice - Chopped green onions for garnish This sauce is creamy and a bit sweet. The Sriracha adds the right amount of heat. Feel free to adjust spice levels to suit your taste. If you want to change things up, here are some ideas: - Swap chicken for tofu or shrimp for a different protein. - Use gluten-free flour if you need a gluten-free option. - Instead of mayonnaise, try Greek yogurt for a lighter sauce. These changes can give Bang Bang Chicken a new twist. You can find the Full Recipe to explore all these options. To start, take your chicken breasts. Place them in a bowl. Pour in the buttermilk. You can use regular milk with lemon juice if you prefer. Make sure the chicken is fully coated. Let it marinate for at least 30 minutes. For the best taste, marinate overnight in the fridge. This step tenderizes the meat and adds flavor. Next, prepare the breading. In a separate bowl, mix flour, cornstarch, garlic powder, onion powder, and paprika. Add salt and pepper to taste. This mixture gives the chicken a nice crunch. Once the chicken has marinated, take it out. Let excess buttermilk drip off. Dredge the chicken in the flour mix. Ensure it’s fully covered. This will create a crispy outer layer. Now, it’s time to cook. Heat oil in a large pan over medium-high heat. You want enough oil to cover the bottom. When the oil shimmers, it’s ready. Carefully place the breaded chicken in the hot oil. Cook for about 5 to 7 minutes per side. The chicken should turn golden brown and crispy. Check the internal temperature; it should reach 165°F (75°C). Once cooked, place the chicken on paper towels to drain excess oil. Enjoy your Bang Bang Chicken with the sauce from the Full Recipe. To make your chicken crispy, you must follow a few key steps. First, marinate your chicken in buttermilk. This adds moisture and flavor. Let it soak for at least 30 minutes, or overnight for the best results. Next, mix flour and cornstarch together. The cornstarch gives an extra crunch. Coat each chicken piece well in this mixture. When frying, make sure the oil is hot enough. If it shimmers, it’s ready. Fry the chicken for about 5-7 minutes per side. This ensures a golden brown color. The Bang Bang sauce can be spicy or mild based on your taste. To make it hotter, add more Sriracha. Start with one tablespoon and adjust as needed. If you prefer less heat, cut back on the Sriracha. You can also add more honey to balance the spice. A squeeze of lime juice adds brightness. Always taste the sauce as you mix. This way, you can find your perfect level of spice. For a fun presentation, cut the chicken into strips. Drizzle the Bang Bang sauce on top or serve it on the side for dipping. You can garnish with chopped green onions for color. To add more crunch, serve with a fresh salad. A mix of greens and colorful veggies works great. For a complete meal, consider pairing it with rice or noodles. This adds a nice balance to the dish. Don’t forget to check out the full recipe for more tips! {{image_4}} You can switch the chicken for other proteins. Tofu offers a great plant-based choice. Use firm tofu for the best texture. Just press it to remove excess water. Then, cut it into pieces and marinate it like chicken. You can also try shrimp for a quick and tasty option. Use large shrimp, peel them, and marinate them too. Both options give the dish a fresh twist. Making Bang Bang Chicken gluten-free is easy. For the breading, replace all-purpose flour with a gluten-free blend. Ensure the cornstarch you use is certified gluten-free. This way, you still get that crispy texture. Check the sauce ingredients too. Some mayonnaise brands may contain gluten, so choose a safe one. With these swaps, everyone can enjoy the same great taste. While the classic Bang Bang sauce is delicious, feel free to explore other flavors. You could try a spicy peanut sauce for a new take. Simply blend peanut butter, soy sauce, and a bit of honey. Another option is a tangy yogurt sauce. Mix yogurt with garlic, lemon, and herbs for freshness. These alternatives keep your meals exciting and full of flavor. For the original recipe, check out the Full Recipe. After you enjoy your Bang Bang Chicken, let it cool. Place any leftovers in an airtight container. This keeps the chicken moist and prevents it from absorbing other smells. Store it in the fridge. It will stay fresh for up to three days. If you want to keep it longer, you can freeze it. Wrap the chicken tightly in plastic wrap and then in foil. It can last for up to three months in the freezer. When it's time to eat your leftovers, make sure to reheat them well. For best results, use an oven. Preheat it to 350°F (175°C). Place the chicken on a baking sheet and cover it with foil. Heat for about 15-20 minutes. This keeps the chicken crispy. If you're in a hurry, you can use the microwave. Heat it in short bursts, about 30 seconds each time. Check it to avoid drying it out. The Bang Bang Sauce can last longer than the chicken. If you store it in a sealed container, it can stay good for up to a week in the fridge. For longer storage, freeze it in an ice cube tray. Once frozen, pop the cubes into a bag. This way, you can take out small amounts as needed. Just remember to label the bag with the date so you know when you made it. Bang Bang Chicken is a tasty dish from Asian cuisine. It features crispy chicken coated in a spicy, creamy sauce. The chicken is first marinated to keep it juicy and tender. Then, it gets a crunchy breading before frying. The sauce combines mayonnaise, sweet chili, and Sriracha for a punch of flavor. This dish is a perfect mix of crunchy, spicy, and creamy. Yes, you can prepare some parts of Bang Bang Chicken ahead of time. You can marinate the chicken in buttermilk for up to overnight. The breading can be mixed and stored in a sealed bag. However, I suggest frying the chicken fresh for the best crunch. You can also make the sauce ahead and store it in the fridge. Bang Bang Chicken goes well with many sides. Here are a few options: - Steamed rice or jasmine rice - Fresh salad with light dressing - Stir-fried vegetables - Crispy spring rolls - Noodles tossed in soy sauce These sides add balance to the meal and complement the flavors of the chicken. Yes! You can try different sauces if you want to mix it up. Consider using a peanut sauce for a nutty taste. A sweet and sour sauce can also work well. You can even make a yogurt-based sauce for a lighter option. The key is to match the sauce with the crispy chicken for the best experience. Store leftover Bang Bang Chicken in an airtight container. Make sure it is cool before sealing. Keep it in the fridge for up to three days. For best results, reheat it in the oven. This helps keep the chicken crispy instead of soggy in the microwave. Reheating in the oven is the best choice. Preheat your oven to 375°F (190°C). Place the chicken on a baking sheet. Heat for about 10-15 minutes until warm. This method keeps the chicken crispy and delicious. If you are in a hurry, a skillet can work too. Heat a bit of oil, then fry the chicken until hot. Absolutely! You can adjust the spice level in the sauce. Add more Sriracha if you like it hot. You can also mix in some cayenne pepper or chili flakes. Start with a little and taste as you go. This way, you can find the perfect heat level for your taste buds. This article covered the key ingredients for Bang Bang Chicken and its sauce. We explored how to prepare, cook, and serve this dish perfectly. You learned tips to make your chicken crispy and adjust the spice level to your taste. We also discussed variations and how to store leftovers properly. Bang Bang Chicken is fun to make and enjoy. Now you can impress your family and friends with this flavorful dish. Dive in, get cooking, and enjoy every bite!

Get ready to elevate your dinner game with Bang Bang Chicken! This dish is a crispy, flavor-packed explosion that will have your taste buds dancing. I’ll walk you through simple …

Read more

Categories Appetizers

Fresh Peach Cobbler Bliss Irresistible Dessert Recipe

June 23, 2025 by Chef Remy
To make fresh peach cobbler, gather these key ingredients: - 6 ripe peaches, peeled and sliced - 1 cup granulated sugar, divided - 1 tablespoon freshly squeezed lemon juice - 1 teaspoon pure vanilla extract - 1 teaspoon ground cinnamon - 1/2 teaspoon ground nutmeg - 1 cup all-purpose flour - 1 tablespoon baking powder - 1/2 teaspoon sea salt - 1 cup whole milk - 1/2 cup unsalted butter, melted - 1/4 cup light brown sugar - 1 teaspoon cornstarch (optional for thicker filling) Each ingredient plays a role. The peaches give that sweet, juicy flavor. Sugar adds sweetness, while lemon juice brightens the taste. Vanilla and spices create warmth and depth. Flour, baking powder, and milk help form a soft, fluffy batter. Butter adds richness, and brown sugar gives a lovely caramel touch. If you lack any ingredient, don’t worry. Here are some substitutes: - Use nectarines instead of peaches for a similar taste. - Swap granulated sugar for coconut sugar or honey. - Substitute lemon juice with lime juice for a different twist. - Use almond or soy milk instead of whole milk. - Replace all-purpose flour with gluten-free flour if needed. These swaps keep the flavor intact while catering to your needs. To pick the best peaches, follow these tips: - Look for peaches that are slightly soft to the touch. - Choose peaches with a deep yellow or orange color. - Avoid any with bruises or blemishes. - Smell the peaches; they should have a sweet aroma. Fresh, ripe peaches make the cobbler truly shine. Use what is in season for the best flavor and taste. For the full recipe, check out the recipe section. Start by washing and peeling your ripe peaches. Use a sharp knife to slice them into thin pieces. Next, place the sliced peaches in a large bowl. Add 1/2 cup of granulated sugar, lemon juice, vanilla extract, ground cinnamon, ground nutmeg, and cornstarch if you want a thicker filling. Gently toss the mixture so the peaches get coated well. Let this sit for about 15 minutes. This waiting time helps the flavors blend nicely. In another bowl, mix the flour, the remaining 1/2 cup of granulated sugar, baking powder, and sea salt. Whisk them together until they are combined completely. Gradually add in the whole milk and melted butter. Stir gently until the batter is smooth. Do not overmix; this keeps the cobbler light and fluffy. Grease a 9x13 inch baking dish with butter or non-stick spray. Pour your batter into the dish, spreading it evenly. Carefully spoon the peach mixture over the batter. Do not stir; the peaches will sink while baking. Sprinkle the brown sugar on top for added sweetness. Bake in your preheated oven at 350°F (175°C) for 35-40 minutes. The cobbler is ready when it turns golden brown and a toothpick comes out clean. Let it cool for at least 10 minutes before serving. This makes it easier to serve and allows the juices to set. Enjoy your Fresh Peach Cobbler Bliss! For the full recipe, check the section above. To get the best cobbler texture, use fresh, ripe peaches. The juices from the peaches help create a soft, moist filling. Avoid overmixing your batter; mix just until combined. This keeps the cobbler light and fluffy. Add lemon juice to brighten the peach flavor. A scoop of vanilla extract brings warmth and depth. Ground cinnamon and nutmeg add spice. You can also try adding a splash of almond extract for a new twist. One mistake is using hard, unripe peaches. They won't soften well during baking. Another error is stirring the peach filling into the batter. Let the peaches sink naturally for a better look and taste. Lastly, don’t skip the resting time after baking; it helps flavors meld and makes serving easier. For the complete recipe, check out the Full Recipe. {{image_4}} You can change up your cobbler with other fruits. Try using ripe berries, apples, or pears. Each fruit brings its own taste and texture. Berries add a tart flavor, while apples give a nice crunch. You can mix different fruits too. A blend of peaches and blueberries can be delightful. You can make this cobbler gluten-free or dairy-free. For gluten-free, swap all-purpose flour with almond or coconut flour. These flours work well and taste great. Use almond milk or coconut milk instead of whole milk for a dairy-free option. You can also use a dairy-free butter substitute. Spices can change the flavor of your cobbler. Try adding a pinch of cardamom for warmth. Ginger can add a nice zing. You can also use a mix of spices for a more complex taste. Experiment with cloves or allspice. Each spice can make your cobbler unique and exciting. Remember, you can find the full recipe for my peach cobbler at the beginning of this article. Enjoy exploring these delicious variations! After you enjoy your fresh peach cobbler, store any leftovers in an airtight container. Let the cobbler cool to room temperature. Cover it tightly with plastic wrap or a lid. This keeps the cobbler moist and fresh. You can keep it in the fridge for up to three days. To reheat peach cobbler, preheat your oven to 350°F (175°C). Place the cobbler in an oven-safe dish. Cover it with foil to keep it from drying out. Heat for about 15-20 minutes, or until warm. You can also use a microwave. Heat individual portions on medium power for about 30 seconds to 1 minute. You can freeze peach cobbler for later. First, let it cool completely. Cut it into portions and wrap each piece in plastic wrap. Place the wrapped pieces in a freezer-safe bag. Remove as much air as possible. Freeze for up to three months. When ready to eat, thaw in the fridge overnight and reheat. This way, you can enjoy your delicious peach cobbler anytime! For the full recipe, check out the Peach Cobbler Delight section. Yes, you can use frozen peaches. Just thaw them and drain any excess juice. This keeps your cobbler from getting too watery. Frozen peaches may also need a bit more sugar since they are often less sweet than fresh ones. The cobbler is done when it turns golden brown. To check, insert a toothpick into the batter. If it comes out clean, your cobbler is ready! The top should look firm, and the edges should be bubbling. Fresh peach cobbler pairs perfectly with a scoop of vanilla ice cream. Whipped cream also adds a nice touch. If you want a twist, serve it with cream cheese frosting or a sprinkle of nuts for crunch. Homemade peach cobbler stays fresh for about 3-4 days in the fridge. Store it in an airtight container to keep it moist. You can also freeze it for up to 3 months. Just reheat it in the oven before serving for the best taste. For the full recipe, check out the Peach Cobbler Delight section. In this post, we explored key ingredients, step-by-step instructions, and tips for a great peach cobbler. Remember to choose ripe peaches and avoid common mistakes for the best outcome. You can even try different fruits and flavors to mix things up. Store leftovers correctly or freeze them for later enjoyment. This dessert is not just tasty; it brings joy to any gathering. Enjoy your baking journey!

Are you ready to discover the joy of Fresh Peach Cobbler? This sweet, warm, and gooey dessert will leave you craving more. I’ll guide you step-by-step on how to make …

Read more

Categories Desserts

Mini Frittata Muffins Delicious and Easy to Make

June 23, 2025 by Chef Remy
- 6 large eggs - 1 cup milk (dairy or plant-based) - 1 cup fresh spinach, chopped - 1/2 cup bell peppers, diced - 1/2 cup cherry tomatoes, halved - 1/2 cup shredded cheese (cheddar or mozzarella) - 1/4 cup red onion, finely chopped - Salt and pepper to taste - 1 teaspoon garlic powder - 1 teaspoon dried oregano - Cooking spray or oil The stars of this dish are eggs and milk. Eggs give the muffins their structure, while milk adds creaminess. Spinach adds color and nutrients. Bell peppers and cherry tomatoes bring sweetness and crunch. Cheese makes everything rich and gooey. Red onion adds a mild zing. The spices—garlic and oregano—boost the flavor, while salt and pepper balance it. You can mix and match these ingredients to suit your taste. Try adding: - Zucchini for moisture - Cooked bacon or sausage for protein - Mushrooms for earthiness - Fresh herbs like basil for added freshness For cheese, feel free to swap in feta or goat cheese for a tangy twist. To make these muffins, you need a few tools: - A muffin tin to shape the muffins - Mixing bowls for combining the ingredients Using cooking spray or oil is key. It keeps the muffins from sticking to the tin. This step ensures easy release. You want to enjoy your delicious creations without any mess! To start, preheat your oven to 350°F (175°C). This step is key for even baking. Next, grab a muffin tin and grease it well with cooking spray or oil. This helps the muffins come out easily after baking. Now it’s time to chop your ingredients. Take fresh spinach and chop it into small pieces. Dice your bell peppers into tiny cubes for even cooking. Halve the cherry tomatoes, and finely chop the red onion. Measure out your cheese too. In a large bowl, crack the six eggs and add one cup of milk. Use a whisk to beat them well together. You want a nice, frothy mix. This froth will help your muffins rise and become fluffy. Once mixed, add salt, pepper, garlic powder, and dried oregano for flavor. Stir it all together until it’s well combined. Now, it’s time to fill your muffin tin. Carefully pour the egg mixture into each cup. Fill them about 3/4 full. This allows space for the muffins to puff up while baking. Be careful not to overfill, or they may spill over. Place the muffin tin in your preheated oven. Bake for 18 to 20 minutes. Keep an eye on them as they puff up. To check if they’re done, insert a toothpick into the center of a muffin. If it comes out clean, they are ready. Once baked, take the muffin tin out of the oven. Let them cool for about 5 minutes. Then, gently transfer the muffins to a wire rack. This helps them cool completely and keeps them fluffy. For the full recipe, refer to the recipe section above. To make your mini frittata muffins fluffy, preheat your oven to 350°F (175°C). Use a whisk to beat the eggs and milk together until frothy. This adds air to the mix. Avoid overmixing after adding your veggies. Gently fold them in. This keeps the texture light. Prevent sogginess by using fresh vegetables. Make sure to drain excess moisture from ingredients like spinach. You can also sauté your veggies for a few minutes before mixing them in. This step helps remove water and keeps your muffins dry. These mini frittata muffins are great for brunch or breakfast. Pair them with salsa or hot sauce for a kick. They also taste good with a dollop of sour cream or yogurt. You can serve them as snacks too. They’re easy to grab on the go! Consider making a big batch for a gathering. They look lovely on a platter. You can offer a variety of flavors to please everyone. Make your mini frittata muffins look stunning. Use a colorful plate or a fun muffin stand. This adds flair to your table. You can stack them high or arrange them in a circle. Garnish your muffins with fresh herbs like parsley or chives. This adds color and makes them pop. You can also sprinkle some cheese on top right before serving for extra appeal. For the full recipe, check out the recipe section. Enjoy making these delightful mini frittata muffins! {{image_4}} You can have fun with mini frittata muffins by changing the flavors. Try adding cooked bacon or sausage for a meaty twist. You can also experiment with seasonal veggies like zucchini or asparagus. Using fresh herbs such as basil or dill brightens up the taste. You can mix and match ingredients based on what you have and what you love. If you need a gluten-free option, these muffins are already perfect. Just make sure any added ingredients, like meats or sauces, are also gluten-free. For vegan frittata muffins, swap the eggs with a mix of silken tofu and a bit of nutritional yeast. Use plant-based milk and cheese for a creamy texture without dairy. These changes keep the flavor while meeting dietary needs. Making your mini frittata muffins look pretty can add to the fun. Use colorful cupcake liners for a festive touch. You can also grease the muffin tin for a classic look. For special occasions, garnish with fresh herbs or a sprinkle of paprika. This adds color and makes your dish stand out. Your guests will love the effort you put into the look! To store mini frittata muffins in the refrigerator, place them in an airtight container. You can also use a resealable plastic bag. Keep the muffins in the fridge for up to four days for the best freshness. This way, they stay moist and tasty, ready for your next meal. To freeze your mini frittata muffins, let them cool completely first. Arrange them in a single layer on a baking sheet. Freeze them for about one hour. Once frozen, transfer the muffins to a freezer-safe bag. They can last for up to three months. To thaw, put them in the fridge overnight. For best results, reheat them in the oven or microwave. To keep your muffins fluffy when reheating, use the oven at a low temperature. Set it to 350°F (175°C) and warm them for about 10 minutes. This method helps retain moisture. Avoid using the microwave as it can make them chewy and dry. If you must use a microwave, heat them in short bursts of 15 seconds. This helps prevent any mishaps with texture. Mini frittata muffins can last in the fridge for up to five days. Store them in an airtight container. This keeps them fresh and tasty. If you want to savor them longer, freeze them. When frozen, they keep well for about three months. Just remember to thaw them in the fridge before reheating. Yes, you can make mini frittata muffins ahead of time. Prepare them the night before and store them in the fridge. This way, you can enjoy them for breakfast or a quick snack. Just reheat them when you're ready to eat. They hold up well when cooked and stored correctly. If you need an egg substitute, you have options. You can use 1/4 cup of unsweetened applesauce for each egg. Flaxseed meal mixed with water is another option. Combine one tablespoon of flaxseed with three tablespoons of water, let it sit for five minutes, and use it as an egg. These substitutes can change the taste and texture slightly. Applesauce adds sweetness, while flaxseed gives a nutty flavor. Mini frittata muffins are easy to make and great for any meal. We covered essential ingredients, cooking tips, and creative variations. You can customize them with your favorite veggies or meats. Don't forget the right tools for better results. Whether you eat them fresh or store them, enjoy these tasty muffins for breakfast or snacks. Experiment with flavors and presentation to impress your friends. They’re not just good; they’re fun to make, too!

Looking for a quick and tasty breakfast? Mini frittata muffins are your answer! They’re easy to make, packed with flavor, and perfect for grabbing on the go. In this post, …

Read more

Categories Breakfast

Tomato Tart with Brown Rice Flavorful and Easy Recipe

June 23, 2025 by Chef Remy
- 1 cup cooked brown rice - 1 sheet of puff pastry (thawed if frozen) - 3 medium ripe tomatoes, sliced into rounds - 1 cup creamy ricotta cheese - 1/2 cup finely grated Parmesan cheese - 1/4 cup fresh basil leaves, chopped - 1 tablespoon extra virgin olive oil - Salt and freshly ground black pepper to taste - 1 large egg (for egg wash) For this recipe, fresh tomatoes make a big difference. They have better taste and texture than canned ones. Fresh tomatoes bring a bright flavor, while canned tomatoes can be too soft and watery. If you can, choose ripe, juicy tomatoes. You can change up the cheese in this dish. For a different taste, try feta or goat cheese. Both add a nice tang. You can also add other veggies. Sliced zucchini or bell peppers work well. They add color and nutrients. If you need a gluten-free option, look for gluten-free puff pastry. Many stores sell it now. For a vegan version, swap out the cheeses for dairy-free options. Cashew cheese or tofu can work well. You can skip the egg wash, too. It won't affect the flavor. To make a great tomato tart, start by preheating your oven. Set it to 400°F (200°C). This heat helps the pastry rise nicely and cook through. While the oven warms, prepare the puff pastry. Roll it out on a lightly floured surface. You want it to fit a 9-inch tart pan. Once it’s ready, press the pastry gently into the pan. Use a fork to prick small holes in the bottom. This step stops the pastry from puffing up too much while baking. Next, mix your filling. In a bowl, combine 1 cup of cooked brown rice, 1 cup of ricotta cheese, and 1/2 cup of grated Parmesan cheese. Add 1/4 cup of chopped fresh basil. Season the mix with salt and freshly ground black pepper. Stir until it’s creamy and well blended. Adding the right seasoning makes a big difference. Taste the mixture and adjust to your liking. Now, it’s time to assemble your tart. Spoon the filling into the prepared pastry. Spread it evenly across the bottom. This creates a smooth base for the tomatoes. Next, layer your sliced tomatoes on top. Arrange them in a circular pattern, slightly overlapping each slice. Drizzle a bit of extra virgin olive oil over the tomatoes. This adds flavor and helps them cook well. Sprinkle a touch more salt and pepper for extra taste. For a golden crust, prepare an egg wash. Crack 1 large egg into a small bowl and whisk it until smooth. Use a pastry brush to glaze the edges of the pastry with the egg wash. Now, place the tart in the preheated oven. Bake for 25-30 minutes or until the pastry is golden brown and puffed. The tomatoes should look soft and slightly caramelized. Enjoy the sight of your beautiful tart as it bakes! To get a crispy crust, start with cold puff pastry. Make sure your oven is preheated to 400°F (200°C). This heat helps the pastry puff up nicely. Before adding your filling, prick small holes in the bottom with a fork. This step allows steam to escape. A soggy bottom often comes from too much moisture in the filling. Spread the filling evenly, but don’t overfill it. This keeps the crust dry and crisp. For extra flavor, consider adding herbs like thyme or oregano. You can mix these into your cheese filling for a burst of taste. A sprinkle of crushed red pepper can add a nice kick. When you drizzle the olive oil, do it lightly over the tomatoes. This helps to enhance their natural sweetness. Be cautious not to drown them in oil, as this can make the tart greasy. Serve your tomato tart with a light side salad. A fresh arugula salad complements the rich cheese well. You can also add a squeeze of lemon to brighten the dish. For presentation, garnish with fresh basil leaves. This adds color and a lovely aroma. You can slice the tart into wedges for easy serving. Enjoy the vibrant colors and flavors that make this dish a true delight! {{image_4}} You can switch out brown rice for quinoa or couscous. Quinoa adds a nutty flavor and a protein boost. It cooks quickly and has a nice texture. Couscous is another great choice. It’s light and fluffy, perfect for soaking up flavors. Both options keep the dish light and tasty. You can also explore other crust options. If you want a gluten-free base, try almond flour or chickpea flour crusts. These add unique tastes and textures. You can even use a savory pie crust for a rich flavor. The choice is yours, and it can make the tart even better! Seasonal vegetables can change the game for your tart. In spring, use fresh asparagus or zucchini for a light touch. Summer is perfect for bell peppers and fresh corn. In fall, think about roasted butternut squash or sweet potatoes. These veggies will make your tart stand out. Herbs bring life to your dish. In summer, you might use fresh basil or parsley. In fall, consider sage or thyme for warmth. You can mix and match herbs to keep your tart exciting all year round. This will help you enjoy seasonal flavors each time you cook. You can give your tart a Mediterranean spin. Add olives, artichokes, or feta cheese. These ingredients bring a salty and savory taste. A drizzle of balsamic glaze adds sweetness that pairs well with tomatoes. For an international flair, try spices from other cuisines. Add cumin and coriander for a Middle Eastern vibe. You can also sprinkle in curry powder for a unique twist. Each spice brings its own character, making your tart a world tour for your taste buds! If you want to try the full recipe, check out the Tomato Tart Delight with Brown Rice. To store leftover tomato tart, let it cool first. Wrap it tightly in plastic wrap or foil. Place it in the fridge. It stays fresh for about three days. For best flavor, eat it within this time frame. If you want to keep it longer, freezing is a great option. To freeze the tart, cut it into slices. Wrap each slice in plastic wrap, then place them in a freezer-safe bag. Label the bag with the date. You can freeze it for up to three months. When ready, just thaw it in the fridge overnight before reheating. For reheating, I recommend using an oven. Preheat it to 350°F (175°C). Place the tart on a baking sheet. Heat it for about 15-20 minutes. This keeps the crust crispy and the filling warm. If you're short on time, you can use a microwave. Place a slice on a microwave-safe plate. Cover it with a damp paper towel. Heat for 1-2 minutes, but be careful. The crust may get soggy this way. The freshness of ingredients matters. Fresh tomatoes last about a week in the fridge. Once cooked, the filling stays good for up to four days. If you notice any off smells or colors, it’s best to toss it. Ricotta cheese lasts about a week after opening. Always check for any mold or changes in texture. Parmesan cheese can last much longer, up to six months. Just ensure it stays sealed and dry. Can I make this dish ahead of time? Yes, you can prepare this tart ahead. Make the filling and assemble it. Cover the tart and store it in the fridge for a day. Bake it when you are ready. This saves time and keeps the flavors fresh. Is it possible to make it without using puff pastry? Absolutely! You can use a pie crust or even a homemade crust. A simple biscuit crust works well too. Just remember to adjust the baking time if you switch crusts. What can I use instead of ricotta cheese? If you don’t have ricotta, try cottage cheese or cream cheese. You can also use silken tofu for a dairy-free option. Blend it smooth to mimic the creamy texture. How can I make this recipe dairy-free? You can use almond milk or soy milk for the creamy elements. Swap ricotta for blended soaked cashews or a dairy-free cheese. This keeps the dish rich and tasty without dairy. What oven temperature is best for other tarts? Most tarts bake well at 375°F to 400°F (190°C to 200°C). This range cooks the crust evenly and gives it a nice golden color. How do I prevent my tart from leaking filling? To avoid leaks, make sure to prick holes in the crust. This lets steam escape. Also, let your filling cool slightly before adding it to the crust. A cooler filling helps prevent sogginess. This blog post covered everything to make a great tomato tart. We explored key ingredients, optional add-ins, and helpful dietary substitutions. You learned step-by-step instructions for prepping, filling, and baking your tart. I shared tips for perfecting texture and added serving ideas. Plus, we looked at exciting variations to keep things fresh season after season. With proper storage and reheating tips, your tart can last and taste great longer. Remember, cooking is all about experimenting. Enjoy your delicious creation, and don't be afraid to make it your own!

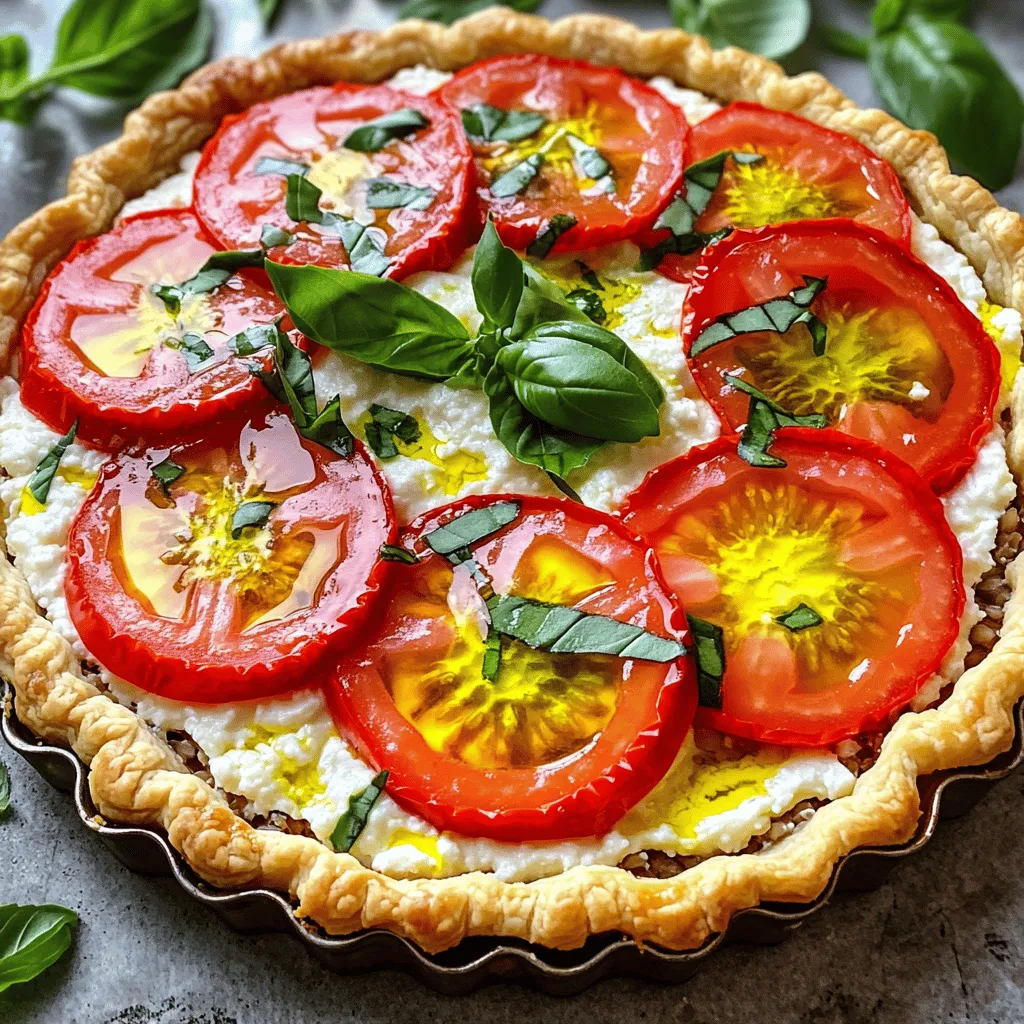
Looking for a dish that’s flavorful and easy to make? This Tomato Tart with Brown Rice is just what you need! You’ll find fresh ingredients and smart tips that take …

Read more

Categories Dinner

Triple Crust Peach Cobbler Irresistible Dessert Recipe

June 22, 2025 by Chef Remy
To make this delicious cobbler, you need the following main ingredients: - 4 cups fresh peaches, peeled and sliced - 1 cup granulated sugar - 1 tablespoon freshly squeezed lemon juice - 1 teaspoon pure vanilla extract - 1 teaspoon ground cinnamon - 1/4 teaspoon ground nutmeg - 2 tablespoons cornstarch - 1/2 cup unsalted butter, melted - 2 cups all-purpose flour - 1 tablespoon baking powder - 1 teaspoon salt - 3/4 cup milk - 1/4 cup packed brown sugar - 1 teaspoon powdered sugar, for dusting These ingredients create a sweet, juicy filling and a lovely, crisp topping. When measuring ingredients, use dry measuring cups for flour and sugar. For liquids, use a clear measuring cup. Make sure to level off dry ingredients for accuracy. For the peaches, choose ripe ones for the best flavor. Peel them easily by blanching in boiling water for 30 seconds, then transferring them to ice water. This makes the skin come off quickly. Mix the peach filling gently to keep the slices intact. Let it rest for about 10 minutes. This allows the juices to mix with the sugar and spices, creating a tasty syrup. You can add a few ingredients for extra flavor: - 1/2 teaspoon almond extract for a nutty taste - 1 tablespoon fresh herbs like thyme for a twist - A splash of bourbon or rum for depth These optional ingredients can elevate your cobbler to new heights. Don't be afraid to experiment! For the full recipe, check out the complete instructions. To make the peach filling, start by peeling and slicing 4 cups of fresh peaches. Place the peaches in a large bowl. Add 1 cup of granulated sugar, 1 tablespoon of lemon juice, 1 teaspoon of vanilla extract, 1 teaspoon of ground cinnamon, 1/4 teaspoon of nutmeg, and 2 tablespoons of cornstarch. Mix everything well. This helps to coat the peaches and bring out their sweet flavor. Let it sit for about 10 minutes. This resting time lets the juices blend and makes the filling juicy. In another bowl, whisk together 2 cups of flour, 1 tablespoon of baking powder, and 1 teaspoon of salt. Make a well in the center. Pour in 1/2 cup of melted butter and 3/4 cup of milk. Mix gently with a spatula until just combined. Don't worry if the batter is a bit lumpy; this adds to the cobbler's charm. Grease a 9x13-inch baking dish. Pour half of the batter into the dish, spreading it evenly. Next, layer the peach filling on top of the batter. Be sure to distribute the peaches evenly for great flavor. Drizzle the rest of the batter over the peaches. It's okay if the peaches peek through; it looks rustic. Finally, sprinkle 1/4 cup of brown sugar on top. This will create a nice, crispy crust. Bake in a preheated oven at 375°F (190°C) for 40-45 minutes. The cobbler is ready when it's golden brown and bubbly. Let it cool for about 10 minutes before serving. For an extra touch, dust the top with powdered sugar. Enjoy this delightful dessert warm! To get a great triple crust, start with ripe peaches. The peaches should be juicy and sweet. Use a mix of butter and milk to make the batter rich. This makes the crust flaky and tender. Be careful not to overmix the batter. A few lumps are okay! They add texture. Use a 9x13-inch dish for even baking. This size helps the cobbler cook well and gives it a nice shape. One common mistake is using unripe peaches. They won’t give you the sweet taste you want. Another mistake is not letting the peach mixture sit. This step helps the flavors mix and the juices to flow. Don't skip the cornstarch. It thickens the filling and keeps it from being runny. Also, avoid opening the oven door too often while baking. This can change the temperature and affect how the cobbler cooks. Serve your cobbler warm for the best taste. It pairs well with vanilla ice cream. The cold ice cream melts into the warm cobbler, creating a delicious mix. You can also add whipped cream for a lighter touch. For a fun twist, sprinkle nuts or granola on top. Fresh mint leaves add a pop of color and flavor. Enjoy your dessert with friends or family; it makes a great treat for gatherings! For the complete recipe, check the Full Recipe link. {{image_4}} You can switch up the fruit in this cobbler. For summer, try berries. Blueberries and raspberries work well. In fall, use apples or pears. Their flavors blend nicely with spices. Each season brings a new taste, making your cobbler unique. If you need gluten-free options, use almond flour or a gluten-free blend. Both work well in place of all-purpose flour. For a dairy-free version, replace butter with coconut oil. Use almond or oat milk instead of regular milk. These swaps keep the dessert tasty without dairy or gluten. Get creative with toppings! Add a scoop of ice cream or whipped cream. For a crunchy twist, sprinkle some granola on top. You can also drizzle honey or chocolate sauce. Each addition brings a new layer of flavor and texture to your cobbler. For the full recipe, check out the link provided. After you have enjoyed your delicious cobbler, store any leftovers in an airtight container. Keep it at room temperature for up to two days. If it is warm, allow it to cool first. This keeps the crust from getting too soggy. For longer storage, put it in the fridge. It can last up to five days there. If you want to save your cobbler for later, freezing is a great option. First, let the cobbler cool completely. Then, wrap it tightly in plastic wrap or aluminum foil. Place it in a freezer-safe container or bag. This will protect it from freezer burn. You can freeze it for up to three months. When you’re ready to eat, just thaw it in the fridge overnight. To bring back that fresh-baked taste, reheat your cobbler in the oven. Preheat your oven to 350°F (175°C). Place the cobbler in an oven-safe dish. Cover it with aluminum foil to keep it from drying out. Heat for about 15-20 minutes, or until it is warm throughout. For extra crispiness, remove the foil for the last few minutes. Enjoy it warm, perhaps with a scoop of ice cream! To peel peaches easily, start by boiling water in a large pot. Next, score an "X" shape on the bottom of each peach. Once the water boils, drop the peaches in for about 30 seconds. Remove them and place them in an ice bath. The skins will slip off with little effort. This method saves time and keeps your hands clean. Yes, you can use canned peaches if fresh ones are not available. Just make sure to drain them well. Canned peaches may have added sugar, so you might want to adjust the sugar in the recipe. They can make a tasty cobbler, but fresh peaches give a better flavor and texture. You can tell your peach cobbler is done when the top is golden brown. A toothpick should come out clean from the crust. Look for bubbling around the edges too. This means the filling is hot and ready. Let it cool for about 10 minutes before serving. Enjoy your delicious dessert! In this blog post, we explored how to make a delicious triple crust peach cobbler. We covered key ingredients, step-by-step instructions, and helpful tips for perfect results. Remember, using fresh peaches can make a big difference. Don’t shy away from trying variations to suit your taste. Whether you choose to freeze leftovers or heat them later, enjoy this treat whenever you can. Follow these steps, and you’ll create a dessert that brings joy to all. Happy baking!

If you love dessert, you need to try my Triple Crust Peach Cobbler! This sweet treat has three flaky layers, making it a delight for any peach fan. Finding the …

Read more

Categories Desserts

Savory Southern Tomato Pie Flavorful and Easy Dish

June 22, 2025 by Chef Remy
To make a great Southern tomato pie, you need simple yet fresh ingredients. Here’s what you should gather: - 2 cups fresh ripe tomatoes, thinly sliced - 1 cup shredded mozzarella cheese - 1 cup shredded sharp cheddar cheese - 1/2 cup mayonnaise - 1/4 cup fresh basil, finely chopped - 1/4 cup green onions, finely chopped - 1 teaspoon Dijon mustard - Salt and freshly ground pepper to taste - 1 pre-made pie crust (store-bought or homemade) - 1 tablespoon extra virgin olive oil - 1 tablespoon cornmeal (optional, for crust texture) These ingredients combine for a rich and creamy flavor. The tomatoes bring a juicy freshness, while the cheeses add a melty goodness. For the best taste, choose tomatoes that are ripe and flavorful. I recommend: - Heirloom tomatoes for their sweet and complex flavor - Beefsteak tomatoes for their large size and meaty texture - Roma tomatoes for their firmness and low moisture Using a mix of these varieties can elevate your dish. Each type adds its unique taste and texture to the pie. Seasoning is key to enhance the flavors in your pie. Besides salt and pepper, consider adding: - Garlic powder for a hint of depth - Crushed red pepper flakes for a bit of heat - Grated Parmesan cheese for a salty finish For toppings, you might want to sprinkle some extra cheese or fresh herbs like parsley or more basil. These small touches can make your Southern tomato pie even more special. You can find the Full Recipe for more details on preparation and baking! Start by preheating your oven to 375°F (190°C). This makes sure the oven is hot when you bake. Next, take your pie crust. If you bought it, place it in a 9-inch pie dish. Press it into the edges to fit well. If you made your own, roll out the dough to fit the dish. For a better crust, you can sprinkle cornmeal on the bottom. This helps the crust stay crisp and adds a nice texture. Now, let’s prep the tomatoes. Slice your fresh tomatoes thinly. This helps them cook evenly. Sprinkle a bit of salt on the slices and let them sit in a colander for 10-15 minutes. This step is key. It helps draw out extra moisture. With less water, your pie won’t get soggy. In a large bowl, combine the filling. Add 1 cup of shredded mozzarella cheese and 1 cup of sharp cheddar cheese. Then, mix in 1/2 cup of mayonnaise, 1/4 cup of chopped basil, and 1/4 cup of green onions. Don’t forget to add 1 teaspoon of Dijon mustard. Season with salt and pepper. Stir until everything is creamy and well mixed. This mix will bring a rich flavor to your pie. For the full recipe, check out the details above. Enjoy making your Southern Tomato Pie! Choose ripe tomatoes for the best flavor. Look for firm, slightly soft tomatoes with deep color. Varieties like heirloom, vine-ripened, or beefsteak work well. They bring sweetness and tang to your pie. Avoid tomatoes that feel mushy or have dark spots. Fresh, local tomatoes often taste best. To keep your pie from getting soggy, it’s key to remove excess moisture. After slicing your tomatoes, sprinkle them with salt and let them drain in a colander. This step helps draw out water. You can also sprinkle cornmeal in the pie crust. This adds texture and absorbs moisture. Serve your Southern Tomato Pie warm or at room temperature. A fresh green salad pairs nicely with the pie. You can also add a drizzle of balsamic reduction for extra flavor. For a festive touch, garnish with fresh basil leaves. This makes each slice pop with color and taste. For the full recipe, check out the Southern Tomato Pie Delight section. {{image_4}} You can easily add protein to your Southern tomato pie. Try cooked bacon or diced ham for a smoky flavor. Cooked chicken or shrimp also works well. Simply layer the protein between the tomatoes and cheese. This makes the dish heartier and even more satisfying. If you want a vegetarian pie, skip the meat and focus on fresh veggies. Add spinach, zucchini, or bell peppers for extra nutrition. For a vegan twist, use vegan cheese and mayo. You can also replace regular pie crust with a plant-based one. This keeps the dish light while still being tasty. Get creative with toppings to make your pie shine. Try adding a sprinkle of breadcrumbs for a crunchy top. You can also use sliced olives or jalapeños for some heat. Fresh herbs like thyme or oregano can brighten up the flavor. Finally, a drizzle of balsamic glaze before serving adds a touch of sweetness. For the full recipe, check out the Southern Tomato Pie Delight! After enjoying your Southern Tomato Pie, store any leftovers in the fridge. Place slices in an airtight container. This keeps the pie fresh for up to three days. If you notice excess moisture, place a paper towel in the container to absorb it. To reheat, preheat your oven to 350°F (175°C). Place a slice of pie on a baking sheet. Heat for about 15-20 minutes. This method keeps the crust crispy. If you’re in a hurry, you can use the microwave. Heat on medium power for 1-2 minutes. This method is quick but may make the crust softer. You can freeze Southern Tomato Pie for longer storage. Wrap the whole pie or slices tightly in plastic wrap. Then, place them in a freezer bag or container. This keeps the pie fresh for up to three months. To enjoy, thaw in the fridge overnight. Reheat in the oven for best results. Yes, you can use canned tomatoes in a pinch. Look for whole, peeled tomatoes. Drain them well to avoid excess moisture. Fresh tomatoes give better flavor, but canned can work fine if necessary. Just remember to season them to enhance their taste. Southern Tomato Pie pairs well with a fresh side salad. A crisp green salad with a light vinaigrette complements the pie's richness. You can also serve it with grilled vegetables or a simple pasta dish. These sides balance the flavors and add variety to your meal. To make this recipe gluten-free, choose a gluten-free pie crust. Many stores sell ready-made gluten-free options. You can also make a crust using almond flour or gluten-free oats. Just ensure all your other ingredients, like cheese and spices, are gluten-free as well. Enjoy your pie without worry! Southern Tomato Pie is a delicious dish full of ripe tomatoes and savory flavor. You learned how to choose the best ingredients, prepare the pie, and avoid sogginess. The tips for variations and storage help you enjoy it longer. Feel free to be creative! This pie can fit many diets and tastes. Whether you share it with friends or enjoy it solo, it’s sure to impress. With this recipe in hand, you’re ready to whip up your own Southern Tomato Pie masterpiece!

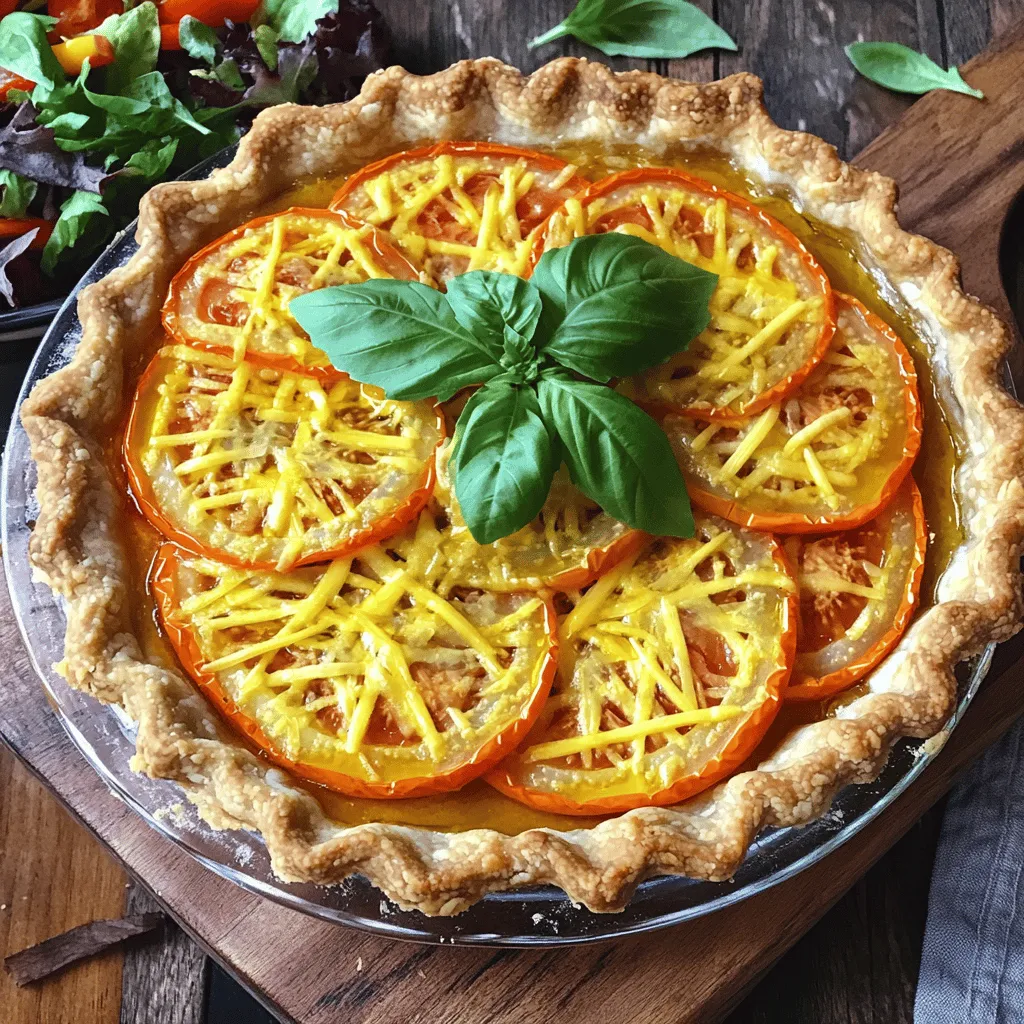
Welcome to the world of Southern Tomato Pie! This dish blends fresh tomatoes, cheese, and herbs into a savory dream. It’s easy to make and will wow your family and …

Read more

Categories Dinner

Homemade Peach Cobbler Delightful and Simple Recipe

June 22, 2025 by Chef Remy
For a great peach cobbler, you need fresh, ripe peaches. Here’s what you’ll need: - 6 ripe peaches, pitted and sliced - 1 tablespoon freshly squeezed lemon juice Using ripe peaches gives the dish a sweet and juicy flavor. Look for peaches that are soft but not mushy. The skin should have a nice color, usually yellow or a bit of red. These pantry staples help create the base for your cobbler: - 1 cup granulated sugar, divided - 1/4 cup brown sugar - 1 teaspoon ground cinnamon - 1 teaspoon pure vanilla extract - 1 cup all-purpose flour - 1 teaspoon baking powder - 1/4 teaspoon salt - 1/2 cup milk (whole milk preferred) - 1/3 cup unsalted butter, melted - 1/4 teaspoon ground nutmeg (optional) These ingredients blend together to create a sweet, fluffy topping and a rich filling. The sugars add sweetness, while the spices bring warmth to the dish. Choosing the right peaches is key. Here are some tips: - Look for peaches with a slight give. They should feel soft when pressed gently. - Check the aroma. Ripe peaches smell sweet and fragrant. - Avoid any with blemishes or bruises. This may mean they are overripe or spoiled. When you pick the best peaches, your cobbler will shine. Remember to enjoy the process of cooking and creating something delicious! Start by preheating your oven to 350°F (175°C). This ensures even cooking. Next, lightly grease a 2-quart baking dish. This step helps the cobbler not stick. In a large bowl, mix the sliced peaches with 1/2 cup of granulated sugar, brown sugar, lemon juice, cinnamon, and vanilla extract. Gently toss until the peaches coat well. Let the mixture sit for 15 minutes. This helps the peaches release their juices and enhances the flavor. In a separate bowl, combine the flour, the remaining 1/2 cup of sugar, baking powder, salt, and nutmeg. Whisk these dry ingredients until they blend well. Slowly stir in the milk and melted butter until just combined. The batter should be thick and slightly lumpy. Pour the peach mixture into your greased baking dish. Spread it evenly across the bottom. Next, dollop spoonfuls of the batter over the peaches. To create a marbled look, gently swirl the batter with a knife. Be careful not to mix it completely. Place the baking dish in the oven. Bake for 40-45 minutes. The cobbler is done when the top turns golden brown. A toothpick inserted in the center should come out clean. If the top browns too fast, cover it with aluminum foil. Once baked, take the cobbler out of the oven. Let it cool for about 10 minutes before serving. For a delicious treat, serve warm in bowls. Top it with creamy vanilla ice cream or a fluffy dollop of whipped cream. For a fresh finish, add mint leaves. Enjoy this delightful summer peach cobbler with family and friends. For the full recipe, check out the detailed overview. To make your peach cobbler stand out, use ripe peaches. Fresh, juicy peaches bring the best flavor. Slice them evenly for a uniform cook. Toss them with sugar and let them sit. This step draws out the juices. It also enhances the sweetness and flavor. When mixing the batter, stir gently. A thick, slightly lumpy batter gives the cobbler its charm. Remember, a little love goes a long way. One common mistake is overmixing the batter. This can lead to a tough texture. Another mistake is not letting the peach mixture rest. Skipping this step means less flavor. Make sure your oven is fully preheated too. If it's not hot enough, the cobbler won't rise well. Lastly, avoid baking too long. A golden top is perfect, but dry is not. Serve your peach cobbler warm for the best experience. A scoop of vanilla ice cream on top is a classic choice. It adds creaminess and makes each bite special. You can also pair it with whipped cream. For a refreshing twist, try fresh mint leaves. They add a pop of color and flavor. Don't forget to check out the Full Recipe for more tips! {{image_4}} You can enjoy peach cobbler without gluten. Use a gluten-free flour blend instead of all-purpose flour. Look for blends made from rice, almond, or coconut flour. Add a bit of cornstarch for a lighter texture. The rest of the recipe stays the same. Your gluten-free cobbler will still taste amazing! If you want a vegan version, swap the milk for almond or oat milk. Replace the butter with coconut oil or a vegan butter. For the egg, use a flaxseed meal mix. Just combine one tablespoon of flaxseed meal with three tablespoons of water and let it sit. This will help bind your ingredients. The flavor will still shine through. Get creative with your cobbler! Try adding spices like ginger or cardamom for a twist. You can mix in blueberries, raspberries, or even diced apples with the peaches. For a nutty crunch, sprinkle chopped almonds or pecans on top before baking. Each variation brings a new taste to your dessert. You can find more ideas in the Full Recipe. After you enjoy your peach cobbler, let it cool completely. Then, cover it tightly with plastic wrap or foil. Place it in the fridge. It will stay fresh for about 3 to 4 days. If you want to keep it longer, consider freezing it. To reheat your cobbler, preheat your oven to 350°F (175°C). Place the cobbler in an oven-safe dish. Cover it with foil to keep it moist. Heat for about 20 minutes or until warm. If you prefer the top to be crispy, remove the foil for the last 5 minutes. To freeze peach cobbler, let it cool completely. Cut it into individual portions for easier thawing. Wrap each piece tightly in plastic wrap, then place them in a freezer bag. Make sure to label the bag with the date. You can freeze it for up to 3 months. When you're ready to enjoy it, thaw overnight in the fridge before reheating. Homemade peach cobbler lasts about 3 to 5 days in the fridge. To keep it fresh, store it in an airtight container. After a few days, the topping may become soggy, but it will still taste good. You can reheat it in the oven for a warm dessert. Yes, you can use canned peaches! Just make sure to drain them well. Canned peaches are soft and sweet, making them a great option. However, fresh peaches offer a better texture and flavor. If you want a fresher taste, go with fresh peaches when possible. You can use almond flour, oat flour, or gluten-free flour as substitutes. Each option brings its own flavor. Almond flour adds nuttiness, while oat flour gives a wholesome taste. Make sure to adjust the liquid in the recipe if needed. Serve peach cobbler warm in bowls. Top it with vanilla ice cream or whipped cream for a treat. You can also sprinkle some cinnamon on top for added flavor. Garnishing with mint leaves adds a nice touch too. Enjoy it fresh from the oven for the best experience! This peach cobbler recipe is simple and fun to make. You need ripe peaches for the best flavor. Mixing the sugars with the peaches helps them get juicy. The batter is thick and easy to spread. Swirling the batter into the peaches gives a nice look. Each serving has about 250 calories. It contains 8 grams of fat and 40 grams of carbs. The cobbler has some fiber from the peaches, too. If you want a treat, this recipe fits the bill. You will spend about 20 minutes preparing the cobbler. Baking it takes around 40-45 minutes. In total, you’ll need about an hour to enjoy this delicious dessert. Just follow the full recipe for step-by-step guidance! You learned how to make a great peach cobbler, starting with fresh ingredients. I shared easy steps for preparation and baking that anyone can follow. Remember to avoid common mistakes for the best results. You can even try gluten-free or vegan options for a fun twist. Store leftovers properly to enjoy later. With this knowledge, you can impress friends and family with your baking skills. Peach cobbler brings warmth and joy to any gathering. Enjoy your delicious creation!

If you crave a warm, sweet treat, let me introduce you to my homemade peach cobbler! This delightful and simple recipe brings together juicy peaches and a fluffy crust. With …

Read more

Categories Desserts
Older posts
Newer posts
← Previous Page1 … Page84 Page85 Page86 … Page130 Next →

ROASTED RECIPES

Where bold flavors meet everyday meals. Warm, vibrant, and made to share. 🔥🥗🍴

PAGES

Home About Contact Privacy Policy Terms & Conditions Cookie Policy GDPR Policy Copyright Policy Disclaimer

CATEGORIES

Appetizers Desserts Salads Breakfast Dinner

Contact

  • Pinterest
  • Mail
Copyright © 2025 Roasted Flavors. All rights reserved.