The Best Chocolate Chip Zucchini Muffins Irresistible Treat

Are you ready to dive into a delicious treat that’s both sweet and wholesome? These chocolate chip zucchini muffins are the perfect way to sneak in some veggies while enjoying …
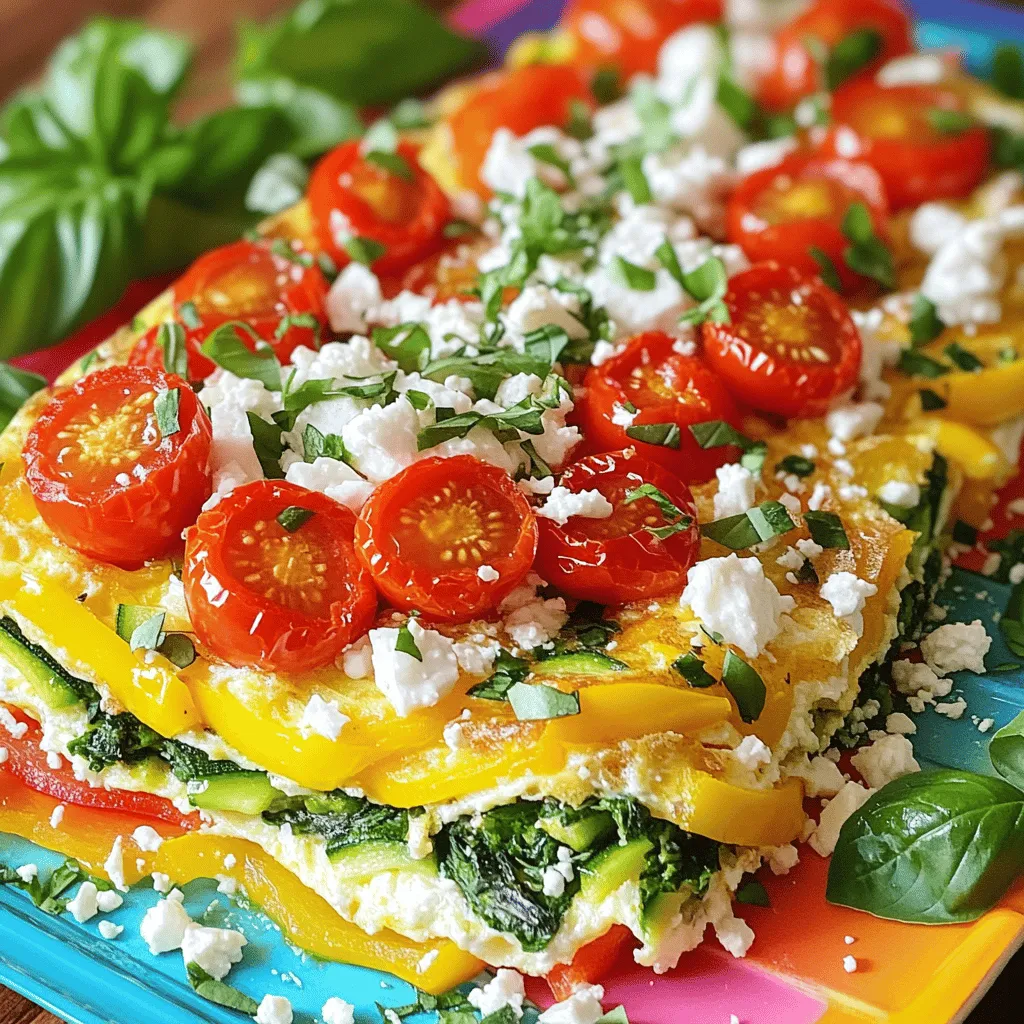
![To make this tasty Crack Corn Salad, you will need: - 4 cups fresh corn kernels (about 4 ears of corn) - 1 1/2 cups cherry tomatoes, halved - 1 cup crunchy cucumbers, diced - 1/2 cup red onion, finely chopped - 1/2 cup assorted bell peppers, diced (mix colors for fun) - 1 cup shredded sharp cheddar cheese - 1/2 cup creamy mayonnaise - 1 tablespoon apple cider vinegar - 1 tablespoon honey - 1 teaspoon garlic powder - Salt and pepper, to taste - 1/4 cup fresh cilantro, chopped (optional garnish) You can change some ingredients based on what you like. Try these swaps: - Use Greek yogurt instead of mayonnaise for a lighter taste. - Swap cherry tomatoes for diced regular tomatoes if you prefer. - Add black beans for extra protein and fiber. - Substitute avocado for cheese for a creamy texture. - Toss in corn chips for a crunchy bite. Fresh corn is best for this salad. It has a sweet taste and great crunch. To prepare fresh corn, cook it briefly in boiling water. If you use canned corn, rinse it well to cut down on salt. Canned corn works in a pinch but may not taste as fresh. Fresh corn gives your salad a bright flavor that makes it stand out. For the best results, I always recommend using fresh corn when you can. If you want the full recipe, check out [Full Recipe]. First, you need to cook the corn. Bring a pot of water to a boil. Add the ears of corn and cook for about 5-7 minutes. This step makes the corn tender and sweet. Once done, drain the corn and let it cool. Carefully cut the kernels off the cob. If you use canned corn, just drain and rinse it well. Grab a large mixing bowl. Add the corn kernels, halved cherry tomatoes, diced cucumbers, finely chopped red onion, and assorted bell peppers. Use different colors for a pretty dish. Gently toss everything together until all the veggies mix well. In a medium bowl, whisk together the mayonnaise, apple cider vinegar, honey, garlic powder, salt, and pepper. This dressing gives a sweet and tangy taste. Make sure there are no lumps, and it’s smooth. Pour the dressing over the vegetable mix. Stir gently to coat all the ingredients well. Then, fold in the shredded sharp cheddar cheese. This adds creaminess and flavor to your salad. Now it’s time to taste the salad. If it needs more flavor, add more salt or pepper. For some heat, sprinkle in cayenne pepper or finely chopped jalapeños. Adjust until it tastes just right. Cover the bowl with plastic wrap or a lid. Refrigerate the salad for at least 30 minutes. This chilling time helps all the flavors blend beautifully. When ready to serve, consider garnishing with fresh cilantro for a pop of color. You can serve the salad in a large bowl or in individual dishes. Enjoy this fresh and colorful Crack Corn Salad! For the complete recipe, check out the Full Recipe. To boost the flavor of your Crack Corn Salad, focus on fresh herbs and spices. Fresh cilantro adds brightness and a pop of green. You can also try other herbs like basil or parsley for a unique twist. For extra zest, add lime juice or zest to the dressing. A splash of hot sauce can kick it up a notch too. Remember, balance is key. You want sweet, salty, and tangy all in one bowl. When selecting corn, look for firm, bright kernels. The husk should be green and moist. For tomatoes, choose plump, shiny cherry tomatoes. They should smell sweet and earthy. Cucumbers should feel crisp and firm. Avoid any that feel soft or have blemishes. Bell peppers should be colorful and shiny, with no wrinkles. Freshness will make your Crack Corn Salad taste amazing. Garnishing can elevate your salad's look and taste. Fresh cilantro is a great choice. You can also sprinkle some crumbled queso fresco for a salty bite. Sliced radishes add a crunch and a pop of color. For a nutty flavor, try adding toasted pumpkin seeds or sunflower seeds. These little touches make your dish more appealing and fun to eat. {{image_4}} To add some heat to your Crack Corn Salad, try making a spicy version. You can add diced jalapeños or a dash of hot sauce. Start with one jalapeño for a mild kick. If you want more spice, feel free to add more! Mixing in a teaspoon of cayenne pepper also works well. This heat balances out the sweetness of the corn and dressing, creating a flavor explosion. For a heartier salad, consider adding more veggies. You can include black beans, diced avocados, or even corn chips for crunch. These additions enhance the texture and flavor. If you want to boost protein, add chickpeas or kidney beans. This way, you keep the salad fresh while making it more filling and nutritious. You can change the salad with the seasons. In summer, use fresh herbs like basil or parsley. In the fall, try adding diced apples or roasted pumpkin. These ingredients give a new twist to the classic salad. Each season brings unique flavors, so feel free to get creative. Enjoy the freshness of seasonal produce in your Crack Corn Salad. For more ideas, check out the Full Recipe. To store leftover Crack Corn Salad, place it in an airtight container. This keeps moisture in and prevents drying. Make sure the container is clean and dry before adding the salad. Storing it in the fridge is best. It stays fresh for up to three days. To keep your salad fresh, avoid mixing in the dressing until serving. This helps prevent sogginess. If you have extra vegetables, store them separately. You can also add a layer of paper towels on top of the salad. This absorbs excess moisture and keeps it crisp. Freezing Crack Corn Salad is not ideal due to the textures. The veggies and cheese may become watery when thawed. If you must freeze it, consider just freezing the corn. Cooked corn freezes well and can be added later to fresh salad. Just remember to thaw it completely before mixing. For the best taste, enjoy it fresh! Crack Corn Salad is a tasty mix of fresh corn, veggies, and cheese. It shines with bright colors and flavors. The main ingredients are corn, tomatoes, cucumbers, bell peppers, and cheddar cheese. You dress it with a creamy mix of mayonnaise, vinegar, and honey. This salad is crunchy, sweet, and savory, making it a crowd-pleaser. Yes, you can make Crack Corn Salad ahead of time. It tastes even better after chilling in the fridge. Prepare it a few hours or even a day before serving. Just keep it covered in the fridge to stay fresh. This way, you save time and enjoy more moments with friends or family. Crack Corn Salad lasts about 3 to 5 days in the fridge. Make sure to store it in a sealed container. If you notice any change in smell or color, it's best to discard it. Always check before eating leftovers to ensure it is still safe. Absolutely! Crack Corn Salad is perfect for potlucks. It's easy to make and share. The colorful look attracts attention, and the flavor keeps people coming back for more. Just remember to bring enough for everyone to enjoy. For the full recipe, check out the section above. Crack Corn Salad is a fun and tasty dish. We covered ingredients, instructions, and tips for making it your own. You can use fresh or canned corn and try new flavors for variety. Plus, I shared how to store leftovers and answers to common questions. Enjoy making this salad for any meal or gathering. You'll impress your guests and family with this simple recipe. It’s easy, delicious, and perfect for any occasion.](https://roastedflavors.com/wp-content/uploads/2025/06/1e158261-8438-4753-9e6d-50c2fbfa2f5c.webp)
![Here’s what you need for Zucchini Parmesan Delight. Gather these items to create a tasty dish: - 3 medium zucchinis, sliced into 1/4-inch rounds - 1 cup breadcrumbs (whole wheat recommended for a richer flavor) - 1/2 cup grated Parmesan cheese - 1 cup shredded mozzarella cheese - 2 large eggs, beaten - 2 tablespoons fresh basil, finely chopped - 1 teaspoon garlic powder - 1 teaspoon onion powder - Salt and freshly ground black pepper, to taste - Olive oil spray or 2 tablespoons olive oil for drizzling - Fresh parsley, finely chopped, for garnish (optional) These ingredients come together to create a delicious layer of cheese and zucchini. The mix of cheeses adds richness, while the herbs bring freshness. Using whole wheat breadcrumbs gives your dish a heartier texture. Each bite will be filled with flavor. If you want more ideas, check the Full Recipe for tips and tricks! Set your oven temperature to 375°F (190°C) for optimal baking. This step is key for a crispy finish. In a large mixing bowl, combine breadcrumbs, Parmesan cheese, garlic powder, onion powder, salt, and pepper. Mix these ingredients well to blend flavors. In another bowl, beat the eggs. Dip each zucchini slice into the eggs, letting excess drip off. Then, roll it in the breadcrumb mixture until fully coated. Place the coated slices on a clean plate. Drizzle olive oil in a baking dish. You can also use an olive oil spray. Arrange the zucchini slices in a single layer. This helps them cook evenly. First, bake the zucchini for 20 minutes. They should turn golden and crispy. After that, add mozzarella on top and bake for an additional 10 minutes. The cheese should melt and bubble. Once the cheese has melted, take the dish out of the oven. Garnish with fresh basil and parsley for extra flavor. Enjoy this cheesy delight! For the full recipe, check the earlier sections. Choose firm zucchinis with smooth skin for the best results. Fresh zucchinis have a vibrant color and feel heavy. Avoid those with soft spots or wrinkles. Picking the right zucchini improves the taste and texture of your dish. You can explore using gluten-free breadcrumbs or crushed crackers for variations. If you want a crunch, try crushed cornflakes. For a nutty flavor, use ground almonds or oats. Each option gives a unique twist to your Zucchini Parmesan. Add spices or herbs to the breadcrumb mix for extra flavor. I like to use dried oregano or thyme for a savory kick. You can also try a pinch of smoked paprika for depth. Fresh herbs like parsley or basil work well too. This small addition makes your dish even more delicious. {{image_4}} Want a little heat? Add red pepper flakes to your breadcrumb mix. This tiny change gives the dish a fun kick. Just a pinch can transform the flavor. You can adjust the amount to fit your taste. Start small and taste as you go! Cheese lovers can get creative. Try using different cheeses like cheddar or Gruyère. Each cheese brings a unique flavor. Cheddar adds sharpness, while Gruyère gives a nutty taste. Mix and match cheeses for a tasty twist. Don't be afraid to experiment! For a vegan option, swap eggs for flaxseed meal. Mix one tablespoon of flaxseed meal with three tablespoons of water. Let it sit for five minutes until it thickens. Use plant-based cheese instead of dairy. This way, you can enjoy a delicious dish that fits your diet. Everyone can savor Zucchini Parmesan! For the full recipe, check out the [Full Recipe]. You can keep leftover zucchini Parmesan in an airtight container. It stays fresh for up to 3 days in the fridge. This way, you can enjoy this dish again without losing flavor. If you want to save it for later, freeze your baked zucchini Parmesan. It lasts for up to 2 months in the freezer. Just remember to thaw it before reheating. This is a great way to have a delicious meal on hand. To reheat, use the oven for the best texture. It keeps the crispy crust intact. If you're in a hurry, you can use the microwave for convenience. Just be careful not to overheat it. Enjoy your meal once again! You can pair Zucchini Parmesan with many tasty sides. A fresh salad adds a nice crunch. Try a simple green salad with vinaigrette for balance. Pasta goes great too! A light garlic or marinara sauce enhances the meal. Crusty bread is another good choice. It soaks up any extra sauce and adds texture. Yes, you can prepare Zucchini Parmesan in advance! You can coat the zucchini and store it in the fridge. Just bake it when you are ready to eat. This helps save time on busy days. You can also bake it completely. Then, store it in the fridge. Just reheat it when you want to serve. Look for a golden brown color on the top. The cheese should be melted and bubbly. You can poke a slice to check. It should feel soft but not mushy. If you see these signs, your Zucchini Parmesan is ready! To make Zucchini Parmesan gluten-free, use gluten-free breadcrumbs. You can find these at most grocery stores. You can also crush gluten-free crackers if needed. Ensure all other ingredients are gluten-free as well. This way, everyone can enjoy the dish! Check the labels for any hidden gluten. Zucchini Parmesan is an easy, tasty dish you can make at home. You learned about the ingredients, simple steps, and tips for great results. Experiment with flavors and find what you love. Whether you're cooking for yourself or family, this dish is sure to please everyone. Remember, you can tweak the recipe as you wish. Enjoy your cooking and share this treat with others!](https://roastedflavors.com/wp-content/uploads/2025/06/79f0fc7b-112c-477c-86b1-52dbb422ac0b.webp)

![- 2 medium zucchinis, finely grated - 1 cup panko breadcrumbs - 1/2 cup freshly grated Parmesan cheese - 2 cloves of garlic, finely minced - 2 large eggs, well beaten - 1/4 cup fresh parsley, finely chopped - 1/2 teaspoon onion powder - 1/2 teaspoon baking powder - Salt and freshly ground black pepper to taste - Olive oil spray Zucchini garlic bites shine with fresh flavors. The main ingredient, zucchini, brings a light taste and a moist texture. Grating the zucchini makes it easy to blend with other ingredients. I like to use panko breadcrumbs for a crispier bite. The Parmesan cheese adds a nice salty flavor that works well with the garlic. Garlic is a star in these bites. It gives a punchy taste that pairs perfectly with zucchini. I always use fresh garlic for the best results. The eggs hold everything together, while parsley brightens the mix. Onion powder and baking powder help enhance the savory notes and give it a fluffy texture. Using quality ingredients makes a big difference. Fresh herbs and good cheese elevate your dish. You can find the full recipe in the article. These bites are easy to make and great for sharing! 1. Preheat your oven to 400°F (200°C). This ensures even cooking. 2. Grate the zucchinis into a large bowl. Sprinkle with a pinch of salt. Let it sit for 10 minutes. This helps pull out excess moisture. 3. After 10 minutes, take a clean kitchen towel. Bundle up the grated zucchini and squeeze it tightly. Remove as much moisture as you can. This step is key for crisp bites. 4. Return the drained zucchini to the bowl. Now, add the panko breadcrumbs, grated Parmesan cheese, minced garlic, beaten eggs, fresh parsley, onion powder, baking powder, and a sprinkle of salt and pepper. Mix until all ingredients are combined. 5. With your hands, form small patties, about 2 inches wide. Place them on your baking sheet, leaving space between each for even cooking. 1. Lightly spray the tops of each zucchini bite with olive oil spray. This helps them turn golden brown and crispy. 2. Bake in the preheated oven for 20 to 25 minutes. Flip them halfway through for even cooking. You'll know they are done when they are golden and crispy on the outside. 3. Once finished, remove the baking sheet from the oven. Let the zucchini bites cool for a few minutes. This helps them hold their shape. For the full recipe, check out the details provided above. You will love how simple and tasty these bites are! - Squeezing out moisture for crispness: After grating the zucchini, sprinkle it with salt. Let it sit for about 10 minutes. This helps pull out extra moisture. Then, use a towel to squeeze out as much water as you can. This step is key for crispy bites. - Using fresh ingredients vs. dried: Always choose fresh garlic and parsley. Fresh herbs bring more flavor than dried ones. Fresh ingredients help your zucchini bites taste bright and delicious. - Presentation tips for serving: Place the zucchini bites on a nice platter. Drizzle with olive oil for shine. Add a sprinkle of parsley for color. This simple touch makes your dish look fancy. - Recommended dips like yogurt or marinara: Serve your zucchini bites with yogurt dip or marinara sauce. Both options add a tasty contrast. They enhance the flavor and make your bites more enjoyable. If you want the complete recipe, check out the [Full Recipe]. {{image_4}} You can easily switch some ingredients in zucchini garlic bites for different tastes. If you want a vegan option, use nutritional yeast instead of cheese. This will give a cheesy flavor without dairy. You can also try using cashew cheese for a creamy texture. Want to add more flavor? Sprinkle in some smoked paprika or cayenne pepper. These spices add warmth and depth. You can also use fresh herbs like basil or dill for a vibrant twist. You don’t have to bake these bites. Try using an air fryer for a crispier finish. Preheat your air fryer to 375°F (190°C). Place the patties in a single layer and cook for about 12 minutes. Flip them halfway for even cooking. If you prefer pan-frying, heat a little olive oil in a skillet. Cook the patties for about 3-4 minutes on each side. This method gives a nice golden color and a crunchy texture. For the full recipe, check out the Zesty Zucchini Garlic Bites. To keep your zucchini garlic bites fresh, store them in the fridge. Place them in an airtight container. They will stay good for up to three days. If you want to save them longer, freezing is a great option. Here’s how to do it: - Cool the bites completely before freezing. - Layer them between parchment paper in a freezer-safe bag. - They can last for up to three months in the freezer. When you're ready to eat them, just take out what you need! Reheating your zucchini bites is easy. For the best texture and flavor, use the oven: - Preheat your oven to 350°F (175°C). - Place the bites on a baking sheet. - Heat them for about 10 to 15 minutes. You can also reheat them in an air fryer for a crispy finish. Set the air fryer to 350°F (175°C) and cook for about 5 minutes. Enjoy your delicious bites just like they were fresh out of the oven! Can I make these bites ahead of time? Yes, you can! Just prepare the mixture and form the patties. Then, store them in the fridge for up to a day. Cook them when you are ready to serve. This keeps them fresh and tasty. Are zucchini garlic bites healthy? Absolutely! They use fresh zucchini and herbs. They are low in calories and high in nutrients. The panko adds crunch without too many carbs. You can enjoy these bites guilt-free. What can I do with leftover zucchini? Leftover zucchini can be used in many ways. You can add it to salads, stir-fries, or soups. It’s also great in smoothies for extra nutrients. Don’t let it go to waste! How can I make these gluten-free? To make zucchini garlic bites gluten-free, simply replace panko with gluten-free breadcrumbs. You can also use crushed gluten-free crackers. This keeps the texture while making it safe for gluten-sensitive folks. For the full recipe, check out the Zesty Zucchini Garlic Bites section. In this post, we shared a simple recipe for zucchini garlic bites. We covered ingredients, preparation steps, and cooking methods. I provided tips to make your bites crispy and delicious. Remember, you can also try different flavors or cooking methods like air frying. Overall, these bites are fun to make and great for snacks or appetizers. Enjoy these treats with your favorite dips! Happy cooking!](https://roastedflavors.com/wp-content/uploads/2025/06/dc333eac-a466-4b53-9f4c-d47e8699ceba.webp)

![To make Broccoli Cheese Stuffed Chicken, you need these simple ingredients: - Boneless, skinless chicken breasts (4 pieces) - Broccoli florets (1 cup, blanched) - Sharp cheddar cheese (1 cup, shredded) - Cream cheese (1/2 cup, softened) - Garlic (1/4 cup, minced) - Seasonings (black pepper and sea salt) - Extra virgin olive oil (1 tablespoon) - Breadcrumbs (optional, for topping) - Fresh parsley (for garnish) These ingredients blend well to create a rich, cheesy filling. The sharp cheddar gives a strong flavor, while the cream cheese adds creaminess. Blanching the broccoli keeps it bright and crisp, which balances the dish. Using fresh garlic adds a nice punch. Seasoning the chicken with black pepper and sea salt enhances its flavor. If you like some crunch, add breadcrumbs on top before baking. The fresh parsley at the end not only looks good but also adds a fresh taste. For the full recipe, check out the [Full Recipe]. - Preheat your oven to 375°F (190°C). This helps cook the chicken evenly. - Prepare the filling by mixing the broccoli, cheeses, garlic, and seasonings in a bowl. You want a creamy texture that holds together well. - Cut pockets into each chicken breast. Make the cuts in the thickest part, but don’t cut all the way through. - Sear the chicken in olive oil over medium heat until it turns golden brown. This should take about 3 to 4 minutes on each side. - If you want a crunchy topping, sprinkle breadcrumbs on top of the stuffed chicken. - Transfer the skillet to the preheated oven. Bake the chicken for 20 to 25 minutes. Check that the chicken reaches an internal temperature of 165°F (75°C). - After baking, let the chicken rest for 5 minutes. This keeps the meat juicy. - Just before serving, garnish the chicken with fresh parsley. It adds a nice touch and color. - Use a meat thermometer to ensure chicken is cooked through. It should reach 165°F (75°C). - Allow resting time for juicier chicken. Resting helps keep the juices inside. - Substitute different cheeses or vegetables in the filling. Try mozzarella or spinach for a twist. - Adjust spiciness with added ingredients. Red pepper flakes or jalapeños can add heat. - Plate with a balsamic glaze drizzle for a touch of elegance. It adds flavor and flair. - Pair with sides for a complete meal. Steamed vegetables or a fresh salad work well. Enjoy the process! For more details, check the Full Recipe. {{image_4}} You can make this dish your own by changing some ingredients. Using spinach instead of broccoli adds a new twist. Spinach gives a different taste and pairs well with cheese. You might also try using different types of cheese. Mozzarella brings a mild flavor, while gouda adds a nutty touch. Both options can create a unique taste experience. If you need to make this meal fit specific diets, you have options. For gluten-free needs, you can use gluten-free breadcrumbs or skip the topping altogether. This keeps the dish light but still tasty. If dairy is a concern, there are many dairy-free cheese and cream cheese options available. These swaps allow everyone to enjoy this delicious meal. Checking labels is key to ensuring the alternative products work for your needs. To refrigerate leftovers, let the chicken cool first. Place the stuffed chicken in an airtight container. This keeps it fresh and prevents odors. Use glass or plastic containers with tight lids. You can store it in the fridge for up to three days. For long-term storage, freezing works well. Wrap each stuffed chicken breast tightly in plastic wrap. Then, place them in a freezer-safe bag or container. This helps keep out air and avoid freezer burn. You can freeze the chicken for up to three months. To thaw, move the chicken from the freezer to the fridge. Let it thaw overnight. This keeps the chicken safe and tasty. When reheating, you want to keep the chicken moist. The best way is to use the oven. Preheat your oven to 350°F (175°C). Place the chicken in a baking dish. Add a splash of chicken broth or water to help with moisture. Cover the dish with foil. Heat for about 20 minutes or until warmed through. This keeps your chicken juicy and delicious. Can I use frozen broccoli for this recipe? Yes, you can use frozen broccoli. Just thaw and drain it well before mixing. This helps avoid excess water in the filling. How can I tell when the chicken is properly cooked? Use a meat thermometer to check the chicken. It should reach 165°F (75°C) in the thickest part. This ensures it's safe to eat. What sides pair well with Broccoli Cheese Stuffed Chicken? Great sides include steamed rice, roasted potatoes, or a fresh salad. These add color and balance to your meal. How to adjust cooking time for thicker chicken breasts? For thick chicken, bake longer. Add about 5-10 minutes to baking time. Always check with a thermometer for safety. Can I make this dish ahead of time? Yes, you can prepare the chicken and filling ahead. Stuff the chicken, cover, and refrigerate for up to 24 hours before cooking. Can I grill the stuffed chicken instead of baking it? Yes, grilling works well! Just sear the chicken on medium heat, then cook until fully done. Keep the grill lid closed for even cooking. Is it possible to cook the chicken in an air fryer? Absolutely! Preheat the air fryer to 375°F (190°C). Cook for about 15-18 minutes, checking for doneness as you go. In this article, we explored a tasty recipe for Broccoli Cheese Stuffed Chicken. You learned about the key ingredients, step-by-step cooking methods, tips for better results, and storage advice. Remember, you can personalize this dish by swapping veggies or cheeses. Cooking should be creative and fun. Don't hesitate to try new ideas or methods. With these tips, you can make a delicious meal that impresses everyone. Enjoy your cooking journey and happy eating!](https://roastedflavors.com/wp-content/uploads/2025/06/4c18a98c-6fe6-4c7f-bab7-ba5dfb0666b2.webp)