Skip to content
Roasted Flavors
  • Home
  • Appetizers
  • Desserts
  • Salads
  • Breakfast
  • Dinner
  • Privacy Policy
  • Contact
  • About

Chef Remy

The Most Delicious Low Sugar Zucchini Bread Recipe

July 1, 2025 by Chef Remy
To make this low sugar zucchini bread, you need fresh and simple ingredients. Here’s what you’ll gather: - 2 cups grated zucchini (about 2 medium zucchinis, well-drained) - 1 cup whole wheat flour - 1 cup almond flour - 1 teaspoon baking soda - 1 teaspoon baking powder - 1 teaspoon ground cinnamon - 1/2 teaspoon ground nutmeg - 1/4 teaspoon salt - 1/2 cup unsweetened applesauce - 1/4 cup honey or maple syrup - 2 large eggs - 1 teaspoon vanilla extract - 1/2 cup chopped walnuts or pecans (optional) - 1/2 cup dark chocolate chips (optional) These ingredients create a moist and tasty bread while keeping the sugar low. You can use honey or maple syrup in this recipe. Both add sweetness but keep sugar levels lower than regular sugar. Honey is sweeter, while maple syrup gives a unique flavor. You can also try other sweeteners like stevia or monk fruit if you want a sugar-free option. Just adjust the amount based on their sweetness level. Feel free to get creative with your zucchini bread! You can add: - 1/2 cup chopped walnuts or pecans for crunch. - 1/2 cup dark chocolate chips for a sweet touch. - Dried fruit like raisins or cranberries for extra flavor. - A tablespoon of chia seeds for added nutrition. These add-ins make your bread unique and delicious, enhancing its taste and texture. Check out the Full Recipe to explore more! Start by grating the zucchini. You need about 2 cups. Use two medium zucchinis and make sure to drain them well. Excess water can make the bread soggy. Next, grab a large bowl. Add the grated zucchini, unsweetened applesauce, honey or maple syrup, eggs, and vanilla extract. Mix them together until smooth. This blend brings moisture and flavor to your bread. In a separate bowl, combine the dry ingredients. Use 1 cup each of whole wheat and almond flour. Add 1 teaspoon of baking soda, 1 teaspoon of baking powder, and 1 teaspoon of ground cinnamon. Don't forget 1/2 teaspoon of ground nutmeg and 1/4 teaspoon of salt. Whisk these ingredients together. This helps ensure that the baking soda and powder spread evenly in the bread. Now, slowly add the dry mix to the wet mix. Stir gently until just combined. Be careful not to overmix, as this can make the bread tough. If you like a crunch, fold in 1/2 cup of chopped walnuts or pecans. For a hint of sweetness, add 1/2 cup of dark chocolate chips. These are optional but delicious! Finally, pour the batter into a greased loaf pan. Smooth the top with a spatula and bake. Follow the full recipe for exact baking times and tips for the best results. To keep your zucchini bread moist and tasty with less sugar, use unsweetened applesauce. This adds moisture without extra sugar. Be sure to drain your zucchini well before using it. Excess water can make your bread soggy. Another trick is to use a mix of whole wheat and almond flour. Almond flour adds healthy fats and keeps the bread soft. Moisture is key for a great texture, so keep these tips in mind! Mixing too much can ruin your zucchini bread's texture. When you combine the wet and dry ingredients, mix gently. Stir until just combined; lumps are okay! Overmixing creates tough bread. You want it light and fluffy, not dense. This simple step makes a big difference in the final product. Even cooking is crucial for great zucchini bread. Preheat your oven to 350°F (175°C) before baking. Use a 9x5-inch loaf pan and grease it well or line it with parchment paper. This helps the bread come out easily. To check if it’s ready, insert a toothpick in the center. It should come out clean or with a few moist crumbs. This ensures the bread is cooked through and not gummy. Follow these tips for the best results! {{image_4}} To make this low sugar zucchini bread gluten-free, swap whole wheat flour for gluten-free flour. Use a blend that includes almond flour and oat flour for the best results. Ensure the baking powder is gluten-free too. This mix keeps the bread light and tasty while still being safe for those with gluten allergies. For a vegan version, replace eggs with flax eggs. To make a flax egg, mix one tablespoon of ground flaxseed with three tablespoons of water. Let it sit for five minutes to thicken. Use maple syrup instead of honey for sweetness. These swaps keep the bread moist and delicious without any animal products. Spice things up by adding a pinch of ginger or cardamom. You can also mix in some unsweetened shredded coconut for a tropical flair. Want extra crunch? Toss in sunflower seeds or pumpkin seeds. Dried fruits like cranberries or raisins add a sweet touch too. These twists keep your zucchini bread exciting and full of flavor. For the full recipe, check the original recipe section. To keep your leftover zucchini bread fresh, wrap it tightly in plastic wrap. This helps prevent it from drying out. You can also place it in an airtight container. Store it at room temperature for up to three days. If you want it to last longer, consider freezing it. For long-term storage, freeze your zucchini bread. First, let it cool completely. Then, slice it into portions. Wrap each slice in plastic wrap. Place the wrapped slices in a freezer bag or container. Label the bag with the date. You can freeze it for up to three months. This way, you can enjoy a slice whenever you want. To reheat your zucchini bread, use the oven or the microwave. For the oven, preheat it to 350°F (175°C). Place the bread on a baking sheet and heat for about 10-15 minutes. This method keeps the crust nice and crisp. If you're short on time, use the microwave. Heat a slice for about 20-30 seconds. It will be warm and soft, ready to enjoy! The best way to grate zucchini is using a box grater. Use the largest holes for a coarse grate. Coarse zucchini gives the bread a nice texture. You can also use a food processor with a grating attachment if you have one. Just be careful not to over-process. After grating, press the zucchini in a clean cloth. This removes excess moisture. You want it well-drained for the best bread. Yes, you can use frozen zucchini in this recipe. Just be sure to thaw it first. Drain any liquid after thawing. Frozen zucchini may have more water than fresh. This means you need to squeeze it well. Frozen zucchini works well if fresh is not available. It’s a great way to use up summer zucchini. To make this recipe sugar-free, use unsweetened applesauce and a sugar substitute. You can replace honey or maple syrup with a sugar-free sweetener. Look for options like stevia or erythritol. Adjust the amount based on the sweetener’s instructions. This keeps the flavor while cutting sugar. Always taste the batter to ensure it meets your preference. For a hint of sweetness, consider adding vanilla extract. Low sugar zucchini bread is easy to make and fun to enjoy. We covered key ingredients, alternative sweeteners, and optional add-ins for flavor. I shared step-by-step instructions for mixing and baking. You learned tips for keeping your bread moist and preventing overmixing. I also mentioned gluten-free and vegan variations, plus storage tips for leftovers. In the end, this delicious bread fits into many diets. Now, you can enjoy a healthier treat that’s easy to share!

Zucchini bread can be both tasty and healthy! In this post, I’ll show you how to make the most delicious low sugar zucchini bread. With just a few simple ingredients, …

Read more

Categories Desserts

Chocolate Zucchini Bread Rich and Moist Delight

June 29, 2025 by Chef Remy
- 1 ½ cups finely grated zucchini - 1 cup all-purpose flour - ½ cup unsweetened cocoa powder The main ingredients give this bread its rich and moist texture. Zucchini adds moisture, while cocoa powder offers that deep chocolate flavor. The flour acts as the base for the bread, helping it rise. - ½ cup granulated sugar - ½ cup packed brown sugar - 2 large eggs Sugar adds sweetness, making the bread delightful. Brown sugar gives a hint of caramel flavor. Eggs bind everything together, ensuring a nice rise. - ½ cup semi-sweet chocolate chips - ¼ cup chopped walnuts Chocolate chips enhance the chocolate flavor. They melt as the bread bakes, creating gooey pockets of chocolate. Walnuts add a nice crunch and nutty taste, but they are completely optional. For the complete guide on making this delicious bread, check the Full Recipe. 1. Preheat your oven to 350°F (175°C). Choose a 9x5 inch loaf pan and grease it well. You can also line it with parchment paper to help remove the bread later. 2. Grate one medium zucchini until you have about 1 ½ cups. Put the grated zucchini in a medium bowl and add a pinch of salt. Let it sit for about 10 minutes. This helps draw out excess moisture. After 10 minutes, take a clean kitchen towel or paper towels. Squeeze the zucchini to remove as much liquid as you can. 1. In a large bowl, mix the dry ingredients. Combine 1 cup of all-purpose flour, ½ cup of unsweetened cocoa powder, 1 teaspoon of baking soda, ½ teaspoon of baking powder, and ½ teaspoon of salt. Whisk them together until they are well mixed. 2. In a separate bowl, blend the wet ingredients. Whisk together ½ cup of granulated sugar, ½ cup of packed brown sugar, 2 large eggs, ⅓ cup of vegetable oil, and 1 teaspoon of vanilla extract. Mix until it is smooth and creamy. 1. Slowly add the dry mixture to the wet mixture. Stir gently until just combined. Be careful not to overmix; this keeps your bread light and fluffy. 2. Fold in the grated zucchini, ½ cup of semi-sweet chocolate chips, and ¼ cup of chopped walnuts if you like. Ensure everything is evenly mixed. 3. Pour the batter into your prepared loaf pan. Use a spatula to smooth the top. 4. Place the loaf pan in your preheated oven. Bake for 50-60 minutes. Check for doneness by inserting a toothpick into the center. If it comes out clean or with a few moist crumbs, your bread is ready. 5. After baking, let the bread cool in the pan for about 10 minutes. Then, gently transfer it to a wire rack to cool completely. For the complete instructions, refer to the Full Recipe. To make the best chocolate zucchini bread, start with squeezing the zucchini. This step helps control moisture. Too much water can make your bread soggy. After grating the zucchini, let it sit with a pinch of salt for about 10 minutes. This draws out excess water. Then, use a clean towel to squeeze out as much liquid as you can. Next, avoid overmixing your batter. When you combine the wet and dry ingredients, stir gently. Overmixing can make the bread tough. You want a light and moist texture. Mix until just combined, and then fold in the zucchini and chocolate chips. Spices can elevate your chocolate zucchini bread. Adding a teaspoon of cinnamon or nutmeg brings warmth and depth. You can also try different sweeteners. Substitute granulated sugar with honey or maple syrup for unique flavors. Each option adds a new twist to the basic recipe. Presentation matters! Serve your slices with powdered sugar on top. This adds a nice touch and looks appealing. You can also add a dollop of yogurt or whipped cream on the side. For extra flair, sprinkle some chocolate chips on top. These small details make your bread stand out and taste even better. For the full recipe, check out the complete instructions to create your masterpiece! {{image_4}} You can make your chocolate zucchini bread even better with different add-ins. Consider adding nuts, fruits, or seeds. Walnuts add a nice crunch. Dried cherries or raisins can bring a sweet touch. You can also use alternative types of chocolate. Try white chocolate chips or dark chocolate chunks for a new twist. If you want a healthier version, substitute coconut oil for vegetable oil. Coconut oil adds a light coconut flavor and healthy fats. You can also choose whole wheat flour instead of all-purpose flour. Whole wheat flour adds fiber and nutrients, making your bread more filling. Change the flavor based on the season! For fall, try pumpkin chocolate zucchini bread. Combine pumpkin puree with your zucchini and cocoa, and you’ll love the taste. In winter, adding peppermint extract can give your bread a festive twist. It’s a fun way to celebrate the holidays. For the full recipe, check out the complete guide above! Store your chocolate zucchini bread at room temperature for up to three days. Place it in an airtight container to keep it fresh. If you want to keep it longer, put it in the fridge. This will extend its life to about a week. Just remember, the cold may change the texture a bit, making it denser. To freeze leftovers, wrap the bread tightly in plastic wrap. You can also use aluminum foil for added protection. Place the wrapped bread in a freezer bag. Label the bag with the date. It will last in the freezer for up to three months. When you want a slice, just take it out and thaw it at room temperature. To warm up your chocolate zucchini bread, preheat your oven to 350°F (175°C). Place slices on a baking sheet and heat for about 10 minutes. You can also use a microwave. Heat individual slices for about 15-20 seconds. Enjoy it warm for a soft, fresh taste! For more delicious ideas, check out the Full Recipe. Can I use frozen zucchini? Yes, you can use frozen zucchini. Just make sure to thaw it first. Squeeze out any extra water after thawing. This step keeps your bread from becoming too wet. Is zucchini bread healthy? Zucchini bread can be healthy. Zucchini adds moisture and some nutrients. The bread has sugar, but you can use less sugar or swap it for healthier options. How to know when the bread is done? Check if the bread is done by inserting a toothpick into the center. If it comes out clean or with a few crumbs, the bread is ready. If you see wet batter, bake it a bit longer. Can I make this recipe vegan? Yes, you can make this recipe vegan. Replace eggs with flax eggs or applesauce. Use a plant-based oil and check for dairy-free chocolate chips. Why is my bread too dense? A dense bread often comes from overmixing the batter. Mix just until the dry and wet ingredients blend. Too much mixing can lead to tough bread. How can I make it more chocolatey? To boost the chocolate flavor, add more cocoa powder or extra chocolate chips. You can even swirl in some melted chocolate before baking for a rich taste. You learned how to make tasty chocolate zucchini bread with simple steps. We covered key ingredients and essential tips for baking success. You can add your own twist with flavors or healthier options. Remember to store leftovers properly, so they stay fresh. This recipe is fun and flexible. Enjoy baking, and don't hesitate to experiment. You'll make a treat everyone loves, and that’s what matters most. Happy baking!

Are you ready to bake a treat that combines rich chocolate and healthy zucchini? My Chocolate Zucchini Bread is a game-changer. This moist delight is perfect for breakfast or dessert, …

Read more

Categories Desserts

Gluten Free Low Carb Zucchini Fries Crispy and Fresh

June 29, 2025 by Chef Remy
- 2 medium zucchinis, sliced into fry-shaped sticks - 1 cup almond flour - 1/2 cup freshly grated Parmesan cheese - 2 large eggs - 1 teaspoon garlic powder - 1 teaspoon onion powder - 1 teaspoon dried oregano - Salt and freshly ground black pepper to taste - Olive oil cooking spray - Calories per serving: About 150 calories - Total carbs per serving: Approximately 8 grams - Macros breakdown: - Protein: 6 grams - Fat: 10 grams - Fiber: 2 grams Zucchini fries are a great snack. They are low in carbs and gluten-free. Each serving gives you a nice boost of healthy fats and protein, too. Almond flour and Parmesan make them crispy and tasty. You can enjoy these fries without the guilt! When you make this dish, you get fresh zucchinis packed with nutrients. Plus, you can customize the spices to match your taste. I love adding garlic and onion powder for extra flavor. It all comes together in a yummy way. For the full experience, check out the Full Recipe. This recipe makes it easy to enjoy a healthy snack that feels indulgent. 1. Preheat your oven to 425°F (220°C). This high heat helps the fries crisp up nicely. 2. Line a baking sheet with parchment paper. This prevents the fries from sticking and makes cleanup easy. 1. In a shallow dish, mix the almond flour, Parmesan cheese, garlic powder, onion powder, and oregano. Add a pinch of salt and pepper for flavor. 2. In another bowl, crack the two eggs and beat them until they are frothy. This air helps the coating stick well. 1. Take each zucchini stick and dip it into the beaten eggs. Make sure both sides are coated. 2. Roll the egg-coated stick in the almond flour mix. Press lightly to cover the zucchini well. This creates the crispy outer layer. 1. Arrange the coated fries on your prepared baking sheet in a single layer. This allows hot air to circulate evenly. 2. Lightly spray the tops with olive oil. This aids in achieving a golden crisp. 3. Bake in the preheated oven for 20-25 minutes. Flip the fries halfway through for even crispiness. 4. Once they are golden brown and crispy, remove them from the oven. Let them cool for a few minutes on the baking sheet. This step enhances their crispiness. For the complete recipe, check out the [Full Recipe]. To get the best crispiness from your zucchini fries, space them well on the baking sheet. If they are too close, they will steam instead of crisp. A single layer works best. When you bake, preheat the oven to 425°F (220°C). This high heat helps the fries cook fast and crisp up nicely. Remember to flip them halfway through baking. This step ensures all sides get that golden crunch. Zucchini fries can be fun with flavor. You can add spices like paprika or cayenne for heat. A dash of smoked salt gives a great twist. For dipping sauces, marinara is a classic choice. Try ranch or garlic aioli for a fresh taste. You can even mix yogurt with herbs for a cool dip. These options will elevate your fries and make them even more tasty! To serve your crispy fries, use a basket lined with parchment paper. This gives it a fun, rustic look. You can sprinkle fresh herbs like parsley or chives on top for a pop of color. For a creative touch, serve your fries with a side of assorted dips. This makes it a fun dining experience. You can even add a squeeze of lemon to brighten the flavors. Enjoy your crispy zucchini fries in style! {{image_4}} You can change up the coating for zucchini fries. Try using coconut flour or chickpea flour instead of almond flour. Each flour offers a different texture and flavor. You can also add herbs like thyme or rosemary to the coating. Spices like paprika or chili powder can give your fries a kick. Experiment with different flavors to find what you love. If you want a vegan version, switch the eggs for flaxseed meal. Mix one tablespoon of flaxseed meal with two and a half tablespoons of water. Let it sit for a few minutes to thicken. For a cheesy flavor, sprinkle in some nutritional yeast instead of Parmesan cheese. This makes your fries tasty and keeps them plant-based. Get creative with your zucchini fries by adding cheese blends to the coating. A mix of mozzarella and cheddar can give a richer taste. You can also use spices that reflect different cultures. Consider using curry powder for an Indian twist or taco seasoning for a Mexican flair. These little changes can take your fries from good to great. To keep your cooked zucchini fries fresh, let them cool first. Place them in an airtight container. I recommend using glass containers for the best results. They help prevent moisture build-up. You can store them in the fridge for up to 3 days. If you want to keep them longer, freezing is an option. When it's time to enjoy your leftovers, reheating is key for crispiness. The best method is to use an oven. Preheat it to 375°F (190°C). Place the fries on a baking sheet and reheat for about 10 minutes. This helps the fries regain their crunch. Avoid using a microwave if you can. Microwaving often makes fries soft and soggy. If you must use it, keep the time short, and check often. Always aim to keep that crispy texture. To make zucchini fries crispy, focus on a few key factors: - Dry the zucchini: Remove excess moisture by patting the zucchini strips dry with paper towels. - Use almond flour: Almond flour gives a great crunch. It coats well and crisps in the oven. - Space them out: Place the fries in a single layer without touching. This helps air circulate. - Spray with oil: Use olive oil cooking spray on top for extra crispiness. Yes, zucchini fries are healthy! Zucchini is low in calories and high in nutrients. - Low in carbs: They fit well in low-carb diets. - Rich in vitamins: Zucchini is full of vitamin C and potassium. - High in fiber: Fiber helps with digestion and keeps you full longer. You can freeze gluten-free zucchini fries! Here’s how: - Before baking: Coat the zucchini fries as usual. - Lay them flat: Place them on a baking sheet and freeze until solid. - Store in bags: Once frozen, transfer to freezer bags. This prevents clumping. - Thaw before baking: When ready to eat, thaw in the fridge and bake as usual. Zucchini fries pair well with many sides and dips! Here are some ideas: - Dipping sauces: Marinara, ranch, or garlic aioli work great. - Sides: Serve with a fresh salad or grilled chicken. - Toppings: Sprinkle with fresh herbs for added flavor. Zucchini fries last up to three days in the fridge. Here are some tips: - Store in a container: Use an airtight container to keep them fresh. - Reheat properly: Use an oven or air fryer to keep them crispy when reheating. - Check for spoilage: If they look or smell off, it’s best to discard them. For the full recipe, check out the Crispy Zucchini Fries 🥒 section! Zucchini fries are a great snack with a tasty twist. We covered the key ingredients, step-by-step cooking, and tips for maximum crispiness. Plus, we discussed fun flavor variations and easy storage methods. Enjoy these healthy bites as a snack or side. With the right techniques, you can elevate any meal. Don't forget to get creative with spices and sauces. Your kitchen will become a hub of delicious flavors. Dive in and savor the joy of making zucchini fries!

Are you ready to crunch into a tasty guilt-free snack? These Gluten Free Low Carb Zucchini Fries are crispy, fresh, and full of flavor. They’re perfect for anyone looking to …

Read more

Categories Appetizers

Peach Crisp Delightful and Easy Summer Treat

June 29, 2025 by Chef Remy
- 6 ripe peaches, pitted and sliced - 1 cup brown sugar, divided - 1 tablespoon fresh lemon juice - 1 teaspoon pure vanilla extract - 1 cup rolled oats - 1/2 cup all-purpose flour - 1/2 cup unsalted butter, melted - 1 teaspoon ground cinnamon - 1/4 teaspoon salt - 1/4 cup chopped pecans (optional) Gathering the right ingredients is key. I love using ripe peaches for their sweet flavor. The brown sugar adds depth, while lemon juice brightens the dish. Vanilla extract gives the crisp a warm aroma. Rolled oats create that perfect crunchy topping. Flour helps bind the topping together. Melted butter is crucial for richness. Ground cinnamon adds a warm spice, and salt enhances all the flavors. Pecans are optional but add a nice crunch. Each ingredient plays a role in creating a delightful summer treat. For the complete method, check the Full Recipe above. 1. Preheat your oven to 350°F (175°C). This step is key for even baking. 2. In a large bowl, mix the sliced peaches with 1/2 cup of brown sugar. Add the lemon juice and vanilla. Toss gently to coat the peaches well. 3. Transfer the peach mixture into a greased 9x13-inch baking dish. Spread the peaches evenly for best cooking. 1. In another bowl, mix rolled oats, the remaining brown sugar, all-purpose flour, melted butter, ground cinnamon, and salt. 2. Blend these ingredients until they look crumbly. If you like, add chopped pecans for extra crunch. 1. Layer the peach mixture with the oat topping in the baking dish. Make sure the peaches are well covered. 2. Place the dish in the oven. Bake for 30-35 minutes. Look for a golden brown topping and bubbling peach juices to know it's ready. For the complete details, check the Full Recipe. Enjoy making this tasty Peach Crisp! To make the best peach crisp, start with ripe, juicy peaches. They bring out the sweet, natural flavor. Look for peaches that give a little when you press them gently. After baking, let the crisp cool for a brief time. This will help the juices settle and make serving easier. Serve your warm peach crisp with a scoop of vanilla ice cream. The cold ice cream melts into the warm fruit, creating a delightful mix. For an extra touch, dust it with cinnamon. This simple addition enhances the flavors and adds warmth. One common mistake is overmixing the topping mixture. Mix just until crumbly. If you blend too much, it turns into a paste. Another mistake is not preheating the oven. This step is key for even baking and a perfect crisp. Always preheat your oven to 350°F (175°C) before you start. Following these tips will lead to a perfect peach crisp every time. For more details, check the Full Recipe. {{image_4}} You can change the fruit in your crisp. Instead of peaches, try apples or berries. Apples give a nice tartness, while berries add a sweet burst. Mixing different fruits can make a fun twist. A mixed fruit crisp can be a hit at any gathering. Just use the same method as the peach crisp. If you need a gluten-free option, oat flour works great. It keeps the crisp texture and taste. You can also swap butter for coconut oil. This makes the dish dairy-free and adds a subtle coconut flavor. Both changes keep your dessert delicious and light. Want to spice things up? Add nutmeg or ginger to your topping. These spices bring warmth and depth to your crisp. You can also add chopped nuts for extra crunch. Pecans or walnuts work well here. They add a nice texture that contrasts with the soft fruit. Explore these variations to make your Peach Crisp unique. For the full recipe, check out Peachy Paradise Crisp. To keep your Peach Crisp fresh in the fridge, let it cool completely. Then, cover it with plastic wrap or aluminum foil. It will stay good for up to four days. If you want to freeze it, cut the crisp into individual portions. Place the pieces in an airtight container or freezer bag. Make sure to label it with the date. Frozen Peach Crisp can last for about three months. For the best taste, reheat your Peach Crisp in the oven. Preheat the oven to 350°F (175°C). Place the crisp in a baking dish and cover with foil. Heat for about 15-20 minutes or until warm. You can also use a microwave for quick reheating. Just warm it for 30-60 seconds. When serving reheated portions, top them with a scoop of vanilla ice cream. This adds creaminess and makes it even better! Enjoy your delicious Peach Crisp again! You can tell your Peach Crisp is ready by looking for a few signs: - The topping should look golden brown. - The peach juices should bubble around the edges. - A toothpick inserted in the topping should come out clean. These signs mean your crisp is perfectly baked. If you see these signs, take it out of the oven. Let it cool a bit before serving. This waiting time helps the juices settle for better flavor. Yes, you can make Peach Crisp ahead of time! Here are some tips: - Prepare the peach mixture and topping separately. - Store them in the fridge for up to a day. - When ready to bake, layer them in the dish and bake. This helps save time when you have guests. You can also make it a day before and simply reheat it. To ripen peaches quickly at home, try these methods: - Place peaches in a paper bag. This traps ethylene gas, speeding up ripening. - Add a ripe banana to the bag for even faster results. - Keep the bag at room temperature, away from direct sunlight. Check them daily. In a few days, you’ll have sweet, ripe peaches for your crisp. Enjoy the process and the delicious results! You now have everything you need for a delicious peach crisp. We covered the ingredients, preparation, tips, variations, storage, and answers to common questions. Enjoy juicy peaches layered with a crunchy topping. Remember to pick ripe fruit for the best taste. You can make this recipe your own by switching fruits or adding spices. The possibilities are endless. Keep this straightforward guide handy for your baking adventures. You’ll impress friends and family with your tasty creation!

Nothing says summer like a warm, delightful Peach Crisp. Juicy, ripe peaches pair perfectly with a crunchy, buttery topping, creating a treat that makes your taste buds dance. In this …

Read more

Categories Desserts

Herb and Cheddar Squash Bread Deliciously Savory Loaf

June 29, 2025 by Chef Remy
To make this tasty Herb and Cheddar Squash Bread, you will need: - 1 cup cooked and pureed butternut squash (about 1 medium squash) - 1 ½ cups all-purpose flour - 1 teaspoon baking powder - ½ teaspoon baking soda - 1 teaspoon salt - ½ teaspoon freshly ground black pepper - 1 tablespoon fresh thyme, finely chopped (or 1 teaspoon dried thyme) - 1 tablespoon fresh rosemary, finely chopped (or 1 teaspoon dried rosemary) - 1 cup sharp cheddar cheese, shredded - 2 large eggs - ¼ cup extra virgin olive oil - ¾ cup whole milk - 1 tablespoon honey (optional, for a touch of sweetness) You can swap some ingredients if you run out or want to try new flavors. Here are a few ideas: - Butternut squash can be replaced with pumpkin or sweet potato puree. - All-purpose flour can be switched for whole wheat flour for a heartier texture. - You can use feta or mozzarella instead of sharp cheddar for a different taste. - If you want a dairy-free option, use almond milk instead of whole milk. - Instead of honey, maple syrup can add a nice sweetness too. Using fresh herbs gives the best flavor to your bread. They bring a bright taste and aroma. However, dried herbs are a great option when fresh ones aren’t available. - Fresh Herbs: Use about three times more fresh herbs than dried. For instance, if a recipe calls for 1 teaspoon of dried thyme, use 1 tablespoon of fresh thyme. - Dried Herbs: They are more concentrated. They work well when mixed into the batter early on, allowing their flavors to bloom. Experiment and see what you like best! This recipe is flexible, and you can adjust it to fit your taste. You can find the full recipe above to make this mouthwatering loaf. Enjoy the process! Making Herb and Cheddar Squash Bread is fun and simple. You will need about 15 minutes to prep. Then, it bakes for about 45 to 50 minutes. This recipe makes enough for 8 slices. Gather all your ingredients first, and you will be ready to go. 1. Preheat the Oven: Set your oven to 350°F (180°C). Grease your 9x5-inch loaf pan or line it with parchment paper. This helps with easy removal later. 2. Mix the Wet Ingredients: In a big bowl, mix the pureed butternut squash, eggs, olive oil, milk, and honey if you want a bit of sweetness. Whisk until it looks smooth. 3. Prepare the Dry Ingredients: In another bowl, mix the all-purpose flour, baking powder, baking soda, salt, black pepper, thyme, and rosemary. Make sure everything is well combined. 4. Combine Wet and Dry Ingredients: Slowly add the dry mix to the wet mix. Stir with a spatula or wooden spoon until it is just combined. Don’t overmix; the batter should be thick but without dry spots. 5. Incorporate the Cheese: Gently fold in the shredded sharp cheddar cheese. Make sure it is spread evenly in the batter. 6. Pour into the Pan: Transfer the batter into your prepared loaf pan. Use a spatula to smooth the top for a nice finish. 7. Bake the Bread: Put the pan in the oven and bake for 45 to 50 minutes. To check if it’s done, stick a toothpick in the center. It should come out clean or with a few crumbs. 8. Cool and Serve: After baking, take the bread out and let it cool in the pan for about 10 minutes. Then, move it to a wire rack to cool completely. Slice it up and serve warm or at room temperature. - Always measure your ingredients carefully for best results. - Use a whisk for wet ingredients to make them smooth. - Mix dry ingredients well to spread the flavors evenly. - When combining wet and dry, stir just until no dry flour shows. This keeps the bread soft. Try this full recipe and enjoy every bite of this savory loaf! To get the best texture in your Herb and Cheddar Squash Bread, focus on the squash. Make sure it is well-cooked and smooth when pureed. A chunky puree can lead to uneven texture. Use fresh ingredients for the best rise. Mixing too much can make the bread dense. Stir gently until the dry and wet mixes combine. This will keep your loaf light and fluffy. Flavor is key in this savory bread. Fresh herbs, like thyme and rosemary, shine here. Use them generously for a fragrant and tasty loaf. You can swap fresh herbs for dried ones, but use less. They are stronger in taste. Adding a pinch of garlic powder can bring depth. A little honey adds a sweet touch that pairs well with cheddar. Avoid overmixing your batter. This can make your bread tough. Also, don't skip the cooling step. Letting the bread cool properly improves the texture. If you cut it too soon, it may crumble. Lastly, ensure your oven is at the right temperature. An oven that is too hot can burn the outside while leaving the inside raw. Follow the Full Recipe for precise steps. {{image_4}} You can use different cheeses to change the flavor. Try mozzarella for a milder taste. Feta adds a nice tang. Goat cheese gives a creamy texture. Each cheese will make this bread unique. Just remember to shred or crumble the cheese for even mixing. Feel free to mix in extra goodies. Chopped sun-dried tomatoes add a sweet burst. Spinach or kale can boost nutrition. For spice, add diced jalapeños or red pepper flakes. Nuts, like walnuts or pecans, can add crunch. Be creative and make it your own! To make this bread gluten-free, swap the all-purpose flour. Use a gluten-free flour blend instead. Look for blends with xanthan gum to help with texture. You can also try almond flour for a nutty flavor. Follow the same baking steps and enjoy a gluten-free loaf! For the full recipe, check out the details above. To keep your Herb and Cheddar Squash Bread fresh, store it at room temperature. Use a bread box or a paper bag for best results. Avoid plastic bags, as they trap moisture and can make the bread soggy. If you have leftover slices, wrap them in foil or wax paper. This way, the bread stays soft and tasty for a few days. You can freeze this savory loaf to enjoy later. First, let the bread cool completely. Then, wrap it tightly in plastic wrap and aluminum foil. This double wrap prevents freezer burn. You can freeze the whole loaf or slice it first for easy thawing. It stays good in the freezer for about three months. When you're ready to enjoy your frozen Herb and Cheddar Squash Bread, it's simple to reheat. For individual slices, pop them in the toaster for a crispy finish. If you have the whole loaf, preheat your oven to 350°F (180°C). Place the wrapped loaf in the oven for about 15-20 minutes. This keeps the bread warm and restores its soft texture. Enjoy it warm with butter or your favorite spread! For the complete recipe, check out the Full Recipe. To know if the bread is done, stick a toothpick into the center. If it comes out clean or with a few crumbs, the bread is ready. You want to avoid any wet batter on the toothpick. The bread should also feel firm to the touch. A nice golden-brown crust will form on the top as it bakes. This gives a good sign of a well-cooked loaf. Yes, you can use other squashes. Acorn or pumpkin can be great alternatives. Each squash will add a unique flavor and texture. Just make sure to cook and puree the squash first. This helps the bread stay moist and gives it a smooth texture. Experimenting with different squashes can lead to fun new tastes. This savory loaf pairs well with many dishes. Try serving it with a warm bowl of soup. It also goes nicely with fresh salads or a simple green salad. For breakfast, enjoy it with eggs or as toast. You can even spread some butter or cream cheese on top. The bread’s flavors shine through with any of these options. For more ideas, check out the Full Recipe for serving suggestions. This blog post covered all key aspects of making Herb and Cheddar Squash Bread. We explored the ingredients, substitutes, and the choice between fresh and dried herbs. You learned the step-by-step process for preparing and baking. Also, you discovered tips for texture and flavor, plus common mistakes to avoid. We discussed variations and storage options for your bread. Remember, cooking is about experimenting. Use this guide to create a delicious loaf that suits your taste. Enjoy your baking journey!

Are you ready to bake something truly special? Herb and Cheddar Squash Bread is a savory loaf that brings warmth and flavor to your table. With easy steps and simple …

Read more

Categories Dinner

Grilled Zucchini Salad Fresh and Flavorful Delight

June 29, 2025 by Chef Remy
To make this grilled zucchini salad, you need simple, fresh ingredients. Here’s what you’ll need: - 3 medium zucchinis, sliced into 1/4-inch rounds - 1 red bell pepper, sliced into strips - 1 cup cherry tomatoes, halved - 1/2 red onion, thinly sliced - 2 tablespoons extra-virgin olive oil - 1 teaspoon garlic powder - Sea salt and freshly cracked black pepper to taste - 1/4 cup crumbled feta cheese - Fresh basil leaves for garnish - Balsamic glaze for drizzling (optional) These ingredients work well together. The zucchini gives a soft texture, while the bell pepper adds crunch. You can customize your salad with these extra touches: - Avocado slices for creaminess - Toasted nuts for crunch - Different cheeses like goat cheese or mozzarella - A squeeze of lemon juice for brightness These toppings can enhance the flavors in your salad. Feel free to mix and match based on your taste. You will need a few handy tools to prepare this dish: - A grill or grill pan - A sharp knife for slicing vegetables - A large mixing bowl for tossing - A serving platter for presentation Having these tools ready makes cooking easier. With the right setup, you can create a beautiful and tasty salad. For the complete recipe, check out the Full Recipe section. To start, preheat your grill to medium heat. The grill needs to be hot enough for nice grill marks. This step is key for flavor and texture. If your grill has grates, clean them well before heating. A clean grill helps keep your veggies from sticking. Next, take a large mixing bowl and add your sliced zucchinis, red bell pepper strips, halved cherry tomatoes, and thinly sliced red onion. Drizzle on the extra-virgin olive oil. Then, sprinkle garlic powder, sea salt, and cracked black pepper over the veggies. Toss gently until everything is well coated. This mix brings out the best flavors. Now, it’s time to grill. Carefully place the zucchini and bell pepper slices on the grill. Grill for about 3-4 minutes per side. Look for those lovely grill marks. The veggies should be tender but still a bit crisp. This balance makes every bite enjoyable. Once cooked, remove them from the grill and let them cool slightly. When ready to serve, take a large platter or bowl. Arrange the grilled zucchinis and bell peppers, then add the halved cherry tomatoes and sliced red onion. This makes a pretty display. Next, sprinkle the crumbled feta cheese over the top for creaminess. Finish with fresh basil leaves for a pop of color. If you like, drizzle balsamic glaze for extra flavor. Enjoy your fresh and flavorful grilled zucchini salad! For a complete guide, check the Full Recipe. When selecting zucchini, look for firm, shiny skin. Choose medium-sized zucchinis. They are sweeter and less watery than larger ones. Avoid zucchinis with soft spots or blemishes. The color should be bright green, with no yellowing. Fresh zucchinis will give your salad the best flavor. To get the best flavor from your zucchini, preheat your grill. Medium heat works well for grilling. Lightly oil the grill grates to prevent the veggies from sticking. Grill the zucchini slices for 3-4 minutes on each side. Look for nice grill marks and a slight tenderness. This ensures a smoky, charred flavor that enhances your salad. This grilled zucchini salad is easily made vegetarian or vegan. Simply skip the feta cheese for a vegan option. You can add avocado for creaminess instead. If you want extra protein, consider chickpeas or black beans. They add texture and flavor without meat. Enjoy this fresh salad while keeping it plant-based! {{image_4}} You can easily boost the flavor and nutrition of your grilled zucchini salad by adding protein. Chicken and shrimp work great. For chicken, grill it until it's cooked through, then slice it. For shrimp, season them with olive oil, salt, and pepper before grilling. Grill the shrimp for about 2-3 minutes on each side until they turn pink. This adds a nice, savory touch to your salad. Dressings can change the whole vibe of your salad. A simple lemon vinaigrette adds a bright, zesty taste. Mix lemon juice, olive oil, salt, and pepper in a jar. Shake it up! If you want something richer, try a creamy ranch or a balsamic vinaigrette. Both dressings enhance the fresh flavors of the grilled veggies. Feel free to swap out the vegetables based on what’s in season. Grilled asparagus, bell peppers, or even eggplant can add new flavors. Each season brings different veggies to the table. Experimenting with these options keeps your salad fresh and exciting. You can even add some corn in summer or roasted butternut squash in fall for a cozy touch. For the full recipe, check out the detailed steps to make this delightful dish! To keep your salad fresh, store it in an airtight container. Make sure to let it cool to room temperature first. This helps prevent moisture build-up. If you have leftover feta, keep it separate to avoid sogginess. You can store the salad in the fridge for up to three days. For meal prep, consider chopping your veggies ahead of time. Store each type of vegetable separately in the fridge. This keeps them fresh until you are ready to grill. When you want to assemble the salad, mix the veggies together, grill them, and then combine everything. This method makes it easy to enjoy a fresh salad all week. Grilled zucchini salad tastes best fresh, but it can be stored for later. As mentioned, it lasts up to three days in the fridge. If you want to reheat it, use a skillet over low heat. This warms the salad gently without losing its texture. You may also enjoy it cold or at room temperature. For the full recipe, check the earlier sections! Yes, you can use many vegetables. Try bell peppers, eggplant, or asparagus. These veggies add color and taste. Grilling brings out their natural sweetness. Feel free to mix and match to your liking. If you want a cheese swap, try goat cheese or ricotta. They both add creaminess. You can also use vegan cheese if you prefer. Nutritional yeast gives a cheesy flavor as a non-dairy option. Yes, this salad is gluten-free! All ingredients are naturally free of gluten. It’s a great choice for anyone with gluten sensitivities or celiac disease. Enjoy without worry! You can prepare the veggies and grill them in advance. Store them in an airtight container. Just add the cheese and basil right before serving. This keeps the salad fresh and tasty. This salad pairs well with grilled meats like chicken or fish. You can also serve it with crusty bread or quinoa. It’s a versatile dish that complements many meals. For the full recipe, check out the details above! Grilled zucchini salad is fresh, easy, and tasty. We covered the main ingredients and optional toppings to boost flavor. I shared simple steps for grilling, serving, and storing the salad. You learned ways to customize and make it even better. Remember, grilled zucchini can pair with many foods. Enjoy your cooking journey, and don’t hesitate to experiment with flavors. Making this dish will bring joy to your table.

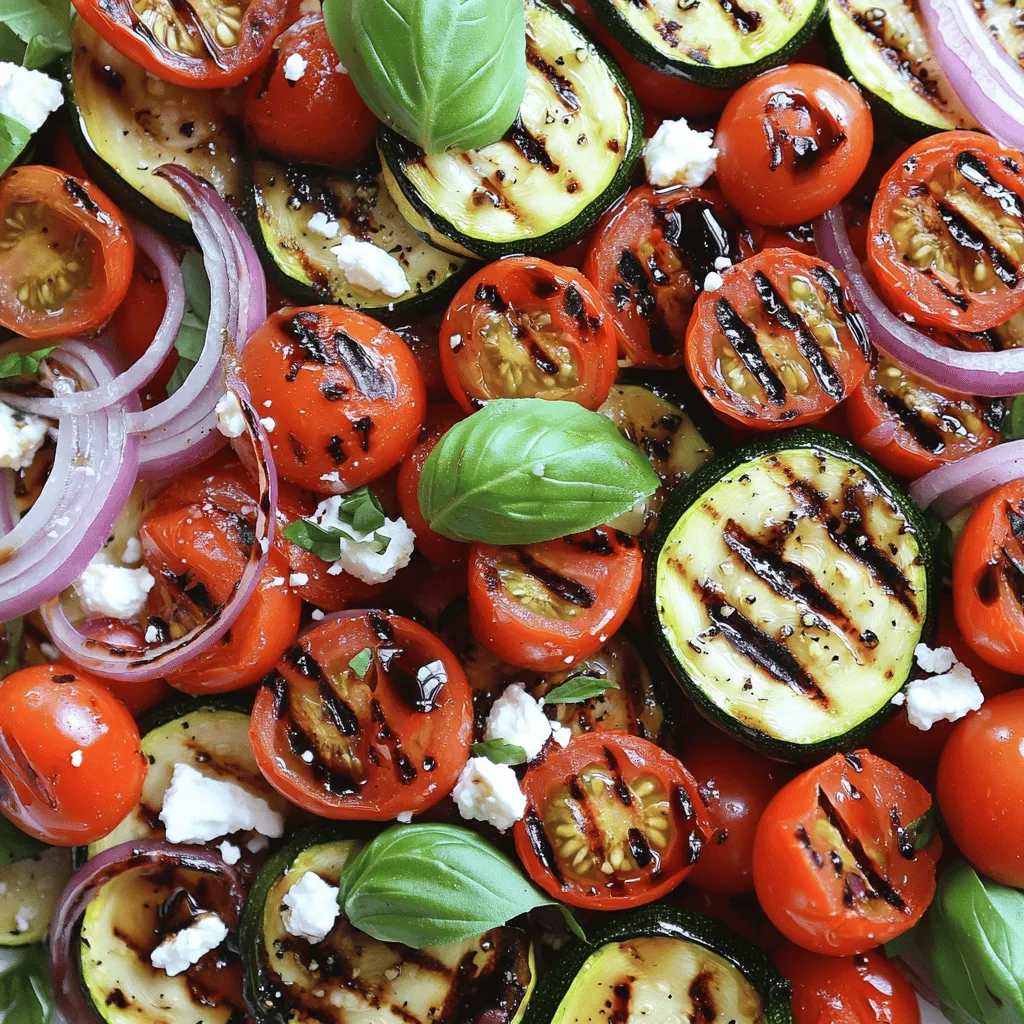
Looking for a fresh and tasty dish that’s easy to make? The Grilled Zucchini Salad is perfect for you! This salad bursts with flavor and is packed with healthy ingredients. …

Read more

Categories Salads

Roasted Zucchini Delight Simple and Flavorful Dish

June 29, 2025 by Chef Remy
To make roasted zucchini, gather these key items: - 4 medium zucchinis, sliced into thick rounds - 3 tablespoons extra virgin olive oil - 1 teaspoon garlic powder - 1 teaspoon onion powder - 1 teaspoon smoked paprika - 1 teaspoon dried oregano - 1 teaspoon dried thyme - Salt and fresh cracked pepper to taste - Zest of 1 lemon, finely grated - 2 tablespoons freshly chopped parsley for garnish These ingredients make the base of your dish. The zucchini brings a fresh taste, while olive oil adds richness. The spices create a flavorful kick that makes each bite exciting. You can add more spices to enhance the flavor. Consider these options: - Red pepper flakes for heat - Fresh herbs like basil or dill - Parmesan cheese for a savory touch These spices bring extra depth to the dish. Feel free to mix and match based on what you enjoy! Garnishes make your dish look and taste better. Try these: - Crushed nuts for crunch - A squeeze of fresh lemon juice for brightness - A drizzle of balsamic reduction for sweetness These garnishes add a fun twist. They make your roasted zucchini look pretty and taste even better. For the full recipe, see the section above. Enjoy your cooking adventure! Start by preheating your oven to 425°F (220°C). A hot oven makes the zucchini crisp. Gather your ingredients: four medium zucchinis and spices like garlic powder, onion powder, and smoked paprika. You will also need olive oil, lemon zest, and fresh parsley for garnish. Make sure to slice the zucchinis into thick rounds. This helps them roast evenly. In a large bowl, pour three tablespoons of extra virgin olive oil. Add one teaspoon of garlic powder, onion powder, and smoked paprika. Then, add one teaspoon each of dried oregano and thyme. Sprinkle in salt and fresh cracked pepper to taste. Finally, add the zest of one lemon. Whisk everything together until it forms a smooth marinade. The mix should smell great and look vibrant. Carefully add the sliced zucchini rounds into the bowl. Toss them gently to coat each piece in the marinade. Line a baking sheet with parchment paper for easy cleanup. Spread the coated zucchini in a single layer on the sheet. It is important not to overlap them. Place the baking sheet in the oven and roast for 20-25 minutes. Halfway through, flip the zucchini for even browning. When they turn golden, take them out and let them cool for a few minutes. Just before serving, sprinkle chopped parsley on top for color and flavor. This dish is simple yet full of taste. You can find the full recipe for Zesty Herb Roasted Zucchini in the article. To make your zucchini perfect, start by preheating your oven to 425°F (220°C). The hot oven gives your zucchini a nice, crispy edge. Make sure to cut the zucchini into thick rounds. Thicker slices hold their shape and cook evenly. Spread them out on the baking sheet. If they are too close together, they will steam instead of roast. Where's the fun in plain zucchini? Use fresh herbs like basil or thyme to boost the taste. You can also add a splash of balsamic vinegar for a tangy kick. A sprinkle of cheese, like feta or parmesan, adds a savory touch. Experiment with spices too! Try adding chili flakes for heat or lemon zest for brightness. Each tweak makes the dish unique. Many people overlook the importance of slicing size. Thin slices can become mushy. Always toss your zucchini in the marinade well. If they are not coated, they won't have enough flavor. Remember to flip them halfway through roasting. This helps them brown evenly. Lastly, avoid overcrowding the baking sheet. This mistake will lead to soggy zucchini. Follow these tips, and you’ll make roasted zucchini a true delight! {{image_4}} You can change the flavors of roasted zucchini easily. Try using different spices. For a spicy kick, add cayenne pepper. If you want a sweet touch, sprinkle some brown sugar. You can also use fresh herbs like basil or dill. These will give your zucchini a unique taste. Roasted zucchini pairs well with many vegetables. You can mix zucchini with bell peppers, onions, or cherry tomatoes. Cut them into similar sizes to cook evenly. This creates a colorful and tasty dish. You can enjoy a variety of flavors and textures in every bite. Roasted zucchini is already vegan and gluten-free. If you want to add more protein, try chickpeas. They roast well and add a nice crunch. For extra richness, drizzle some tahini over the veggies before serving. This adds creaminess without dairy. The dish remains simple and healthy. For the full recipe, check out Zesty Herb Roasted Zucchini. To keep leftover roasted zucchini fresh, allow it to cool. Once cooled, place it in an airtight container. Store the container in the fridge for up to three days. This way, you can enjoy your zucchini later without losing flavor. When you're ready to eat the leftovers, preheat your oven to 350°F (175°C). Spread the zucchini on a baking sheet. Heat for about 10 minutes or until warm. You can also use a microwave. Just place the zucchini on a microwave-safe plate and heat for 1-2 minutes. This keeps the zucchini moist. Roasted zucchini is great for meal prep. You can add it to salads, wraps, or grain bowls. Mix it with quinoa or brown rice for a quick lunch. You can also toss it into pasta dishes or omelets for added veggies. This makes your meals colorful and tasty. For the full recipe, check out the Zesty Herb Roasted Zucchini. The best temperature for roasting zucchini is 425°F (220°C). This heat helps to cook the zucchini evenly. It also allows the outside to get a nice brown color while keeping the inside tender. If you use a lower temperature, your zucchini may become soggy instead of crisp. Yes, you can make roasted zucchini ahead of time. Roast it, let it cool, and store it in an airtight container. Keep it in the fridge for up to three days. When you are ready to eat, reheat it in the oven or stovetop to regain some crispness. To keep your zucchini from being soggy, follow these tips: - Choose firm zucchini: Select fresh zucchinis that feel heavy and firm. - Slice evenly: Cut the zucchini into even rounds. This helps them cook at the same rate. - Don’t overcrowd the pan: Spread the zucchini in a single layer on the baking sheet. This allows steam to escape, keeping them crisp. - Use high heat: Roasting at 425°F (220°C) creates a nice texture. For a delicious way to enjoy zucchini, follow this Full Recipe. You will need: - 4 medium zucchinis, sliced into thick rounds - 3 tablespoons extra virgin olive oil - 1 teaspoon garlic powder - 1 teaspoon onion powder - 1 teaspoon smoked paprika - 1 teaspoon dried oregano - 1 teaspoon dried thyme - Salt and fresh cracked pepper to taste - Zest of 1 lemon, finely grated - 2 tablespoons freshly chopped parsley for a vibrant garnish Roasting zucchini is simple yet rewarding. We covered the key ingredients, from required items to fun spices. I shared tips for the perfect roast and ways to add more flavor. You also learned how to store leftovers and make them last. Embrace these methods. Enjoy experimenting with flavors and textures. Your meals will shine with delicious roasted zucchini.

Are you ready to transform simple zucchini into a mouth-watering dish? Roasted zucchini is easy to make and full of flavor. This versatile veggie can shine at any meal, whether …

Read more

Categories Appetizers

Zucchini Soup Simple and Nourishing Recipe

June 29, 2025 by Chef Remy
- 4 medium zucchinis, diced - 1 medium onion, finely chopped - 2 cloves garlic, minced - 2 cups vegetable broth - 1 cup coconut milk - 2 tablespoons extra virgin olive oil - 1 teaspoon dried thyme - Sea salt and black pepper - Fresh basil leaves for garnish Zucchini is low in calories and packed with vitamins. It helps keep your heart healthy. Using low-sodium broth is key. It cuts down on salt but keeps flavor. Coconut milk adds creaminess and healthy fats. This makes the soup rich and satisfying without dairy. Zucchini is high in water content, which makes it hydrating. It's also good for digestion. The broth provides minerals and flavor without the sodium. Coconut milk brings in healthy medium-chain fats, which can boost energy. The herbs add not just taste but also nutrients, enhancing the soup's benefits. These ingredients not only make a tasty soup but also support a balanced diet. For the full recipe, check out Creamy Zucchini Delight. Enjoy your cooking adventure! 1. Heating the olive oil and sautéing onions In a large pot, heat 2 tablespoons of extra virgin olive oil over medium heat. When the oil is hot, add 1 finely chopped onion. Sauté the onion for about 5 minutes. Stir it often. The onion should turn soft and translucent. 2. Cooking garlic until fragrant Next, add 2 minced garlic cloves to the pot. Cook for 1 more minute. Stir constantly to avoid burning. The garlic will become fragrant and add great flavor. 1. Sautéing zucchini and thyme Now, add 4 diced medium zucchinis and 1 teaspoon of dried thyme. Sauté everything for 5-7 minutes. Stir often. The zucchinis will soften and become tender. 2. Adding vegetable broth and bringing to a boil Carefully pour in 2 cups of low-sodium vegetable broth. Stir the mixture well. Increase the heat to bring it to a gentle boil. Once it boils, lower the heat to a simmer. Cook for 10-15 minutes until the zucchinis are fully tender. 1. Pureeing with an immersion blender Remove the pot from the heat. Use an immersion blender to puree the soup. Blend until it reaches a silky smooth texture. If you do not have an immersion blender, pour the soup in batches into a countertop blender. Blend until smooth, then return it to the pot. 2. Incorporating coconut milk and seasoning Stir in 1 cup of coconut milk. Season the soup with sea salt and freshly cracked black pepper to taste. Let the soup simmer on low heat for 5 more minutes. This allows all the flavors to meld beautifully. To boost the flavor, add spices like cumin or coriander. Fresh herbs, like parsley or dill, also work well. Seasoning is key. Always taste your soup as you go. Adjusting salt and pepper can make a big difference. For a silky smooth soup, blend until no lumps remain. If using a countertop blender, let the soup cool a bit. Always fill it halfway. This avoids spills and burns. Blend in batches if needed. This ensures the soup is creamy and delightful. Garnishing makes your soup stand out. Drizzle coconut milk on top for a nice touch. Add fresh basil leaves for color. Serve in bowls with crusty bread on the side. This creates a warm and inviting meal. Enjoy the beauty of your dish! {{image_4}} You can make zucchini soup even more exciting by swapping in different veggies. Try using yellow squash, butternut squash, or even carrots. Each will add its unique flavor and color. You can also toss in some spinach or kale for extra nutrition. Adding legumes is another great option. Chickpeas or white beans can boost the protein content. They will make your soup heartier and more filling. If you want a lighter soup, stick to the original recipe. If you want to make this soup vegan, simply use vegetable broth and coconut milk, which are already in the recipe. This soup is naturally gluten-free, so feel free to enjoy it without worry. For those watching carbs, you can skip the potatoes if you add them. Instead, use cauliflower for a low-carb option. It blends well and keeps the soup creamy. You can use a slow cooker to make this soup. Just toss all ingredients into the pot and set it on low for 6 hours. This method allows the flavors to deepen nicely. If you prefer quicker cooking, try an Instant Pot. Cook on high pressure for about 10 minutes. This will save you time and still give you a delicious soup. For the full recipe, follow the steps outlined earlier to guide your cooking adventure! To keep your zucchini soup fresh, store it in the fridge. Use a clean, airtight container. This helps maintain flavor and texture. I find glass containers work best. They do not stain and are easy to clean. Make sure to cool the soup before sealing it. This step prevents moisture build-up. Want to save some soup for later? Freezing is a great option. First, let the soup cool completely. Then, pour it into freezer-safe bags or containers. Leave some space for expansion as it freezes. When you’re ready to eat, thaw the soup in the fridge overnight. To reheat, warm it on the stove or in the microwave. Stir well to ensure even heating. Homemade zucchini soup lasts about 3 to 5 days in the fridge. After that, it may spoil. Always check for signs of spoilage. Look for strange smells or changes in color. If the soup has any mold, toss it out. Your health is worth more than a few bites of soup! What can I add to enhance the flavor of my soup? You can add a squeeze of lemon juice. This brightens the soup. Fresh herbs like dill or parsley also boost flavor. A pinch of red pepper flakes adds a nice kick. You might try adding some grated cheese for richness too. Can I use frozen zucchinis in this recipe? Yes, frozen zucchinis work well. They save time and reduce waste. Just thaw them first and drain any excess water. They may not have the same texture as fresh, but the taste will still shine. Is this recipe suitable for a keto diet? Yes, this zucchini soup fits a keto diet. Zucchini is low in carbs. Coconut milk adds healthy fats too. Use a low-sodium vegetable broth to keep it light and tasty. How can I make zucchini soup lower in calories? To lower calories, cut back on coconut milk. You can replace it with vegetable broth. Using less olive oil also helps. Focus on fresh herbs to add flavor without extra calories. What pairs well with zucchini soup? This soup pairs well with crusty bread. A fresh salad is also a great side. Try serving it with a dollop of sour cream or yogurt for creaminess. Can I make this soup ahead of time for meal prep? Absolutely! This soup keeps well. Make it a day in advance to let flavors meld. Store it in the fridge for up to three days. You can also freeze it for up to three months. Just thaw and reheat before serving. Zucchini soup is simple and healthy. We explored its main ingredients, like zucchini, garlic, and coconut milk. I shared easy steps to make it and tips for great flavor. You can adjust the recipe for a vegan or gluten-free dish. Storing leftovers and freezing options ensure nothing goes to waste. Make this soup your own with fun swaps and spices. Enjoy experimenting and nourishing your body with each bowlful. Trust me, once you try it, you’ll love it!

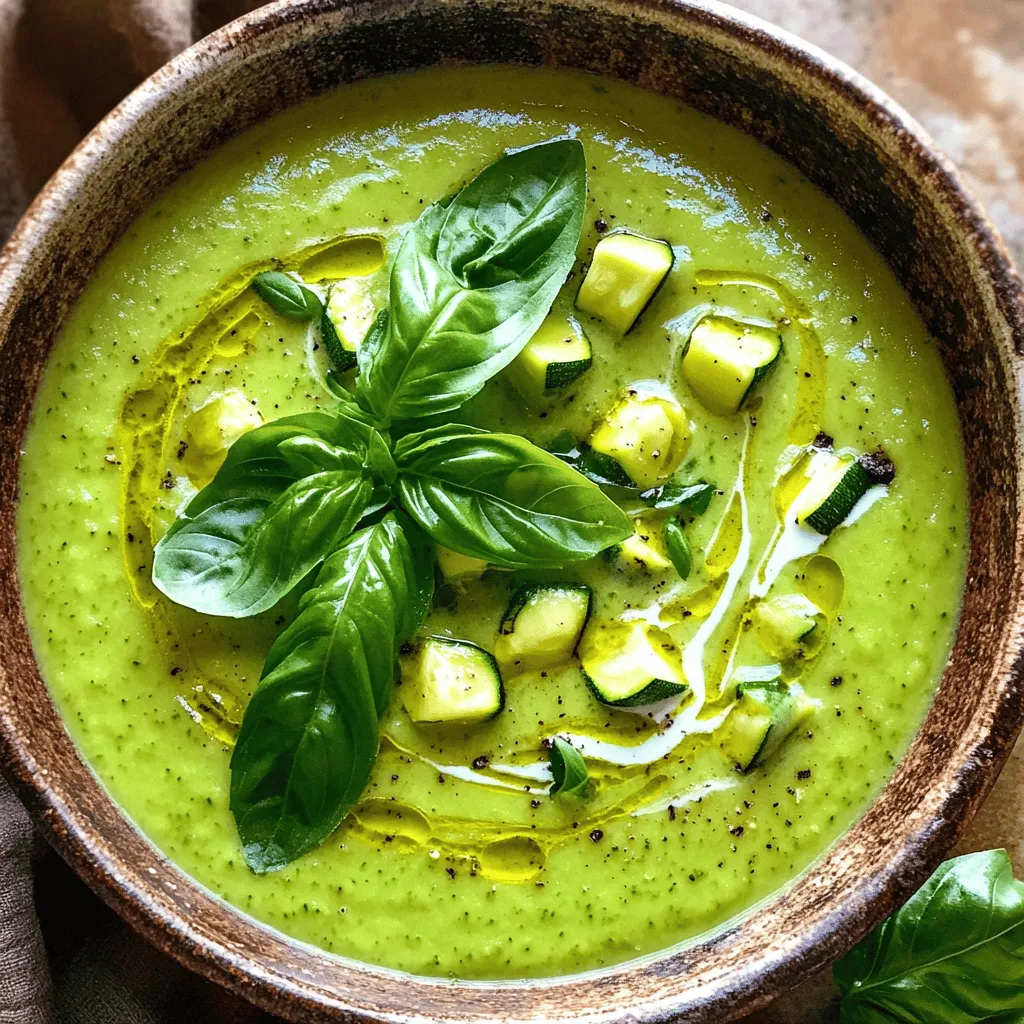
Discover the joy of making a warm bowl of zucchini soup with my simple recipe. Packed with fresh ingredients like zucchini, garlic, and creamy coconut milk, this dish is not …

Read more

Categories Dinner

The Best Zucchini Salsa Flavorful and Fresh Recipe

June 29, 2025 by Chef Remy
To make the best zucchini salsa, you need fresh and tasty ingredients. Here are the key items: - 2 medium zucchinis, diced into small, even cubes - 1 cup ripe tomatoes, diced for freshness - 1/2 red onion, finely chopped for sweetness - 1 jalapeño pepper, seeds removed and minced for a kick - 1 clove garlic, minced for depth of flavor - 1/4 cup fresh cilantro, chopped for a burst of herbaceous goodness - Juice of 1 lime, freshly squeezed for brightness - 1 teaspoon ground cumin for warmth - Salt and pepper to taste When you pick produce, look for bright colors and firm textures. Choose zucchinis that feel heavy for their size and have smooth skin. Ripe tomatoes should have a rich red color and a slight give when you press them lightly. Fresh cilantro should smell strong and look vibrant. Quality ingredients make a big difference in flavor. You can spice up your salsa with some fun add-ins. Try adding: - Diced bell peppers for sweetness - Corn for a crunchy bite - Black beans for extra protein - Avocado for creaminess These options can add new layers of taste to your salsa. Feel free to mix and match to find your favorite combination! For the full recipe, check out The Ultimate Zucchini Salsa Fiesta. Start by dicing the zucchinis into small, even cubes. This step is key for texture. Next, chop your tomatoes into similar-sized pieces. Use a sharp knife for clean cuts. Then, finely chop the red onion. The sweet taste of the onion balances the salsa. Remove the seeds from the jalapeño pepper and mince it finely. This will add a nice kick to your salsa. Mince the garlic next. Garlic brings depth to the dish. In a large bowl, mix the zucchinis, tomatoes, red onion, jalapeño, and garlic. Toss gently to combine. You want each piece to shine! To elevate the flavor, add fresh cilantro. It brings a burst of herbal goodness. Also, squeeze in the juice of one lime. The lime adds brightness and freshness. Sprinkle in ground cumin for warmth. This spice adds a nice depth. Season with salt and pepper to taste. Mixing in these elements at this stage ensures all flavors blend well. Use a spatula to fold the ingredients together gently. Make sure everything is coated evenly. Resting time is crucial for flavor. Allow the salsa to sit for 15-30 minutes at room temperature. This lets the flavors meld beautifully. Think of it as a mini-vacation for your salsa! The longer it rests, the better the taste. This step makes a big difference in your final dish. So, don’t skip this part! To make the best zucchini salsa, focus on fresh ingredients. Use ripe tomatoes for sweetness. When dicing zucchinis, aim for even cubes. This helps with texture. Always taste as you mix. Adjust salt and lime juice to your liking. A splash of vinegar can add extra zing. One mistake is not letting the salsa rest. Resting helps flavors blend well. Avoid using stale or overripe produce. This can ruin your salsa's taste. Don’t skip the lime juice; it brightens the dish. Also, be careful with jalapeños. Too many can overpower the other flavors. Serve zucchini salsa in a bright bowl. This makes it more appealing. Pair it with crispy tortilla chips for a great snack. You can also use it as a topping on tacos or grilled meats. For a fun twist, add it to scrambled eggs for breakfast. Enjoy experimenting with this fresh, tasty salsa! {{image_4}} You can make your zucchini salsa unique by adding different flavors. Try adding diced bell peppers for a sweet crunch. Corn kernels can also add a pop of color and sweetness. If you want a bit of sweetness, add diced mango or peach. Mixing in avocado gives a creamy texture that many love. You might even consider a splash of soy sauce for a fun twist. If you enjoy heat, change the jalapeño to a serrano pepper. This pepper packs more spice and adds depth. You can also add a dash of hot sauce to heat things up. For a smoky flavor, try mixing in some chipotle in adobo sauce. This can take your salsa to a whole new level. Seasonal produce can keep your salsa fresh and exciting. In summer, add fresh corn or diced cucumbers for a refreshing crunch. In fall, try roasted pumpkin or butternut squash for a sweet, earthy flavor. Winter brings hearty ingredients like diced carrots or even roasted beets, offering color and taste. Always feel free to adjust based on what’s fresh and in season. This will keep your salsa vibrant and full of flavor. For the full recipe, see The Ultimate Zucchini Salsa Fiesta. To keep your zucchini salsa fresh, place it in an airtight container. Make sure the lid seals well. This helps keep air out and keeps the salsa tasting great. If you want to enjoy it later, refrigerate it right away. This will slow down spoilage. Zucchini salsa stays fresh in the fridge for about 3 to 5 days. If you want to keep it longer, freezing is a smart option. You can freeze it for up to 3 months. Just remember to leave some space in the container for expansion. Thaw it in the fridge overnight when you’re ready to eat it again. Use glass jars or plastic containers with tight-fitting lids for the best results. Glass jars are great since they don’t stain and are easy to clean. If you prefer plastic, choose BPA-free options. These containers keep your salsa safe and fresh for a longer time. For the full recipe, check out The Ultimate Zucchini Salsa Fiesta 🥒. Yes, you can make zucchini salsa ahead of time. I often prepare it a few hours before serving. This resting time lets the flavors blend well. Just store it in an airtight container in the fridge. It stays fresh for about two to three days. The longer it sits, the more the taste develops. But be careful not to let it sit too long. It can become soggy over time. Zucchini salsa is super versatile. I love serving it with crispy tortilla chips. It also brightens up grilled chicken or fish. You can spoon it over tacos for a fresh twist. It works well in wraps or sandwiches too. Try it with scrambled eggs for a tasty breakfast. The options are endless, and it adds a lovely crunch to any dish. To make zucchini salsa less watery, start by salting the zucchini. After dicing, sprinkle salt on it and let it sit for about 10 minutes. This draws out excess water. You can then pat the zucchini dry with a paper towel. Another tip is to use firm tomatoes. Ripe but not overly soft tomatoes help keep the salsa thick. These steps will help you achieve a perfect texture for your salsa. In this blog post, we explored how to make the best zucchini salsa. We covered key ingredients, with tips on choosing fresh produce. You learned the best steps for preparation and how resting time enhances flavor. Don’t forget the tips to avoid common mistakes. Try the variations for unique twists and know how to store your salsa properly. With this guide, you're ready to create delicious, fresh salsa your friends will love. Enjoy the process and get creative with your ingredients!

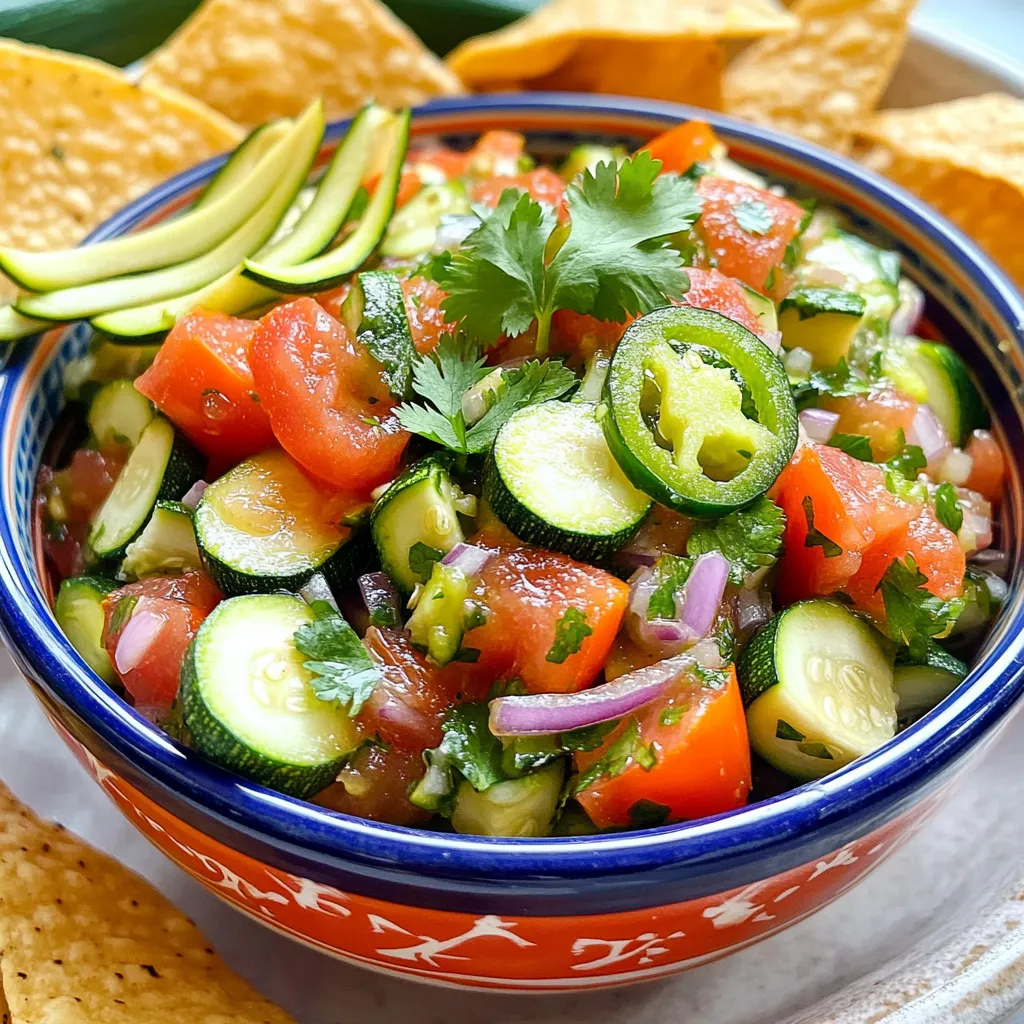
If you love fresh flavors and easy recipes, then you’ve found your new go-to dish: zucchini salsa! This vibrant and tasty salsa, packed with garden-fresh ingredients, adds a burst of …

Read more

Categories Appetizers

Savory Zucchini, Squash & Corn Casserole Recipe

June 29, 2025 by Chef Remy
- 2 medium zucchini, sliced into thin rounds - 2 medium yellow squash, sliced into thin rounds - 1 cup fresh corn kernels (or frozen, thawed) - 1 medium onion, diced finely - 2 cloves garlic, minced Fresh vegetables bring lots of flavor and nutrients. Zucchini and squash add a nice texture. Corn gives a sweet burst in each bite. Onions and garlic add depth and aroma. When you slice everything thin, it cooks evenly. - 1 cup shredded cheddar cheese, divided - 1 cup milk - 2 large eggs Cheddar cheese adds a creamy and sharp flavor. Milk makes the casserole rich and fluffy. Eggs bind everything together, creating a nice texture. Using the right amount of cheese makes it extra cheesy and delicious. - 1 teaspoon dried thyme - 1 teaspoon paprika - Salt and pepper to taste - 1 cup breadcrumbs - 2 tablespoons olive oil for cooking and greasing Seasonings like thyme and paprika enhance the flavors. Salt and pepper balance everything out. Breadcrumbs add a nice crunch on top. Olive oil helps in cooking and keeps the dish from sticking. For the full recipe, you can check the detailed instructions. - Preheat your oven to 375°F (190°C). - Lightly grease a 9x13-inch casserole dish with 1 tablespoon of olive oil. - In a large skillet, heat 1 tablespoon of olive oil over medium heat. - Add diced onion and minced garlic, sautéing until translucent (3-4 minutes). - Incorporate sliced zucchini and yellow squash, cooking until softened (5-7 minutes). - Season with salt, pepper, dried thyme, and paprika. - In a large bowl, whisk together eggs and milk, then add half of the shredded cheese. - Fold in sautéed vegetables and corn, mixing gently. - Pour the mixture into the prepared dish and spread evenly. - Top with remaining shredded cheese and breadcrumbs. - Bake for 25-30 minutes until golden brown and set. This savory zucchini, squash, and corn casserole is easy to make. Follow these steps closely for the best results. You can find the full recipe above. Enjoy your cooking! Using fresh vegetables makes a big difference. Fresh zucchini, squash, and corn have better flavor. They also have more nutrients. I recommend using fresh when you can. However, frozen vegetables work well too. They are quick and easy. Frozen corn is sweet and just as good in the casserole. Thaw frozen veggies before mixing them in. This helps reduce extra water in the dish. To get a creamy interior, mix the eggs and milk well. This adds richness to the casserole. Cook the vegetables until barely soft. This helps keep some crunch. For a crispy topping, use breadcrumbs. Adding a little olive oil to the breadcrumbs makes them golden. Feel free to adjust the seasonings. Try adding garlic powder, onion powder, or herbs. A pinch of cayenne pepper adds a nice kick. Make your casserole look great when serving. Use fresh herbs like parsley or cilantro to garnish. This adds color and freshness. Serve it on a nice plate for a special touch. Pair the casserole with a light side salad. A crisp green salad balances the warm flavors. This makes for a beautiful and tasty meal. {{image_4}} You can enhance the dish by adding protein. Diced chicken or turkey works well. Cooked sausage also adds great flavor. These proteins make the casserole more filling. You can mix them in with the vegetables. This way, you create a heartier meal for your family. If you want more veggies, you can add bell peppers or spinach. Both options bring color and nutrition. Bell peppers add a sweet crunch, while spinach offers a soft texture. You can mix these in with the zucchini and squash. Feel free to get creative with seasonal vegetables too! Cheese can change the whole flavor of the casserole. Try using feta for a tangy twist. Mozzarella will give a nice meltiness. You can even mix different cheeses together. This allows you to find the perfect flavor for your taste. Cheese options are endless, so explore what you like best! For the full recipe, check out the Zucchini, Squash & Corn Casserole details. To keep your casserole fresh, let it cool first. Place the leftovers in an airtight container. This step helps prevent moisture loss. Store the container in the fridge. Your casserole will stay fresh for up to three days. When you reheat it, make sure it’s heated all the way through. If you want to save some for later, freezing works well. Cut the casserole into portions. Wrap each piece tightly in plastic wrap. Then, place them in a freezer bag or airtight container. This method helps avoid freezer burn. When you're ready to eat, thaw it overnight in the fridge. Reheat in the oven or microwave until hot. In the fridge, your casserole lasts about three days. In the freezer, it can last for up to three months. Always check for signs of spoilage before eating. If it smells off or looks strange, it’s best to toss it. Enjoy your zucchini, squash, and corn casserole with confidence! You can find the full recipe [here](#). Yes, you can make this casserole ahead of time. Prepare it up to the baking step. Cover it well and store it in the fridge for up to 24 hours. When ready, bake it straight from the fridge. You might need to add a few extra minutes to the baking time. This casserole pairs well with a light side salad or some grilled chicken. You can also serve it with crusty bread or a fresh fruit salad. These sides balance the rich flavors in the casserole. You can tell the casserole is done when it is set in the center. The top should be golden brown and bubbly. Use a knife to check the center. If it comes out clean, your casserole is ready to enjoy. Yes, you can use other squash types. Butternut or acorn squash can add sweetness. Delicata squash adds a nice texture. Each type will change the flavor a bit, so feel free to experiment! In this blog post, we explored the tasty zucchini, squash, and corn casserole. We covered fresh veggies, dairy, and eggs that create a creamy base. You learned how to prepare, assemble, and bake the dish for the best flavor. We also offered storage tips, variations, and answers to common questions. This casserole is versatile and easy. It can be a delicious side or a main meal. Try it out and enjoy the vibrant flavors!

If you’re looking for a delicious and easy dish, this Savory Zucchini, Squash & Corn Casserole is perfect for you! Bursting with fresh veggies and creamy cheese, it’s a fantastic …

Read more

Categories Dinner
Older posts
Newer posts
← Previous Page1 … Page79 Page80 Page81 … Page130 Next →

ROASTED RECIPES

Where bold flavors meet everyday meals. Warm, vibrant, and made to share. 🔥🥗🍴

PAGES

Home About Contact Privacy Policy Terms & Conditions Cookie Policy GDPR Policy Copyright Policy Disclaimer

CATEGORIES

Appetizers Desserts Salads Breakfast Dinner

Contact

  • Pinterest
  • Mail
Copyright © 2025 Roasted Flavors. All rights reserved.