Blueberry Streusel Bread Simple and Tasty Recipe
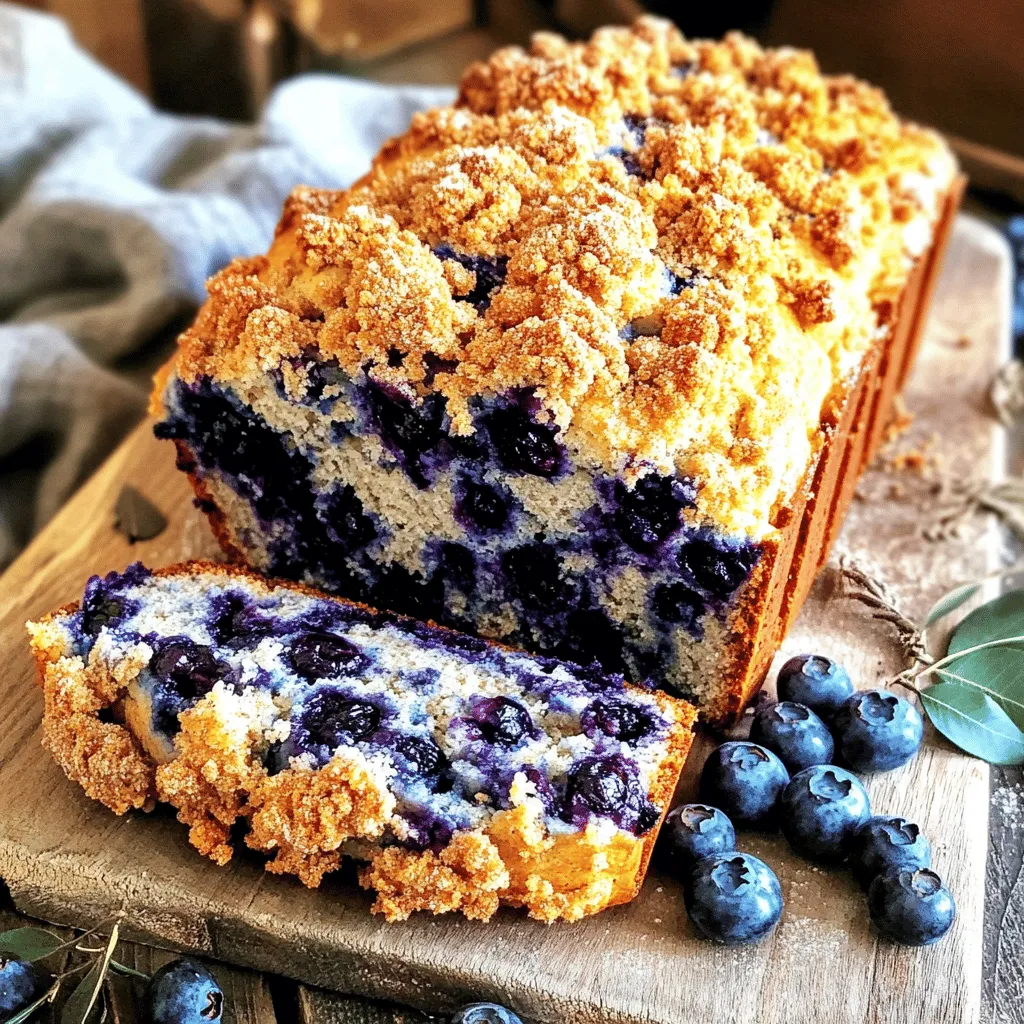
Ready to bake something special? This Blueberry Streusel Bread is a simple treat that packs a lot of flavor. With just a few fresh ingredients and easy steps, you can …
Ready to bake something special? This Blueberry Streusel Bread is a simple treat that packs a lot of flavor. With just a few fresh ingredients and easy steps, you can …
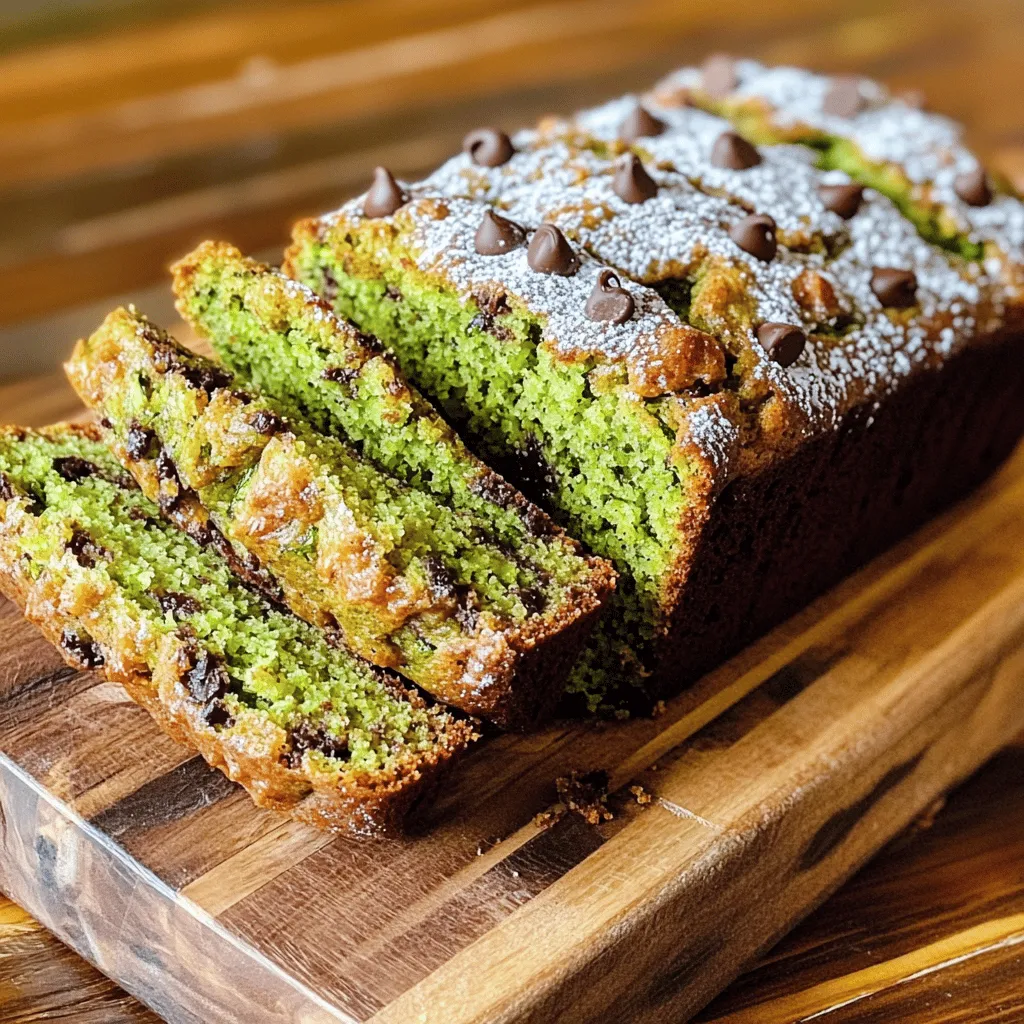
![To make Blueberry Banana Zucchini Bread, gather these key items: - 1 cup grated zucchini (about 1 medium zucchini) - 1 ripe banana, thoroughly mashed - 1 cup fresh or frozen blueberries - 1/2 cup granulated sugar - 1/4 cup packed brown sugar - 1/3 cup vegetable oil - 2 large eggs, at room temperature - 1 teaspoon pure vanilla extract - 1 teaspoon baking powder - 1/2 teaspoon baking soda - 1/2 teaspoon ground cinnamon - 1/4 teaspoon fine salt - 1 1/2 cups all-purpose flour - Optional: 1/2 cup chopped walnuts or pecans Each ingredient plays a role. The zucchini adds moisture and fiber. The banana brings sweetness. Blueberries burst with flavor and color. Sugar balances the flavors, while oil keeps it tender. Eggs provide structure, and the dry ingredients create the bread's body. You can make this recipe your own by adding: - Chopped walnuts or pecans for crunch - Other fruits like raspberries or chopped apples for different flavors These add-ins enhance texture and flavor. Experiment and find your favorite mix! This bread is not just tasty; it's healthy too. Here’s why: - Zucchini: Low in calories and high in water, it helps you feel full. - Banana: Provides potassium and energy. - Blueberries: Packed with antioxidants, they support heart health. For each slice (about 1/8 of the loaf), you get around 150 calories. This can vary based on add-ins and portion sizes, but it’s a guilt-free treat! 1. Preheat the Oven: First, set your oven to 350°F (175°C). This is key for even baking. 2. Prepare the Loaf Pan: Grease a 9x5 inch loaf pan with oil or butter. You can also line it with parchment paper for easy removal. 3. Mix the Wet Ingredients: In a large bowl, add the grated zucchini, mashed banana, granulated sugar, brown sugar, vegetable oil, eggs, and vanilla extract. Use a whisk or spatula and mix until everything is smooth. 1. Combine Dry Ingredients: In a different bowl, whisk together the all-purpose flour, baking powder, baking soda, ground cinnamon, and fine salt. Make sure they are well mixed. 2. Gradually Add Dry Ingredients: Slowly add the dry mix to the wet mixture. Stir gently with a spatula or wooden spoon. Don’t overmix; just combine them until they are blended. 1. Fold in Blueberries: Carefully fold in the blueberries and any optional nuts. Be gentle to avoid mashing the blueberries. 2. Pour into Pan: Transfer the batter into the prepared loaf pan. Use a spatula to smooth the top if needed. 3. Bake: Place the pan in the oven and bake for 55-60 minutes. To check for doneness, insert a toothpick into the center. It should come out clean or with a few moist crumbs. This recipe is simple and fun to make. You can find the Full Recipe [here]. Enjoy your baking! To achieve the perfect texture in your Blueberry Banana Zucchini Bread, focus on mixing. Start by not overmixing the batter. When you combine your wet and dry ingredients, stir gently. This keeps the bread light and fluffy. Overmixing can lead to a dense loaf. Moisture is key. Zucchini adds great moisture to your bread. The more water in your batter, the softer your bread will be. If your zucchini is too dry, your bread may turn out crumbly. If you want to cut back on sugar, try using honey or maple syrup. These natural sweeteners work well in this recipe. You can also swap out vegetable oil for applesauce. This gives moisture without extra fat. For gluten-free options, use almond flour or a gluten-free blend. Both can replace all-purpose flour well. Just keep in mind that the texture may change slightly. For an appealing presentation, serve this bread on a colorful platter. You can slice it thick or thin, depending on your preference. A light dusting of powdered sugar adds charm. Pair it with a hot cup of tea or coffee. Cream cheese or a dollop of butter goes well on top. This adds flavor and richness. You can also serve it with yogurt for a delightful twist. This Blueberry Banana Zucchini Bread is a treat for any occasion! For the full recipe, check out the earlier section. {{image_4}} You can change the flavor of your Blueberry Banana Zucchini Bread by adding spices. Nutmeg and ginger can bring warmth to each bite. Just a pinch can make a big difference. You can also swap out fruits or nuts. Instead of blueberries, try raspberries or chopped apples. For nuts, walnuts or pecans work great. Each choice will create a new twist for your taste buds. If you want a vegan version, replace eggs with flaxseed meal or applesauce. Use plant-based oils to keep it moist. You can also make it sugar-free. Substitute granulated sugar with stevia or erythritol. These options can help you enjoy this treat while meeting your dietary needs. Make changes for the seasons or holidays. In fall, add pumpkin spice for a cozy feel. In winter, try adding cranberries for a festive touch. You can also use seasonal fruits. In summer, fresh peaches or cherries can brighten up the bread. Each season can inspire a fresh take on this comforting recipe. For the complete recipe, check the [Full Recipe]. To keep your Blueberry Banana Zucchini Bread fresh, wrap it tightly in plastic wrap or foil. You can also place it in an airtight container. Store it at room temperature for up to three days. If you want longer freshness, you can store it in the fridge for up to a week. If you have leftover bread, freezing is a great option. First, let the bread cool completely. Then, slice it into pieces. Wrap each slice in plastic wrap, and place them in a freezer bag. Press out as much air as possible. This will help to prevent freezer burn. You can freeze the bread for up to three months. To thaw, simply take a slice out and leave it at room temperature for about 30 minutes. You can also reheat it in a toaster or microwave for a warm treat. Understanding how long your Blueberry Banana Zucchini Bread lasts is key. When stored at room temperature, it stays fresh for about three days. In the fridge, it can last up to a week. If you freeze it, it can remain good for three months. Always check for any signs of spoilage before enjoying your bread. How do I know when the bread is done baking? You can check if the bread is done by inserting a toothpick into the center. If it comes out clean or with a few moist crumbs, the bread is ready. Baking usually takes about 55 to 60 minutes. Can I make this recipe ahead of time? Yes, you can prepare the batter a day in advance. Just store it in the fridge. When ready, pour it into the pan and bake as directed. Is it possible to use frozen blueberries? Absolutely! Frozen blueberries work well in this recipe. Just fold them in directly from the freezer. This keeps your bread moist and adds great flavor. What if my batter is too thick or too runny? If your batter is too thick, add a tablespoon of milk or water to loosen it. If it’s too runny, add a bit more flour, one tablespoon at a time, until it reaches the right consistency. Can I replace the zucchini with another vegetable? Yes, you can replace zucchini with finely grated carrots or even apples. Both add moisture and flavor, but keep an eye on the sugar content in your recipe. Why use zucchini in breads? Zucchini adds moisture without strong flavor. It makes the bread soft and fluffy, while also sneaking in some veggies. It’s a great way to use up extra summer zucchini. Tips for customizing the recipe to personal taste You can tweak this recipe by adding spices like nutmeg or ginger. Try different nuts or even add chocolate chips for a fun twist. Enjoy experimenting with flavors! This blog shared a tasty Blueberry Banana Zucchini Bread recipe. We covered ingredients, steps, and storage tips. You learned about optional add-ins and nutritional benefits. I also provided variations to suit your taste. In the end, this bread is fun to make and good for you. Experiment with flavors and enjoy your baking!](https://roastedflavors.com/wp-content/uploads/2025/07/e07af898-bf7d-42c9-830e-e96a6d1d6dd1.webp)
Are you ready to enjoy a moist and flavorful twist on classic bread? My Blueberry Banana Zucchini Bread recipe combines sweet, ripe bananas, fresh blueberries, and nutritious zucchini to create …
![- 1 cup finely grated zucchini - 1 cup whole wheat flour - 1/2 cup rolled oats - 1/2 cup honey or maple syrup - 1 large egg, at room temperature Zucchini is the star of this recipe. It adds moisture and nutrition. Whole wheat flour gives a hearty texture. Oats add fiber, making these muffins a great snack. Sweetness comes from honey or maple syrup, which you can choose based on your taste. The egg binds everything together for a perfect rise. - 1/2 cup chopped walnuts or pecans - 1/2 cup raisins or dark chocolate chips You can customize the muffins. Adding nuts gives a nice crunch. If you prefer something sweeter, toss in raisins or dark chocolate chips. Both options make your muffins unique and tasty. - 1 teaspoon baking powder - 1/2 teaspoon baking soda - 1 teaspoon ground cinnamon - 1/4 teaspoon ground nutmeg - 1/4 teaspoon salt Spices add warmth and flavor to your muffins. Baking powder and baking soda help them rise. Cinnamon gives a sweet, cozy taste, while nutmeg adds depth. Salt enhances all the flavors, making each bite delicious. For the full recipe, check out the [Full Recipe]. - Preheat oven to 350°F (175°C) - Prepare muffin tin with liners or grease Start by setting your oven to 350°F (175°C). This is the perfect temperature for baking. While the oven warms, grab your muffin tin. You can use paper liners to make cleanup easy. If you don’t have liners, lightly grease the tin with a bit of oil or cooking spray. This helps the muffins release easily. - Combine grated zucchini, honey (or maple syrup), egg, applesauce, and yogurt In a large bowl, mix together your grated zucchini, honey (or maple syrup), egg, applesauce, and yogurt. Make sure the zucchini is finely grated for the best texture. Use a whisk or spatula to blend these until smooth. This step gives your muffins moisture and sweetness. - Whisk together flour, oats, baking powder, baking soda, spices, and salt - Fold dry mix into wet mixture gently In another bowl, whisk together the whole wheat flour, oats, baking powder, baking soda, ground cinnamon, ground nutmeg, and salt. Make sure there are no lumps for even baking. Gently fold this dry mixture into the wet ingredients. Do not overmix; this keeps your muffins light and fluffy. - Mix in nuts and dried fruit or chocolate, if desired If you like, you can mix in nuts or dried fruit now. Chopped walnuts or pecans add crunch. Raisins or dark chocolate chips bring a nice touch of sweetness. Stir these in gently to distribute them evenly throughout the batter. - Fill muffin cups 3/4 full with batter Using a scoop or spoon, fill each muffin cup about 3/4 full with the batter. This gives the muffins room to rise while baking. If you overfill them, they might spill over. - Bake for 20-25 minutes - Cool muffins before serving Bake your muffins in the preheated oven for 20-25 minutes. They are done when a toothpick inserted in the center comes out clean or with just a few moist crumbs. Once baked, let them cool in the tin for about 5 minutes. After that, transfer them to a wire rack. Let them cool completely before serving. Enjoy your easy and healthy zucchini muffins! For the full recipe, check out the detailed instructions above. To keep your zucchini muffins moist, use applesauce and Greek yogurt. These two ingredients add great moisture without extra fat. Remember, overmixing the batter can make muffins tough. Mix until just combined for the best texture. A dash of vanilla extract can boost the flavor of your muffins. You can also experiment with spices like ginger or allspice for a unique twist. These spices add warmth and depth to each bite, making your muffins truly special. For a lovely finish, drizzle your muffins with honey or dust them with powdered sugar. This adds sweetness and makes them look inviting. You can also serve them with fresh zucchini slices to add a pop of color and freshness. {{image_4}} If you want to make gluten-free zucchini muffins, it's easy! Just swap out the whole wheat flour for a gluten-free flour blend. Most blends work well in this recipe. Make sure to check the label for a good mix, so your muffins stay soft and tasty. You can change the sweetness in your muffins too. Instead of honey or maple syrup, try using mashed bananas. They add a nice natural sweetness and keep the muffins moist. This is a great option if you want to cut back on added sugars. Feel free to get creative with your muffins! You can add shredded coconut for a tropical twist. Dried cranberries also make a great addition, giving a sweet and tart flavor. These add-ins not only give texture but also boost the taste of your zucchini muffins. For the full recipe, check out the link provided! You can keep your leftover muffins in an airtight container at room temperature for 2-3 days. This keeps them fresh and tasty. If you want them to last longer, refrigerate them. They will stay good for up to one week. To freeze muffins, first flash freeze them. This means you should place them on a tray and put them in the freezer for about an hour. Once they are firm, transfer the muffins to freezer bags. This helps keep them fresh. When you want to enjoy one, simply thaw it at room temperature or warm it in the oven. For the best taste, reheat your muffins in the oven. Set it to 350°F (175°C) and warm them for about 5-10 minutes. This gives them a fresh-baked taste. If you need a quick warm-up, you can use the microwave. Heat them for about 10-15 seconds until they are warm. Yes, you can use other veggies! Carrots and sweet potatoes are great options. They add nice flavor and moisture. To make these muffins vegan, swap the egg for flaxseed meal. Use a plant-based yogurt instead of Greek yogurt. This will keep the muffins moist and tasty. Check the muffins by inserting a toothpick into the center. If it comes out clean or has a few moist crumbs, they are ready! Absolutely! If you want mini muffins, just adjust the baking time. Bake them for about 15-20 minutes instead. Each muffin can have around X calories, X grams of carbs, and X grams of protein. This may change based on your choices. Yes, you can! Just refrigerate the batter for up to 2 hours before you bake it. This makes it easy to prep in advance. Zucchini muffins are simple to make and full of flavor. We discussed key ingredients like zucchini, whole wheat flour, and oats. I shared step-by-step instructions for mixing, baking, and storing these tasty treats. With optional add-ins, spices, and variations, you can get creative. Remember, you can easily adjust sweetness and keep the muffins moist. These muffins are a healthy choice for breakfast or snacks. Give this recipe a try and enjoy delicious homemade muffins any time!](https://roastedflavors.com/wp-content/uploads/2025/07/9d3b43e2-514b-4673-bbea-4a000de55582.webp)
Looking for a quick snack that’s easy, tasty, and healthy? You’re in luck! My Zucchini Muffins are perfect for busy days. Made with whole wheat flour and sweetened naturally, these …
Looking for a delicious and easy way to enjoy zucchini? This Savory Ultimate One Bowl Zucchini Bread Recipe is your answer! With just a few simple steps, you’ll create moist, …

Looking for a tasty and healthy snack? You’ve got to try Parmesan Zucchini Chips! These chips are crispy, flavorful, and easy to make. Plus, they use simple ingredients you likely …
![- 1 ½ cups grated zucchini - 1 ½ cups all-purpose flour - 1 teaspoon baking soda - ½ teaspoon baking powder - ½ teaspoon salt - ½ teaspoon ground cinnamon - 1 cup granulated sugar - 1/3 cup vegetable oil - 2 large eggs - 1 tablespoon lemon zest - 2 tablespoons freshly squeezed lemon juice - 1 teaspoon pure vanilla extract - Optional: ½ cup chopped walnuts, ½ cup raisins To make the Pioneer Woman lemon zucchini bread, you need fresh, simple ingredients. Grated zucchini gives this bread its moist texture. For the best results, use medium-sized zucchini. You’ll also need all-purpose flour to provide structure. Baking soda and baking powder help the bread rise. Salt and cinnamon add flavor to the mix. Granulated sugar sweetens the bread nicely. Vegetable oil keeps it moist and tender. Eggs bind the mixture together and add richness. Lemon zest and juice give a refreshing taste. Finally, if you want some crunch, add chopped walnuts or raisins. Gather these ingredients first. This helps keep your cooking process smooth and fun. If you want to see the entire process, check out the Full Recipe. Start by preheating your oven to 350°F (175°C). This step is key for even baking. Next, prepare your loaf pan. You can grease it lightly with butter or oil. Dust it with flour, or line it with parchment paper for easy removal later. In a medium bowl, combine the flour, baking soda, baking powder, salt, and cinnamon. Whisk these together until they blend well. This mix adds the perfect rise and flavor to your bread. In a large bowl, combine the granulated sugar and vegetable oil. Whisk them until smooth. Then, add the eggs one at a time. Beat well after each egg. Next, mix in the lemon zest, lemon juice, and vanilla extract until everything is well blended. Now, it’s time to combine the dry and wet mixtures. Gradually add the dry mix to the wet mix. Stir gently until just combined. Be careful not to overmix! This keeps your bread light and fluffy. After that, fold in the grated zucchini. If you want, add walnuts and raisins for extra flavor and texture. Pour the batter into your prepared loaf pan. Smooth the top with a spatula for even baking. Place the pan in your preheated oven. Bake for 50-60 minutes. To check if it’s done, insert a toothpick in the center. It should come out clean or with a few moist crumbs. Once baked, let it cool in the pan for about 10 minutes. Then, move it to a wire rack to cool completely before slicing. For the full recipe, check out the details above. Enjoy this delicious lemon zucchini bread! To get the best texture, avoid overmixing the batter. When you mix too much, the bread can become tough. Stir until just combined. This keeps it light and fluffy. Also, drain the zucchini well. If you have too much moisture, it can make the bread soggy. Wrap the grated zucchini in a clean cloth and squeeze out excess water. You can make this bread even more tasty by adding spices or zest. Try cinnamon, nutmeg, or ginger for a warm kick. If you want a brighter taste, add more lemon zest. This will give your bread a fresh and zesty flavor. Don’t be afraid to experiment; each spice adds a unique twist! Once your bread cools, slice it beautifully. Arrange the slices on a wooden board for a rustic look. Garnish with lemon peel or a sprinkle of powdered sugar. This makes your bread look inviting and delicious. It pairs well with tea or coffee too! For the full recipe, check out the details above. {{image_4}} If you want a nut-free bread, you can easily make a few swaps. Simply replace the walnuts with sunflower seeds for a crunchy texture. If you prefer, you can also skip nuts altogether. Either choice keeps the flavor bright and fresh. For those who need a gluten-free option, it’s simple. Just use gluten-free all-purpose flour. This flour works well and keeps the bread tasty without gluten. Look for a blend that has a good mix of flours like brown rice and almond. You can take this lemon zucchini bread to the next level with fun add-ins. Try adding chocolate chips for a sweet twist. Dried cranberries also work well for a fruity burst. Mix them in when you fold in the zucchini for a tasty surprise in every bite. For the full recipe, check out the Zesty Lemon Zucchini Delight. To keep your lemon zucchini bread fresh, store it in an airtight container. You can refrigerate it for up to one week. If you want to keep it longer, freeze the bread. Wrap it in plastic wrap and then foil. This way, it can last for three months in the freezer. To keep the bread moist, always let it cool completely before storing. If you notice it getting dry, place a slice of bread in the container. The bread will help keep the loaf soft. You can also cover it with a damp paper towel for added moisture. To warm your lemon zucchini bread, slice a piece and place it on a plate. Microwave it for about 15-20 seconds. If you prefer, you can toast the slice in a skillet for a few minutes. This adds a lovely crispness to the outside while keeping the inside soft. For the full recipe, check out the [Full Recipe]. Yes, you can use frozen zucchini for this recipe. Make sure to thaw the zucchini first. Squeeze out any extra water before adding it to the batter. This helps keep your bread from becoming too soggy. Fresh zucchini gives a better texture, but frozen works well in a pinch. To check if your lemon zucchini bread is done, use the toothpick test. Insert a toothpick into the center of the loaf. If it comes out clean or with a few moist crumbs, it’s ready. You can also look for a golden-brown top. The edges should pull slightly away from the pan as well. Yes, you can easily turn this recipe into muffins. Fill your muffin tin about two-thirds full with batter. Bake at the same temperature, but start checking for doneness at 20 minutes. Muffins usually take about 20-25 minutes to bake. They are a fun, portable option for breakfast or snacks. For the full recipe, check the details above. This blog post showed you how to make lemon zucchini bread. We covered the right ingredients, step-by-step instructions, and helpful tips. I highlighted variations and storage methods to keep it fresh. Baking is fun and rewarding. With practice, you'll master this recipe. Enjoy sharing it with friends and family. Your kitchen will smell amazing and your taste buds will thank you!](https://roastedflavors.com/wp-content/uploads/2025/07/d8be305a-45d0-49ea-9128-c5dc88f46ca3.webp)
If you love fresh flavors, you’re in for a treat! This Pioneer Woman Lemon Zucchini Bread blends bright lemon zest with moist zucchini for a deliciously unique twist. Perfect for …

Looking to elevate your muffin game? These Easy Peach Crumb Topping Muffins are a simple delight! Packed with fresh peaches and topped with a crisp, sweet crumb, they make for …

If you’re looking for a dish that’s both tasty and healthy, you’ve come to the right place! The Mediterranean Chicken Zucchini Bake is packed with flavor, easy to make, and …
![- 4 medium zucchinis, sliced into half-moons (about 1/4 inch thick) - 3 tablespoons extra virgin olive oil - 3 cloves garlic, finely minced - 1 teaspoon red pepper flakes (adjust for spice preference) - Zest of 1 lemon (about 1 tablespoon) - Juice of 1 lemon (about 2 tablespoons) - Salt and freshly cracked black pepper, to taste - 1/4 cup fresh parsley, finely chopped - 2 tablespoons grated Parmesan cheese (optional for serving) When I cook sautéed zucchini, I focus on fresh, vibrant flavors. Zucchini gives a mild taste that soaks up other flavors well. The garlic adds depth, and the olive oil creates a silky texture. Red pepper flakes bring a gentle heat, while lemon zest and juice lift the dish with brightness. The salt and pepper balance the flavors perfectly. For some extra flair, I sprinkle fresh parsley for color and flavor. If you want a richer touch, try adding Parmesan cheese. Feel free to explore the [Full Recipe] for detailed steps on making this dish. Cooking zucchini can be simple yet rewarding, and with the right ingredients, you will create a dish everyone loves. To begin, rinse the zucchinis under cold water. This removes dirt and debris. After washing, dry them well with a towel. Now, slice each zucchini into half-moons. Aim for about 1/4 inch thick pieces. This thickness helps them cook evenly. If the slices are too thick, they may not cook well. Next, heat the olive oil in a large skillet. Set the heat to medium. When the oil shimmers, it is ready. Carefully add the minced garlic and red pepper flakes. Sauté these ingredients for about 1 minute. Stir often to avoid burning the garlic. You want it to smell great, not dark brown. Now, add the zucchini slices to the skillet. Stir them well to coat with oil and garlic. Cook the zucchini for about 5 to 7 minutes. You want them tender yet slightly crisp. Stir occasionally for even cooking. After that, add the lemon zest and juice. Mix everything for 2 minutes. Finally, season with salt and black pepper. Remove the skillet from the heat. Fold in the fresh parsley. If you like, sprinkle the Parmesan cheese on top. Your sautéed zucchini is now ready to serve! You can find the complete recipe in the Full Recipe section. For sautéing zucchini, use a wide, flat skillet. A non-stick skillet works best. It allows the zucchini to cook evenly and not stick. Heat your skillet to medium. This helps the zucchini brown nicely without burning. If you use high heat, watch closely. It can go from golden to burnt quickly. To boost flavor, try adding fresh herbs. Basil and thyme pair well with zucchini. You can also use spices like cumin or smoked paprika for depth. If you want to replace lemon, use vinegar or lime juice. Both options add brightness without the same taste. Plating is key for a beautiful dish. Arrange the sautéed zucchini in a circle on a white plate. This creates a nice contrast. You can sprinkle fresh parsley on top for a pop of color. A few shavings of Parmesan cheese can make it look gourmet. Remember, we eat with our eyes first! {{image_4}} You can easily change up the ingredients in sautéed zucchini. One great swap is yellow squash. It cooks similarly and adds a nice color. You can also add bell peppers. They bring a sweet crunch and vibrant hues to the dish. Want to switch the taste? For an Italian vibe, use Italian herbs like basil and oregano. This adds warmth and depth. If you crave heat, try adding jalapeños. They give a spicy kick that elevates the dish. Sautéed zucchini pairs well with proteins like grilled chicken or fish. The flavors complement each other beautifully. You can also transform this dish into zoodles. Just spiralize the cooked zucchini, and you have a fun, low-carb option. For the full recipe, check out the Zesty Lemon Garlic Sautéed Zucchini. To keep sautéed zucchini fresh, store it in the fridge. Place it in an airtight container. This helps to lock in flavors. Make sure to cool it down first. Hot food in a container can create steam and spoil it faster. Use glass or BPA-free plastic containers for best results. You can freeze sautéed zucchini if you want to keep it longer. First, let it cool completely. Then, place it in freezer-safe bags. Squeeze out the air to prevent freezer burn. When you are ready to eat, thaw it in the fridge overnight. For quick reheating, microwave it for a few minutes until warm. Sautéed zucchini lasts about 3 to 5 days in the fridge. If stored properly, it stays fresh longer. Watch for signs of spoilage like a sour smell or slimy texture. If you notice either, throw it away. Enjoy your sautéed zucchini while it’s still tasty! For the full recipe, check out Zesty Lemon Garlic Sautéed Zucchini. You can sauté zucchini without oil by using vegetable broth or water. Heat a non-stick skillet over medium heat. Add the broth or water instead of oil. Toss in sliced zucchini and cook until tender, about 5-7 minutes. This method keeps the dish light and healthy. Yes, you can use frozen zucchini for sautéing. However, it may release more water. Thaw it first and pat dry with a towel. Then, sauté in a hot skillet. Cook for a few extra minutes to ensure it is fully heated and tender. The best spices for sautéed zucchini include: - Garlic - Red pepper flakes - Black pepper - Italian herbs These spices enhance the natural flavor of zucchini and make it more savory. Yes, sautéed zucchini is healthy. Zucchini is low in calories and high in water. It provides vitamins A and C, along with fiber. Sautéing it adds flavor without a lot of fat, especially if you use minimal oil. You can make sautéed zucchini more flavorful by adding: - Fresh herbs like basil or thyme - A splash of balsamic vinegar - Cheese, such as Parmesan - Nuts for a crunchy texture These additions create layers of taste and make the dish more exciting. For a full recipe, check out the Zesty Lemon Garlic Sautéed Zucchini. This post walks you through sautéing zucchini, from ingredients to storage tips. You learned about the key ingredients, like zucchini, garlic, and olive oil, plus seasonings that enhance flavor. I shared easy steps to prepare the dish and added some tips for better results. Remember, you can vary the recipe with different ingredients and flavors too. Sautéed zucchini can be a healthy side or a base for many meals. Use the advice here to enjoy your cooking adventure!](https://roastedflavors.com/wp-content/uploads/2025/07/7fcd58f7-f807-4eee-83fe-02cbda6625cb.webp)
Zucchini is a versatile vegetable that shines when sautéed. In my blog, Sautéed Zucchini: Savory and Simple Vegetable Dish, I’ll guide you through a quick and tasty recipe. With just …

Looking for a healthy yet delicious meal? Try my Mediterranean Stuffed Zucchini! This dish combines fresh zucchini with a tasty quinoa filling, packed with flavor and nutrition. It’s easy to …