Keto Yogurt Cake Tasty and Effortless Dessert Recipe

Looking for a simple yet delicious dessert? This Keto Yogurt Cake is your answer! With just a few ingredients and easy steps, you can whip up a tasty treat that …
Looking for a simple yet delicious dessert? This Keto Yogurt Cake is your answer! With just a few ingredients and easy steps, you can whip up a tasty treat that …

Looking for a quick and tasty dinner? This Quick Weeknight Ranch Chicken Recipe is your answer! You’ll whip up flavorful, crispy chicken breasts in no time. With just a few …

Looking for a snack that’s both crunchy and tasty? I’ve got the perfect solution: Baked Zucchini Fries! These fries are easy to make and full of flavor. They are a …
. You’ve learned how to make cheesy garlic zucchini steaks, from ingredient choices to baking techniques. Remember to prep your zucchini well and be mindful of cooking times. Enjoy trying various cheese and veggie combos for added flavor. Store leftovers properly to keep them tasty. With these tips and tricks, you’ll avoid common mistakes and impress everyone with your dish. Embrace the fun in cooking and enjoy every bite. Happy cooking!](https://roastedflavors.com/wp-content/uploads/2025/07/32ba849c-0f9b-4da3-8feb-ca2cbfa22762.webp)
Are you ready to elevate your veggie game with a dish that’s both tasty and simple? Cheesy Garlic Zucchini Steaks deliver rich flavor and satisfying crunch. In this post, I …
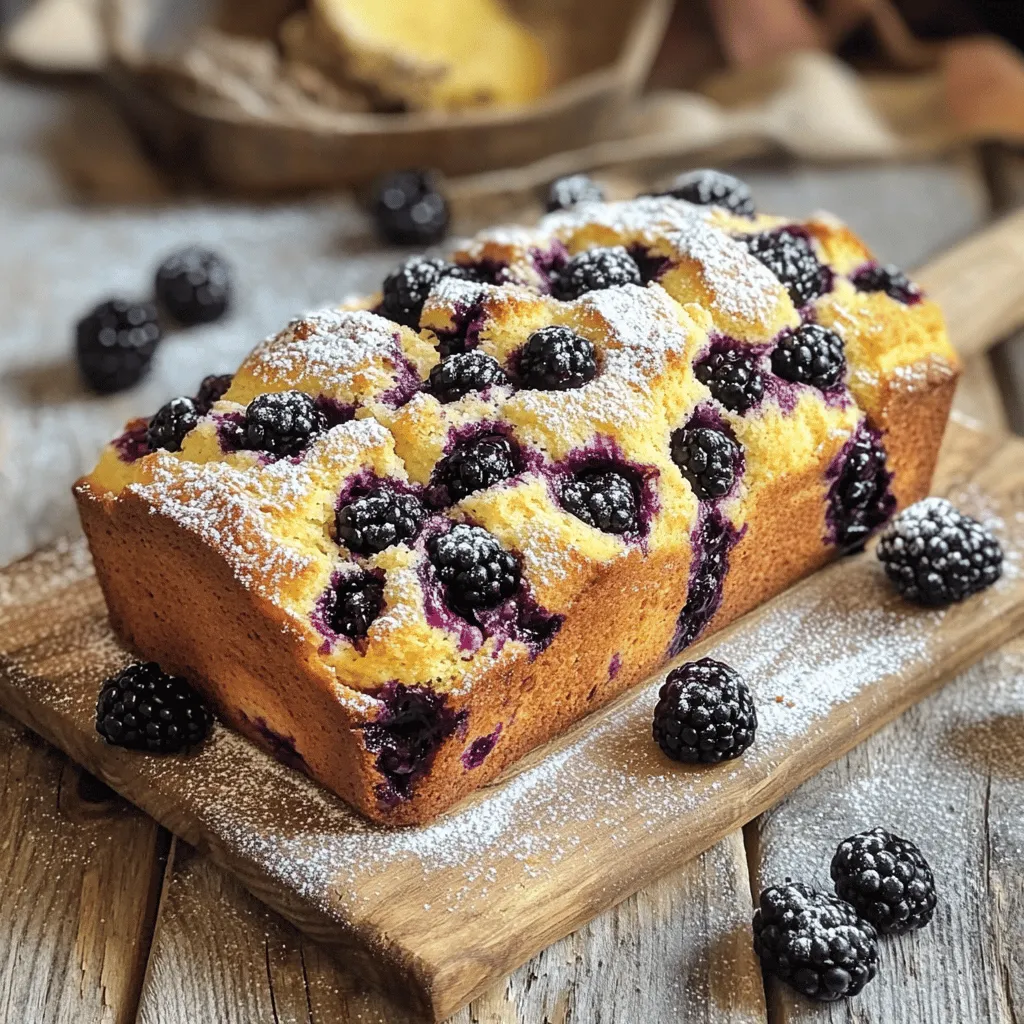
Are you ready to bake something delicious? This easy blackberry loaf is a fun treat that anyone can make. With simple ingredients and clear steps, you’ll whip up this moist, …
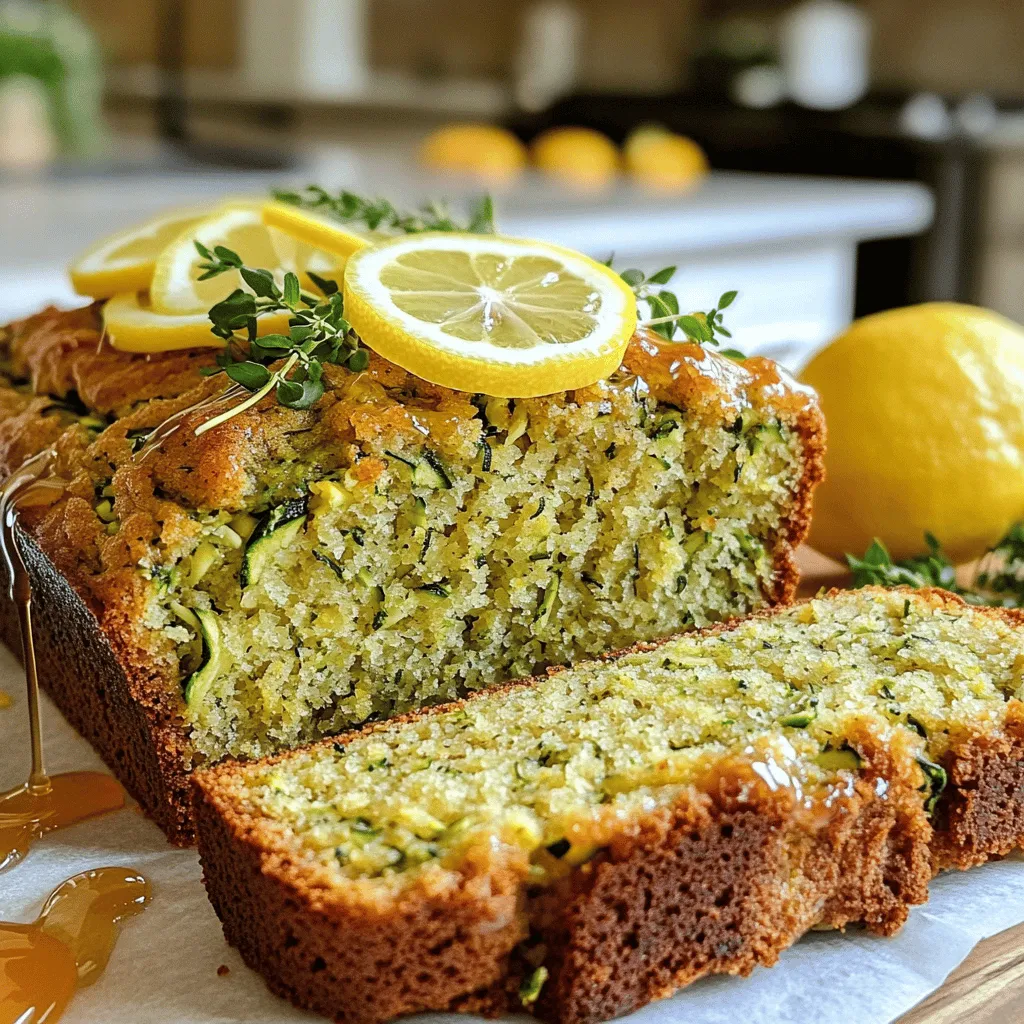
![To make a delicious zucchini banana bread, you need a few simple ingredients. Here’s what you’ll need: - 1 cup grated zucchini (about 1 medium zucchini) - 1 cup ripe bananas (about 2 medium bananas, mashed) - 1/3 cup vegetable oil (or melted coconut oil) - 1 large egg - 1 teaspoon vanilla extract - 1 cup all-purpose flour - 1/2 cup whole wheat flour - 1 teaspoon baking soda - 1/2 teaspoon baking powder - 1/2 teaspoon salt - 1 teaspoon ground cinnamon - 1/2 cup chopped walnuts (optional) - 1/2 cup chocolate chips (optional) These ingredients blend well to create a moist and tasty bread. The zucchini adds moisture, while the bananas provide sweetness and flavor. I love adding walnuts or chocolate chips for extra texture. If you want to try the full recipe, check this [Full Recipe]. First, set your oven to 350°F (175°C). This step helps ensure even cooking. Next, take a 9x5-inch loaf pan. Grease it with oil or line it with parchment paper. This way, your bread will come out easily after baking. In a large bowl, combine 1 cup of grated zucchini and 1 cup of mashed bananas. Mix them well with a fork or whisk. Then, add 1/3 cup of oil, 1 large egg, and 1 teaspoon of vanilla extract. Beat the mixture until it is smooth and well blended. This forms a great base for your bread. In another bowl, mix together the dry ingredients. Use 1 cup of all-purpose flour, 1/2 cup of whole wheat flour, 1 teaspoon of baking soda, 1/2 teaspoon of baking powder, 1/2 teaspoon of salt, and 1 teaspoon of ground cinnamon. Stir well so that everything is evenly distributed. This mixture adds structure and flavor to your bread. Now, add the dry mix to the wet mixture. Stir gently until just combined. Be careful not to over-mix. Over-mixing can make your bread dense. If you want, you can fold in 1/2 cup of chopped walnuts or chocolate chips at this stage. This gives extra flavor and texture. Pour the batter into your prepared pan. Smooth the top with a spatula. Place it in your preheated oven and bake for 50-60 minutes. To check if it's done, insert a toothpick into the center. It should come out clean. Once baked, let it cool in the pan for 10 minutes. Then, transfer it to a wire rack to cool completely. Enjoy your delicious Zucchini Banana Bread! For the full recipe, check the full recipe section. To make your Zucchini Banana Bread moist, use fresh ingredients. The riper the bananas, the better. They should be brown and soft. This adds natural sweetness and moisture. Also, don't overmix the batter. Stir just until combined to keep it light and fluffy. If you want extra moisture, add a splash of milk or yogurt. Measuring ingredients correctly is key for good bread. Use a kitchen scale for best results. For dry ingredients, spoon them into a measuring cup and level off with a knife. Avoid packing them down. For liquid ingredients, use a clear measuring cup and check at eye level. This gives you the right amount every time. A great presentation makes your bread even more appealing. Slice the bread evenly for a nice look. Serve it warm with butter or honey on top. You can also add a sprinkle of walnuts or banana slices for flair. This not only looks good but tastes great too. Enjoy making your dish shine! For the full recipe, check [Full Recipe]. {{image_4}} You can make this recipe gluten-free. Just swap regular flour with gluten-free flour. The texture may change a bit, but it will still taste great. To make this bread vegan, replace the egg with a flax egg. Mix one tablespoon of ground flaxseed with three tablespoons of water. Let it sit for five minutes to thicken. Use plant-based oil for moisture. Adding spices or nuts can boost flavor. Try adding nutmeg or ginger for warmth. You can also mix in half a cup of chocolate chips for a sweet twist. Walnuts or pecans add a nice crunch. Use these options to create a unique version of zucchini banana bread. For the full recipe, check out the Zesty Zucchini Banana Bread 🥒. Enjoy experimenting! To keep your zucchini banana bread fresh, store it at room temperature. Wrap it tightly in plastic wrap or foil. This keeps moisture in and prevents it from drying out. You can also store it in an airtight container. If you want it to last longer, consider refrigeration. Just be aware that it may dry out a bit, so reheat before serving. Freezing zucchini banana bread is easy. First, let it cool completely. Then, wrap it tightly in plastic wrap. Place it in a freezer bag or container to protect it from freezer burn. Label it with the date so you know how long it’s been there. It can stay frozen for up to three months. When you’re ready to enjoy your bread, take it out of the freezer. Let it thaw in the fridge overnight or on the counter for a few hours. You can reheat slices in the microwave for about 15-20 seconds. If you prefer a crispy crust, pop it in the oven at 350°F (175°C) for about 10 minutes. Enjoy the warm, delicious taste of your zucchini banana bread again! For the full recipe, check out the detailed instructions above. Yes, you can use frozen bananas. Just thaw them first. Remove any excess water. This helps keep the bread moist. Frozen bananas often taste sweeter. They work well in Zucchini Banana Bread. To make your bread lighter, try these tips: - Use room temperature ingredients. - Don’t overmix the batter. Mix just until combined. - Add a bit more baking powder. This helps the bread rise. - Consider adding an extra egg for fluffiness. To check if the bread is done, use a toothpick. Insert it into the center of the loaf. If it comes out clean, the bread is ready. If it has batter on it, bake for a few more minutes. This ensures a perfectly baked Zucchini Banana Bread. This blog shows you how to make delicious Zucchini Banana Bread. You learned about the key ingredients, simple steps, and tips for success. We also explored variations, like gluten-free and vegan options, plus how to store and reheat your bread. Now, you can enjoy fresh, moist bread anytime. Baking can be fun. Be brave and try new flavors and methods. Enjoy your time in the kitchen!](https://roastedflavors.com/wp-content/uploads/2025/07/6a098f1d-c952-4876-95fe-fa811912d6af.webp)
Are you looking for a new twist on classic banana bread? This Zucchini Banana Bread recipe is both simple and tasty, blending sweet bananas with fresh zucchini for a delightfully …
Looking for a tasty, homemade treat that’s easy to bake? My Zucchini Bread recipe is just what you need! With simple ingredients like fresh zucchini, flour, and eggs, this delightful …
Looking for a tasty way to use up that garden zucchini? You’ve found it! My delightful and easy homemade zucchini bread recipe is perfect for breakfast or as a snack. …
. To keep your gnocchi fresh, store leftovers in an airtight container. Place the container in the fridge. This method helps to seal in flavors and keep everything fresh. Make sure to consume leftovers within three days for the best taste. If you want to save some for later, freezing is a great option. Just spread the gnocchi in a single layer on a baking sheet. Freeze them for about an hour before transferring to a freezer bag. This prevents them from sticking together. When you are ready to enjoy your gnocchi again, reheating is key. The best way to reheat is in a skillet. Heat a bit of olive oil over medium heat. Add the gnocchi and stir gently for about 5-7 minutes. This method keeps the gnocchi's texture nice and soft. You can also use the microwave if you're in a hurry. Place the gnocchi in a bowl with a splash of water. Cover it and heat for 1-2 minutes, stirring halfway through. For unused fresh produce, like tomatoes and zucchini, store them in the fridge. They usually last about 3-5 days. Fresh spinach and basil should be used within a week for the best flavor. As for gnocchi, if stored correctly in the fridge, they will last about 2-3 days after cooking. If frozen, they can last up to three months. Just remember to label your bags with the date! You can tell gnocchi is done when they float. When you cook gnocchi, they sink to the bottom at first. Once they rise to the surface, they are ready. This usually takes about 2-3 minutes. Floating means they have cooked through. After draining, they are ready for the next step in your dish. Yes, you can make gnocchi from scratch! Here are some basic steps: - Use 2 cups of mashed potatoes. - Mix in 1 cup of all-purpose flour. - Add 1 egg and a pinch of salt. - Knead the dough until smooth. - Roll and cut into small pieces. - Boil them until they float, just like store-bought gnocchi. This is a fun way to enjoy homemade pasta. Gnocchi pairs well with many side dishes. Here are some ideas: - A fresh garden salad with a light vinaigrette. - Grilled or roasted vegetables like asparagus or bell peppers. - Crusty bread to soak up any extra sauce. - A simple caprese salad with tomatoes and mozzarella. These sides balance the meal and add more flavor. In this post, we explored easy summer gnocchi, focusing on key ingredients like store-bought gnocchi, fresh vegetables, and herbs. I shared step-by-step cooking tips, from boiling gnocchi to sautéing garlic. We discussed how to perfect the texture and avoid common mistakes. Remember, using fresh ingredients makes a big difference. You can also customize the dish with seasonal veggies and spices. Keep these tips in mind, and enjoy your delicious gnocchi. Happy cooking!](https://roastedflavors.com/wp-content/uploads/2025/07/2b9c8c76-2679-40fe-9696-1f1cf54e49e5.webp)
If you crave a quick, fresh meal this summer, you’ll love this Easy Summer Gnocchi recipe. Made with store-bought gnocchi and seasonal veggies like cherry tomatoes and zucchini, it’s packed …
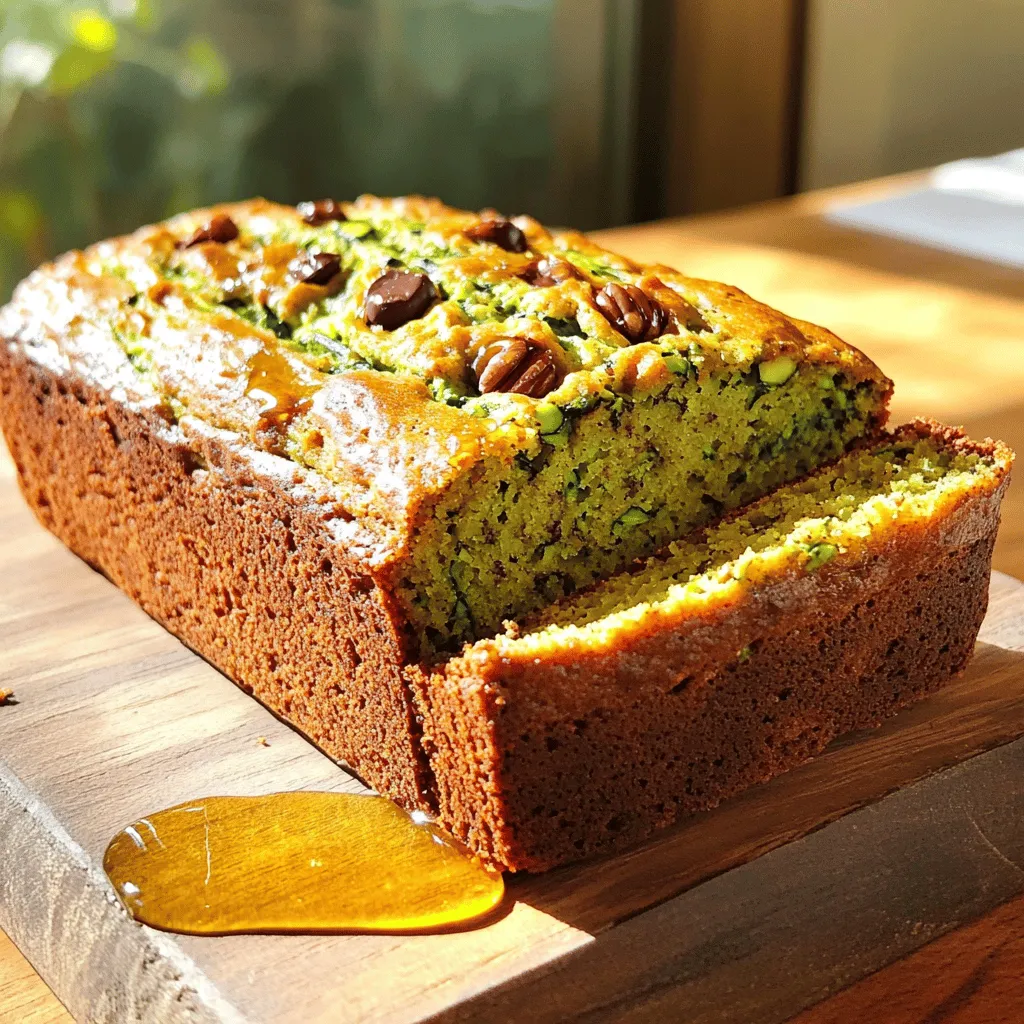
![- Grated zucchini - All-purpose flour - Granulated sugar - Unsweetened cocoa powder - Baking soda and baking powder - Salt - Vegetable oil - Eggs - Vanilla extract - Greek yogurt - Semi-sweet chocolate chips For the best results, use accurate measurements. Here are the amounts you need for each ingredient: - Grated zucchini: 2 cups (about 2 medium zucchinis) - All-purpose flour: 1 ¾ cups - Granulated sugar: 1 cup - Unsweetened cocoa powder: ½ cup - Baking soda: 1 tsp - Baking powder: ½ tsp - Salt: ½ tsp - Vegetable oil: ¾ cup - Eggs: 2 large - Vanilla extract: 2 tsp - Greek yogurt: ½ cup - Semi-sweet chocolate chips: 1 cup (plus extra for topping) To measure dry ingredients, use a dry measuring cup. Spoon the flour gently into the cup and level it off with a knife. For liquids, use a clear measuring cup. Pour until the liquid reaches the right line. This ensures your cake will have the right texture and taste. 1. Preheat the oven: Start by setting your oven to 350°F (175°C). This step helps the cake bake evenly. 2. Grease the sheet pan: Take a 9x13-inch sheet cake pan. Use cooking spray or butter to grease it well. This keeps the cake from sticking. 1. Combine wet ingredients: In a large bowl, mix the grated zucchini, vegetable oil, eggs, vanilla extract, and Greek yogurt. Stir until everything is smooth and well-blended. 2. Incorporate dry ingredients: In another bowl, whisk together the flour, sugar, cocoa powder, baking soda, baking powder, and salt. Make sure these dry ingredients are mixed well to spread the flavors. 3. Add chocolate chips: Slowly add the dry mix to the wet ingredients. Stir gently until just combined. Be careful not to overmix. Then, fold in the chocolate chips, ensuring they are evenly spread throughout the batter. 1. Pouring batter into the pan: Now, pour the batter into your prepared pan. Use a spatula to smooth it out evenly. If you like, sprinkle extra chocolate chips on top for added sweetness. 2. Baking time and doneness check: Place the pan in your preheated oven. Bake for 30-35 minutes. To check if it's done, insert a toothpick in the center. It should come out clean when the cake is baked. For the full recipe, check [Full Recipe]. To get a great texture, avoid overmixing the batter. When you mix, do it just enough to combine the wet and dry ingredients. If you mix too much, your cake can turn out tough. Cooling time is also key. Let the cake cool in the pan for 10-15 minutes. This helps it set and makes slicing easier. If you slice too soon, it may crumble and fall apart. You can boost the cake's flavor by adding spices. Cinnamon or nutmeg can add warmth. A splash of almond extract can give it a nice twist. Using high-quality chocolate makes a big difference. Choose semi-sweet chocolate chips with rich flavor. The better the chocolate, the more delicious your cake will be. Serve your chocolate zucchini sheet cake with toppings. A dollop of whipped cream or a sprinkle of powdered sugar looks nice. You can also add fresh berries for a pop of color. This cake is perfect for any occasion. It works well for birthdays, potlucks, or just a cozy family night. Your guests will love it! For more details, check the Full Recipe. {{image_4}} You can easily make this chocolate zucchini sheet cake fit your diet. - Gluten-free options: Use almond flour or a gluten-free blend instead of all-purpose flour. This keeps the cake moist and tasty. Just make sure your cocoa powder is also gluten-free. - Vegan alternatives: Replace eggs with flax eggs. Mix one tablespoon of ground flaxseed with three tablespoons of water. Let it sit for a few minutes. Use plant-based yogurt instead of Greek yogurt for moisture. There are many ways to change the flavor of your cake. - Adding nuts or dried fruit: Chopped walnuts or pecans add a nice crunch. Dried cherries or raisins give a sweet surprise. Just fold them into the batter with the chocolate chips. - Experimenting with different types of chocolate: Try dark chocolate or white chocolate chips. Each type adds a unique taste. You can also mix chocolates for a fun twist. This cake is versatile and can be adapted for any occasion. - Converting to muffins or cupcakes: Pour the batter into muffin tins instead of a sheet pan. Bake for about 20 minutes. This gives you perfect, portable treats. - Layering cakes for special occasions: Bake two sheet cakes and stack them with frosting in between. This makes an impressive dessert for parties and celebrations. For more details, check the Full Recipe. Store your chocolate zucchini sheet cake at room temperature for up to three days. Place it in an airtight container or cover it tightly with plastic wrap. If it's hot or humid, you may want to refrigerate it. This keeps the cake fresh but might change its texture slightly. To freeze leftovers, first cool the cake completely. Cut it into squares. Wrap each piece in plastic wrap, then place them in a freezer bag. Make sure to remove as much air as possible before sealing. The cake freezes well for up to three months. To thaw, move the cake from the freezer to the fridge for several hours or overnight. If you're in a hurry, you can leave it out at room temperature for about an hour. It's best to enjoy the cake at room temperature for the best taste. The chocolate zucchini sheet cake stays fresh for about three days at room temperature. If stored in the fridge, it can last up to a week. If frozen, it retains its flavor and moisture for three months. Always check for any signs of spoilage before eating. Can I use frozen zucchini? Yes, you can use frozen zucchini. Just thaw it and drain excess water. Frozen zucchini works well in this cake. How do I know when the cake is done? Check the cake at 30 minutes. Insert a toothpick in the center. If it comes out clean, the cake is done. Can I replace granulated sugar with a sugar substitute? Yes, you can use a sugar substitute. Make sure it measures like sugar for the best results. What to do if the batter is too thick? If the batter is too thick, add a splash of milk. This will help smooth it out without losing flavor. How to make the cake more chocolatey? Add more cocoa powder or extra chocolate chips. You can also use dark chocolate for a richer taste. Do I need to peel the zucchini? No, peeling is not needed. The skin adds color and nutrients to the cake. Can I substitute other vegetables for zucchini? Yes, you can use carrots or squash. Both will add moisture and keep the cake soft. This article covered key steps to bake a delicious zucchini chocolate cake. We discussed the best ingredients, measurements, and clear instructions for mixing and baking. Tips and tricks for perfecting flavor and texture can help you enjoy every bite. We explored fun variations and smart storage methods to keep your cake fresh. Remember, experimenting with flavors can lead to your ideal creation. Enjoy baking and sharing this tasty treat any time!](https://roastedflavors.com/wp-content/uploads/2025/07/567d6054-852f-436d-bf8e-a120b664f129.webp)
Looking for a fun way to use that leftover zucchini? My Chocolate Zucchini Sheet Cake is a simple and delicious treat that hides veggies in the sweetest way! With rich …