Fresh Basil Vinaigrette Flavorful and Simple Recipe
![Fresh basil is the star of this vinaigrette. It gives a bright, fresh taste. You need one cup of tightly packed basil leaves. Look for deep green leaves that smell fragrant. Avoid any yellow or wilted leaves. Rinse them well under cold water to remove dirt. Then, dry them gently with a towel. Extra virgin olive oil is key for a rich flavor. You’ll need half a cup for this recipe. The oil adds a smooth texture and balances the acidity of lemon. Choose a high-quality oil for the best results. Look for one with a fruity taste that complements the basil. You'll need some more simple ingredients to bring out the flavor: - 1/4 cup freshly squeezed lemon juice - 2 tablespoons honey or maple syrup (for a vegan option) - 1 teaspoon Dijon mustard - 1 clove garlic, finely minced - Salt and freshly ground black pepper, to taste The lemon juice adds a zesty kick. Honey or maple syrup sweetens the vinaigrette, balancing the tartness. Dijon mustard gives it a touch of creaminess and depth. Garlic adds a nice punch, making the flavor pop. Finally, season with salt and pepper to taste. For the complete recipe, you can check out the Full Recipe. First, rinse your fresh basil leaves under cold running water. This step helps remove dust and dirt. After rinsing, gently pat them dry using a clean paper towel. This keeps the leaves fresh and ready for blending. Now, grab your food processor or high-speed blender. Add the packed basil leaves, fresh lemon juice, honey or maple syrup, Dijon mustard, and the minced garlic clove. These ingredients work together to create a bright and zesty flavor. Pulse the mixture a few times until the basil is finely chopped. Then, while blending, slowly drizzle in the olive oil. This step forms a creamy and smooth vinaigrette. Pause to taste your dressing. Add salt and freshly ground black pepper as you like. Blend briefly again to mix in the seasoning. Now your vinaigrette is ready! For the best taste, chill it in the fridge for at least 30 minutes. Enjoy your fresh basil vinaigrette with salads or grilled veggies. For the full recipe, check the instructions above. To make your fresh basil vinaigrette truly shine, focus on the quality of your ingredients. Use fresh basil, as it brings a vibrant flavor. Look for bright green leaves without any brown spots. For the olive oil, choose high-quality extra virgin. It adds depth and richness. Freshly squeezed lemon juice is key. It gives a bright, zesty kick. If you want a hint of sweetness, try honey or maple syrup. You can also add a pinch of red pepper flakes for an exciting twist. Store your vinaigrette in a clean, airtight jar. This keeps it fresh and prevents strong odors from other foods. It’s best to chill it in the fridge. The flavors will meld beautifully. Just remember to shake or stir before use. The vinaigrette may separate, and that’s normal. Use it within one week for the best taste. You can also freeze small portions. Just pour it into ice cube trays. Once frozen, transfer the cubes to a zip-top bag. This way, you can enjoy it later. This vinaigrette pairs well with many dishes. Drizzle it over a garden salad for a refreshing touch. It’s also fantastic on grilled veggies. Try it on roasted potatoes or as a marinade for chicken. You can even use it as a dip for fresh bread. For a fun twist, add it to pasta salads for a burst of flavor. The options are endless! To see the full recipe, check out the [Full Recipe]. {{image_4}} You can change the sweetener in this vinaigrette to suit your taste. Honey adds a nice touch, but you can also use maple syrup. If you want a low-calorie option, try agave nectar or stevia. Each sweetener gives a different flavor, so feel free to experiment. You might find a new favorite! Fresh basil shines in this recipe, but other herbs work too. Try using cilantro for a fresh twist or parsley for a milder flavor. Mint adds a bright note, perfect for summer salads. Mix and match herbs to create your own unique vinaigrette. Each herb brings its own magic to the dish. If you love creamy dressings, I have a tasty option for you. Add a few tablespoons of Greek yogurt or sour cream to the mix. This will give your vinaigrette a rich texture. Blend it well with the other ingredients for a smooth finish. This creamy twist is great on salads or as a dip for veggies. It makes every bite more delightful! For the complete guide, check out the Full Recipe. After making your Fresh Basil Vinaigrette, store it in a clean jar. Seal it tightly to keep air out. Place the jar in the fridge right away. This helps keep the flavors fresh. Your vinaigrette stays good in the fridge for about 5 to 7 days. Over time, the vibrant flavor of the basil may fade. Always check for any off smells or changes in color before using. If it looks or smells odd, it’s best to toss it. You can freeze this vinaigrette if you want to keep it longer. Pour it into ice cube trays for easy use later. Once frozen, pop the cubes into a freezer bag. This way, you can grab a cube or two whenever you need a burst of flavor. Just remember to thaw it in the fridge before use. You can use dried basil, but fresh gives better flavor. Dried herbs lose some taste over time. If you use dried basil, use one-third the amount. So, for one cup of fresh basil, use one-third cup of dried. The taste will be different, but it can still work in a pinch. You can store Fresh Basil Vinaigrette in the fridge for up to one week. Keep it in a clean jar with a tight lid. The flavors meld together as it sits. Just give it a shake before using. If it separates, that’s normal. This vinaigrette adds a bright taste to many dishes. It works great on salads, especially those with mixed greens. Drizzle it over grilled vegetables for a fresh kick. You can also use it as a marinade for chicken or fish. It’s perfect for summer dishes! For the full recipe, check out the details above. In this post, we explored making a fresh basil vinaigrette. We looked at key ingredients, like fresh basil and olive oil. We covered preparation steps for mixing and blending. Useful tips helped enhance flavor and storage methods. Variations offered sweeteners and herb choices. Remember, fresh ingredients make a big difference. Enjoy your vinaigrette on salads, pasta, and more. It's a simple way to add flavor to your meals. Get creative and have fun in the kitchen!](https://roastedflavors.com/wp-content/uploads/2025/07/a11a5d63-9d24-4557-a242-14106c096858.webp)
If you love vibrant flavors, you’ll adore my Fresh Basil Vinaigrette recipe. It’s quick, easy, and brightens up any dish. With fresh basil and simple ingredients, this vinaigrette adds a …
![- 4 boneless, skinless chicken breasts - 2 tablespoons extra virgin olive oil - Fresh herbs: rosemary and thyme - Seasonings: sea salt and black pepper - 1 tablespoon fresh lemon zest (from about 1 lemon) - 3 tablespoons freshly squeezed lemon juice - 3 cloves garlic, minced (about 1 tablespoon) - 1 tablespoon honey - Fresh herbs - Lemon wedges To make a great grilled chicken, you need a mix of fresh and tasty ingredients. The main items are chicken breasts, olive oil, herbs, and seasonings. These items give the chicken a nice flavor. For the marinade, I use lemon zest, lemon juice, garlic, and honey. This mix adds a zesty and sweet touch that makes the chicken shine. You can also add fresh herbs and lemon wedges as garnishes. They make the dish look beautiful and add extra flavor. If you want to see the full recipe, check out the Zesty Herb-Infused Grilled Chicken. First, gather your ingredients for the marinade. You need olive oil, lemon zest, lemon juice, garlic, rosemary, thyme, honey, sea salt, and black pepper. - Combine all these ingredients in a mixing bowl. - Whisk them together until they blend well. - Next, add the chicken breasts to the bowl. Make sure each piece gets a good coat of the marinade. - Cover the bowl with plastic wrap or a lid. Refrigerate it for at least 30 minutes. For better flavor, marinate for 2-4 hours. Now, let’s get the grill ready. - Preheat your grill to medium-high heat, about 400°F (200°C). - Clean the grill grates with a brush to remove old bits. - Oil the grates lightly to help prevent sticking. Once your grill is ready, it’s time to cook the chicken. - Take the chicken out of the marinade. Let the excess drip off. - Place the chicken breasts on the grill, spacing them apart. - Grill for 6-7 minutes on one side without moving them. This helps create nice grill marks. - Flip the chicken and grill the other side for another 6-7 minutes. - Use a meat thermometer to check the internal temperature. It should reach 165°F (75°C) to be safe to eat. After grilling, let the chicken rest for about 5 minutes. This helps keep it juicy. For the full recipe, you can find more details. Marinating chicken is key to great flavor. I suggest marinating for at least 30 minutes. For even better taste, go for 2-4 hours. This lets the herbs soak in. Feel free to add your favorite herbs, like basil or parsley. Spice it up with a pinch of cayenne or smoked paprika. These choices add more depth to your dish. Flare-ups can ruin your grilling. To avoid them, keep a close eye on the heat. Move the chicken to a cooler part of the grill if flames rise. For that perfect sear, don’t flip the chicken too soon. Let it cook for 6-7 minutes on one side before turning. This helps lock in juices and flavor. Resting is crucial for juicy chicken. After grilling, let the chicken sit for about 5 minutes. This step allows the juices to spread out. If you cut right away, the juices escape. The result is dry meat. Trust me, this small wait makes a big difference in taste. {{image_4}} You can change up the flavor of your grilled chicken with different marinades. Here are a few ideas: - Citrus-based marinades: Use orange or lime juice instead of lemon. These fruits add a sweet and tangy taste. Mix in some zest for extra flavor. - Spicy or sweet options: Add chili powder or cayenne for heat. For a sweet touch, try maple syrup or brown sugar. Both give a nice balance to the chicken. You can grill chicken in different ways. Here are two methods you can try: - Oven-baked grilled chicken: If you don’t have a grill, you can use your oven. Preheat it to 425°F (220°C). Place the marinated chicken on a baking sheet. Bake for about 25-30 minutes. Check that it reaches 165°F (75°C) inside. - Stovetop grilling method: If you want to grill indoors, use a grill pan. Heat the pan over medium-high heat. Add a little oil to prevent sticking. Cook the chicken just like on an outdoor grill. Grilled chicken pairs well with many sides. Here are some ideas to enhance your meal: - Pairing grilled chicken with salads: A fresh salad goes great with grilled chicken. Try mixed greens with a light vinaigrette. Add fruits like berries or mango for a sweet contrast. - Adding sauces and dips for flavor enhancement: Serve the chicken with dips like tzatziki or salsa. These add a nice burst of flavor. You can also drizzle some balsamic glaze over the top for an elegant touch. These variations keep your grilled chicken exciting and tasty. For the full recipe, check out [Full Recipe]. To keep grilled chicken fresh, let it cool first. Place it in an airtight container. Store it in the fridge. Consume it within three to four days. This helps prevent spoilage and maintains flavor. To freeze grilled chicken, wrap each piece tightly in plastic wrap. Then place them in a freezer bag. Remove as much air as possible. This keeps the chicken from getting freezer burn. You can freeze grilled chicken for up to three months. When ready to eat, thaw the chicken overnight in the fridge for best results. Reheating grilled chicken can make it dry. To avoid this, use a microwave with a damp paper towel. You can also use the oven at 350°F (175°C). Heat until it's just warm. Check the middle to ensure it's heated through. Enjoy your flavorful chicken without losing moisture. You should marinate chicken for at least 30 minutes. For the best flavor, aim for 2 to 4 hours. This time allows the marinade to soak into the meat. It helps to make the chicken tasty and moist. You can even marinate overnight for a stronger flavor. Just keep it in the fridge to stay safe. The best internal temperature for grilled chicken is 165°F (75°C). Use a meat thermometer to check this. This temperature ensures the chicken is safe to eat. Undercooked chicken can cause foodborne illness. Always let the chicken rest after grilling. This helps keep the juices in the meat. Yes, you can grill frozen chicken, but it is not ideal. It is better to thaw chicken before grilling. Thawing helps cook the chicken evenly. You can thaw chicken in the fridge overnight or in cold water. If grilling from frozen, cook it longer and check the internal temperature carefully. Grilled chicken is a tasty and simple dish that many enjoy. This guide shared key ingredients, marinade tips, and grilling steps to make it a success. You learned about variations and storage methods to keep the chicken fresh. Remember, a good marinade and resting time make all the difference. Explore new flavors and techniques to elevate your grilling game. With practice, you can create delicious meals that impress every time. Enjoy your grilling adventures and savor every bite!](https://roastedflavors.com/wp-content/uploads/2025/07/d574719a-a5b0-407a-b83d-80b5847442dd.webp)
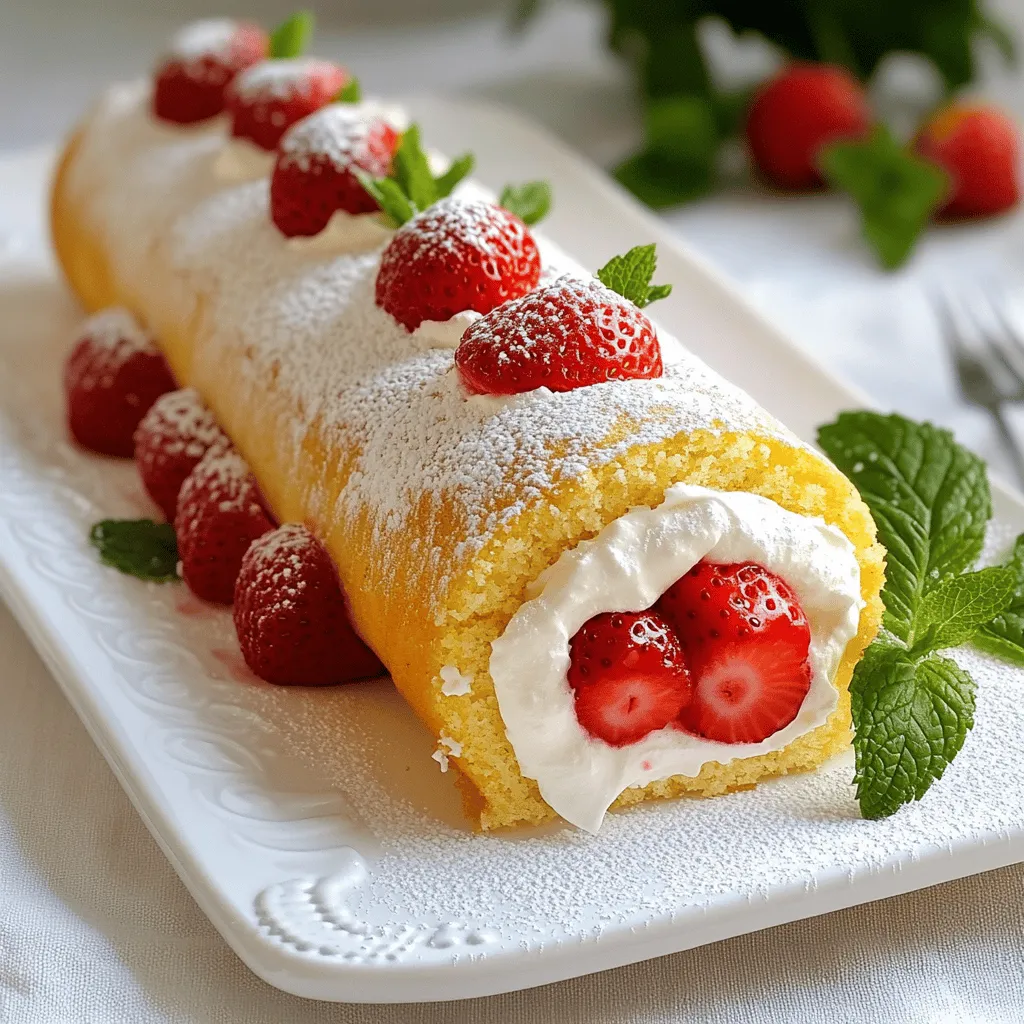
![To make this Frozen Chocolate Strawberry Cake, you will need the following ingredients. - 1 cup chocolate wafer cookies, finely crushed - 4 tablespoons unsalted butter, melted - 2 cups fresh strawberries, hulled and halved - 2 cups heavy cream - 1 cup powdered sugar - 1 teaspoon vanilla extract - 1/2 cup chocolate ganache (store-bought or homemade) - Optional: Fresh mint leaves for garnish The chocolate wafer cookies form a rich base. The butter helps bind the cookies together. Fresh strawberries add flavor and bright color. Heavy cream provides a fluffy texture. Powdered sugar sweetens the cream. Vanilla adds a warm aroma. Chocolate ganache gives a rich finish. Mint leaves can dress up the cake. Each ingredient plays a key role in making this cake a delight. I love how simple it is, yet it tastes fancy! This cake is perfect for parties or just a sweet treat at home. To start, we need to make the crust. In a medium bowl, mix 1 cup of finely crushed chocolate wafer cookies with 4 tablespoons of melted unsalted butter. Stir until the crumbs soak up all the butter. Next, transfer this mixture into a 9-inch springform pan. Press it firmly using a flat-bottomed glass to make a smooth base. Once done, place the pan in the freezer for 15 minutes to set the crust. Now, let’s prepare the filling. In a blender, puree half of the 2 cups of hulled strawberries until smooth. For the other half, chop them into small pieces and set aside. This gives our filling a nice texture. Next, we will whip the cream. In a large bowl, use a hand mixer to whip 2 cups of heavy cream on medium speed. When it starts to thicken, gradually add 1 cup of powdered sugar and 1 teaspoon of vanilla extract. Keep whipping until soft peaks form. This step is key for sweet, flavored cream. With the crust ready and the filling made, it’s time to layer the cake. Take the crust from the freezer. Pour the strawberry filling over it and smooth the top with a spatula. To finish, drizzle 1/2 cup of chocolate ganache over the filling. Use a knife to swirl the ganache into the filling for a marble effect. Cover the cake tightly with plastic wrap and freeze for at least 4 hours, or overnight if you can wait. Before serving, let it sit at room temperature for 10 minutes to make slicing easier. Don't forget to check out the Full Recipe for all details! To make a great crust, use finely crushed chocolate wafer cookies. Mix them well with melted butter to coat every crumb. Press the mixture firmly into the bottom of your springform pan. This helps the crust hold its shape. Don’t skip the freezing step! It helps the crust set and makes it easier to slice later. Whipping the cream is key to a light texture. Start at medium speed until it thickens. Add in the powdered sugar and vanilla gradually. Keep whipping until you see soft peaks. This means the cream is airy and sweet, perfect for blending with strawberries. Avoid over-mixing, as it can turn your cream grainy. When it's time to serve, let the cake sit for about 10 minutes outside the freezer. This makes slicing easier. For a beautiful presentation, garnish with fresh mint leaves and extra strawberries. For clean cuts, dip your knife in hot water first. This will help you get perfect slices every time! {{image_4}} You can add nuts to your cake for a tasty crunch. I love using chopped walnuts or almonds. Just mix in about half a cup of nuts into your strawberry filling. This will give the cake a nice texture and a fun twist. You can also sprinkle some nuts on top for extra flair. If you want a dairy-free cake, you can switch some ingredients. Use coconut cream instead of heavy cream. It gives a nice flavor and texture. For the ganache, choose dairy-free chocolate. This way, everyone can enjoy this delightful treat without dairy. Feel free to play with different fruits! Blueberries, raspberries, or even bananas can work great. Just chop them up and fold them into the filling like you do with strawberries. Each fruit brings its own flavor and makes the cake unique. Try mixing and matching to find your favorite. For a full recipe and detailed steps, check out the [Full Recipe]. After you make the Frozen Chocolate Strawberry Cake, you might have some leftovers. Store any leftover cake in the freezer. Use plastic wrap to cover it tightly. This helps keep it fresh and prevents freezer burn. If you want to keep it longer, put it in an airtight container. It can last up to three months in the freezer. Don’t forget to label it with the date so you know when you made it! If you want to freeze the whole cake, you can do that too! After you finish making it, wrap it in plastic wrap. Then, place it in a freezer-safe container. This keeps the cake safe from frost. When you’re ready to enjoy it later, just follow the thawing tips below. Freezing keeps the flavors fresh and delicious. Thawing is easy! Take the cake out of the freezer and remove the wrap. Let it sit at room temperature for about 10 minutes. This makes it easier to slice. For best taste, don’t rush the thawing. You can also put it in the fridge overnight if you plan to eat it the next day. This helps keep the cake nice and cool without melting it too fast. Enjoy your treat! Yes, you can make this cake a day ahead. It actually tastes better when chilled overnight. This allows the flavors to blend well. Just cover it tightly with plastic wrap and store it in the freezer. If you don’t have chocolate wafer cookies, try using graham crackers or Oreos. Both options work well as a crust. Just crush them finely and mix with melted butter. The cake is ready when it is firm and holds its shape. You can check by gently pressing the top. If it feels solid, it's good to go. Let it sit at room temperature for about 10 minutes before slicing. Yes, you can use frozen strawberries, but thaw them first. Drain any excess liquid to keep the filling from getting too watery. This helps maintain the cake's texture and flavor. You can store the cake in the freezer for up to three months. Just make sure it's well-wrapped to prevent freezer burn. When ready to enjoy, let it thaw in the fridge overnight before serving. You now have all the steps to create a delicious Chocolate Strawberry Cake. We explored ingredients, including chocolate wafer cookies and fresh strawberries. You learned how to prepare, whip, and layer the cake for the best results. I shared tips for the perfect crust and cream texture, plus fun variations. Feel free to store leftovers and know how to freeze or thaw your cake. Enjoy making this treat for any occasion!](https://roastedflavors.com/wp-content/uploads/2025/07/3a1ab1cb-e325-443b-aab6-407179e88c71.webp)
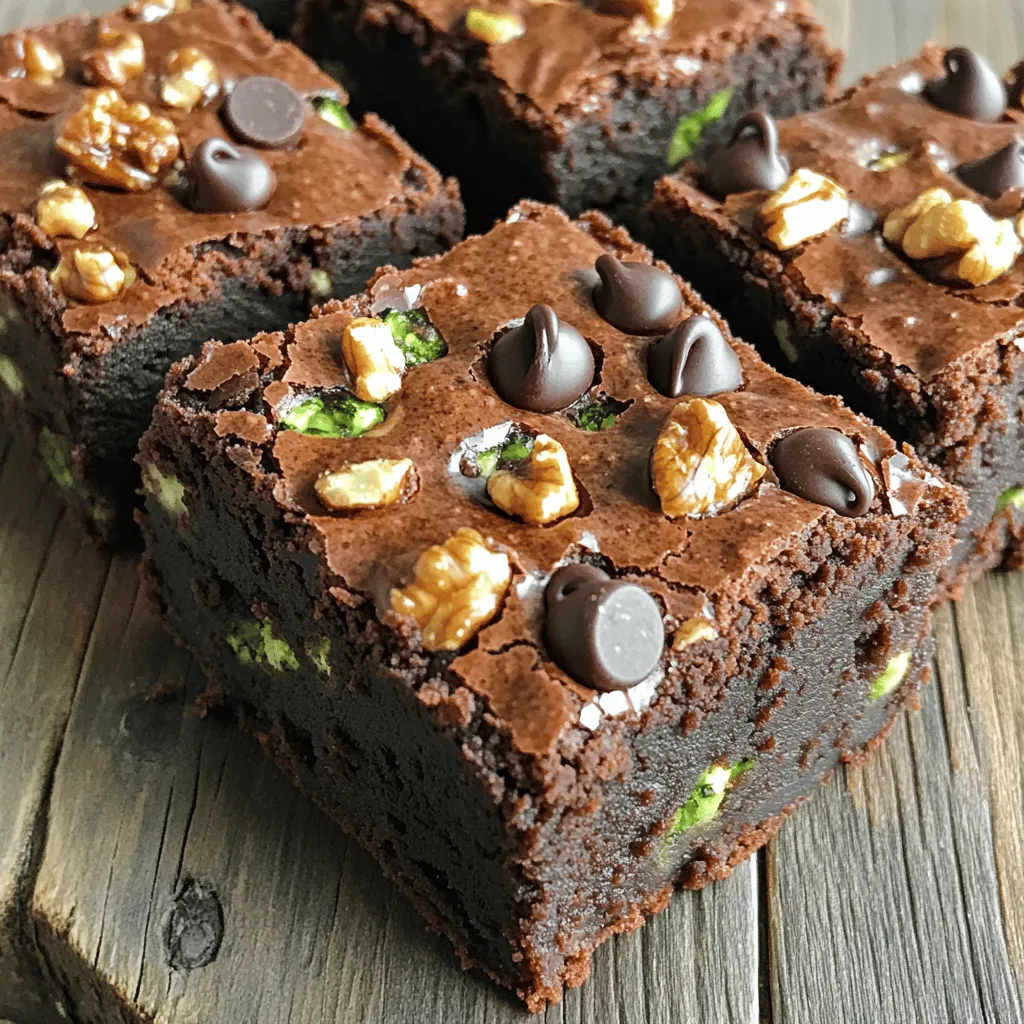
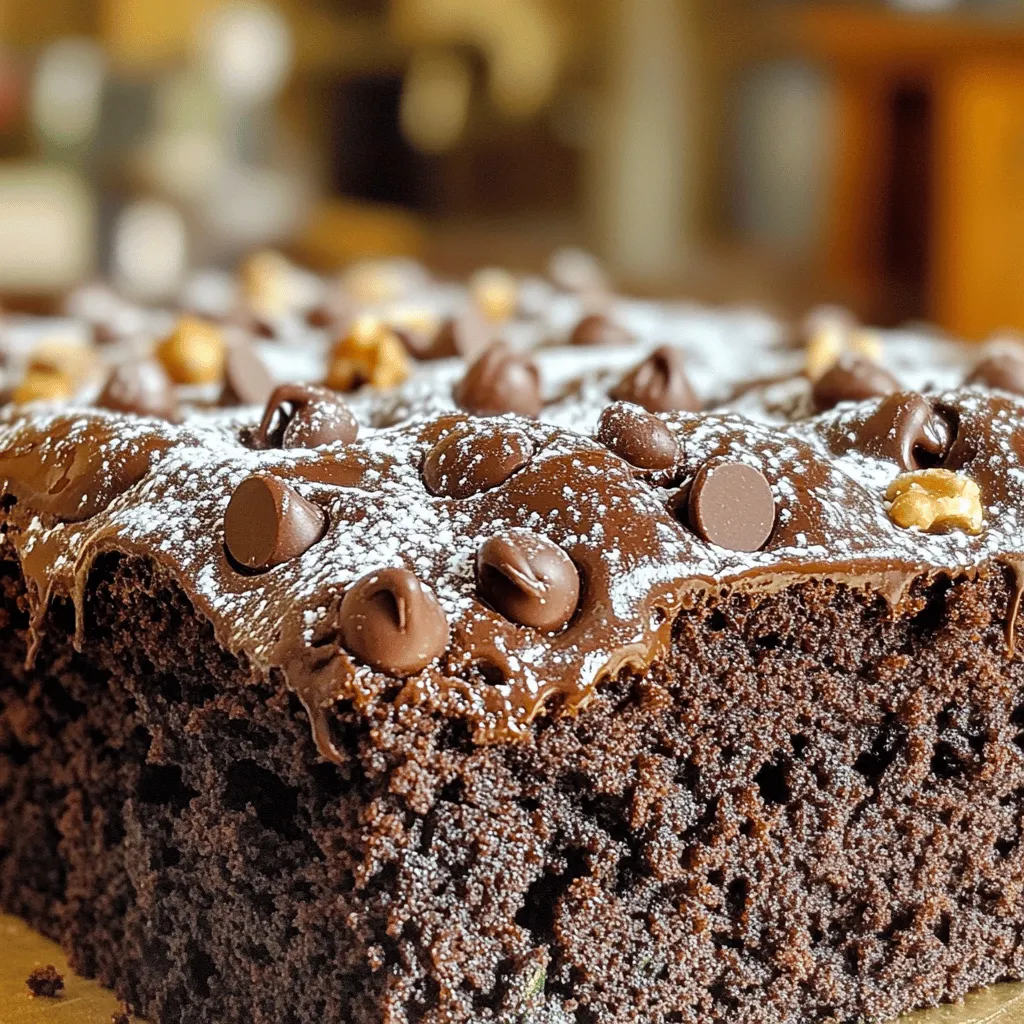
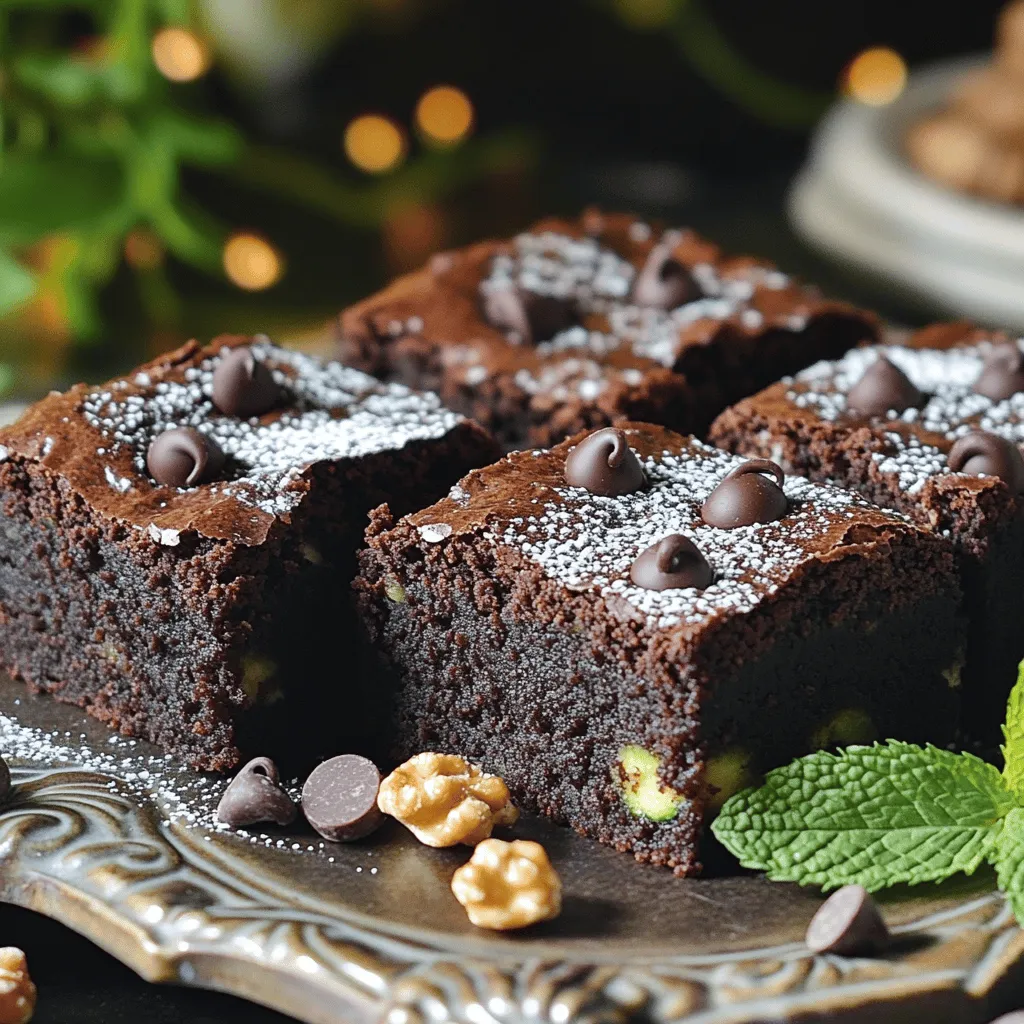
![To make the best chocolate chip cake, you need a few simple ingredients. Here is the list of what you'll need: - 1 ¾ cups all-purpose flour - 1 cup granulated sugar - ½ cup packed brown sugar - ½ cup unsalted butter, softened - 3 large eggs - 1 teaspoon pure vanilla extract - 1 teaspoon baking powder - ½ teaspoon baking soda - ½ teaspoon fine salt - 1 cup buttermilk - 1 cup semi-sweet chocolate chips - ½ cup chopped walnuts (optional) These ingredients create a cake that is rich and full of flavor. The chocolate chips add sweetness, while the walnuts give a nice crunch if you choose to include them. Each item plays a key role in making this cake delicious and moist. I always recommend using fresh ingredients for the best taste. For instance, fresh eggs and real vanilla extract will elevate your cake. Plus, using room temperature butter and buttermilk helps create a smooth batter. This cake is not just a treat; it's an experience. For the complete recipe and detailed instructions, check out the Full Recipe section. Happy baking! First, preheat your oven to 350°F (175°C). Choose your pan size: a 9x13 inch rectangular cake pan works well. You can also use two 9-inch round pans. Grease and flour your pan to help the cake come out easily. In a large bowl, combine ½ cup of softened butter, 1 cup of granulated sugar, and ½ cup of packed brown sugar. Beat these together at a medium speed until the mixture is light and fluffy. This should take about 2-3 minutes. This step adds air to the mixture, helping your cake rise. Next, add 3 large eggs, one at a time. Mix well after each egg to ensure they blend smoothly. After the last egg, stir in 1 teaspoon of pure vanilla extract. This will give your cake a lovely flavor. In a separate bowl, whisk together 1 ¾ cups of all-purpose flour, 1 teaspoon of baking powder, ½ teaspoon of baking soda, and ½ teaspoon of fine salt. Make sure there are no lumps. This mix helps the cake rise and gives it structure. Now, it's time to combine the wet and dry mixes. Gradually add the dry mixture to the wet mixture. Alternate this with 1 cup of buttermilk, starting and ending with the dry mix. Mix just until combined. Be careful not to overmix, as this keeps your cake tender. Gently fold in 1 cup of semi-sweet chocolate chips and ½ cup of chopped walnuts, if you like. Ensure that they are evenly spread throughout the batter. This adds great flavor and texture to your cake. Pour the batter into your prepared pan(s) and smooth the top with a spatula. Place the pan in the oven and bake for 25-30 minutes. To check if it's done, insert a toothpick into the center of the cake. It should come out clean or with a few moist crumbs. Once baked, take the cake out of the oven and let it cool in the pan for about 10 minutes. After that, carefully transfer it to a wire rack to cool completely. Cooling is key before you add any frosting or toppings. Check out the [Full Recipe] for more details! To get a soft and tender cake, I focus on mixing techniques. When you cream the butter and sugars, mix until light and fluffy. This takes about 2-3 minutes. After adding eggs one at a time, it’s crucial to mix gently. When you add the dry ingredients, mix just until combined. Overmixing can make your cake tough. Use a spatula to fold in the chocolate chips. This keeps them evenly spread without overworking the batter. Even baking is key for a great chocolate chip cake. Ensure your oven is preheated to 350°F (175°C) before baking. Use the middle rack for even heat. If you use round pans, check for domed tops. To avoid this, gently tap the pans on the counter before baking. This helps the batter settle. Keep an eye on the cake as it bakes. Use a toothpick to check for doneness; it should come out clean with some crumbs. Serving your chocolate chip cake can be fun! For a beautiful look, dust slices with powdered sugar. This adds elegance. You can also serve a slice with a scoop of vanilla ice cream. A fresh sprig of mint on top makes it pop. For a more festive touch, add colorful sprinkles or chocolate shavings. These small details make your cake even more inviting. For the full recipe, check out the Heavenly Chocolate Chip Delight Cake page! {{image_4}} You can change the taste of your chocolate chip cake by using different types of chocolate. Try dark chocolate chips for a rich flavor. You can also use milk chocolate for a sweeter cake. If you are feeling creative, mix in white chocolate chips. Adding a swirl of peanut butter or caramel can give your cake a twist too. These options let you make a cake that fits your taste. To make a lighter version of the cake, swap some ingredients. Use unsweetened applesauce instead of half the butter. This keeps the cake moist while cutting down on fat. You can also use whole wheat flour in place of all-purpose flour. This adds fiber, making it a healthier choice. For a lower sugar option, reduce sugar by one-third. The cake will still taste great. If you need a gluten-free cake, you can still enjoy this recipe! Replace all-purpose flour with a gluten-free all-purpose blend. Make sure it has xanthan gum for better texture. You can also use almond flour or coconut flour. Just adjust the amount of liquid in the recipe since these flours absorb more moisture. This way, everyone can enjoy a slice of your delicious cake. For the complete recipe, check out the Full Recipe section. To keep your cake fresh, wrap it tightly in plastic wrap. You can also use an airtight container. Store it at room temperature for up to three days. If you want to keep it longer, place it in the fridge. Just remember, the cake might dry out a bit in the fridge. Always let it come back to room temperature before serving. Freezing is a great option if you want to save some cake for later. Slice the cake into pieces. Wrap each piece in plastic wrap, then place them in a freezer bag. This helps keep them safe from freezer burn. The cake can last in the freezer for about three months. When you’re ready to enjoy it, just take a slice out and let it thaw at room temperature. If you prefer, you can quickly warm it in the microwave for about 10-15 seconds. Enjoy your delicious cake anytime! For the full recipe and more details, check the Full Recipe. You can tell when the cake is done by checking a few signs. The top should look golden brown and feel firm to touch. If you insert a toothpick into the center, it should come out clean or have only a few moist crumbs. This means the cake is perfectly baked. If the toothpick has wet batter, give it a few more minutes. Yes, you can use different types of sugar. Granulated sugar gives a sweet base, while brown sugar adds moisture and a rich flavor. Mixing them can create a nice balance. If you want a deeper taste, try using dark brown sugar. Just remember, the type of sugar can change the cake's texture. If you don’t have buttermilk, you can use plain yogurt or sour cream. Mix one cup of yogurt or sour cream with a little water to thin it out. You can also use milk with a splash of vinegar or lemon juice. Let it sit for a few minutes before using. This will mimic the acidity of buttermilk. Yes, you can make this cake in advance. Bake it and let it cool completely. Then wrap it tightly in plastic wrap or foil. Store it at room temperature for a few days or in the fridge for longer freshness. You can also freeze it for up to three months. Just thaw it in the fridge when you’re ready to serve. For the best taste, frost it just before serving. You can find the Full Recipe for more details on preparation. You now know all the steps to create a delicious chocolate chip cake. We covered the key ingredients, preparation, baking tips, and even storage. Remember to mix carefully for the best texture and feel free to try new flavors. If you have leftovers, storing them right keeps them fresh and tasty. Whether you bake this as a treat or special occasion, enjoy the process and the results! Happy baking!](https://roastedflavors.com/wp-content/uploads/2025/07/4d9b76bc-5570-4e35-b24c-47050f1866dd.webp)
![To make Spicy Dilly Garlic Beans, you need fresh and simple ingredients. Here’s what you will need: - 1 lb fresh green beans, trimmed - 3 cloves of garlic, finely minced - 1 tablespoon extra virgin olive oil - 1 teaspoon red pepper flakes - 2 tablespoons fresh dill, finely chopped - 1 tablespoon apple cider vinegar - Sea salt, to taste - 1/4 teaspoon freshly ground black pepper - 1 teaspoon sugar (optional) Each ingredient brings its own flavor to this dish. The fresh green beans add a crisp texture. Garlic adds warmth, while red pepper flakes kick up the heat. Dill gives a fresh note, and apple cider vinegar brings a tangy twist. Sea salt and black pepper enhance all these flavors. You can use sugar to balance the heat, if needed. When selecting green beans, look for vibrant ones. They should feel firm and snap easily. Fresh dill should smell strong and fragrant. These choices will ensure your dish is as tasty as possible. For the full recipe, check the section above. You will enjoy how these simple ingredients come together for a delightful side dish! - Rinse and trim the green beans. This helps remove dirt and makes them neat. - Blanch the green beans for 3-4 minutes. This keeps them bright and slightly tender. - Plunge beans into ice water for quick cooling. This stops the cooking and locks in color. - Heat olive oil and sauté minced garlic in a skillet. This brings out the garlic's rich flavor. - Add red pepper flakes and infuse oil. This step adds a spicy kick to the dish. - Toss blanched green beans in the skillet. Make sure they get coated in the garlic oil. - Add fresh dill and apple cider vinegar. This brings a fresh taste to the beans. - Season and adjust to taste. Add salt, black pepper, and sugar if you want to balance the heat. This easy recipe makes a delightful side dish. You can find the full recipe for Spicy Dilly Garlic Beans in the earlier sections. Enjoy every bite! To make your Spicy Dilly Garlic Beans even better, you can adjust the red pepper flakes. If you love heat, add more. If you prefer a milder taste, use less. You can also experiment with other herbs or spices. Try adding a pinch of smoked paprika or a dash of cumin for a twist. Fresh herbs like basil or parsley can also add a unique flair. Presentation matters! Serve your beans on a vibrant platter to catch the eye. Scatter extra dill on top for an added pop of color. To brighten the dish, include lemon wedges on the side. A squeeze of lemon adds great freshness and lifts the flavors. Using ice water after blanching is key. It helps lock in the beans' bright green color and crisp texture. When you cook garlic, be careful not to burn it. Garlic cooks fast and can turn bitter. Sauté it just until fragrant; about one minute is perfect. These small tips will enhance the overall taste and look of your dish. {{image_4}} You can change up the beans in this dish. Try using yellow wax beans or even chickpeas. Both will bring a new flavor. You can also swap in different veggies. For instance, sliced bell peppers or zucchini work well. They add a nice crunch and color. Vinegar is key for the tangy taste. You can substitute apple cider vinegar with white wine vinegar if you prefer. This swap gives a milder flavor. Another option is rice vinegar, which adds a sweet touch. Each vinegar will give a unique twist. Making this dish vegan is easy. All the ingredients are plant-based, so you’re set. Just skip the sugar if you want a low-sugar option. The beans will still taste great without it. If you need a gluten-free option, you can relax. This recipe is naturally gluten-free. Always check your vinegar for hidden gluten if you buy pre-made. This dish fits many diets while keeping the flavor intact. To keep your Spicy Dilly Garlic Beans fresh, store them in the fridge. Place the beans in an airtight container. This helps prevent moisture loss and keeps them crisp. You can enjoy your beans for up to three days. For best results, let the beans cool completely before sealing them. This practice avoids steam buildup that can cause sogginess. If you have a vacuum sealer, that’s even better! It removes air and keeps the beans vibrant. If you want to keep them longer, freezing is a great option. First, make sure the beans are completely cool. Then, portion them in freezer-safe bags or containers. Remove as much air as possible to avoid freezer burn. To thaw, simply place the frozen beans in the fridge overnight. You can also use the microwave for quick thawing. Heat them gently to avoid overcooking. When reheating on the stove, add a splash of olive oil to bring back their flavor. Enjoy your beans even after freezing! For the full recipe, check out the details provided above. Spicy Dilly Garlic Beans are a vibrant, flavorful side dish. They feature fresh green beans, garlic, and dill. The addition of red pepper flakes gives them a spicy kick. The taste is a mix of fresh, tangy, and savory notes. This dish is crunchy and bright, making it a perfect addition to any meal. Yes, you can prepare these beans ahead of time. Blanch and cool the beans, then store them in the fridge. Keep them in an airtight container for up to three days. When you’re ready to serve, just heat them in a skillet with the garlic and spices. This saves time and allows the flavors to meld. Spicy Dilly Garlic Beans pair well with grilled meats and fish. They also complement hearty grains like quinoa or rice. Serve them alongside roasted chicken or a fresh salad for a balanced meal. Their bright flavor can elevate any dish, making them a versatile side. To adjust the spice, change the amount of red pepper flakes. Start with less if you prefer a milder flavor. You can also add a touch of sugar to balance the heat. For those who love spice, increase the flakes or add sliced jalapeños. This way, you can make the dish just right for your taste. For the full recipe, check the [Full Recipe]. Spicy Dilly Garlic Beans are easy to make and packed with flavor. You learned about the key ingredients, how to prepare them, and tips for enhancing taste and appearance. You can switch ingredients for variety, and my storage tips help keep leftovers fresh. This dish not only shines on its own but pairs well with many meals. Enjoy creating your own version, and don't shy away from making it your own. You’ll impress your guests and family with this delightful side!](https://roastedflavors.com/wp-content/uploads/2025/07/ef6d7567-726f-4d3c-88b9-8c8d1b8da828.webp)