Skip to content
Roasted Flavors
  • Home
  • Appetizers
  • Desserts
  • Salads
  • Breakfast
  • Dinner
  • Privacy Policy
  • Contact
  • About

Chef Remy

Fudgy Red Velvet Brownies Rich and Decadent Delight

July 22, 2025 by Chef Remy
For fudgy red velvet brownies, you need some key ingredients. Here’s what you will use: - 1 cup all-purpose flour - 1/2 cup unsweetened cocoa powder - 1 cup granulated sugar - 1/2 cup brown sugar, packed tightly - 1/2 cup unsalted butter, melted and slightly cooled - 2 large eggs, at room temperature - 1 tablespoon red food coloring - 1 teaspoon pure vanilla extract - 1/2 teaspoon baking powder - 1/4 teaspoon fine sea salt - 1/2 cup semi-sweet chocolate chips (optional, but recommended) These ingredients create a rich and moist brownie that stands out. Using the right measurements is key. If you need to substitute, here are some ideas: - You can use whole wheat flour instead of all-purpose flour for a healthier option. - Maple syrup or honey can replace granulated sugar, but adjust the liquid in the recipe. - If you want a dairy-free option, use coconut oil in place of unsalted butter. - For a vegan twist, use flax eggs instead of regular eggs (1 tablespoon ground flaxseed + 2.5 tablespoons water per egg). These swaps help fit various diets while keeping the flavor intact. Want to take your brownies to the next level? Consider these optional add-ins: - Chopped nuts like walnuts or pecans add a nice crunch. - Swirling in cream cheese can create a lovely contrast. - A sprinkle of sea salt on top enhances the sweetness. - You can add festive sprinkles for a fun touch. These extras can make your fudgy red velvet brownies even more special. For the complete recipe, refer to the Full Recipe section. Start by preheating your oven to 350°F (175°C). This ensures the brownies bake evenly. Next, prepare a 9x9-inch baking pan. Grease it with cooking spray or softened butter. Alternatively, you can line it with parchment paper. This makes removing the brownies easy later. In a large mixing bowl, pour in the melted butter. Add one cup of granulated sugar and half a cup of brown sugar. Whisk these together. Make sure the mixture is smooth and well combined. This step gives your brownies a rich sweetness. Now, crack in two large eggs. Add them one at a time. Mix well after each addition. This helps to keep the batter fluffy. Then, add one tablespoon of red food coloring and one teaspoon of pure vanilla extract. Stir until the mixture turns a bright, inviting red. Take another bowl. Sift together one cup of all-purpose flour, half a cup of cocoa powder, half a teaspoon of baking powder, and a quarter teaspoon of fine sea salt. Sifting mixes the ingredients well and removes lumps. These dry ingredients are key for that fudgy texture. Gradually add the dry mix to the wet ingredients. Use a spatula or wooden spoon to fold them together. Be gentle and do not overmix; this keeps your brownies fudgy. If you love chocolate, now is the time to fold in half a cup of semi-sweet chocolate chips. Pour the rich brownie batter into the prepared pan. Use your spatula to even out the top. Place the pan in the preheated oven. Bake for 25 to 30 minutes. To check if they are done, insert a toothpick into the center. It should come out with a few moist crumbs, not wet batter. To get that rich fudgy texture, you must use the right balance of ingredients. The key is to not overmix the batter. When you combine the wet and dry ingredients, mix just until you see no more flour. Overmixing adds air and can make brownies cake-like instead of fudgy. Another tip is to use melted butter. This gives the brownies a dense and moist feel. If you want extra fudginess, consider adding more chocolate chips. Avoid using cold eggs; they can change the batter's texture. Make sure your eggs are at room temperature before adding them in. Also, do not skip the sifting step for dry ingredients. Sifting helps blend everything smoothly, which affects your final product. Lastly, be cautious with baking time. Every oven is different, so check your brownies a few minutes early. If you pull them out too late, they can dry out. These fudgy red velvet brownies shine when served warm. Try adding a scoop of vanilla ice cream on top for a classic touch. A drizzle of cream cheese frosting also works wonders, enhancing the red velvet flavor. You can pair these brownies with a rich chocolate sauce or fresh berries for a refreshing contrast. For an extra layer of flavor, serve them alongside a cup of coffee or a glass of cold milk. For the full experience, check out the Full Recipe to make these delightful treats. {{image_4}} To make gluten-free fudgy red velvet brownies, swap all-purpose flour for a gluten-free blend. Look for a blend that includes xanthan gum. This gum helps give structure to your brownies. Make sure to check that your cocoa powder and chocolate chips are also gluten-free. The taste remains rich and delicious, just like the original! To create a vegan version of these brownies, replace the eggs with flaxseed meal. Use 1 tablespoon of flaxseed meal mixed with 2.5 tablespoons of water for each egg. Let it sit for about five minutes to thicken. For butter, use coconut oil or a plant-based butter. Choose dark chocolate chips that are dairy-free for a tasty treat. You can add fun flavors to your fudgy red velvet brownies. For a mint twist, add 1 teaspoon of mint extract to the batter. If you love hazelnut, stir in some chopped hazelnuts or hazelnut spread. You can mix in different extracts, too, like almond or orange, for a unique taste. Try these variations to wow your guests! For the complete recipe, refer to the [Full Recipe]. To keep your fudgy red velvet brownies fresh, store them in an airtight container. This container helps lock in moisture and keeps your brownies soft. You can stack them in layers, but place parchment paper between layers to avoid sticking. Keep the container at room temperature for up to three days. If you want to keep them longer, consider freezing. Freezing brownies is simple. First, let them cool completely after baking. Cut them into squares or leave them whole. Wrap each piece in plastic wrap, then place them in a freezer bag. Make sure to remove as much air as possible. These brownies can stay frozen for up to three months. Label the bag with the date for easy tracking. To enjoy your brownies again, thaw them in the fridge overnight. For a warm treat, heat them in the microwave. Place a brownie on a plate and microwave for about 10-15 seconds. If you prefer an oven, preheat it to 350°F (175°C). Warm the brownies for about 5-10 minutes. This method helps keep them soft and fudgy, just like when they were fresh. For the full recipe, check out the details above. Brownies last about 3 to 5 days at room temperature. Store them in an airtight container to keep them fresh. You can also refrigerate them, which can extend their life to a week. If you want to save them longer, freeze them for up to 3 months. Yes, you can use other food colorings. Gel food coloring works well, as it gives a deep color without adding too much liquid. You could also try natural colorings, like beet juice, for a different twist. Just keep in mind that the shade may vary. To check if your brownies are done, insert a toothpick in the center. If it comes out with a few moist crumbs, they are ready. If it has wet batter, bake them a few more minutes. Avoid overbaking to keep them fudgy and soft. Fudgy red velvet brownies pair nicely with vanilla ice cream or whipped cream. You can also dust them with powdered sugar. For a fun touch, try adding fresh raspberries or a drizzle of chocolate sauce. These additions make your dessert even more delightful. For the full recipe, check the section above! You now have a complete guide to making fudgy red velvet brownies. We covered key ingredients, measurements, and fun add-ins for flavor. The step-by-step instructions ensure your brownies are a hit. With tips to avoid common mistakes and variations for gluten-free and vegan options, you can customize your treats. Proper storage keeps leftovers fresh, and the FAQs help clear up any questions. Enjoy baking your brownies, and share them with others for smiles all around!

If you crave a sweet treat that’s rich, fudgy, and unforgettable, you’re in for a delight. These Fudgy Red Velvet Brownies combine a classic dessert with a splash of color …
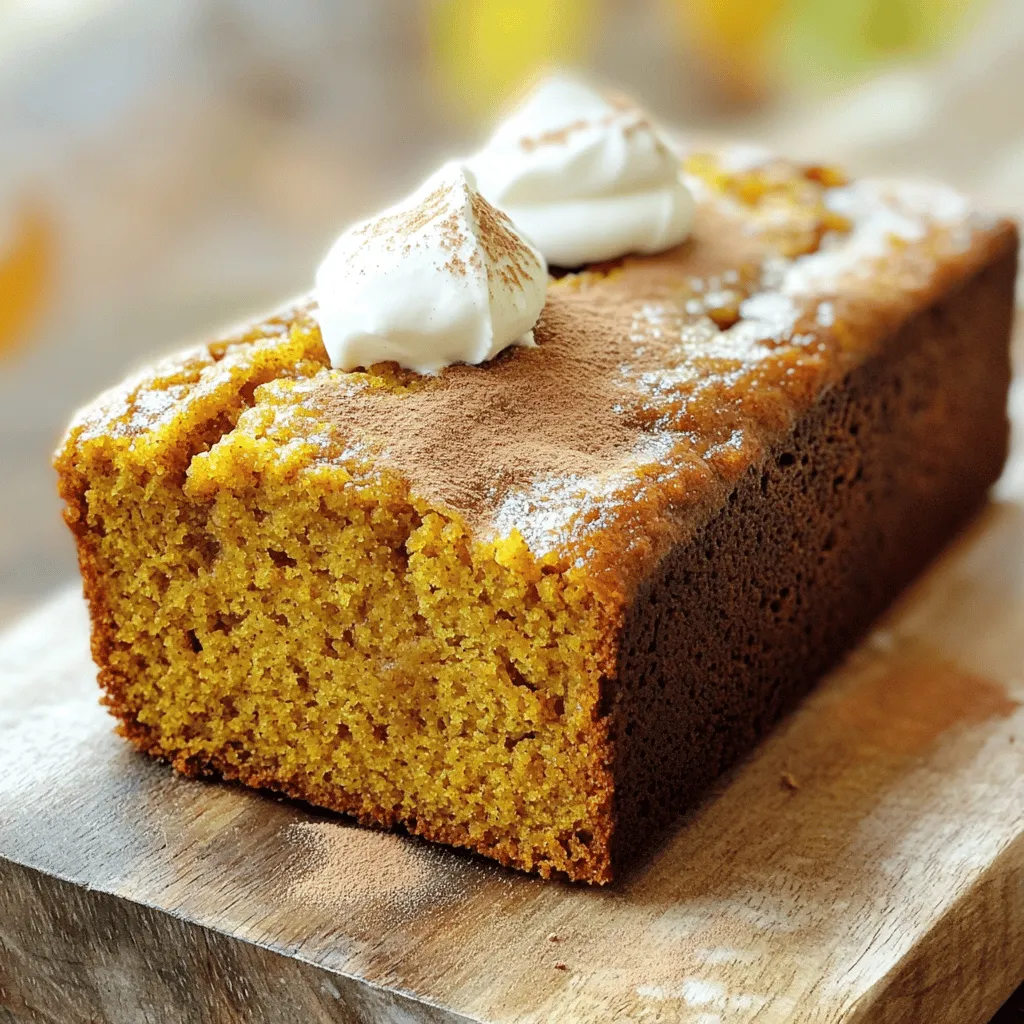
Read more

Categories Desserts

Cinnamon Roll Banana Bread Delicious and Easy Recipe

July 22, 2025 by Chef Remy
To make your delicious cinnamon roll banana bread, gather these key ingredients: - 3 ripe bananas, thoroughly mashed - 1/2 cup unsalted butter, melted and slightly cooled - 3/4 cup granulated sugar - 2 large eggs, at room temperature - 1 teaspoon pure vanilla extract - 1 teaspoon baking soda - 1 1/2 cups all-purpose flour - 1/2 teaspoon fine sea salt - 1 tablespoon ground cinnamon - 1/4 cup packed brown sugar Each ingredient plays a vital role. The ripe bananas add natural sweetness and moisture. Unsalted butter gives a rich flavor, while granulated sugar boosts sweetness. Eggs help bind the mixture and add fluffiness. The vanilla extract adds depth to the flavor. Baking soda acts as a leavening agent, helping the bread rise. Flour provides structure, while fine sea salt enhances all the flavors. Ground cinnamon and brown sugar create that classic cinnamon roll taste, bringing warmth and comfort to each bite. With this blend of ingredients, you are ready to make a delightful treat that everyone will love. For the complete recipe, check out the Full Recipe. - Preheat your oven to 350°F (175°C). - Grease a 9x5-inch loaf pan with cooking spray or butter. - In a large bowl, mash the ripe bananas. - Pour in the melted butter, mixing until smooth. - Add the sugar, eggs, and vanilla. Stir well until no lumps remain. - Sprinkle baking soda and salt into the mixture. - Gently fold in the all-purpose flour until just combined. - In a small bowl, mix brown sugar and ground cinnamon. - Pour half of the batter into the loaf pan and sprinkle half of the cinnamon sugar on top. - Add the remaining batter and sprinkle the rest of the cinnamon sugar. Swirl with a butter knife for a marbled look. - Place the loaf pan in the oven and bake for 50-60 minutes. - Check doneness with a toothpick; it should come out clean. - Let the bread cool in the pan for 10 minutes before moving it to a wire rack to cool completely. For a great twist on this recipe, check out the Full Recipe for more details! To test for doneness, insert a toothpick into the center of the bread. If it comes out clean, your banana bread is ready. If not, bake a little longer. This method is simple and works every time. Adjust your oven temperature if you notice uneven baking. If the top browns too fast, lower the temperature by 25°F. This banana bread pairs great with coffee or tea. The warmth of these drinks enhances the cinnamon flavor. For a lovely presentation, slice the bread and serve it warm. You can drizzle a glaze made of powdered sugar and milk over the top. A sprinkle of cinnamon adds a nice touch. Store leftover banana bread in an airtight container at room temperature. This keeps it fresh for about three days. You can also freeze banana bread for up to three months. Wrap it tightly in plastic wrap and place it in a freezer bag. When ready to enjoy, thaw it overnight in the fridge. {{image_4}} You can make this bread even more fun with add-ins. Here are two great ideas: - Nuts and chocolate chips: Chopped walnuts or pecans add crunch. Dark chocolate chips give a sweet, rich flavor. - Dried fruits: Raisins or dried cranberries can add a fruity twist. They pair well with the banana flavor. You can also change the flavors to fit your taste. Consider these options: - Alternative spices like nutmeg: Nutmeg adds warmth. You can use it with cinnamon for a cozy blend. - Swapping types of sugar: Try brown sugar for a deeper taste. Coconut sugar is a great choice for a healthier option. If you have dietary needs, don't worry. You can still enjoy this bread: - Gluten-free alternatives: Use a gluten-free flour blend. This will keep the texture soft and moist. - Vegan substitutions: Replace eggs with flaxseed meal mixed with water. Use coconut oil instead of butter for a tasty vegan option. Feel free to explore these variations to make this Cinnamon Roll Banana Bread your own! For the complete recipe, check out the [Full Recipe]. You can check if the banana bread is done by using a toothpick. Insert the toothpick into the center of the bread. If it comes out clean, your bread is ready. If it has wet batter on it, bake for a few more minutes. The bread should look golden brown and spring back when you touch it. This simple test helps ensure your banana bread is perfect every time. Yes, you can use frozen bananas for this recipe. Just thaw them completely before use. Once thawed, drain any excess liquid and mash them well. Frozen bananas work great and can even add more flavor. They are often sweeter and softer, making them perfect for banana bread. Absolutely! You can make mini versions of this banana bread. Use mini loaf pans and adjust the baking time. Bake them for about 25-30 minutes. Keep an eye on them, as they may bake faster than a full-sized loaf. Mini loaves are fun to share or freeze for later. Cinnamon Roll Banana Bread combines the best of two worlds: soft banana bread and sweet cinnamon rolls. This recipe is easy to follow and yields a delicious treat. Nutritive Information: - Serving Size: 1 slice - Calories: Approximately 180 - Fat: 7g - Carbohydrates: 26g - Protein: 2g Quick Reference for Ingredients and Instructions: - 3 ripe bananas, thoroughly mashed - 1/2 cup unsalted butter, melted and slightly cooled - 3/4 cup granulated sugar - 2 large eggs, at room temperature - 1 teaspoon pure vanilla extract - 1 teaspoon baking soda - 1 1/2 cups all-purpose flour - 1/2 teaspoon fine sea salt - 1 tablespoon ground cinnamon - 1/4 cup packed brown sugar 1. Preheat your oven to 350°F (175°C). Grease a 9x5-inch loaf pan. 2. In a large bowl, mix the mashed bananas and melted butter until smooth. 3. Add granulated sugar, eggs, and vanilla. Mix well until no lumps remain. 4. Stir in baking soda and salt, then mix in flour gently. 5. Combine brown sugar and cinnamon in a small bowl. 6. Pour half of the batter into the loaf pan and sprinkle half of the cinnamon sugar on top. 7. Add the rest of the batter, then sprinkle the remaining cinnamon sugar on top. Swirl with a knife. 8. Bake for 50-60 minutes. Check with a toothpick to see if it’s done. 9. Cool the bread in the pan for 10 minutes, then transfer to a wire rack to cool completely. This recipe makes about 10 servings. Enjoy a slice warm for a special treat! This post walked you through making delicious banana bread. You started with ripe bananas and other simple ingredients. Then, I showed you how to mix wet and dry components and layer in cinnamon sugar for flavor. You learned tips for baking, serving, and storing, plus fun variations like nuts or gluten-free options. Now, go ahead and try the recipe. You’ll enjoy a tasty treat and feel great about making it!

Are you ready to transform your ripe bananas into a delightful treat? Cinnamon Roll Banana Bread is the perfect mix of soft, sweet banana bread and rich cinnamon swirl. In …

Read more

Categories Desserts

Libby’s Pumpkin Bread Simple and Tasty Recipe

July 22, 2025 by Chef Remy
To make Libby’s Pumpkin Bread, you need simple, fresh ingredients. Here’s what you will gather: - 1 ¾ cups all-purpose flour - 1 teaspoon baking soda - ½ teaspoon baking powder - ½ teaspoon salt - 1 teaspoon ground cinnamon - ½ teaspoon ground nutmeg - ½ teaspoon ground ginger - 1 can (15 oz) Libby’s Pure Pumpkin - 1 cup granulated sugar - ½ cup packed brown sugar - ½ cup vegetable oil - 4 large eggs - 1 teaspoon vanilla extract These ingredients blend together to create a moist, flavorful bread. The Libby’s Pure Pumpkin is the star, giving the bread its rich taste and texture. If you want to add some flair, consider these optional ingredients: - 1 cup chopped nuts (e.g., walnuts or pecans) - 1 cup chocolate chips Adding nuts gives a nice crunch, while chocolate chips add a sweet twist. You can mix and match based on your taste! For those watching their diet, here’s a quick look at the nutrition: - Serving size: 1 slice (about 100g) - Calories: 250 - Total fat: 10g - Saturated fat: 1g - Carbohydrates: 38g - Fiber: 2g - Protein: 4g This bread is a treat, but it also packs some nutrients thanks to the pumpkin. It’s a great way to enjoy a sweet snack without too much guilt! For the full recipe, check out Libby's Delightful Pumpkin Bread . Start by gathering all your items. You need to have everything ready. This makes the process smooth and easy. First, measure out 1 ¾ cups of all-purpose flour, and have the spices ready. You will need baking soda, baking powder, salt, cinnamon, nutmeg, and ginger. Put these in one bowl. In another bowl, get your wet ingredients: one can of Libby’s Pure Pumpkin, granulated sugar, brown sugar, vegetable oil, and eggs. This is a key step to keep things organized. In a large bowl, mix the Libby’s Pure Pumpkin with the sugars and oil. Use a whisk or electric mixer to blend well. You want a smooth mix. Add the eggs one by one, stirring well after each. This helps the mix stay light. Finally, stir in the vanilla extract. The mix should look thick and creamy. In your medium bowl, take the dry mix of flour and spices. Whisk them together until they are well combined. This step adds flavor and helps the bread rise. Now, take the dry mix and add it to the wet mix. Do this slowly. Fold the two together gently with a spatula. Be careful not to overmix, as this can make the bread dense instead of fluffy. You want a light batter that still has some lumps. If you like, now is the time to add in chopped nuts or chocolate chips. These add great texture and taste. Gently fold them into the mix, ensuring they are evenly spread throughout the batter. Pour the batter into your greased loaf pan. Smooth the top with your spatula. Bake in a preheated oven at 350°F for 60-70 minutes. Check the center with a toothpick; it should come out clean. When done, let the bread cool in the pan for about 10 minutes. Then, move it to a wire rack to cool completely. Enjoy the warm, inviting smell as it cools! To make the best pumpkin bread, follow these tips: - Measure Flour Correctly: Spoon flour into your measuring cup and level it off. This helps avoid dense bread. - Room Temperature Eggs: Use eggs at room temp for better mixing. This keeps the batter smooth. - Don’t Overmix: Mix the batter just until combined. Overmixing can make the bread tough. - Watch the Oven: Every oven is different. Check your bread a few minutes early to avoid over-baking. When baking pumpkin bread, keep these common errors in mind: - Skipping the Spice: Don’t forget to add spices like cinnamon and nutmeg. They give flavor. - Not Testing for Doneness: Always use a toothpick to check if your bread is done. It should come out clean. - Using Cold Ingredients: Cold ingredients can lead to uneven mixing. Bring them to room temp first. Serving your pumpkin bread can be fun! Here are some ideas to make it special: - Slice Neatly: Use a sharp knife for clean slices. This makes a nice presentation. - Add Toppings: Sprinkle cinnamon sugar on top or add a dollop of whipped cream. It enhances flavor. - Use a Plate: Serve on a pretty plate or a wooden board. It makes the bread look inviting. For the complete recipe, check out the Full Recipe link. {{image_4}} You can make Libby’s pumpkin bread a bit healthier. Use whole wheat flour instead of all-purpose flour. This swap adds fiber and nutrients. You can also replace granulated sugar with honey or maple syrup. Both sweeteners add a nice flavor and keep the bread moist. For a lighter option, try using applesauce instead of vegetable oil. This change reduces fat and calories. Feel adventurous? Add different spices to your pumpkin bread. Try cardamom or allspice for a unique twist. You can also mix in dried fruits like cranberries or raisins for extra sweetness. For a nutty flavor, use pecans or walnuts instead of the usual chopped nuts. If you love chocolate, add dark chocolate chips or cocoa powder to the batter. These changes make each loaf a new surprise! Pumpkin bread is great for any holiday. For Halloween, add orange zest for a citrusy kick. At Thanksgiving, sprinkle some chopped pecans on top before baking for a festive touch. You can even drizzle a simple glaze made of powdered sugar and milk over the bread after it cools. This small addition creates a beautiful finish that’s perfect for gatherings. Each season can bring new flavors to your table with these fun adaptations. After baking, let your pumpkin bread cool completely. This step is key to keeping it fresh. Once cooled, wrap the bread tightly in plastic wrap. You can also use aluminum foil for added protection. Store it at room temperature for up to three days. If you want to keep it longer, refrigeration is a good choice. However, this can change the texture slightly. If you have extra pumpkin bread, freezing is a great option. Slice the bread before freezing. This makes it easy to grab just what you need. Wrap each slice in plastic wrap, then place them in a freezer bag. Be sure to remove as much air as you can. Label the bag with the date. Frozen pumpkin bread stays fresh for about three months. When you want some, it will still taste yummy! To enjoy your frozen pumpkin bread, take out a slice and unwrap it. Thaw the slice in the fridge overnight. If you are in a hurry, you can use the microwave. Heat it for about 15-20 seconds. Just be careful not to overheat. If you like your bread warm, you can also pop it in a toaster or oven for a few minutes. This makes it taste just baked! For more delightful ideas, check out the Full Recipe. Yes, you can use homemade pumpkin puree. Make sure it’s thick and not too watery. Drain any excess liquid to keep your bread from becoming soggy. Homemade puree can add a fresh taste. Just remember, Libby’s has consistent flavor, so your bread might taste slightly different. To make a gluten-free version, swap the all-purpose flour with a gluten-free blend. Look for a blend that contains xanthan gum. This helps mimic the texture of regular flour. You can also use almond flour or coconut flour, but adjust the liquid since they absorb more moisture. Homemade pumpkin bread lasts about 3 to 4 days at room temperature. Wrap it tightly in plastic wrap or foil to keep it fresh. If you store it in the fridge, it may last up to a week. For longer storage, consider freezing it. Absolutely! You can add raisins, walnuts, or even chocolate chips for a tasty twist. Feel free to experiment with spices too. Try adding cardamom or cloves for a unique flavor. Just keep the total dry ingredients in mind so the bread bakes well. In this blog post, we explored the key ingredients for Libby’s pumpkin bread, from essential to optional for added flavor. I shared step-by-step instructions to guide you through mixing and baking. We discussed tips to ensure your bread turns out perfect and offered variations to spark your creativity. Finally, we covered storage tips to keep your bread fresh. Remember, homemade pumpkin bread brings warmth and joy. Enjoy sharing this treat with family and friends!

Are you ready to bake the most delicious pumpkin bread? Libby’s Pumpkin Bread recipe is simple and full of flavor. In this post, I’ll guide you through each step, from …

Read more

Categories Desserts

Halloween Chocolate Chip Sugar Cookies Irresistible Treat

July 22, 2025 by Chef Remy
- 2 ¾ cups all-purpose flour - 1 cup unsalted butter, softened - 1 cup granulated sugar - ½ cup brown sugar - 1 large egg The base of our cookies starts with flour, butter, and sugars. Flour gives structure, while butter adds rich flavor. Granulated sugar makes them sweet, and brown sugar adds moisture and a hint of caramel taste. The egg helps bind everything together. - 1 cup semi-sweet chocolate chips - ½ cup spooky-themed sprinkles - Optional: Food coloring (orange or black) Chocolate chips give a delicious bite to each cookie. The spooky sprinkles add fun and festivity. If you want to make the cookies extra festive, add a splash of food coloring. This makes the dough even more fun and colorful for Halloween! - 1 tsp baking soda - ½ tsp salt - Parchment paper for baking Baking soda helps the cookies rise and become soft. Salt enhances the flavors and balances the sweetness. Parchment paper ensures easy cleanup and prevents sticking. Using these essentials will help you bake perfect cookies every time. You can find the full recipe at the bottom of the article to make these delightful treats! - Preheat your oven to 350°F (175°C). - Line your baking sheet with parchment paper. First, turning on your oven is crucial. This step ensures your cookies bake evenly. Parchment paper helps cookies come off the sheet easily. It also makes cleanup a breeze. - Whisk together flour, baking soda, and salt. - Cream butter, granulated sugar, and brown sugar. In a medium bowl, whisk the flour, baking soda, and salt. This mix forms the base of our cookies. Then, in a large bowl, beat the softened butter with both sugars. You want it light and fluffy. This process takes about 2-3 minutes. - Incorporate egg and vanilla extract. - Mix in food coloring (optional). - Add dry ingredients to wet ingredients. Next, add the egg and vanilla to the butter-sugar mix. Beat until everything blends well. If you want a spooky touch, add food coloring now. Mix until you see your desired color. Then, gently fold in the dry mix. Be careful not to overmix. This keeps your cookies soft. These steps lead to a delicious dough. Ready to scoop onto the baking sheet? Follow the full recipe for the next steps! To get the best cookies, avoid overmixing. Mix until the dough is just combined. This keeps your cookies soft and chewy. When you add the dry mix to the wet mix, stir gently. If you mix too much, the cookies can become tough. For baking time, I recommend 10 to 12 minutes. Keep an eye on them. You want the edges to be light golden. The centers may look underbaked, but they will set as they cool. Choosing the right chocolate chips is key. I love using semi-sweet chocolate chips. They melt well and give a rich taste. A popular brand is Ghirardelli, but any good quality chips will work. Adding food coloring can make your cookies pop. Use orange or black for a festive look. Just a few drops will create a fun effect. Mix it in with your wet ingredients for even color. When it comes to serving, think fun! Arrange cookies on a spooky platter. You can add extra sprinkles on top or drizzle melted chocolate for flair. For display, place mini pumpkins or ghost figurines around the cookies. This adds to the Halloween spirit. Your friends and family will love the effort and enjoy these tasty treats! {{image_4}} For a gluten-free cookie, swap the all-purpose flour with a gluten-free blend. This works well and keeps the cookies tasty. Look for brands that have xanthan gum to help with the texture. If you want a vegan option, replace the butter with coconut oil or a plant-based butter. You can use a flax egg instead of the large egg. To make a flax egg, mix one tablespoon of ground flaxseed with three tablespoons of water. Let it sit for a few minutes until it thickens. You can change the flavor of your cookies by adding nuts, like walnuts or pecans. These add a nice crunch and taste. You can also use different types of chocolate chips, such as dark or milk chocolate. Flavored extracts can take your cookies to the next level. Try using almond or pumpkin spice for a special twist. Just a few drops can make a big difference. Get creative with spooky shapes! Use cookie cutters to create ghosts, bats, or pumpkins. Kids love helping with this fun part. Decorating with icing can add extra Halloween flair. Use colored icing to make your cookies look festive. Add fun designs like spider webs or faces. This makes your cookies not only tasty but also a treat for the eyes. For the full recipe, check out the details above! To keep your Halloween chocolate chip sugar cookies fresh, store them in an airtight container. This helps maintain their softness and prevents them from drying out. You can use: - Plastic storage containers - Glass jars with lids - Ziplock bags Make sure the cookies are completely cool before packing them. If you stack the cookies, place parchment paper between layers to avoid sticking. Freezing is a great way to enjoy these cookies later. You can freeze both the dough and the baked cookies. To freeze the dough, scoop it into balls and place them on a baking sheet. Freeze until solid, then transfer to a ziplock bag. For baked cookies, let them cool completely before freezing. - Thawing: To thaw dough, leave it in the fridge overnight. For baked cookies, let them sit at room temperature for a few hours. - Reheating: Warm baked cookies in the oven at 350°F for about 5 minutes. At room temperature, your cookies will last for about 5 to 7 days. Keep them stored properly to extend their freshness. Look for these signs of spoilage: - Change in texture (hard or dry) - Off smell - Mold growth Enjoy your treats while they are fresh and tasty! To make chewy cookies, you need to adjust the baking time. Bake them for less time. Check them at 10 minutes. The edges should be lightly golden. The centers can look soft. They will firm up as they cool. You can also lower the temperature to 325°F (163°C). This helps keep them chewy. Yes, you can make these cookies ahead of time. You can prepare the dough and store it. Cover the dough tightly with plastic wrap. This will keep it fresh in the fridge for up to three days. When ready to bake, scoop and place on a baking sheet. You can also freeze the dough. It lasts up to three months in the freezer. Just thaw it in the fridge before baking. If you don’t have spooky sprinkles, don’t worry! You can use regular sprinkles. Colors like orange or purple work well. You can also use chopped nuts, mini candies, or chocolate pieces. These will still make your cookies fun and festive. Get creative with what you have! In this post, we covered making Halloween chocolate chip sugar cookies. We talked about key ingredients, special additions, and baking essentials. I shared step-by-step instructions for perfect cookies. You learned tips for texture, flavor, and fun presentations. We also discussed variations for diets and creative designs. Lastly, I provided storage tips to keep your treats fresh. Enjoy baking these festive cookies. They are sure to bring joy this Halloween season!

Get ready to bake some magic this Halloween! These Halloween Chocolate Chip Sugar Cookies are the perfect blend of sweet and spooky. With simple ingredients and fun decorations, you’ll charm …

Read more

Categories Desserts

Caramel Apple Buttermilk Muffins Simple and Tasty Treat

July 22, 2025 by Chef Remy
- 1 ½ cups all-purpose flour - 1 teaspoon baking powder - ½ teaspoon baking soda - ½ teaspoon salt - 1 teaspoon ground cinnamon - ½ cup unsalted butter, softened to room temperature - ¾ cup brown sugar, firmly packed - 1 large egg - 1 teaspoon pure vanilla extract - ½ cup buttermilk - 1 cup apples, peeled and diced (approximately 2 small apples) - ½ cup caramel sauce (plus additional for drizzling on top) I always use a dry measuring cup for flour. It helps me get the right amount. For sticky items like brown sugar, I pack it firmly into the cup. This ensures I use enough for good flavor. I use a liquid measuring cup for buttermilk. Pour it in until I reach the right line. This helps with accuracy. Feel free to switch the apples. You can try pears or even berries. These fruits add new flavors. For a fun twist, use nuts like walnuts or pecans. They add crunch. If you want a vegan option, try flax eggs and plant-based butter. This keeps the muffins tasty and light. Start by preheating your oven to 350°F (175°C). This step ensures even baking. While the oven warms up, prepare your muffin tin. Line it with paper liners or grease it well with cooking spray. This helps prevent the muffins from sticking. Next, take a medium bowl and whisk together your dry ingredients. Combine 1 ½ cups of all-purpose flour, 1 teaspoon of baking powder, ½ teaspoon of baking soda, ½ teaspoon of salt, and 1 teaspoon of ground cinnamon. Mixing these well ensures a good rise and flavor in the muffins. In a large bowl, cream together ½ cup of softened unsalted butter and ¾ cup of firmly packed brown sugar. Use an electric mixer on medium speed for about 2-3 minutes. You want the mixture to be light and fluffy. This step adds air to the batter, making your muffins tender. Add 1 large egg and 1 teaspoon of pure vanilla extract to your creamed butter and sugar. Mix until everything is smooth and well combined. The egg adds moisture, while the vanilla gives a lovely flavor. Now, gradually add your dry ingredients to the wet mixture. Start with about a third of the flour mix, then add ½ cup of buttermilk. Repeat this until all ingredients are combined. Make sure to start and end with the dry mix. Use a spatula to fold gently. This keeps your muffins soft and fluffy. Carefully fold in 1 cup of peeled and diced apples and ½ cup of caramel sauce. Make sure the apples are evenly spread throughout the batter. Reserve some caramel for later drizzling. Spoon the batter into your muffin cups. Fill each cup about three-quarters full. This gives them room to rise. Place the muffin tin in the oven and bake for 18-20 minutes. Check with a toothpick; it should come out clean. Once baked, take the muffin tin out of the oven. Let it cool for about 5 minutes in the pan. After that, transfer the muffins to a wire rack to cool completely. This helps keep them from getting soggy. Before serving, drizzle the reserved caramel sauce over each muffin. This adds a sweet touch and makes them look great. For more fun, serve them warm on a nice platter. - Measure Accurately: Use a kitchen scale for precise amounts. This helps the muffins rise well. - Room Temperature Ingredients: Make sure your butter and egg are at room temperature. This creates a smoother batter. - Don’t Overmix: Mix just until combined. Overmixing makes muffins dense and tough. - Fill Muffin Cups Correctly: Fill cups about three-quarters full. This gives muffins room to rise. - Use Fresh Apples: Choose firm, crisp apples for the best texture and flavor. Granny Smith and Honeycrisp work great. - Butter: You can use coconut oil if you want a dairy-free option. It adds a unique flavor. - Brown Sugar: Swap for coconut sugar for a healthier option. It will change the taste slightly. - Buttermilk: Mix one cup of milk with one tablespoon of vinegar. Let it sit for five minutes to sour. - Apples: Pears can be a nice twist. They add sweetness and moisture. - Skipping the Cooling Step: Letting muffins cool in the pan can make them soggy. Transfer them to a wire rack right away. - Not Preheating the Oven: Always preheat your oven to ensure even baking. - Ignoring Muffin Size: If you fill too much or too little, muffins may not bake evenly. Stick to the three-quarters rule. - Using Old Ingredients: Make sure your baking powder and baking soda are fresh. Old ingredients can affect rising. Following these tips will help you bake perfect Caramel Apple Buttermilk Muffins every time. Enjoy the process and the delicious results! If you want to see the complete recipe, check out the Full Recipe. {{image_4}} You can change the apples to other fruits. Pears work well, adding a sweet touch. You can also try diced peaches for a summer twist. Berries, like blueberries or raspberries, can give a burst of flavor. Each fruit adds its own charm to the muffins. Just make sure the fruit is ripe and ready to eat. If you want to make these muffins vegan, swap the egg for a flax egg. To do this, mix 1 tablespoon of flaxseed meal with 2.5 tablespoons of water. Let it sit for a few minutes to thicken. Use plant-based butter instead of regular butter. You can also replace buttermilk with almond or soy milk. Add a splash of vinegar to make it sour, similar to buttermilk. This vegan version will still taste great! For a gluten-free option, switch the all-purpose flour for gluten-free flour. Make sure it has a good binding agent, like xanthan gum. Check that your baking powder is gluten-free too. The muffins may be a bit denser, but they will still be soft and tasty. Enjoy these gluten-free caramel apple buttermilk muffins without worry! For the full recipe, check out the details above. To keep your caramel apple buttermilk muffins fresh, store them in an airtight container. This will help lock in moisture and flavor. You can keep them at room temperature for up to three days. For longer freshness, consider refrigerating them. Just make sure to seal them well to avoid drying out. When you want to enjoy a warm muffin, preheat your oven to 350°F (175°C). Place the muffins on a baking sheet and heat them for about 5-10 minutes. You can also use the microwave. Heat each muffin for 15-20 seconds. Just be careful not to overheat, or they may become tough. Freezing muffins is easy! Allow them to cool completely. Then, wrap each muffin in plastic wrap. Place the wrapped muffins in a freezer-safe bag. They will stay good for up to three months. When you're ready to enjoy them, thaw in the fridge overnight or at room temperature for a few hours. Reheat them for warmth and taste. You can find the full recipe for these delicious muffins earlier in the article. You can easily make buttermilk at home. Just add 1 tablespoon of vinegar or lemon juice to 1 cup of milk. Stir the mixture well and let it sit for about 5-10 minutes. This will sour the milk and mimic buttermilk. You can use this homemade buttermilk in your caramel apple buttermilk muffins. Yes, you can use different types of apples. Granny Smith apples add a nice tartness. Honeycrisp apples are sweet and crisp, while Fuji apples are juicy. Each type brings its own flavor and texture. Just make sure to peel and dice the apples before adding them to your muffin batter. If you don’t have caramel sauce, you can make a simple version. Mix brown sugar and butter in a saucepan over medium heat. Stir until the sugar dissolves, then add a splash of cream. Cook until it thickens. You can also use store-bought chocolate sauce or even maple syrup as a tasty alternative. For the best flavor, try to drizzle some sauce on top of each muffin before serving. This blog post covered all you need to bake delicious muffins. We discussed key ingredients, measurement details, and optional ingredients to make your muffins special. The step-by-step instructions guide you from mixing ingredients to baking and drizzling caramel on top. I shared tips to avoid common mistakes and ways to adapt recipes for various diets. With proper storage, your muffins can stay fresh longer. Keep these tips in mind to bake tasty treats anytime. Enjoy your baking journey!

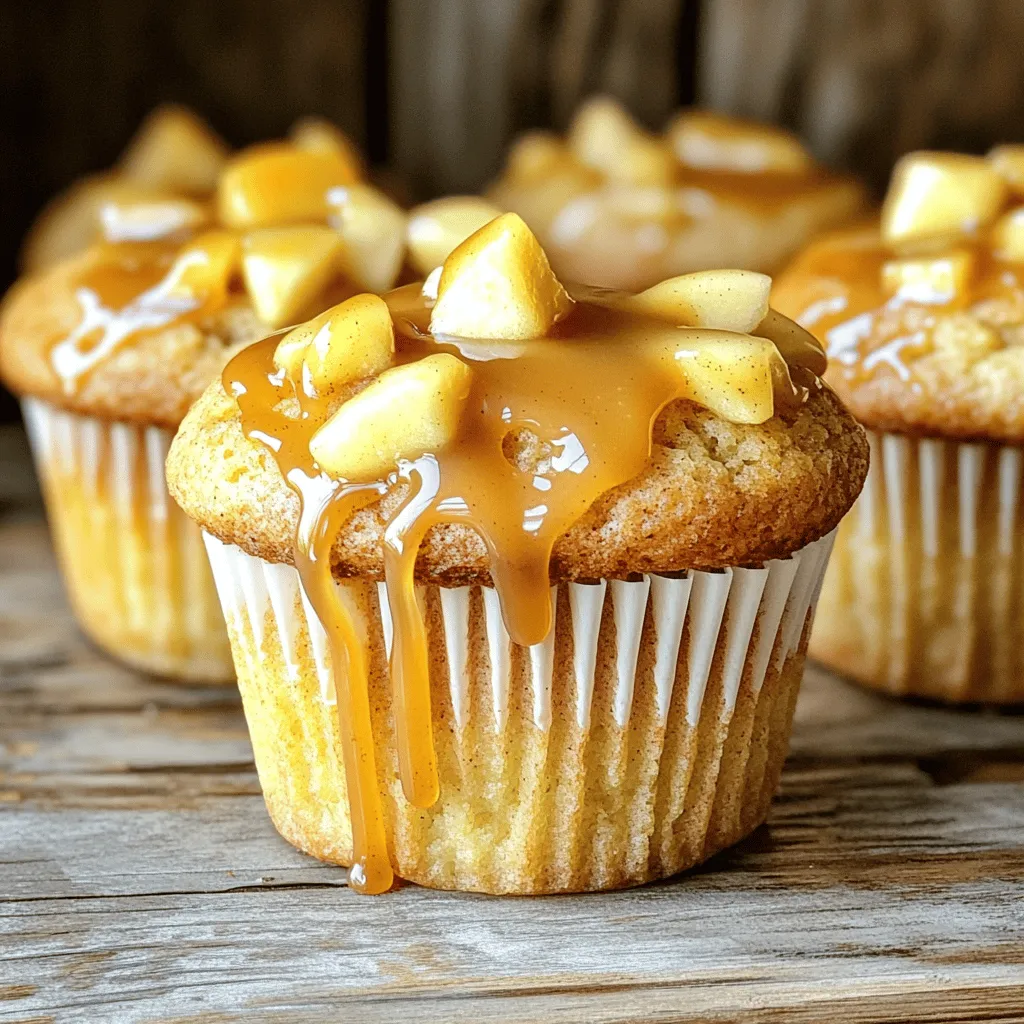
Looking for a quick snack that bursts with flavor? These Caramel Apple Buttermilk Muffins are your answer! They’re soft, sweet, and perfect for any time of day. I’ll guide you …

Read more

Categories Desserts

Pumpkin Brownies Irresistible and Fudgy Treat Recipe

July 21, 2025 by Chef Remy
To make these pumpkin brownies, you'll need: - 1 cup all-purpose flour - 1/2 cup unsweetened cocoa powder - 1 cup granulated sugar - 1/2 cup packed brown sugar - 1/2 cup unsalted butter, melted and slightly cooled - 3 large eggs, at room temperature - 1 teaspoon pure vanilla extract - 1/2 teaspoon baking powder - 1/4 teaspoon fine sea salt - 3/4 cup pumpkin puree (canned or homemade) - 1 teaspoon pumpkin pie spice - 1/2 cup semi-sweet chocolate chips These ingredients combine to create a rich, fudgy texture. The pumpkin puree adds moisture and a lovely flavor, while cocoa powder gives that classic brownie taste. If you want to mix things up, consider adding these: - Chopped walnuts or pecans for a crunchy bite - White chocolate chips for a sweeter twist - A sprinkle of sea salt on top for contrast - A dash of cinnamon or nutmeg for extra warmth These optional ingredients can help you create your unique version of pumpkin brownies. You can tailor the recipe to fit your taste. Each brownie offers a delightful treat. Here’s a basic rundown of the nutrition: - Calories: About 180 per brownie - Total Fat: 8g - Saturated Fat: 4g - Cholesterol: 40mg - Sodium: 60mg - Carbohydrates: 25g - Fiber: 1g - Sugar: 14g - Protein: 2g This information helps you enjoy these brownies in moderation. You can indulge without straying too far from a balanced diet, especially if you share them! For the full recipe, check out the earlier section. First, preheat your oven to 350°F (175°C). Grab an 8x8-inch baking pan. Lightly grease it with butter or cooking spray. Next, line the pan with parchment paper. Leave some parchment hanging over the edges. This helps you lift the brownies out easily later. In a large bowl, combine melted butter, granulated sugar, brown sugar, and vanilla extract. Use a whisk to mix everything until smooth. Now, add the eggs one at a time, mixing well after each. This makes the batter creamy. In another bowl, sift the flour, cocoa powder, baking powder, and salt. Gradually fold this dry mix into the wet ingredients. Use a spatula and mix until just combined. Avoid overmixing to keep the brownies fudgy. Set aside about 1/4 of the brownie batter in a small bowl. You will use this for the pumpkin swirl. Fold semi-sweet chocolate chips into the remaining batter. Stir gently to spread the chips evenly. In the reserved brownie batter, add pumpkin puree and pumpkin pie spice. Mix until smooth. Now, pour the main brownie batter into the prepared pan. Spread it evenly. Spoon dollops of the pumpkin mixture over the brownie batter. Use a knife or toothpick to swirl the pumpkin into the brownie batter. Be careful not to overmix; you want nice swirls. Bake the brownies for 25-30 minutes. Check by inserting a toothpick in the center. It should come out with some moist crumbs. This means they are done but still gooey. Let the brownies cool in the pan for about 10 minutes. Then, lift them out using the parchment overhang and place them on a wire rack. Cool completely before slicing into squares. For the full recipe, refer to the earlier section. When making pumpkin brownies, it's easy to make a few common errors. Here are some to watch out for: - Overmixing the batter: This can make your brownies tough. Mix just until the flour disappears. - Using cold eggs: Cold eggs can affect the texture. Always use eggs at room temperature. - Skipping the parchment paper: This makes it hard to lift brownies from the pan. Use it for easy removal. To get that perfect fudgy texture, follow these tips: - Use more fat: The melted butter adds moisture. Stick with the recipe's butter amount for rich flavor. - Less flour: Too much flour can dry out your brownies. Measure carefully. - Underbake slightly: Remove brownies from the oven when a toothpick shows a few moist crumbs. This keeps them gooey. The right baking time is key to great brownies. Here’s what to remember: - Temperature check: Always preheat your oven to 350°F (175°C). This ensures even baking. - Watch the clock: Bake for 25-30 minutes. Adjust based on your oven's quirks. - Use a toothpick: Check for doneness by inserting a toothpick into the center. If it has moist crumbs, it’s done! By following these tips, you can craft the most delicious pumpkin brownies. For all the details, check the Full Recipe. {{image_4}} You can make vegan pumpkin brownies by swapping a few ingredients. Use flaxseed meal instead of eggs. Combine 1 tablespoon of flaxseed meal with 2.5 tablespoons of water for each egg. Let it sit for about 5 minutes until it thickens. Replace the unsalted butter with coconut oil or a plant-based butter. Use a vegan chocolate option for the chocolate chips. This way, you get a rich, fudgy brownie that everyone will love! For gluten-free pumpkin brownies, it’s easy to adjust the recipe. Simply use a gluten-free all-purpose flour blend instead of regular flour. Make sure it has xanthan gum for the right texture. The rest of the ingredients stay the same. This change ensures your brownies are still delicious and fudgy without gluten. To boost the texture of your pumpkin brownies, add nuts or other mix-ins. Chopped walnuts or pecans add a nice crunch. You can also try adding chocolate chunks for extra richness. Stir in these mix-ins when you fold in the chocolate chips. This small step makes a big difference in taste and texture! For the full recipe, check out the complete guide. After enjoying your brownies, let them cool completely. Cut them into squares. Place the squares in an airtight container. Make sure to layer parchment paper between the layers to keep them from sticking. Store them at room temperature for up to four days. If you want them to last longer, consider freezing. Freezing is a great option if you want to save some brownies for later. First, let them cool completely. Then, wrap each brownie in plastic wrap. After that, place the wrapped brownies in a freezer-safe bag or container. They can stay in the freezer for up to three months. When you're ready to enjoy, just thaw them at room temperature. If you prefer warm brownies, reheating is easy. Preheat your oven to 350°F (175°C). Place the brownies on a baking sheet. Cover them with aluminum foil to keep them moist. Heat for about 10 minutes. You can also reheat them in the microwave. Just warm one brownie for about 15-20 seconds. Enjoy your fudgy pumpkin brownies warm! You can use several substitutes for eggs in pumpkin brownies. Common options include: - Flaxseed meal: Mix 1 tablespoon of flaxseed meal with 2.5 tablespoons of water. Let it sit for a few minutes to thicken. - Applesauce: Use 1/4 cup of unsweetened applesauce for each egg. - Greek yogurt: Replace each egg with 1/4 cup of plain Greek yogurt. - Silken tofu: Blend 1/4 cup of silken tofu until smooth for each egg. These swaps keep the brownies moist and fudgy! Yes, you can use fresh pumpkin instead of canned puree. Here’s how to do it: 1. Choose a sugar pumpkin for the best flavor. 2. Cut it in half and remove the seeds. 3. Roast the halves in the oven at 350°F (175°C) for about 45 minutes or until soft. 4. Scoop out the flesh and puree it in a blender or food processor. This fresh puree adds a lovely taste and texture to your brownies! To check if your pumpkin brownies are done, follow these steps: - Insert a toothpick into the center of the brownies. - If it comes out with a few moist crumbs, they are ready. - If the toothpick comes out clean, the brownies may be overbaked. Keep an eye on them during the last few minutes. The perfect brownie should be gooey and fudgy! For the full recipe, check out the earlier section. You learned about the key ingredients for tasty pumpkin brownies and how to make them. We covered steps for mixing, baking, and creating a pumpkin swirl. I shared common mistakes and tips to make your brownies fudgy. You can even try vegan or gluten-free options for fun. Remember to store leftovers correctly and reheat them for the best flavor. Keep these tips in mind, and enjoy baking these delicious brownies again and again!

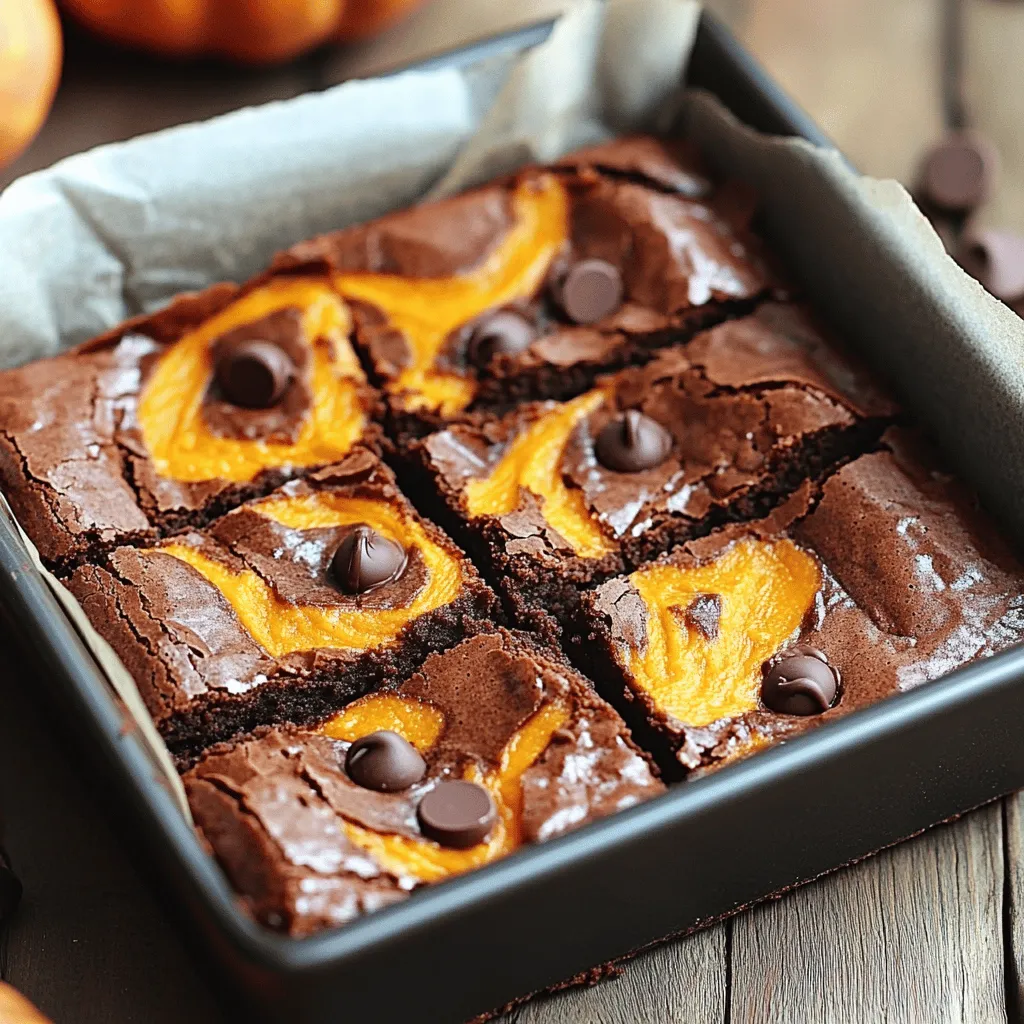
Looking for a fun twist on a classic dessert? You’ve found it! My Pumpkin Brownies recipe is both fudgy and full of seasonal flavor. With just a few simple ingredients, …

Read more

Categories Desserts

Adult Lunchable Bento Box Meal Prep Delight

July 21, 2025 by Chef Remy
- Hummus (store-bought or homemade) - Mixed seasonal vegetables (carrot sticks, cucumber slices, bell pepper strips) - Sliced roasted chicken breast or turkey - Assorted cheese (cubed cheddar, gouda, etc.) - Whole grain crackers - Olives (green or black) - Dried fruit (apricots, apples, cranberries) - Optional: chia seeds When I prepare my Adult Lunchable Bento Box, I focus on fresh and colorful ingredients. I love hummus because it adds creaminess and flavor. You can use store-bought hummus or make your own. Carrot sticks, cucumber, and bell peppers bring crunch and color. For protein, I choose sliced roasted chicken breast or turkey. If you prefer plant-based options, marinated chickpeas work well too. I also add assorted cheese. Cubes of cheddar or gouda are tasty choices. Whole grain crackers give you that satisfying crunch. I often include olives to add a briny touch. A handful of dried fruit, like apricots or cranberries, adds sweetness. If you want an extra crunch, sprinkle chia seeds on your veggies. Each ingredient plays a role in creating a balanced meal. This complete ingredient list gives you everything you need for a fun and tasty bento box. You can find the full recipe in the article. Start by choosing the right bento box. A 3-compartment box works best. It helps keep food separate and fresh. Compartmentalization is key to a great bento box. It allows you to pack various flavors without mixing them. For container sizes, aim for portions of about 1 cup each. This size fits most meal needs and keeps you satisfied. Portion out mixed vegetables first. Use a mix of carrot sticks, cucumber slices, and bell pepper strips. Aim for bright colors to make it visually appealing. Next, arrange your protein in the second compartment. You can use sliced roasted chicken or turkey. If you prefer plant-based options, try marinated chickpeas or edamame. Fill the cheese compartment with your favorite cheese. Cubed cheddar and gouda pair well with the protein. You can choose just one cheese or mix two for variety. For snacks, choose whole grain crackers that you enjoy. These add crunch and balance to your meal. When arranging your bento box, think about how it looks. Place items in an organized way. This makes it more fun to eat. Lastly, add a handful of olives and a small serving of dried fruit. These add flavor and sweetness. If you want more crunch on your veggies, sprinkle chia seeds on top. This adds a nice texture. Follow these steps for a well-rounded Adult Lunchable Bento Box Meal Prep. For a full recipe, check the details above. - Preparing ingredients in advance: Start by washing and cutting your veggies. Doing this saves time. You can even cook your protein in advance. Store each item in separate containers. This way, you can mix and match later. - Storing meals for maximum freshness: Use airtight containers to keep your food fresh. This prevents odors and maintains flavor. Remember to label your containers with dates. This helps you track what’s fresh. - Ideal shelf life for prepared bento boxes: Your bento boxes can last three to five days in the fridge. Check for signs of spoilage like off smells or changes in texture. When in doubt, throw it out. - Color coordination for visual appeal: Use a variety of colors for your ingredients. Bright veggies like red peppers and green cucumbers make your box pop. A colorful presentation makes meals more fun to eat. - Use of mini containers for dips: Mini containers are great for hummus or dressings. They keep flavors separate and fresh. Plus, they add a fun element to your meal. - Creative garnishing options: Consider adding herbs or seeds for a finishing touch. A sprinkle of parsley or sesame seeds enhances the look. This small detail makes your meal feel gourmet. - Nutritional balance in a bento box: Aim for a mix of protein, carbs, and fats. This keeps your energy up and helps you feel full. Include a variety of food groups to cover your nutritional needs. - Portion control guidance: Use your compartments wisely. Fill half your box with veggies, a quarter with protein, and a quarter with carbs. This balance helps manage portion sizes without counting calories. - Suggested food pairings for extra nutrients: Pairing foods can boost nutrition. For example, add nuts for healthy fats. Combine fruits with cheese for protein and fiber. These pairings make your meal more satisfying. {{image_4}} You can easily make a vegetarian bento box. Start by substituting meat with plant-based proteins. Try marinated chickpeas or roasted tofu for protein. These choices are tasty and filling. Adding legumes like lentils or black beans boosts fiber. You’ll enjoy a balanced meal while keeping it meat-free. If you need gluten-free options, look for gluten-free crackers. Many brands offer tasty choices that fit right in. You can also use rice cakes or vegetable chips for crunch. For dairy-free cheese options, check out nut-based cheeses. They melt well and add great flavor to your box. Make your lunch more fun by using seasonal fruits and veggies. In summer, add juicy tomatoes and sweet berries. In fall, think of apples and squash. Adjusting flavors for different times of the year keeps things fresh. You can switch your hummus to a pumpkin spice version in fall. Enjoy the changing seasons in every bite! You can find the full recipe for the Adult Lunchable Bento Box Meal Prep here! Keep your bento boxes in the fridge at 32°F to 40°F. This range helps keep food fresh. Always use airtight containers. They keep moisture in and air out. This way, your meals stay tasty longer. If you want to reheat proteins, do it safely. Use a microwave or stove. Heat chicken or turkey until they reach 165°F. This ensures any germs are gone. Avoid overheating, or food can dry out. Always cover food while reheating. This helps maintain moisture and taste. Some parts of your bento box can be frozen. Hummus, cheese, and olives freeze well. Vegetables might lose their crunch, so freeze them only if needed. When ready to eat, thaw in the fridge overnight. After thawing, check if food is still good. Reheat as needed, and enjoy! You can store your bento box in the fridge for up to four days. After that, food may lose freshness. Always check for any signs of spoilage. If you use ingredients like hummus or cooked meat, aim to eat them sooner for the best flavor. Yes, leftovers work great in your bento box! Use cooked chicken, roasted vegetables, or even pasta. Just remember to cool them down before packing. This helps keep your food safe and tasty. I recommend using three-compartment bento boxes. They keep food separate and fresh. Look for airtight containers that are easy to seal. This helps prevent leaks and keeps your meals fresh longer. To make your bento box portable, choose stackable containers. Use a lunch bag with an ice pack to keep items cool. Also, consider adding mini containers for dips to avoid spills. This way, you can enjoy your meal on the go without a mess. Absolutely! Swap out whole grain crackers for slices of cucumber or bell pepper. You can also increase the protein by adding more cheese or nuts. This keeps your meal tasty and filling while lowering carbs. For the full recipe, check out Adult Lunchable Bento Box Meal Prep. This bento box guide helps you create tasty, balanced meals easily. We covered ingredient choices, container tips, and fun variations. You now have great strategies for meal prep and storage. Remember to mix flavors and colors for visual appeal. Don't be afraid to try new foods or adapt recipes to fit your needs. Enjoy your healthy lunches and feel good about what you eat. Happy bento-making!

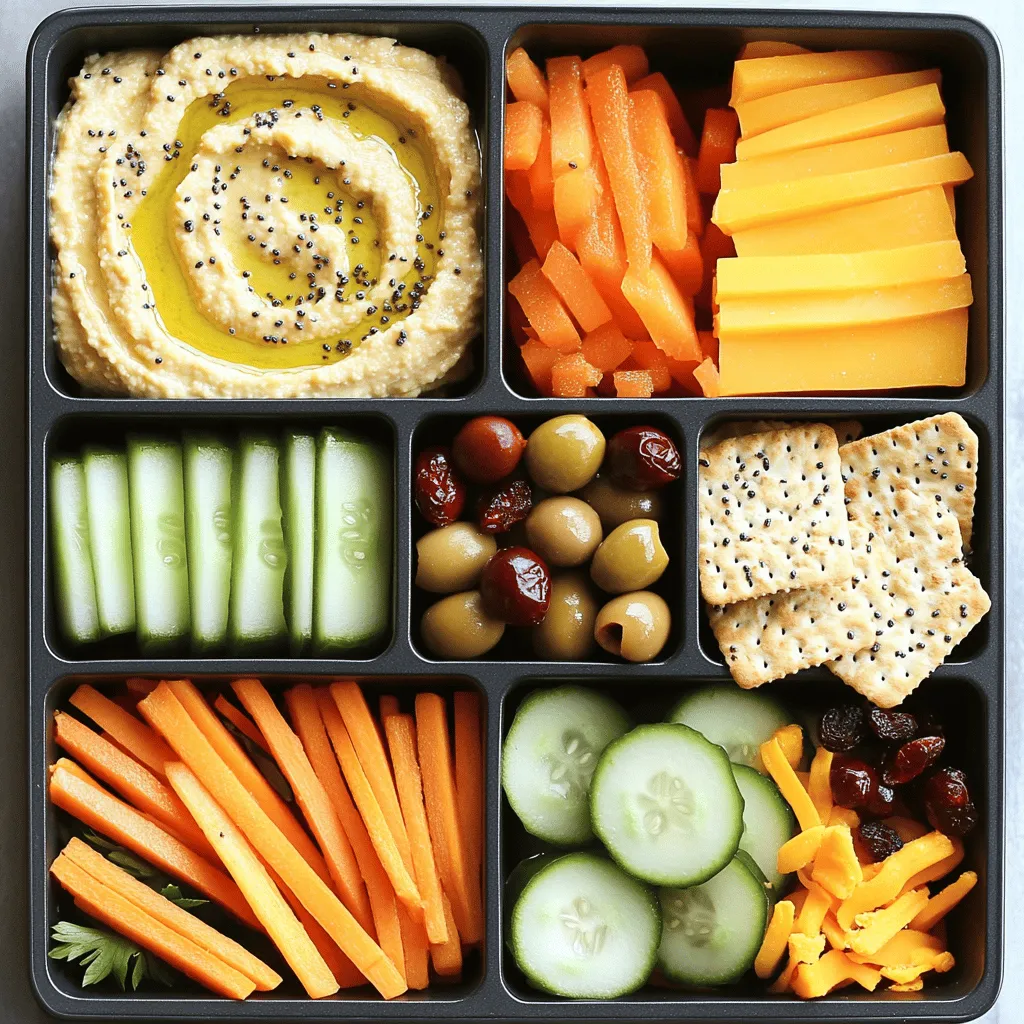
Are you tired of boring lunches? Get ready to elevate your meal prep game with my Adult Lunchable Bento Box Meal Prep Delight! This fun and nutritious twist on a …

Read more

Categories Appetizers

Simple Apple Arugula Salad Recipe Fresh and Flavorful

July 21, 2025 by Chef Remy
- 4 cups arugula - 1 large apple (Granny Smith or Honeycrisp) - 1/2 cup walnuts - 1/4 cup crumbled feta cheese (optional) - 1/4 cup dried cranberries - Salt and freshly cracked black pepper to taste - 3 tablespoons extra virgin olive oil - 2 tablespoons apple cider vinegar - 1 teaspoon honey To create this simple apple arugula salad, start with fresh produce. I love using arugula. It has a peppery taste that pairs well with sweet apples. I often choose Granny Smith for a tart kick or Honeycrisp for sweetness. Next, I add nuts for crunch. Walnuts add a nice earthy flavor. Feta cheese is optional but provides a creamy touch. Then, I consider dried ingredients. Dried cranberries bring sweetness and color. I finish with salt and fresh black pepper to balance all the flavors. For the dressing, I use extra virgin olive oil. It adds richness. Apple cider vinegar gives the salad a tangy bite. A bit of honey adds sweetness, making it perfect. Every bite of this salad is fresh and flavorful. You can find the full recipe below for detailed steps to make this delightful dish. - Step 1: Combine arugula and apple slices. In a large bowl, add 4 cups of fresh arugula. Then, add 1 large, thinly sliced apple. I love using Granny Smith for a nice tartness. Toss them gently to mix. - Step 2: Add walnuts, feta cheese, and cranberries. Next, fold in 1/2 cup of roughly chopped walnuts, 1/4 cup of optional crumbled feta cheese, and 1/4 cup of dried cranberries. This mix adds great flavor and crunch. - Step 3: Whisk together dressing ingredients. In a small bowl, combine 3 tablespoons of extra virgin olive oil, 2 tablespoons of apple cider vinegar, and 1 teaspoon of honey. Add a pinch of salt and pepper too. - Step 4: Emulsify until well mixed. Whisk the dressing vigorously. You want it to blend into a smooth, thick mix. This will coat the salad nicely. - Step 5: Drizzle dressing over salad mixture. Pour the dressing over the salad. Make sure you cover everything well for the best taste. - Step 6: Toss gently to coat. Use your hands to toss the salad. Be gentle so you don’t bruise the arugula or break the apple slices. - Step 7: Taste and adjust seasoning. Take a bite of your salad. If it needs more flavor, add a bit more salt and pepper to taste. - Step 8: Serve on chilled plates. Serve the salad right away on chilled plates. This keeps it fresh and crisp. Enjoy this fresh and flavorful dish! For the full recipe, check out the earlier section. - Use fresh, quality ingredients for the best taste. Fresh arugula and crisp apples shine in this dish. - Adjust vinegar and honey for personal preference. If you like it tangy, add more vinegar. For sweetness, increase the honey. - Serve in shallow bowls for elegance. A beautiful presentation makes the salad more inviting. - Garnish with whole walnuts and feta. This adds a nice touch and makes your salad look fancy. - Prepare ingredients in advance for quick assembly. Wash and slice your apples and arugula ahead of time. - Store dressing separately until serving. This keeps the salad fresh and prevents sogginess. For the full recipe, check out the recipe section. Enjoy making your Simple Apple Arugula Salad! {{image_4}} You can make this salad heartier by adding protein. Grilled chicken or shrimp works great. Just slice the protein and place it on top. This adds flavor and makes the salad filling. If you want to change the taste, swap the apple for pear. Other seasonal fruits like peaches or berries also taste great. This gives you different flavors and keeps the salad fresh. You can make this salad friendly for all diets. Use vegan feta for a dairy-free option. This keeps the creaminess without any dairy. If you need a nut-free option, substitute nuts with seeds. Pumpkin or sunflower seeds add crunch and taste, too. To keep your apple arugula salad fresh, store the salad and dressing separately. This helps keep the arugula crisp and the apples fresh. If you mix them together, the salad can become soggy. Use a container with a lid for the salad and a small jar for the dressing. You can store the salad in an airtight container in the fridge for up to three days. After that, the taste and texture may change. Make sure to check for any signs of spoilage before you eat it. Salad is best when it is fresh. Avoid reheating it, as that can make the greens wilt and lose their crunch. Enjoy it cold for the best taste! If you're looking for a fresh experience, you can always make a new batch using the [Full Recipe]. Yes, you can use balsamic or red wine vinegar instead. They add a nice flavor. Experiment with what you have at home. Both options work well in this salad. To make the salad vegan, just leave out the feta cheese. You can also use a plant-based dressing. This way, you keep all the great flavors without animal products. This salad pairs well with grilled meats. You can also serve it with crusty bread. Both options make for a tasty and balanced meal. To make the salad heartier, add grains like quinoa or farro. These grains give extra texture and nutrients. You can cook them ahead of time and mix them in for a satisfying meal. For the full recipe, check out the [Full Recipe]. This blog post walks you through a simple, tasty salad recipe. You learned what ingredients to use, from fresh arugula to walnuts and apple slices. I shared easy steps for preparation and tips to enhance flavors. You can try variations to suit your taste or dietary needs. Finally, proper storage can keep leftovers fresh. Enjoy this salad as a healthy side or light meal. It’s a great way to add nutrients and flavor to your diet. Happy cooking!

Are you ready to elevate your salad game? My Simple Apple Arugula Salad Recipe is fresh, vibrant, and incredibly easy to make. With just a handful of ingredients, you’ll enjoy …

Read more

Categories Salads

Pumpkin Cinnamon Rolls with Coffee Maple Frosting Delight

July 21, 2025 by Chef Remy
- 2 cups all-purpose flour - 1/4 cup granulated sugar - 1 teaspoon active dry yeast - 1/2 teaspoon baking soda - 1/2 teaspoon baking powder - 1/2 teaspoon salt - 1/2 teaspoon ground cinnamon - 1/4 teaspoon ground nutmeg - 1 cup canned pumpkin puree - 1/4 cup warm milk - 1/2 teaspoon vanilla extract - 1/4 cup unsalted butter, melted - 1/2 cup brown sugar - 1 tablespoon ground cinnamon - 1 cup powdered sugar - 2 tablespoons brewed coffee (cooled) - 1 tablespoon maple syrup - 1 tablespoon unsalted butter, softened When I make pumpkin cinnamon rolls, I start with the dry ingredients. You need flour, granulated sugar, yeast, baking soda, baking powder, salt, cinnamon, and nutmeg. These spices bring warmth and flavor. Next, I grab the wet ingredients. Canned pumpkin puree is key here. It keeps the rolls moist. I mix that with warm milk, vanilla extract, and melted butter. This blend gives the dough a rich taste. For the filling, I whip up brown sugar and cinnamon. This sweet mixture adds a lovely surprise inside the rolls. Now, we can't forget the frosting! I combine powdered sugar, brewed coffee, maple syrup, and softened butter. This creamy topping adds a nice sweetness that pairs perfectly with the rolls. By using the Full Recipe, you’ll have everything needed to create this delicious treat. - Combine warm milk, granulated sugar, and yeast. - Let it rest until frothy. To start, pour warm milk into a medium bowl. Add granulated sugar and yeast. Stir gently. Now, let this mixture sit for about 5 to 7 minutes. You want it to look frothy. This means the yeast is active and ready to help your rolls rise. - Mix dry ingredients in a large bowl. - Add wet ingredients and combine. In a large mixing bowl, whisk together the flour, baking soda, baking powder, salt, ground cinnamon, and nutmeg. This blend gives the rolls their warm, cozy flavor. Next, add the yeast mixture, canned pumpkin puree, vanilla extract, and melted butter. Mix until everything is well combined. You need a soft dough that sticks together but isn’t too sticky. - Knead the dough until smooth. - Let the dough rise in a warm area. Transfer the dough to a floured surface. Knead the dough for about 5 minutes. It should feel smooth and elastic when done. Next, place the dough in a greased bowl. Cover it with a kitchen cloth. Let it rise in a warm spot for about 1 hour. The dough should double in size. - Roll out the dough, add filling, and cut into slices. - Place slices in a greased baking dish. Once the dough has risen, punch it down to release the air. Roll it out into a rectangle, about 12x18 inches. In a small bowl, mix brown sugar and cinnamon. Spread this mixture evenly over the dough. Starting at one long side, roll the dough tightly into a log. Slice the log into 12 equal pieces. Place these slices cut-side up in a greased baking dish. - Let rolls rise for another 30 minutes. - Bake at 350°F (175°C) for 20-25 minutes. Cover the rolls with a cloth again. Let them rise for another 30 minutes. This second rise makes them fluffy. Preheat your oven to 350°F (175°C). Bake the rolls for 20 to 25 minutes. They should be golden brown when done. - Whisk frosting ingredients until smooth. - Drizzle over warm rolls. While the rolls bake, mix the frosting. In a bowl, whisk together softened butter, powdered sugar, cooled coffee, and maple syrup. Blend until smooth and creamy. If the frosting seems too thick, add a bit more coffee. When your rolls are out of the oven, let them cool for a bit. Then, drizzle the Coffee Maple Frosting generously over the warm rolls. For the full recipe, check out the complete instructions above! To make soft and fluffy rolls, knead the dough well. Aim for about five minutes. You want it smooth and elastic. If your dough feels sticky, add a little flour. Start with a tablespoon at a time. Keep kneading until it feels right. It should not stick to your hands anymore. Want to jazz up your rolls? Try adding spices like ginger or allspice. These add warmth and depth. You can also add chopped nuts or dried fruit for a fun twist. For drink pairings, these rolls go great with coffee or herbal tea. The flavors blend perfectly for a cozy treat. Serve your rolls on a beautiful wooden board. Drizzle the Coffee Maple Frosting on top. To make it look extra special, sprinkle a little cinnamon over the rolls. Add some toasted pumpkin seeds for crunch and color. This simple touch makes your dish pop! Check out the Full Recipe for more details. {{image_4}} You can switch up the frosting for your rolls. Cream cheese frosting adds a rich, tangy taste. Mix softened cream cheese with powdered sugar and a splash of vanilla. This change makes your rolls creamy and delicious. Another option is a maple butter glaze. Just combine melted butter, maple syrup, and powdered sugar. This glaze gives a sweet, buttery touch that pairs well with pumpkin. If you need gluten-free rolls, swap all-purpose flour for a gluten-free blend. Look for one that works well for baking. This keeps the texture light and fluffy. For a vegan version, replace butter with coconut oil or vegan butter. Use a plant-based milk in place of regular milk. You can also make the frosting with vegan butter. It still tastes great without dairy. Try adding cranberries for a tart bite. Just fold in a cup of fresh or dried cranberries into the dough. They add a splash of color and flavor. Pecans also make a lovely addition. Chop them and sprinkle them in the filling for a nice crunch. For a fresh twist, add a dash of orange zest to the dough. This brightens up the flavor and gives a hint of citrus. For the complete recipe, check out the Full Recipe linked above. To keep your pumpkin cinnamon rolls fresh, store them in an airtight container. You can place them in the fridge for up to five days. If you want to save them for a longer time, freeze the rolls. First, let them cool completely. Wrap each roll tightly in plastic wrap, then place them in a freezer bag. They can last in the freezer for about three months. When you're ready to enjoy your rolls, preheat your oven to 350°F (175°C). Place the rolls on a baking sheet and cover them with foil. Heat for about 10-15 minutes. This method helps keep the rolls soft. You can also use the microwave if you're in a hurry. Heat them for about 15-20 seconds. Be careful not to overheat, or they may become tough. When stored properly, pumpkin cinnamon rolls can stay fresh for five days in the fridge. In the freezer, they remain good for about three months. Always check for signs of spoilage before eating. If you see any mold, or if the rolls smell off, it's best to toss them out. Enjoy your sweet treats while they’re fresh for the best flavor! Yes, you can use fresh pumpkin. Fresh pumpkin has a different texture than canned. Canned pumpkin is smoother and more consistent. Fresh pumpkin can be watery. You should cook and strain fresh pumpkin to remove excess moisture. This helps get the right dough consistency. Look for a golden brown color on top. The rolls should feel firm but soft to the touch. You can also insert a toothpick into the center. If it comes out clean, your rolls are done. The smell of warm spices will fill your kitchen, too! Yes, you can prepare the dough ahead of time. Mix the dough and let it rise. After the first rise, cover it and place it in the fridge. It can stay there overnight. When ready, let it warm up and shape it. Definitely! You can prepare them the night before. Form the rolls and place them in your baking dish. Cover and refrigerate them. In the morning, let them rise for about 30 minutes before baking. You’ll enjoy fresh rolls with less morning fuss. You can easily adjust the sweetness. If you want it less sweet, use less powdered sugar. If you love sweet flavors, add more sugar. Taste as you mix. You can also try adding more maple syrup for a different taste. These pumpkin rolls are simple and fun to make. We covered the key ingredients, step-by-step instructions, and helpful tips throughout the process. You learned about variations, storage options, and answers to common questions. Now, with this knowledge, you can create delicious pumpkin rolls. Enjoy the warm smell filling your kitchen. Share them with friends and family for a delightful treat that will impress everyone. Happy baking!

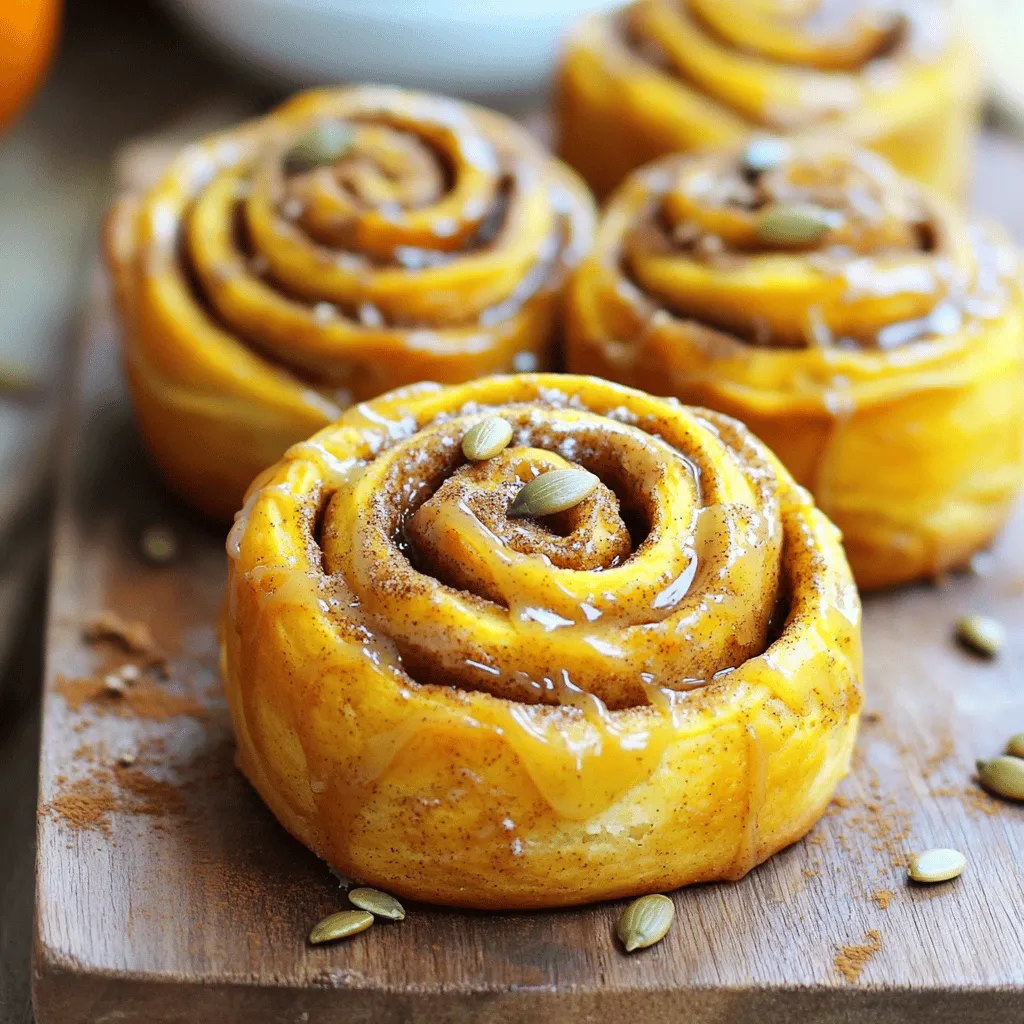
Craving a warm, cozy treat? These Pumpkin Cinnamon Rolls with Coffee Maple Frosting are just what you need! Imagine dough that’s fluffy and soft, filled with rich cinnamon, and topped …

Read more

Categories Desserts

Gilmore Girls Pumpkin Pancakes Scrumptious Fall Treat

July 21, 2025 by Chef Remy
- 1 cup all-purpose flour - 1 tablespoon baking powder - 1/2 teaspoon baking soda - 1 teaspoon ground cinnamon - 1/2 teaspoon ground nutmeg - 1/4 teaspoon ground ginger - 1/4 teaspoon salt - 1 cup pumpkin puree (canned or fresh) - 1 cup milk (or your favorite dairy-free alternative) - 2 large eggs - 2 tablespoons pure maple syrup - 2 tablespoons unsalted butter, melted (or coconut oil for a dairy-free option) - Optional: Chopped pecans or walnuts for topping When I make Gilmore Girls pumpkin pancakes, I love to gather all my ingredients first. It helps keep me organized and makes cooking more fun. Start with 1 cup of all-purpose flour. This forms the base of our pancakes. Next, add 1 tablespoon of baking powder and 1/2 teaspoon of baking soda. These ingredients make the pancakes rise and become fluffy. Now, for the spices! I use 1 teaspoon of ground cinnamon, 1/2 teaspoon of ground nutmeg, and 1/4 teaspoon of ground ginger. These spices give the pancakes their warm flavor, perfect for fall. Don’t forget 1/4 teaspoon of salt to balance the sweetness. Next, we need the star of the show: 1 cup of pumpkin puree. You can use canned pumpkin or make your own from fresh pumpkins. Then, pour in 1 cup of milk. If you prefer dairy-free, any milk alternative works great. Crack in 2 large eggs for moisture and richness. Add 2 tablespoons of pure maple syrup for sweetness, and 2 tablespoons of melted unsalted butter. If you want a dairy-free option, use coconut oil instead. Finally, I love topping my pancakes with chopped pecans or walnuts. They add a nice crunch and extra flavor. Now you have all the right ingredients to make these scrumptious pancakes! If you want the full recipe, you can check it out. First, grab a large mixing bowl. Whisk together the all-purpose flour, baking powder, baking soda, ground cinnamon, ground nutmeg, ground ginger, and salt. This step is key for fluffy pancakes. Mixing these dry ingredients well ensures an even distribution of the leavening agents and spices. You want every bite to be packed with flavor! Next, in a separate bowl, blend the pumpkin puree, milk, eggs, pure maple syrup, and melted butter. Blend until the mixture is smooth and creamy. A creamy texture is important here. It helps to create a rich flavor and keeps the pancakes moist. Now, gently pour the wet mixture into the dry ingredients. Use a spatula to stir until just combined. Avoid overmixing! It’s okay if the batter has small lumps. This will help make your pancakes fluffy and light. Let’s get cooking! Preheat a non-stick skillet or griddle over medium heat. Lightly grease the surface with a bit of butter or oil. For each pancake, pour about 1/4 cup of batter onto the hot skillet. Cook for about 2-3 minutes. Look for small bubbles forming on top and edges that start to look set. Carefully flip each pancake and cook for another 2-3 minutes until golden brown. If they brown too quickly, lower the heat. This helps cook them evenly. Once done, remove them from the skillet and keep warm while you cook the rest. Now you're ready to enjoy these delicious pumpkin pancakes! For the full recipe, check out the detailed instructions. To make fluffy pancakes, avoid overmixing the batter. When you mix the wet and dry ingredients, stir gently. It is okay if there are small lumps. Overmixing can lead to tough pancakes. Let the batter rest for about five to ten minutes. This helps the flour absorb the liquid. Resting also allows the baking powder to activate, which makes your pancakes rise nicely. While maple syrup is a classic topping, try adding fresh fruit like bananas or berries. Whipped cream can also add a nice touch. For a crunch, sprinkle some chopped nuts on top. Pecans or walnuts work great with pumpkin pancakes. If you want to mix things up, add chocolate chips or nuts directly into the batter. Just fold them in gently. This adds bursts of flavor in each bite. To know when to flip your pancakes, look for small bubbles on the surface. When the edges start to look set, it’s time to flip. Make sure your heat is just right. If it’s too hot, the pancakes will brown too fast. If it’s too low, they won’t cook properly. Aim for medium heat to ensure even cooking. Adjust as needed based on your stove. For the full recipe, check out the details above. {{image_4}} To make these pancakes dairy-free, you can easily swap out a few ingredients. Instead of regular milk, use almond milk, oat milk, or soy milk. These alternatives work well and keep the pancakes tasty. For the butter, replace it with coconut oil or a dairy-free margarine. Both options add richness without the dairy. You can spice up your pumpkin pancakes by adding other flavors. Try mixing in a bit of allspice or cardamom for a warm touch. Chopped apples or raisins can add a nice texture. If you're inspired by Gilmore Girls, think about using chocolate chips or a hint of bourbon. These little twists will make your pancakes stand out. These pancakes shine when paired with other breakfast items. Serve them with crispy bacon or sausage for a hearty meal. Fresh fruit like sliced bananas or berries adds a bright flavor. For toppings, try drizzling honey or flavored syrups, like caramel or maple. You can also sprinkle some nuts on top for a crunch. To keep your leftover pancakes fresh, start by letting them cool down. Place them in a single layer on a plate or tray. For short-term storage, wrap them in plastic wrap or foil. You can also use an airtight container. If you want to store them longer, freeze them. Use parchment paper between layers to prevent sticking. This way, you can enjoy them later without losing their shape. There are several methods to reheat your pancakes. The microwave is quick. Place a pancake on a microwave-safe plate. Heat it for about 20 to 30 seconds. This is great for one or two pancakes. For a larger batch, use the oven. Preheat it to 350°F (175°C). Place pancakes on a baking sheet and cover them with foil. Heat for 10 minutes. To keep pancakes fluffy, avoid high heat. If using a skillet, warm it on low. Add a little butter or oil, then place the pancakes in the pan. Flip them after a minute to warm both sides. Enjoy your Gilmore Girls pumpkin pancakes just as fresh as the first time! Yes, you can! Use gluten-free flour blends. Look for blends that include xanthan gum. This helps the pancakes hold together and stay fluffy. You can also try almond flour or oat flour. They add a nice flavor, too. Just adjust the liquid, as these flours may absorb more. Start with a little extra milk to get the right batter consistency. To make these pancakes healthier, reduce sugar by using less maple syrup. You can also substitute some of the butter with applesauce. This keeps them moist without all the fat. Use whole wheat flour for extra fiber. You can even add mashed bananas for natural sweetness and nutrition. This makes the pancakes taste great and keeps them filling. You can use leftover pumpkin puree in many ways! Add it to smoothies for a creamy texture. Mix it into oatmeal for a warm breakfast. You can also make pumpkin muffins or bread. Another idea is to stir it into soups for added flavor. Don't forget to check out the Full Recipe for inspiration on using pumpkin in other tasty dishes. You learned how to make delicious pumpkin pancakes. We covered the ingredients, step-by-step instructions, and tips for the fluffiest results. I shared variations for dietary needs and ways to store leftovers. These pancakes are perfect for breakfast or a cozy brunch. Enjoy experimenting with flavors and toppings. With practice and creativity, your pancakes will shine at the table. Happy cooking!

Fall is the perfect time to whip up a batch of Gilmore Girls Pumpkin Pancakes. These delicious, pumpkin-infused treats will remind you of cozy mornings in Stars Hollow. I’ll guide …

Read more

Categories Breakfast
Older posts
Newer posts
← Previous Page1 … Page62 Page63 Page64 … Page130 Next →

ROASTED RECIPES

Where bold flavors meet everyday meals. Warm, vibrant, and made to share. 🔥🥗🍴

PAGES

Home About Contact Privacy Policy Terms & Conditions Cookie Policy GDPR Policy Copyright Policy Disclaimer

CATEGORIES

Appetizers Desserts Salads Breakfast Dinner

Contact

  • Pinterest
  • Mail
Copyright © 2025 Roasted Flavors. All rights reserved.