Pumpkin Spice Pull Apart Bread Simple Festive Treat
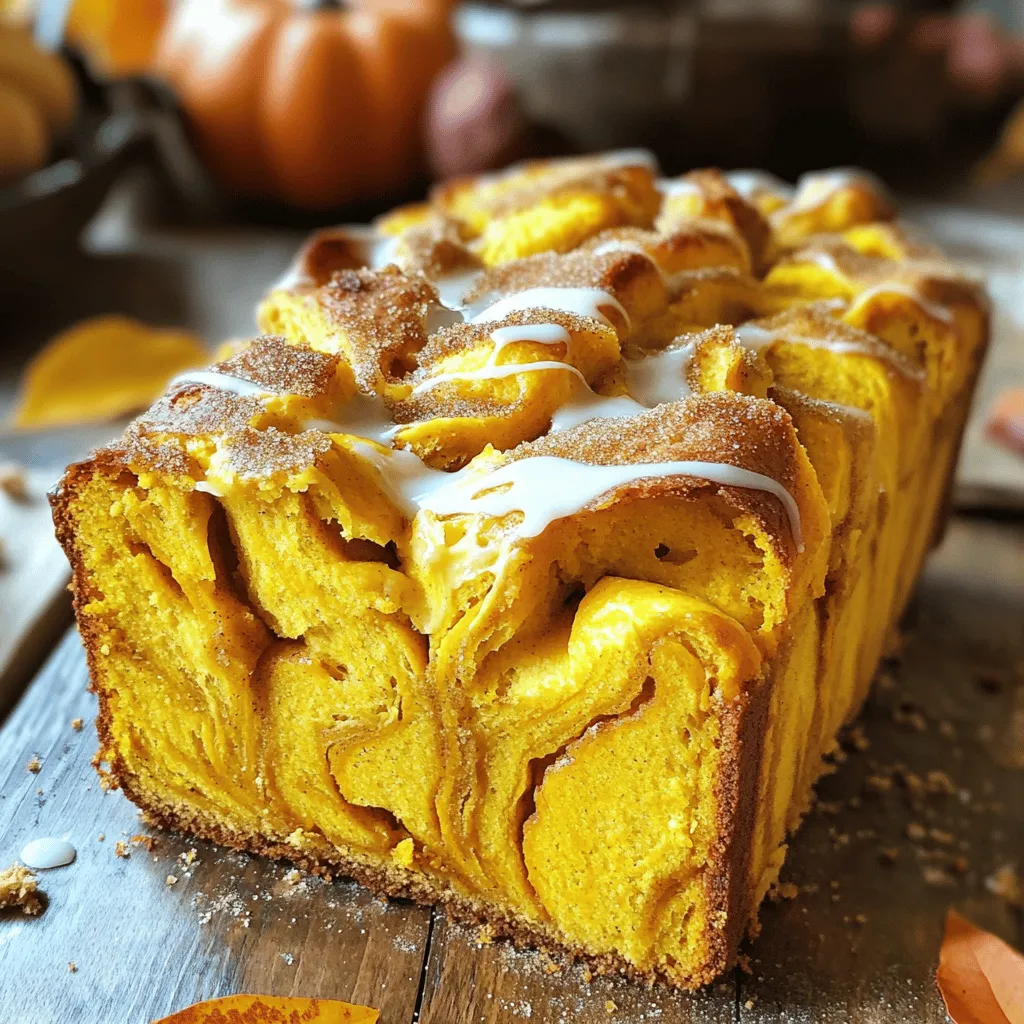
Get ready for a cozy baking adventure with my Pumpkin Spice Pull Apart Bread! It’s a simple, festive treat that will fill your home with warm spices and sweet aromas. …
Get ready for a cozy baking adventure with my Pumpkin Spice Pull Apart Bread! It’s a simple, festive treat that will fill your home with warm spices and sweet aromas. …
![- Puff pastry - Fresh blueberries - Granulated sugar - Cornstarch - Lemon juice - Vanilla extract - Egg (for egg wash) - Water - Powdered sugar (for dusting) Gathering quality ingredients is key to making a great Blueberry Danish. Start with puff pastry, as it gives a flaky texture. Use fresh blueberries for the best flavor. The granulated sugar will enhance the sweetness of the fruit. Cornstarch thickens the filling, making it less runny. Lemon juice adds a bright note, balancing the sweetness. Vanilla extract brings warmth and depth to the filling. Don't forget the egg for the wash! It gives the pastry a lovely golden finish. You’ll mix this with a bit of water. Finally, powdered sugar is perfect for a sweet dusting at the end. - Calories: 250 - Carbohydrates: 35g - Protein: 3g - Fats: 12g This Blueberry Danish is a treat, but it also packs some calories. Each serving has around 250 calories. The carbohydrates come mostly from the pastry and sugar. You’ll get about 3 grams of protein, mainly from the egg wash. The fats come from the buttery pastry. Enjoy this as an occasional indulgence! For the full recipe, check out the Blueberry Bliss Danish 🥐. - Preheat your oven to 400°F (200°C). - Line a baking sheet with parchment paper. This helps your pastries not to stick. - In a medium bowl, combine 1 cup of fresh blueberries, 1/4 cup of granulated sugar, 1 tablespoon of cornstarch, 1 teaspoon of lemon juice, and 1/2 teaspoon of vanilla extract. - Gently fold the ingredients together. This helps coat the blueberries well. Let the mixture sit for a few minutes. The cornstarch will help thicken it slightly. - On a lightly floured surface, roll out the puff pastry sheet to about 1/8 inch thick. - Cut the dough into four equal squares or rectangles, depending on how big you want your Danishes. - Create a decorative border by making shallow cuts around the edges, about 1/2 inch from the edge. Do not cut all the way through. - Spoon some of the blueberry mixture into the center of each pastry. Keep it within the borders to hold the juices in. - In a small bowl, whisk one egg with 1 tablespoon of water to create an egg wash. - Using a pastry brush, apply the egg wash along the borders of the pastry. This will give a nice golden color while baking. - Place the pastries in the preheated oven and bake for 15-20 minutes. Look for a golden brown color and puffiness. Once they are done, let your Blueberry Danishes cool for a few minutes. Dust them with powdered sugar for a sweet touch before serving. Enjoy! Thawing puff pastry is key for a great Blueberry Danish. If you rush this step, your dough may not puff well. Place the pastry in the fridge for a few hours or overnight. This keeps it cold but soft enough to shape. To achieve a golden brown finish, use an egg wash. Mix one egg with a tablespoon of water. Brush this mixture on the edges of the pastry before baking. This helps the pastry shine and turn golden. Bake your Danishes at 400°F (200°C) for 15-20 minutes. Watch closely as they bake to avoid burning. Enjoy your Blueberry Danish with a cup of coffee or tea. The warm pastry pairs perfectly with a hot drink. For the best taste, serve them warm. They can cool for a few minutes before you dig in. To boost the flavor, consider adding spices. A pinch of cinnamon adds warmth and depth. You can also experiment with zest. Try adding orange zest for a bright, fresh taste. These small tweaks can make your Danish even more delightful. {{image_4}} You can change the fruit in this recipe easily. Instead of blueberries, try raspberries or peaches. Both fruits bring a unique flavor that pairs well with pastry. Just substitute them in equal amounts. This keeps the recipe fresh with every season. For a vegan version, swap the egg wash with a plant-based option. You can mix almond milk with a bit of maple syrup for a nice shine. If gluten is a concern, choose gluten-free puff pastry. Many brands offer great alternatives that work well in this recipe. Cream cheese filling is a delicious choice. Mix cream cheese with a little sugar and vanilla for a rich center. After baking, consider adding a glaze. Mix powdered sugar with a bit of milk for a sweet topping. It adds a lovely finish before serving. To keep your Blueberry Danish fresh, store them in an airtight container. Place them in the fridge if you do not eat them right away. This helps prevent them from getting soggy. For the best taste, enjoy them within two days. How to freeze before baking You can freeze the unbaked Blueberry Danish. After shaping the pastry, place them on a baking sheet. Make sure they do not touch each other. Cover the sheet with plastic wrap and freeze them for about one hour. Once firm, transfer the pastries to a freezer bag. Seal tightly and freeze for up to three months. How to freeze after baking To freeze baked Blueberry Danish, let them cool completely. Then, wrap each pastry in plastic wrap. Place them in a freezer-safe bag or container. They can last up to three months in the freezer. Best methods to reheat for optimal taste To reheat, you have a few options. The oven is best for keeping the pastry crispy. Preheat your oven to 350°F (175°C). Place the Danish on a baking sheet and warm for about 10 minutes. You can also use a microwave, but be careful. It may make the pastry soft. Heat on medium for 15-20 seconds. Enjoy your Blueberry Danish warm for the best taste! For more details, check out the [Full Recipe]. To make Blueberry Danish from scratch, follow these steps: 1. Preheat your oven to 400°F (200°C) and line a baking sheet with parchment paper. 2. In a bowl, mix fresh blueberries, sugar, cornstarch, lemon juice, and vanilla. 3. Roll out the puff pastry and cut it into squares. 4. Create a border by making shallow cuts around the edges. 5. Spoon the blueberry mix into the center of each square. 6. Brush the edges with egg wash for a golden finish. 7. Bake for 15-20 minutes until golden brown. 8. Dust with powdered sugar before serving. For the complete details, refer to the Full Recipe. Yes, you can use frozen blueberries. They are convenient and still tasty. However, fresh blueberries have a better texture and flavor. Frozen blueberries may release more juice when cooked. This can make your filling runny. If you use frozen berries, thaw and drain them first. This helps keep your filling thick and juicy. You can find Blueberry Danish at many local bakeries. Look for ones that make their pastries fresh each day. Some grocery stores also sell Blueberry Danish in their bakery section. If you prefer online shopping, many bakeries offer delivery services. Search for specialty bakeries near you to find the best options. Making Blueberry Danish takes about 35 minutes in total. This includes 20 minutes of prep time and 15 minutes of bake time. The process is quick and easy, perfect for a tasty treat. You can enjoy delicious pastries in no time! This blog post covered how to make tasty blueberry Danishes at home. We explored ingredients, step-by-step instructions, and cooking tips. You learned about variations, serving ideas, and storage methods to keep them fresh. In conclusion, making blueberry Danishes is simple and fun. With the right ingredients and a few techniques, you can impress anyone with your baking skills. Whether you enjoy them warm or cold, these treats are sure to delight. Try experimenting with different fruits and flavors to personalize your Danishes even more. Happy baking!](https://roastedflavors.com/wp-content/uploads/2025/08/175f329a-f5bc-4295-9ba3-9ad6f7accab9.webp)
If you’re craving a sweet treat that bursts with flavor, look no further than my Blueberry Danish Delight! This recipe combines fresh blueberries with flakey puff pastry for an irresistible …
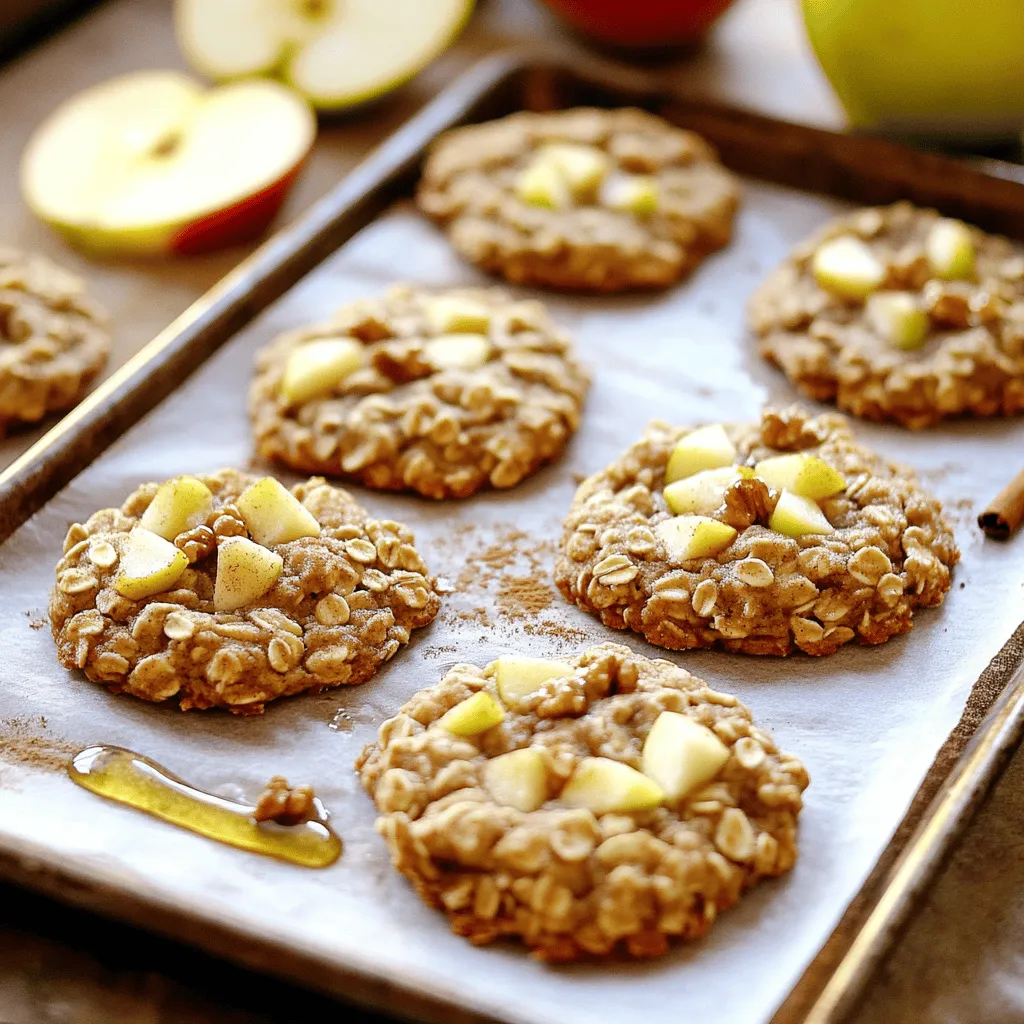
Are you ready to enjoy a delightful treat that’s both healthy and tasty? These Healthy Apple Pie Oatmeal Cookies combine the warm flavors of apple pie with the goodness of …
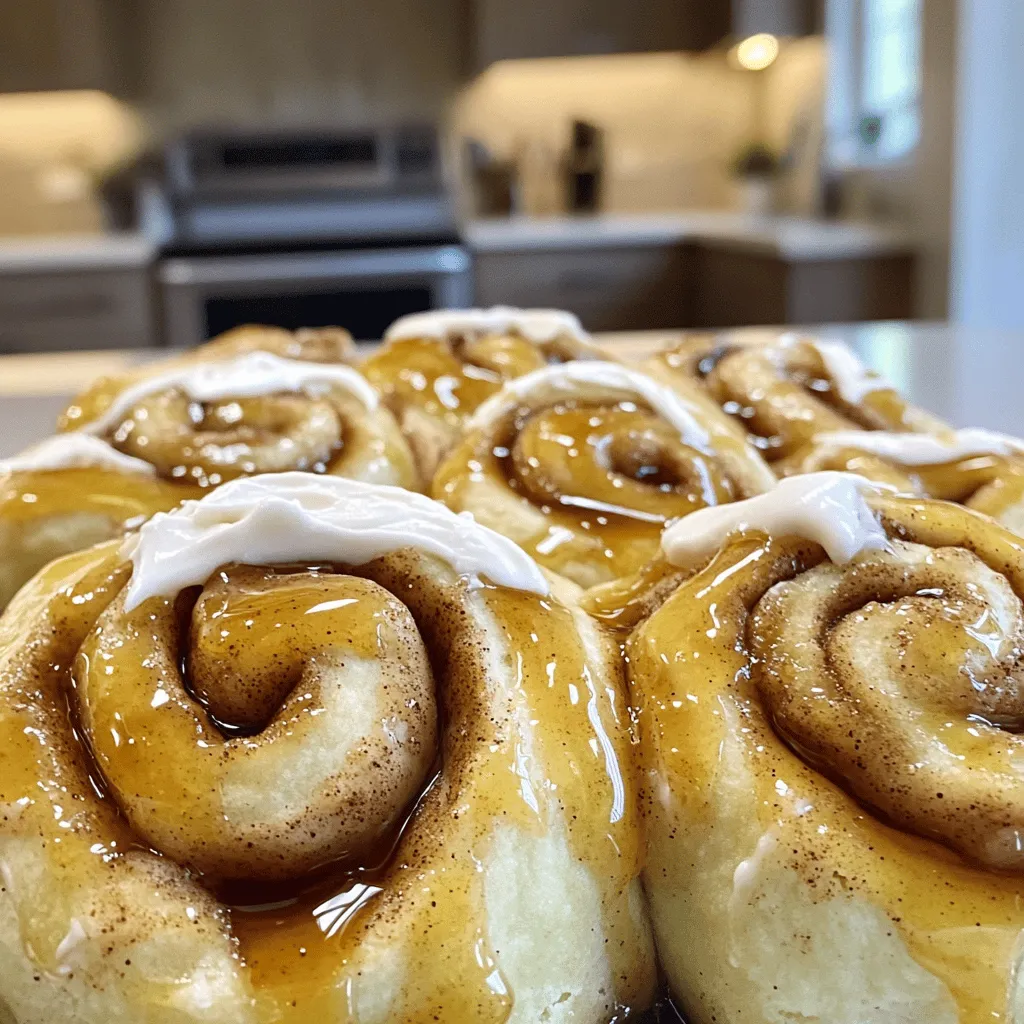
Are you ready to impress your family and friends? This easy recipe for Irresistible Apple Cider Cinnamon Rolls will do just that! With simple ingredients and straightforward steps, you’ll create …
![To make a tasty pumpkin chai iced latte, gather the following ingredients: - 1 cup strong brewed chai tea - 1/2 cup pumpkin puree (canned or freshly made) - 1/4 cup milk (your choice of dairy or non-dairy) - 2 tablespoons maple syrup (adjust based on desired sweetness) - 1/2 teaspoon pure vanilla extract - 1/2 teaspoon pumpkin pie spice (plus extra for garnish) - Ice cubes - Whipped cream (optional, for a decadent topping) For the best flavor, choose high-quality ingredients. Use fresh or organic pumpkin puree. It enhances the taste and nutrition. For chai tea, select a strong blend. Loose leaf tea often has richer flavor. If you prefer non-dairy milk, almond or oat milk works well. They add creaminess without overpowering the drink. Use pure maple syrup for sweetness. Avoid imitation syrups that lack real flavor. You can swap some ingredients for different flavors. Instead of pumpkin puree, try using sweet potato puree. It gives a unique taste and maintains the creaminess. For the milk, coconut milk adds a tropical twist. If you want it sweeter, use honey or agave instead of maple syrup. Adjust the spices to your liking; add a pinch of nutmeg for warmth or cinnamon for extra flavor. To start, brew your chai tea. You can use 1 1/2 teaspoons of loose chai tea leaves or 1 tea bag. Steep it in 1 cup of boiling water for 5 to 7 minutes. This step brings out the rich flavors of the chai. After steeping, remove the leaves or tea bag. Let the tea cool to room temperature while you prepare the rest. Next, grab a mixing bowl or high-speed blender. Add the pumpkin puree, maple syrup, milk, vanilla extract, and pumpkin pie spice. Blend this mixture on medium speed. You want it to be smooth and creamy. This will be the star of your iced latte. If you love pumpkin, feel free to add a little more pumpkin spice for extra flavor. Now it’s time to put it all together. Take a tall glass and fill it halfway with ice cubes. This keeps your latte nice and chilled. Pour the cooled chai tea over the ice, filling the glass most of the way. Then, gently spoon or pour the pumpkin mixture on top. This creates a lovely layered look. For a fun finish, you can stir it a bit to mix the flavors or leave it layered for a fancy touch. If you want to indulge, add whipped cream on top and sprinkle some extra pumpkin pie spice for garnish. Enjoy your delicious Pumpkin Chai Iced Latte! For the complete recipe, check out the [Full Recipe]. To make the best Pumpkin Chai Iced Latte, you must find the right taste balance. Start with strong chai tea. It gives your drink a spicy kick. If you want a sweeter latte, adjust the maple syrup. You can add more or less to suit your taste. Remember, pumpkin puree is rich and creamy, so don’t overpower it with too much sweetness. Balance is key! A beautiful drink is fun to sip. Use a clear glass to show off the layers. Fill it with ice first, then slowly pour in the chai tea. This way, you keep the layers separate. Next, add the pumpkin mixture on top. For a fancy touch, add whipped cream. Finish with a sprinkle of pumpkin pie spice for that festive look. A colorful straw can also make sipping more enjoyable! Avoid brewing weak chai tea. A strong brew makes the flavor pop! Don't rush the cooling process. If the tea is too warm, it can melt the ice too fast. This makes your latte watery. Also, don’t skip the pumpkin pie spice. It adds warmth and depth. Finally, always taste your drink before serving. Adjust sweetness or spices if needed. These simple tips can take your latte from good to great! {{image_4}} You can easily make this latte dairy-free. Just swap out regular milk for almond, oat, or coconut milk. These choices keep the taste rich and creamy. You can also use unsweetened versions to cut back on sugar. If you want a vegan sweetener, choose agave syrup instead of maple syrup. This keeps your drink plant-based, tasty, and guilt-free. You can boost the flavor of your pumpkin chai iced latte. Try adding a pinch of cinnamon or nutmeg for a warm touch. You can also experiment with sweeteners. Brown sugar or honey can add different flavors. If you like a spicier kick, add more pumpkin pie spice. Each tweak can change the drink, making it your own. You can enjoy this drink hot too! To make a hot latte, brew the chai as usual, but skip the ice. Mix the pumpkin puree with hot milk instead. Blend until smooth and pour over the hot chai. This gives you a cozy drink for chilly days. Adjust the sweetness to your taste as well. Whether iced or hot, it’s sure to please! To keep your ingredients fresh, store each one properly. For pumpkin puree, place it in an airtight container. It helps to keep it from drying out. If you use canned pumpkin, seal it well and refrigerate. Chai tea can stay in the fridge too. Just make sure it cools down first. If you have extra iced latte, store it in the fridge. Use a sealed container to avoid spills. It’s best to drink it within one day. If you wait too long, the ice will melt. This will make the latte watery and less tasty. - Chai tea: lasts for up to 5 days in the fridge. - Pumpkin puree: can stay fresh for about 5 days once opened. - Milk: should be used within 7 days, depending on its expiration date. - Maple syrup: lasts for months in the pantry if sealed. Keeping these tips in mind will help you enjoy your Pumpkin Chai Iced Latte for longer! For the full recipe, check out the details above. Yes, you can make this drink without pumpkin puree. You can substitute with butternut squash puree or sweet potato puree. Both options give a rich flavor too. Keep in mind that the drink will taste a bit different. Aim for similar consistency to pumpkin puree for the best results. The best milk for this recipe depends on your taste. Whole milk gives a creamy texture. Almond milk adds a nutty flavor, while oat milk is rich and slightly sweet. You can use any milk you prefer, even soy or coconut milk. Just avoid any milk that may have strong flavors that clash with chai. To make your latte extra creamy, use whole milk or add heavy cream. Blending in a bit of cream cheese can also add richness. You can even increase the amount of pumpkin puree for a thicker texture. Another trick is to froth your milk before adding it to the drink. You can find Pumpkin Chai Iced Lattes at many coffee shops in the fall. Popular chains like Starbucks often have seasonal versions. Local cafes may also offer unique twists on this drink. If you prefer to make it at home, you can follow the [Full Recipe] for a delicious version. This blog post guides you on making a Pumpkin Chai Iced Latte. You learned about key ingredients, step-by-step instructions, and tips for the best flavor. Variations show how to customize your drink, while storage info helps you keep leftovers fresh. In conclusion, making this latte is simple and fun. Enjoy your tasty drink any time of day. With these tips, you can avoid common mistakes and impress anyone. Stay creative and always experiment with flavors!](https://roastedflavors.com/wp-content/uploads/2025/08/d76586e7-9300-4374-9590-684485a31eac.webp)
Looking for a fall drink that’s both simple and delicious? The Pumpkin Chai Iced Latte is the perfect choice! With warm spices and creamy pumpkin, this drink brings comfort in …
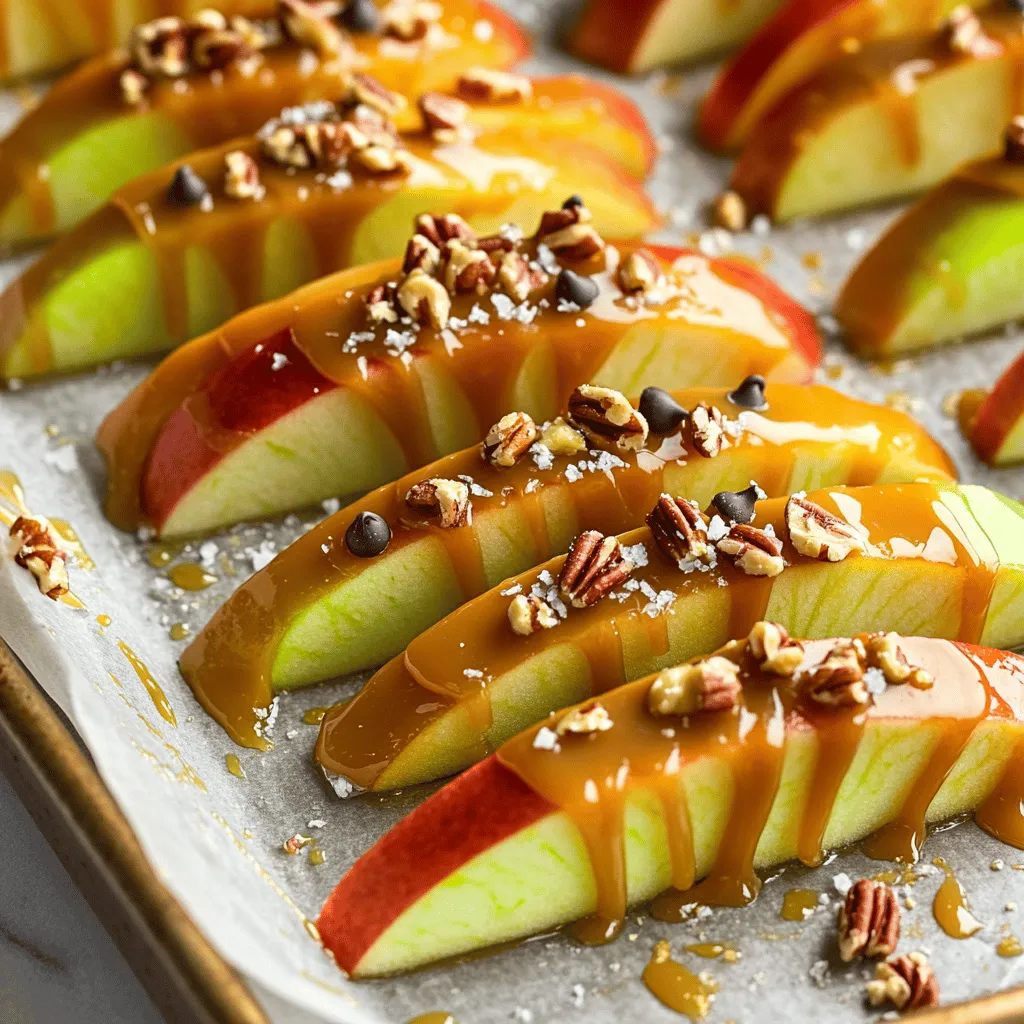
Get ready to satisfy your sweet tooth with my simple guide to Easy Caramel Apple Slices. This treat combines crunchy apples and rich caramel for a perfect snack. You’ll find …
![- 1 medium butternut squash, peeled and cut into 1-inch cubes - 1 cup quinoa, thoroughly rinsed under cold water - 2 cups vegetable broth (homemade or low-sodium recommended) - 1 medium onion, finely diced - 2 cloves garlic, minced - 1 teaspoon ground cinnamon - 1/2 teaspoon freshly grated nutmeg - Salt and freshly ground black pepper to taste Butternut squash is the star here. It gives the dish a creamy texture and a sweet flavor. You want to pick a squash that feels heavy for its size and has smooth skin. The quinoa adds protein and a nice bite to the dish. Make sure to rinse it well. This helps remove bitterness and makes it fluffier. The vegetable broth adds depth and aroma. You can use homemade or a good store-bought brand. - 1 cup shredded sharp cheddar cheese (or your preferred cheese variety) - 1/2 cup whole wheat breadcrumbs (for added nutrition) - 2 tablespoons olive oil - Fresh parsley, finely chopped (for garnish) The cheese creates a melty, delicious layer on top. Sharp cheddar works great, but feel free to mix it up. The whole wheat breadcrumbs add crunch and a bit of fiber. Drizzling olive oil on the breadcrumbs helps them crisp up nicely. Fresh parsley not only adds color but also a bright flavor that contrasts well with the squash. - Rinsing quinoa: Rinse it under cold water until the water runs clear. This removes the saponins, which can make quinoa taste bitter. - Selecting the right butternut squash: Look for a heavy squash with smooth skin. Avoid any that feel soft or have blemishes. - Optional seasoning suggestions: You can add herbs like thyme or rosemary for extra flavor. Try using smoked paprika for a hint of smokiness. I love these tips because they help you achieve the best taste and texture. With these ingredients and notes, you’re well on your way to a wonderful butternut squash casserole. For the complete method, check out the Full Recipe. How to peel and cube butternut squash Start by cutting off both ends of the butternut squash. Use a sharp peeler to remove the skin. Cut the squash in half lengthwise. Scoop out the seeds with a spoon. Finally, chop the squash into 1-inch cubes. Properly rinsing quinoa To rinse quinoa, place it in a fine mesh strainer. Run cold water over it for about 1 minute. This helps remove any bitter coating. Shake off excess water before using it in the recipe. Sautéing onions and garlic In a large skillet, heat olive oil on medium heat. Add diced onion and cook for 5 to 7 minutes. Stir until the onion turns soft and slightly golden. Then, add minced garlic and sauté for 2 more minutes. Incorporating spices Next, sprinkle in ground cinnamon and nutmeg. Add a pinch of salt and pepper. Stir well to mix spices with the onion and garlic. This step creates a fragrant base for your casserole. Mixing ingredients and pouring into the baking dish In a big bowl, add cubed butternut squash, rinsed quinoa, and vegetable broth. Pour in the sautéed onion and garlic mix. Stir everything together until well combined. Then, transfer this mixture to a greased 9x13 inch baking dish. Adding cheese and breadcrumbs Sprinkle shredded cheese evenly over the top of the mixture. Follow with breadcrumbs for a crunchy topping. This adds both flavor and texture to the casserole. Covering with foil and cooking time Cover the baking dish tightly with aluminum foil. This keeps moisture inside while baking. Place it in the preheated oven for 30 minutes. Final baking without foil for a golden top After 30 minutes, take off the foil. Bake for an additional 15 to 20 minutes. Watch for a golden top and tender squash. A fork should easily pierce the squash when done. For the complete recipe, check out the Full Recipe. To ensure tender butternut squash, cut it into even 1-inch cubes. This helps it cook evenly. Roast for about 30 minutes to soften it before adding to the casserole. For a crispy breadcrumb topping, toast the breadcrumbs in olive oil before sprinkling them on top. This small step gives your casserole a delightful crunch. You can add herbs or spices to change the taste. Try fresh thyme or sage for a warm, earthy flavor. For a twist, use smoked paprika or chili powder for a kick. You can also swap the cheese. Use mozzarella for a milder taste or feta for a tangy zing. Each cheese brings its own magic to the dish. Serve the casserole straight from the baking dish for a warm feel. For an upgrade, layer extra cheese on top before baking. This enhances both flavor and looks. Garnish with fresh parsley for color. You might also add a sprinkle of chili flakes for a pop of color and heat. {{image_4}} You can easily make this casserole vegetarian or vegan. For a dairy-free version, swap out the cheese. Use nutritional yeast or a dairy-free cheese that melts well. This adds a cheesy flavor without the dairy. You can also add more veggies. Consider adding spinach, mushrooms, or bell peppers. They will mix well with the squash and spices. You can sneak in some extra nutrients, which is always a win! Cranberries or nuts can give your casserole a nice twist. Add a cup of dried cranberries for sweetness. Toasted nuts like pecans or walnuts add crunch and flavor. They also give your dish a festive touch. You might also try seasonal spices. In the fall, cinnamon and nutmeg shine. In spring, you can add fresh herbs like thyme or rosemary for a bright flavor. Adjust the spices to match the season and your taste. Pair your casserole with simple sides. A fresh green salad or roasted vegetables work well. They bring balance to the rich flavors of the dish. Got leftovers? Transform them into a new meal! You can use the casserole as a filling for wraps or tacos. Or, serve it over a bed of greens for a light lunch. The options are endless, and you'll love the variety! For the full recipe, check out the [Full Recipe]. To store leftovers, let the casserole cool first. Once it cools, cover it tightly. You can use plastic wrap or a lid. In the fridge, it stays fresh for up to 4 days. Make sure to check for odors before you eat it again. You can freeze butternut squash casserole before or after baking. If you freeze it before baking, cover it well. Use a freezer-safe container or wrap it with plastic wrap. To freeze after baking, let it cool first, then wrap it. It stays good for about 3 months. To reheat, thaw in the fridge overnight. Bake at 350°F (175°C) until hot. To prevent sogginess, let the casserole cool before storing. Also, avoid covering it too tightly. Use containers that allow some air to escape. Glass or plastic containers with a loose lid work well. This keeps the texture nice and helps the flavors stay fresh. Baking butternut squash casserole takes about 45 to 50 minutes. First, cover it with foil and bake for 30 minutes. Then, remove the foil and bake for another 15 to 20 minutes. This method helps keep it moist and allows the top to get golden brown. Yes, you can prepare the casserole ahead of time. Assemble the dish, cover it, and store it in the fridge for a day. When you are ready to bake, just add a few extra minutes to the cooking time. This makes it easy for busy days. If you want to replace quinoa, try using brown rice or farro. Both options work well and give a nice texture. Just make sure to adjust the cooking time and liquid needed based on what you choose. Yes, butternut squash casserole is quite healthy. It is full of vitamins and minerals from the squash and quinoa. The cheese adds some calcium, while the whole wheat breadcrumbs increase fiber. It is a balanced dish that tastes great too. Yes, you can easily double or halve the recipe. Just adjust the amounts of each ingredient. Use a larger or smaller baking dish based on your serving needs. This flexibility makes it perfect for gatherings or small family meals. This post covered a tasty butternut squash casserole recipe. You learned about each ingredient, from the squash to the toppings. I shared tips on preparation, ensuring perfect texture, and ways to use leftovers. Cooking should be fun and creative. Feel free to experiment with flavors and textures. Enjoy making this dish your own, and share it with others. Happy cooking!](https://roastedflavors.com/wp-content/uploads/2025/08/de4df7fa-b436-47f4-ace5-8c52966e293c.webp)
Are you ready to delight your taste buds with a dish that’s both simple and tasty? My Easy Butternut Squash Casserole is perfect for any meal. With just a few …
![- Ripe Tomatoes - Large Onion - Garlic Cloves - Jalapeño Peppers - Fresh Cilantro - Fresh Lime Juice - Salt - Extra Virgin Olive Oil How to Choose Ripe Tomatoes Pick tomatoes that feel heavy for their size. Look for rich color and a slight give when you press them. The smell should be sweet and fragrant. This means they're ready to shine in your salsa. Selecting the Right Onion Choose a large onion with a firm feel and smooth skin. Avoid those with soft spots or blemishes. A good onion adds sweetness to your salsa and balances the heat from the jalapeños. Freshness in Herbs and Spices Look for bright green cilantro leaves with no wilting. Fresh herbs boost flavor in your salsa. When you smell them, they should have a strong and fresh scent. For salt, use a fine sea salt to help it blend well. Using fresh ingredients makes a big difference. They bring amazing flavor to your fire roasted salsa. Check out the Full Recipe for a complete list and instructions! - Preheat your grill to medium-high heat, or warm a cast iron skillet on the stove. - Arrange the halved tomatoes, quartered onion, unpeeled garlic cloves, and halved jalapeños on your grill or skillet. - Roast the veggies for about 10 to 12 minutes. Turn them often to get even charring. You want the skins to blister and the garlic to soften. - Watch for the tomatoes to get nice dark spots and the garlic to turn tender. - Once the veggies cool for 5 minutes, peel the garlic. Add all roasted vegetables to a blender. - Toss in chopped cilantro, fresh lime juice, and a pinch of salt. Blend until you reach your desired salsa texture. - Taste your salsa. Adjust flavors by adding more salt or lime juice if needed. - Drizzle a tablespoon of olive oil over the salsa to boost the flavor before serving. For the full recipe, check the Fire Roasted Salsa section. Roasting your ingredients brings out a deep, rich taste. When you fire-roast tomatoes, onions, and peppers, the heat caramelizes their natural sugars. This adds a sweet and smoky flavor to your salsa. Roasting also softens the vegetables, making them easier to blend. For the best results, I suggest using a grill or a cast iron skillet. A grill gives that nice char and smoky edge. If using a skillet, make sure it’s well-seasoned. Heat it to medium-high before adding your veggies. Fire roasted salsa pairs well with many dishes. You can serve it with tortilla chips for a classic snack. It also goes great on tacos, grilled meats, or even scrambled eggs. The fresh lime juice adds a zesty kick that brightens any meal. For presentation, use a rustic bowl. Add a sprinkle of chopped cilantro on top. This adds color and freshness. You might also drizzle a bit of olive oil for a polished look. If you have leftover salsa, store it in an airtight container. It will stay fresh in the fridge for about a week. For longer storage, you can freeze it. Just make sure to leave some space in the container, as the salsa will expand when frozen. You can also use leftover salsa in other recipes. Mix it into scrambled eggs for a tasty breakfast. Stir it into soups or stews for added flavor. You can even use it as a topping for grilled chicken or fish. Enjoy exploring all the ways to use your fire roasted salsa! {{image_4}} You can easily change the heat of your fire roasted salsa. If you want it milder, use less jalapeño. You can also remove the seeds to lower the spice. For a spicier salsa, add more jalapeños or even a pinch of cayenne pepper. You can taste as you go to find the right heat for you. You can swap out some ingredients if needed. For example, you can use red bell peppers instead of jalapeños for a sweet flavor. You could also try using green onions instead of a regular onion. Fresh herbs like parsley or basil can replace cilantro. Want to get creative? You can mix in other ingredients. Chopped mango adds sweetness. Black beans give you protein and texture. For a smoky flavor, try adding roasted corn. Each choice adds a unique twist to your salsa. Fire roasted salsa is great in many dishes. You can use it as a topping for tacos or burritos. It also works well as a fresh dip with chips. You can even stir it into scrambled eggs for breakfast. Add fire roasted salsa to grilled meats for extra flavor. It’s perfect on chicken, fish, or steak. You can also make a delicious salsa salad by mixing the salsa with diced cucumber and avocado. The options are endless! For the full recipe, check out the full recipe. You can find pre-made fire roasted salsa at many stores. Look for brands like Frontera, Pace, or Trader Joe’s. These brands make tasty salsa with fire-roasted flavors. You can buy them online as well. Check sites like Amazon, Walmart, or Target. They often have good prices and fast shipping. If you want to make salsa at home, you need the right tools. A good blender or food processor makes blending easy. I recommend brands like Ninja or Vitamix for great results. For roasting, use a sturdy grill or a cast iron skillet. A cast iron skillet heats evenly and works well on the stove. You will also need basic utensils like a knife, cutting board, and a spoon for mixing. With the right tools, making fire roasted salsa becomes simple and fun. You can check the [Full Recipe] for details on how to make it! What is Fire Roasted Salsa? Fire roasted salsa is a fresh dip made from roasted tomatoes, onions, garlic, and jalapeños. The roasting gives it a smoky flavor that adds depth. You can mix in cilantro, lime juice, and salt for a bright finish. This salsa is great for chips or as a topping for tacos. How Long Does Fire Roasted Salsa Last? Fire roasted salsa can last up to five days in the fridge. Make sure to store it in an airtight container. If you notice any off smell or changes in color, it’s best to toss it. Can I Freeze Fire Roasted Salsa? Yes, you can freeze fire roasted salsa! It keeps well for about three months. Use freezer-safe containers and leave some space for expansion. Thaw it in the fridge overnight before using. Can I roast the ingredients in the oven? Absolutely! You can roast the ingredients in your oven. Set it to 400°F (200°C). Spread the veggies on a baking sheet and roast until they’re charred. This method gives a similar flavor to grilling. What if I don’t have a grill or skillet? If you lack a grill or skillet, use your oven or even a broiler. Place the veggies on a tray and broil them for a few minutes. Just keep an eye on them to avoid burning. Is Fire Roasted Salsa Healthy? Yes, fire roasted salsa is healthy! It’s low in calories and packed with vitamins. The fresh ingredients offer a lot of nutrients without added sugars or fats. What Are the Health Benefits of Fire Roasted Ingredients? Fire roasting enhances the flavors and nutrients in veggies. Roasted tomatoes have more lycopene, which is good for your heart. Garlic adds immune-boosting properties. Jalapeños can help with metabolism. Enjoying this salsa gives you tasty health benefits! This post explored the key ingredients and steps to make fire-roasted salsa. We discussed selecting fresh tomatoes, onions, and herbs to ensure the best flavors. Roasting techniques elevate the taste, and blending brings everything together. You can adjust spice levels or substitute ingredients for custom options. Serve it fresh alongside your favorite dishes. Remember, storing salsa correctly can enhance its shelf life. Try different variations to keep it exciting. Enjoy making your salsa, and don’t be afraid to experiment!](https://roastedflavors.com/wp-content/uploads/2025/08/111c10c8-cd17-4cbb-a163-fb5425230489.webp)
Fire roasted salsa brings bold flavor and vibrant freshness to your table. In this simple recipe guide, I will help you create a salsa that bursts with taste. With just …
![Here are the ingredients you will need to make these delightful cookies: - 1 cup unsalted butter, softened to room temperature - 1 cup granulated sugar - 1/2 cup packed brown sugar - 1 cup pumpkin puree (ensure it's not pumpkin pie filling) - 2 large eggs - 3 1/4 cups all-purpose flour - 1 teaspoon baking soda - 1 teaspoon cream of tartar - 1 teaspoon ground cinnamon - 1/2 teaspoon ground nutmeg - 1/2 teaspoon ground ginger - 1/4 teaspoon ground allspice - 1/4 teaspoon salt - 1/4 cup granulated sugar (for rolling) - 2 teaspoons pumpkin pie spice (for rolling) If you're missing an ingredient, you can make some swaps. Here are a few ideas: - Butter: Use coconut oil or margarine. - Pumpkin puree: Sweet potato puree works well. - Eggs: Replace each egg with 1/4 cup applesauce. - All-purpose flour: Use a gluten-free blend if needed. - Brown sugar: Mix white sugar with a bit of molasses. These swaps can help you adapt the recipe to your needs while keeping the flavors close. Fresh ingredients make a big difference. Here’s how to choose the best: - Butter: Look for butter that feels cool and firm. It should not be soft or oily. - Pumpkin puree: Check the label. It should list only pumpkin as the ingredient. - Spices: Smell the spices. They should have a strong aroma. If not, they may be old. - Flour: Ensure the flour has no lumps and smells fresh. Using fresh ingredients helps create the best Pumpkin Spice Snickerdoodles. For the full recipe, refer to the previous section. To make pumpkin spice snickerdoodles, you start by preheating your oven to 350°F (175°C). This step ensures even baking. Line a baking sheet with parchment paper to keep cookies from sticking. In a large mixing bowl, combine 1 cup of softened butter, 1 cup of granulated sugar, and 1/2 cup of packed brown sugar. Use an electric mixer to cream them until fluffy. This should take about 2-3 minutes. Next, add 1 cup of pumpkin puree. Mix until smooth. Then, add 2 large eggs, one at a time, mixing well after each. In a separate bowl, whisk together 3 1/4 cups of all-purpose flour, 1 teaspoon of baking soda, 1 teaspoon of cream of tartar, 1 teaspoon of ground cinnamon, 1/2 teaspoon of ground nutmeg, 1/2 teaspoon of ground ginger, 1/4 teaspoon of ground allspice, and 1/4 teaspoon of salt. This helps spread the flavors evenly. Gradually add the dry mix to the wet mix. Stir until just combined. Avoid overmixing to keep cookies soft. While mixing, make sure to scrape down the sides of the bowl. This ensures all ingredients blend well. When you roll the dough, use a cookie scoop or a tablespoon to ensure even sizes. This helps them bake at the same rate. Coat each dough ball in a mixture of 1/4 cup granulated sugar and 2 teaspoons pumpkin pie spice. This gives that classic snickerdoodle taste. Place the dough balls on the baking sheet, spacing them about 2 inches apart. This allows room for spreading. Bake the cookies for 10-12 minutes. Keep an eye on them. The edges should be lightly golden, and the centers should look set. Once they’re done, let them cool on the baking sheet for about 5 minutes. This step allows them to firm up. After that, transfer them to a wire rack to cool completely. For a fun touch, stack the cookies on a plate and dust them with extra pumpkin pie spice before serving. Enjoy your warm, soft treats! For the complete process, check out the Full Recipe. To make your snickerdoodles soft, start with room temperature butter. Cold butter does not work well. Cream the butter and sugars until fluffy. This adds air and helps the cookies rise. Do not overmix your dough; just mix until combined. Overmixing makes the cookies tough. Lastly, chill the dough for 30 minutes before baking. This helps them hold their shape and stay soft. One common mistake is measuring flour wrong. Always scoop flour into your measuring cup, then level it off. Too much flour makes cookies dry. Another mistake is skipping the cream of tartar. It adds that classic snickerdoodle taste and keeps them soft. Remember not to bake them too long. Pull them out when the edges are golden, and the centers look set. They will continue to firm up as they cool. To boost flavor, consider adding chocolate chips or nuts. Walnuts or pecans add a nice crunch. You can also mix in dried cranberries for a tart twist. If you love spice, add more ginger or nutmeg. A splash of vanilla extract enhances the sweet taste. Feel free to experiment with these options. Each change can give a new life to your snickerdoodles. Follow the [Full Recipe] for precise measurements and steps. {{image_4}} You can make these cookies gluten-free by using a gluten-free flour blend. Look for a mix that contains xanthan gum. This helps mimic the texture of regular flour. Measure the gluten-free flour the same way as you would all-purpose flour. The taste and texture will still be soft and chewy. To make a vegan version, swap the butter for coconut oil or vegan butter. Use flax eggs instead of regular eggs. To make one flax egg, mix one tablespoon of flaxseed meal with three tablespoons of water. Let it sit for about five minutes. This will bind the ingredients well. The cookies will still be rich and flavorful. You can spice things up by adding different flavors. Try mixing in some chocolate chips or chopped nuts. Dried cranberries or raisins can also add a nice touch. For a fun twist, add a splash of maple syrup or vanilla extract. Each addition gives a unique flavor, making these cookies even more special. For the full recipe, check out the complete guide to making Pumpkin Spice Snickerdoodles! To keep your pumpkin spice snickerdoodles fresh, store them in an airtight container. This helps maintain their soft texture. You can place a piece of bread in the container. This will help keep the cookies moist. Make sure to seal the container well to keep out air. Avoid stacking the cookies too high to prevent them from getting squished. You can freeze these cookies to enjoy later. First, let the cookies cool completely. Place them in a single layer on a baking sheet. Freeze them for about an hour. Once firm, transfer the cookies to a freezer-safe bag. Remove as much air as possible before sealing. You can freeze them for up to three months. When you want to enjoy them, thaw at room temperature. You can also warm them in the oven for a few minutes for that fresh-baked taste. Pumpkin spice snickerdoodles stay fresh for about a week at room temperature. When stored in an airtight container, they can last longer. If you freeze them, they will keep their best flavor for about three months. After thawing, eat them within a week for the best taste. If your dough is too sticky, add more flour. Start with one tablespoon at a time. Mix it in well. You want the dough to be soft but not clingy. Sometimes, the weather affects the dough. Humidity can make it wetter. So, adjusting with flour helps. I do not recommend using pumpkin pie filling. Pumpkin pie filling has added spices and sugar. This can change the taste and texture of your snickerdoodles. Stick to pure pumpkin puree for the best flavor. It gives the cookies a fresh and natural pumpkin taste. To reheat cookies, use the oven for best results. Preheat it to 300°F (150°C). Place your cookies on a baking sheet. Heat them for about 5 minutes. This warms them up and makes them soft again. You can also use a microwave. Just heat for about 10-15 seconds. Enjoy your warm, fresh cookies! For the complete recipe, check out the full recipe. You learned how to make pumpkin spice snickerdoodles step by step. We covered the right ingredients, mixing techniques, and baking tips. Keeping your cookies fresh is key, as is knowing how to store them well. You can even try gluten-free or vegan options. Remember, baking is about fun and flavor. Use these tips to make the best cookies for any season. Happy baking!](https://roastedflavors.com/wp-content/uploads/2025/08/8b2a32d4-ea9d-445a-9166-69fff292a0e2.webp)
Are you ready to make pumpkin spice snickerdoodles that are soft and full of flavor? These cookies combine classic snickerdoodle charm with a fall twist. With easy steps, helpful tips, …
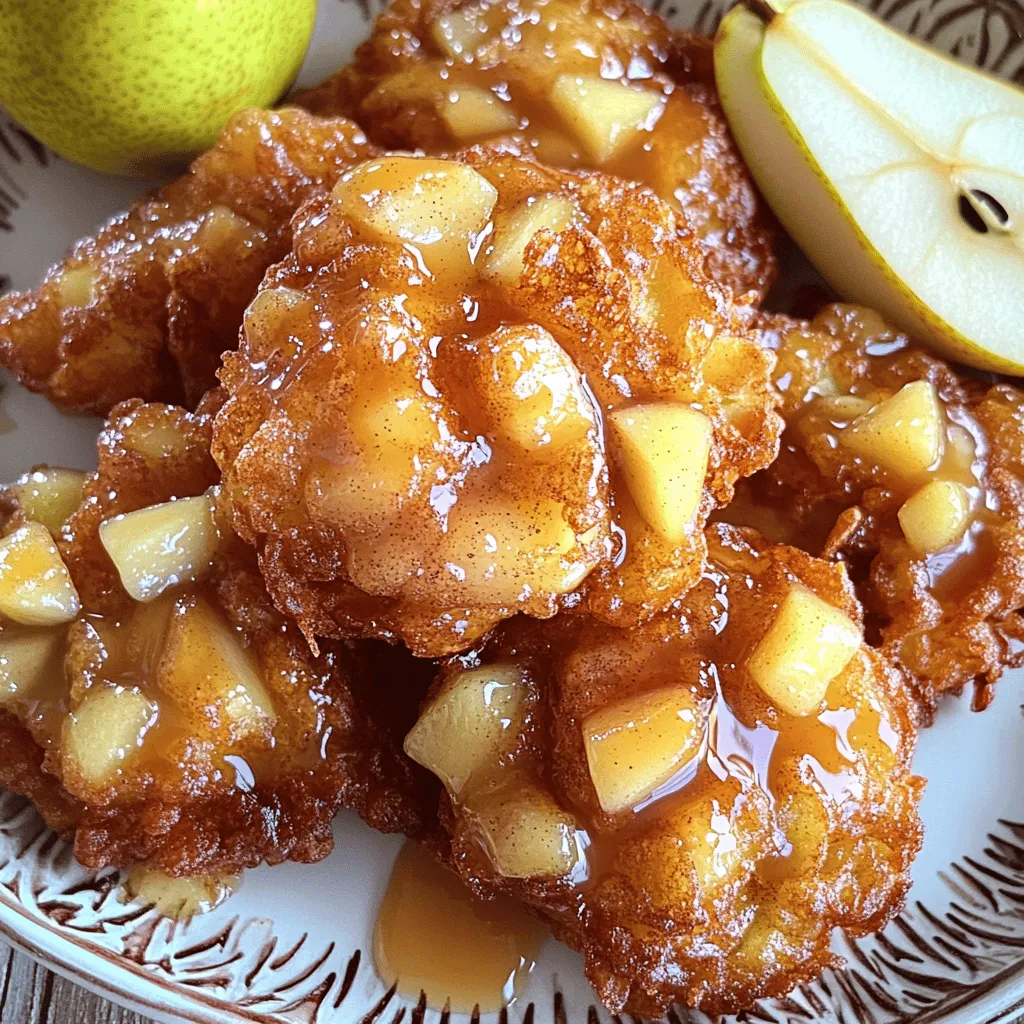
Are you ready to indulge in a sweet treat that combines juicy pears and a sticky maple-honey glaze? In this recipe for Delicious Pear Fritters with Maple-Honey Glaze, I’ll guide …