Skip to content
Roasted Flavors
  • Home
  • Appetizers
  • Desserts
  • Salads
  • Breakfast
  • Dinner
  • Privacy Policy
  • Contact
  • About

Chef Remy

My Best Pumpkin Muffins Recipe Simple and Delicious

August 7, 2025 by Chef Remy
Here’s what you need to make my best pumpkin muffins. Each item adds flavor and texture. Gather these ingredients for a simple and tasty treat. - 1 ½ cups all-purpose flour - 1 cup canned pumpkin puree - 1 cup granulated sugar - ½ cup packed brown sugar - ½ cup vegetable oil - 2 large eggs - 1 teaspoon vanilla extract - 1 teaspoon baking powder - 1 teaspoon baking soda - ½ teaspoon salt - 1 teaspoon ground cinnamon - ½ teaspoon ground nutmeg - ½ teaspoon ground ginger - ½ cup chopped walnuts or pecans (optional) - ½ cup chocolate chips (optional) Each ingredient plays a role. The flour gives structure. The pumpkin adds moisture and flavor. Sugar sweetens and creates a nice crust. Eggs bind everything together. You can choose to add nuts or chocolate for extra fun. Want to make these muffins even better? Use fresh spices for a stronger taste. Fresh ground cinnamon or nutmeg will elevate your muffins. Check out the Full Recipe for precise measurements and baking tips. Start by preheating your oven to 350°F (175°C). This step is crucial for even baking. While it heats, prepare your muffin tin. Line it with paper liners or grease each cup lightly. This will help the muffins come out easily. In a large mixing bowl, combine the following dry ingredients: - 1 ½ cups all-purpose flour - 1 teaspoon baking powder - 1 teaspoon baking soda - ½ teaspoon salt - 1 teaspoon ground cinnamon - ½ teaspoon ground nutmeg - ½ teaspoon ground ginger Use a whisk to blend everything well. Make sure there are no lumps. Set this bowl aside for now. In another bowl, mix together: - 1 cup granulated sugar - ½ cup packed brown sugar - ½ cup vegetable oil - 2 large eggs Whisk these ingredients until they blend into a smooth mixture. This will be your wet base. Now, gently fold in: - 1 cup canned pumpkin puree - 1 teaspoon vanilla extract Stir these into your egg-sugar mix. This creates a creamy, flavorful base. Gradually add your dry mix to the wet mix. Use a spatula or wooden spoon to combine. Be careful not to overmix! A few lumps are okay. They will help make your muffins fluffy. If you want to enhance your muffins, fold in: - ½ cup chopped walnuts or pecans (optional) - ½ cup chocolate chips (optional) These add texture and flavor. Feel free to get creative with your choices! Spoon the batter into the prepared muffin tin. Fill each cup about three-quarters full. This gives the muffins room to rise without spilling over. Place your muffin tin in the preheated oven. Bake for 18-20 minutes. To check if they are done, insert a toothpick into the center of a muffin. It should come out clean or with a few moist crumbs. Once baked, take the muffin tin out of the oven. Let the muffins cool in the tin for 5 minutes. After that, gently transfer them to a wire rack to cool completely. Enjoy your delicious pumpkin muffins warm or at room temperature! For more details, check the Full Recipe. To make the best pumpkin muffins, follow a few simple tips. First, measure your flour correctly. Too much flour can make muffins dry. Use a spoon to fill the measuring cup, then level it off with a knife. Second, avoid overmixing your batter. Mix just until combined; some lumps are okay. This keeps your muffins soft and fluffy. Lastly, check your oven's temperature. An oven thermometer can help. Even a few degrees off can affect baking. If you need to change ingredients, here are some easy swaps. You can use brown sugar instead of granulated sugar for a deeper flavor. Replace the vegetable oil with melted coconut oil for a unique taste. If you're out of eggs, try ¼ cup applesauce per egg. It keeps the muffins moist. For gluten-free muffins, use a gluten-free flour blend. This way, everyone can enjoy them! Presentation matters when serving your muffins. Here are some ideas to make them shine. Serve muffins on a colorful plate to brighten the table. Dust with powdered sugar for a sweet look. You could also add a dollop of whipped cream on top. For a festive touch, sprinkle with chopped nuts or chocolate chips. These small details can make your muffins even more inviting. Enjoy them warm for the best experience! - Serving Suggestions: Pair your pumpkin muffins with a hot cup of coffee or tea. They also go well with yogurt or a fresh fruit salad. For a fun twist, serve them with a side of maple syrup for dipping. {{image_4}} You can add more spice to your muffins. Try using cardamom or allspice. These spices give a warm and cozy flavor. Mix them into the dry ingredients. This fun twist can change the taste! If you want a healthier muffin, swap out sugars. Use honey or maple syrup instead. Both are natural sweeteners. They can add a nice flavor and keep the muffins moist. Need gluten-free muffins? Use almond or coconut flour. Both work great in this recipe. For vegan muffins, replace eggs with flaxseed meal or applesauce. This keeps them fluffy and tasty. You can enjoy these muffins no matter your diet! For the full recipe, check out My Best Pumpkin Muffins Recipe. You can store your pumpkin muffins at room temperature for up to three days. Place them in an airtight container. This keeps them fresh and moist. Avoid stacking them too high to prevent squishing. For longer storage, freeze your muffins. Wrap each muffin tightly in plastic wrap. Then, place them in a freezer bag. They stay fresh for up to three months. When ready to eat, thaw them overnight in the fridge. Let your muffins cool completely before storing. This prevents moisture buildup. To reheat, microwave one muffin for 15 to 20 seconds. You can also warm them in a toaster oven. Enjoy them warm for the best taste! For the full recipe, check here. To make pumpkin muffins moist, use canned pumpkin puree. This adds moisture and flavor. Also, don’t overmix your batter. Mixing too much can make muffins tough. Adding oil keeps them soft, so don’t skip that. You can also try adding yogurt or sour cream for extra moisture. Yes, you can use fresh pumpkin. Just cook and puree it first. You want the puree to be smooth and thick. Fresh pumpkin may need more sugar since it can taste less sweet. Measure carefully to keep the texture right. Pumpkin muffins last about three days at room temperature in an airtight container. If you want to keep them longer, store them in the fridge. They can last up to a week there. Just remember to check for any signs of spoilage. You can serve pumpkin muffins with honey or maple syrup drizzled on top. Cream cheese spread is also a tasty option. Pairing them with coffee or tea works well, too. If you want something light, serve with fresh fruit for a nice contrast. Yes, you can freeze pumpkin muffins. Let them cool completely first. Then, wrap each muffin in plastic wrap, then foil. This helps keep them fresh. They can last up to three months in the freezer. To eat, just thaw at room temperature or warm them in the oven. You now have all you need to make delicious pumpkin muffins. We covered the key ingredients, mixed the wet and dry parts, and learned some handy tips. You can even try fun variations to suit different tastes. Remember, your muffins will stay fresh with proper storage. Baking is about joy and creativity, so don’t hesitate to experiment. Enjoy your tasty treats and share them with others!

Welcome to my simple and delicious pumpkin muffins recipe! If you love warm, fluffy muffins, you’re in for a treat. These muffins are easy to make and packed with flavor. …

Read more

Categories Desserts

Classic Pumpkin Spice Cake Roll Tasty Fall Delight

August 7, 2025 by Chef Remy
To make a classic pumpkin spice cake roll, you need a few simple ingredients. Here’s what to gather: - 1 cup all-purpose flour - 1 teaspoon baking powder - 1 teaspoon baking soda - 1 teaspoon ground cinnamon - 1/2 teaspoon ground nutmeg - 1/2 teaspoon ground ginger - 1/4 teaspoon ground cloves - 1/2 teaspoon salt - 3 large eggs - 1 cup granulated sugar - 1 cup pumpkin puree (not pumpkin pie filling) - 1 teaspoon vanilla extract - 1 cup cream cheese, softened - 1/4 cup unsalted butter, softened - 2 cups powdered sugar - 1 teaspoon vanilla extract (for the frosting) - Optional: Chopped pecans or walnuts for garnish These ingredients blend together to create a moist, spiced cake that rolls up beautifully. Each element plays a key role, from the spices that bring warmth to the pumpkin that adds moisture. Remember, using pure pumpkin puree is crucial for the right flavor. You can find the full recipe [here]. 1. Preheat your oven to 375°F (190°C). This is key for a good rise. 2. Prepare a 15x10-inch jelly roll pan by lining it with parchment paper. Leave some paper hanging over the edges. This helps with easy removal later. Lightly grease the parchment with cooking spray or butter. 3. In a medium bowl, sift together the dry ingredients. Combine 1 cup of all-purpose flour, 1 teaspoon baking powder, 1 teaspoon baking soda, and your spices: 1 teaspoon ground cinnamon, 1/2 teaspoon ground nutmeg, 1/2 teaspoon ground ginger, 1/4 teaspoon ground cloves, and 1/2 teaspoon salt. Mix well and set it aside. 1. In a large mixing bowl, beat together 3 large eggs and 1 cup of granulated sugar. Whisk them until the mixture is pale and fluffy, about 5 minutes. 2. Add in 1 cup of pumpkin puree and 1 teaspoon of vanilla extract. Mix until everything is well combined. 3. Gently incorporate the dry mixture into the pumpkin mix using a spatula. Fold carefully to avoid overmixing. You want a nice, light texture. 1. Pour the batter into the prepared jelly roll pan. Use a spatula to spread it evenly. 2. Bake the cake for 13-15 minutes. It should spring back when you touch the center lightly. 3. Once baked, remove the cake from the oven. Dust the top with powdered sugar while it’s warm. 4. Place a clean kitchen towel over the top. Carefully invert the cake onto the towel, removing the parchment paper. 5. Roll the cake up tightly from the short end. Use the towel to help you. Let it cool completely in this rolled position. This process is easy and fun. Once you master these steps, you can enjoy the delicious flavors of the classic pumpkin spice cake roll. For the full recipe, check out the instructions in the earlier section. To get the perfect texture for your cake roll, do not overmix the batter. When you fold the dry ingredients into the wet, stop mixing as soon as you don't see any flour. This will keep your cake light and fluffy. When rolling the cake, do it while it's warm. Use a clean kitchen towel for help. Start from the short end and roll it tightly. This will help prevent cracking. For smooth cream cheese frosting, beat the cream cheese and butter until they are creamy. Avoid lumps by mixing well. Add powdered sugar slowly to keep it smooth. You can try adding flavors like maple or orange zest for a fun twist. These flavors will give your frosting a unique taste. Garnishing your cake roll can make it look special. Dust it with powdered sugar right before serving. You can also add chopped pecans or walnuts for some crunch. For drinks, pair it with warm cider or a pumpkin spice latte. These pairings will enhance your fall experience and delight your guests. For the full recipe, check the Classic Pumpkin Spice Cake Roll section. {{image_4}} You can change flavors in your pumpkin spice cake roll. For a fun twist, try adding chocolate. Use cocoa powder in the batter for a rich taste. You can also drizzle melted chocolate over the top for a sweet finish. Another option is caramel. Swirl caramel sauce in the cream cheese frosting. This gives it a lovely, sweet flavor that pairs well with pumpkin. You can also switch up the spices. Instead of just cinnamon, nutmeg, and ginger, add cardamom or allspice. These spices can give your cake roll a unique twist. If you need a gluten-free option, swap the all-purpose flour for a gluten-free blend. Many blends work well in baking, making your cake just as tasty. For a vegan version, replace eggs with flaxseed meal. Mix one tablespoon of flaxseed with three tablespoons of water and let it sit until it thickens. Use plant-based butter and vegan cream cheese in the frosting. This way, everyone can enjoy this fall treat! Explore the Full Recipe for more details. To keep your classic pumpkin spice cake roll fresh, store it properly. First, wrap the cake roll tightly in plastic wrap. This keeps air out and prevents drying. You can also place it in an airtight container for extra protection. Make sure to refrigerate it right after it cools. It stays fresh for up to a week in the fridge. If you want to enjoy it later, freezing is a great option. Freezing your cake roll is easy and a good way to save it. Start by letting the cake cool completely. Then, roll it up with the cream cheese frosting inside. Wrap it well in plastic wrap or aluminum foil. This will prevent freezer burn. To thaw, take it out of the freezer and place it in the fridge overnight. This slow thaw keeps the texture nice. If you need it faster, you can let it sit at room temperature for a couple of hours. Once thawed, dust with powdered sugar and enjoy! Freezing does not change the taste or quality much, so it’s a smart choice for busy days. Can I make this cake roll ahead of time? Yes, you can make this cake roll a day or two in advance. Just keep it wrapped in plastic wrap in the fridge. This helps the flavors blend nicely. What to do if the cake cracks while rolling? If the cake cracks, don't worry! You can still fix it. Just use frosting to cover the cracks. It will still taste amazing. How long will the cake roll last in the refrigerator? The cake roll lasts about five days in the fridge. Just remember to keep it covered. What can I use if I don’t have cream cheese? If you don’t have cream cheese, you can use mascarpone cheese. It gives a similar creamy texture. Greek yogurt is another option, but it will be tangier. How to make a pumpkin spice cake roll without baking soda? If you want to skip baking soda, use baking powder instead. Just double the amount. This helps the cake rise well without baking soda. For the full recipe, check out the Classic Pumpkin Spice Cake Roll details. Enjoy baking! In this post, we explored the classic pumpkin spice cake roll. I shared the essential ingredients and detailed steps for preparation, mixing, baking, and rolling. I included tips for perfect texture and frosting techniques, plus tasty variations to try. Remember, proper storage keeps your cake fresh, whether refrigerated or frozen. This delightful treat is not just fun to make; it brings joy to every occasion. I hope you feel inspired to create your own pumpkin spice cake roll. Enjoy each bite!

Fall is here, and there’s no better treat than a Classic Pumpkin Spice Cake Roll! This delightful dessert combines warm spices and creamy frosting, making it the perfect addition to …

Read more

Categories Desserts

Quick Southwest Chicken Salad Easy and Healthy Recipe

August 7, 2025 by Chef Remy
- 2 cups of cooked chicken breast, shredded into bite-sized pieces - 1 can (15 oz) of black beans, thoroughly rinsed and drained - 1 cup of corn kernels (either fresh, canned, or frozen) - 1 bell pepper (choose between vibrant red or golden yellow), diced into small cubes - 1 cup of cherry tomatoes, halved for sweetness - 1 small red onion, finely chopped for a delectable crunch - 1 ripe avocado, diced into creamy pieces - 1/4 cup of fresh cilantro, coarsely chopped for flavor - Juice of 2 juicy limes for zest - 3 tablespoons of extra-virgin olive oil for richness - 1 teaspoon of ground cumin for an earthy note - 1 teaspoon of chili powder for a hint of spice - Salt and pepper to taste, ensuring balance - Diced avocado - Fresh cilantro - Additional lime wedges This hearty salad bursts with flavor and color. You can easily make it your own by adding or swapping ingredients. For the full recipe, check out the detailed instructions provided. Start by gathering all your ingredients. In a big mixing bowl, combine the following main items: - 2 cups of cooked chicken breast, shredded into bite-sized pieces - 1 can (15 oz) of black beans, thoroughly rinsed and drained - 1 cup of corn kernels (either fresh, canned, or frozen) - 1 bell pepper, diced into small cubes - 1 cup of cherry tomatoes, halved for sweetness - 1 small red onion, finely chopped Mix everything gently. You want to keep the ingredients intact for that nice crunch. In a medium-sized bowl, whisk together these ingredients: - Juice of 2 juicy limes - 3 tablespoons of extra-virgin olive oil - 1 teaspoon of ground cumin - 1 teaspoon of chili powder - Salt and pepper to taste Blend until smooth. This dressing adds a zesty kick to your salad. Now, drizzle the dressing over your salad base. Use a large spoon to toss everything together. Make sure every bit of the salad gets coated well. Next, carefully add: - 1 ripe avocado, diced into creamy pieces - 1/4 cup of fresh cilantro, coarsely chopped Gently toss again, but be careful not to mash the avocado. Taste your salad and adjust the seasoning if needed. For the full recipe, check out [Full Recipe]. Enjoy your meal! To make your Quick Southwest Chicken Salad even better, adjust the seasoning. Taste it as you mix. If you want more zest, squeeze in more lime juice. This brightens the flavors and brings life to the dish. How you serve your salad matters. Arrange it in pretty bowls for a nice look. You can also use garnishes like lime wedges or extra cilantro. These add color and make the salad more inviting. Want to save time? Use pre-cooked or rotisserie chicken. It cuts down your prep time. You can also chop your vegetables ahead of time. Store them in the fridge until you are ready to make the salad. These small steps help you enjoy your meal faster. For the full recipe, check out the link above. {{image_4}} You can change the protein in your salad. Try using chickpeas or tofu for a plant-based option. They add great texture and protein. If you want something different, grilled shrimp or steak work well too. Both add a nice smoky flavor to the salad. You can add more veggies to boost nutrients. Avocado adds creaminess and healthy fats. Zucchini can give a nice crunch and is very mild. Chopped greens like spinach or kale add a lot of vitamins without changing the taste much. You might want to switch up the dressing. Try a different vinaigrette, like balsamic or honey mustard, for a new flavor. If you prefer creamy dressings, ranch or a yogurt-based dressing can add richness. Each option brings a unique twist to your salad. For the full recipe, check out the Zippy Southwest Chicken Salad. Enjoy experimenting with your own variations! To keep your Quick Southwest Chicken Salad fresh, store it in the fridge right away. Use an airtight container. This helps keep the salad crisp and tasty. You can enjoy it for up to three days. If you notice any sogginess, drain excess liquid before serving again. You cannot freeze the whole salad. Freezing will change the texture of fresh veggies and avocado. If you want to save some, freeze only the chicken. To thaw, place it in the fridge overnight. Once thawed, add fresh veggies and dressing to refresh the salad. If you need to reheat chicken, do so gently. Use the microwave on low power for one to two minutes. This keeps the chicken juicy. Avoid reheating the whole salad, as it may wilt. Always check the texture before serving. A quick toss helps bring back some freshness. This salad stays fresh in the fridge for about three days. To keep it tasty, store it in an airtight container. The longer it sits, the more the flavors mix, which can be nice. However, the avocado may brown, so add it just before serving. Yes, you can prepare this salad ahead of time! I suggest making the base a day before. Just mix the chicken, beans, corn, and veggies. Keep the dressing separate. When you're ready to eat, simply drizzle the dressing and toss everything together. This keeps it crunchy and fresh. This salad pairs well with many dishes. Here are some ideas: - Tortilla chips for a crunchy side - Grilled corn on the cob for sweetness - A slice of crusty bread for a filling option - A fresh fruit salad for a sweet contrast For the full recipe, check out the main sections of the article! This blog post covered how to make a quick Southwest chicken salad. You learned about the main ingredients, seasonings, and tips to enhance flavors. There are also ways to vary the recipe with different proteins and veggies. Proper storage helps keep leftovers fresh. Lastly, I shared answers to common questions about the salad. Enjoy making this salad your own! It's a tasty and healthy choice that's easy to prepare.

Looking for a quick and healthy meal? You’ll love this Quick Southwest Chicken Salad! It’s packed with fresh ingredients, bold flavors, and easy to make. In just a few steps, …

Read more

Categories Salads

Cinnamon Crunch Banana Bread Irresistible Delight

August 7, 2025 by Chef Remy
To make Cinnamon Crunch Banana Bread, you need simple ingredients that blend well together. This recipe is easy to follow, even for new cooks. The result is a moist and flavorful bread with a sweet crunch on top. - 3 ripe bananas, thoroughly mashed - 1/3 cup coconut oil, melted - 1 teaspoon pure vanilla extract - 1 large egg, beaten until frothy - 3/4 cup granulated sugar (or brown sugar for a deeper flavor) - 1 teaspoon baking soda - A pinch of salt - 1 teaspoon ground cinnamon - 1 1/2 cups all-purpose flour - 1/2 cup walnuts or pecans, chopped These key ingredients create the base for your delicious banana bread. The ripe bananas bring natural sweetness and moisture. The coconut oil gives it a rich taste and keeps it soft. - For the Crunch Topping: - 1/4 cup granulated sugar - 1 teaspoon ground cinnamon - 1/4 cup rolled oats The optional crunch topping adds a delightful texture. You can skip it if you prefer a simpler loaf. However, I highly recommend adding it for that extra layer of flavor. Before you start, gather all your ingredients. You want everything ready to go. Preheat your oven to 350°F (175°C). This step is key for even baking. Grease a 9x5 inch loaf pan with butter or cooking spray. This will keep your bread from sticking. In a large bowl, mash the ripe bananas well. You want a smooth consistency. Next, pour in the melted coconut oil and stir until mixed. Add the pure vanilla extract and the beaten egg. Mix until everything is smooth. Now, add the granulated sugar, baking soda, salt, and ground cinnamon. Stir to combine these dry ingredients well. Gradually fold in the all-purpose flour. Be gentle to keep the bread fluffy. Finally, mix in the chopped walnuts or pecans evenly. In a small bowl, combine the granulated sugar, ground cinnamon, and rolled oats. This topping adds a sweet crunch. Sprinkle it evenly on top of the batter in the loaf pan. This step makes the bread even more delightful. Now, it's ready to bake! Place the pan in the oven and bake for 60 to 70 minutes. Check for doneness by inserting a toothpick into the center. If it comes out clean, your banana bread is ready. After baking, let it cool in the pan for 10 minutes. Then, transfer it to a wire rack to cool completely. For the full recipe, refer back to the ingredient section. To get that perfect crunch on top, mix sugar, cinnamon, and oats well. This topping adds a nice texture. Make sure to sprinkle it evenly over the batter before baking. If you want it extra crunchy, bake for a couple of extra minutes. Just keep an eye on it to avoid burning. Store your banana bread in an airtight container. This keeps it moist and fresh. If you plan to eat it within a few days, leave it at room temperature. For longer storage, wrap it tightly in plastic wrap and place it in the fridge. You can also freeze slices for up to three months. Thaw at room temperature when ready to enjoy. One common mistake is overmixing the batter. This can make your bread tough. Mix until just combined. Another mistake is not using ripe bananas. The riper they are, the sweeter and better your bread will be. Lastly, don’t skip the crunch topping! It gives a great flavor boost. For more details, check the Full Recipe. {{image_4}} You can easily make this banana bread nut-free. Simply leave out the walnuts or pecans. This change still keeps the bread moist and tasty. You might also add sunflower seeds for a little crunch. They give a nice texture without any nuts. If you want a vegan version, swap the egg for ground flaxseed. Mix one tablespoon of flaxseed meal with three tablespoons of water. Let it sit for five minutes to thicken. Use this mix in place of the egg. You can also replace the coconut oil with applesauce. This keeps the bread moist while adding natural sweetness. To make your banana bread even more special, try adding extra spices. A pinch of nutmeg or ginger can really boost the flavor. You can also mix in some chocolate chips for a sweet touch. Dried fruit like raisins or cranberries adds a nice chewy texture too. Each option gives you a new way to enjoy this classic treat. For the full recipe, check the earlier section. To keep your banana bread fresh, store it at room temperature. Wrap it tightly in plastic wrap or place it in an airtight container. This way, it stays moist and tasty. It will last for about 2 to 3 days. If you live in a humid area, the fridge is a better choice. It can last up to a week in the fridge. However, it may lose some of its soft texture. Freezing banana bread is simple. First, let it cool completely. Then, slice it into pieces for easy serving later. Wrap each slice in plastic wrap. Place the wrapped slices in a freezer bag or container. This will help keep out air and prevent freezer burn. You can freeze it for up to 3 months. When ready, just thaw it at room temperature or microwave it for a quick treat. To enjoy your banana bread warm, preheat your oven to 350°F (175°C). Place the slices on a baking sheet. Heat them for about 10 minutes. This method brings back the fresh-baked taste. For faster reheating, use a microwave. Heat a slice for 10 to 15 seconds. Just be careful not to overheat it, or it may become dry. Enjoy your delicious banana bread warm! To make your banana bread fluffier, use fresh, ripe bananas. They add moisture and natural sweetness. Mixing the wet and dry ingredients separately can also help. Then, fold the flour gently into the batter. This keeps the bread light and airy. Avoid overmixing, as this can make it dense. Adding an extra egg or using cake flour instead of all-purpose flour can also boost fluffiness. Yes, you can substitute ingredients in this recipe. For example, if you don't have coconut oil, use vegetable oil or melted butter instead. You can swap granulated sugar for brown sugar for a richer taste. If you have dietary restrictions, try using a flax egg instead of a regular egg. For a nut-free version, leave out the walnuts or pecans. You can also use applesauce in place of some banana for a unique twist. You can serve Cinnamon Crunch Banana Bread in many fun ways. Top each slice with a dollop of yogurt or cream cheese for a creamy touch. Serve it warm with a drizzle of honey or maple syrup for extra sweetness. Pair it with fresh fruit, like berries or sliced bananas, for a healthy side. You can also enjoy it with a cup of coffee or tea for a cozy treat. This blog post shared the best way to make Cinnamon Crunch Banana Bread. We covered key ingredients, step-by-step instructions, and tips for great results. You learned how to store your bread and avoid common mistakes. Plus, I shared variations to suit your taste and lifestyle. In conclusion, use these ideas to make your baking fun and tasty. Enjoy each bite, and share with friends! Happy baking!

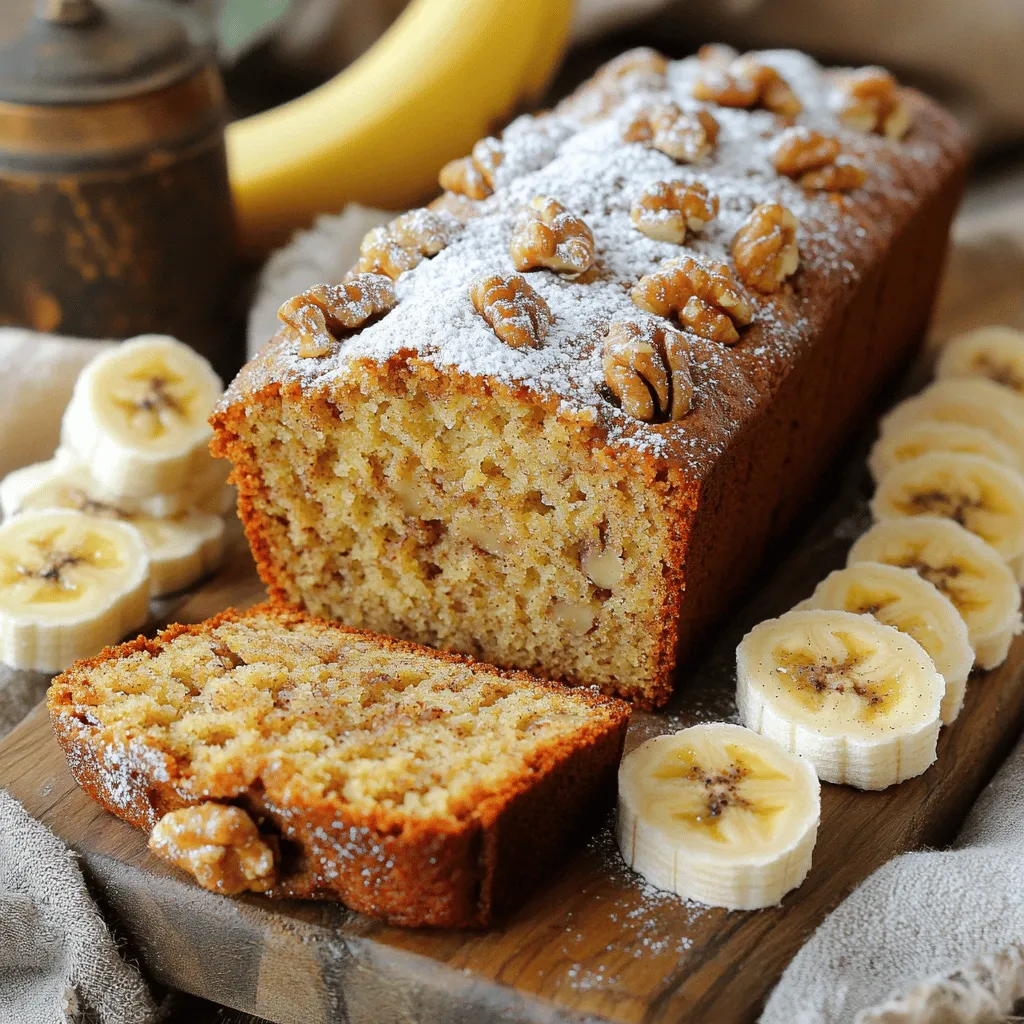
Are you ready for a treat that smells amazing and tastes even better? This Cinnamon Crunch Banana Bread is an irresistible delight that you won’t want to miss. I’ll guide …
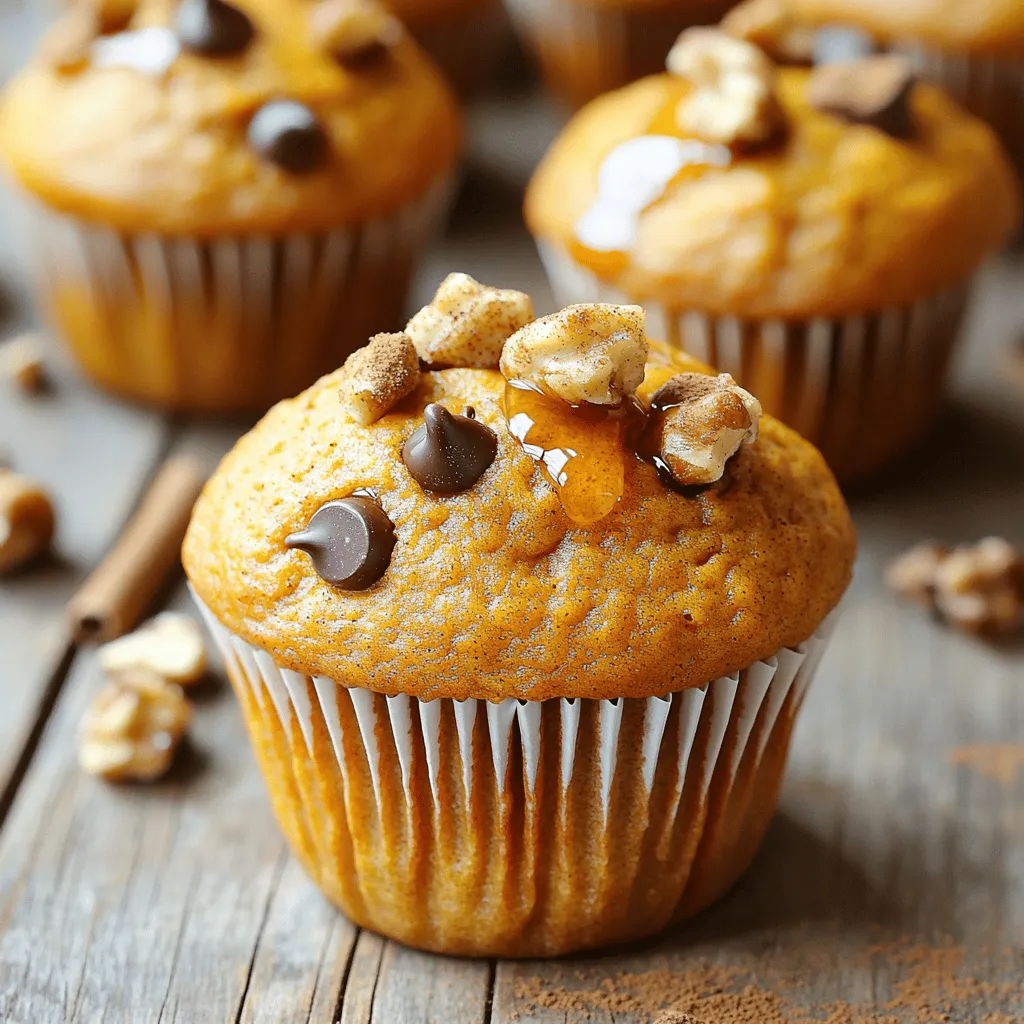
Read more

Categories Desserts

Pumpkin Muffins Delicious and Simple Recipe Guide

August 7, 2025 by Chef Remy
- 1 ½ cups all-purpose flour - 1 cup pumpkin puree - ¾ cup granulated or brown sugar - ½ cup vegetable oil - 2 large eggs To make pumpkin muffins, use these main ingredients. The flour gives structure. The pumpkin puree adds moisture and flavor. Sugar sweetens the muffins, while oil keeps them soft. Eggs bind everything together. - 1 teaspoon baking soda - ½ teaspoon baking powder - 1 teaspoon ground cinnamon - ½ teaspoon ground nutmeg - ½ teaspoon ground ginger - ¼ teaspoon ground cloves - ½ teaspoon sea salt Spices are key to flavor. Baking soda and baking powder help muffins rise. Cinnamon, nutmeg, ginger, and cloves bring warmth. Sea salt balances sweetness and enhances flavors. - ½ cup chopped walnuts or pecans - ½ cup semi-sweet chocolate chips Add-ins make the muffins special. Nuts add crunch and protein. Chocolate chips bring sweetness. You can skip these or mix them in based on your taste. For the complete recipe, check the Full Recipe section. - Preheat the oven and prepare muffin tray: Start by setting your oven to 350°F (175°C). Grab a 12-cup muffin tray. Line it with paper liners or spray it lightly with non-stick spray. This helps the muffins to come out easily. - Whisk the dry ingredients: In a medium mixing bowl, combine 1 ½ cups of all-purpose flour, 1 teaspoon of baking soda, and ½ teaspoon of baking powder. Add 1 teaspoon of ground cinnamon, ½ teaspoon of ground nutmeg, ½ teaspoon of ground ginger, ¼ teaspoon of ground cloves, and ½ teaspoon of sea salt. Whisk them together well and set this bowl aside. - Mix the wet ingredients: In a large mixing bowl, combine 1 cup of pumpkin puree, ¾ cup of sugar (granulated or brown), and ½ cup of vegetable oil. Use a whisk to blend these ingredients until smooth and creamy. - Incorporate eggs into the pumpkin mixture: Crack 2 large eggs into the pumpkin mix one at a time. Whisk after each addition. Make sure the eggs blend well into the mixture for a fluffy texture. - Gradually combine wet and dry mixtures: Slowly add the dry mixture to the wet mixture. Use a spatula or wooden spoon to mix gently. Stir until just combined, leaving a few small lumps. Avoid overmixing, as it can make the muffins tough. - Fill muffin cups and bake: Evenly distribute the batter into the prepared muffin cups. Fill each cup about two-thirds full to let them rise. Place the tray in the preheated oven and bake for 18-20 minutes. Check if they are done by inserting a toothpick into the center; it should come out clean. - Cooling the muffins: Once baked, remove the tray from the oven. Let the muffins cool in the pan for about 5 minutes. Then, transfer them to a wire rack to cool completely. Enjoy your delicious pumpkin muffins warm or at room temperature! To make perfect pumpkin muffins, avoid overmixing the batter. Mix just until you combine the wet and dry ingredients. This keeps the muffins light and tender. When baking, use a toothpick to check for doneness. Insert it into the center of a muffin; if it comes out clean, the muffins are ready. Serve your pumpkin muffins warm for the best taste. A dusting of powdered sugar adds a nice touch. These muffins pair well with coffee, tea, or even a glass of warm apple cider. Enjoy them during breakfast or as a sweet snack. Want a stronger flavor? Add more spices like cinnamon or nutmeg. You can also customize the texture by folding in nuts or chocolate chips. Walnuts or pecans add crunch, while chocolate chips bring sweetness. This way, you can make your muffins truly your own. For the full recipe, check out the Spiced Pumpkin Muffins section. {{image_4}} You can easily make gluten-free pumpkin muffins. Just swap regular flour for gluten-free flour. Options include almond flour or a gluten-free blend. Make sure to check the brands for binding agents. You might need to add a bit more liquid to keep the batter moist. This change keeps the muffins soft and tasty. To make vegan pumpkin muffins, you can skip the eggs and oil. Use flaxseed meal or chia seeds mixed with water as a binder. For oil, try unsweetened applesauce or coconut oil. These swaps keep the muffins light and fluffy. The pumpkin flavor still shines, giving you tasty results. You can spice things up by adding more flavors. Try mixing in some nutmeg or cardamom for depth. Chocolate chips add sweetness, while nuts give a nice crunch. Dried fruits like cranberries can add a chewy texture. Each tweak creates a unique twist on your pumpkin muffins. Experiment and find your favorite mix! For the full recipe, check the [Full Recipe]. You can store pumpkin muffins at room temperature or in the fridge. If you keep them at room temperature, place them in an airtight container. They will stay fresh for about three days. If you want them to last longer, put them in the fridge. This will keep them good for up to a week. Just remember to let them cool completely before sealing. To freeze your pumpkin muffins, let them cool first. Wrap each muffin in plastic wrap. Then, place them in a freezer bag. This keeps out air and moisture. You can freeze them for up to three months. When you want to eat one, take it out and leave it at room temperature for a few hours. You can also microwave it for about 20 seconds to warm it up quickly. Pumpkin muffins have a good shelf life if stored correctly. At room temperature, they stay fresh for three days. In the fridge, they last for one week. If frozen, they can be good for up to three months. Checking for freshness is key. Look for any signs of mold or off-smells before eating. Enjoy your muffins at their best! To make your pumpkin muffins moist, focus on the right ingredient ratios. Use enough pumpkin puree; it keeps the muffins tender. I suggest about 1 cup of pumpkin for 1 ½ cups of flour. Also, don’t overbake them. Check for doneness at 18 minutes. Remove them when a toothpick comes out clean but still moist. Yes, you can use fresh pumpkin puree. Fresh pumpkin gives a bright flavor. It also has less water than canned, so be careful with ratios. Roast the pumpkin first, then blend it until smooth. This adds a fresh twist to your muffins. If you need egg alternatives, try using applesauce or mashed bananas. About ¼ cup of either works well for one egg. You can also use flaxseed meal. Mix 1 tablespoon of flaxseed with 2.5 tablespoons of water. Let it sit until it thickens. This makes a great binding agent. To check if your muffins are done, insert a toothpick in the center. If it comes out clean or with a few crumbs, they are done. The top should look golden and spring back when touched. If the muffins look wet or mushy, give them a few more minutes in the oven. In this post, we explored the key ingredients and steps to make delicious pumpkin muffins. We covered how to mix the right spices, add tasty extras, and provided baking tips for perfect results. You can even try gluten-free or vegan options. In the end, pumpkin muffins are simple and fun to make. Enjoy the warm, tasty results any time of year!

Are you ready to fill your kitchen with the cozy scent of pumpkin muffins? This simple recipe guide is here to help you bake delicious treats that everyone will love. …

Read more

Categories Breakfast

Zesty Southwest Chicken Salad Fresh and Flavorful Dish

August 7, 2025 by Chef Remy
For this salad, gather the following ingredients: - 2 cups cooked chicken breast, shredded - 1 can (15 oz) black beans, rinsed and drained - 1 cup corn kernels (fresh or frozen) - 1 cup cherry tomatoes, halved - 1 red bell pepper, diced - 1/2 red onion, finely chopped - 1 ripe avocado, diced - 1/4 cup fresh cilantro, chopped - Juice of 2 limes - 3 tablespoons extra virgin olive oil - 1 teaspoon ground cumin - 1 teaspoon chili powder - Sea salt and freshly ground black pepper to taste - Crispy tortilla strips for garnish When selecting your ingredients, look for bright colors and firm textures. Fresh vegetables should feel crisp, not wilted. Choose ripe avocados that yield slightly when pressed. For tomatoes, pick ones that smell fragrant and have smooth skin. For canned beans, check the label for low sodium options. Fresh herbs should look vibrant and smell strong. These choices will create a salad that bursts with flavor. This salad is packed with nutrients. It offers protein from chicken and black beans, fiber from the beans and vegetables, and healthy fats from the avocado. Each serving provides a good balance of vitamins and minerals. The lime juice adds vitamin C, while the olive oil provides healthy monounsaturated fats. Enjoy this salad as a great option for a light lunch or dinner. It’s healthy, filling, and delicious! To start, gather your ingredients. You need cooked chicken, black beans, corn, cherry tomatoes, red bell pepper, red onion, avocado, and cilantro. 1. In a large bowl, add 2 cups of shredded chicken. 2. Next, add 1 can of black beans that you rinsed and drained. 3. Toss in 1 cup of corn kernels, either fresh or frozen. 4. Now, add 1 cup of halved cherry tomatoes. 5. Dice 1 red bell pepper and add it to the mix. 6. Finely chop 1/2 of a red onion and add that too. 7. Dice 1 ripe avocado and mix it in gently. 8. Finally, sprinkle in 1/4 cup of chopped cilantro. 9. Use a spatula to gently combine everything. The dressing brings life to this salad. 1. In a small bowl, squeeze the juice of 2 limes. 2. Add 3 tablespoons of extra virgin olive oil. 3. Include 1 teaspoon of ground cumin and 1 teaspoon of chili powder. 4. Season with a pinch of sea salt and black pepper. 5. Whisk the mixture until it blends well. Now, let’s put it all together. 1. Drizzle the zesty dressing over the salad mix. 2. Use a folding motion to coat all the ingredients. 3. Taste and adjust seasoning if needed. 4. Let the salad rest for about 10 minutes. 5. Transfer to a large serving platter. 6. Garnish with crispy tortilla strips for a nice crunch. Try this recipe for a fresh and flavorful meal! You can find the Full Recipe for Zesty Southwest Chicken Salad above. Use fresh herbs like cilantro and lime juice. They brighten up the salad. Try adding a pinch of smoked paprika for a smoky twist. Ground cumin and chili powder bring warmth and depth. If you want more heat, add diced jalapeño. Spice blends can also work well. Experiment with your favorites. Prep ingredients ahead of time for easy assembly. Store each component separately in the fridge. This keeps the salad fresh and crisp. Mix the dressing just before serving. This way, the salad won't get soggy. For meal prep, use portioned containers. This makes it easy to grab and go. Presentation matters! Use crispy tortilla strips for texture. They add crunch and look great on top. You can also sprinkle extra cilantro for color. For a pop of color, add sliced radishes or cherry tomatoes. A lime wedge on the side adds a nice touch too. These simple garnishes make your salad more inviting. Enjoy creating your Zesty Southwest Chicken Salad with these tips! For the complete recipe, check out the [Full Recipe]. {{image_4}} You can change the chicken in this salad to fit your diet. Use grilled shrimp or tofu for a fun twist. If you want a vegetarian option, chickpeas or lentils work well. These choices keep the protein high while adding new flavors. While the lime dressing shines, you can swap it out for variety. A creamy avocado dressing adds richness. Mix yogurt with lime juice for a tangy twist. For a spicy kick, try a chipotle ranch dressing. Each dressing brings its own special taste to the salad. Feel free to make this salad your own. Add diced cucumber for a crunch or shredded carrots for sweetness. You can even toss in some spinach or arugula for extra greens. If you love heat, sliced jalapeños can bring a fiery flavor. The more colorful and varied your veggies, the better your salad will taste. Explore all these options to keep your Zesty Southwest Chicken Salad fresh and exciting. For the complete recipe, be sure to check out the Full Recipe. To keep your Zesty Southwest Chicken Salad fresh, store it in the fridge. Place the salad in an airtight container. Make sure to seal it tightly to lock in flavors. If you have leftover dressing, store it separately. This keeps the salad crisp and tasty. Use glass or BPA-free plastic containers for storage. Glass containers are great for keeping flavors intact. They are also easy to clean. Choose containers that are the right size for your salad. This will prevent excess air from getting in. The salad stays fresh in the fridge for about 3 days. If you see any changes in color or smell, it’s time to toss it. The avocado may brown faster, so eat it sooner. For the best taste, enjoy your salad within the first two days. The best way to cook chicken for this salad is to grill or bake it. Grilling gives a nice smoky flavor. Baking keeps it tender and juicy. Use boneless chicken breasts for ease. Cook the chicken until it reaches 165°F. Let it rest before shredding. This keeps the juices inside. You can also use leftover rotisserie chicken if you're in a hurry. Yes, you can make Zesty Southwest Chicken Salad ahead of time. This salad tastes even better after chilling. Prepare the salad and store it in the fridge. Just wait to add the avocado until serving. This helps it stay fresh and bright. The flavors meld well when it sits. Aim to eat it within 2 days for the best taste. Avoid adding too much dressing at once. You want to coat, not drown, the salad. Also, be careful with seasoning. Taste as you go to find the right balance. Don't skip resting the salad. This step is key for flavor development. Lastly, use fresh ingredients for the best taste. Check that your beans and corn are rinsed well. These tips will help you make a perfect salad every time. Zesty Southwest Chicken Salad is easy and fun to make. We went over the best ingredients and tips for freshness. I shared step-by-step instructions and ways to enhance flavor. You learned about substitutes and how to store your salad well. With these ideas, you can enjoy a tasty meal. Don't be afraid to try new flavors or variations. Enjoy crafting your salad!

Are you ready to spice up your meal routine? This Zesty Southwest Chicken Salad is a vibrant mix of fresh ingredients that bursts with flavor. In this post, I’ll guide …

Read more

Categories Salads

Apple Cinnamon Rolls Irresistible Homemade Delight

August 6, 2025 by Chef Remy
To make apple cinnamon rolls, gather these key ingredients: - 2 cups all-purpose flour - 1/4 cup granulated sugar - 1 packet (2 1/4 teaspoons) instant yeast - 1/2 teaspoon salt - 1/4 cup unsalted butter, melted - 3/4 cup warm milk (about 110°F / 43°C) - 1 large egg - 1 teaspoon vanilla extract - 2 apples, peeled, cored, and finely chopped - 1 tablespoon lemon juice - 1 tablespoon ground cinnamon - 1/4 cup brown sugar, packed - 1/4 teaspoon ground nutmeg - 1/4 cup chopped pecans (optional) - 1 cup powdered sugar - 2 tablespoons cream cheese, softened - 1-2 tablespoons milk (for icing, adjust for desired consistency) You can make your rolls even more special with these options: - Chopped walnuts for extra crunch - Raisins or dried cranberries for sweetness - Drizzle of caramel sauce on top - A sprinkle of sea salt for contrast If you need to swap ingredients, consider these options: - Whole wheat flour instead of all-purpose flour - Coconut sugar instead of granulated sugar - Any milk type, like almond or oat milk, - Applesauce can replace the egg for a vegan option - Cream cheese can be swapped with mascarpone for a different flavor Explore these ingredients to craft your own version of these delightful rolls. You can find the full recipe in the earlier sections. Enjoy experimenting! To start, grab a large mixing bowl. Combine 2 cups of all-purpose flour, 1/4 cup of granulated sugar, 2 1/4 teaspoons of instant yeast, and 1/2 teaspoon of salt. Mix these dry ingredients well. In another bowl, whisk together 1/4 cup of melted unsalted butter, 3/4 cup of warm milk, 1 large egg, and 1 teaspoon of vanilla extract. Pour this wet mixture into the dry ingredients. Stir until you form a cohesive dough. Next, transfer the dough to a floured surface. Knead it for about 5 minutes until smooth and elastic. Now, shape the dough into a ball and place it in a greased bowl. Cover it with a kitchen towel and let it rise in a warm spot for about 1 hour. The dough should double in size. While your dough rises, prepare the filling. Take 2 peeled and cored apples, then finely chop them. Toss the apples in a bowl with 1 tablespoon of lemon juice. This keeps them fresh and tasty. In another bowl, mix 1 tablespoon of ground cinnamon, 1/4 cup of packed brown sugar, and 1/4 teaspoon of ground nutmeg. If you like nuts, add 1/4 cup of chopped pecans. Stir this mixture well. Once your dough has risen, roll it out on a floured surface into a rectangle about 12x8 inches. Brush the surface with the remaining melted butter. Evenly sprinkle the cinnamon-sugar mixture over the dough. Then, spread the chopped apples on top. Start at one long edge and roll the dough tightly into a log. Pinch the seams to seal it. Slice the log into 12 equal rolls. Place the rolls in a greased baking dish, cover with a towel, and let them rise for another 30 minutes. Preheat your oven to 350°F (175°C). Bake the rolls for 25-30 minutes, until they are golden brown. While the rolls bake, mix 1 cup of powdered sugar, 2 tablespoons of softened cream cheese, and 1-2 tablespoons of milk in a bowl. Adjust the milk until you get a smooth icing that drizzles easily. When the rolls come out of the oven, let them cool for a few minutes. Drizzle the icing generously over the warm rolls before serving. For the full recipe, check out the details above. Enjoy these delightful treats! To get soft and fluffy rolls, the dough needs to rise well. Use warm milk, about 110°F, to help the yeast work. The temperature is key; too hot can kill the yeast. Place the dough in a warm spot, away from drafts. Cover it with a towel to keep it cozy. Let it rise until it doubles in size, which usually takes about an hour. The longer it rises, the better the flavor! Kneading the dough is very important. Knead for about five minutes until it feels smooth. This develops the gluten, making your rolls soft. After shaping the rolls, let them rise again for about 30 minutes. This second rise helps them become light and airy. Do not rush this step. If they feel puffy, they are ready for the oven! The icing should be smooth and easy to drizzle. Start with powdered sugar and cream cheese. Add milk slowly until it reaches a nice consistency. If it’s too thick, add a little more milk. If it’s too thin, add more sugar. You want it to hold its shape but still flow easily over the warm rolls. This icing adds a sweet touch to your apple cinnamon rolls! For more details, check the Full Recipe. {{image_4}} You can swap apples for other fruits. Pears add a soft, sweet bite. Cherries bring a tart flavor that dances on your tongue. You can even use berries for a fun twist. Just chop them finely and mix with lemon juice. This helps keep them fresh. Each fruit gives a whole new taste to your rolls. Get creative and find your favorite! If you need gluten-free rolls, use a gluten-free flour blend. Look for one that includes xanthan gum for the best texture. For vegan rolls, substitute the egg with a flax egg. Just mix one tablespoon of ground flaxseed with three tablespoons of water. Let it sit for a few minutes to thicken. Use almond milk in place of regular milk, and substitute the butter with coconut oil. Your rolls will still be soft and tasty! Think beyond the basic icing. Try adding crushed nuts or a sprinkle of oats on top. For a twist, mix in a bit of maple syrup with the icing. You can also add a splash of vanilla or almond extract for more flavor. Another fun idea is to use a cream cheese frosting instead of the simple icing. It adds a rich taste that pairs well with the cinnamon. These toppings make your apple cinnamon rolls even more special! To keep your apple cinnamon rolls fresh, place them in an airtight container. You can also wrap them in plastic wrap. Store them at room temperature for up to two days. If you want to keep them longer, refrigerate. Just be aware that refrigeration can dry them out a bit. When you're ready to enjoy your rolls again, reheating them is easy. Simply place them in the microwave for about 10-15 seconds. This warms them without making them tough. If you prefer a crispier texture, pop them in the oven at 350°F (175°C) for 5-10 minutes. This brings back that fresh-baked taste. These rolls freeze beautifully! Allow them to cool completely after baking. Then, wrap each roll in plastic wrap and place them in a freezer bag. They can stay in the freezer for up to three months. When you're ready to eat one, let it thaw in the fridge overnight, then reheat as mentioned above. Enjoy your homemade delight anytime! Yes, you can make these rolls ahead of time! Prepare the dough and fill the rolls. Place them in a greased baking dish. Cover and chill in the fridge overnight. In the morning, let them rise for about 30 minutes before baking. This saves time and gives you fresh rolls when you need them. If you want to switch it up, try using pears or peaches. Both fruits bring a sweet and juicy taste. You can also use dried fruits like raisins or cranberries. Just remember to chop them small for even baking. The rolls are ready when they turn a golden brown color. You can also tap the top gently; it should sound hollow. Use a toothpick to check the center. If it comes out clean, your rolls are done! Yes, active dry yeast works well too. Just remember to activate it first. Mix it with warm milk and sugar for about 5-10 minutes. Once it's bubbly, you can add it to your dough mixture. Serve these rolls warm for the best taste. Drizzle with icing right before serving. You can add extra cinnamon on top for flair. For a cozy touch, pair them with hot coffee or tea. A scoop of ice cream makes for a fun dessert! For the full recipe, check out the detailed steps above. You now have all the tools to create delicious apple cinnamon rolls. We started with the key ingredients and discussed helpful substitutions. Next, I showed you step-by-step how to prepare, assemble, and bake the rolls, topped off with homemade icing. You learned tips for perfect rolls and explored fun variations. Finally, we covered how to store and reheat leftovers. Enjoy this tasty treat any time, and remember, you can always customize it to fit your taste!

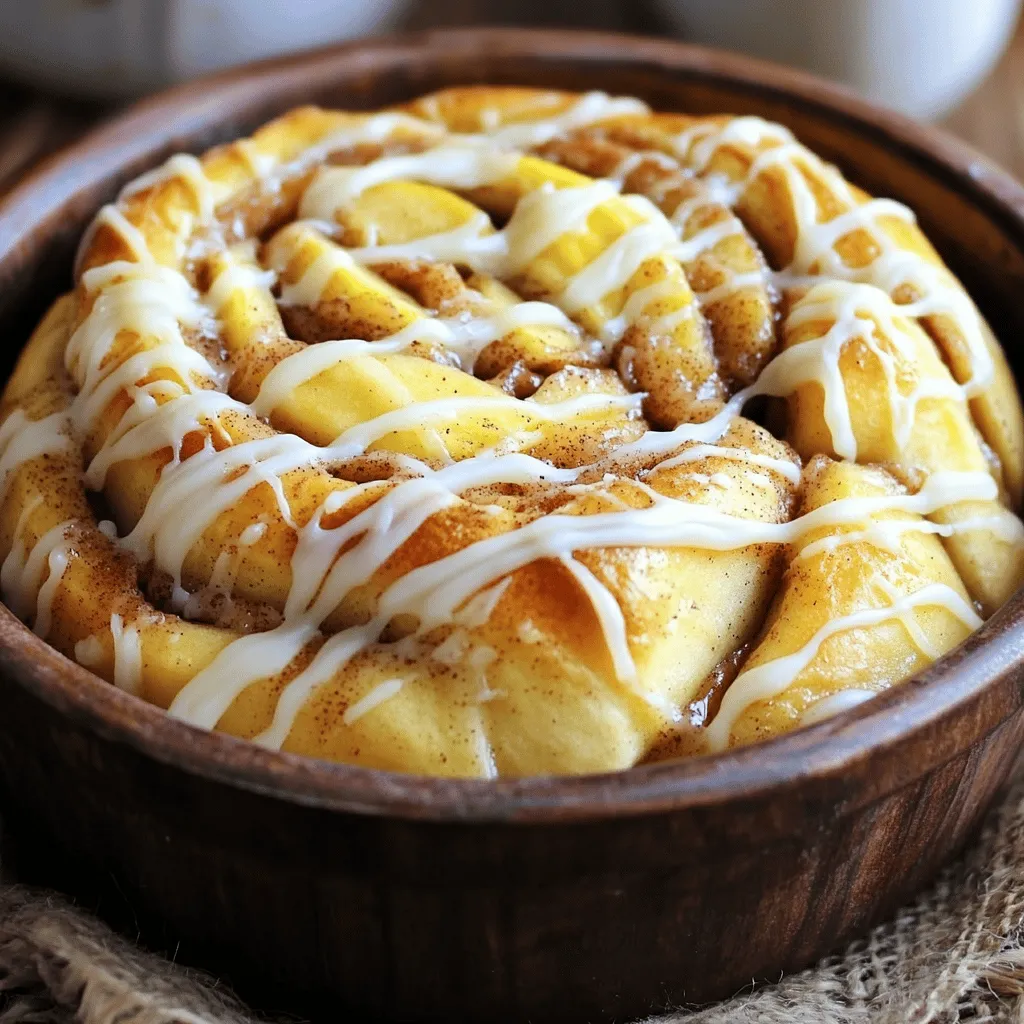
If you crave a warm, sweet treat, you’re in the right place! These apple cinnamon rolls are an irresistible homemade delight you can’t resist. I’ll guide you through each step, …

Read more

Categories Desserts

Crockpot Tortellini Soup Simple and Tasty Recipe

August 6, 2025 by Chef Remy
To make this tasty Crockpot Tortellini Soup, you need these simple ingredients: - 4 cups vegetable broth - 1 can (14 oz) diced tomatoes, undrained - 2 cups fresh spinach, roughly chopped - 1 cup sliced carrots - 1 cup zucchini, diced - 1 medium onion, finely chopped - 3 cloves garlic, minced - 1 teaspoon Italian seasoning - 1/2 teaspoon red pepper flakes (optional, for heat) - 2 cups cheese tortellini (either fresh or frozen) - 1 cup heavy cream - Salt and black pepper, to taste - Fresh basil leaves, for garnish You can use either fresh or frozen tortellini in this soup. Fresh tortellini cooks faster and has a soft texture. Frozen tortellini is easy to store and lasts longer. Both options taste great, so the choice is yours. If you're in a hurry, go for fresh. If you want to keep some on hand, choose frozen. Feel free to mix in other vegetables to suit your taste. You can add: - Bell peppers for sweetness - Mushrooms for an earthy flavor - Kale instead of spinach for extra nutrients - Peas for a burst of color and sweetness These swaps can make your soup unique and delicious! To start, grab your crockpot and add 4 cups of vegetable broth. This will be the soup's heart. Next, open a can of diced tomatoes and pour it in without draining. The juices add great flavor. Now it's time for the veggies! Add 2 cups of roughly chopped spinach. Then, toss in 1 cup of sliced carrots and 1 cup of diced zucchini. Next, add 1 medium finely chopped onion and 3 cloves of minced garlic. These ingredients create a tasty base. Sprinkle in 1 teaspoon of Italian seasoning. If you like some heat, add 1/2 teaspoon of red pepper flakes. Mix everything gently to blend the flavors well. Cover your crockpot and set it to cook. Choose low for 6 hours or high for 3 hours. This allows the flavors to come together. About 30 minutes before serving, add 2 cups of cheese tortellini to the pot. Stir gently to ensure they cook evenly. Just before you're ready to serve, pour in 1 cup of heavy cream. Stir again and season with salt and black pepper to taste. Let the soup warm for an extra 5 to 10 minutes. Now you're ready to enjoy your comforting Crockpot Tortellini Soup! For the full recipe, check out the details above. To boost the taste of your soup, use fresh herbs. Fresh basil and parsley add a bright touch. You can also add a splash of lemon juice for a zing. For extra depth, consider using roasted garlic instead of raw. If you like a bit of kick, add more red pepper flakes. If your soup is too thick, add more vegetable broth or water. Stir it well to mix everything together. For a thicker soup, let it cook longer with the lid off. This will help it reduce and become creamier. Serve the soup hot in deep bowls. Garnish with fresh basil leaves for color and flavor. A sprinkle of grated Parmesan cheese can add richness. Pair it with crusty bread for dipping, or a side salad for a complete meal. For a fun twist, add a dollop of pesto on top. Enjoy your comforting bowl of soup! {{image_4}} To make gluten-free tortellini soup, choose gluten-free tortellini. Many brands offer this option. You can also use rice or quinoa instead of tortellini. Just be sure to check labels for gluten-free status. This simple swap keeps the dish tasty and safe for those with gluten intolerance. Adding chicken or sausage makes your soup heartier. If you like chicken, use cooked, shredded chicken. Add it in the last 30 minutes of cooking. For sausage, choose Italian sausage for great flavor. Cook and crumble the sausage before adding. This extra protein boosts flavor and fills you up. To make this soup vegan or vegetarian, swap out the heavy cream. Use coconut milk or cashew cream for a creamy texture. Choose vegetable broth and ensure your tortellini is plant-based. You can also add more veggies like bell peppers or mushrooms for extra nutrition. These changes keep the soup delicious and plant-friendly. You can find the full recipe to get started on your own tasty creation. Once you finish your meal, let the soup cool down. Then, scoop it into airtight containers. Store the soup in the fridge for up to three days. Before serving, check for any signs of spoilage. This soup tastes great even after a day in the fridge! If you want to keep some for later, freezing is a good option. First, let the soup cool completely. Then, pour it into freezer-safe bags or containers. Make sure to leave some space at the top since liquids expand when frozen. You can freeze the soup for up to three months. Label the bags with the date to keep track. To reheat, you can use the stove or microwave. If using the stove, pour the soup into a pot. Heat it over medium heat, stirring occasionally until it's hot. If using the microwave, transfer the soup to a microwave-safe bowl. Heat it in short bursts, stirring in between, until piping hot. Always check that it’s warm enough before serving. Enjoy your comforting bowl of tortellini soup! Yes, you can use different broth types. Chicken broth gives a richer taste. Beef broth adds depth. For a lighter option, use water with seasoning. Each broth changes the flavor and feel of the soup. Feel free to experiment with what you like best! You can store Crockpot Tortellini Soup for up to four days in the fridge. Make sure to keep it in an airtight container. If you want to keep it longer, freeze it. Properly frozen soup can last up to three months. Just label the container with the date to remember! Yes, you can make this soup in advance. It actually tastes better the next day! The flavors meld and become richer. Just make sure to store it properly. Reheat it on the stove or in the microwave before serving. For the best taste, add fresh basil right before you serve it. If you want the full recipe, check the section above! In this post, we covered the key ingredients for the perfect tortellini soup. You learned how to prepare the base, add fresh veggies, and mix in tortellini and cream. We shared tips to boost flavor and adjust the soup’s texture. You also saw variations, including gluten-free and vegan options. Remember to store leftovers properly. This soup is easy to make and delicious. Enjoy making it your own!

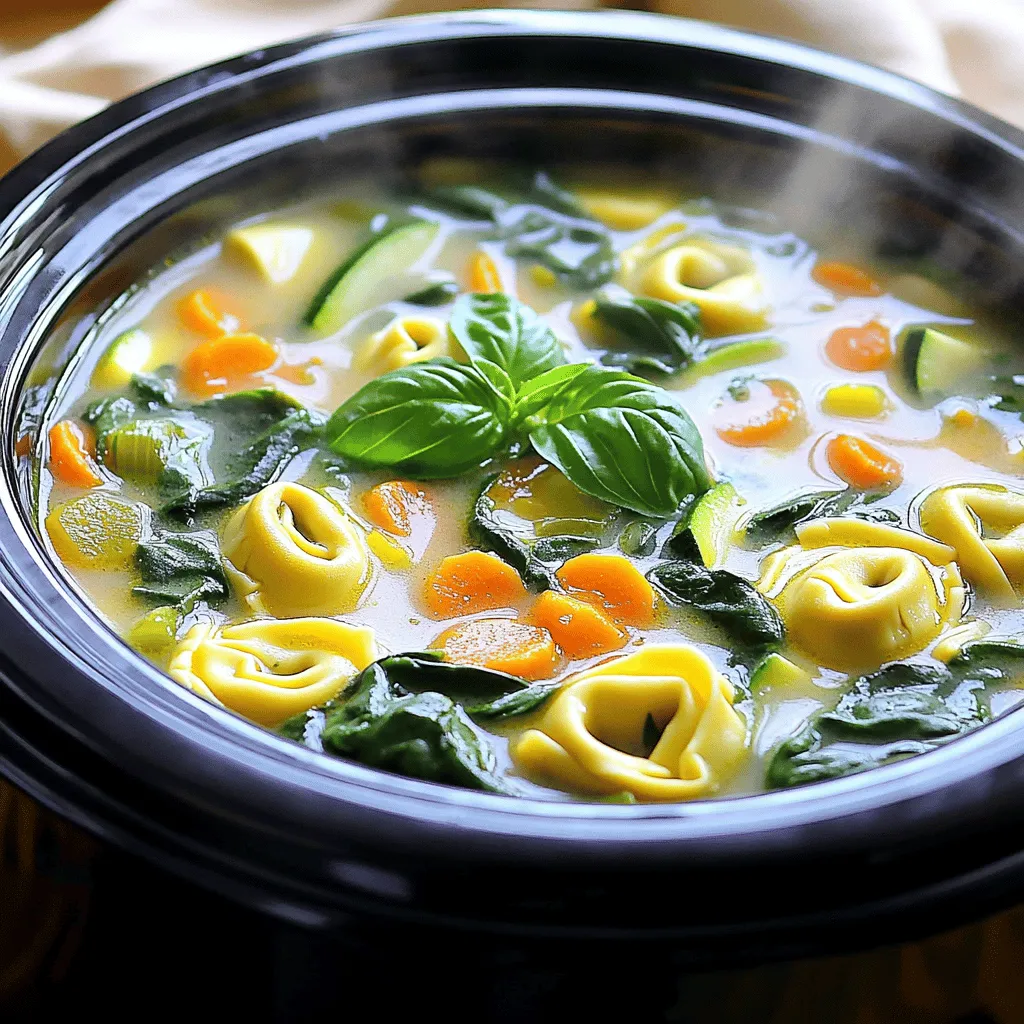
Looking for a warm, cozy dish that practically cooks itself? Let me introduce you to my Crockpot Tortellini Soup! This simple and tasty recipe combines tender tortellini, fresh veggies, and …

Read more

Categories Dinner

Pumpkin Scones Delightful and Easy Fall Treat

August 6, 2025 by Chef Remy
To make delicious pumpkin scones, gather these key ingredients: - 2 cups all-purpose flour - 1/2 cup packed brown sugar - 1 tablespoon baking powder - 1/2 teaspoon baking soda - 1/2 teaspoon salt - 1 teaspoon ground cinnamon - 1/2 teaspoon ground nutmeg - 1/4 teaspoon ground ginger - 1/2 cup unsalted butter, cold and cut into small cubes - 1/2 cup canned pumpkin puree - 1/4 cup heavy cream - 1 large egg - 1/2 teaspoon vanilla extract - Extra flour for dusting You can add extra flavors or textures with these optional ingredients: - 1/2 cup chopped pecans or walnuts - Glaze made from 1 cup powdered sugar mixed with 2-3 tablespoons milk One serving of these pumpkin scones (1 scone) has: - Calories: 180 - Total Fat: 8g - Saturated Fat: 5g - Carbohydrates: 25g - Dietary Fiber: 1g - Sugars: 8g - Protein: 3g These scones not only taste great but also fill you up. Enjoy your tasty fall treat! For the full recipe, check out the details above. To start, preheat your oven to 400°F (200°C). This ensures your scones bake evenly. Next, take a large mixing bowl and combine the following dry ingredients: - 2 cups all-purpose flour - 1/2 cup packed brown sugar - 1 tablespoon baking powder - 1/2 teaspoon baking soda - 1/2 teaspoon salt - 1 teaspoon ground cinnamon - 1/2 teaspoon ground nutmeg - 1/4 teaspoon ground ginger Whisk them well. This makes sure all the flavors mix together. Now, add in 1/2 cup of cold, cubed unsalted butter. Use a pastry cutter or your fingers to mix it in until it looks like coarse crumbs. Some butter chunks should still be small. In another bowl, whisk together: - 1/2 cup canned pumpkin puree - 1/4 cup heavy cream - 1 large egg - 1/2 teaspoon vanilla extract Mix until smooth. Pour this pumpkin mixture into the flour mix. Use a spatula to fold them together gently until just combined. If you want to add nuts, this is the time to do it. Turn the dough onto a floured surface. Knead it gently a few times until it holds together. Shape the dough into a circle about 1 inch thick. To cut your scones, use a sharp knife to slice the dough into 8 wedges. If you prefer round shapes, a biscuit cutter works well. Place the scones on your prepared baking sheet, leaving space between them. Bake your scones for 15-18 minutes. They should turn golden brown, and a toothpick should come out clean when poked in the center. If you like, you can make a glaze by mixing 1 cup of powdered sugar with 2-3 tablespoons of milk. Drizzle this over the warm scones once they cool a bit. This step adds a sweet touch to your delicious treat. Follow these steps for a perfect batch of pumpkin scones. Enjoy the process as much as the end result! For the complete recipe, check the Full Recipe section. To make your scones light, use cold butter. Cold butter helps create steam while baking. This steam makes the scones rise and become fluffy. Mix the butter into the flour until it looks like coarse crumbs. Handle the dough gently, and avoid overmixing. You want to keep some lumps for better texture. One common mistake is using warm butter. Warm butter leads to dense scones, so keep it cold. Another mistake is overworking the dough. If you knead too much, the scones will not rise well. Lastly, don’t forget to preheat your oven! A hot oven is key for that perfect bake. Serve your scones warm for the best taste. They pair well with butter, jam, or cream. For a cozy drink, enjoy them with hot apple cider or tea. You can also add a drizzle of glaze for extra sweetness. This makes each bite irresistible. For an added crunch, sprinkle chopped nuts on top before baking. {{image_4}} You can easily make gluten-free pumpkin scones. Swap the all-purpose flour for a gluten-free blend. Look for one that includes xanthan gum for the best texture. Use the same amount as the recipe states. Follow all other steps in the full recipe. This way, you enjoy the same great taste without gluten. To make vegan pumpkin scones, replace the butter with coconut oil or vegan butter. Use a flax egg for the egg. Mix one tablespoon of ground flaxseed with three tablespoons of water. Let it sit for five minutes until it thickens. Then add it to the wet ingredients. Your scones will be just as tasty without animal products. You can also add fun flavors to your pumpkin scones. Try mixing in chocolate chips for a sweet twist. Half a cup works well. If you prefer spices, add a pinch of allspice or cloves. This will give your scones a unique taste. Feel free to mix and match flavors that you love! Store leftover scones in an airtight container. Keep them at room temperature for 1 to 2 days. If you want to keep them fresh longer, refrigerate them. Just make sure to wrap them well in plastic wrap or foil. You can freeze your pumpkin scones for up to 3 months. First, let them cool completely. Next, wrap each scone in plastic wrap. Then, place them in a freezer bag or container. Make sure to label the bag with the date. This way, you know when to enjoy them! To reheat scones, preheat your oven to 350°F (175°C). Place the scones on a baking sheet. Heat them for about 5 to 10 minutes until warm. This keeps them soft and tasty. If you want a quick option, you can microwave them for 15 to 20 seconds. Just watch them closely so they don’t get too hot. Enjoy your pumpkin scones with a cup of tea or coffee! Yes, you can use fresh pumpkin. First, cook the pumpkin until soft. Then, mash it well. Make sure to drain excess water to avoid a soggy dough. Pumpkin scones stay fresh for about three days. Store them in an airtight container at room temperature. For longer storage, consider freezing them. Yes, you can make the dough ahead. Wrap it tightly in plastic wrap and chill it in the fridge. Use it within two days for the best results. The best toppings include a light glaze or a sprinkle of cinnamon sugar. You can also add chopped nuts or serve with cream cheese spread for extra flavor. For the full recipe, check out the details below: - 2 cups all-purpose flour - 1/2 cup packed brown sugar - 1 tablespoon baking powder - 1/2 teaspoon baking soda - 1/2 teaspoon salt - 1 teaspoon ground cinnamon - 1/2 teaspoon ground nutmeg - 1/4 teaspoon ground ginger - 1/2 cup unsalted butter, cold and cut into small cubes - 1/2 cup canned pumpkin puree - 1/4 cup heavy cream - 1 large egg - 1/2 teaspoon vanilla extract - Extra flour for dusting - Optional: 1/2 cup chopped pecans or walnuts - Optional: Glaze made from 1 cup powdered sugar mixed with 2-3 tablespoons milk In this post, we explored the world of pumpkin scones. You learned about key ingredients, step-by-step baking, and helpful tips to create light, fluffy treats. We also covered variations, like gluten-free and vegan options, to suit different diets. Finally, we discussed storage methods to keep your scones fresh. Remember, great baking takes practice. Don't rush, enjoy the process, and share your scones with others. Happy baking!

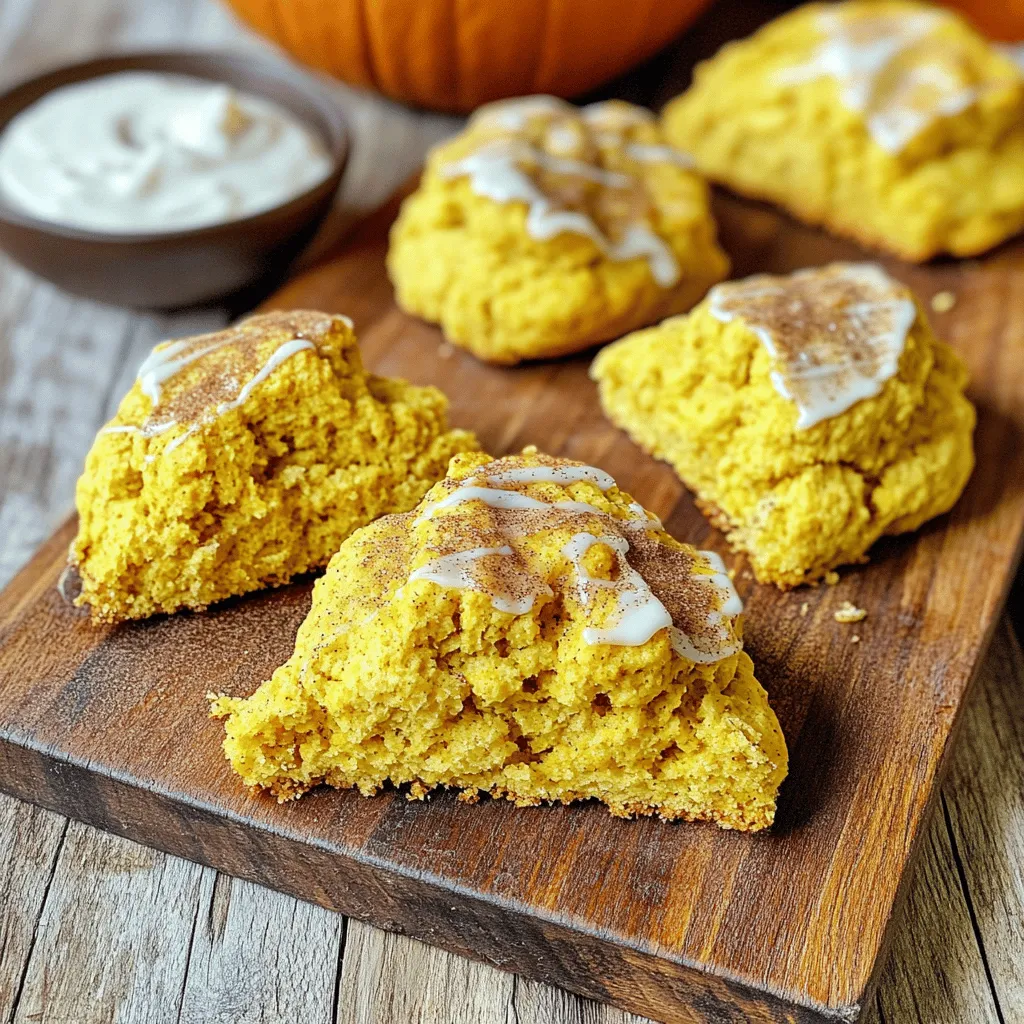
Fall is here, and it’s time to embrace the cozy flavors of pumpkin! In this post, I’ll share my delightful and easy recipe for pumpkin scones that will warm your …

Read more

Categories Desserts

Delicious Apple Blondies with Maple Frosting Recipe

August 6, 2025 by Chef Remy
To create tasty apple blondies, you need a few key items. Here’s what you'll need: - 1 cup unsalted butter, melted - 1 ½ cups packed brown sugar - 2 large eggs - 1 teaspoon pure vanilla extract - 2 cups all-purpose flour - 1 teaspoon baking powder - ½ teaspoon baking soda - ½ teaspoon salt - 1 teaspoon ground cinnamon - 1 ½ cups Granny Smith apples, peeled and diced These ingredients combine to give the blondies their rich flavor and soft texture. The maple frosting adds a sweet finish to your blondies. You will need: - ½ cup unsalted butter, softened to room temperature - 2 cups powdered sugar - 3 tablespoons pure maple syrup - 1 teaspoon pure vanilla extract - 1-2 tablespoons milk (as needed for consistency) This frosting is creamy and has a warm maple taste that pairs perfectly with the blondies. If you want to mix things up, consider adding: - ½ cup chopped walnuts or pecans These nuts add a nice crunch and enhance the overall flavor. You can also try chocolate chips for an extra treat! For the complete recipe with instructions, check out the Full Recipe. Start by preheating your oven to 350°F (175°C). Grease a 9x13 inch baking pan or use parchment paper for easy removal. In a large bowl, mix 1 cup of melted unsalted butter with 1 ½ cups of packed brown sugar. Stir until smooth and well combined. Next, add 2 large eggs one at a time, mixing well after each addition. Then add 1 teaspoon of pure vanilla extract. In another bowl, whisk together 2 cups of all-purpose flour, 1 teaspoon of baking powder, ½ teaspoon of baking soda, ½ teaspoon of salt, and 1 teaspoon of ground cinnamon. Gradually fold the dry mix into the wet mixture until just combined. Be careful not to overmix! This keeps the blondies soft and tender. Now, gently fold in 1 ½ cups of peeled and diced Granny Smith apples. If you like, add ½ cup of chopped walnuts or pecans for a crunch. Pour the batter into your prepared pan and spread it with a spatula. While the blondies cool, let’s make the maple frosting. In a medium bowl, beat ½ cup of softened unsalted butter until creamy. Gradually mix in 2 cups of powdered sugar, 3 tablespoons of pure maple syrup, and 1 teaspoon of vanilla extract. Keep mixing until it’s light and fluffy. If your frosting is too thick, add 1-2 tablespoons of milk until you get the right consistency. Bake the blondies in your preheated oven for 25-30 minutes. To check if they are done, insert a toothpick in the center. If it comes out clean, they are ready! Let them cool completely in the pan on a wire rack. Once cool, spread the maple frosting evenly over the top. Cut them into squares and enjoy! For a nice touch, dust the top with a sprinkle of cinnamon or drizzle extra maple syrup. Want the full recipe? Check out the Full Recipe! To get the best texture in your apple blondies, focus on mixing. When you combine the wet and dry ingredients, fold them gently. This keeps the blondies soft and chewy. Overmixing can make them tough. Also, use fresh, firm Granny Smith apples. They add moisture and a nice bite. One common mistake is not measuring your flour correctly. Too much flour can lead to dry blondies. Use the spoon-and-level method. Scoop flour into your measuring cup, then level it off with a knife. Another mistake is skipping the cooling step. Cutting into warm blondies can cause them to fall apart. Let them cool completely before slicing. Apply frosting only when the blondies are cool. Warm blondies can melt the frosting. Use a spatula to spread the frosting evenly. Start from the center and work your way out. For a pretty finish, consider adding a sprinkle of cinnamon or a drizzle of maple syrup on top. This makes the blondies look extra special. For the full recipe, follow the steps outlined above. {{image_4}} You can swap out Granny Smith apples for other fruits. Consider using pears for a softer texture. Peaches add a lovely sweetness, while blueberries bring a burst of color. Each fruit gives a unique taste to the blondies. While maple frosting is tasty, feel free to get creative. Cream cheese frosting adds a tangy kick. You can also try chocolate frosting for a rich twist. Even a simple glaze made with powdered sugar and milk works well! To make gluten-free blondies, substitute all-purpose flour with a gluten-free mix. Almond or coconut flour is also a great choice. For vegan blondies, replace the eggs with flax eggs or applesauce. Use vegan butter for the frosting, and your dessert stays plant-based! For the full recipe, check the main article on this delightful treat! After you make these apple blondies, you may have some left. To keep them fresh, store them in an airtight container. This helps prevent them from drying out. You can keep them at room temperature for up to three days. If you want to extend their life, you can refrigerate them. They will last about a week in the fridge. Freezing is a great option for long-term storage. To do this, first let the blondies cool completely. Then, cut them into squares. Wrap each square tightly in plastic wrap. Place the wrapped squares in a freezer-safe bag or container. They can stay frozen for up to three months. When you want to eat them, just thaw them in the fridge or at room temperature. To enjoy your blondies warm, you can reheat them. Preheat your oven to 350°F (175°C). Place the blondies on a baking sheet. Heat them for about 5-10 minutes. You can also use a microwave. Heat each square for about 15-20 seconds. Watch closely to avoid overheating. Enjoy them warm with that delicious maple frosting! Yes, you can use other fruits in this recipe. Some great options are pears, peaches, or even bananas. Just make sure to use fruits that are firm. This helps keep the blondies from getting too soggy. You will know the blondies are done when a toothpick comes out clean. Insert it in the center of the pan. If it has wet batter, bake a bit longer. The top should also look golden and slightly firm to the touch. If you don’t have maple syrup, honey works well too. You can also use agave nectar or corn syrup. Just remember, these options will change the flavor a bit, but they will still taste good! For the full recipe, check out the earlier section. In this blog post, we covered how to make delicious apple blondies. You learned the key ingredients, from apples to optional add-ins, and how to prepare them step by step. We also shared tips for great texture, common mistakes, and various frosting options. Remember, you can adapt the recipe to suit your taste, even making it gluten-free or vegan. With these tips, you’ll bake perfect apple blondies every time. Enjoy your cooking, and share these treats with friends and family!

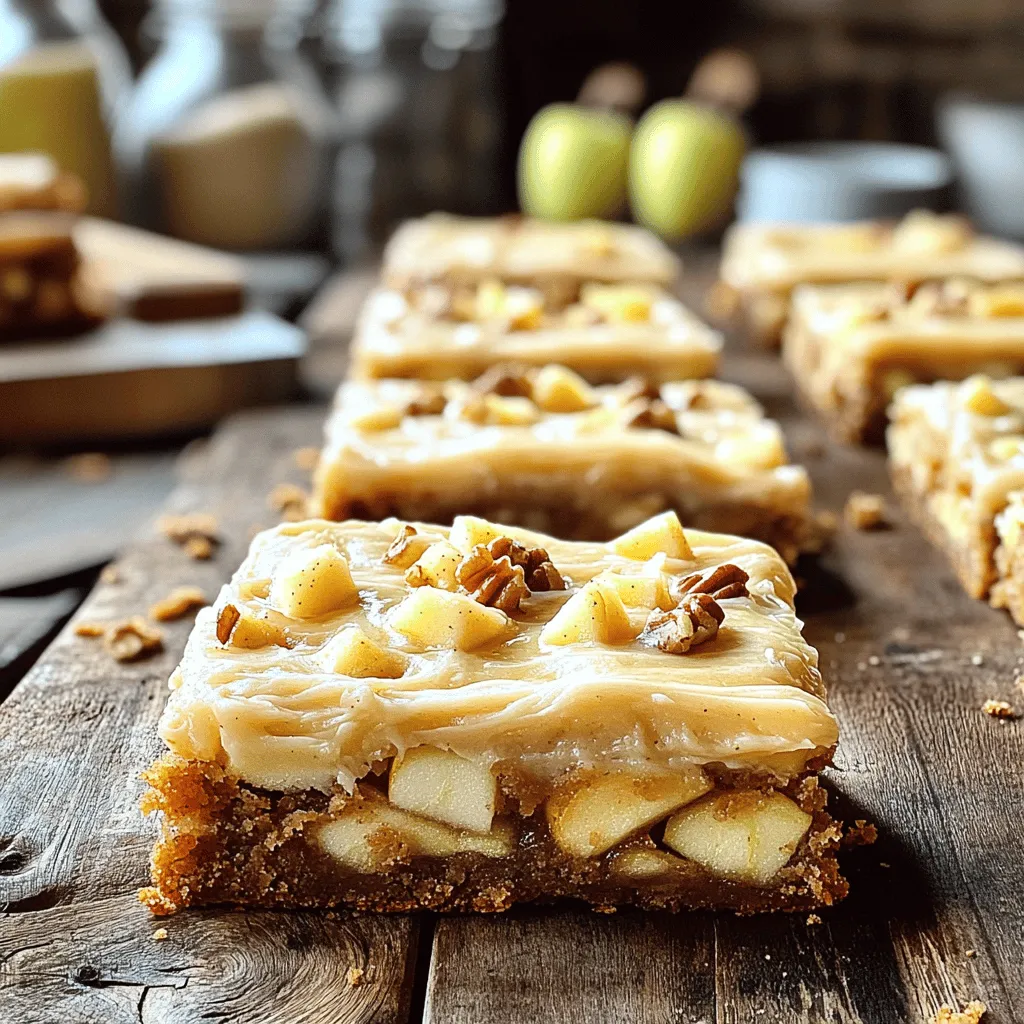
Get ready to bake something special! My delicious apple blondies with maple frosting are perfect for any occasion. You’ll enjoy the warm, sweet flavor of apples combined with creamy maple …

Read more

Categories Desserts
Older posts
Newer posts
← Previous Page1 … Page50 Page51 Page52 … Page130 Next →

ROASTED RECIPES

Where bold flavors meet everyday meals. Warm, vibrant, and made to share. 🔥🥗🍴

PAGES

Home About Contact Privacy Policy Terms & Conditions Cookie Policy GDPR Policy Copyright Policy Disclaimer

CATEGORIES

Appetizers Desserts Salads Breakfast Dinner

Contact

  • Pinterest
  • Mail
Copyright © 2025 Roasted Flavors. All rights reserved.