Skip to content
Roasted Flavors
  • Home
  • Appetizers
  • Desserts
  • Salads
  • Breakfast
  • Dinner
  • Privacy Policy
  • Contact
  • About

Chef Remy

Apple Pie Cupcakes Delightful and Simple Recipe

August 8, 2025 by Chef Remy
- 1 1/2 cups all-purpose flour - 1 teaspoon baking powder - 1/2 teaspoon baking soda - 1/2 teaspoon salt - 1/2 cup unsalted butter, softened - 1 cup granulated sugar - 2 large eggs, at room temperature - 1 teaspoon vanilla extract - 1/2 cup buttermilk, at room temperature - 2 cups Granny Smith apples, peeled and diced - 1 teaspoon ground cinnamon - 1/4 teaspoon ground nutmeg - 1 tablespoon fresh lemon juice - Gluten-free flour alternatives - Vegan substitutes - Powdered sugar - Whipped cream - Garnishes like apple slices When making apple pie cupcakes, the right ingredients are key. The main ingredients bring out the sweet and spicy apple flavor. I love using Granny Smith apples for their tartness. They really shine in this recipe. For those with dietary needs, feel free to swap regular flour for a gluten-free option. You can also replace eggs with applesauce or flaxseed for vegan cupcakes. These small changes can still yield a tasty treat! To top off your cupcakes, consider a light dusting of powdered sugar. Whipped cream adds a nice touch. You can also garnish with fresh apple slices to make them look more appealing. These toppings make your cupcakes not just taste good but look great too. For the full recipe, check out the details above. - Preheat oven to 350°F (175°C). - Prepare muffin pan with liners. Start by preheating your oven. This step is key for even baking. Next, line your muffin pan with fun cupcake liners. This not only keeps them neat but adds color to your treats. - Combine dry ingredients in a bowl. - Cream butter and sugar, add eggs and vanilla. - Alternate adding flour and buttermilk, then fold in apple mixture. In a medium bowl, mix together flour, baking powder, baking soda, and salt. This forms the dry base for our cupcakes. In a larger bowl, cream the softened butter and sugar with an electric mixer. Mix until it's fluffy and light, about three minutes. Add the eggs one by one, mixing well after each addition. This helps the batter combine smoothly. After that, blend in the vanilla. Now, it's time to add the dry mix. Alternate adding the dry ingredients and buttermilk. Start and finish with the flour. Mix gently, so the batter stays light. In another bowl, toss the diced apples with cinnamon, nutmeg, and lemon juice. This adds flavor and keeps the apples fresh. Gently fold this apple mix into your batter until it's evenly distributed. - Fill cupcake liners and bake for 18-20 minutes. - Cool cupcakes in the pan then transfer to a wire rack. Now, fill each cupcake liner about two-thirds full with the batter. This gives them room to rise. Bake in the oven for 18 to 20 minutes. Check if they are done by inserting a toothpick. If it comes out clean, they're ready! Once baked, let them cool in the pan for about 10 minutes. After that, carefully transfer them to a wire rack. This allows them to cool completely. For the full recipe, see the section above. - Accurate measurements matter. Use a scale for best results. - Room temperature ingredients mix better. Let butter and eggs sit out before use. - For a fun look, dust cupcakes with powdered sugar. - Whipped cream adds creaminess. A slice of apple gives a fresh touch. - Don’t over-mix the batter. This makes cupcakes tough. - Over-baking can dry them out. Check for doneness with a toothpick. These tips will help you create perfect Apple Pie Cupcakes. For the full recipe, check the earlier sections! {{image_4}} If you need gluten-free cupcakes, don't worry! You can use gluten-free flour blends. Look for a blend that includes xanthan gum. This helps create the right texture. Here are some good flour substitutes: - Almond flour - Oat flour - Coconut flour When using these, adjust the liquid in your recipe. Gluten-free flours can absorb more moisture. For a vegan version, you'll need to replace eggs and dairy. You can use flaxseed meal or applesauce as egg replacements. - For each egg, mix 1 tablespoon of flaxseed meal with 2.5 tablespoons of water. Let it sit until it thickens. - You can also use 1/4 cup of unsweetened applesauce per egg. For dairy, try these alternatives: - Almond milk - Coconut milk - Soy milk These will keep your cupcakes moist and tasty. To make your cupcakes exciting, try adding caramel or nuts. Chopped pecans or walnuts add a nice crunch. You can also play with spices to give a twist: - Add a pinch of cardamom for warmth. - Try ginger for a spicy kick. These additions can elevate your cupcakes to new heights, making every bite delightful! To keep your Apple Pie Cupcakes fresh for 3-5 days, store them in an airtight container. This helps lock in moisture and flavor. If you want, you can also place a piece of bread in the container. The bread keeps the cupcakes soft and prevents them from drying out. Keep the container at room temperature, away from direct sunlight. If your kitchen is warm, the fridge may be a better option. Just note that refrigeration can slightly change the texture. For long-term storage, freezing is a great option. Allow the cupcakes to cool completely before freezing. Wrap each cupcake tightly in plastic wrap. Then, place them in a freezer-safe bag or container. Label the bag with the date to keep track. You can freeze them for up to three months. When you're ready to enjoy, simply take them out and let them thaw at room temperature. To revive your cupcakes for the best flavor, preheat your oven to 350°F (175°C). Take the cupcakes out of the container and remove any wrapping. Place them on a baking sheet. Heat them in the oven for about 5-7 minutes. This warms them up and makes them taste fresh again. If you prefer, you can also use a microwave. Heat on low for about 10-15 seconds. Enjoy them warm for a delightful treat. For the full recipe, check out the Apple Pie Cupcakes section above. Granny Smith apples are the best choice for these cupcakes. They have a tart flavor that balances the sweetness of the cake. Honeycrisp apples also work well, adding a juicy crunch. Use a mix of both for depth in flavor. Avoid soft apples like Red Delicious, as they can get mushy. Yes, you can make these cupcakes ahead of time! Bake the cupcakes and let them cool completely. Store them in an airtight container for up to three days. You can also freeze them for longer storage. Just wrap each cupcake in plastic wrap. Thaw them in the fridge overnight before serving. To keep your cupcakes moist, use room temperature ingredients. This helps the batter mix well. Adding buttermilk gives a rich flavor and soft texture. Do not overmix the batter; mix just until combined. You can also add a bit of applesauce for extra moisture. To check if your cupcakes are done, insert a toothpick in the center. If it comes out clean, the cupcakes are ready. Keep an eye on them while baking. They usually bake for 18-20 minutes. If they begin to brown too much, take them out to avoid dryness. You now have a clear plan for making delicious apple pie cupcakes. Use the right ingredients, like Granny Smith apples and spices, to create flavor. Remember to follow the simple baking steps and tips for perfect texture. Whether you choose gluten-free or vegan options, you can adapt the recipe to fit your needs. Store them properly to keep your cupcakes fresh. With this guide, you are ready to bake a treat that everyone will enjoy. Happy baking!

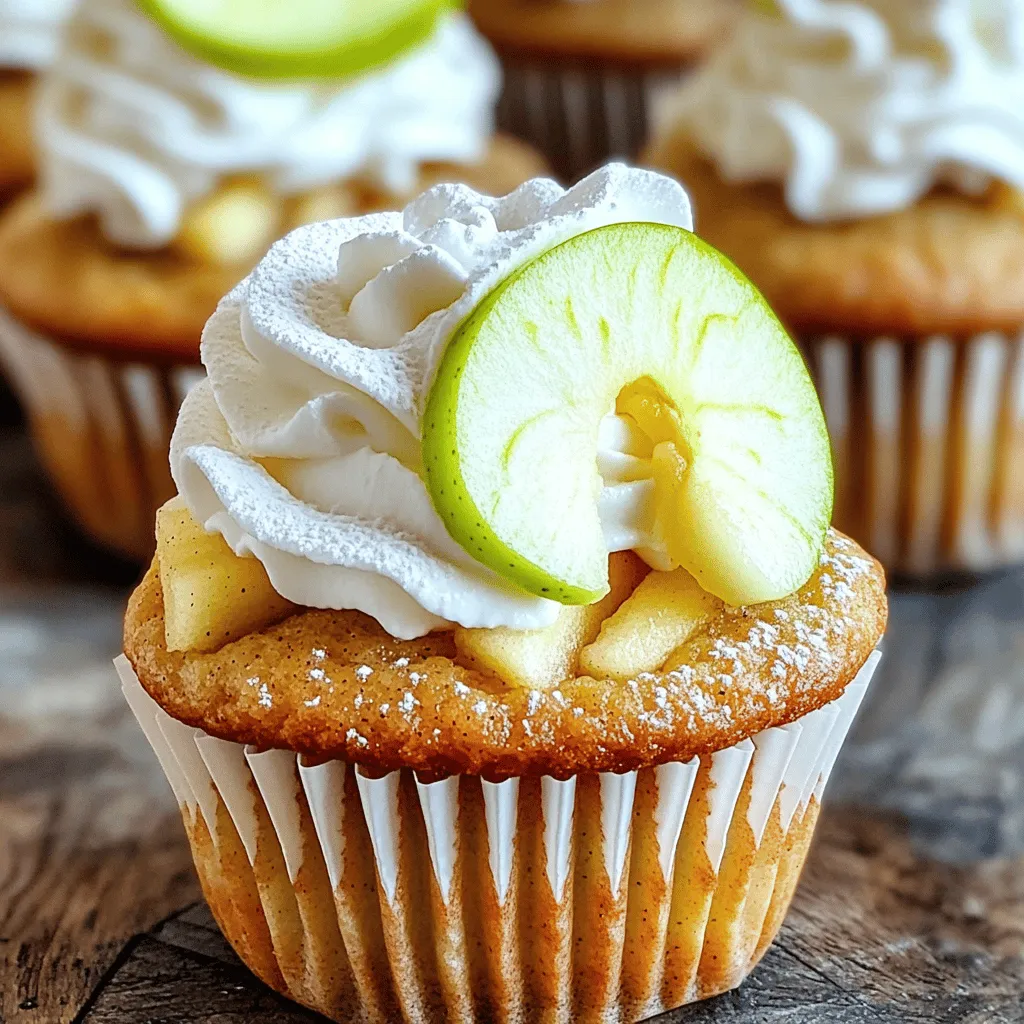
Get ready to indulge in a sweet twist on a classic dessert! Apple Pie Cupcakes are not only delightful but also simple to make. In this recipe, you will learn …

Read more

Categories Desserts

Pumpkin Cream Cold Foam Cold Brew Refreshing Delight

August 8, 2025 by Chef Remy
To make a delightful Pumpkin Cream Cold Foam Cold Brew, you'll need a few simple ingredients. Here’s what you will need: - Cold Brew Coffee - Heavy Cream - Pumpkin Puree - Maple Syrup - Vanilla Extract - Pumpkin Pie Spice - Ice Cubes - Optional Topping (like whipped cream) This list keeps it easy and fun. Each ingredient adds its own special touch to your drink. The cold brew coffee gives a smooth base, while the heavy cream creates a rich foam. Pumpkin puree brings that fall flavor you love. Maple syrup adds sweetness without being too much. Vanilla extract gives a nice depth, and pumpkin pie spice makes everything cozy. Don't forget the ice cubes to keep your drink chilled. Finally, if you want to make it extra special, add a dollop of whipped cream on top. This recipe is perfect for anyone looking to enjoy a seasonal treat. You can find the full recipe to guide you through each step and create your own refreshing delight. To make cold brew coffee, you need a few simple steps. You can choose to brew it at home or buy it from a store. For homemade cold brew, mix coarsely ground coffee with water. Use a ratio of 1 part coffee to 4 parts water. Place this mix in a large jar or pitcher. Let it steep in the fridge for at least 12 hours. After steeping, strain the coffee using a fine mesh sieve or coffee filter. If you need a quick option, ready-made cold brew is available in most stores. Now, let's whip up the pumpkin cream cold foam. Start by getting a chilled mixing bowl. Combine the heavy cream, pumpkin puree, maple syrup, vanilla extract, and pumpkin pie spice in the bowl. Mix until the flavors blend well. This step is key for a great taste! You want a nice balance of sweet and spice for your foam. Next, it’s time to whip the mixture. Use an electric hand mixer or a whisk on medium speed. Whip until soft peaks form. This means the foam should hold its shape but still be light. Be careful not to over-whip. If you whip too long, you’ll make butter instead of foam. Let’s serve this delicious drink! Start by filling a glass with ice cubes. Leave some space at the top for the foam. Pour the chilled cold brew coffee over the ice, filling the glass about three-quarters full. This way, you’ll have enough room for the foam. Now it’s time for the fun part! Carefully spoon the pumpkin cream cold foam over the cold brew. Aim for a lovely layered effect. The foam should float on top for the best look! This adds a nice touch and makes your drink visually appealing. For a final touch, you can prepare a dollop of whipped cream. Place it on top of the pumpkin cream foam. To make it even better, sprinkle a little pumpkin pie spice on top. This adds a festive look and a hint of extra flavor to your drink. Enjoy your Pumpkin Cream Cold Foam Cold Brew! For the full recipe, refer back to the details above. - Ideal Brew Time: The best brew time is 12 to 24 hours. This slow steeping gives smooth flavor. - Storage Suggestions: Store cold brew in an airtight container. It stays fresh for up to two weeks in the fridge. - Additional Spices or Sweeteners: You can add cinnamon or nutmeg for extra warmth. Honey is a great sweetener, too. - Tips for Vegan or Dairy-Free Options: Use coconut cream instead of heavy cream for a vegan foam. Almond milk adds a nice flavor, too. - Whipping Errors: Do not over-whip the cream. You want soft peaks, not stiff ones. - Ingredient Substitutions: Avoid using flavored creams. They can clash with the pumpkin taste. Stick to the recipe for the best results. These tips will help you enjoy the perfect Pumpkin Cream Cold Foam Cold Brew. For further guidance, check the full recipe for all the steps! {{image_4}} You can change the flavors of your cold foam to match the seasons. For summer, try a sweet peach foam. In winter, a rich peppermint foam works wonders. You can swap the pumpkin puree for fruit purees or flavored syrups, like caramel or vanilla, to create new tastes. This recipe shines as an iced drink, but you can adapt it for hot coffee. Just prepare hot brewed coffee instead of cold brew. To make hot pumpkin cream foam, warm the cream gently before mixing. The foam will still be creamy and delicious. You can also use cold foam in other drinks. Add it to hot chocolate for a cozy treat or pour it over chai tea for a spicy kick. The options are endless! Add a twist to your drink by mixing in flavors like cinnamon or nutmeg. You can even use chocolate syrup for a mocha-style foam. For toppings, get creative! Besides whipped cream, try crushed graham crackers or chocolate shavings. A sprinkle of sea salt can also enhance the flavors, making your drink even more delightful. Remember, these variations keep your pumpkin cream cold foam cold brew exciting and fresh! You can find the full recipe above to get started on your delicious journey. To keep cold brew coffee fresh, store it in an airtight container. Glass jars work great for this. Make sure to keep it in the fridge. Avoid leaving it out at room temperature. Cold brew can last up to two weeks if stored correctly. Store leftover pumpkin cream cold foam in a sealed container in the fridge. It will stay fresh for about two days. Before using, give it a gentle stir. If the foam separates, that is normal. Yes, you can freeze pumpkin cream cold foam! Use ice cube trays to freeze it. Once frozen, transfer the cubes to a zip-top bag for easy storage. To reuse, thaw the cubes in the fridge overnight. Stir well before using. Enjoy your pumpkin cream cold foam in your next cold brew! Pumpkin cream cold foam is a frothy topping made with heavy cream, pumpkin puree, and spices. It sits on top of cold brew coffee. The blend creates a rich, creamy layer that adds flavor. The pumpkin pie spice gives it a warm, cozy taste. This foam makes your drink look stunning and taste delicious. Yes, you can! To make it dairy-free, swap heavy cream with coconut cream or almond milk foam. You can also use a dairy-free whipped topping. These options work well and still taste great. Just be sure to pick a brand that blends nicely with the pumpkin flavor. Cold brew coffee lasts in the fridge for about one to two weeks. Store it in an airtight container to keep it fresh. Over time, the flavor may change, becoming less vibrant. If you notice any off tastes, it’s best to make a new batch. The best coffee for cold brew is coarsely ground coffee. A medium roast works well, offering a balanced flavor. Dark roasts can be rich but may overpower the pumpkin. Choose what you enjoy, but keep the grind coarse for smooth brewing. Using fresh pumpkin is possible, but it takes more effort. You will need to cook and puree the pumpkin until smooth. Canned pumpkin puree is convenient and saves time. It also ensures a consistent flavor and texture in your drink. You can easily adjust sweetness in your pumpkin cream cold foam. To make it sweeter, add more maple syrup or use brown sugar. For less sweetness, cut back on the syrup. Taste as you mix to find what you enjoy best. This blog post showed you how to make Pumpkin Cream Cold Foam and cold brew coffee. You learned about the ingredients, steps for preparation, and tips to avoid mistakes. I shared ways to store your drinks and various fun options to try. Remember, getting the balance of flavors right is key. Enjoy this tasty drink whenever you like and feel free to make it your own. Happy brewing!

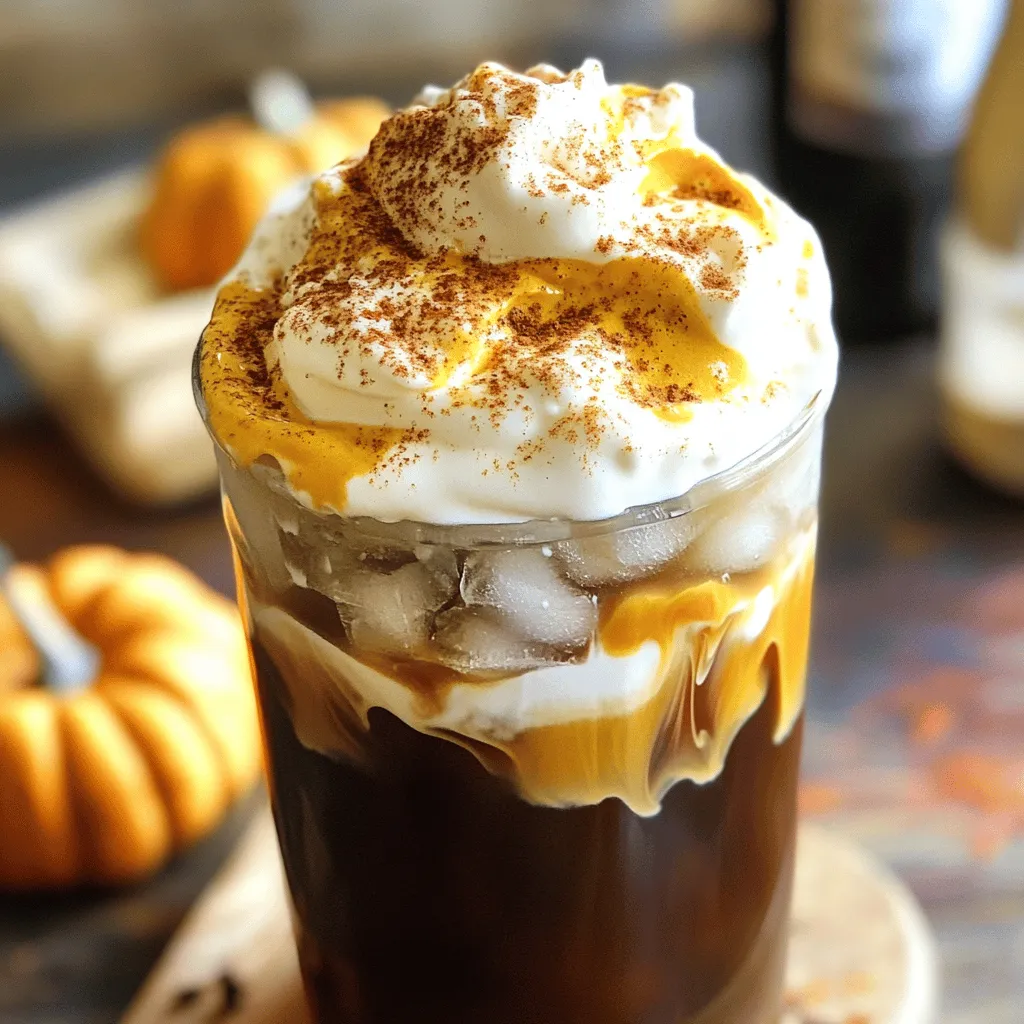
Have you ever tried a Pumpkin Cream Cold Foam Cold Brew? If not, you’re missing out on a delightful drink that’s perfect for Fall! This creamy, pumpkin-spiced cold brew is …

Read more

Categories Breakfast

The Best Fudgy Red Velvet Brownies Delightful Treat

August 8, 2025 by Chef Remy
To make the best fudgy red velvet brownies, you need simple ingredients. Here’s what you will need: - 1 cup (2 sticks) unsalted butter, melted - 1 1/2 cups granulated sugar - 1/2 cup packed brown sugar - 4 large eggs - 1 tablespoon vanilla extract - 1 tablespoon red food coloring - 1 1/4 cups all-purpose flour - 1/2 cup unsweetened cocoa powder - 1 teaspoon baking powder - 1/2 teaspoon baking soda - 1/2 teaspoon salt - 1 cup semi-sweet chocolate chips For the frosting, you will need: - 1/2 cup cream cheese, softened - 1 cup powdered sugar - 1 tablespoon milk - Optional: white chocolate chips for garnish Using high-quality ingredients makes a big difference. Choose a good cocoa powder for rich flavor. Fresh eggs add moisture and fluffiness. Always use unsalted butter to control the salt level. The red food coloring is key for that vibrant hue. If you want a sweeter taste, add more brown sugar. For a richer texture, use dark chocolate chips instead of semi-sweet. If you have allergies, there are easy swaps. Use dairy-free butter and cream cheese for a vegan option. You can also try gluten-free flour if you need a gluten-free recipe. If you dislike red food coloring, substitute with beet juice for color. Remember, these swaps can change the texture and taste slightly, so adjust your baking time as needed. For the full recipe, check the detailed steps to make these delicious brownies. Start by preheating your oven to 350°F (175°C). Grab a 9x13 inch baking pan. Lightly grease it with butter or cooking spray. Next, line the pan with parchment paper. Make sure to let some paper hang over the edges. This helps you lift the brownies out later. In a large bowl, whisk together the melted butter, granulated sugar, and brown sugar. Mix for about 2-3 minutes until smooth. Next, add the eggs one at a time. Mix well after each egg. Then, stir in the vanilla extract and red food coloring. The batter should look bright and even. In another bowl, sift the all-purpose flour, cocoa powder, baking powder, baking soda, and salt. Gradually add this dry mix to the wet ingredients. Stir gently with a spatula until just combined. Don’t overmix! Finally, fold in the semi-sweet chocolate chips. Make sure they are spread throughout the batter. Pour the batter into the prepared pan. Use a spatula to spread it evenly. Bake for 25 to 30 minutes. Check with a toothpick in the center. It should come out with a few moist crumbs, not wet batter. Once done, let the brownies cool in the pan for about 10 minutes. Then, remove them using the parchment paper overhang. Allow them to cool completely before cutting into squares. For the full recipe, refer to the section above. To get those rich, fudgy brownies, focus on how much you mix. Overmixing can make them dry. Stir just until your ingredients combine. Use semi-sweet chocolate chips. They add moisture and flavor. Don't bake too long; check them at 25 minutes. If a toothpick comes out with a few moist crumbs, they are perfect. For smooth cream cheese frosting, start with soft cream cheese. Beat it well before adding sugar. This helps create a creamy texture. Add milk slowly to control thickness. If it's too thick, add a bit more milk. Want extra flavor? Mix in a splash of vanilla extract. This gives your frosting a lovely taste. If your brownies turn out too cakey, reduce the mixing time. This helps keep them fudgy. If they are too dry, check your oven temperature. It might be too hot. Use an oven thermometer for accuracy. If your brownies stick to the pan, line it with parchment paper. This makes removal easy. For soft brownies, allow them to cool fully before cutting. {{image_4}} You can change the flavor and fun of your brownies by adding mix-ins. Chopped nuts like walnuts or pecans add a nice crunch. You can also use chocolate chips, peanut butter chips, or even butterscotch chips for a sweet twist. Try adding a cup of shredded coconut for a tropical vibe. Mix these in after folding in your main chocolate chips. This step makes each bite different and exciting. Switching up chocolate types can change the taste of your brownies. Instead of semi-sweet chocolate chips, use dark chocolate for a rich flavor. Milk chocolate gives a sweeter taste, which kids often love. You can even try white chocolate chips for a unique twist. Each type brings its own character to the dish. Experiment with your favorites to find the perfect match for your taste buds. You can make these brownies fit any season or holiday. For fall, add pumpkin spice or chopped apples. In winter, sprinkle crushed candy canes on top for a festive touch. During summer, mix in fresh berries for a burst of flavor. You can even dye the frosting different colors for special occasions. These small changes keep every batch fresh and fun. For the full recipe, check out the details above. After baking, allow your brownies to cool completely. This step keeps them soft and moist. Use an airtight container for storage. If you want, line it with parchment paper. This helps to prevent sticking. Keep the container at room temperature if you plan to eat them in a few days. If stored correctly, these brownies stay fresh for up to five days. If you want them to last longer, consider freezing them. Wrap each brownie in plastic wrap, then place them in a freezer bag. They can last up to three months in the freezer, but I recommend eating them sooner for the best taste. To enjoy warm brownies, preheat your oven to 350°F (175°C). Place the brownies on a baking sheet. Heat them for about 10 minutes. You can also use a microwave. Heat a single brownie for about 10-15 seconds. This warms them up nicely without drying them out. Enjoy your fudgy red velvet brownies warm for the best experience! To make brownies fudgier, you need to adjust a few key things. First, use more fat. Adding an extra tablespoon of butter makes a big difference. Second, don't overmix your batter; mix it just until everything is combined. This keeps the brownies dense. Lastly, bake them for a shorter time. Check them at the 25-minute mark. If a toothpick comes out with a few moist crumbs, they are ready. This will give you that rich, fudgy texture you want. Yes, you can use different food coloring. While red is classic for red velvet, you can try other colors too. Gel food coloring works best because it gives vibrant color without adding too much liquid. If you want a different shade, feel free to mix colors. Just remember that using a lot of food coloring may change the taste slightly. Yes, you can make this recipe gluten-free. Substitute all-purpose flour with a 1:1 gluten-free flour blend. Make sure your baking powder is gluten-free as well. When baking, check for the same texture and doneness. The brownies should still be fudgy and delicious. Enjoy your gluten-free treat! For the complete recipe, check out the Full Recipe section! This blog post covered how to create delicious brownies. We explored key ingredients for the best flavor and tips for making them fudgy. I shared step-by-step instructions for mixing batter and baking techniques. You learned handy tips for cream cheese frosting and how to fix common baking problems. We discussed fun variations and smart storage methods. With these insights, you can bake brownies that taste great and wow your friends. Enjoy your baking journey, and have fun experimenting with flavors and techniques!

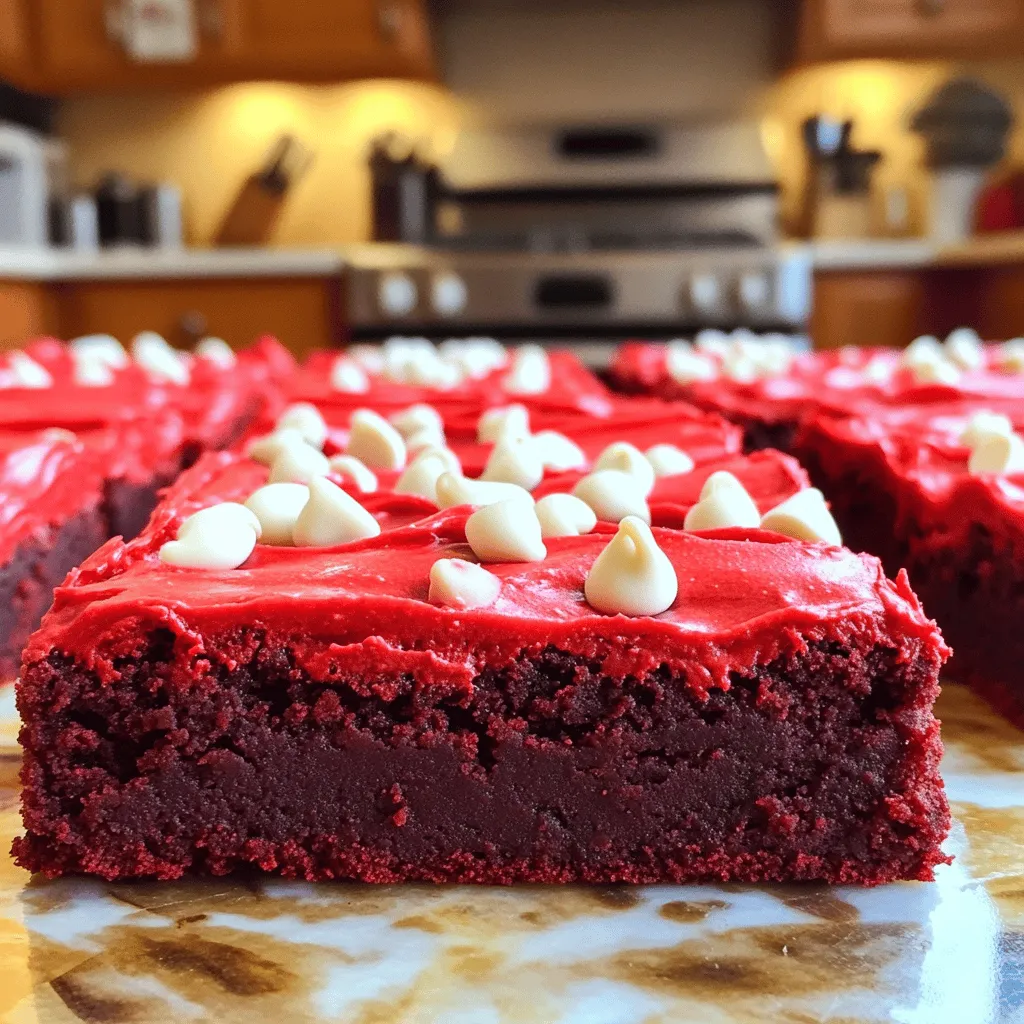
Are you ready to indulge in the ultimate dessert? These fudgy red velvet brownies are rich, chewy, and oh-so-delicious! In this article, I’ll guide you through the key ingredients and …

Read more

Categories Desserts

No-Bake Pumpkin Mini Cheesecakes Creamy Delight

August 8, 2025 by Chef Remy
- 1 cup graham cracker crumbs - 1/4 cup unsalted butter, melted - 2 tablespoons brown sugar - 8 oz cream cheese, softened at room temperature - 1 cup pumpkin puree (canned or fresh) - 1/2 cup powdered sugar - 1 teaspoon pure vanilla extract - 1 teaspoon pumpkin spice mix - 1/2 cup heavy whipping cream - Whipped cream for topping - Ground cinnamon for garnish Each ingredient plays a key role in creating these mini cheesecakes. The graham cracker crumbs make a crunchy base. Butter helps bind the crumbs together, while brown sugar adds sweetness and depth. Cream cheese gives the cheesecake its rich and creamy texture. Pumpkin puree provides that classic autumn flavor, and powdered sugar sweetens the mix. Vanilla extract enhances the overall taste, while pumpkin spice mix brings warmth and spice to every bite. Heavy whipping cream adds lightness and fluffiness to the filling. You can make these mini cheesecakes even more special with a few tasty toppings. Whipped cream is a must for that fluffy finish. You might also add chocolate shavings for a sweet touch. If you want to play with flavors, consider a drizzle of caramel sauce or a sprinkle of crushed nuts. For a twist, try adding more spices like nutmeg or even a hint of ginger. Each option adds a new layer of flavor and fun to your dessert experience. To start, gather your graham cracker crumbs, melted butter, and brown sugar. In a medium bowl, mix these three ingredients well. You want every crumb to soak up the butter and sugar. This step is key for a tasty crust. Next, grab your mini cheesecake cups or a muffin tin. Spoon about one tablespoon of the crumb mixture into each cup. Use the back of a spoon or your fingers to press it down firmly. This helps create a solid base. After pressing, place the crusts in the fridge. This will help them firm up while you make the filling. Now, let’s make the filling. In a large bowl, beat the softened cream cheese with an electric mixer. Mix until it’s smooth and creamy. Next, add the pumpkin puree, powdered sugar, vanilla extract, and pumpkin spice. Mix these together thoroughly. A good blend makes for a smooth and creamy texture. After mixing, it’s time to whip the cream. In a separate bowl, whip the heavy cream until it forms stiff peaks. Then, carefully fold the whipped cream into the pumpkin mixture. Use a spatula for this step. You want them to mix well without losing all the air from the whipped cream. Take the crusts out of the fridge. Now, it’s time to fill them. Spoon or pipe the pumpkin cheesecake filling into each crust. Fill them generously, but avoid overflowing. Once filled, return the mini cheesecakes to the fridge. Let them chill for at least four hours. For the best taste and texture, I recommend chilling them overnight. This step is crucial for letting the flavors meld together. For the full recipe, check the details above. To make your mini cheesecakes creamy, start with cold heavy cream. Whip it until you see stiff peaks. This step adds air and lightness to your filling. Next, let your cream cheese sit out for 30 minutes. This helps it soften and blend smoothly. If the cream cheese is too cold, it won't mix well. A common mistake is not pressing the crust firmly enough. If the crust is loose, it can crumble. Use the back of a spoon to press it down well. For the filling, watch the mixing time. If you over-mix, it can become too runny. Mix just until smooth and creamy. These mini cheesecakes are perfect for parties. Serve them on a pretty platter with a dollop of whipped cream. You can also sprinkle some ground cinnamon on top for extra flavor. They pair well with hot apple cider or spiced coffee. Try serving them alongside chocolate treats for a fun contrast. If you want more ideas, check the Full Recipe for additional tips! {{image_4}} You can make these mini cheesecakes even more fun. Try adding different spices. Cinnamon gives a warm flavor. Nutmeg adds a nice touch too. You can mix them in the filling or sprinkle on top. Consider chocolate or caramel layers. A chocolate layer can add a rich taste. Melt chocolate and pour over the crust. Or, layer caramel on top of the cheesecake. These choices make your dessert unique and tasty. If you want a gluten-free version, swap the graham crackers. Use gluten-free cookies or nuts for the crust. Crush them and mix with melted butter. This keeps the base crunchy and delicious. For a dairy-free option, choose plant-based cream cheese. It works well with pumpkin. You can also use coconut cream instead of heavy cream. This gives a rich flavor without dairy. These swaps let everyone enjoy your cheesecake! For the full recipe, refer to the main section. To keep your mini cheesecakes fresh, store them in the fridge. Use an airtight container. This will help prevent any odors from other foods. These treats can stay good for about 3 to 5 days in the fridge. If you want to keep them longer, you can freeze them. Just wrap each cheesecake tightly in plastic wrap and then in foil. They can last up to 2 months in the freezer. If you freeze the cheesecakes, you need to thaw them. Take them out of the freezer and place them in the fridge overnight. This slow thaw helps keep their creamy texture. After thawing, serve them cold for the best taste. If you want them a bit warmer, you can let them sit at room temperature for about 15 minutes before serving. This makes the flavors pop! For an extra touch, add whipped cream and a sprinkle of cinnamon just before serving. Enjoy your creamy delight! Yes, you can use homemade pumpkin puree. Just make sure it is thick and not watery. If you use fresh pumpkin, roast it first to bring out the best flavor. Strain any excess liquid to keep your filling creamy. Homemade puree adds a lovely taste and can make your mini cheesecakes even better. These mini cheesecakes should not sit out for more than two hours. Bacteria can grow quickly at room temperature. After serving, refrigerate any leftovers to keep them fresh. Make sure to cover them well. This way, they stay tasty for later. Absolutely! You can make these mini cheesecakes up to two days ahead. Just store them in the fridge covered with plastic wrap. This helps the flavors blend and makes them even more delicious. Remember to add whipped cream just before serving. You’ll keep it looking fresh and pretty. For the full recipe, check out the detailed instructions above. In this post, we explored how to make no-bake pumpkin mini cheesecakes. We discussed essential ingredients and their roles, plus optional toppings to enhance flavor. I provided clear steps for preparing the crust, making the filling, and chilling for the best texture. You learned tips to avoid common mistakes and how to customize flavors. Remember to store them properly for fresh enjoyment later. These mini cheesecakes are great for any gathering. Enjoy your delicious creation, and share with friends and family. It’s a dessert everyone will love!

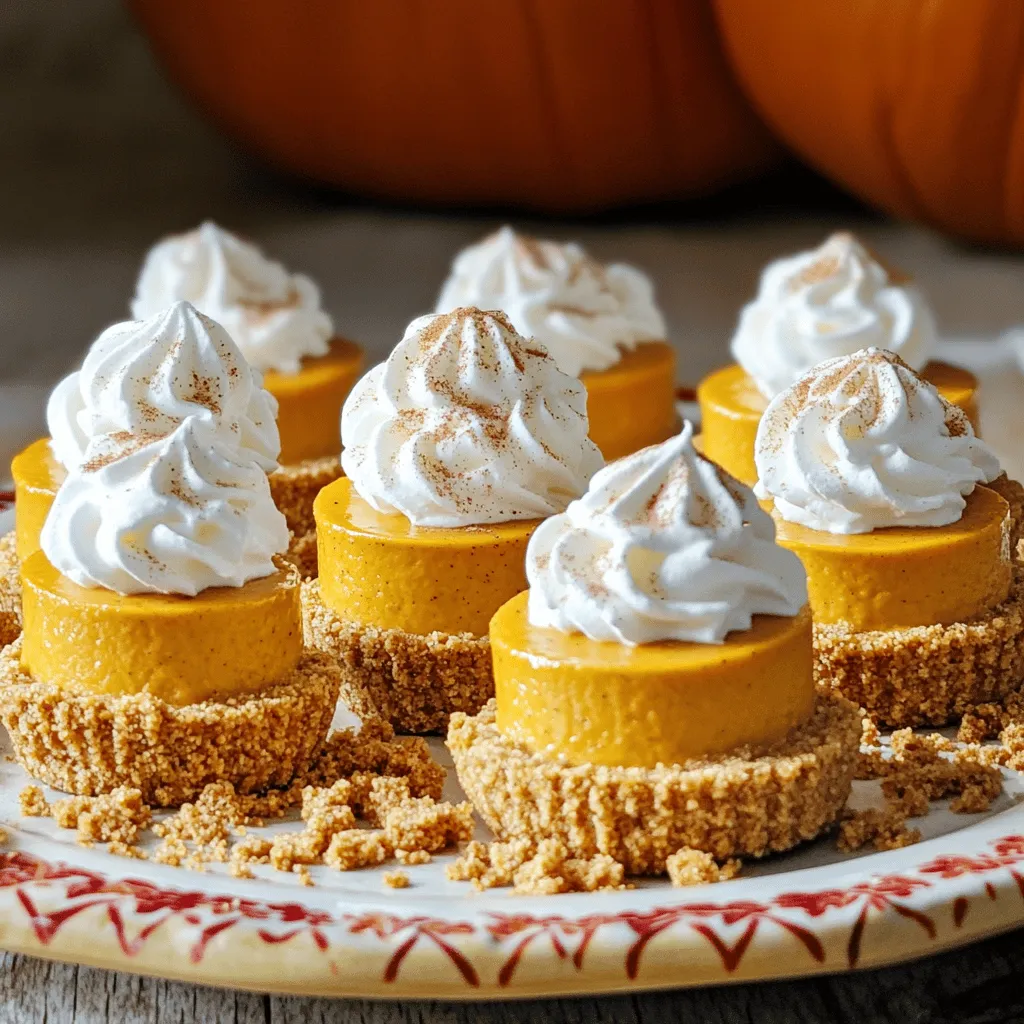
Get ready to delight your taste buds with my no-bake pumpkin mini cheesecakes! This creamy treat combines smooth pumpkin with a crunchy crust, making it perfect for fall gatherings or …

Read more

Categories Desserts

Creamy Cucumber Salad Refreshing and Healthy Dish

August 8, 2025 by Chef Remy
- 2 large cucumbers, thinly sliced - 1 cup plain Greek yogurt - 1 tablespoon fresh lemon juice - 1 tablespoon fresh dill, finely chopped - 1/4 cup red onion, finely chopped - 1 tablespoon toasted sesame seeds (for garnish) - 1 clove garlic, minced - 1 tablespoon honey - 1/2 teaspoon sea salt - 1/4 teaspoon freshly ground black pepper The main ingredients create a fresh and crunchy base. You want crisp cucumbers and rich yogurt for creaminess. The lemon juice adds brightness, while fresh dill gives great flavor. If you like, add red onion for a little bite. Next, the seasoning and flavor enhancers are key. Minced garlic brings depth, while honey balances the tartness. Sea salt and black pepper round out the taste. Together, these ingredients make a salad that is both refreshing and healthy. For the full recipe, check out my earlier notes. Each component plays a vital role in making this creamy cucumber salad shine. - First, wash the cucumbers under cool water. - Slice them into thin rounds, about 1/8 inch thick. - Transfer the sliced cucumbers to a large mixing bowl. - In a separate bowl, combine the Greek yogurt, lemon juice, dill, garlic, honey, salt, and pepper. - Whisk the ingredients together until smooth and well mixed. - If you want more flavor, mix in the optional red onion with the cucumbers. - Drizzle the creamy dressing over the cucumbers and red onion. Toss everything gently to coat. - Cover the salad with plastic wrap or use a sealed container. - Refrigerate for at least 15-20 minutes to enhance the flavor. This refreshing cucumber salad is a great side dish. You can find the Full Recipe for a complete guide. To make your creamy cucumber salad even better, you can add more herbs and spices. Fresh mint or parsley works well with cucumbers. A pinch of cumin adds warmth too. Chilling the salad is key. It helps mix the flavors and makes each bite refreshing. Aim to chill it for at least 15-20 minutes. Serving your salad in chilled bowls makes it look fancy. You can also add sprigs of dill on top. This gives the dish a pop of color. A sprinkle of toasted sesame seeds adds a nice crunch. It also enhances the salad's flavor, making it even more delightful. For easy mixing and serving, use a large mixing bowl. A spatula helps combine the ingredients without breaking the cucumbers. Tongs are great for tossing the salad gently. A whisk is perfect for blending the dressing smoothly. Having these tools makes the whole process quicker and more fun. For the Full Recipe, check out the detailed instructions above. {{image_4}} You can switch up the dressing for your creamy cucumber salad. Instead of using Greek yogurt, try sour cream or cottage cheese. They add a nice tang without losing creaminess. For a lighter version, mix olive oil, vinegar, and a little mustard. This vinaigrette keeps it fresh and bright. Want more crunch? Add chopped bell peppers or juicy tomatoes. They bring color and flavor to your salad. You can also toss in nuts or seeds. Almonds, walnuts, or sunflower seeds add a delightful crunch. These ingredients make every bite more exciting. Herbs can change the whole dish! Try fresh mint or basil for a different taste. They add a refreshing twist. You can also experiment with flavored vinegars, like balsamic or apple cider. This can elevate the salad's taste, making it even more special. To store your creamy cucumber salad, keep it in the fridge. Use an airtight container. This helps keep your salad fresh and tasty. Make sure to cover it well. If you don’t have a lid, plastic wrap works great too. Your salad stays fresh for about three days in the fridge. After that, it begins to lose its crunch. Look for signs that it has gone bad. If the cucumbers are mushy or the dressing smells off, it’s time to toss it. I do not recommend freezing creamy cucumber salad. The cucumbers will become watery and mushy. If you want to freeze, store the dressing separately. You can freeze the dressing in small containers for up to a month. Just thaw it in the fridge when you are ready to use it. For best results, mix it with fresh cucumbers just before serving. You can use alternatives like sour cream or cashew cream. Both options create a rich texture. For vegan options, try silken tofu blended until smooth. This gives a creamy feel without dairy. You can also use coconut cream for a tropical twist. Just keep in mind that these swaps may change the flavor a bit. Yes, you can use various types of cucumbers. Persian cucumbers are smaller and sweeter. English cucumbers have a thin skin and fewer seeds. If you like crunch, try Kirby cucumbers. Their crispness adds a nice bite to the salad. Just pick any cucumber you enjoy. Each type brings a unique taste. Creamy cucumber salad is quite healthy. Cucumbers are low in calories and high in water. They help keep you hydrated. Greek yogurt adds protein and probiotics, promoting gut health. Fresh herbs like dill offer vitamins and minerals. However, watch the added sugar if you use honey. Overall, it’s a refreshing and nutritious dish when made with fresh ingredients. This creamy cucumber salad is simple and fresh. You primarily need cucumbers, yogurt, and herbs. We discussed how to prepare it, enhance its flavor, and present it beautifully. Remember to chill the salad before serving for the best taste. You can also try various dressings and add vegetables for texture. Proper storage ensures leftovers stay fresh and tasty. Enjoy making this easy, healthy dish that can please anyone. Dive into your next salad adventure with these tips!

Looking for a cool, refreshing dish that packs a healthy punch? Try my creamy cucumber salad! This easy recipe combines crisp cucumbers with tangy Greek yogurt and fresh herbs. It’s …

Read more

Categories Salads

Easy Mexican Street Corn Flavorful and Simple Recipe

August 8, 2025 by Chef Remy
For the best Easy Mexican Street Corn, gather these key ingredients: - 4 ears of ripe fresh corn, husked - 1/2 cup creamy mayonnaise - 1/2 cup crumbly cotija cheese - 1 teaspoon vibrant chili powder - 1 teaspoon fragrant garlic powder - 1 tablespoon freshly squeezed lime juice - 1/4 teaspoon smoky paprika - Fresh cilantro, finely chopped (for garnishing) - Lime wedges (for serving) These ingredients work together to create a rich and tasty dish. The corn gives you sweetness, while the mayonnaise adds creaminess. Cotija cheese brings a salty bite, and the spices give depth. Want to make your corn even more special? Here are some optional add-ins: - A pinch of cayenne pepper for heat - Chopped green onions for a fresh crunch - A drizzle of hot sauce for added spice - Grated Parmesan cheese for a different cheese flavor Feel free to mix and match these add-ins. Each one can take your corn to the next level. No cotija cheese? No problem! Here are some good substitutes: - Feta cheese offers a similar salty flavor. - Queso fresco is another great choice. - Vegan mayo can replace regular mayonnaise for a dairy-free option. Adjust the recipe to fit what you have at home. Cooking should be fun and flexible. If you want the full recipe to try this dish, check out the detailed steps. Start with fresh corn. You need four ears, husked and cleaned. Husked corn means you remove the green leaves and silk. This way, the corn can grill evenly. Rinse the corn under cool water to remove any dirt. Dry it with a clean towel. While the corn is drying, mix the sauce. In a bowl, combine half a cup of mayonnaise with one tablespoon of lime juice. Add one teaspoon of chili powder and one teaspoon of garlic powder. For a smoky taste, include a quarter teaspoon of paprika. Stir well until it is smooth. This sauce will add a zesty kick to your corn. Now, preheat your grill to medium-high. Place the corn directly on the grates. Grill for about 10 to 15 minutes. Turn the corn often. You want nice grill marks and tender corn. When it’s done, take the corn off the grill and let it cool for a minute. Once the corn is cool enough to touch, it’s time to assemble. Use a brush or the back of a spoon to spread the creamy sauce all over the corn. Don’t be shy! Next, sprinkle half a cup of crumbled cotija cheese on top. Finally, add fresh cilantro for garnish. Serve with lime wedges on the side. This adds a fresh burst of flavor. Enjoy this tasty dish with your friends and family. For the full recipe, check the details above! To get great corn, start with fresh ears. Look for bright green husks. Hot grills make the best marks. Aim for medium-high heat. Grill the corn for 10-15 minutes. Turn it often to cook evenly. You want a nice char but avoid burning. That sweet, smoky taste makes all the difference. You can make this dish just how you like it. Want it spicy? Add more chili powder or a dash of cayenne. For a milder taste, cut back on the spice. You can also mix in some paprika for flavor without too much heat. Taste your sauce as you go. Adjust the spice until you are happy. Serve your Mexican street corn hot off the grill. It pairs well with grilled meats or fish. You can also serve it as a tasty side for tacos. For a fun twist, try it with nachos or quesadillas. Don’t forget the lime wedges! They add a fresh kick. For more flavor, sprinkle extra cotija cheese on top. This dish is perfect for summer barbecues or casual get-togethers. Check out the Full Recipe for more tips on serving. {{image_4}} You can switch up the cheese for a new taste. Try feta cheese for a salty kick. Parmesan cheese works too, adding a nutty flavor. If you want more creaminess, use cream cheese. Each choice gives you a unique twist on this dish! You can enjoy this dish without dairy. Use vegan mayo as a base. Instead of cheese, try nutritional yeast for a cheesy flavor. Add a sprinkle of lime juice for that zesty kick. This way, you can savor the taste while sticking to a vegan diet. Want more heat? Add diced jalapeños to the creamy sauce. You can also sprinkle cayenne pepper for a fiery touch. For a smoky flavor, use chipotle powder instead of chili powder. Each addition raises the excitement of this tasty corn dish! For the full recipe, check out the details above. To store your leftover Mexican street corn, wait for it to cool. Then, wrap each ear in plastic wrap or place it in an airtight container. This helps keep the corn fresh. You can store it in the fridge for up to three days. Make sure to check for any signs of spoilage before using it. When you're ready to enjoy your leftovers, reheating is key. The best way to reheat corn is on the grill or in a skillet. This keeps the corn juicy and enhances the flavors. Heat it for about five minutes, turning occasionally to avoid burning. If you want, add a little extra mayo and cheese to boost the taste. Leftover Mexican street corn can add a fun twist to other meals. You can slice the corn off the cob and mix it into salads for a crunchy bite. It also works well in tacos or burritos, adding a zesty touch. You can even stir it into soups for added flavor. The possibilities are endless, and it's a great way to use what you have! For the full recipe, check out the Easy Mexican Street Corn Delight. The best time to grill corn is during summer. Fresh corn is at its peak then. Look for corn with bright green husks and plump kernels. Grilling during warm days brings out the sweet flavor. Yes, you can make parts of this recipe ahead of time. You can grill the corn a few hours before serving. Just keep it warm in foil. Mix the sauce in advance too. Store it in the fridge until you are ready to use it. This way, it stays fresh and tasty. You can use frozen corn but the texture will be different. Frozen corn may not get the same char as fresh corn. If you use frozen corn, thaw and drain it first. Then, grill it in a pan or on a grill to get some color. If you can't find cotija cheese, try feta cheese. Feta has a similar crumbly texture. You can also use queso fresco or even Parmesan cheese. Each option will give a nice flavor to your dish. Easy Mexican street corn is simple to make with the right ingredients and steps. We covered key components, optional add-ins, and substitutions to suit your taste. I shared tips for grilling and customizing flavors, plus fun variations for all diets. Remember to store leftovers properly and use them in new dishes. Mexican street corn is a fun way to enjoy summer flavors anytime. Now, it’s time to get cooking and savor this tasty treat!

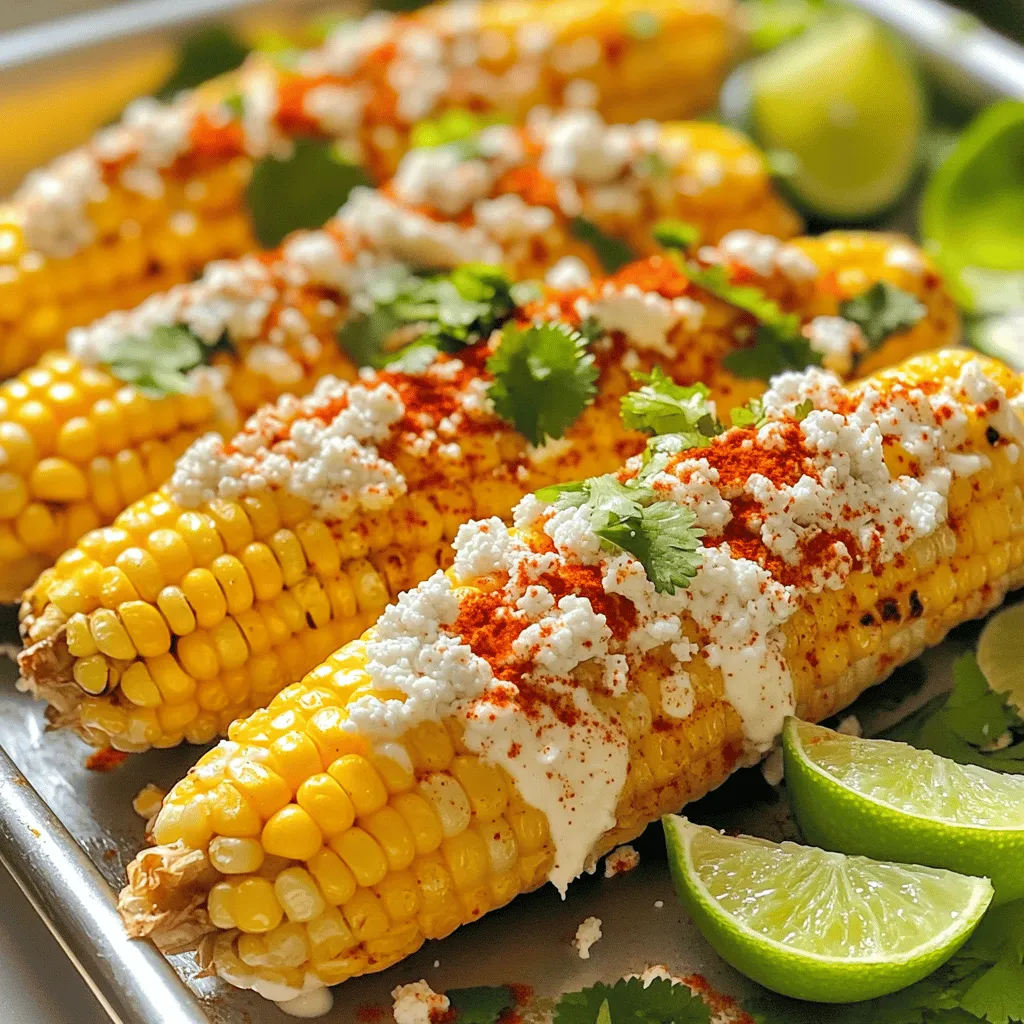
Are you ready to taste the vibrant flavors of Easy Mexican Street Corn? This simple recipe will transport you straight to the bustling streets of Mexico. With a few fresh …

Read more

Categories Appetizers

Incredible Gingerbread Oatmeal Cream Pies Delight

August 8, 2025 by Chef Remy
For the cookies, gather these items: - 1 ½ cups rolled oats - 1 cup whole wheat flour - 1 teaspoon baking soda - 1 teaspoon ground ginger - 1 teaspoon ground cinnamon - ¼ teaspoon ground nutmeg - ¼ teaspoon salt - ½ cup unsalted butter, softened - ½ cup packed brown sugar - ½ cup granulated sugar - 1 large egg - 1 teaspoon vanilla extract - ½ cup molasses For the cream filling, you will need: - 1 cup powdered sugar - ½ cup cream cheese, softened - 2 tablespoons unsalted butter, softened - 1 teaspoon vanilla extract These ingredients create the perfect balance of spice and sweetness. I love how the oats add a hearty texture to the cookies. The cream filling brings a smooth richness that complements the gingerbread flavor. If you follow the Full Recipe, you will have delightful treats to share or enjoy solo! First, set your oven to 350°F (175°C). This warm-up helps cookies bake evenly. While the oven heats, grab two baking sheets. Line each one with parchment paper. This step keeps cookies from sticking and makes clean-up easier. In a large bowl, mix the dry ingredients. Start with rolled oats, whole wheat flour, baking soda, ground ginger, ground cinnamon, ground nutmeg, and salt. Use a whisk to blend them well. Set this bowl aside. In another bowl, cream the butter and sugars. Use softened butter, brown sugar, and granulated sugar. A hand or stand mixer works best here. Beat the mixture on medium speed until it looks light and fluffy, which takes about three minutes. Next, add the egg, molasses, and vanilla extract. Mix until everything is smooth. Now, it's time to combine the dry and wet mixtures. Gradually add the dry ingredients to the wet mix. Stir gently until just combined. Be careful not to over-mix, or your cookies will turn out tough. Now, let’s form the cookies. Use a cookie scoop or two tablespoons. Portion out the dough and drop round balls onto the lined sheets. Space them about two inches apart. This gives them room to spread while baking. Place the sheets in your preheated oven. Bake for 10 to 12 minutes. Look for slightly golden edges and soft centers. When they are done, take them out and let the cookies cool on the sheets for about five minutes. After that, transfer them to a wire rack to cool completely. To get the best texture, do not over-mix your dough. Over-mixing can lead to tough cookies. When you combine the dry ingredients with the wet, stir gently until just mixed. This helps keep your cookies soft and chewy. Cooling is also important. After baking, let the cookies sit on the sheet for about 5 minutes. Then, move them to a wire rack. This cooling method lets them firm up without becoming dry. Spices make your cookies shine. I suggest adding a pinch of ground cloves or allspice for a warm kick. You can also mix in some citrus zest for a fresh twist. For sweetness, taste your dough as you mix. If you want it sweeter, add a little extra brown sugar. Just remember, the cream filling will bring more sweetness too. Garnishing makes your pies look special. Dust the tops with powdered sugar for a snowy effect. You can also drizzle some melted chocolate over them for a fun touch. For the holidays, serve these pies on a festive plate. Add sprigs of pine or holly around them. This creates a lovely, seasonal display that will impress your guests. For the complete recipe, check the Full Recipe above. {{image_4}} You can make these pies healthier by using gluten-free ingredients. Try gluten-free oats and flour. You can also use a gluten-free flour blend. This will keep the texture nice without the gluten. When it comes to sweeteners, you can swap out brown sugar. Use coconut sugar or honey instead. Both will add a nice flavor without too much guilt. Just remember, different sweeteners can change the taste, so experiment to find what you like best. Want to jazz up your pies? Add mix-ins like chocolate chips or chopped nuts. Dark chocolate chips bring a rich taste. Walnuts or pecans add crunch. You can also try dried fruit like cranberries or raisins for a fun twist. For the cream filling, play with flavors too. Instead of vanilla, use almond extract or peppermint oil. This gives a unique taste that fits any mood or season. You might even want to mix in a bit of cocoa powder for a chocolate cream filling. These pies are great for any holiday. For Christmas, you can sprinkle some cinnamon on top. For Halloween, use orange food coloring in the filling to make it festive. You can even shape the cookies into stars or hearts for Valentine’s Day. If you want a fall flavor, try pumpkin spice. Just add pumpkin spice to the cookie dough. This gives a warm flavor that everyone loves. You can also make a pumpkin cream filling to match. This way, you can have a new twist on your favorite recipe. Enjoy the full recipe to create your own incredible gingerbread oatmeal cream pies! To keep your gingerbread oatmeal cream pies fresh, store them in an airtight container. Place parchment paper between the layers to prevent sticking. You can stack them, but separate each layer for best results. For the cream filling, it’s best to store any extra in the fridge. Use a small, sealed container to keep it fresh. If you have leftover cookies without filling, you can store them separately. This helps maintain their texture. You can freeze baked cookies or unbaked dough. If freezing baked cookies, let them cool completely first. Then, wrap them in plastic wrap and place them in a freezer-safe bag. They can last up to three months in the freezer. For unbaked dough, scoop the dough balls onto a baking sheet and freeze them for about an hour. Once frozen, transfer them into a freezer-safe bag. When you’re ready to bake, just place the frozen dough on a baking sheet and add a couple of minutes to the baking time. To thaw cookies, take them out of the freezer and let them sit at room temperature for about 30 minutes. For dough, let it sit out for about 15 minutes. This way, you can enjoy your gingerbread oatmeal cream pies at their best. For the full recipe, check out the details to make these delightful treats! You can use quick oats, but the texture will differ. Quick oats cook faster and become softer. This can make your cookies chewier. Rolled oats add a nice bite and heartiness to your Gingerbread Oatmeal Cream Pies. I recommend using rolled oats for the best result. They hold their shape and give a great chewiness. To make a fluffier filling, beat the cream cheese and butter well. Air needs to mix in as you beat. Use a hand mixer or stand mixer on medium speed. This helps incorporate air and creates a light texture. You can also add a bit of heavy cream for extra fluffiness. Just mix until it’s smooth and creamy, but don’t overdo it. These pies last about five days when stored properly. Keep them in an airtight container at room temperature. If you want them to stay fresh longer, you can refrigerate them. Storing in the fridge can extend their life to a week. Just remember to let them sit out a bit before serving, so they soften up. You now know how to make delicious cookies with cream filling. We covered the ingredients, step-by-step instructions, and tips for the best texture and flavor. I also shared fun variations to try and storage tips to keep your treats fresh. Remember, baking is about having fun and trying new things. Use this guide to create your own treats, impress your friends, and enjoy every bite! Happy baking!

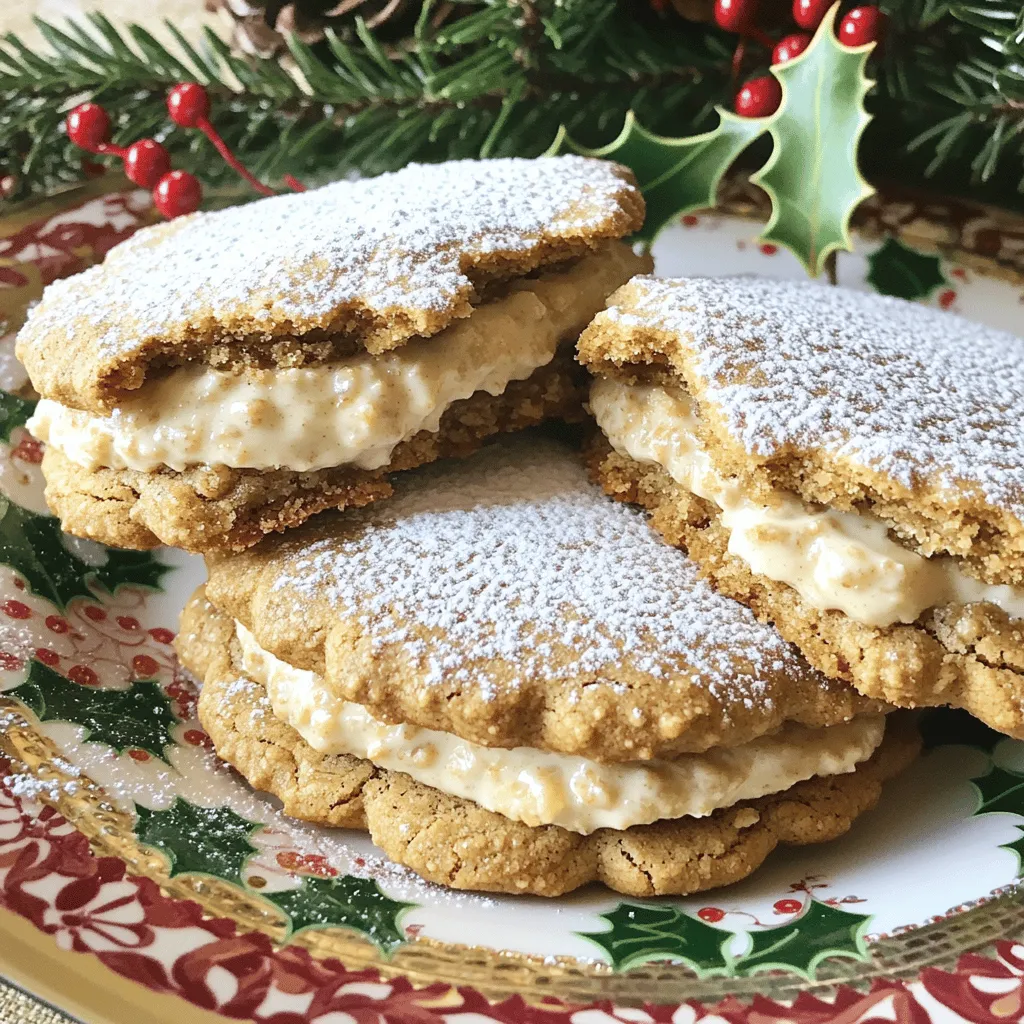
Are you ready to whip up a treat that combines the best flavors of the season? These Incredible Gingerbread Oatmeal Cream Pies are not only delicious but also super easy …

Read more

Categories Desserts

Maple Pumpkin Cookies Irresistible Fall Treats

August 7, 2025 by Chef Remy
- 1 cup canned pumpkin puree - 1/2 cup pure maple syrup - 1/2 cup unsalted butter, softened to room temperature - 1 cup packed brown sugar - 1 large egg These ingredients are key to making soft and flavorful cookies. Canned pumpkin puree brings moisture and a rich taste. Pure maple syrup adds a sweet, earthy note. The unsalted butter gives a creamy base, while brown sugar adds a hint of caramel. Finally, the egg binds everything together. - 2 cups all-purpose flour - 1 teaspoon baking soda - 1 teaspoon ground cinnamon - 1/2 teaspoon ground nutmeg - 1/4 teaspoon ground ginger - 1/2 teaspoon salt - 1/2 cup chopped pecans (optional) - 1/2 cup white chocolate chips (optional) For the dry mix, all-purpose flour forms the cookie base. Baking soda helps them rise. Ground cinnamon, nutmeg, and ginger give that warm, fall flavor. Salt balances the sweetness. If you want extra crunch, add pecans. For a sweet twist, stir in white chocolate chips. You can find the full recipe for these cookies at the end of this article. First, preheat your oven to 350°F (175°C). This step is key to getting soft, warm cookies. Next, prepare your baking sheet. Line it with parchment paper. This helps the cookies not stick. Now, let’s cream the butter and sugar. In a large bowl, add the softened butter and packed brown sugar. Use a hand mixer or stand mixer on medium speed. Mix until the mixture is light and fluffy. This should take about 3-4 minutes. Next, it’s time to mix in the wet ingredients. Add the canned pumpkin puree, pure maple syrup, large egg, and pure vanilla extract to the bowl. Mix on low speed until everything comes together. The texture should be smooth. In another bowl, combine the dry ingredients. Whisk together the all-purpose flour, baking soda, ground cinnamon, ground nutmeg, ground ginger, and salt. Make sure they are evenly mixed. Now, let’s combine the wet and dry ingredients. Gradually add the dry mixture into the wet mixture. Use a spatula to stir gently. Be careful not to overmix; some flour streaks are okay. If you like, fold in the chopped pecans and white chocolate chips. This adds a nice crunch and sweetness. Using a cookie scoop or spoon, drop rounded tablespoons of dough onto the prepared baking sheet. Space them about 2 inches apart. This allows for spreading while baking. Bake the cookies in the preheated oven for 12-15 minutes. They should be lightly golden around the edges. The centers should look set. Your kitchen will smell amazing during this time! Once baked, remove the cookies from the oven. Let them cool on the baking sheet for a few minutes. Then, gently transfer them to a wire rack to cool completely. For the full recipe, refer to the provided details. Enjoy your delicious maple pumpkin cookies! To get the best maple pumpkin cookies, use the right measurements. Always measure your flour correctly. Scoop it into the cup and level it off with a knife. This way, you avoid making your cookies too dense. Also, keep your butter at room temperature. It mixes better with the sugar. Avoid overmixing the dough. Once you add the dry ingredients, mix just until you see no more flour. A few lumps are okay. Overmixing can make your cookies tough. You want them soft and chewy. Check your oven’s temperature with a thermometer. An oven can be off by a few degrees. Preheat it to 350°F (175°C) for perfect baking. This temperature helps your cookies rise well. Use parchment paper on your baking sheet. It makes cookie removal easy and prevents sticking. After baking, let the cookies cool for a few minutes on the sheet before moving them to a wire rack. For serving, use a rustic wooden platter. This adds charm to your cookies. Dust them lightly with powdered sugar for a sweet touch. Pair your cookies with warm tea or coffee. This makes for a cozy snack time. If you want to impress guests, serve with a side of whipped cream or vanilla ice cream. The flavors of the maple and pumpkin shine through, making each bite delightful. Enjoy these sweet treats! {{image_4}} You can make these cookies even more fun! Add chocolate or butterscotch chips for a sweet twist. Their rich taste pairs well with pumpkin. You can also try different nuts, like walnuts or almonds. Nuts give a nice crunch and extra flavor. If you need gluten-free cookies, swap all-purpose flour for a gluten-free blend. Many brands work well in baking. For a vegan option, use a flax egg instead of a regular egg. Just mix one tablespoon of ground flaxseed with three tablespoons of water. Let it sit for five minutes to thicken, and then use it in your cookie mix. To spice things up, add more autumn spices like cloves or allspice. These scents remind us of fall. You can even change the recipe to make pumpkin bread. Just adjust the baking time and use a loaf pan instead of a cookie sheet. This way, you can enjoy the flavors in a new form. For the full recipe, check out the details above! You want to keep your maple pumpkin cookies fresh and tasty. For short-term storage, place them in an airtight container at room temperature. This method keeps them soft for several days. If you want to keep them longer, try refrigeration. A cool spot will help them last up to two weeks. Just make sure to seal the container well to avoid drying out. Freezing cookies is a great way to save them for later. To freeze, first, let the cookies cool completely. Then, place them in a single layer on a baking sheet. Put the sheet in the freezer for about an hour. Once they are firm, transfer the cookies to a freezer bag. Be sure to remove as much air as possible to prevent freezer burn. When you are ready to enjoy a cookie, just take it out and let it thaw on the counter for about 15-20 minutes. You can also warm them in the oven at 350°F for about 5 minutes for a fresh-baked taste. Following these steps will give your cookies a longer shelf life while keeping them delicious. For the full recipe, check back to ensure you have all the steps down! Look for some key signs. The edges should be lightly golden brown. The center will look set but not overcooked. You can also gently press the top; it should spring back. If it leaves a dent, they need more time. Yes, you can make the dough ahead of time. Wrap it tightly in plastic wrap. You can store it in the fridge for up to three days. This helps the flavors meld, making the cookies taste even better. If you don't have maple syrup, you can use honey or agave nectar. These sweeteners will change the flavor slightly. You might also need to adjust the amount of flour, as they can add more moisture. To achieve softer cookies, try adding more pumpkin puree. You can also reduce the baking time slightly. If you want chewier cookies, use brown sugar instead of white sugar. This adds moisture and richness to the texture. For the full recipe, check out the details above! These maple pumpkin cookies combine simple ingredients for a delightful treat. We covered the essential components, from pumpkin puree to optional add-ins like chocolate chips. I shared step-by-step instructions to guide your baking process. You learned tips for perfect cookies, including key measurements and baking methods. Plus, we explored variations for special diets and seasonal flavors. These cookies are easy to make and perfect for sharing. Enjoy the warmth they bring to your fall gatherings!

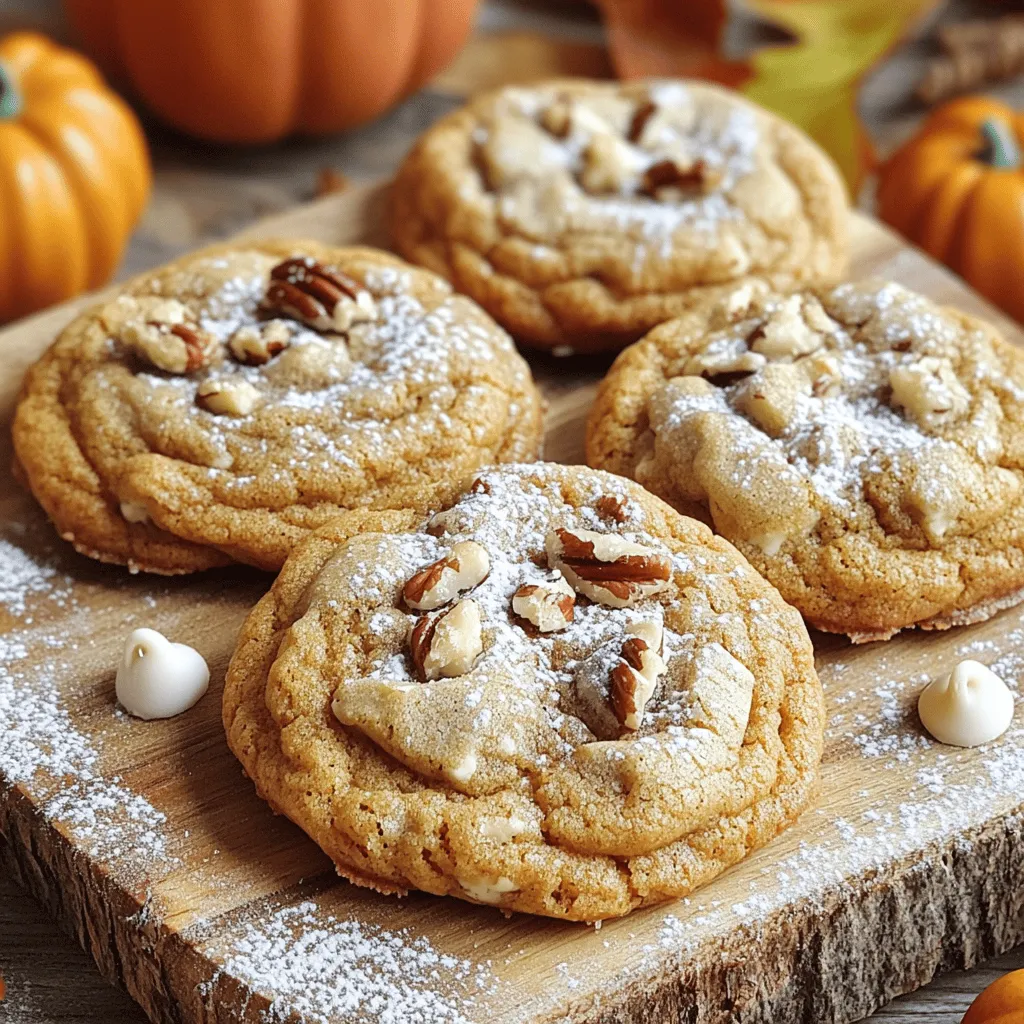
If you’re looking for a sweet way to celebrate fall, look no further! These Maple Pumpkin Cookies are the perfect blend of flavors, bringing comfort and joy to your autumn …

Read more

Categories Desserts

Cream Cheese Filled Pumpkin Bread Irresistible Delight

August 7, 2025 by Chef Remy
- 2 cups all-purpose flour - 1 teaspoon baking soda - 1 teaspoon baking powder - 1 teaspoon ground cinnamon - ½ teaspoon ground nutmeg - ½ teaspoon salt - 1 cup canned pumpkin puree - 1 cup granulated sugar - ½ cup packed brown sugar - ½ cup vegetable oil - 3 large eggs - 1 teaspoon vanilla extract - 8 ounces cream cheese, softened - 1/4 cup powdered sugar - 1 teaspoon fresh lemon juice For this recipe, you need some simple ingredients. Each one plays a key role in making your pumpkin bread taste amazing. You can swap some ingredients based on what you have. - Alternatives for All-purpose Flour: You can use whole wheat flour or almond flour for a different taste. Make sure to adjust the liquid in your recipe to match the flour you choose. - Sweetener Options: If you want less sugar, you can use honey or maple syrup. Just reduce the liquid in your recipe slightly. - Dairy-Free Cream Cheese Suggestions: You can find brands of dairy-free cream cheese at stores. These work great if you want to avoid dairy. These substitutions help you customize the recipe to your taste and needs. - Preheating the Oven First, preheat your oven to 350°F (175°C). This step warms up the oven for even baking. While it heats, grease a 9x5-inch loaf pan with cooking spray or butter. This helps the bread slide out easily when done. - Mixing Dry Ingredients In a medium bowl, whisk together these dry ingredients: - 2 cups all-purpose flour - 1 teaspoon baking soda - 1 teaspoon baking powder - 1 teaspoon ground cinnamon - ½ teaspoon ground nutmeg - ½ teaspoon salt This helps distribute the leavening agents and spices evenly. - Combining Wet Ingredients In a large bowl, mix these wet ingredients: - 1 cup canned pumpkin puree - 1 cup granulated sugar - ½ cup packed brown sugar - ½ cup vegetable oil - 3 large eggs - 1 teaspoon vanilla extract Whisk until smooth, ensuring there are no lumps. - Incorporating Dry Ingredients Gradually add the dry mix to the wet mix. Use a spatula or wooden spoon. Stir gently until just combined. Overmixing can make the bread tough. - Preparing the Cream Cheese Filling In another bowl, mix: - 8 ounces cream cheese, softened - ¼ cup powdered sugar - 1 teaspoon fresh lemon juice Blend until smooth. This filling adds a rich, tangy flavor. - Stacking the Batter and Filling in the Pan Pour half of the pumpkin batter into your prepared loaf pan. Spread it evenly. Next, dollop the cream cheese filling over the batter. Leave a half-inch border around the edges. Finally, pour the remaining pumpkin batter on top, covering the filling fully. - Bake Time and Temperature Place the loaf in your preheated oven. Bake for 60 to 70 minutes. The bread is ready when a toothpick inserted into the center comes out clean or with a few moist crumbs. - Cooling Process After baking, remove the loaf from the oven. Let it cool in the pan for about 15 minutes. Then, transfer it to a wire rack to cool completely. - Serving Suggestions Slice the pumpkin bread warm for the best taste. For a special touch, dust the top with powdered sugar. You can also add a dollop of whipped cream or a scoop of vanilla ice cream on the side. To make your cream cheese filled pumpkin bread shine, focus on two key areas: mixing and flavor. Avoiding Overmixing When you mix your batter, do it gently. Overmixing can lead to dense bread. Mix only until the dry and wet ingredients combine. A few lumps are okay. This keeps the bread light and fluffy, just how you want it. Enhancing Pumpkin Flavor To boost the pumpkin flavor, use fresh spices. Ground cinnamon and nutmeg are your best friends here. You can even add a pinch of ground ginger for a warm kick. Fresh pumpkin puree also packs a stronger taste than canned. Try it if you can find it! Choosing the right tools makes your baking easier and more fun. Best Loaf Pan Size A standard 9x5-inch loaf pan works best for this recipe. It gives the bread room to rise and bake evenly. If you want taller slices, use a smaller pan, but watch the baking time. Kitchen Tools for Easier Preparation You’ll need a whisk, mixing bowls, and a spatula. A measuring cup for liquids is also a must. A hand mixer can help mix the cream cheese filling smoothly. These tools make prep quick and easy! The way you present your bread can make it even more tempting. Dusting with Powdered Sugar After slicing, sprinkle some powdered sugar on top. This adds a sweet touch and makes your bread look fancy. It’s a simple step that impresses! Serving Pairings Serve your pumpkin bread warm, paired with whipped cream or vanilla ice cream. The cold cream next to warm bread creates a lovely contrast. You can even add a drizzle of caramel for extra sweetness. Enjoy every bite! {{image_4}} You can easily change the flavor of your pumpkin bread. Adding nuts or chocolate chips makes it richer. Try using chopped walnuts or pecans for a nice crunch. If you prefer chocolate, mini chocolate chips work great. You can also add seasonal spices like ginger or cloves. These spices give a warm taste that enhances the pumpkin flavor. You can switch up the cream cheese filling. Try flavored cream cheese, like vanilla or cinnamon. This adds extra layers of taste. You can also use fruit jams or compotes. A sweet apple or cherry jam adds a fruity twist. Just spread it over the batter before adding the cream cheese. If you need a gluten-free version, use gluten-free flour instead of all-purpose flour. This keeps the texture light and fluffy. For a vegan adaptation, replace eggs with flaxseed meal. Mix one tablespoon of flaxseed meal with three tablespoons of water for each egg. You can also use a dairy-free cream cheese for the filling. These swaps let everyone enjoy this tasty treat. For the full recipe, check out the detailed instructions in the earlier section. To keep your cream cheese filled pumpkin bread fresh, store it properly. First, let it cool completely. Then, wrap it in plastic wrap or place it in an airtight container. This helps keep moisture in and prevents it from drying out. For the best flavor, store it in the fridge if you plan to eat it within a week. If you want it to last longer, consider freezing it. Freezing is a great option for longer storage. Slice the bread before freezing. Wrap each slice in plastic wrap and then put them in a freezer bag. This way, you can take out only what you need. Make sure to squeeze out as much air as possible. The bread will stay fresh for about three months in the freezer. When stored properly, cream cheese filled pumpkin bread can last a week in the fridge. It may even taste better after a day as the flavors blend. Check for signs of spoilage. If you see mold or the bread smells off, it is best to toss it. A change in texture can also be a sign. If the bread feels very dry or hard, it may not taste good anymore. Reheating your pumpkin bread can bring back its fresh taste. You can use a microwave or an oven. For the microwave, warm a slice for about 15-20 seconds. Check to ensure it’s not too hot. For the oven, preheat it to 350°F (175°C) and heat the slices for about 10 minutes. This will keep the bread soft and warm. Always aim for a warm temperature when reheating. This enhances the flavors and makes the cream cheese filling melt slightly. Enjoy your treat at its best! How to tell when the pumpkin bread is done? You can test the bread by inserting a toothpick into the center. If it comes out clean or with a few moist crumbs, it’s done. If there’s wet batter on the toothpick, bake it a bit longer. Can I make this bread ahead of time? Yes! You can bake the bread a day or two in advance. Just let it cool completely and wrap it tightly. This helps the flavors blend nicely. What temperature should I store the cream cheese bread at? Store the bread at room temperature for up to two days. If you need to keep it longer, place it in the fridge. Wrap it well to keep it fresh. Can I adjust the sweetness in the recipe? Absolutely! You can reduce the sugar by a little or add extra sweetener if you prefer. Just remember, less sugar can change the texture slightly. How to fix dense bread? If your bread turns out dense, it may be due to overmixing. Mix the batter just until combined. You can also check if your baking soda and powder are fresh. Can I use fresh pumpkin instead of canned? Yes! You can use fresh pumpkin. Just roast it, puree it, and measure it out. This gives a nice, fresh taste to your bread. What drinks pair well with pumpkin bread? Pumpkin bread pairs great with coffee, tea, or even apple cider. These drinks enhance the warm flavors of the bread. Is cream cheese pumpkin bread good for breakfast? Yes! It makes a lovely breakfast treat. The cream cheese adds a nice touch, making it feel special. How to toast pumpkin bread for better flavor? To toast, slice the bread and place it in a toaster or on a hot pan. Toast until golden brown for a warm, crunchy bite. This blog post covered everything you need to know about making delicious pumpkin bread. We discussed the key ingredients, step-by-step instructions, and helpful tips to get the best results. You can add your touch with variations and substitutions to suit your tastes. Remember to store your bread properly for freshness and enjoy it with your favorite drinks or toppings. Making this treat shouldn't just be about following a recipe—it should be about sharing warmth and joy. Enjoy baking, and savor each bite of your homemade pumpkin bread!

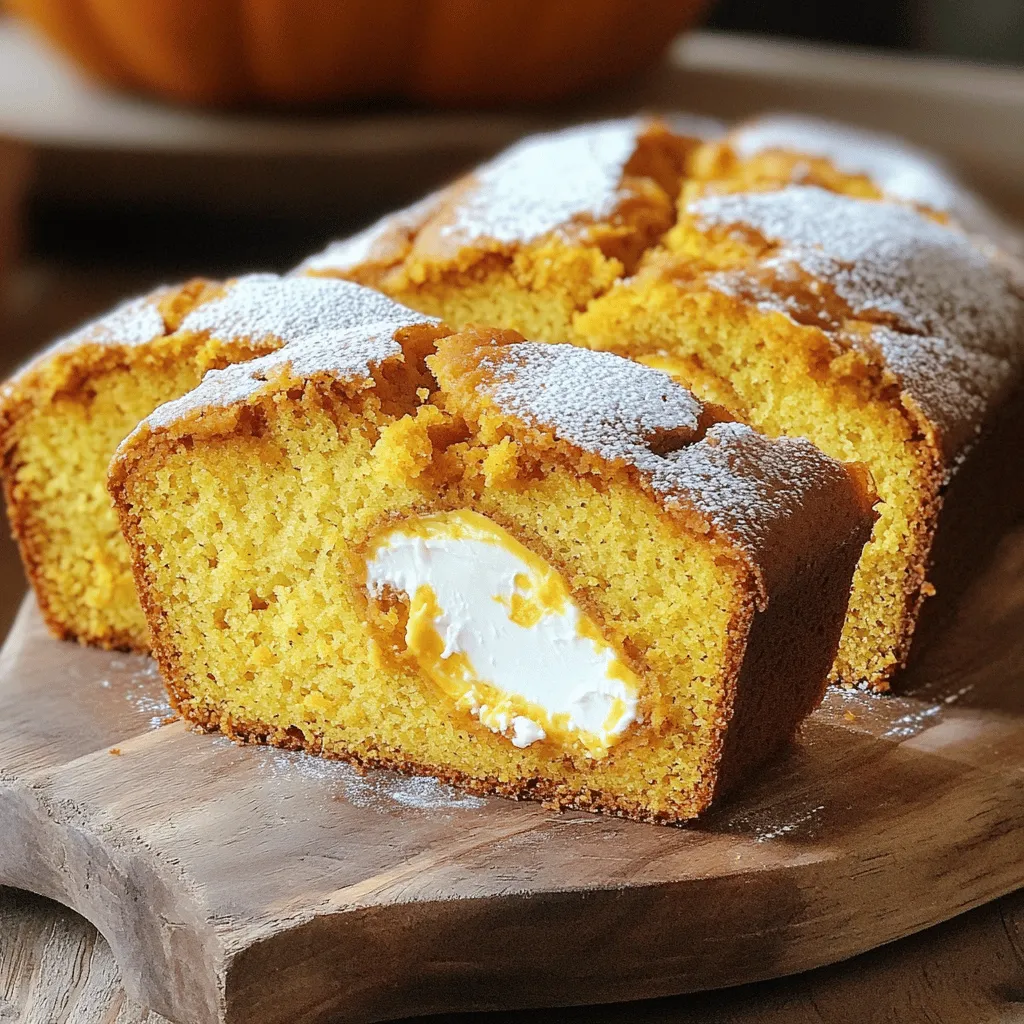
Are you ready for a treat that combines the warm flavors of fall with a creamy surprise? Look no further! My Cream Cheese Filled Pumpkin Bread is the perfect balance …

Read more

Categories Desserts

Caramel Apple Dessert Cups Tasty and Simple Treat

August 7, 2025 by Chef Remy
- 2 large apples (preferably Granny Smith or Honeycrisp), diced - 1 cup granulated sugar - 1/2 cup unsalted butter, diced - 1/4 cup heavy cream - 1 teaspoon pure vanilla extract - 1 teaspoon ground cinnamon - 1 cup granola - 1 cup whipped cream - Chopped nuts (e.g., pecans or walnuts) - Fresh apple slices - Cinnamon for dusting - Medium-sized saucepan - Mixing bowls - Dessert cups To make the caramel apple dessert cups, you need simple and fresh ingredients. Start with two large apples. I recommend Granny Smith or Honeycrisp. These apples add a nice tartness to balance the sweet caramel. Next, grab one cup of granulated sugar for the caramel. You'll also need half a cup of unsalted butter, which makes the caramel rich and smooth. Add a quarter cup of heavy cream for that creamy texture. Don't forget one teaspoon of pure vanilla extract and one teaspoon of ground cinnamon for extra flavor. For the crunchy layer, use one cup of granola. This adds texture and a delightful crunch. To finish, you will need one cup of whipped cream and some chopped nuts like pecans or walnuts for garnish. You can also add optional garnishes. Fresh apple slices look great on top. A light dusting of cinnamon adds flavor and flair. With these ingredients ready, you’re all set to create a delicious dessert that’s sure to impress! 1. Start by placing 1 cup of granulated sugar in a medium saucepan. 2. Heat the sugar over medium heat. Stir it gently and watch it melt. 3. Once it bubbles, keep stirring. You want to see a golden-brown color. 4. When it reaches that color, add 1/2 cup of diced butter. Stir until it melts. 5. Next, slowly pour in 1/4 cup of heavy cream. Keep stirring until smooth. 6. Remove the pan from heat. Stir in 1 teaspoon of vanilla extract and 1 teaspoon of ground cinnamon. Set it aside to cool slightly. 1. In a medium bowl, take 2 large diced apples. 2. Pour half of the caramel sauce over the apples. 3. Mix gently to coat every piece with caramel. 1. For each dessert cup, layer the bottom with 2 tablespoons of granola. 2. Spoon the caramel-coated apple mixture over the granola layer. Spread it evenly. 3. Add a dollop of whipped cream on top of the apples. Use a spatula to smooth it out. 4. Drizzle more caramel sauce over the whipped cream for extra sweetness. 5. Finish by sprinkling some chopped nuts on top for crunch. These steps will help you create a delightful treat. You can find the Full Recipe for more details on this delicious dessert. To make great caramel, you must watch the temperature. The ideal range is between 320°F and 350°F. Use a candy thermometer for best results. Signs of perfect caramel include a rich, golden-brown color and a smooth texture. If it looks too dark or smells burnt, it’s likely ruined. Granny Smith and Honeycrisp are popular choices, but you can try other apples too. Fuji apples add sweetness, while Braeburn apples combine sweet and tart flavors. For a softer texture, use Golden Delicious apples. They will break down a bit but taste great. These dessert cups shine at fall parties or holiday gatherings. They are a fun treat for family movie nights or casual dinners with friends. Pair these dessert cups with hot cider or a scoop of vanilla ice cream. They also go well with a cup of coffee or tea for a cozy treat. {{image_4}} You can make your caramel apple dessert cups even more exciting. Adding spices like nutmeg or ginger can give a warm twist. A pinch of nutmeg adds richness, while ginger adds a zing. You can also use flavored whipped cream. Try vanilla or caramel-flavored cream for an extra layer of taste. Some people need special diets, and that's okay! For gluten-free options, use gluten-free granola as your base. You can easily find this in stores now. If you want a vegan twist, substitute regular whipped cream with coconut whipped cream. It’s creamy and delicious, just like the original. Seasonal fruits can add a fresh take on this dessert. In fall, try adding ripe pears for a sweet change. They pair well with caramel and add a nice texture. You can slice them thin and layer them with the apples for a fun mix. This keeps your dessert interesting all year round! For the complete recipe, check out the Full Recipe section. To keep your caramel apple dessert cups fresh, store them in the fridge. Use an airtight container to prevent them from absorbing other scents. These dessert cups will stay fresh for about 2 to 3 days in the fridge. However, the granola may lose its crunch after one day. To keep it crispy, store granola separately and add it just before serving. You can freeze the dessert cups for later enjoyment. To freeze, assemble the cups without the whipped cream and granola. Cover them tightly with plastic wrap or foil. They can last about 2 months in the freezer. When you’re ready to eat, thaw them in the fridge overnight. After thawing, top with whipped cream and granola for the best taste. To thicken your caramel sauce, you can cook it longer. This helps to reduce the liquid. Stir often to avoid burning. You can also add more sugar. Start with an extra tablespoon. Heat it until it dissolves fully. If you want to use cream, try adding less. This will make the sauce denser. Yes, you can prepare your dessert cups ahead of time. Assemble the cups without adding whipped cream. Store them in the fridge for up to a day. Add the whipped cream just before serving. This keeps it fresh and fluffy. You can also store the caramel sauce separately. It stays good for a week in the fridge. If you want to skip granola, try crushed cookies. Graham crackers work well too. You can also use puffed rice or nuts for a different crunch. Oats mixed with a bit of honey can be a great base. Just make sure whatever you choose is crunchy and adds texture. To add extra crunch, try sprinkling some chopped nuts. Pecans or walnuts are great choices. Add them on top of the whipped cream. You can also consider toasted coconut or crispy rice cereal. These will give your cups a nice texture contrast. For a fun twist, try adding popcorn for a surprising crunch. This blog post guides you through making delicious caramel apple dessert cups. We covered the key ingredients like apples, sugar, and whipped cream. I shared step-by-step instructions for preparing the caramel and assembling the cups. You learned tips for perfecting your dessert and explored fun variations. Remember, these cups are perfect for sharing or celebrating. Enjoy making this treat, and don’t hesitate to get creative with flavors or toppings. Happy cooking!

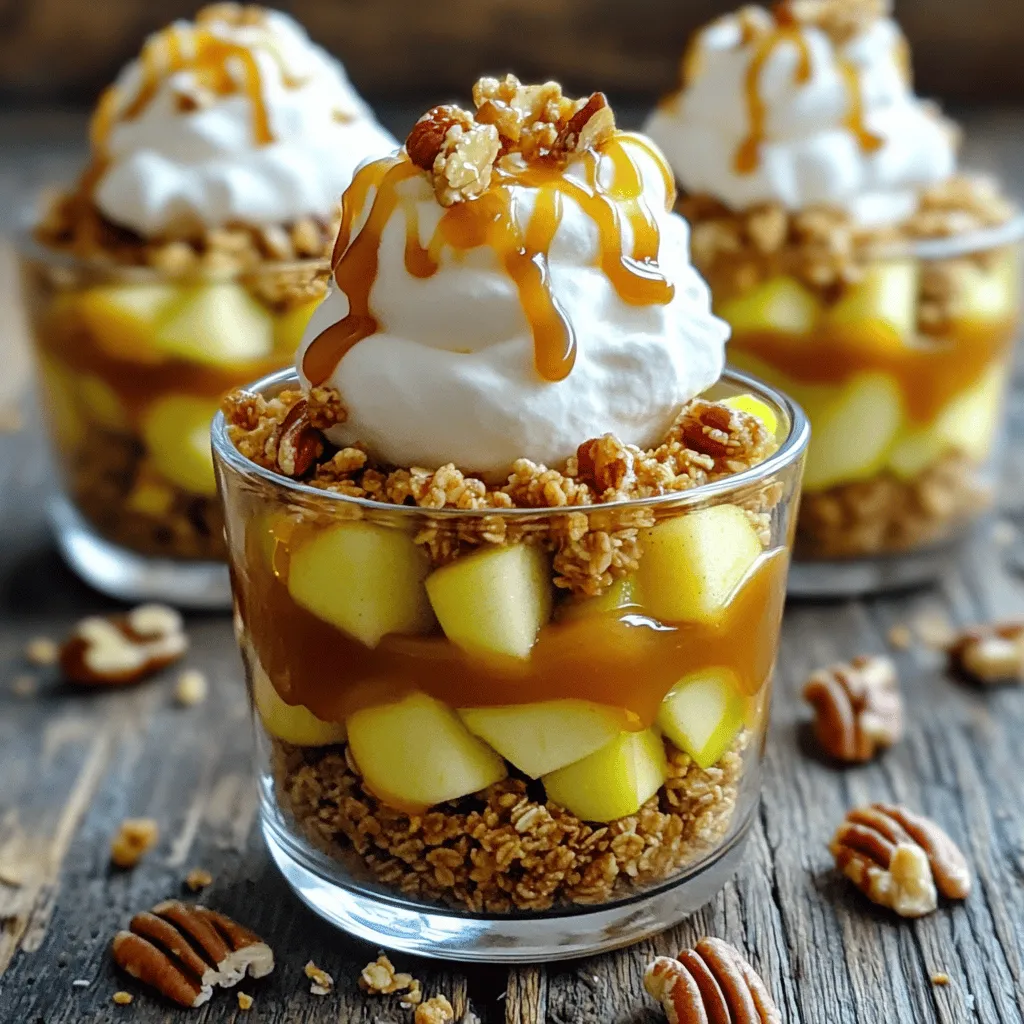
Craving something sweet and easy? Let’s whip up Caramel Apple Dessert Cups! These delightful treats combine crunchy apples, creamy caramel, and granola for a fun dessert you can enjoy anytime. …

Read more

Categories Desserts
Older posts
Newer posts
← Previous Page1 … Page49 Page50 Page51 … Page130 Next →

ROASTED RECIPES

Where bold flavors meet everyday meals. Warm, vibrant, and made to share. 🔥🥗🍴

PAGES

Home About Contact Privacy Policy Terms & Conditions Cookie Policy GDPR Policy Copyright Policy Disclaimer

CATEGORIES

Appetizers Desserts Salads Breakfast Dinner

Contact

  • Pinterest
  • Mail
Copyright © 2025 Roasted Flavors. All rights reserved.