Pumpkin Cake Pops Simple and Tasty Treats to Make

Looking for a fun, tasty treat to impress your friends and family? I’m here to share my simple recipe for pumpkin cake pops! These sweet bites are packed with flavor …
Looking for a fun, tasty treat to impress your friends and family? I’m here to share my simple recipe for pumpkin cake pops! These sweet bites are packed with flavor …
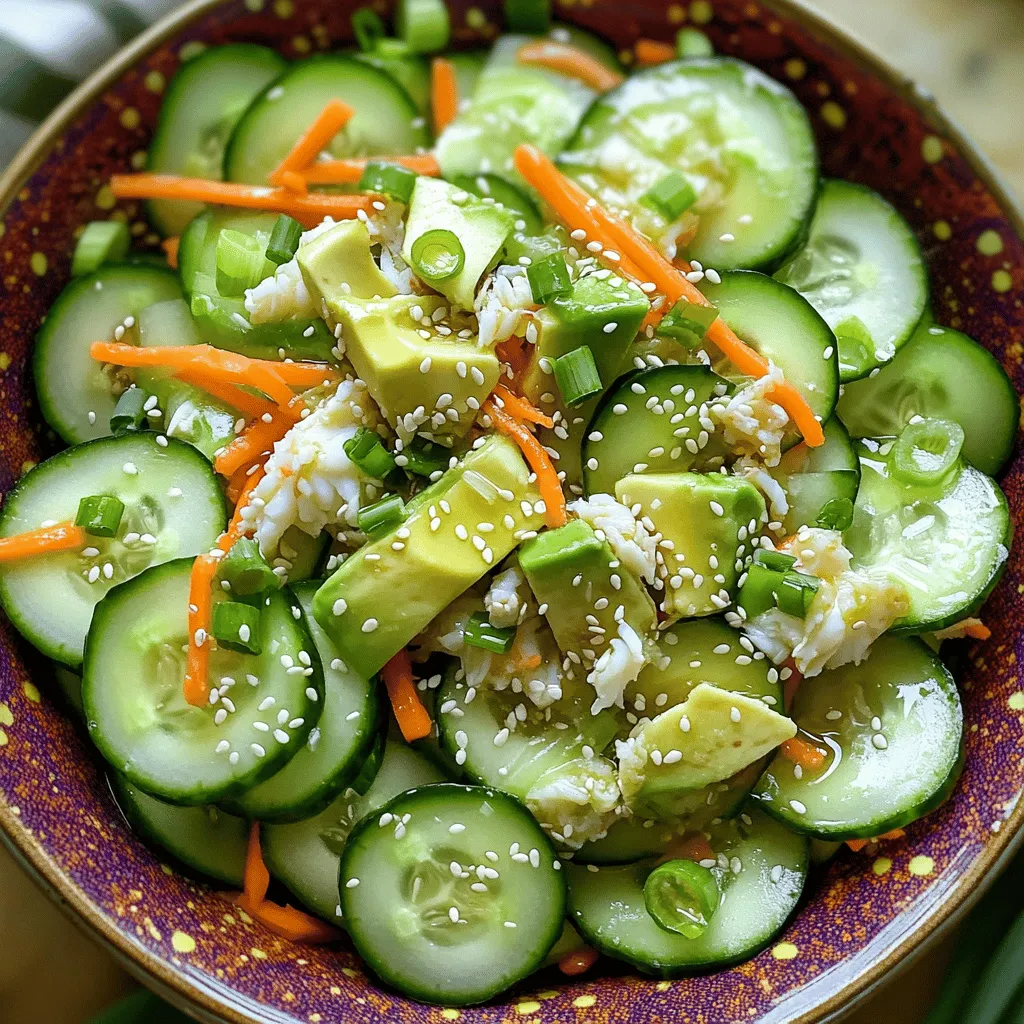
Are you craving a fresh, tasty dish that’s easy to make? Look no further than my California Roll Cucumber Salad! This delightful mix of crisp cucumbers and savory flavors will …
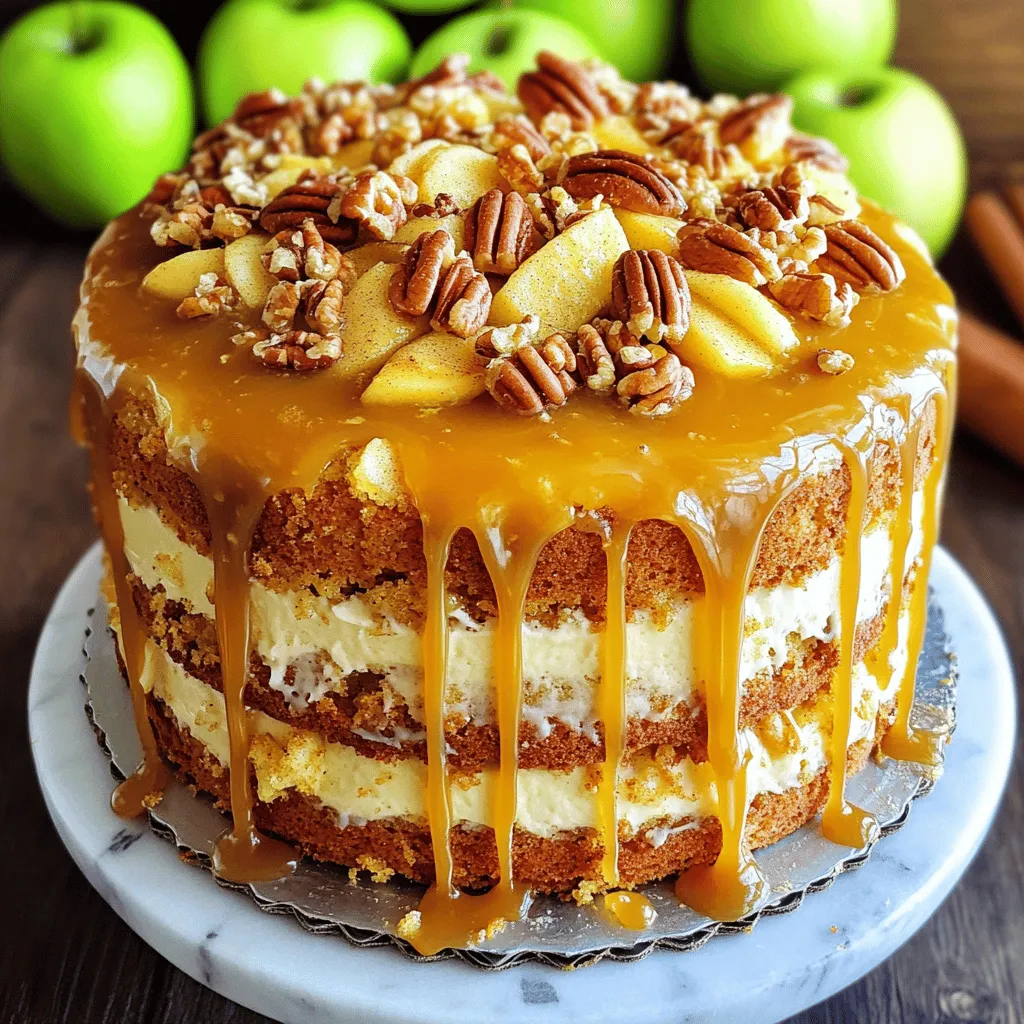
Get ready for a treat that blends sweet apples and crunchy pecans! This Apple Pecan Cake with Caramel Glaze is a showstopper for any occasion. I’ll guide you through simple …
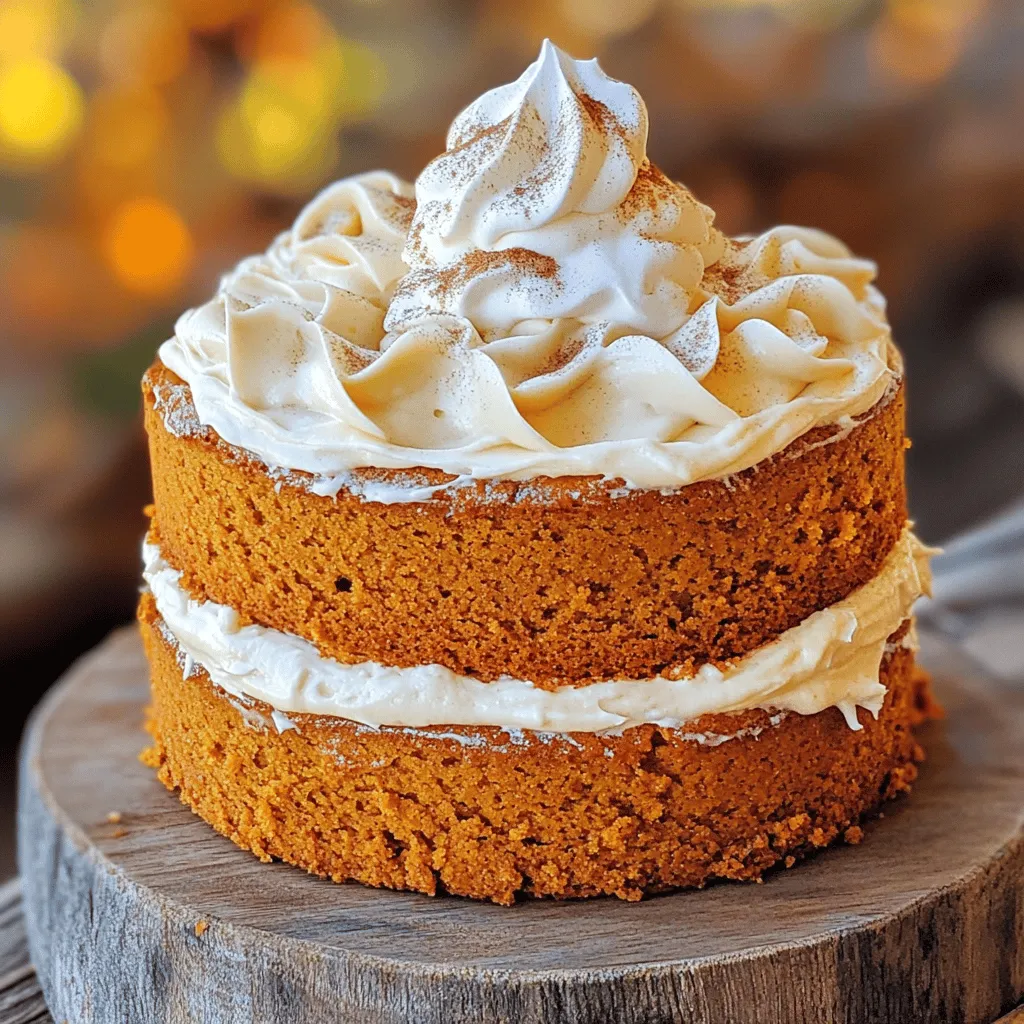
Fall is here, and there’s no better way to celebrate than with a Pumpkin Spice Latte Cake! This cake combines the warmth of spices with rich coffee flavors to create …
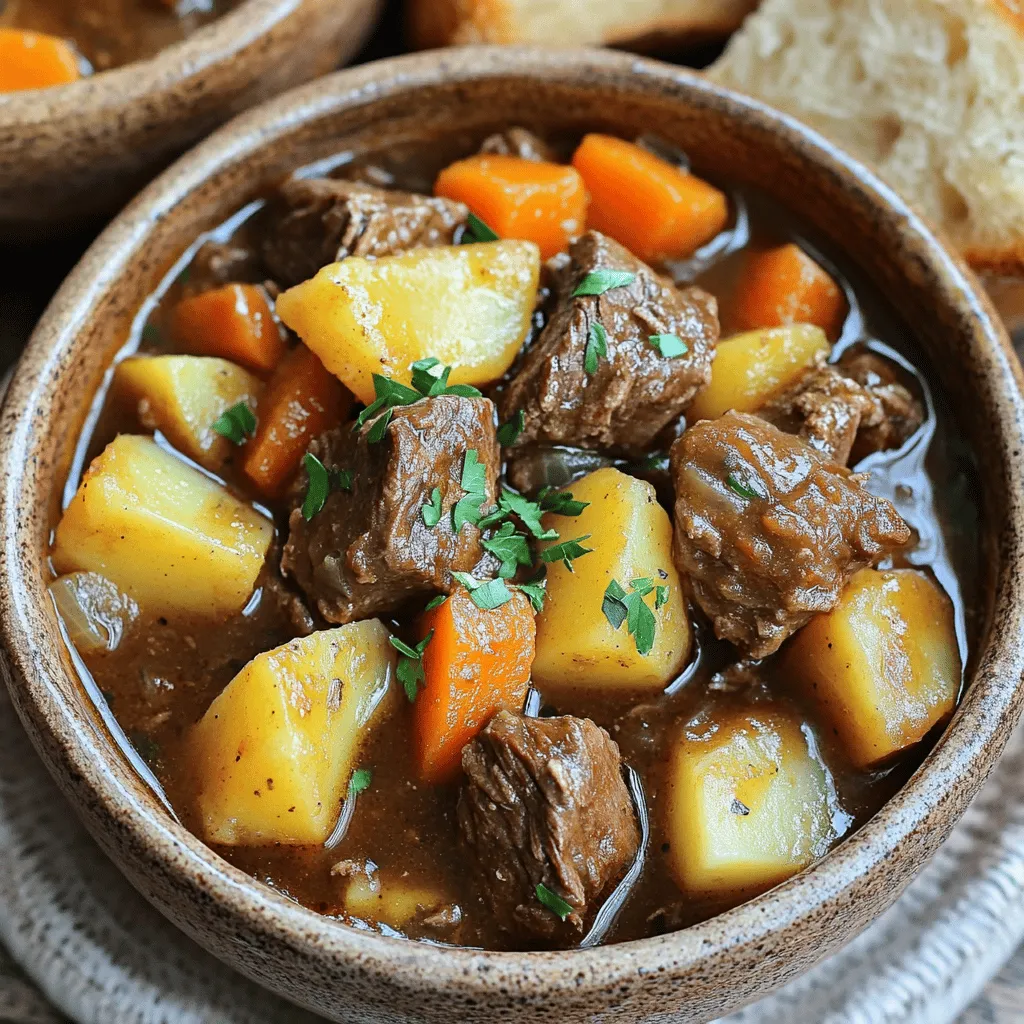
Looking for a hearty meal that cooks itself? You’ve found it! My Savory Slow Cooker Beef Stew is easy, delicious, and perfect for busy days. With simple ingredients and clear …
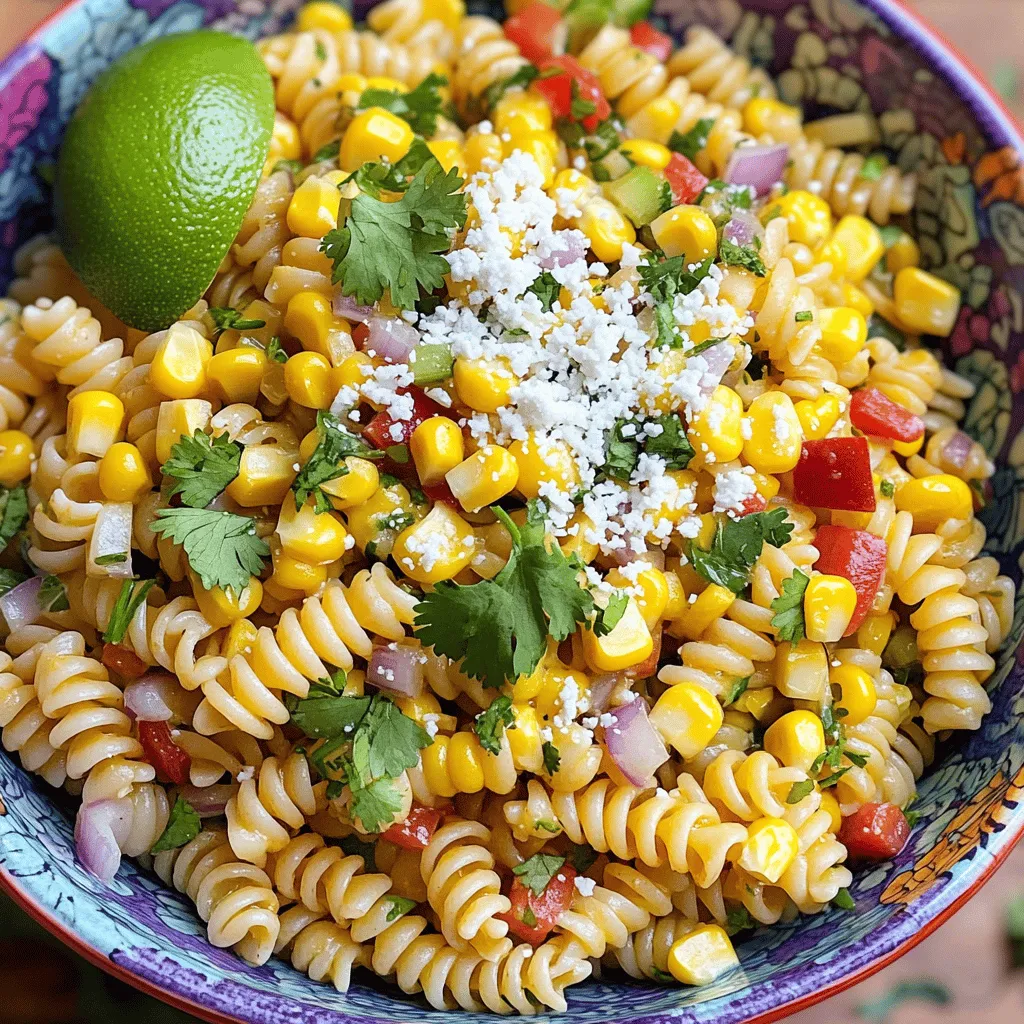
If you’re craving a dish that bursts with flavor, try my Mexican Street Corn Pasta Salad! This fresh, vibrant recipe combines pasta, grilled corn, and zesty spices to create a …

Looking for a tasty twist on taco night? Try my Walking Taco Casserole! This dish combines beef, beans, and cheesy goodness with crunchy chips, creating a fun family meal. It’s …
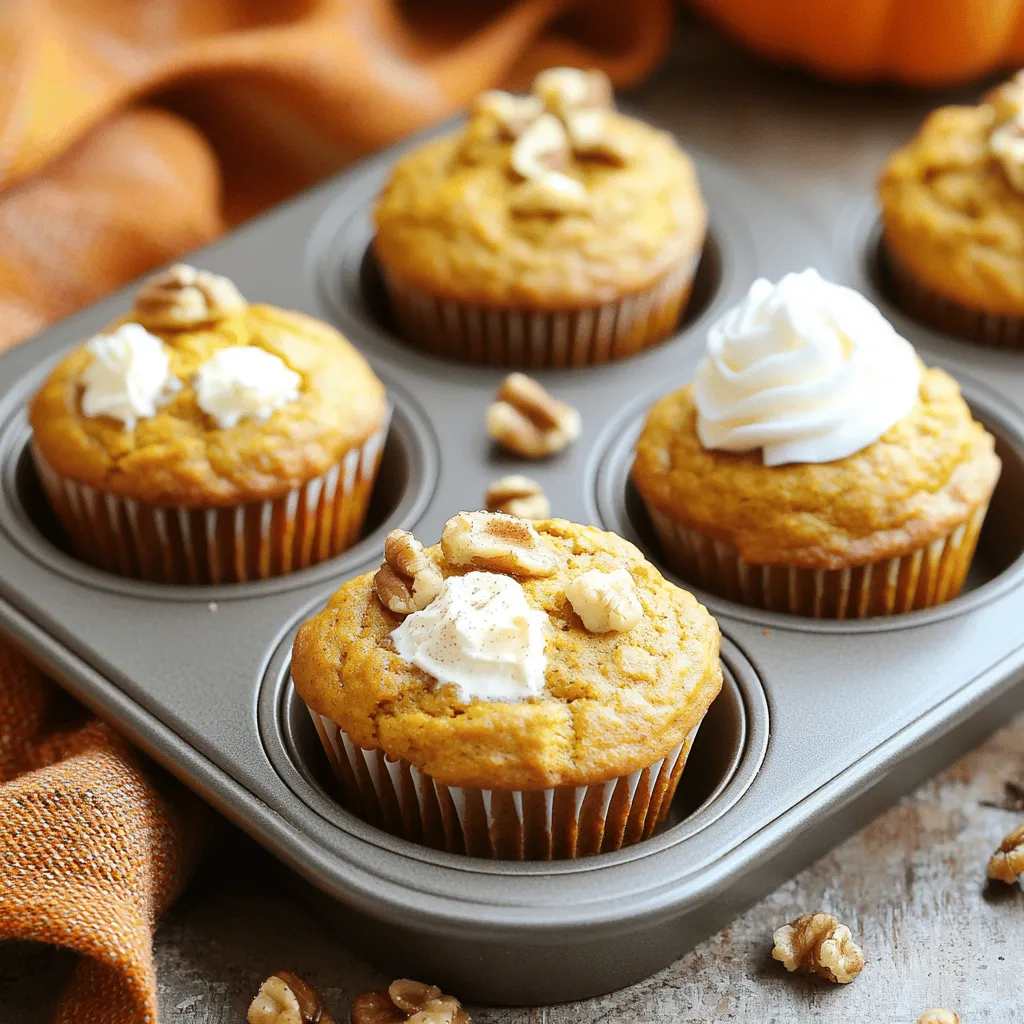
Are you ready to bake the perfect fall treat? My Pumpkin Cream Cheese Muffins are simple, tasty, and sure to impress! With warm spices and creamy filling, these muffins capture …
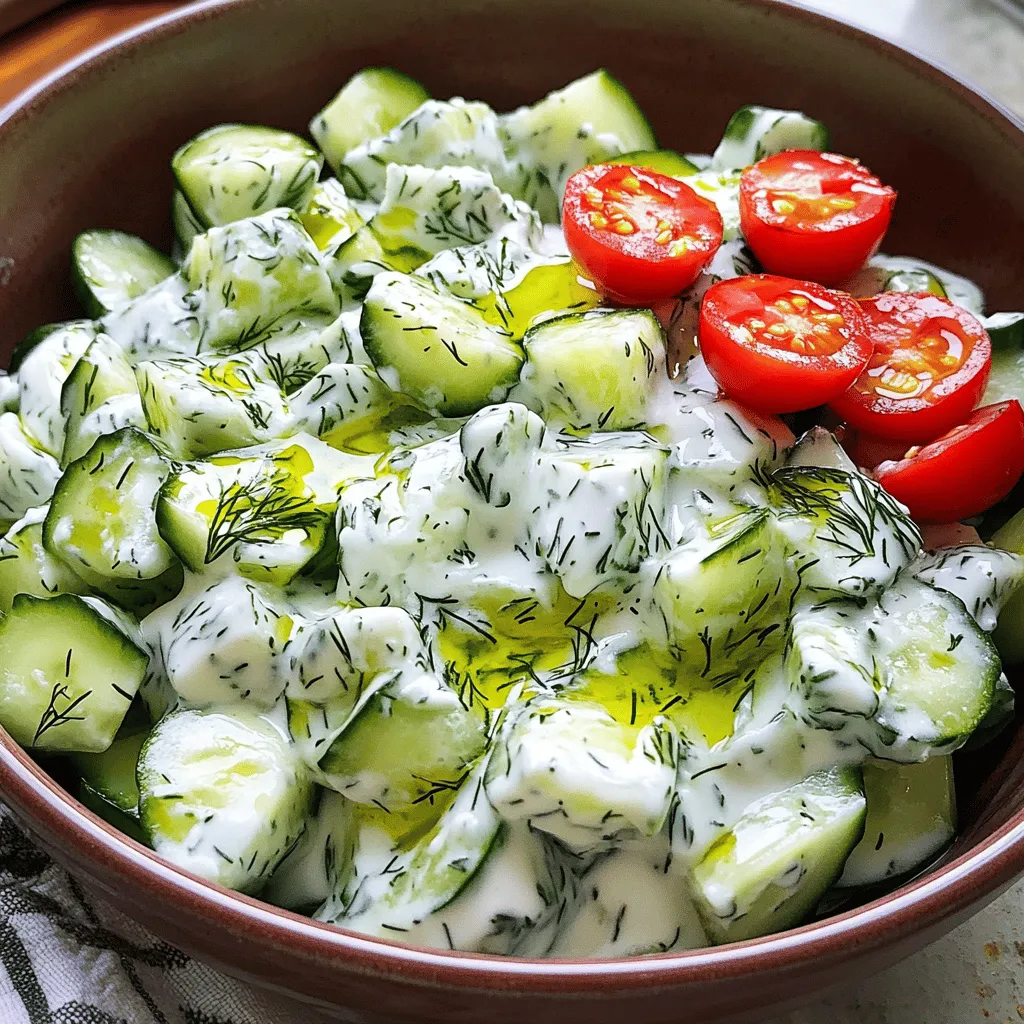
Are you ready to enjoy a fresh and zesty dish that brightens any meal? Tzatziki Cucumber Salad brings together creamy Greek yogurt, crunchy cucumbers, and fragrant herbs for a delightful …

Are you ready to spice up your summer meals? Grilled Elote Corn is a delicious and easy dish that brings fresh flavors to your table. With just a few key …