Skip to content
Roasted Flavors
  • Home
  • Appetizers
  • Desserts
  • Salads
  • Breakfast
  • Dinner
  • Privacy Policy
  • Contact
  • About

Chef Remy

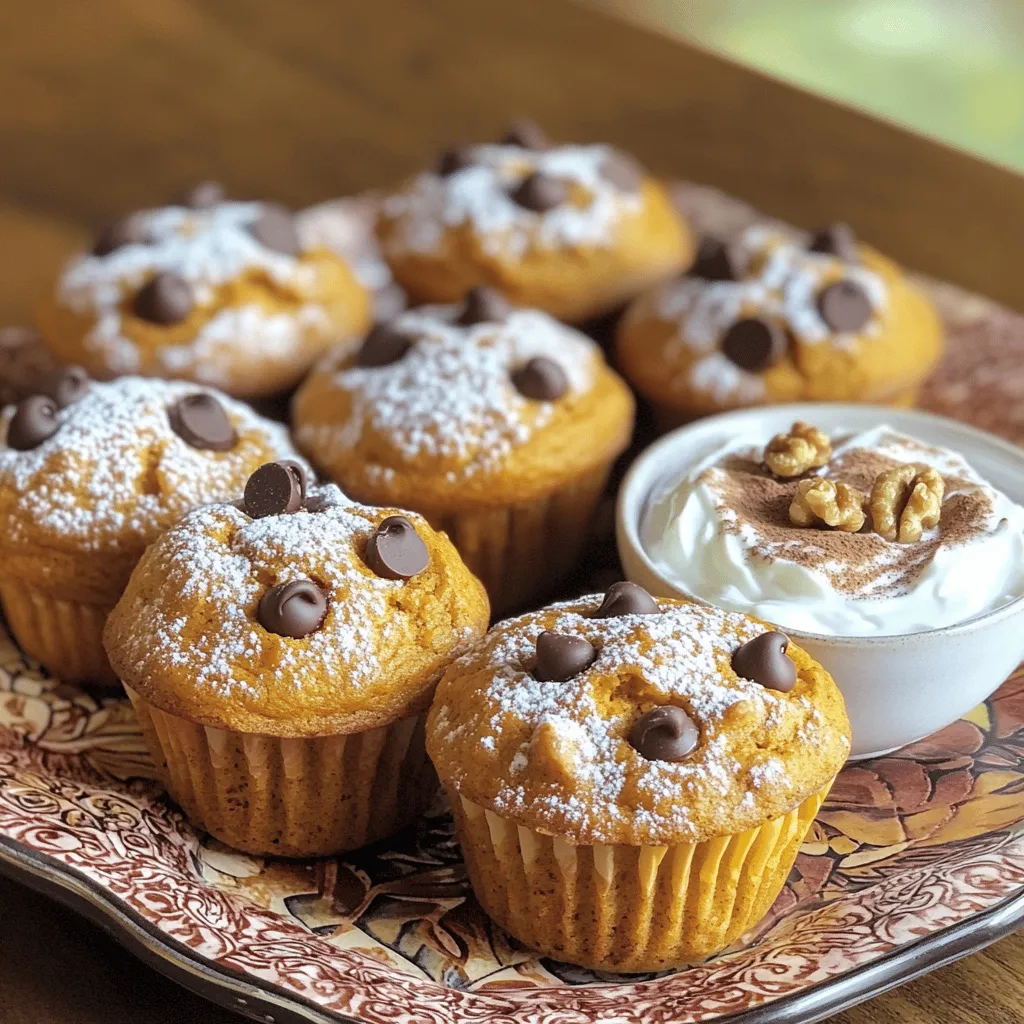
Healthy Pumpkin Bread Simple and Delicious Recipe

August 15, 2025 by Chef Remy
The main ingredients in this healthy pumpkin bread are simple and nutritious: - 1 cup pumpkin puree - 2 large eggs - Natural sweeteners: honey or pure maple syrup - Coconut oil for moisture Pumpkin puree gives this bread its rich flavor and bright color. You can use fresh pumpkin or canned puree. Both work well! The eggs help bind the bread and add protein. Honey or maple syrup provide sweetness without refined sugar. Coconut oil keeps the bread moist and adds a nice texture. Choosing the right flour can boost the bread's nutrition. Here are two great options: - Whole wheat flour benefits: Whole wheat flour adds fiber and nutrients. It helps keep you full longer. - Almond flour for added nutrition: Almond flour is lower in carbs. It also adds healthy fats and protein. Mixing whole wheat flour with almond flour gives a great balance of taste and nutrition. Spices enhance the flavor and aroma of your pumpkin bread. Here are some key spices: - Importance of cinnamon, nutmeg, and ginger: These spices add warmth and depth. They make the bread smell wonderful while it bakes. - Reducing added sugars with spices: Using spices means you can use less sweetener. The flavors from the spices help satisfy your sweet tooth. Adding these spices makes your pumpkin bread not just tasty, but also comforting! First, preheat your oven to 350°F (175°C). This step is key for even baking. Next, prepare your loaf pan. You can grease it lightly with coconut oil or line it with parchment paper. This makes it easier to remove the bread after baking. In a large bowl, combine 1 cup of pumpkin puree, 2 large eggs, and 1/3 cup of honey or maple syrup. Add 1/4 cup of melted coconut oil and 1 teaspoon of vanilla extract. Whisk these ingredients until smooth. This mixing is important. It helps blend the flavors and create a nice texture. In a separate bowl, sift together 1 cup of whole wheat flour, 1/2 cup of almond flour, 1 teaspoon of baking soda, and 1 teaspoon of baking powder. Add 1 teaspoon of ground cinnamon, 1/2 teaspoon of nutmeg, 1/4 teaspoon of ginger, and 1/4 teaspoon of sea salt. Sifting removes lumps and helps mix the dry ingredients well. Gradually add this mix to the wet ingredients, stirring gently until just combined. It’s okay to have a few lumps. Overmixing can make the bread tough. Pour the batter into the prepared loaf pan. Use a spatula to spread and smooth the top. Bake in the preheated oven for 50-60 minutes. Check for doneness by inserting a toothpick into the center. If it comes out clean, your bread is ready. If the top browns too quickly, cover it loosely with foil. After baking, let the bread cool in the pan for about 10 minutes. Then, remove it from the pan and transfer it to a wire rack to cool completely. To keep your pumpkin bread moist, avoid overmixing the batter. Overmixing can lead to a tough texture. You want to mix just until the dry and wet ingredients blend together. A few lumps are okay. Coconut oil is key in this recipe. It adds moisture and richness. As it melts, it helps create a soft crumb. Using melted coconut oil also keeps your bread from drying out. For the perfect texture, mix gently. Use a spatula to fold in the dry ingredients. This helps keep the air in the batter. A light touch is best. Combining different flours gives a nice texture. Whole wheat flour adds fiber. Almond flour brings a nutty taste and moisture. Together, they create a lovely crumb. You can boost flavor and nutrition by adding optional ingredients. Nuts like walnuts or pecans add crunch and healthy fats. Chocolate chips or raisins bring sweetness. Feel free to mix and match! Spices make a big difference too. Cinnamon, nutmeg, and ginger add warmth and depth. They help reduce added sugars. Using spices makes your pumpkin bread even more delicious. {{image_4}} If you want a nut-free pumpkin bread, you can simply leave out the nuts. Instead, you can use seeds like sunflower or pumpkin seeds for crunch. These seeds add great texture and are perfect for those with nut allergies. They also bring healthy fats and protein to your bread. If you want to cut back on sugar, consider using applesauce or mashed bananas. These fruits can sweeten the bread naturally while keeping it moist. You can also use stevia or monk fruit sweetener if you prefer low-calorie options. Just remember to adjust the amount to taste, as these sweeteners can be much sweeter than honey or maple syrup. To make your pumpkin bread even more special, think about adding spices. A pinch of allspice or a dash of cloves can give your bread a warm, cozy flavor. You can also mix in dried fruits like cranberries or raisins for a sweet surprise. For a fun twist, add some dark chocolate chips or even coconut flakes. These mix-ins can elevate your bread from good to great! To keep your healthy pumpkin bread fresh, store it in a cool, dry place. If you plan to eat it within a few days, room temperature storage works well. Just place it in an airtight container or wrap it in plastic wrap. This will help keep moisture in and prevent it from drying out. If you want to save some for later, refrigeration is great but can change the texture. It might become a bit dense. If you do chill it, wrap it tightly to keep it fresh. To freeze pumpkin bread, first let it cool completely. Then, slice the bread into pieces for easy thawing. Wrap each slice tightly in plastic wrap. You can also use aluminum foil for extra protection. Place the wrapped slices in a freezer bag. Be sure to remove as much air as possible before sealing it. To thaw, take out a slice and let it sit at room temperature for about 30 minutes. If you want, you can warm it up in the toaster or microwave. Enjoy it with a pat of butter or a drizzle of honey for a tasty treat! Yes, you can use fresh pumpkin. Fresh pumpkin puree gives a richer taste. It also has more nutrients than canned. To make fresh puree, roast a pumpkin. Cut it in half, remove seeds, and bake it until soft. Then, scoop out the flesh and blend it until smooth. This process enhances the flavor in your pumpkin bread. To make this pumpkin bread gluten-free, swap the whole wheat flour. Use almond flour or a gluten-free blend instead. Almond flour adds a nice flavor and keeps it moist. A mix of gluten-free flours can also work well. Just ensure they are finely ground for the best texture. If your bread is dense, try a few tricks. First, check your flour measurement. Too much flour can make it heavy. Next, be gentle when mixing. Overmixing can lead to a tough texture. Lastly, consider adding an extra egg. This can help lighten the bread and improve its rise. In this article, we explored how to make healthy pumpkin bread using simple ingredients like pumpkin puree, eggs, and natural sweeteners. We discussed the best flour options and essential spices that enhance flavor. You learned step-by-step instructions, helpful tips to achieve the right texture, and variations for dietary needs. Remember to store your bread properly to keep it fresh. Creating this tasty treat is easy and rewarding. Enjoy experimenting with flavors and make it your own!

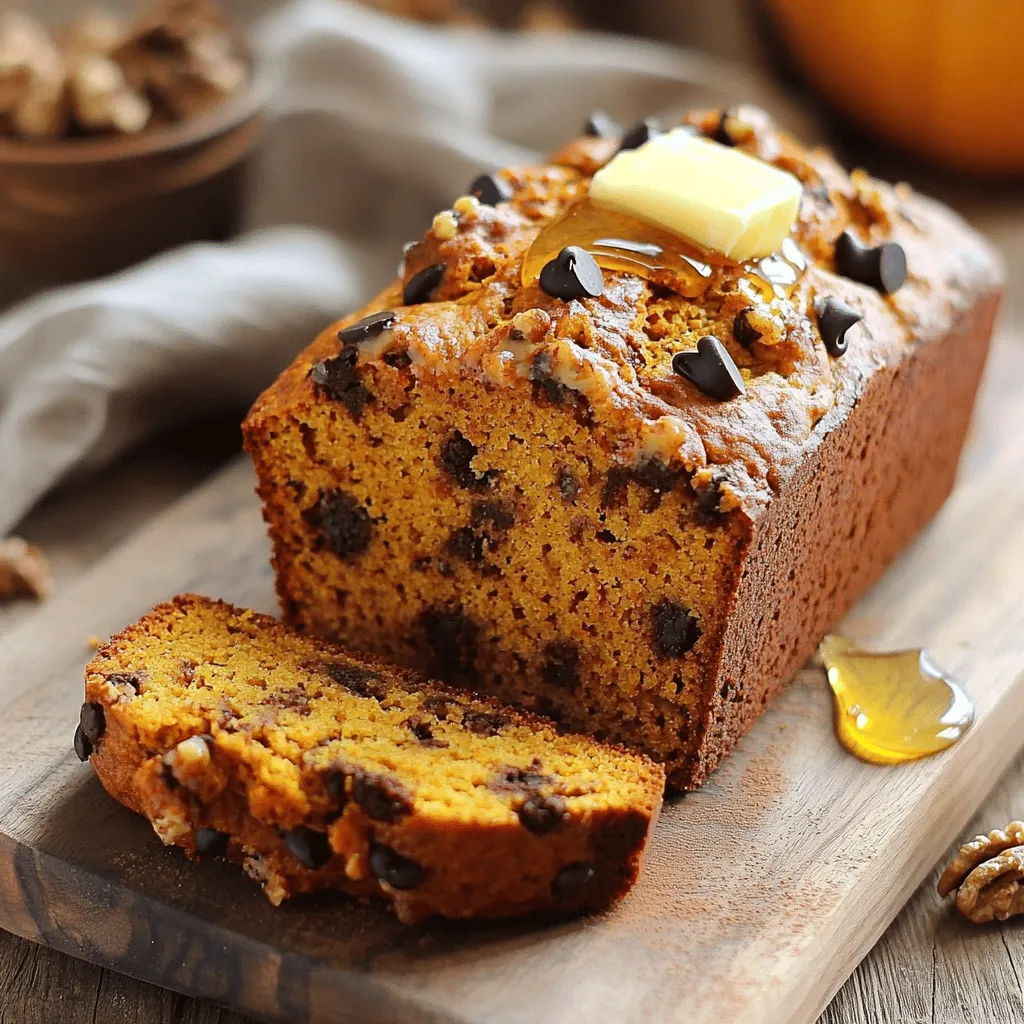
Are you craving a warm, comforting slice of pumpkin bread without the guilt? You’re in the right place! This healthy pumpkin bread recipe combines simple ingredients like pumpkin puree, natural …

Read more

Categories Desserts

High-Protein Greek Yogurt Pumpkin Muffins Recipe

August 15, 2025 by Chef Remy
To make High-Protein Greek Yogurt Pumpkin Muffins, you need the following: - 1 cup canned pumpkin puree - 1 cup non-fat Greek yogurt - 2 large eggs - 1/2 cup honey or maple syrup - 1/4 cup unsweetened applesauce - 1 1/2 cups whole wheat flour - 1 teaspoon baking soda - 1 teaspoon baking powder - 1 tablespoon pumpkin pie spice - 1/2 teaspoon salt - 1/2 cup chopped walnuts or pecans (optional) - 1/4 cup chocolate chips (optional) You can swap some ingredients for a different taste or diet: - Use almond butter instead of applesauce for a nutty flavor. - Instead of whole wheat flour, try oat flour for a gluten-free option. - For a vegan muffin, replace eggs with flax eggs (1 tablespoon flaxseed meal + 2.5 tablespoons water per egg). - Maple syrup can replace honey for a vegan sweetener. These muffins are not just tasty; they also pack a nutritional punch. Each muffin has roughly: - Calories: 150 - Protein: 6 grams - Carbohydrates: 24 grams - Fat: 5 grams - Fiber: 3 grams Using Greek yogurt boosts the protein content. Plus, pumpkin adds vitamins like A and C. Start by preheating your oven to 350°F (175°C). This helps the muffins bake evenly. Next, prepare your muffin tin. You can line it with paper liners or spray it with non-stick spray. Both options work well for easy muffin release. In a large bowl, combine the following ingredients: - 1 cup canned pumpkin puree - 1 cup non-fat Greek yogurt - 2 large eggs - 1/2 cup honey or maple syrup - 1/4 cup unsweetened applesauce Whisk these ingredients together until the mixture is smooth. Make sure there are no lumps. This step is key for a nice, fluffy muffin. In another bowl, sift together: - 1 1/2 cups whole wheat flour - 1 teaspoon baking soda - 1 teaspoon baking powder - 1 tablespoon pumpkin pie spice - 1/2 teaspoon salt Sifting helps mix the dry ingredients well and adds air. This makes your muffins light and fluffy. If you want to add a twist, now is the time! Gently fold in: - 1/2 cup chopped walnuts or pecans (optional) - 1/4 cup chocolate chips (optional) These add-ins give your muffins a nice crunch and a bit of sweetness. Spoon the batter into the prepared muffin tin. Fill each cup about three-quarters full. This gives them room to rise. Bake in the preheated oven for 18 to 22 minutes. To check if they are done, use a toothpick. If it comes out clean or with a few crumbs, they are ready. After baking, let the muffins cool in the tin for about 5 minutes. Then, transfer them to a wire rack. This keeps them fluffy and prevents sogginess. Store any leftovers in an airtight container. Enjoy your delicious muffins! To create the best muffins, follow these simple tips: - Measure ingredients carefully. Use a kitchen scale if possible. - Don’t overmix. Stir just until the wet and dry ingredients blend. - Fill the muffin cups correctly. Fill them three-quarters full for good rise. - Use fresh ingredients. Check your baking powder and spices for freshness. - Bake in batches. If your oven has uneven heat, bake in smaller batches. Many make common mistakes when baking muffins. Here are a few to avoid: - Overmixing the batter. This leads to tough muffins. Mix gently and stop when combined. - Skipping the cooling step. Muffins need time to set. Let them cool before eating. - Not checking for doneness. Use a toothpick to check if they are baked through. - Ignoring ingredient temperatures. Use room-temperature eggs and yogurt for better mixing. - Using too much flour. Scoop flour lightly into the measuring cup to avoid adding too much. Serve your muffins for breakfast or a snack. Here are some fun ideas: - Pair with Greek yogurt. A dollop on the side adds creaminess. - Add a sprinkle of cinnamon. Dust a little cinnamon on top for extra flavor. - Serve warm. Warm muffins taste best and bring out the flavors. - Try a drizzle of honey. A honey drizzle adds sweetness and moisture. - Pair with coffee or tea. They make a perfect morning or afternoon treat! {{image_4}} You can make these muffins gluten-free. Use a gluten-free flour blend instead of whole wheat flour. Look for a mix that has xanthan gum in it. This will help the muffins rise and hold together well. To make these muffins vegan, swap the eggs for flaxseed meal. Use one tablespoon of flaxseed mixed with three tablespoons of water for each egg. Let it sit for a few minutes until it thickens. Replace Greek yogurt with a dairy-free yogurt. Maple syrup can be used for sweetening. You can change the flavor of these muffins in fun ways. Try adding different spices, like cardamom or allspice, to give them a unique taste. You can also mix in dried fruits, like cranberries or raisins. Nuts like almonds or pecans can add crunch. If you want a sweeter touch, fold in chocolate chips or butterscotch chips for a rich flavor. To keep your high-protein Greek yogurt pumpkin muffins fresh, store them in an airtight container. A simple zip-top bag works well too. Make sure to let them cool completely before sealing. This keeps moisture at bay and helps them stay fluffy. If you plan to eat them within a few days, keep them at room temperature. If you need them to last longer, consider freezing. To freeze your muffins, first, let them cool down. Then, wrap each muffin in plastic wrap. After that, place the wrapped muffins in a freezer-safe bag. This extra layer prevents freezer burn. They can stay in the freezer for up to three months. When you want a muffin, just take one out and let it thaw at room temperature. Reheating your muffins is easy and quick. For the best result, preheat your oven to 350°F (175°C). Place the muffins on a baking sheet and warm them for about 5 to 10 minutes. This helps restore their softness. You can also microwave them for about 15-20 seconds. Just be careful not to overheat, or they may become dry. Enjoy your muffins warm for a delightful treat! Yes, you can use different flours. Almond flour and oat flour are great options. Keep in mind, each flour changes the texture. For example, almond flour can make muffins softer. Oat flour can add a nice chew. If you use gluten-free flour, check the package for measurements. To sweeten the muffins, add more honey or maple syrup. You can also mix in chocolate chips for extra sweetness. If you want a natural sweetener, try mashed bananas or dates. They can boost flavor and moisture too. Greek yogurt adds protein and moisture. It gives the muffins a nice texture. It also helps keep them fresh longer. Greek yogurt contains probiotics, which are good for digestion. Plus, it cuts down on added fat, making this recipe healthier. These muffins last about 3 to 5 days at room temperature. Store them in an airtight container. If you want them to last longer, freeze them. They can keep for up to 3 months in the freezer. Just thaw them before enjoying! We covered all you need for making great muffins, from ingredients to storage tips. You learned about ingredient swaps, step-by-step prep, and tricks for perfect muffins. Don’t forget, you can customize flavors and find healthy ways to store them. Enjoy experimenting with options, and share your tasty results! Happy baking!

Welcome to your new favorite fall treat: High-Protein Greek Yogurt Pumpkin Muffins! These muffins are not just delicious; they pack in nutrition too. Made with Greek yogurt, they stay moist …

Read more

Categories Breakfast

Apple Blondies Delightful and Simple Dessert Recipe

August 15, 2025 by Chef Remy
- 1 ½ cups all-purpose flour - 1 teaspoon baking powder - ½ teaspoon baking soda - ½ teaspoon salt - ½ cup unsalted butter, melted - 1 cup packed light brown sugar - ½ cup granulated sugar - 2 large eggs - 1 teaspoon pure vanilla extract - 1 ½ cups fresh diced apples (preferably Granny Smith for tartness) - ½ cup caramel sauce (store-bought or homemade) - ½ teaspoon ground cinnamon (optional, but recommended for warmth) - Chopped pecans or walnuts for topping (optional) I love using fresh apples in this recipe. Granny Smith apples offer a bright tart flavor. They balance perfectly with the sweetness of the sugars and caramel. You can use any apples you like, but Granny Smith is my go-to choice. The flour, baking powder, baking soda, and salt form the base of the blondies. The butter adds richness, while the sugars make them sweet and chewy. Eggs and vanilla bind everything together, adding flavor and texture. Caramel sauce adds a sweet layer, enhancing the apple flavor. Ground cinnamon warms the dish and makes it feel cozy. If you like crunch, sprinkle chopped pecans or walnuts on top. They pair well with the soft blondies and add texture. Gather these ingredients, and you will create a delightful dessert that is simple yet impressive! Start by preheating your oven to 350°F (175°C). This temperature helps the blondies bake evenly. Next, grab a 9x9 inch baking pan. Grease it well with butter or line it with parchment paper. This step makes it easy to remove the blondies later. In a medium mixing bowl, add 1 ½ cups of all-purpose flour, 1 teaspoon of baking powder, ½ teaspoon of baking soda, ½ teaspoon of salt, and ½ teaspoon of ground cinnamon if you like. Whisk these dry ingredients together until they blend well. Set this mixture aside for later. Take a large mixing bowl and pour in ½ cup of melted unsalted butter. Add 1 cup of packed light brown sugar and ½ cup of granulated sugar. Stir these together until they look creamy and smooth. Make sure there are no lumps. Crack 2 large eggs into the bowl, one at a time. Mix well after each egg to keep it smooth. Then, add 1 teaspoon of pure vanilla extract and stir until everything mixes well. Now, take the bowl with dry ingredients. Gradually add it to the wet mixture. Stir gently until just combined. Be careful not to overmix; a few lumps in the batter are okay. This keeps the blondies soft. Take 1 ½ cups of fresh diced apples and fold them into the batter. You can use Granny Smith apples for a nice tartness. Next, add ½ cup of caramel sauce, folding it in evenly. This adds a sweet touch to your blondies. Pour the batter into the prepared baking pan. Use a spatula to smooth the top. Drizzle the remaining caramel sauce over the batter. If you want, sprinkle some chopped pecans or walnuts on top for extra crunch. Place the pan in the preheated oven. Bake for 25–30 minutes. To check if they are done, insert a toothpick into the center. If it comes out clean or with a few moist crumbs, your blondies are ready! Let the blondies cool in the pan for about 15 minutes. After that, transfer them to a wire rack to cool completely. Once cooled, cut them into squares. For a delightful treat, serve them warm with a scoop of vanilla ice cream on top. Drizzle with extra caramel sauce for a sweet finish. Enjoy! To get a gooey texture, you need to watch your mixing. Mix the wet and dry ingredients just until they combine. A few lumps are fine! Overmixing can make your blondies tough. You want them soft and chewy. Blondies taste great with ice cream or whipped cream. A scoop of vanilla ice cream on top makes them even better! Drizzle with extra caramel sauce for a sweet finish. For a nice look, serve them warm on a plate. Add chopped nuts on top for extra crunch. To keep blondies fresh, store them in an airtight container. You can leave them at room temperature for a few days. For longer storage, put them in the fridge. Just make sure they are cooled first. If you want to freeze them, wrap each piece in plastic wrap. Enjoy them later for a quick treat! {{image_4}} You can make your apple blondies more exciting by adding spices. Try some nutmeg or cardamom for a warm twist. These spices will bring out the sweetness of the apples. You can also switch up the apples you use. Granny Smith apples give a nice tartness. However, sweeter apples like Fuji or Honeycrisp can add a different flavor profile. Get creative with your toppings! You can add chocolate chips for a sweet surprise. Coconut flakes can add a chewy texture. If you like nuts, try mixing pecans with walnuts for crunch. Each topping adds a unique flavor, making your blondies even more special. Want to make these blondies gluten-free? No problem! You can use almond flour or oat flour instead of all-purpose flour. These options will keep the texture nice and fluffy. Just ensure you adjust the amount of flour to get the right consistency. To store your apple blondies, let them cool completely. You can keep them at room temperature for up to three days. Just place them in an airtight container. If you prefer, store them in the refrigerator. This will keep them fresh for about a week. Just make sure they are covered to avoid drying out. If you want to enjoy these blondies later, freezing is a great option. First, cut them into squares and wrap each piece in plastic wrap. Then, place them in a freezer-safe bag or container. This will keep them fresh for up to three months. When you're ready to eat them, take out the blondies and let them thaw in the fridge overnight. You can also warm them in the microwave for a few seconds. This way, you’ll have a cozy treat ready whenever you want! To check if your apple blondies are done, use a toothpick. Stick it in the center of the blondies. If it comes out clean or with a few moist crumbs, they are ready to take out. If the toothpick is covered in batter, bake them a bit longer. This test is quick and easy. It helps ensure you get the right texture. Yes, you can use different types of apples. Granny Smith apples are great for a tart flavor. Honeycrisp apples add sweetness and crunch. Fuji apples are also sweet and juicy. Each type of apple will change the taste a bit. Feel free to mix apples for a unique flavor blend. If you want to switch up the flavor, try different toppings. You can use chocolate sauce or a rich butterscotch sauce. A fruit compote can also add a nice twist. You can even leave it out and add extra spices for flavor. These options will give your blondies a fun new taste. Apple blondies last about 3 to 4 days at room temperature. Keep them in an airtight container to keep them fresh. If you store them in the fridge, they can last up to a week. For longer storage, freeze them. They can last up to three months in the freezer. Just thaw them overnight before enjoying! This guide takes you through making delicious apple blondies step by step. You learned about essential ingredients, from flour and butter to fresh apples. We covered each mixing stage and baking tips for a perfect texture. Remember, don’t overmix the batter to keep them gooey. You can add your favorite flavors or nuts for a twist. Finally, store leftovers properly to enjoy them later. Happy baking! Enjoy these treats with friends or on your own.

Craving a simple dessert that’s bursting with flavor? Look no further than these delightful Apple Blondies! This easy recipe combines fresh apples, caramel, and just the right spice to create …

Read more

Categories Desserts

Pumpkin Cream Cheese Swirl Muffins Deliciously Easy

August 15, 2025 by Chef Remy
The right ingredients make these muffins shine. Let’s break them down into dry, wet, and cream cheese swirl ingredients. - 1 ½ cups all-purpose flour - ½ cup granulated sugar - ½ cup packed brown sugar - 1 teaspoon baking soda - 1 teaspoon baking powder - ½ teaspoon salt - 1 teaspoon ground cinnamon - ½ teaspoon ground nutmeg - ½ teaspoon ground ginger These dry ingredients form the base of your muffins. The flour gives structure, while sugars add sweetness. Baking soda and baking powder are your leavening agents, helping the muffins rise. Cinnamon, nutmeg, and ginger add warmth and spice, making your kitchen smell amazing. - 1 cup canned pumpkin puree - 2 large eggs, at room temperature - ½ cup vegetable oil - 1 teaspoon vanilla extract Pumpkin puree is the star of the show, giving moisture and flavor. The eggs help bind everything together. Vegetable oil keeps the muffins soft, and vanilla adds a lovely aroma. - 8 oz cream cheese, softened to room temperature - ¼ cup powdered sugar - 1 teaspoon vanilla extract This swirl adds richness and creaminess. Mixing in powdered sugar sweetens the cream cheese, making it a delightful contrast to the spiced muffin batter. The vanilla enhances the overall flavor, creating a perfect harmony. These ingredients blend to create a cozy treat you’ll want to share. - Preheat the oven to 350°F (175°C). This step is key for even baking. - Line your muffin tin with paper liners. This helps with easy removal and cleanup. - In a large mixing bowl, combine 1 ½ cups all-purpose flour, ½ cup granulated sugar, ½ cup brown sugar, 1 teaspoon baking soda, 1 teaspoon baking powder, ½ teaspoon salt, 1 teaspoon cinnamon, ½ teaspoon nutmeg, and ½ teaspoon ginger. - Whisk these dry ingredients thoroughly. This ensures that your spices and leavening agents mix well. - In a separate bowl, blend 1 cup pumpkin puree, 2 large eggs, ½ cup vegetable oil, and 1 teaspoon vanilla extract. Mix until smooth. - Pour the wet mixture into the dry ingredients. Mix gently with a spatula or wooden spoon. - Avoid overmixing! A few lumps are okay, as this keeps your muffins light. - In another bowl, beat 8 oz softened cream cheese with ¼ cup powdered sugar and 1 teaspoon vanilla extract. Mix until it's smooth and creamy. - Spoon about 2 tablespoons of muffin batter into each lined muffin cup. - Add 1 tablespoon of cream cheese mixture on top, then finish with another tablespoon of muffin batter. - Use a toothpick to gently swirl the cream cheese into the muffin batter. This creates a nice marbled look. - Bake the muffins for 18-20 minutes. - Check for doneness by inserting a toothpick into the center. It should come out clean or with a few moist crumbs. - Let the muffins cool in the pan for about 5 minutes. Then, transfer them to a wire rack to cool completely. This helps set their texture nicely. Using room temperature ingredients is key. It helps the batter mix well. Cold eggs and cream cheese can cause lumps. Let these sit out for about 30 minutes before you start. Avoid overmixing your batter. When you mix too much, muffins can turn dense. Stir just until the dry and wet ingredients combine. A few lumps are okay; they will bake out. You can add spices for an extra flavor boost. Try a pinch of cloves or allspice. You could also mix in chopped nuts or chocolate chips for a fun twist. For toppings, consider a light glaze. A simple mix of powdered sugar and milk works well. You can also sprinkle some cinnamon sugar on top before baking. Once cooled, dust the muffins lightly with powdered sugar. This adds a nice touch and looks great. Serve them on a pretty platter. Pair these muffins with hot coffee or tea for a cozy treat. You could even add a side of cream cheese frosting for extra yum! {{image_4}} You can make these muffins even better for you. Try using whole wheat flour instead of all-purpose flour. Whole wheat flour adds fiber and nutrients. It gives the muffins a hearty taste. For sweeteners, consider using honey or maple syrup. These natural sweeteners give a unique flavor. They also can be less processed than regular sugar. Want to change things up? Add chocolate chips or nuts to the batter. Chocolate chips bring a sweet surprise. Nuts add crunch and a nutty flavor. You can also switch your spices. Use pumpkin spice for a classic taste. Or try other spices like cloves for a new twist. Incorporating seasonal fruits makes the muffins special. Add cranberries for a tart burst. Apples add sweetness and a nice texture. You can adjust these muffins for holidays too. For Halloween, add spooky sprinkles. For Thanksgiving, use nutmeg and cinnamon for more fall flavors. To keep your muffins fresh, store them in an airtight container. This helps to prevent them from drying out. You can use a plastic container or a resealable bag. If they sit out, eat them within two days. For longer storage, consider freezing. Freezing muffins is simple. First, let them cool completely. Then, wrap each muffin tightly in plastic wrap and place them in a freezer bag. This keeps them fresh for up to three months. When you want to enjoy them, just take one out and let it thaw at room temperature or microwave it for a few seconds. To reheat muffins, use your oven or microwave. For the oven, set it to 350°F (175°C) and place the muffin inside for about 5-10 minutes. This helps keep the texture soft. If using a microwave, heat each muffin for 10-15 seconds. Be careful not to overheat, as this can dry them out. Yes, you can use fresh pumpkin. Just cook and puree the pumpkin first. Make sure it’s smooth, like canned puree. This will give your muffins a fresh taste. If you need a substitute, try Greek yogurt or ricotta cheese. Both will add creaminess. You can also use vegan cream cheese for a dairy-free option. These muffins stay fresh for about three days at room temperature. Store them in an airtight container. You can also keep them in the fridge for up to a week. Yes, you can make these muffins gluten-free. Use a gluten-free flour blend. Ensure it has a good binding agent, like xanthan gum, to keep the muffins fluffy. For dairy-free muffins, use a plant-based cream cheese. Substitute regular milk with almond milk or oat milk. These swaps will keep the muffins moist and tasty. To check if the muffins are done, insert a toothpick in the center. It should come out clean or have a few moist crumbs. If it’s wet, bake for another minute or two. These pumpkin muffins are a tasty treat, packed with flavor and comfort. You learned about the ingredients, how to mix them, and bake them to perfection. I shared tips for texture and flavor, plus fun variations to try. Don’t forget to store or freeze your muffins properly to keep them fresh. Enjoy making these muffins for yourself or to share with others! Happy baking!

If you love the taste of fall, you’ll adore these Pumpkin Cream Cheese Swirl Muffins! They are warm, soft, and packed with pumpkin spice flavor. I’ll show you how easy …

Read more

Categories Desserts

Mexican Street Corn Cups Delightful and Flavorful Treat

August 15, 2025 by Chef Remy
- 3 cups of corn kernels (freshly grilled or frozen) - 1/2 cup of creamy mayonnaise - 1/4 cup of tangy sour cream - 1/2 teaspoon of chili powder - 1 tablespoon of freshly squeezed lime juice - 1/4 cup of crumbled queso fresco (plus more for garnish) - 1/4 cup of finely chopped fresh cilantro (reserve some for garnish) - 1/2 teaspoon of garlic powder - Salt and pepper to taste - 1/2 teaspoon of paprika (for a colorful garnish) The corn is the star of this dish. You can use fresh corn or frozen corn. If you use fresh corn, grilling it gives a nice smoky flavor. The creamy mayonnaise and sour cream blend together to create a rich base. This mixture adds creaminess and a tangy taste. The chili powder and lime juice bring in bold flavor and brightness. Queso fresco adds a salty kick and nice texture, while cilantro gives freshness. Garlic powder enhances the taste, making every bite burst with flavor. You can switch out the mayonnaise for Greek yogurt if you want a lighter option. Instead of sour cream, try using a dairy-free version to make it vegan. If you want more heat, you can add cayenne pepper in place of chili powder. For those who can’t find queso fresco, feta cheese works well too. Lastly, if you dislike cilantro, parsley can be a great substitute for that fresh touch. Start by grilling the corn. If you use fresh corn, grill it on medium-high heat. Cook for about 10 minutes. Turn the corn often until it has a nice char. If you use frozen corn, heat a skillet over medium heat. Sauté the corn for 5 to 7 minutes until it warms up. Let the corn cool a bit before mixing. In a large bowl, add the corn kernels. Then, mix in the creamy mayonnaise and tangy sour cream. Next, sprinkle in the chili powder and pour the lime juice. Add garlic powder along with a pinch of salt and pepper. Stir everything well until you have a creamy and flavorful base. Now it’s time to add some cheese! Gently fold in half of the crumbled queso fresco. Also, add half of the chopped cilantro. This gives the mixture a nice texture and taste. Set aside the rest of the cheese and herbs for later. Use a spoon or a scoop to fill small cups or bowls with the corn mixture. Make sure each cup gets an even amount. You want each serving to be just as tasty as the last. Take the reserved queso fresco and sprinkle it on top of each cup. Add a little more cilantro for color and taste. A dash of paprika will brighten up the cups and add a pop of flavor. You can serve these corn cups right away. They taste best fresh! If you prefer a cold treat, cover them and chill in the fridge for about 30 minutes. This makes them refreshing and perfect for hot days. Enjoy your delightful Mexican Street Corn Cups! Grilling corn gives it a smoky flavor. If using fresh corn, grill it over medium-high heat. Turn the ears every few minutes. Cook for about 10 minutes until they are charred and fragrant. If using frozen corn, heat a skillet. Sauté it over medium heat for 5-7 minutes. Look for a slight caramelization for taste. To get a creamy mixture, use both mayonnaise and sour cream. They blend well and add rich flavors. Mix them with corn right after grilling. This keeps the corn warm, helping the flavors blend. If the mix seems thick, add a little more lime juice. This will help keep it smooth. You can add more flavor to your corn cups. Try mixing in diced jalapeños for heat. You can also add a pinch of cumin for a warm spice. For sweetness, consider adding diced bell peppers. Lastly, sprinkle some extra cheese on top for a richer taste. {{image_4}} You can make Mexican street corn cups vegetarian by using plant-based mayo. Replace sour cream with vegan options, like cashew cream or coconut yogurt. This keeps the creamy texture but makes it dairy-free. For added protein, try adding black beans or chickpeas. They blend well with the corn and add a hearty bite. To add spice, sprinkle in more chili powder or diced jalapeños. For a sweet twist, mix in diced mango or pineapple. This adds a fruity flavor that pairs well with the corn. You can also drizzle honey or agave on top for a sweet touch. Balancing spicy and sweet creates an exciting taste experience. Serve these corn cups with tortilla chips for a fun snack. You can also pair them with grilled meats or fish for a complete meal. They make a great side dish for tacos or burritos. For a colorful platter, add fresh veggies like bell peppers and cucumbers. This makes your table look vibrant and inviting. To keep your Mexican street corn cups fresh, store them in an airtight container. This helps retain their creamy texture and flavor. If you have extra corn mix, place it in a separate container. This way, you can enjoy it later without sogginess. You can freeze the corn mixture for later use. Place it in a freezer-safe container. Make sure to leave some space at the top for expansion. When ready to eat, thaw the mix in the fridge overnight. Reheat it gently in a pan or microwave. Avoid freezing the garnishes like cilantro and queso fresco. These corn cups will stay fresh in the fridge for about 3 days. After that, the taste and texture may change. If you freeze the corn mix, it can last up to 3 months. Remember to check for off smells or changes in color before eating. Mexican street corn is a popular dish called elote. It features grilled corn on the cob, slathered with creamy toppings. Traditionally, it has mayonnaise, cheese, chili powder, and lime. The flavors mix to create a rich and savory treat. Yes, you can use canned corn for this recipe. Just drain and rinse it well. Canned corn is convenient, but fresh grilled corn gives the best flavor. If using frozen corn, sauté it until warm and slightly caramelized. You can prepare the corn mixture a day ahead. Just mix all the ingredients and store it in the fridge. When ready to serve, scoop it into cups and garnish. This helps the flavors meld nicely. These cups go great with tortilla chips, tacos, or grilled meats. They make a perfect side dish for summer barbecues. You can also serve them as part of a festive appetizer spread. Yes, this recipe is gluten-free. All the ingredients are naturally free of gluten. Always check labels for any processed items, just to be safe. Enjoy these corn cups without worry! This blog post covered all you need to know about making Mexican Street Corn Cups. We explored the essential ingredients, key steps, and helpful tips to enhance flavor. You learned how to store leftovers and adapt the recipe for different diets. Mexican Street Corn Cups offer great taste and fun presentation. I encourage you to try making these tasty treats at home! Enjoy sharing them with your friends and family.

Are you ready to bring a taste of Mexico into your kitchen? Mexican Street Corn Cups are a fun and tasty treat that combine rich flavors with easy preparation. In …

Read more

Categories Appetizers

Copycat Pumpkin Spice Latte Delicious Fall Flavor

August 15, 2025 by Chef Remy
To make a delicious copycat pumpkin spice latte, you need a few key ingredients. Here’s what you will need: - Strong brewed coffee - Milk options (dairy vs. plant-based) - Pumpkin puree - Brown sugar - Pumpkin pie spice - Vanilla extract - Whipped cream Start with one cup of strong brewed coffee. This is the base of your latte. You can use your favorite brewing method, whether it's a drip coffee maker, French press, or espresso machine. You can choose one cup of milk. This can be dairy or a plant-based option. Almond, oat, or soy milk all work well. Each adds a unique flavor and texture. You will need two tablespoons of pumpkin puree. This is what gives your latte that cozy pumpkin flavor. Make sure to use pure pumpkin puree, not the sweetened pie filling. Add two tablespoons of brown sugar. Adjust the amount to fit your taste. Brown sugar adds a rich sweetness that pairs perfectly with pumpkin. You’ll need half a teaspoon of pumpkin pie spice. This spice blend usually includes cinnamon, nutmeg, and ginger. It is essential for that classic fall flavor. Save a pinch for garnish. Add half a teaspoon of vanilla extract. This enhances the overall flavor and adds a lovely sweetness. Top your latte with whipped cream for a delightful finish. It adds a creamy texture and an indulgent touch to your drink. These ingredients come together to create a warm, inviting drink. It’s perfect for chilly autumn days. Enjoy the rich flavors and the cozy feeling it brings! 1. Heating the milk and spices: In a small saucepan, pour in 1 cup of milk. Add 2 tablespoons of pumpkin puree, 2 tablespoons of brown sugar, 1/2 teaspoon of pumpkin pie spice, and 1/2 teaspoon of vanilla extract. Set the heat to medium. Whisk the mixture as it heats. This should take about 3 to 5 minutes. You want it warm and lightly frothy. 2. Achieving the right frothiness: Once the mixture is warm, remove it from the heat. For a nice, velvety texture, use an immersion blender. If you don’t have one, pour the mix into a countertop blender. Blend until it is smooth and frothy. 1. Best brewing methods for strong coffee: Brew 1 cup of strong coffee using your favorite method. French press, drip, or espresso works well. A strong brew ensures your latte has a rich flavor. 2. Coffee-to-milk ratio recommendations: I suggest a 1:1 ratio of coffee to pumpkin milk. This means you will pour in 1 cup of your brewed coffee into a large mug. 1. Pouring technique for layering flavors: Gently pour the frothy pumpkin milk mixture over the brewed coffee. Aim to layer it slowly for a beautiful look. You will see the milk blend with the coffee. 2. Stirring to combine: Use a spoon to stir the latte lightly. This helps mix the flavors without losing the frothiness. Now, your cozy pumpkin spice latte is ready to enjoy! To customize your pumpkin spice latte, you can swap brown sugar for other sweeteners. Try using maple syrup or honey for a rich flavor. If you want less sweetness, cut back on the sugar. Taste as you mix to find your perfect level. For a frothy latte, you can use either an immersion blender or a countertop blender. An immersion blender is great for small batches and is easy to clean. A countertop blender can create a very smooth texture. You can also froth milk using a whisk. Just whisk it fast while heating for a nice foam. To enhance the flavor, feel free to add more spices. A pinch of nutmeg or cinnamon can add warmth. You can also try adding a splash of caramel or chocolate syrup for a fun twist. For toppings, consider using crushed graham crackers or a drizzle of caramel. {{image_4}} You can make your pumpkin spice latte even better by switching some ingredients. If you want a dairy-free option, use almond milk, oat milk, or coconut milk. These choices keep the drink rich and creamy while being kind to your tummy. For sweeteners, try using maple syrup or honey instead of brown sugar. Each sweetener adds a unique flavor twist. You can also use sugar substitutes like stevia or monk fruit if you want to cut calories. Want to spice things up? Add chocolate syrup for a mocha twist. Drizzle some caramel sauce for a sweet touch. Both options mix well with pumpkin flavors and make your drink feel special. You can also play with spices. Try adding a pinch of nutmeg or ginger. These spices can give your latte a new depth and warmth that fits perfectly with fall. To make an iced pumpkin spice latte, brew your coffee first, then let it cool. Fill a tall glass with ice. Pour in your cooled coffee, followed by the pumpkin milk mixture. For this version, use less milk to keep it strong. You might also want to blend your pumpkin milk longer to keep it frothy. This way, you get that same cozy flavor in a refreshing drink. To store pumpkin puree, keep it in an airtight container. You can place it in the fridge for up to one week. If you want to keep it longer, freeze it in small portions. This way, you can easily use it later. For spices, store them in a cool, dark place. A glass jar with a tight lid works best. This keeps the spices fresh and full of flavor. Remember to check their smell. If they lack aroma, it might be time to replace them. You can prepare the pumpkin milk mixture in advance. Just heat and blend it as directed. Store it in the fridge for up to three days. When you’re ready to enjoy your latte, simply reheat it on the stove or in the microwave. For best flavor, heat it gently. Stir well to mix the ingredients again. This keeps the taste fresh and delicious. Pumpkin puree lasts about one week in the fridge. If frozen, it can last up to six months. Always check for off smells or mold before use. Homemade latte mix can stay fresh in the fridge for about five days. For the best taste, use it within this time. Store any extra whipped cream in a separate container, and use it within three days for the best texture and flavor. The best coffee for a pumpkin spice latte is a strong brew. I recommend using dark roasts. They have rich flavors that pair well with pumpkin. You can use espresso for a bold taste. Brewed coffee works too, just make it strong. - Dark roast coffee - Espresso - Strong brewed coffee Yes, you can use almond milk. It gives a nutty flavor to the latte. The texture will be a bit different. Almond milk is thinner than regular milk. It may not froth as well. However, it is a great dairy-free option. - Nutty flavor from almond milk - Thinner texture - Less frothiness than regular milk To make your latte less sweet, reduce the brown sugar. Start by using only one tablespoon. You can also try using unsweetened almond milk. This will cut some sweetness. Adding more pumpkin puree can enhance flavor without sugar. - Use less brown sugar - Try unsweetened milk - Add extra pumpkin puree In this post, we covered how to make a delicious pumpkin spice latte. We discussed key ingredients like strong coffee, pumpkin puree, and milk options. I shared step-by-step instructions and tips to adjust sweetness and texture. You can create variations for seasonal flavors, and I provided storage advice for your ingredients. Remember, making your drink is fun and lets you customize it just for you. Enjoy experimenting and sip your perfect pumpkin spice latte!

Fall is here, and that means one thing: pumpkin spice season! If you love warm, cozy drinks, I have the perfect recipe for you. My Copycat Pumpkin Spice Latte has …

Read more

Categories Breakfast

Perfect Pumpkin Muffins Irresistible Fall Treat

August 15, 2025 by Chef Remy
Here is a list of the main ingredients you will need to make perfect pumpkin muffins: - 1 cup canned pumpkin puree - 1/2 cup neutral vegetable oil (like canola or sunflower) - 1/2 cup packed brown sugar - 1/2 cup granulated sugar - 2 large eggs, at room temperature - 1 1/2 cups all-purpose flour - 1 teaspoon baking soda - 1/2 teaspoon baking powder - 1 teaspoon ground cinnamon - 1/2 teaspoon ground nutmeg - 1/4 teaspoon ground ginger - 1/4 teaspoon salt - 1/2 cup chopped walnuts or pecans (optional) - 1/2 cup mini chocolate chips (optional) Canned pumpkin puree gives the muffins a smooth texture. It also adds moisture and flavor. Vegetable oil helps keep them soft. Mixing brown and granulated sugar gives a nice sweetness. Using room temperature eggs helps the muffins rise well. All-purpose flour acts as the base of the batter. Baking soda and baking powder are key for leavening. Ground spices like cinnamon, nutmeg, and ginger bring warmth and richness. Salt balances the sweetness and enhances flavors. If you want extra crunch or sweetness, add walnuts, pecans, or chocolate chips. These optional ingredients make your muffins even more delightful. - Preheat oven to 350°F (175°C). - Prepare muffin tin with liners or cooking spray. In a large bowl, combine the pumpkin puree, vegetable oil, brown sugar, granulated sugar, and eggs. Whisk until smooth and creamy. This gives your muffins a rich flavor and a moist texture. In another bowl, sift together the all-purpose flour, baking soda, baking powder, ground cinnamon, ground nutmeg, ground ginger, and salt. Sifting helps mix the dry ingredients evenly. This ensures each bite bursts with flavor. Gently fold the dry ingredients into the wet mix. Use a spatula and stir just until combined. It's okay to have small lumps. Overmixing can lead to tough muffins, and we want them light and fluffy. If you like, incorporate chopped walnuts, pecans, or mini chocolate chips into the batter. These add texture and flavor. Make sure they are evenly mixed in for a delightful surprise in every bite. Divide the batter evenly among the muffin cups. Fill each cup about three-quarters full. This gives your muffins room to rise. Bake in the preheated oven for 18-20 minutes. To test for doneness, insert a toothpick into the center of a muffin. If it comes out clean, they are ready. Once baked, let the muffins cool in the tin for about 5 minutes. Then, transfer them to a wire rack to cool completely. Enjoy the warm, cozy flavors of fall! To get soft and fluffy muffins, avoid overmixing the batter. When you mix too much, it makes the muffins tough. Stir just until the dry ingredients blend with the wet ones. Remember, some lumps are okay! Using room temperature eggs is also key. Eggs that are warm mix better and help the muffins rise well. You can make your pumpkin muffins even tastier by adjusting the spices. Try adding more cinnamon or nutmeg if you love those flavors. A splash of vanilla extract can also boost the taste. This small change can make a big difference in flavor. For a lovely finish, sprinkle a mix of cinnamon and sugar on top before baking. This will give your muffins a sweet crust. You can also serve them warm with cream cheese frosting or a little butter. This makes each bite feel extra special! {{image_4}} To make gluten-free pumpkin muffins, simply swap all-purpose flour with a gluten-free flour blend. Many brands offer blends that work well in baking. Look for one that includes xanthan gum for better texture. This change keeps your muffins soft and moist. You won’t lose any of the great taste! For vegan pumpkin muffins, replace eggs with flaxseed meal or applesauce. To use flaxseed meal, mix one tablespoon with three tablespoons of water. Let it sit for a few minutes until it thickens. Applesauce is another great choice. Use 1/4 cup per egg. Both options will keep your muffins light and fluffy without eggs. Want to jazz up your muffins? Add cranberries or orange zest for a fruity lift. Dried cranberries give a sweet and tart flavor that pairs well with pumpkin. Just fold in half a cup into the batter. Adding the zest of one orange brings brightness and freshness. These small changes make your muffins even more special! To keep your pumpkin muffins fresh, store them in an airtight container. This helps prevent them from drying out. If you have leftover muffins, place them in the container at room temperature. They stay good for about three days. For longer storage, move them to the fridge. They can last about a week in there. Just be sure to wrap them well to avoid moisture. Freezing muffins is a great way to save them for later. To freeze, let the muffins cool completely. Then, wrap each one in plastic wrap. After that, place the wrapped muffins in a freezer bag. Remove as much air as you can before sealing. Your muffins can stay frozen for up to three months. When you're ready to eat them, just take out how many you want. To reheat your muffins, you can use the oven or microwave. For the oven, preheat it to 350°F (175°C). Place the muffins on a baking sheet and heat for about 5 to 10 minutes. This restores their warm, fresh taste. If you use a microwave, heat one muffin at a time for about 15 to 20 seconds. Make sure to check that it’s warm throughout. Enjoy your muffins like they are fresh out of the oven! Pumpkin muffins are great for a few days. At room temperature, they last about 2-3 days. Keep them in an airtight container to stay fresh. If you store them in the fridge, they can last up to a week. Just remember, they may dry out a bit in the fridge. Yes, you can use fresh pumpkin. Start by cooking the pumpkin until tender. Then, mash it to make a smooth puree. This gives you the same great flavor as canned. Just make sure to measure it correctly. You need 1 cup of fresh puree for the recipe. It may take a bit of time, but the taste is worth it! Dense muffins can be a bummer. This often happens if you overmix the batter. Mixing too much adds too much air and makes them heavy. Another reason could be using too much flour. Always measure your flour correctly. Lastly, check your baking soda and powder. If they are old, they may not work well. You now have a simple way to make delicious pumpkin muffins. We covered all the ingredients, methods, and tips for success. You learned how to mix wet and dry ingredients and bake them perfectly. Remember to experiment with flavors and toppings. Whether you choose gluten-free or vegan options, the possibilities are endless. Store your muffins well for lasting freshness. With these steps, anyone can make tasty muffins easily. Enjoy sharing your tasty treats with friends and family!

Are you ready to bake the perfect pumpkin muffins this fall? These tasty treats are packed with warm spices and a rich pumpkin flavor that everyone loves. In just a …

Read more

Categories Desserts

Pumpkin Spice Cold Brew Savory Seasonal Delight

August 15, 2025 by Chef Remy
- 1 cup coarsely ground coffee - 4 cups cold water - 1 cup pumpkin puree - 4 tablespoons pure maple syrup - 1 tablespoon pumpkin spice blend - 1 teaspoon pure vanilla extract - Milk or a dairy-free alternative - Whipped cream - Ground cinnamon for garnish To make a great pumpkin spice cold brew, gather these ingredients. The coarsely ground coffee gives a rich flavor. Cold water helps extract the coffee taste over time. Pumpkin puree adds a smooth texture and a sweet taste. Maple syrup sweetens the drink just right. The pumpkin spice blend gives it that classic fall flavor. Vanilla extract adds depth to the taste. For a creamy finish, use your favorite milk or a dairy-free option. If you want to make it extra special, top it off with whipped cream. A sprinkle of ground cinnamon can make it look pretty and taste great! Enjoy each sip of this seasonal delight. - Mixing Coffee and Water: Start by taking 1 cup of coarsely ground coffee. Add this to a large jar. Pour in 4 cups of cold water. Stir gently to mix well. Ensure all the coffee grounds are wet. - Steeping Time Recommendations: Cover the jar. Place it in the fridge. Let it steep for 12 to 24 hours. The longer it steeps, the richer the flavor. - Tools Needed for Straining: After steeping, grab a coffee filter or fine-mesh sieve. You need this to strain the coffee. - Tips for a Smooth Brew: Pour the coffee through the filter slowly. This helps catch all the grounds. Aim for a clear, smooth cold brew. - Heating Techniques: In a small saucepan, add 1 cup of pumpkin puree. Mix in 1 tablespoon of pumpkin spice blend. Add 4 tablespoons of pure maple syrup and 1 teaspoon of vanilla extract. Heat on medium. - Ensuring Flavor Integration: Stir the mixture constantly. Heat until warm, but don’t boil. This helps all the flavors blend well. - Ratios for Balance: In a glass, mix 1 part of the pumpkin mixture with 3 parts of cold brew concentrate. This ratio gives a great balance between coffee and pumpkin. - Adjusting Flavor Intensity: If you want a stronger pumpkin flavor, add more pumpkin mixture. Taste as you go for the best results. - Dairy vs. Dairy-Free Choices: Choose your favorite milk. This could be regular milk or a dairy-free option. - Achieving Creaminess and Texture: Stir in the milk until you reach your desired creaminess. This step makes your cold brew smooth and rich. - Ice Cubes and Glass Choices: Fill a tall glass with ice cubes. Pour your pumpkin spice cold brew over the ice. - Decorative Presentation Tips: Top with whipped cream if you like. A sprinkle of ground cinnamon makes it look nice too. Use clear glasses to show those lovely layers! - Recommended Coffee Types: Use coarsely ground coffee for the best flavor. Look for medium to dark roast beans. They bring out rich notes that shine in cold brew. - Steeping Time Adjustments: Steep your coffee for 12 to 24 hours. A longer steep lets the flavors develop. If you want a milder taste, try steeping for just 12 hours. - How to Adjust Sweetness: Maple syrup works great for sweetness. Start with four tablespoons, then taste. You can always add more if you like it sweeter. - Enhancing Pumpkin Flavor: Add more pumpkin puree for a bolder pumpkin taste. You can also mix in extra pumpkin spice for a stronger kick. - Best Pairings with Food: Enjoy your cold brew with spiced muffins or a slice of pumpkin bread. These treats match well with the drink's flavors. - Seasonal Variations: Try adding a splash of apple cider for a fall twist. You can also switch to peppermint for a winter vibe. {{image_4}} For a vegan twist, swap regular milk for a plant-based option. Almond, oat, or coconut milk work great. These choices add a creamy touch without dairy. When mixing, ensure to stir well for a smooth blend. To enhance creaminess, consider adding a dash of coconut cream. It adds richness and a hint of tropical flavor. You may also use a frother to whip your milk alternative for extra texture. If you prefer natural sweeteners, try using agave syrup or honey instead of maple syrup. Both options add a unique flavor. You can adjust the amount based on your taste. For a different flavor profile, consider adding a pinch of brown sugar or even a splash of vanilla syrup. These sweeteners can enhance the overall taste and complement the pumpkin spice. To serve this drink hot, simply warm the cold brew concentrate on the stove. Mix it with the pumpkin mixture as you would for iced. This method keeps the flavor strong without losing the coffee essence. For iced versions, ensure your cold brew is chilled well. You can also add ice cubes made from the coffee itself. This prevents dilution and keeps the drink flavorful. Adjust the pumpkin mixture to taste, as cold drinks may need a bit more sweetener to shine. - Best Containers for Storage: Use glass jars or airtight plastic containers. These keep the brew fresh and avoid unwanted flavors. - Shelf Life Recommendations: Cold brew concentrate stays good in the fridge for about 1 week. After that, it may lose flavor. - Refrigeration Tips: Store the pumpkin spice mixture in a sealed jar. This keeps it fresh and prevents spills. - Reusing Leftovers: You can use leftover pumpkin spice mixture in oatmeal or smoothies. It adds a nice fall flavor to many dishes. - Safe Methods for Heating: If you want to warm the mixture, use a microwave or a small pot. Heat it gently, so it doesn’t boil. - Maintaining Flavor Quality: Always reheat slowly. Quick heating can change the taste. Enjoy your pumpkin spice cold brew hot or cold! For cold brew, I recommend coarsely ground coffee. It makes a smooth brew. Look for beans with a medium to dark roast. They balance well with pumpkin flavors. Use freshly ground coffee for the best taste. Try different blends to find your favorite. Yes, you can! Make your cold brew and pumpkin mixture in advance. Store the cold brew in a sealed jar. It stays fresh for up to two weeks in the fridge. Keep the pumpkin spice mixture in a separate container. It will last about a week. This way, you can enjoy it whenever you want. To enhance the pumpkin spice flavor, add more pumpkin spice blend. You can also mix in extra cinnamon or nutmeg. Start with half a teaspoon and taste as you go. You can even add a dash of ginger for a kick. Customize until it hits your sweet spot! Yes, Pumpkin Spice Cold Brew can be gluten-free. The main ingredients are coffee, pumpkin, and maple syrup. Always check the labels on your ingredients. Some flavored syrups may have gluten. Stick to pure maple syrup for safety. Absolutely! You can customize the sweetness to fit your taste. Start with the 4 tablespoons of maple syrup. Taste it and add more if you like. You can also use other sweeteners like honey or agave. Mix and match until you achieve your perfect flavor! This guide covered how to make a Pumpkin Spice Cold Brew. We discussed key ingredients like coffee and pumpkin puree, as well as flavor boosters like vanilla. You learned step-by-step instructions for brewing, mixing, and serving this tasty drink. Customization options help you create the perfect drink for your taste. Enjoy making this drink at home. It’s simple, fun, and delicious! Share it with friends for a cozy treat this season.

Are you ready to savor the taste of fall? My Pumpkin Spice Cold Brew is a delicious twist on your favorite seasonal drink. With easy ingredients like coarsely ground coffee, …

Read more

Categories Desserts

Small Batch Pumpkin Cinnamon Rolls Soft and Yummy Treat

August 15, 2025 by Chef Remy
To make small batch pumpkin cinnamon rolls, you need these simple ingredients: - 1 cup all-purpose flour - 1/4 cup pumpkin puree - 2 tablespoons granulated sugar - 1/2 teaspoon baking powder - 1/4 teaspoon baking soda - 1/4 teaspoon salt - 1/4 teaspoon ground cinnamon - 1/4 teaspoon nutmeg - 1/4 cup milk - 1 tablespoon unsalted butter, melted - 1/4 teaspoon vanilla extract - For the Filling: - 2 tablespoons brown sugar - 1 tablespoon softened butter - 1 teaspoon ground cinnamon - For the Glaze: - 1/2 cup powdered sugar - 1 tablespoon milk - 1/4 teaspoon vanilla extract These ingredients combine to create soft and yummy rolls. The pumpkin puree adds moisture and flavor. The spices bring warmth and comfort. Each ingredient plays a key role in the final taste. For the filling, brown sugar and cinnamon create a sweet swirl. The glaze adds a perfect finish. Remember to measure carefully for the best results. Enjoy the process of bringing these ingredients together! - Preheat to 350°F (175°C). - Prepare baking dish with parchment or grease. - Whisk together flour, sugar, and leavening agents. - Add spices and ensure no lumps remain. - Mix pumpkin puree, milk, melted butter, and vanilla. - Gently mix dry and wet ingredients. - Ensure dough is slightly sticky, avoid overmixing. - Shape into a rectangle on floured surface. - Blend brown sugar, softened butter, and cinnamon. - Roll into a log and slice into pieces. - Place in the prepared dish and bake for 15-20 minutes. - Whisk together powdered sugar, milk, and vanilla. - Cool slightly and drizzle glaze over rolls. To achieve fluffy rolls, keep these tips in mind: - Use Fresh Ingredients: Check your baking powder and baking soda. Old leavening agents may not work well. - Do Not Overmix: When you combine wet and dry ingredients, mix gently. Overmixing can make the rolls tough. - Temperature Matters: Make sure your oven is preheated to 350°F (175°C). An oven thermometer can help verify the heat. If your oven runs hot or cold, adjust the baking time. Start with the lower time of 15 minutes. Check for a golden brown color and a soft touch to know they are done. Adding nuts or dried fruit can elevate your cinnamon rolls. Consider mixing in: - Chopped walnuts or pecans for crunch. - Dried cranberries or raisins for sweetness. For spice variations, try these tips: - Add ginger or cloves for warmth. - Use pumpkin pie spice instead of individual spices for a quick option. Warm rolls are the best! Serve them straight from the oven for maximum enjoyment. Here are a few ideas: - Drizzle Extra Glaze: Add a little more glaze on top for sweetness. - Sprinkle Cinnamon: A light dusting of cinnamon enhances the look and taste. For beverages, these rolls pair well with: - Hot coffee or tea for a cozy feel. - Spiced cider for a festive touch. {{image_4}} For those needing gluten-free options, you can swap all-purpose flour for a gluten-free blend. Look for one that works well in baking. This helps keep your rolls soft and fluffy. If you want a vegan version, replace milk with almond or oat milk. Use vegan butter instead of regular butter, and check your sugar for animal products. These small changes make your rolls friendly for everyone. You can easily change the filling for a fun twist. Try adding chocolate chips for a sweet surprise. Or, mix in chopped nuts for a nice crunch. Walnuts or pecans pair well with pumpkin's flavor. For glazes, think outside the box. A maple glaze adds a lovely depth. For something creamier, use a cream cheese glaze. Just mix cream cheese with powdered sugar and a splash of milk. Fall is the perfect time to explore other flavors. Add chopped apples or pecans for a different taste. You could even add a dash of ginger for warmth. When the holidays come, think of special flavors. You can infuse these rolls with spices like cardamom or allspice. These little touches make your rolls great for gatherings and special meals. To store your pumpkin cinnamon rolls, let them cool to room temperature. Place them in an airtight container. This helps keep them soft and fresh. You can also use plastic wrap to cover them. Make sure the rolls are sealed well to prevent drying out. To reheat your rolls, you have a few great options. The microwave works well. Heat each roll for about 15-20 seconds. If you prefer, you can use the oven. Preheat it to 350°F (175°C). Place the rolls on a baking sheet and warm them for about 5-10 minutes. This keeps them soft and yummy. You can freeze both the dough and baked rolls. For dough, wrap it tightly in plastic wrap. Place it in a freezer bag to prevent freezer burn. For baked rolls, let them cool completely. Then, wrap them in plastic wrap and aluminum foil. To thaw, just move them to the fridge overnight. For reheating, you can use the oven or microwave as mentioned above. This way, you can enjoy these treats anytime! Making cinnamon rolls from scratch is easy. Here are the key steps: - Mix dry ingredients: Start with flour, sugar, baking powder, baking soda, salt, and spices. - Combine wet ingredients: Mix pumpkin puree, milk, melted butter, and vanilla. - Combine both mixtures: Pour wet into dry ingredients and stir gently. - Roll out dough: Shape the dough into a rectangle about 1/4 inch thick. - Prepare filling: Blend softened butter, brown sugar, and cinnamon, then spread over the dough. - Roll and cut: Roll the dough tightly into a log and slice into pieces. - Bake: Place in a dish and bake until golden brown. These steps ensure soft and fluffy rolls that taste amazing. You can use pumpkin pie filling, but it changes the taste. Pumpkin pie filling has added spices and sugar. If you use it, reduce the sugar in your recipe. For the best flavor, stick with pure pumpkin puree. It gives a nice, fresh taste to the rolls. To keep your cinnamon rolls moist and tender, follow these tips: - Do not overbake: Watch your rolls closely. Bake them just until golden brown. - Cover with a towel: After baking, cover the rolls with a clean kitchen towel while they cool. This traps moisture. - Use a glaze: The glaze adds sweetness and moisture. Drizzle it over warm rolls for the best effect. These steps help your rolls stay soft and tasty. You can prepare these rolls in advance without losing quality. Here’s how: - Make the dough: Prepare the dough and let it rise. Then, shape your rolls. - Chill them: Place the rolled and cut dough in the fridge overnight. This slows down the rising. - Bake when ready: In the morning, let the rolls sit at room temperature for about 30 minutes. Then bake as directed. This method saves time and allows you to enjoy fresh rolls in the morning! You can make delicious pumpkin cinnamon rolls using simple ingredients and easy steps. We discussed how to mix dry and wet ingredients, prepare fillings, and bake the rolls. I also shared tips for achieving fluffy results and creative variations. You can store, reheat, or freeze these rolls for later enjoyment. Enjoy sharing them with family and friends, or make them for a cozy treat. With this guide, you'll impress everyone with your baking skills and enjoy every bite of these tasty rolls.

Craving a soft and yummy treat? These small batch pumpkin cinnamon rolls are everything you need! Perfect for a cozy morning, they blend warm spices with rich pumpkin flavor. Whether …

Read more

Categories Desserts

Salted Maple Brown Butter Pumpkin Bread Delight

August 15, 2025 by Chef Remy
- 1 cup unsalted butter - 1 cup pumpkin puree - 3/4 cup brown sugar, packed tightly - 1/2 cup granulated sugar The main ingredients are the heart of our bread. Unsalted butter adds richness. I love to brown it for deep flavor. Pumpkin puree brings moisture and a hint of sweetness. Brown sugar gives the bread its deep caramel notes, while granulated sugar balances the sweetness. - 2 large eggs - 1/4 cup pure maple syrup - 1 teaspoon pure vanilla extract - 1 1/2 cups all-purpose flour - 1 teaspoon baking soda - 1 teaspoon baking powder Eggs provide structure and help the bread rise. Maple syrup adds a lovely hint of flavor, while vanilla extract enhances all the tastes. The flour forms the base, while baking soda and powder help it rise, making the bread soft and airy. - 1 teaspoon ground cinnamon - 1/2 teaspoon ground nutmeg - 1/4 teaspoon ground ginger - 1/2 teaspoon fine sea salt - 1/2 cup chopped walnuts or pecans (optional) Spices bring warmth to the bread. Cinnamon is a must for fall. Nutmeg and ginger add depth. Sea salt balances all the flavors. You can add walnuts or pecans for crunch, but that’s up to you! This blend creates a delightful mix of flavors, perfect for a cozy day. First, you need to preheat your oven to 350°F. This helps the bread bake evenly. While the oven warms up, prepare your loaf pan. Grease it well or line it with parchment paper. This will help the bread come out easily after baking. Next, let’s make the brown butter. In a medium saucepan, add the unsalted butter over medium heat. Watch it closely as it melts. Stir it often for about 5 to 7 minutes. The butter will turn a rich golden brown and smell nutty. Once it reaches this point, remove it from heat. Allow the butter to cool for a few minutes before using it in the batter. Now it's time to mix the batter. In a large bowl, combine the pumpkin puree, brown sugar, and granulated sugar. Stir until it looks smooth. Then, add the cooled brown butter to the pumpkin mix. Do not forget to scrape in all those tasty brown bits! Mix in the eggs, maple syrup, and vanilla extract until everything is blended well. In a separate bowl, whisk together the all-purpose flour, baking soda, baking powder, cinnamon, nutmeg, fine sea salt, and ground ginger. Once mixed, gently fold the dry mixture into the pumpkin mix. Be careful not to overmix! If you like, fold in chopped walnuts or pecans for a crunchy bite. Pour the batter into your prepared loaf pan. Use a spatula to smooth the top. Before baking, sprinkle some flaky sea salt on the surface. This will enhance the flavor. Bake the bread in the oven for 55 to 65 minutes. To check if it's done, insert a toothpick in the center. It should come out clean, or with only a few moist crumbs. Once baked, let the bread cool in the pan for about 10 minutes. After that, carefully move it to a wire rack to cool completely before slicing. To get brown butter just right, watch the heat closely. Start with medium heat and stir often. The butter will melt, then foam up. Pay attention as it turns golden brown and gives off a nutty smell. This takes about 5-7 minutes. If you go too long, it can burn. To enhance the nutty flavor, make sure to scrape the bottom of the pan. The little brown bits add depth to your bread. Let the butter cool before adding it to the batter. This will keep the eggs from cooking when you mix. Do not overmix the batter. This can make your bread tough. Mix just until you see no dry flour. This keeps your bread light and fluffy. When folding in the dry ingredients, use a gentle hand. A spatula works best for this. Start from the bottom and scoop up to the top. This method helps keep air in the batter. For a great presentation, slice the pumpkin bread thick. Arrange the slices on a wooden board. Drizzle some extra maple syrup on top for a sweet touch. Add a sprinkle of flaky sea salt for a pop of flavor. Pair your bread with a hot cup of coffee or tea. The warm drink balances the sweetness of the bread. Enjoy this treat with friends or family for a cozy moment. {{image_4}} You can make your salted maple brown butter pumpkin bread even more exciting. Here are some fun ideas: - Adding chocolate chips or dried fruit: Toss in a cup of chocolate chips for a rich twist. You can also mix in dried fruit like cranberries or raisins for a chewy texture. Both options add a nice burst of flavor. - Using different nuts or seeds: Walnuts and pecans work well, but you can try almonds or sunflower seeds too. They add crunch and flavor. Consider toasting them first to bring out even more taste. If you need to change the recipe for dietary reasons, there are great options: - Gluten-free flour options: You can swap the all-purpose flour with a gluten-free blend. Look for one that includes xanthan gum to help with texture. This way, everyone can enjoy this tasty bread. - Vegan substitutes for eggs and butter: For a vegan version, use flax eggs instead of regular eggs. Mix one tablespoon of flaxseed meal with three tablespoons of water for each egg. For butter, use coconut oil or a plant-based butter. This makes the bread just as yummy without any animal products. You can keep your salted maple brown butter pumpkin bread at room temperature for up to four days. To maintain freshness, store it in an airtight container. This helps prevent it from drying out. If you notice any moisture, you can place a paper towel in the container. This will absorb excess moisture. To freeze your pumpkin bread, wrap it tightly in plastic wrap. Then, place it in a freezer bag or an airtight container. This method helps keep the bread fresh for up to three months. When you're ready to enjoy it, thaw the bread in the fridge overnight. You can also let it sit at room temperature for a few hours. For reheating, place slices in the oven at 350°F (175°C) for about 10 minutes. This warms the bread and revives its soft texture. To stop your pumpkin bread from sinking, mix your batter gently. Overmixing can add too much air, leading to collapse. Make sure your oven is preheated to 350°F. Place the bread in the center of the oven for even heat. Always test for doneness with a toothpick. If it comes out clean, your bread is ready. Yes, you can make mini loaves or muffins! For mini loaves, bake for about 30-35 minutes. For muffins, check at 18-20 minutes. Keep an eye on them to avoid overbaking. This way, you can enjoy smaller portions or share with friends. You can use butternut squash or sweet potato puree instead. These options keep a similar taste and texture. Applesauce also works, but it will change the flavor a bit. Choose what you like best! Store leftover pumpkin bread in an airtight container. It will stay fresh at room temperature for about three days. For longer storage, wrap it well in plastic and freeze it. It can last up to three months in the freezer. Just thaw it overnight in the fridge before enjoying! In this article, we discussed how to make delicious pumpkin bread. You learned about the key ingredients, including pumpkin puree, brown sugar, and spices. I provided a step-by-step guide to mixing and baking your batter. We also explored tips for perfecting brown butter and different variations for dietary needs. Remember, the right storage keeps your bread fresh longer. Enjoy your baking, and don’t forget to share this tasty treat!

If you’re craving a fall treat that’s warm and cozy, look no further! My Salted Maple Brown Butter Pumpkin Bread is the perfect blend of sweet and nutty flavors. This …

Read more

Categories Desserts
Older posts
Newer posts
← Previous Page1 … Page43 Page44 Page45 … Page130 Next →

ROASTED RECIPES

Where bold flavors meet everyday meals. Warm, vibrant, and made to share. 🔥🥗🍴

PAGES

Home About Contact Privacy Policy Terms & Conditions Cookie Policy GDPR Policy Copyright Policy Disclaimer

CATEGORIES

Appetizers Desserts Salads Breakfast Dinner

Contact

  • Pinterest
  • Mail
Copyright © 2025 Roasted Flavors. All rights reserved.