Easy Apple Crisp Bars Delicious and Homemade Treat
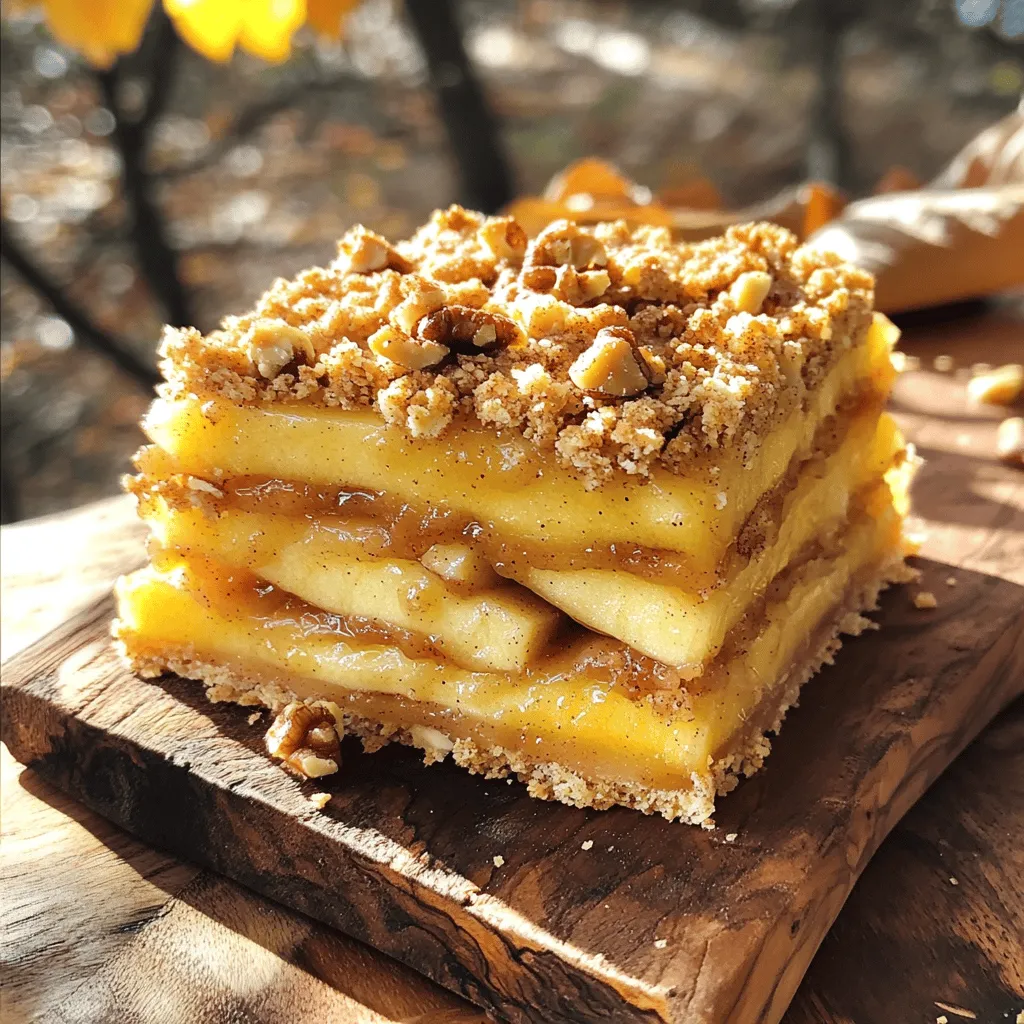
If you’re craving a warm, homemade treat, these Easy Apple Crisp Bars are just what you need. Imagine biting into a chewy oat crust, layered with sweet apples and a …
If you’re craving a warm, homemade treat, these Easy Apple Crisp Bars are just what you need. Imagine biting into a chewy oat crust, layered with sweet apples and a …

Love the warm flavors of fall? You’ll adore my Apple Cinnamon Blondies with Maple Glaze! These chewy blondies combine sweet apples and spices, topped with a creamy maple glaze that’s …

Are you ready to indulge in a tasty treat that’s also good for you? My Healthy Pumpkin Chocolate Chip Muffins are perfect for breakfast or as a snack. With simple …

Are you ready to whip up a treat that’s both easy and delicious? Oat flour pumpkin muffins are the perfect choice! They bring the cozy flavors of fall into every …
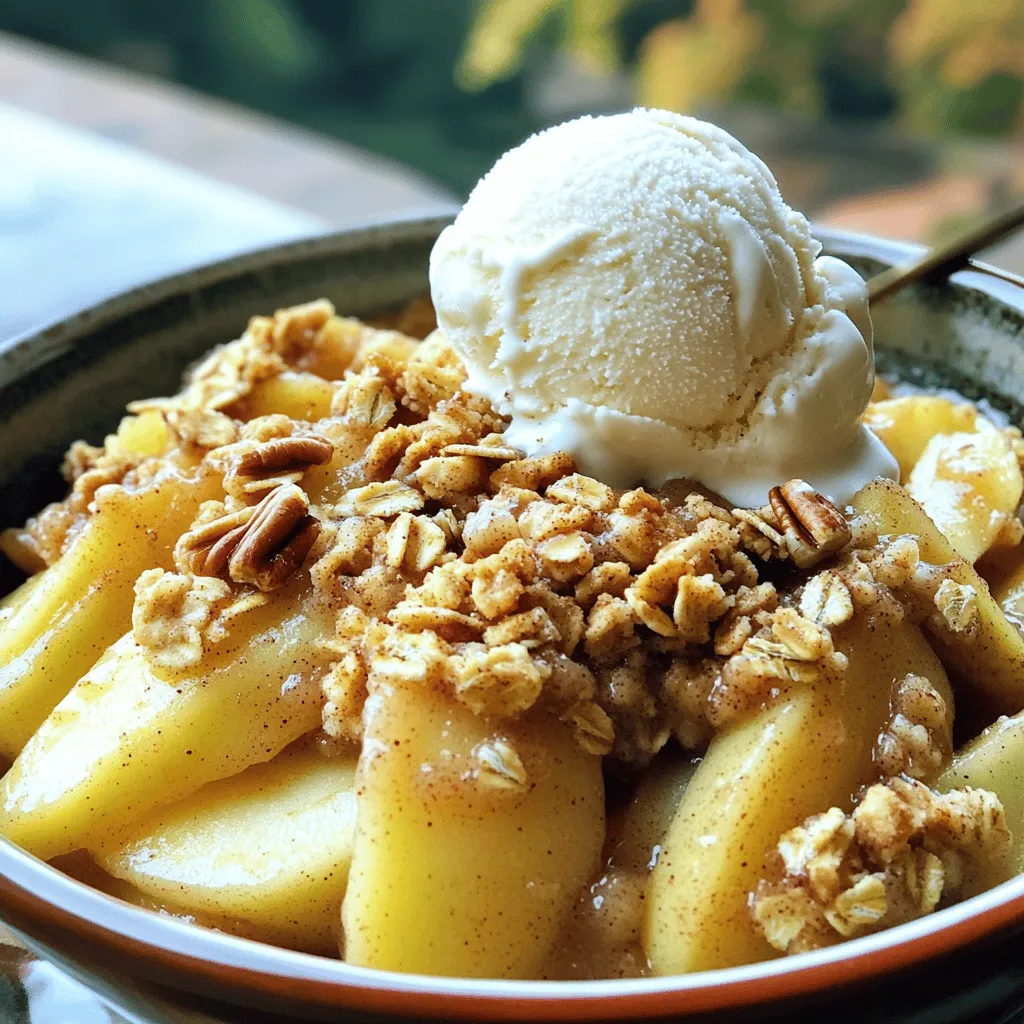
Ready to treat yourself with a delicious dessert? My Super Simple Apple Crisp will have you savoring every bite. With just a few ingredients and easy steps, you’ll create a …
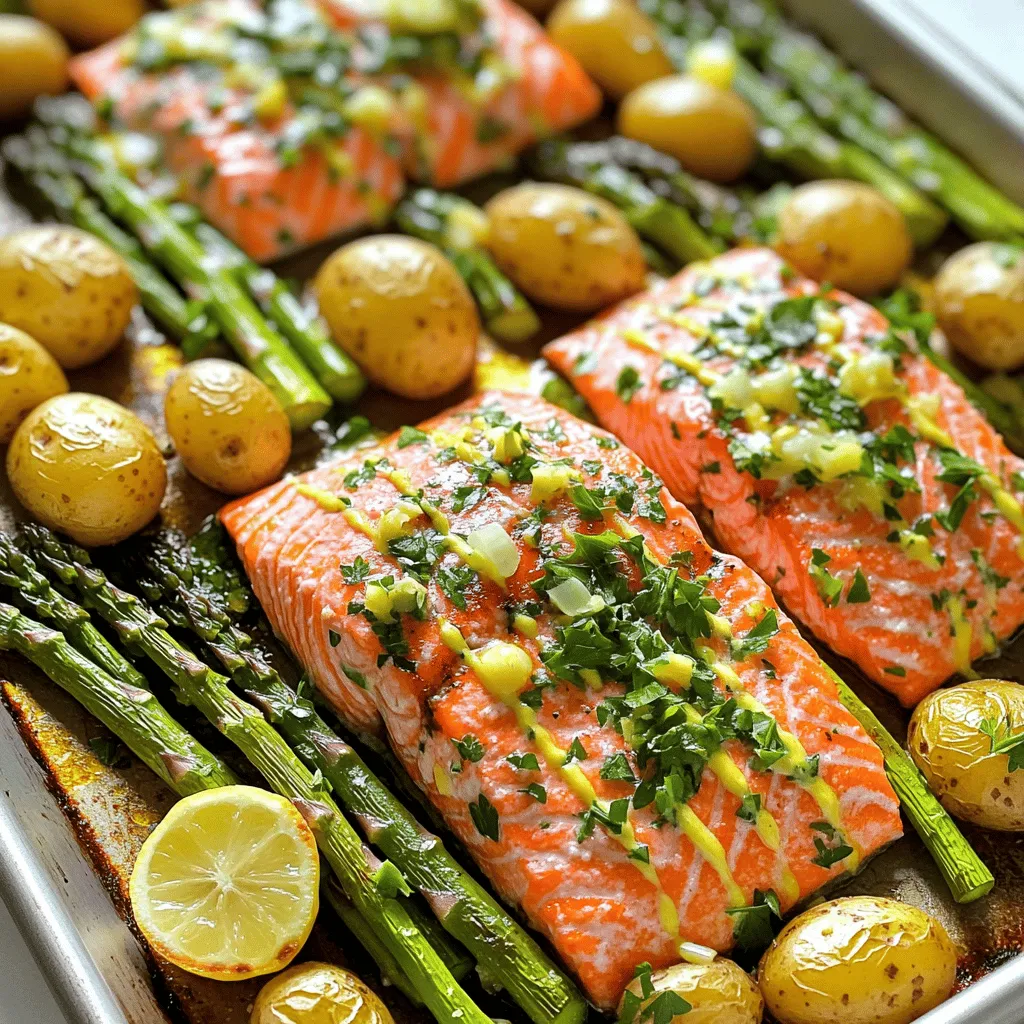
Ready to impress your taste buds? This Lemon Herb Salmon Sheet Pan Dinner is simple and fresh, making it perfect for busy weeknights. With just a few ingredients, you can …
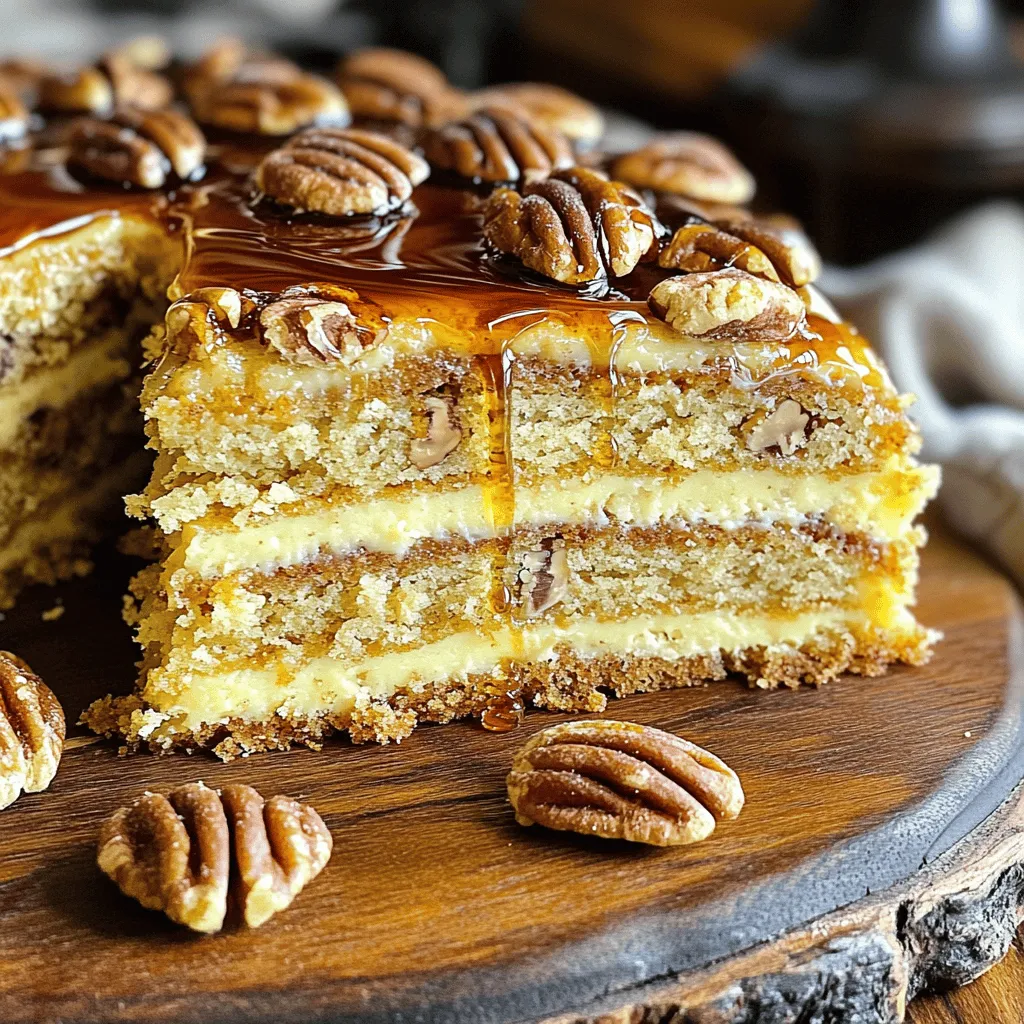
Craving a delicious treat that brightens your mornings? Look no further! My Maple Pecan Coffee Cake recipe is rich, flavorful, and easy to make. With crunchy pecans and sweet maple …

Craving a hearty meal that’s packed with flavor and easy to make? Look no further! My Slow Cooker Chipotle Beef Enchiladas recipe is a game changer for busy nights. With …
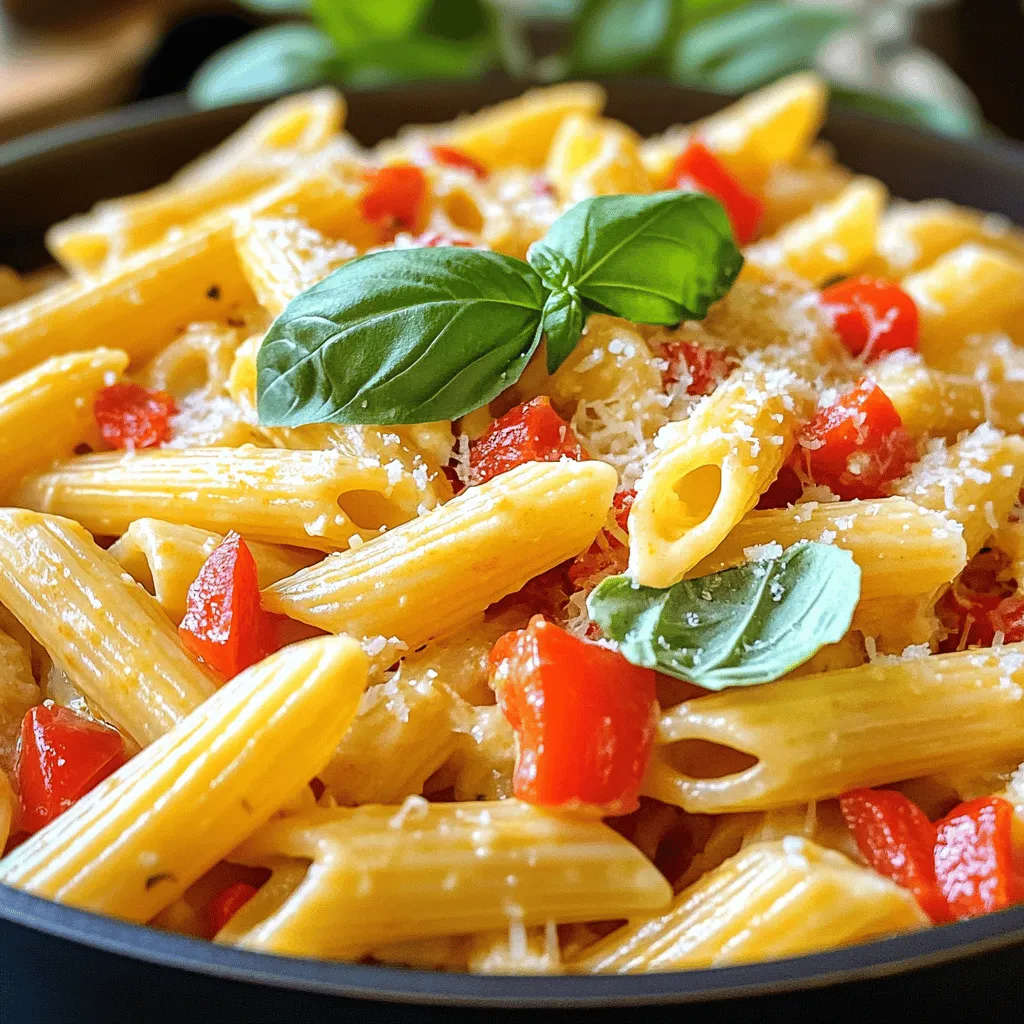
Dive into the creamy goodness of my Creamy Cottage Cheese Red Pepper Pasta Delight! This dish turns simple ingredients into a rich and satisfying meal. You’ll learn the best pasta …

If you’re craving a delicious meal with a kick, look no further! These Spicy Honey Garlic Chicken Thighs are both easy to make and packed with flavor. You’ll soon discover …