Skip to content
Roasted Flavors
  • Home
  • Appetizers
  • Desserts
  • Salads
  • Breakfast
  • Dinner
  • Privacy Policy
  • Contact
  • About

Chef Remy

One-Pot Creamy Garlic Shrimp Pasta Delight

October 6, 2025 by Chef Remy
- 8 oz linguine pasta - 1 lb shrimp, peeled and deveined - 4 cloves garlic, minced - 2 cups chicken broth (or vegetable broth for a lighter option) - 1 cup heavy cream - 1 cup cherry tomatoes, halved - 1 cup fresh spinach leaves - 2 tablespoons olive oil - 1 tablespoon butter - 1 tsp red pepper flakes (feel free to adjust for spice preference) - Salt and pepper to taste Gather these ingredients to make your One-Pot Creamy Garlic Shrimp Pasta. The linguine pasta serves as a perfect base, soaking up the rich sauce. Fresh shrimp adds a nice touch, while minced garlic fills the dish with flavor. The chicken broth brings moisture, and heavy cream gives it that creamy texture we love. Cherry tomatoes add a pop of color, and spinach brings freshness. For seasoning, olive oil and butter work together to create a delicious base. Red pepper flakes give a gentle kick, while salt and pepper enhance all the flavors. This mix of ingredients creates a dish that's not only tasty but also easy to prepare in one pot! - Start by heating 2 tablespoons of olive oil and 1 tablespoon of butter in a large pot over medium heat. - Wait until the butter melts and mixes with the oil. - Add 4 cloves of minced garlic and sauté them for about 1 minute until they smell great and turn lightly golden. - Next, add 1 pound of peeled and deveined shrimp to the pot. - Cook the shrimp for 2-3 minutes, stirring often. They should turn a lovely pink color. - Once they are cooked, remove the shrimp from the pot and set them aside on a plate. - In the same pot, pour in 2 cups of chicken broth. - Bring it to a gentle simmer, then lower the heat. - Add 8 ounces of linguine pasta, making sure it is fully covered by the broth. - Cook the pasta for 8-10 minutes, stirring it now and then, until it is al dente. - When the pasta is ready, turn the heat down to low. - Pour in 1 cup of heavy cream and stir gently. - Add 1 cup of halved cherry tomatoes, 1 cup of fresh spinach, and 1 teaspoon of red pepper flakes. - Season with salt and pepper to taste. - Return the shrimp to the pot and mix everything together gently for about 2 minutes. - This will heat the shrimp and wilt the spinach. - Finally, taste and adjust the seasoning if needed. Now, you have a creamy, delicious dish ready to serve! To ensure even cooking of shrimp, watch them closely. Cook shrimp until they turn pink. This usually takes about 2-3 minutes. If shrimp cook too long, they become tough. When cooking pasta, adjust the time based on the type you use. Linguine cooks in about 8-10 minutes. Check for al dente by tasting a noodle. It should be firm yet tender. This dish is best served hot. The creamy sauce coats the pasta beautifully. For a pop of color, garnish with fresh parsley. Sprinkle grated Parmesan cheese on top for extra flavor. To customize spice levels, add more red pepper flakes. You can also leave them out if you prefer mild dishes. Consider adding more vegetables for extra nutrition. Fresh bell peppers or zucchini work well. Just toss them in with the spinach for a colorful twist. {{image_4}} You can switch shrimp for chicken. Just cut the chicken into small pieces. Cook it until it’s golden brown and fully cooked. This change gives a different flavor but keeps it tasty. If you want a vegetarian option, try tofu or mushrooms. Tofu works well if you press it first to remove water. Cut it into cubes and sauté until golden. Mushrooms add a nice earthiness. You can use button, cremini, or shiitake mushrooms. You can use different pasta types too. Gluten-free pasta is great if you have allergies. Whole wheat pasta adds more fiber. Both options cook similarly, so follow the package instructions. Feel free to try other shapes of pasta. Penne, fusilli, or farfalle all work well. Each shape has a unique texture that can change how your dish feels. If you want something lighter, swap heavy cream for Greek yogurt. This makes your dish creamy without extra fat. Just stir it in at the end to keep the sauce thick. For a dairy-free option, use coconut milk. Coconut milk will add a rich taste and creamy texture. It also pairs well with the other flavors in the dish. Just remember to use the full-fat version for the best results. To store leftovers, place your pasta in an airtight container. This keeps it fresh. It is best to refrigerate within two hours of cooking. If you plan to eat it later, let it cool first. When reheating, use low heat on the stove. Add a splash of chicken broth or cream. This helps bring back the creamy texture. Stir often to prevent sticking. You can also microwave it but be careful not to overheat. Yes, you can freeze One-Pot Creamy Garlic Shrimp Pasta! To freeze, let it cool completely. Then, transfer it to a freezer-safe container. Make sure to leave some space for expansion. To thaw, place it in the refrigerator overnight. For faster results, you can use the microwave. Reheat on low power, stirring every few minutes. If it's too thick, add a bit of broth or cream. This keeps it creamy and tasty. Can I use frozen shrimp? Yes, you can use frozen shrimp. Just make sure to thaw them first. Place them in cold water for about 15 minutes. This helps them cook evenly in the dish. How do I know when the pasta is al dente? Pasta is al dente when it is firm yet cooked through. You can taste a piece after about 8 minutes. It should have a slight bite but not be hard. What can I use instead of chicken broth? You can use vegetable broth for a lighter taste. This works well if you want a vegetarian option. Water can also work, but it may lack flavor. Can I make this dish without heavy cream? Yes, you can swap heavy cream for Greek yogurt or coconut milk. Both options create a creamy texture but with different flavors. Is this recipe gluten-free? No, this recipe is not gluten-free as it uses linguine pasta. You can use gluten-free pasta instead. Look for options made from rice or quinoa. How to make it dairy-free? To make it dairy-free, replace heavy cream with coconut milk. You can also skip cheese and use nutritional yeast for a cheesy flavor. This recipe brings together simple ingredients to create a delicious shrimp linguine. You start by cooking shrimp with garlic and finish with a creamy sauce full of veggies. Remember to adjust flavors to your liking and explore different ingredient options. In the end, this dish is versatile, making it easy to adapt to your taste. Enjoy this satisfying meal and make it your own!

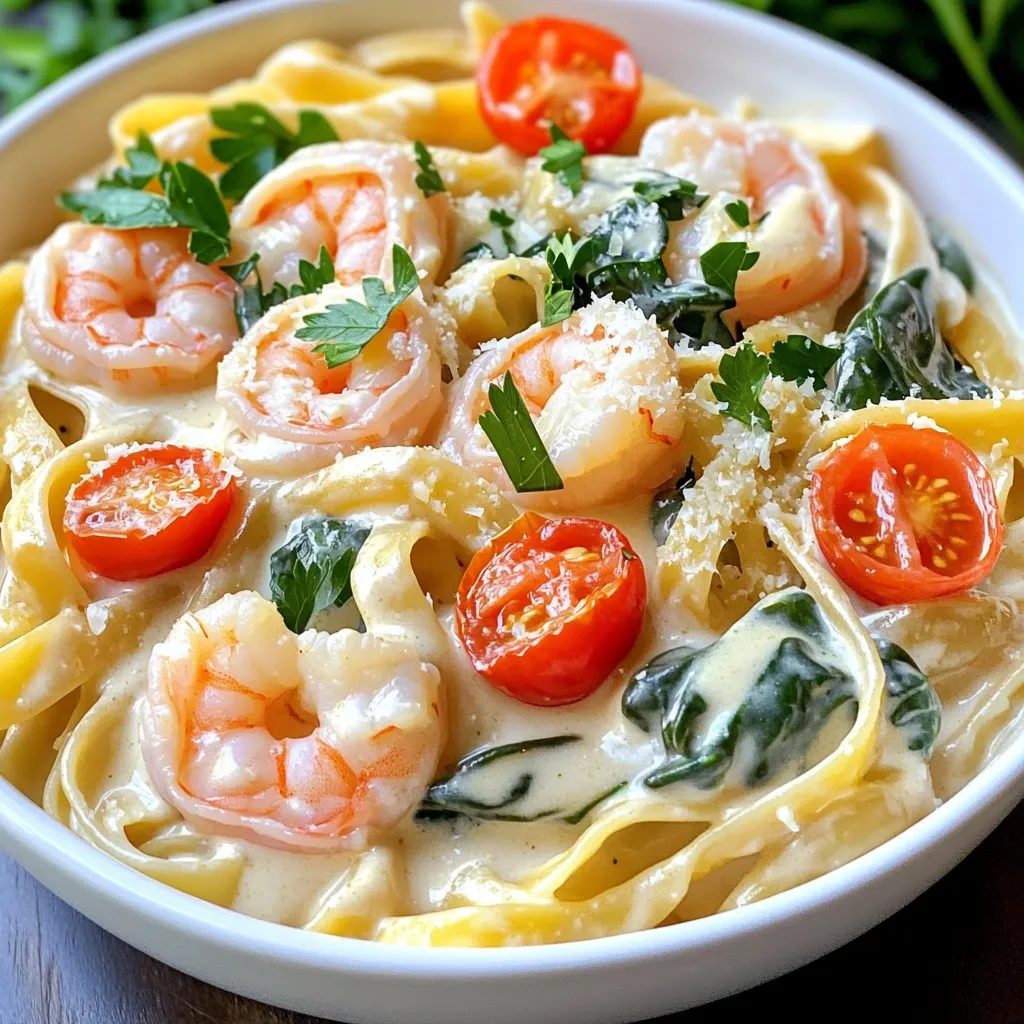
Looking for a quick and delicious dinner idea? Try my One-Pot Creamy Garlic Shrimp Pasta Delight! This simple recipe combines tender shrimp, flavorful garlic, and creamy sauce—all in one pot. …

Read more

Categories Dinner

Grilled Chicken Ranch Wraps Tasty and Simple Meal

November 14, 2025October 5, 2025 by Chef Remy
- Chicken and Marinade Ingredients - 2 boneless, skinless chicken breasts - 1 tablespoon olive oil - 1 teaspoon garlic powder - 1 teaspoon onion powder - 1 teaspoon smoked paprika - ½ teaspoon freshly cracked black pepper - ½ teaspoon sea salt - Tortilla and Filling Ingredients - 4 large tortillas (whole wheat or traditional) - 1 cup Romaine lettuce, chopped - 1 cup cherry tomatoes, halved - ½ cup shredded carrots - ½ cup sharp cheddar cheese, grated - Optional Toppings - ½ cup ranch dressing (or to taste) In this recipe, you need fresh chicken breasts for the best flavor. Marinading the chicken makes it juicy and tasty. I like the mix of spices in the marinade. Garlic powder and onion powder give a nice kick. Smoked paprika adds a warm, smoky flavor. For the wraps, I use big tortillas. Whole wheat is healthy, while traditional is soft and tasty. You can fill them with crunchy Romaine, sweet cherry tomatoes, and soft carrots. Grated cheddar cheese adds richness. Don’t forget the ranch dressing! It brings all the flavors together. You can adjust the amount based on your taste. If you want extra flavor, try adding fresh herbs or hot sauce as toppings. {{ingredient_image_2}} Marinating the Chicken Breasts Start with two boneless, skinless chicken breasts. In a bowl, mix one tablespoon of olive oil, one teaspoon of garlic powder, one teaspoon of onion powder, one teaspoon of smoked paprika, half a teaspoon of black pepper, and half a teaspoon of sea salt. Whisk until smooth. Brush this marinade on both sides of the chicken. This step adds great flavor. Grilling Instructions Preheat your grill to medium-high heat. Place the marinated chicken on the hot grill. Cook for about 6-7 minutes on each side. Use a meat thermometer to check if the chicken reaches 165°F (75°C). Once cooked, take it off the grill and let it rest for five minutes. This helps keep the chicken juicy. Slice the chicken into strips after resting. Resting and Slicing the Chicken Letting the chicken rest allows the juices to settle. After five minutes, cut it into strips. This makes it easier to layer in your wraps. Preparing the Tortillas Lay out your tortillas on a clean surface. You can use whole wheat or traditional tortillas. Make sure they are flat and ready for filling. Layering the Filling Ingredients In the center of each tortilla, add a layer of chopped Romaine lettuce. Then, place halved cherry tomatoes on top for sweetness. Sprinkle shredded carrots for a nice crunch. Add grated sharp cheddar cheese for richness. Drizzling with Ranch Dressing Now, add the sliced grilled chicken on top of the veggies. Drizzle ranch dressing over everything. You can adjust the amount based on your taste. Wrapping Instructions To wrap your tortillas, fold the sides inward. Then, roll from the bottom up tightly. This keeps all your tasty fillings inside. Grilling for Texture For extra texture, put the wraps back on the grill. Grill for 1-2 minutes. This step gives them nice grill marks and warms them through. Serving Suggestions Slice each wrap in half diagonally for easy handling. Serve on a large platter. You can add extra ranch dressing and fresh herbs for a colorful touch. Enjoy your delicious Grilled Chicken Ranch Wraps! - Alternative Protein Options You can swap chicken for turkey or tofu. Both options grill well and keep the flavor. - Vegan or Vegetarian Alternatives Use grilled portobello mushrooms or chickpeas for a hearty veggie wrap. They add texture and taste. - Cheese Variations Try mozzarella or pepper jack cheese. Each adds a unique twist to your wrap. - Achieving Perfect Grill Marks Preheat the grill. Place the chicken and do not move it for 6-7 minutes. Flip carefully for equal marks. - Cooking Temperatures and Times Cook chicken breasts until they reach 165°F (75°C). Use a meat thermometer for accuracy. - Ensuring Juicy Chicken Let the chicken rest for 5 minutes after grilling. This keeps the juices inside for a tender bite. - Pairing with Side Dishes Serve with a side salad or sweet potato fries. Both make a balanced meal. - Presentation Ideas for Gatherings Arrange wraps on a platter. Add fresh herbs and extra ranch dressing for a pop of color. - Enhancing Flavor with Additional Ingredients Consider adding sliced jalapeños or fresh herbs. They can brighten flavors and add a kick to your wrap. Pro Tips Marinate Longer for Flavor: Allow the chicken to marinate for at least 30 minutes, or even overnight, for a more intense flavor. Use a Meat Thermometer: Ensure the chicken is perfectly cooked by using a meat thermometer to check that it reaches an internal temperature of 165°F (75°C). Customize Your Fillings: Feel free to add other vegetables or toppings like avocado, bell peppers, or different cheeses to suit your taste. Grill for Texture: Grilling the assembled wraps for a couple of minutes adds a nice texture and makes them crispy on the outside. {{image_4}} You can switch up your grilled chicken ranch wraps for fun. Here are some tasty ideas: - Southwest Style with Avocado: Add creamy avocado slices and black beans. The flavors blend well with ranch dressing. This creates a smooth, rich taste that feels fresh. - Mediterranean Version with Hummus: Spread hummus on the tortilla instead of ranch. Add cucumbers and olives for extra crunch. This gives a zesty twist to the wrap. - Spicy Buffalo Chicken Variation: Use cooked buffalo chicken instead of grilled. The heat from the buffalo sauce pairs well with ranch. This is perfect for those who love a kick. The type of tortilla can change your wrap game. Here are some options: - Whole Wheat vs. Traditional Tortillas: Whole wheat tortillas add fiber and a nutty flavor. Traditional tortillas give a soft, classic taste. You can choose based on your health goals or mood. - Gluten-Free Options: If you need gluten-free, look for rice or corn tortillas. They work just as well and still taste great. This way, everyone can enjoy the wraps. - Creative Wrapping Ideas: Try using lettuce leaves instead of tortillas for a lighter option. This gives a fresh crunch and cuts down on carbs. You could also use pita bread for a fun twist. Experiment with these ideas to make your wraps exciting and tasty! - Best Practices for Refrigeration Store any leftover wraps in an airtight container. Keep them in the fridge. They stay fresh for up to three days. If you want the best taste, eat them sooner. - Freezing Instructions You can freeze the wraps if you have extra. Wrap each one tightly in plastic wrap. Then place them in a freezer bag. They can last up to three months in the freezer. - Reheating Tips To reheat, take the wrap out of the fridge or freezer. If frozen, let it thaw in the fridge overnight. Warm it up in the microwave for about 1-2 minutes. You can also grill it for a few minutes to get crispy edges again. - How Long Do They Last? Wrapped leftovers last three days in the fridge. If frozen, they can last for three months. - Signs of Spoilage Look for changes in color or smell. If the wrap smells off or the ingredients look bad, throw it away. - Best Practices for Maintaining Freshness Keep the wraps sealed tightly. Use fresh ingredients when making them. This helps maintain their flavor and texture for longer. Yes, you can use frozen chicken breasts. Just remember to thaw them first. Thawing helps the chicken cook evenly. You can use the fridge overnight or a quick method in cold water. You can check the chicken's internal temperature. It should reach 165°F (75°C). Use a meat thermometer for accuracy. The chicken should also look white and no longer pink inside. If you want a change, try Greek yogurt or a creamy avocado dressing. You can also use blue cheese dressing for a different flavor. Salsa or hummus are tasty alternatives too. Yes, you can make these wraps ahead. Prepare them a few hours in advance. Keep them in the fridge, wrapped tightly. Just be sure to eat them within a day for the best taste. A refreshing iced tea or lemonade works great. You can also serve them with a light beer or sparkling water. For a fun twist, try a fruity mocktail to enhance your meal experience. In this post, we explored how to make tasty Grilled Chicken Ranch Wraps. We covered the key ingredients, from the chicken and marinade to optional toppings. I shared steps for grilling the chicken and assembling the wraps. Helpful tips offered ingredient swaps and grilling advice for perfect results. Wrapping it up, these wraps are easy and delicious. You can make them your own with different flavors or toppings. Enjoy your cooking and impress others with your tasty creations!

Looking for a quick and tasty meal? Grilled Chicken Ranch Wraps are your answer! With simple steps, you can create a delicious dish that’s perfect for lunch or dinner. This …

Read more

Categories Dinner

No-Bake Chocolate Peanut Butter Cheesecake Cups Delight

October 5, 2025 by Chef Remy
- 1 cup chocolate cookie crumbs - 4 tablespoons unsalted butter, melted - 8 oz cream cheese, softened to room temperature - 1 cup creamy peanut butter - 1 cup powdered sugar - 1 teaspoon vanilla extract - 1 cup whipped cream (store-bought or homemade) - 1/2 cup semi-sweet chocolate chips, melted (for drizzling) - Crushed peanuts (for garnish) To make the No-Bake Chocolate Peanut Butter Cheesecake Cups, you need simple, tasty ingredients. Each one plays an important role in creating a rich and creamy treat. Start with chocolate cookie crumbs. They give the dessert a sweet, crunchy base. The unsalted butter helps bind them together, making a solid foundation. Next, the cream cheese is key for the cheesecake filling. It gives a smooth texture and creamy taste. Creamy peanut butter adds a nutty flavor that pairs perfectly with chocolate. Powdered sugar sweetens the filling. It blends well, creating a creamy, luscious mix. Vanilla extract adds depth, enhancing the sweetness. Whipped cream lightens the filling. When you fold it in, you get a fluffy texture that feels great in your mouth. For the finishing touch, melted semi-sweet chocolate drizzles over the cups. It gives a beautiful look and adds rich chocolate flavor. Finally, crushed peanuts on top provide a nice crunch. They add a delightful surprise with each bite. Gather all these ingredients, and you’re ready to create a delightful dessert! To make the cookie base, start by mixing the chocolate cookie crumbs with melted butter. Use a medium bowl for this task. Combine them well until the crumbs feel like wet sand. This ensures the crumbs stick together. Next, prepare your serving cups. Small glass cups work best. Place a layer of the cookie crumb mixture in each cup. Press it down firmly, using your fingers or the back of a spoon. This creates a solid base for the cheesecake filling. Now let's make the cheesecake filling. Take a separate bowl and beat the softened cream cheese. Use an electric mixer on medium speed until it looks smooth. There should be no lumps in the mixture. Then, add the creamy peanut butter. Keep mixing until it is fully blended and creamy. Gradually add powdered sugar and vanilla extract. Mix on low speed to combine everything well. Check for lumps again to ensure a perfect texture. Next, we need to fold in the whipped cream. This step is crucial for a light and fluffy filling. Use a spatula and gently incorporate the whipped cream into the peanut butter mixture. Be careful not to deflate the whipped cream. It should stay airy for the best texture. Once mixed, spoon the filling into the cups over the cookie base. Use a spatula to smooth the tops if you want a nice finish. After filling the cups, it’s time to chill them. Place the cups in the refrigerator. They need to chill for at least 2 hours. This helps the cheesecake set and improves the texture. Chilling also enhances the flavors, making each bite delightful. Once set, they’ll be ready for the final touch before serving. To get a smooth filling, start with room-temperature cream cheese. It mixes well and avoids lumps. Beat it until creamy before adding peanut butter. When you mix in the powdered sugar, do it slowly. This way, you keep the filling smooth. Folding whipped cream is key for lightness. Use a spatula and a gentle motion. Start at the center and move to the edges. This helps keep air in the cream. If you mix too hard, the filling will be dense. For serving, arrange the cheesecake cups on a nice tray. It adds a touch of elegance. You can use small glass cups to show off the layers. Garnishing makes a big difference. Drizzle melted chocolate over each cup for flair. Then, sprinkle crushed peanuts on top. This adds crunch and a pop of color. Your guests will be wowed by the look! {{image_4}} You can change the flavor of your No-Bake Chocolate Peanut Butter Cheesecake Cups easily. Try adding different extracts. Almond or coconut extracts can bring a new twist. Just a drop or two will do. It adds a fresh taste that surprises everyone. You can also mix in special treats. Swirl in some caramel for a sweet layer. Or toss in chocolate chunks for extra texture. These small changes can make a big difference. Your cheesecake cups will shine with a unique flair. If you need a gluten-free option, switch to gluten-free cookie crumbs. Many brands offer these now. They work just as well for the crust. This way, you can enjoy the same great taste without worry. For those who follow a vegan diet, there are options too. Use vegan cream cheese and a plant-based whipped cream. Also, substitute the butter with coconut oil. These swaps let everyone enjoy your delicious dessert without missing out. To keep your leftover cheesecake cups fresh, store them in the fridge. Use an airtight container to prevent them from drying out. If you don’t have one, cover each cup with plastic wrap. This keeps the flavors intact and avoids any odors from mixing. In the refrigerator, these cheesecake cups last about 3 to 5 days. If you want to keep them longer, consider freezing. They can stay in the freezer for up to 2 months. Just remember to let them thaw in the fridge before serving. This way, you keep the creamy texture and delicious taste. Yes, you can use crunchy peanut butter. It will change the texture. The cheesecake will have little bits of peanut in it. This adds a fun crunch. If you love texture, go for it! Just remember, it will taste a bit different. These cheesecake cups need to chill for at least 2 hours. This time helps the filling set. It makes the texture creamy and firm. If you can wait longer, chilling overnight is even better. The flavors will blend and taste richer. Yes, you can make these cups ahead of time. They store well in the fridge. Prepare them a day before your event. Just keep them covered tightly. This will keep them fresh and tasty. If you don't have chocolate cookie crumbs, you have options. You can use graham cracker crumbs for a different taste. Oreos are another great choice. They add a fun flavor. Just crush them well to make a good base. You’ve learned how to make delicious cheesecake cups that are easy and fun. We covered the right ingredients, from chocolate cookie crumbs to crushed peanuts. The step-by-step guide ensures a perfect texture and taste. Remember to chill the cheesecake for the best results. You can even try fun variations or make dietary changes. Store your leftovers properly to enjoy later. Trust me, these cheesecake cups will impress at any gathering. Enjoy your tasty creation!

Get ready for a sweet treat that’s simple and indulgent! My No-Bake Chocolate Peanut Butter Cheesecake Cups delight your taste buds with rich chocolate and creamy peanut butter. You’ll love …

Read more

Categories Desserts

Slow Cooker Loaded Baked Potato Soup Delight

October 5, 2025 by Chef Remy
- 4 large russet potatoes, freshly peeled and diced into 1-inch cubes - 1 medium onion, finely chopped - 3 cloves garlic, minced - 4 cups vegetable broth (low-sodium recommended) - 1 cup heavy cream - Turkey bacon - Shredded cheddar cheese - Sour cream - Green onions - Smoked paprika - Salt - Freshly ground black pepper The main ingredients form the base of your soup. The russet potatoes give creaminess and richness. They become soft and tender in the slow cooker. The onion and garlic add depth and flavor that make your soup savory. Vegetable broth serves as a tasty liquid base. For a creamy finish, I use heavy cream, which helps create a luscious texture. Optional add-ins let you customize. Turkey bacon brings a nice crunch and smoky flavor. Shredded cheddar cheese adds even more creaminess. Sour cream gives tanginess and richness. Green onions brighten your dish with a fresh bite. Seasoning is key to a great soup. Smoked paprika adds warmth and subtle spice. Salt and freshly ground black pepper enhance all the flavors. Adjust these to your taste for the best results. With these ingredients, you can create a comforting and flavorful loaded baked potato soup. Dicing potatoes Start by peeling 4 large russet potatoes. Cut each potato into 1-inch cubes. This size helps them cook evenly in the slow cooker. Chopping onion Next, take 1 medium onion and chop it finely. The smaller the pieces, the better the flavor blends in the soup. Mincing garlic Now, grab 3 cloves of garlic. Mince them well. Garlic adds great depth to your soup. Combining ingredients in the slow cooker In your slow cooker, mix the diced potatoes, chopped onion, minced garlic, and 4 cups of vegetable broth. Stir everything well to ensure even mixing. Setting cooking times for low and high Secure the lid on the slow cooker. If you have time, set it to cook on low for 7-8 hours. If you’re in a hurry, you can set it on high for 4-5 hours. You want the potatoes to be fork-tender. Pureeing the soup Once the cooking time is up, carefully remove the lid. Use a potato masher or an immersion blender to puree the soup. You can leave some chunks for extra texture if you like. Mixing in cream and cheese Gently stir in 1 cup of heavy cream, 1 cup of shredded cheddar cheese, and 1/2 cup of sour cream. Add 1 teaspoon of smoked paprika, salt, and pepper to taste. Mix until the cheese melts and the soup is creamy. Adding optional toppings If you want, mix in 6 slices of crumbled turkey bacon for added flavor. Do a final taste test and adjust the seasonings if needed. Let the soup cook on low for another 30 minutes to let the flavors blend. To get the right texture for your soup, you can use a potato masher or an immersion blender. A potato masher gives you a chunky feel, while an immersion blender makes it smooth. You can mix both methods too. If you want some chunks, mash just half of the soup. This gives a nice balance of creaminess and bites. Don’t be shy to experiment with seasonings! Adding garlic powder or cayenne pepper can boost the flavor. Try adding fresh herbs like thyme or chives for a fresh taste. For garnishing, sprinkle some extra cheese or add crispy bacon on top. Green onions add a nice crunch too. Each garnish creates a new taste experience. Prep your ingredients the night before. Chop your potatoes and onions, and store them in the fridge. This saves time on cooking day. If you’re short on time, cook on high for 4-5 hours. This way, you still enjoy a warm bowl of soup without waiting all day. {{image_4}} You can make this soup vegetarian by using different veggies. Try carrots, celery, or bell peppers. Each adds flavor and color. You can also swap the broth. Use vegetable broth instead of chicken broth. This keeps the soup rich and tasty without meat. If you want a dairy-free soup, use coconut milk. It brings a creamy texture without dairy. Nutritional yeast is another great choice. It adds a cheesy flavor without using cheese. This keeps the soup delicious for everyone. For a kick, add jalapeños or a splash of hot sauce. This gives the soup a nice heat. If you like meat, try spicy sausage. Cook it first, then add it to the pot. This makes the soup hearty and full of flavor. To keep your soup fresh, let it cool first. Place it in an airtight container. Glass or plastic containers work great for this. Make sure to store it in the fridge. You can keep it for up to three days. For quick reheating, use a microwave. Pour your soup into a microwave-safe bowl. Heat it for one to two minutes. Stir halfway to heat evenly. If you prefer the slow cooker, pour the soup back in. Heat it on low for about 30 minutes. Stir often to avoid sticking. To freeze your soup, cool it completely first. Use a freezer-safe container or bag. Leave some space at the top to allow for expansion. When you want to eat it, thaw it overnight in the fridge. After freezing, the soup may change a bit. It might be less creamy, but still tasty! To thicken your soup, use a potato masher. Smash some of the potatoes in the pot. You can also add more heavy cream or sour cream for extra richness. If you prefer a very thick soup, mix in a cornstarch slurry. Just combine cornstarch with cold water and stir it in. Let it cook for a few minutes. This helps the soup thicken nicely. Yes, you can make this soup ahead of time. Prepare the soup as usual and let it cool after cooking. Store it in the fridge for up to three days. To reheat, warm it on low heat in the slow cooker or on the stove. Just stir and heat until hot. This soup tastes even better the next day! This soup pairs well with warm, crusty bread or buttery rolls. You can also serve it with a fresh salad for balance. Try adding a side of grilled cheese sandwiches. They create a fun and cozy meal. For something light, consider sliced veggies or a fruit salad. Yes, you can use other potatoes if you wish. Yukon gold or red potatoes work well too. They have a creamy texture, similar to russet potatoes. Just remember, different potatoes may alter the soup's taste a bit. Feel free to experiment and find what you like best. Yes, you can make this soup on the stove. First, cook the potatoes, onion, and garlic in a large pot with broth. Bring it to a boil, then reduce the heat. Simmer until the potatoes are tender. After that, mash or blend the soup as desired. Stir in the cream, cheese, and seasonings last. Enjoy your quicker version! This guide covered making a delicious loaded baked potato soup. We discussed key ingredients, step-by-step cooking, and tips for a perfect finish. You can customize your soup with add-ins, make it vegetarian, or spice it up. Remember to store leftovers properly and reheat gently for the best taste. With these easy steps, you can make a warming soup that your family will love. Enjoy your cooking and have fun experimenting with flavors!

Welcome to Slow Cooker Loaded Baked Potato Soup Delight! If you love creamy, hearty soups, this recipe is for you. Imagine a warm bowl of loaded baked potato soup, made …

Read more

Categories Dinner

Maple Pecan Pumpkin Streusel Muffins Irresistible Treat

October 5, 2025 by Chef Remy
To make these Maple Pecan Pumpkin Streusel Muffins, you need the right ingredients. Here’s a complete list: - Canned pumpkin puree: 1 cup - Brown sugar: 1/2 cup packed - Pure maple syrup: 1/4 cup - Vegetable oil: 1/3 cup - Eggs: 2 large, at room temperature - All-purpose flour: 1 cup - Whole wheat flour: 1/2 cup - Baking powder: 1 teaspoon - Baking soda: 1 teaspoon - Ground cinnamon: 1 teaspoon - Ground nutmeg: 1/2 teaspoon - Ground ginger: 1/4 teaspoon - Salt: 1/4 teaspoon - Chopped pecans: 1/2 cup - Rolled oats: 1/3 cup - Granulated sugar: 1/4 cup (for streusel topping) - Ground cinnamon: 1/2 teaspoon (for streusel topping) These ingredients combine to create a muffin that bursts with flavor. The pumpkin puree gives moisture and a lovely orange hue. Brown sugar adds a deep sweetness, while maple syrup brings a unique taste. The mix of flours provides a hearty base. Pecans add crunch and a rich, nutty flavor. The spices like cinnamon and nutmeg warm your kitchen with their sweet aroma. The streusel topping gives a delightful crunch that contrasts the soft muffin. Gather these ingredients before you start cooking. This way, the process will be smooth and fun. - Preheat oven to 350°F (175°C). - Line muffin tin with paper liners or grease with non-stick spray. - In a large bowl, whisk together pumpkin puree, brown sugar, maple syrup, vegetable oil, and eggs until smooth. - Sift all-purpose and whole wheat flour with baking powder, baking soda, cinnamon, nutmeg, ginger, and salt. - Gradually mix the dry ingredients into the wet mixture until just combined. - Fold in the chopped pecans gently to keep some texture. - In a small bowl, combine rolled oats, granulated sugar, and ground cinnamon until well mixed. - Evenly divide the batter into muffin cups, filling each about two-thirds full. - Generously sprinkle the streusel topping over the batter. - Bake for 20-25 minutes until a toothpick comes out clean. These steps will guide you to perfect Maple Pecan Pumpkin Streusel Muffins. Enjoy the rich flavors and cozy aromas that fill your kitchen! To keep your muffins moist, use room temperature eggs. Cold eggs can make the batter too thick. Also, mix just until combined. Overmixing can dry out the muffins. You want a slightly lumpy batter for the best texture. Get creative with the streusel topping. You can add more spices like nutmeg or cloves for extra warmth. Different nuts, like walnuts or almonds, can also change the flavor. Try adding a pinch of sea salt to balance the sweetness. These muffins shine when served warm. Drizzle some maple syrup on top for a sweet touch. You can also pair them with coffee or tea for a cozy snack. If you're feeling fancy, serve them on a pretty platter with a dusting of powdered sugar. Enjoy these muffins fresh or warmed for that perfect treat! {{image_4}} If you or someone you know has nut allergies, you can easily make these muffins nut-free. Simply substitute the pecans with sunflower seeds. Sunflower seeds add a nice crunch without the nutty flavor. If you prefer, you can also leave the nuts out completely. The muffins will still be tasty! For those who need a gluten-free option, switch to a gluten-free flour blend. Many brands offer a blend that works well in baking. This keeps the muffins light and fluffy. Make sure to check the blend’s instructions, as some may need extra binding agents like xanthan gum. Want to add a twist to your muffins? You can add chocolate chips or dried cranberries. Chocolate chips bring a sweet touch that pairs well with pumpkin. Dried cranberries add a tartness that balances the sweetness. Feel free to mix and match! These simple changes can make your muffins even more delightful. Store your muffins at room temperature. Use an airtight container. They will stay fresh for up to three days. This keeps them soft and tasty. For long-term storage, freeze the muffins. Place them in a zip-top bag. They can last in the freezer for up to three months. This method is great for saving leftovers. When you want to enjoy a muffin, you can reheat it. Use the microwave for 10 to 15 seconds. If you prefer, use the oven. Warm them up until they are nice and cozy. Enjoy the rich flavors again! Yes, but ensure it's pureed and properly cooked. Fresh pumpkin adds a bright taste. Just roast it until soft, then blend until smooth. This step makes your muffins moist and flavorful. Insert a toothpick; it should come out clean when fully baked. If the toothpick has wet batter, bake a few more minutes. This simple test helps you avoid undercooked muffins. Honey or agave syrup can be used as alternatives. Both add sweetness and a unique flavor. Just keep in mind that honey will make the muffins a bit denser. Make sure to accurately measure ingredients and avoid overmixing. Use a light hand when mixing. This keeps air in the batter, making your muffins soft and airy. In this blog post, I shared a simple recipe for delicious pumpkin muffins. You learned about the essential ingredients and steps to prepare them. I also provided tips for making your muffins moist and variations for different tastes. Remember to store leftovers properly to enjoy them later. With these insights, you can bake tasty treats that everyone will love. Now, gather your ingredients and start baking for a warm, cozy snack!

If you crave a warm and cozy treat, you’ll love these Maple Pecan Pumpkin Streusel Muffins! This easy recipe combines rich pumpkin puree and sweet maple syrup, topped with crunchy …

Read more

Categories Desserts

Air Fryer Honey Sriracha Salmon Bowls Flavorful Dish

October 5, 2025 by Chef Remy
- 2 salmon fillets - 2 tablespoons honey - 2 tablespoons Sriracha sauce - 1 tablespoon soy sauce - 1 teaspoon garlic powder - 1 teaspoon ginger powder - Salt and freshly ground pepper to taste The salmon fillets are the stars of the dish. They provide a rich, buttery flavor that pairs perfectly with the sweet and spicy marinade. Honey adds a touch of sweetness, while Sriracha brings heat. Soy sauce adds depth, and garlic and ginger enhance the taste. - 2 cups cooked quinoa or brown rice - 1 cup fresh broccoli florets, steamed until bright green - 1 ripe avocado, sliced into wedges - 2 green onions, thinly sliced For the base, you can choose quinoa or brown rice. Both add a nutty flavor and texture. The steamed broccoli adds color and crunch. Avocado slices bring creaminess, and green onions add a fresh bite. - Toasted sesame seeds - Lime wedges - Crushed red pepper flakes Garnishes make your dish pop. Toasted sesame seeds add a nice crunch. Lime wedges give a zesty kick. Crushed red pepper flakes can spice things up for those who like a bit more heat. - Combine 2 tablespoons of honey, 2 tablespoons of Sriracha sauce, and 1 tablespoon of soy sauce in a bowl. - Add 1 teaspoon of garlic powder, 1 teaspoon of ginger powder, and salt and pepper to taste. - Whisk the mix until it is smooth and well blended. - Take 2 salmon fillets and place them in a shallow dish. - Pour the marinade over the fillets. Make sure you coat them well on all sides. - Cover the dish and let the salmon sit for 15-20 minutes to soak up all the flavors. - While the salmon marinates, preheat your air fryer to 400°F (200°C). This takes about 5 minutes. - After marinating, gently place the salmon fillets in the air fryer basket, skin side down. - Cook for 8-10 minutes. Check if the salmon flakes easily with a fork to know it’s done. - Divide 2 cups of cooked quinoa or brown rice into two bowls as a base. - Neatly arrange 1 cup of steamed broccoli and sliced avocado around the base. - Place the cooked salmon on top and drizzle any remaining marinade over it. - For extra flavor, sprinkle sliced green onions and toasted sesame seeds on top. To get the best salmon, you need to check for doneness. Look for the salmon to flake easily. This means it is cooked right. You can also check the color. Cooked salmon turns from bright pink to a pale hue. If your fillets are thick, adjust your cooking time. Thicker pieces need more time. Start with 8 minutes, then check. If it’s not flaking, give it another minute or two. Want to add more flavor? Consider spices like paprika or cayenne. They can boost the heat and depth. You can also add fresh herbs like cilantro or parsley for freshness. Balancing sweetness and spiciness is key. If your dish is too sweet, add a bit more Sriracha. If it’s too spicy, a drizzle of honey can help. Taste as you go to find your perfect mix. For a beautiful bowl, use color! Arrange the green broccoli beside the golden quinoa. The bright green avocado adds a nice touch too. Don’t forget to serve with lime wedges. A squeeze of lime adds a zesty kick. You can also sprinkle crushed red pepper flakes on top. This adds both flavor and charm to your dish. {{image_4}} You can switch out salmon for chicken or tofu. When using chicken, cut it into smaller pieces. This helps it cook evenly. For tofu, press it to remove extra water. Then, cut it into cubes. Adjust the marinade for these proteins. For chicken, you might want to add a bit more soy sauce. For tofu, keep the marinade the same. Both will soak up the flavors well. While quinoa is great, brown rice works too. Both provide a nice base for your bowl. You can also try other grains like farro or barley. These add different textures and flavors. If you want greens, use spinach or kale instead of grains. These add a fresh twist and are packed with nutrients. Get creative with sauces! Try teriyaki or garlic butter instead of honey sriracha. Each sauce brings its own flavor. Adding seasonal veggies can change the dish. Try bell peppers in summer or carrots in fall. Mix and match to keep your bowls exciting! To store your Air Fryer Honey Sriracha Salmon Bowls, follow these steps: - Refrigeration: Place leftovers in an airtight container. This keeps out air and moisture. Use glass or plastic containers with tight lids for the best results. - Time Frame: Consume the leftovers within 2-3 days. This ensures freshness and taste. If you wait longer, the salmon might lose its flavor and texture. When it’s time to enjoy your leftovers, here’s how to reheat them: - Best Methods: Use the air fryer or a stovetop pan. These methods help keep the salmon crispy. Avoid the microwave if you can, as it may make the fish soggy. - Keeping Flavorful and Moist: Add a splash of water or broth when reheating. This helps maintain moisture. You can also cover the dish with a lid to trap steam. This way, you keep the salmon moist and delicious. Yes, you can make the marinade early. Just mix honey, Sriracha, soy sauce, garlic powder, and ginger powder in a bowl. Store it in the fridge for up to three days. This saves time and enhances flavors. When ready, just pour it over the salmon. Yes, this recipe can be gluten-free. Use tamari instead of regular soy sauce. Tamari is a gluten-free option that tastes great. Always check labels to ensure other ingredients are gluten-free too. Yes, you can use frozen salmon. Just make sure to thaw it first. Place the fillets in the fridge overnight or run them under cool water. After thawing, follow the recipe as usual. The cook time might be slightly longer, so check for doneness. Many sides work well with these salmon bowls. Here are some tasty options: - Steamed green beans - Roasted sweet potatoes - Cucumber salad - Mixed greens with a light vinaigrette These sides add variety and balance to your meal. Enjoy your cooking! This post covered how to make a tasty salmon bowl. We discussed key ingredients like salmon, honey, and quinoa. You learned step-by-step instructions for marinating and cooking the salmon. I shared tips for ensuring perfect doneness and ideas for adding flavor. In the end, this dish is easy to make and delicious. Try the variations and store leftovers well. Enjoy your cooking adventure and make it your own!

Looking for a quick and tasty dinner? You’ll love these Air Fryer Honey Sriracha Salmon Bowls! Packed with flavor, they blend sweet honey and spicy Sriracha for a winning marinade. …

Read more

Categories Dinner

Sheet Pan Lemon Garlic Shrimp and Broccoli Delight

October 4, 2025 by Chef Remy
- 1 pound large shrimp, peeled and deveined - 4 cups broccoli florets - 4 tablespoons extra virgin olive oil - 4 cloves garlic, finely minced - 1 lemon, zested and juiced - 1 teaspoon smoked paprika - 1 teaspoon red pepper flakes (optional) - Salt and freshly cracked black pepper - Fresh parsley, finely chopped In this recipe, the main ingredients shine brightly. The shrimp provides a sweet and light base. Broccoli adds a nice crunch and color. The olive oil coats everything in rich flavor. It helps the dish roast well in the oven. For flavor, garlic is a must. It brings a strong, warm taste. The lemon zest and juice add brightness. Smoked paprika gives a hint of smokiness that makes each bite interesting. If you like heat, you can add red pepper flakes. Just a little can make the dish come alive. Seasoning with salt and black pepper is key for balance. Lastly, I love to sprinkle fresh parsley on top. It adds color and a fresh taste. This dish is not just tasty; it's also a feast for the eyes! - Preheat oven to 425°F (220°C). - Combine shrimp and broccoli in a mixing bowl. Start by warming your oven. This heat helps the shrimp and broccoli cook just right. In a big bowl, toss the shrimp with the broccoli florets. Make sure they mix well. This step sets the stage for the tasty flavors to come. - Add olive oil, garlic, lemon zest, lemon juice, smoked paprika. - Season with salt and pepper, and toss thoroughly. Next, pour in the olive oil. Then, add the minced garlic, lemon zest, and lemon juice. Sprinkle in the smoked paprika. Season with salt and freshly cracked black pepper. This mix brings out bold flavors. Use your hands or a spatula to toss everything together. You want each piece to be coated in this zesty mixture. - Prepare sheet pan with parchment paper. - Spread mixture evenly and bake for 10-12 minutes. Now, line a sheet pan with parchment paper. This keeps your food from sticking and makes cleanup easy. Spread the shrimp and broccoli evenly on the pan. This helps them roast nicely. Place the pan in your preheated oven. Bake for about 10-12 minutes. The shrimp will turn pink and opaque, while the broccoli stays crisp. Keep an eye on it; you want them cooked, but not overdone. To cook shrimp perfectly, look for two key signs. First, it should turn a lovely pink color. Second, it should be opaque. When you see these signs, your shrimp is done! For the broccoli, keep it crisp by not overcooking. Bake it for about 10-12 minutes. This way, it stays bright green and crunchy. If you feel unsure, check it a minute early. You want it tender but not mushy. When it comes to serving, presentation matters. Serve the shrimp and broccoli over a fluffy bed of rice or quinoa. A lemon wedge on the side adds a nice touch. It gives a fresh look and a burst of flavor. You can also use a large, flat plate to show off the colors. You can make this dish even more exciting! Add a pinch of cayenne for spice. Fresh herbs like basil or cilantro can also boost the flavor. To balance the taste, consider a drizzle of honey or a splash of soy sauce. These additions can create a new twist on this classic dish. Experiment and enjoy! {{image_4}} You can swap shrimp for other proteins. Chicken works great and adds a hearty bite. Use boneless chicken breast, cut into bite-sized pieces. For a vegetarian option, try tofu. Firm tofu holds up well when roasted. Cooking times vary: - Chicken takes about 15-20 minutes to cook through. - Tofu needs about 12-15 minutes to get golden and crisp. Mix it up with different vegetables! Bell peppers add sweetness, while asparagus gives a nice crunch. Zucchini is another great choice; it cooks quickly and adds moisture. Adjust cooking times: - Bell peppers and zucchini can roast in about 10-12 minutes. - Asparagus may need a little more time, around 12-15 minutes. Get creative with your seasonings! Try adding cumin or curry powder for a unique twist. Fresh herbs like thyme or rosemary can also brighten the dish. Citrus variations: - Lime adds a tangy kick if you want a twist. - Orange zest can bring a sweet note to balance flavors. Feel free to explore these variations to find your favorite version of this dish! To keep your shrimp and broccoli fresh, cool the dish quickly. Place leftovers in a shallow container. This helps them cool faster. Use an airtight container to prevent odors. Store in the fridge for up to three days. If you want to keep it longer, freeze it. Transfer leftovers to a freezer-safe bag. Remove as much air as possible. This will prevent freezer burn. When reheating, use the oven for the best texture. Preheat your oven to 350°F (175°C). Place the shrimp and broccoli on a baking sheet. Heat for about 10 minutes, or until warm. If you're in a hurry, you can use the microwave. Heat in 30-second intervals on medium power. Check often to avoid overcooking. The shrimp should remain tender, and the broccoli should stay crisp. Your shrimp and broccoli should stay fresh for three days in the fridge. After that, check for any changes. Signs of spoilage include a sour smell or slimy texture. If you see any signs, it’s best to toss it out. If frozen, it can last for up to three months. However, for the best taste, eat it within one month. Always trust your senses. If it looks or smells off, don’t eat it. Yes, you can prepare this dish ahead of time. - To save time, chop the broccoli and mince the garlic a day before. - Store the shrimp in the fridge, covered, until you are ready to cook. - Combine the shrimp with the broccoli and seasoning just before baking. This way, you keep the shrimp fresh and flavorful. Absolutely, you can spice it up! - Add more red pepper flakes for extra heat. - Try a dash of hot sauce or a pinch of cayenne pepper. - For a kick, use chili garlic sauce in place of garlic. Adjust the spice to fit your taste. You have many options for shrimp substitutes. - Chicken breast works well; cut it into small pieces. - Firm tofu gives a nice texture; press it first to remove water. - Use scallops or fish like salmon for a different flavor. Adjust cooking time as needed, since proteins cook differently. This dish is easy and rewarding. You learned about key ingredients like shrimp and broccoli, and how to mix and bake them perfectly. Remember the tips for cooking times and texture. You can even switch proteins or veggies for variety. Store leftovers right to enjoy later. Testing flavors can lead to new favorites. Try these ideas, and you’ll impress anyone at the table. Cooking simple meals like this can be fun and fulfilling. Enjoy your cooking journey!

Looking for a quick and tasty meal? Try my Sheet Pan Lemon Garlic Shrimp and Broccoli Delight! This dish combines sweet shrimp and crisp broccoli, all roasted to perfection. With …

Read more

Categories Dinner

No-Bake Pumpkin Pie Cheesecake Bars Delightful Treat

October 4, 2025 by Chef Remy
- 1 ½ cups graham cracker crumbs - ½ cup unsalted butter, melted - 2 tablespoons brown sugar - 2 (8 oz) packages cream cheese, softened - ½ cup granulated sugar - 1 cup pumpkin puree (not pumpkin pie filling) - 1 teaspoon pure vanilla extract - 1 teaspoon ground cinnamon - ½ teaspoon ground nutmeg - ½ teaspoon ground ginger - 1 cup whipped cream (store-bought or homemade) - Whipped cream and chopped pecans for topping (optional) The graham cracker crumbs form the base. They give the bars a sweet and crunchy crust. The melted butter binds the crumbs together, making a firm layer. Brown sugar adds extra sweetness and depth to the crust. Cream cheese creates the creamy filling. It gives a rich texture and flavor. Granulated sugar sweetens the filling, balancing the spices. Pumpkin puree offers a smooth base and a lovely orange color. Vanilla extract enhances the overall flavor. Ground cinnamon, nutmeg, and ginger add warmth and spice. Whipped cream lightens the filling, giving it a fluffy texture. Finally, whipped cream and pecans as toppings add extra flavor and visual appeal. When choosing graham crackers, look for ones with few additives. This keeps the crust simple and tasty. Use fresh, unsalted butter for the best flavor. For cream cheese, pick a full-fat option. This gives the bars a rich taste and smooth texture. Always use 100% pumpkin puree, not pie filling, for better control of flavor. Check spices for freshness as they can lose flavor over time. Lastly, if you make whipped cream at home, use cold heavy cream for the best results. To start, gather your graham cracker crumbs, melted butter, and brown sugar. In a medium bowl, mix these ingredients well. You want a crumbly texture that sticks together nicely. Once mixed, firmly press this mixture into the bottom of an 8x8 inch baking dish. Use the back of a glass or measuring cup to pack it down evenly. This will create a strong base for your cheesecake bars. Next, you will make the creamy pumpkin filling. In a large bowl, beat the softened cream cheese and granulated sugar with an electric mixer. Mix it on medium speed until it turns smooth and creamy. Then, add the pumpkin puree, vanilla extract, ground cinnamon, nutmeg, and ginger. Keep mixing until everything is well combined. After that, gently fold in the whipped cream using a spatula. This step adds lightness to the filling, so be careful not to deflate it too much. Now it’s time to put everything together. Pour the pumpkin cheesecake filling over the crust. Use a spatula to spread it evenly and smooth out the top. Once it's all nice and flat, cover the dish with plastic wrap. Refrigerate it for at least 4 hours or, for the best results, overnight. This helps the bars set properly. When you're ready to serve, slice the chilled bars into squares or rectangles. You can add whipped cream and chopped pecans on top for extra flair, if you like! To get the right texture, use softened cream cheese. Cold cream cheese will not mix well. Beat it until smooth before adding other ingredients. When you fold in the whipped cream, do it gently. This keeps the filling light and fluffy. If you mix too hard, the filling may become dense. Aim for a creamy, smooth texture that holds its shape. Pumpkin flavor shines through when you use quality pumpkin puree. Avoid pumpkin pie filling, as it has added spices and sugar. Add spices like cinnamon, nutmeg, and ginger in balanced amounts. Taste the filling before pouring it into the crust. Adjust sweetness with more sugar if needed. A touch of vanilla extract enhances the overall flavor, making it more delicious. For a stunning look, cut the bars neatly into squares. Arrange them on a nice platter to impress your guests. Top each bar with a dollop of whipped cream. A sprinkle of cinnamon adds a festive touch. Drizzle caramel sauce over the bars for added sweetness. You can also add chopped pecans for crunch. This makes each bite a delightful experience! {{image_4}} You can easily change the flavor of your cheesecake bars. Try adding extra spices like allspice or cloves. This gives a warm kick. You can also mix in pumpkin pie spice if you want a stronger pumpkin flavor. For a twist, use maple syrup instead of granulated sugar. This adds depth to the taste. The crust does not have to be just graham crackers. You can use crushed ginger snaps for a spicy touch. Oreos give a rich chocolate flavor. If you want a gluten-free option, try almond flour mixed with melted butter. It gives a nutty flavor and a nice crunch. Get creative with your toppings! You can add chocolate chips for a sweet surprise. Dried cranberries or raisins add a chewy texture. For a festive look, use crushed candy corn or sprinkles. Don't forget to top with whipped cream and chopped pecans. A drizzle of caramel sauce makes it even more special. Each bite can be a new experience! To keep your no-bake pumpkin pie cheesecake bars fresh, wrap them tightly. Use plastic wrap or aluminum foil. You can also store them in an airtight container. This helps keep the bars moist and tasty. Make sure to place them in the fridge. They will stay fresh for several days this way. If you want to keep the bars longer, freezing is a great option. First, let the bars chill completely. Then cut them into squares. Wrap each square in plastic wrap. After that, place the wrapped squares in a freezer-safe bag or container. They can last in the freezer for up to three months. When you are ready to enjoy them, let them thaw in the fridge overnight. These cheesecake bars can last in the fridge for about five days. After that, they may start to lose flavor and texture. Watch for any signs of spoilage. If you see any mold or if they smell off, it’s best to throw them away. Always trust your senses. If something seems wrong, don’t eat it! Yes, you can use store-bought pumpkin puree. It saves time and works well. Make sure to choose pure pumpkin puree, not pumpkin pie filling. The filling has added sugar and spices, which can change the taste and texture of your bars. The bars should chill for at least 4 hours. For the best results, chill them overnight. This helps the bars set properly and improves the flavor. You want them to be firm and easy to cut into squares. Yes, you can make several substitutions. If you need a gluten-free option, use gluten-free graham crackers. For a dairy-free version, try vegan cream cheese. You can also use coconut whipped cream instead of regular whipped cream. Always check labels to ensure they meet your dietary needs. This blog post covered everything you need for pumpkin cheesecake bars. We looked at the key ingredients and their roles. I shared steps for a great crust and filling. You learned tips for perfect consistency and flavor. Plus, I offered fun variations and storage advice. Remember, these bars can be adapted to suit your taste. Enjoy making them and impressing your friends with delicious results!

Get ready to enjoy a sweet treat that requires no baking! These No-Bake Pumpkin Pie Cheesecake Bars combine creamy cheesecake with the warm flavors of pumpkin pie. Perfect for fall …

Read more

Categories Desserts

Slow Cooker Beef and Potato Stew Easy Comfort Meal

October 4, 2025 by Chef Remy
- 2 pounds beef chuck, cut into 1-inch cubes - 4 medium potatoes, peeled and diced - 3 large carrots, peeled and sliced - 1 large onion, chopped - 4 cloves garlic, minced - 4 cups beef broth (preferably low sodium) - 2 tablespoons tomato paste - 1 tablespoon Worcestershire sauce - 1 teaspoon dried thyme - 1 teaspoon dried rosemary - Salt and freshly ground black pepper to taste - 2 tablespoons olive oil - 2 tablespoons fresh parsley, chopped (for garnish) To make this stew, you need simple and fresh ingredients. First, I use beef chuck. It has rich flavor and becomes very tender when cooked slowly. Next, I add potatoes and carrots for heartiness. These vegetables soak up the beef's juices, making the stew extra tasty. I also include onion and garlic. These two add depth to the dish. I prefer low-sodium beef broth to control salt levels. Tomato paste and Worcestershire sauce enhance the stew's flavor. Thyme and rosemary bring warmth and earthiness, perfect for comfort food. Lastly, I finish with fresh parsley. It adds a pop of color and freshness to each bowl. When you mix all these ingredients together, you create a cozy meal that warms the soul. - Season the beef cubes with salt and pepper. Make sure to coat all sides. - Sear the beef in olive oil for browning. Heat oil in a skillet over medium-high heat. Add beef cubes in batches. Cook for 3-4 minutes per side until brown. This step adds great flavor. - Add vegetables: potatoes, carrots, onion, and garlic. Place them evenly over the beef in the slow cooker. - Combine liquids and flavorings in a mixing bowl. Mix beef broth, tomato paste, Worcestershire sauce, dried thyme, and dried rosemary. Whisk until blended. Pour this mixture over the beef and veggies. - Set the slow cooker to low heat for 8 hours or high heat for 4 hours. The longer cooking time makes the beef really tender. - Check for doneness before serving. The beef should be fork-tender, and the vegetables should be soft. Adjust seasoning with more salt and pepper if needed. To make your stew taste great, adjust the seasoning to your liking. Always taste before serving. You might want to add more salt or pepper. This helps bring out all the rich flavors. Browning the beef is key. Searing the meat before slow cooking adds a deep, savory taste. It creates a nice crust that seals in juices. Use medium-high heat and sear for about 3-4 minutes on each side. This step is worth it! Choosing the right slow cooker makes a difference. Look for one with even heat distribution. Models with a ceramic pot work well. They cook food evenly and keep it warm. For searing, use a heavy skillet or Dutch oven. A good non-stick option helps prevent sticking. Ensure your pan is hot before adding the beef. This way, you get that perfect golden brown crust. Serve your stew with crusty bread. It’s perfect for soaking up the savory broth. You can also try serving it with a side salad or steamed veggies. They add color and freshness to your meal. Another great side is rice or mashed potatoes. They complement the stew nicely. Enjoy your hearty meal with family and friends! {{image_4}} You can change the meat in the stew. Try using brisket for a different flavor. It adds a nice richness. If you want to switch up the veggies, use seasonal ones. Swap out potatoes for sweet potatoes. You can also add parsnips or turnips for fun. For a lighter stew, use low-fat broth. This cuts down on calories. You can also reduce the olive oil. Adding more vegetables boosts nutrition. Toss in green beans, peas, or even spinach. These add color and vitamins without many calories. Want to spice things up? Add cumin, paprika, or curry powder for a new flavor. Each spice gives the stew a different feel. You might also try adding a splash of beer or wine. This adds depth to the taste. Just make sure to let the alcohol cook off. Store your leftover beef and potato stew in the fridge. Use airtight containers for best results. Glass or BPA-free plastic work well. Make sure to let the stew cool before sealing it. This step helps keep it fresh. To freeze portions, let the stew cool completely. Then, spoon it into freezer-safe bags or containers. Be sure to leave some space at the top, as the stew may expand. When ready to eat, thaw it in the fridge overnight. You can also use the microwave for quicker thawing. Reheat on the stove over low heat, stirring often. In the fridge, your stew lasts about 3 to 4 days. In the freezer, it can last up to 3 months. Always check for signs of spoilage. If it smells sour or has a strange color, it’s best to toss it. Keeping an eye on these details ensures you enjoy every bite safely. Yes, you can use frozen beef. Just remember to thaw it first for best results. Frozen beef may not brown well, which can affect the flavor. If you skip browning, your stew might taste less rich. Always season the beef well, no matter its state. If your stew is too watery, there are easy ways to thicken it. You can mix one tablespoon of cornstarch with two tablespoons of cold water. Stir this mix into the stew and let it cook for a few more minutes. Another option is to mash some of the potatoes. This will give the stew a thicker texture without adding extra ingredients. When cooking at high altitude, you might need to increase the cooking time. The lower air pressure can slow down cooking. For instance, add an extra hour to your low setting or 30 minutes to your high setting. Always check if the beef is tender before serving. Adjust as needed for your specific altitude. This blog post covers a delicious beef stew recipe that is easy and satisfying. We looked at key ingredients like beef, potatoes, and carrots. I shared step-by-step instructions for preparing and cooking your stew. Keep in mind the tips for seasoning and selecting the right tools. Don't hesitate to try variations for different flavors and health needs. Enjoy making this stew today! You will love how it warms your home and your heart.

Looking for a warm, tasty meal that cooks itself while you relax? You’ve found it! This Slow Cooker Beef and Potato Stew combines juicy beef, hearty potatoes, and fresh veggies …

Read more

Categories Dinner

Maple Brown Sugar Oatmeal Cups Tasty Breakfast Treat

October 4, 2025 by Chef Remy
- 2 cups rolled oats - 1/2 cup packed brown sugar - 1/2 teaspoon salt - 1 teaspoon baking powder - 1 teaspoon ground cinnamon The main components of these oatmeal cups create a warm and sweet base. The rolled oats give a hearty texture. Brown sugar adds a rich sweetness. Salt brings out the flavors. Baking powder helps the cups rise. Ground cinnamon adds a lovely spice that warms the heart. - 2 large eggs - 1 cup milk (dairy or non-dairy) - 1/4 cup pure maple syrup - 1 teaspoon vanilla extract The wet ingredients bind everything together. Eggs add protein and help with texture. Milk brings moisture and creaminess. Maple syrup gives a sweet, natural flavor. Vanilla extract adds a lovely aroma. Together, they create a smooth mixture that makes the cups soft and tasty. - 1/2 cup chopped nuts (walnuts or pecans) - 1/2 cup dried fruits (raisins or cranberries) - Optional: Additional maple syrup for drizzling Add-ins let you customize your oatmeal cups. Nuts add crunch and healthy fats. Dried fruits add sweetness and chewiness. You can drizzle more maple syrup on top for extra sweetness. These options make each bite a fun surprise! - Step 1: Preheat your oven to 350°F (175°C). Line a muffin tin with paper liners or grease it lightly with cooking spray. - Step 2: In a large mixing bowl, mix the rolled oats, brown sugar, salt, baking powder, and cinnamon. Ensure all dry ingredients blend well. - Step 3: In another bowl, whisk the eggs, milk, maple syrup, and vanilla extract until smooth. - Step 4: Pour the wet mixture into the bowl with the dry ingredients. Stir gently until just combined. Do not over-mix; this helps keep the cups light and fluffy. - Step 5: Carefully fold in the chopped nuts and dried fruits. This adds flavor and texture to your oatmeal cups. - Step 6: Use a spoon to fill each muffin cup about three-quarters full. This allows room for rising while baking. - Step 7: After baking for 20-25 minutes, let the cups cool in the pan for about 5 minutes. Then, transfer them to a wire rack to cool completely. - Step 8: Just before serving, drizzle some extra maple syrup over the tops. This adds a lovely touch of sweetness. - How to tell when oatmeal cups are done: When baking, look for golden tops. Insert a toothpick. If it comes out clean, they are ready. This usually takes about 20 to 25 minutes. - Avoiding over-mixing for light texture: Mix the wet and dry ingredients until just combined. If you over-mix, the cups can become dense. A few lumps in the batter are just fine. - Plating ideas for an appealing breakfast: Serve the oatmeal cups on a colorful plate. Add a sprinkle of cinnamon on top. You can also place a dollop of yogurt beside the cups for a nice touch. - Pairing with yogurt or extra toppings: Top the oatmeal cups with fresh fruit like berries or bananas. A drizzle of extra maple syrup adds sweetness and flavor. Try adding nuts or seeds for crunch. - Substituting ingredients for dietary preferences: Use almond milk or oat milk for a dairy-free option. You can also swap eggs with flaxseed meal mixed with water for a vegan version. - Alternate flavor combinations: Add mashed banana or applesauce for a fruity twist. You can mix in chocolate chips for a sweeter option. Spices like nutmeg or ginger can also change the flavor profile. {{image_4}} You can change the flavor of your oatmeal cups easily. For a warm twist, try Cinnamon Apple Oatmeal Cups. Just add diced apples and a bit more cinnamon to the mix. This gives a sweet and cozy taste. Another fun option is Peanut Butter Chocolate Chip Oatmeal Cups. Mix in some creamy peanut butter and chocolate chips. This adds richness and a nice touch of sweetness. If you want a healthier breakfast, consider reducing added sugars. Use less brown sugar and more fruit. You can also switch to whole grain or gluten-free oats. These changes keep the taste delicious while making them more nutritious. Make your oatmeal cups fit the season. In fall, add pumpkin puree and spices like nutmeg and cloves. This brings a nice, warm flavor perfect for chilly days. In summer, toss in fresh berries. Blueberries or strawberries add brightness and a burst of flavor, making your breakfast feel fresh and vibrant. To store leftover oatmeal cups, let them cool completely. Place them in an airtight container. You can stack them if you use parchment paper between layers. This helps to keep them fresh and tasty. Store them in the fridge for up to five days. If you want to freeze your oatmeal cups, first let them cool. Wrap each cup in plastic wrap. Then place them in a freezer bag or container. This keeps them safe from freezer burn. They can last in the freezer for up to three months. To thaw, take them out and leave them in the fridge overnight. You can also heat them in the microwave for about 30 seconds to 1 minute. In the fridge, your oatmeal cups will stay fresh for about five days. If frozen, they can last for three months. Just remember, the sooner you eat them, the better they taste! Can I make these oatmeal cups ahead of time? Yes, you can make these oatmeal cups ahead of time. Bake them and let them cool. Store them in the fridge for up to a week. How do I make them vegan? To make these oatmeal cups vegan, replace the eggs with flax eggs. Use 1 tablespoon of flaxseed meal mixed with 2.5 tablespoons of water for each egg. Choose almond or oat milk instead of dairy milk. What’s the calorie count per oatmeal cup? Each oatmeal cup has about 150 calories. This can change based on added nuts or fruits. Are they suitable for meal prep? Yes, these oatmeal cups work well for meal prep. They are quick to grab on busy mornings. What can I use instead of eggs? You can use unsweetened applesauce or mashed bananas. These options help bind the mixture and add flavor. How can I make these gluten-free? To make these oatmeal cups gluten-free, use certified gluten-free oats. This way, you can enjoy them without worry. These oatmeal cups are simple to make and packed with good taste. We covered the main ingredients, preparation steps, and tips for baking and serving. You can even customize flavors and toppings to make them your own. Remember, these treats freeze well and store easily. They’re perfect for busy mornings or meal prep. Enjoy experimenting with your favorite add-ins and flavors. Your delicious oatmeal cups await!

Looking for a quick and tasty breakfast idea? Maple Brown Sugar Oatmeal Cups are the answer! These easy snacks pack flavor and nutrition in each bite. You can whip them …

Read more

Categories Breakfast
Older posts
Newer posts
← Previous Page1 … Page14 Page15 Page16 … Page130 Next →

ROASTED RECIPES

Where bold flavors meet everyday meals. Warm, vibrant, and made to share. 🔥🥗🍴

PAGES

Home About Contact Privacy Policy Terms & Conditions Cookie Policy GDPR Policy Copyright Policy Disclaimer

CATEGORIES

Appetizers Desserts Salads Breakfast Dinner

Contact

  • Pinterest
  • Mail
Copyright © 2025 Roasted Flavors. All rights reserved.