Creamy Garlic Herb Chicken Orzo Skillet Delight
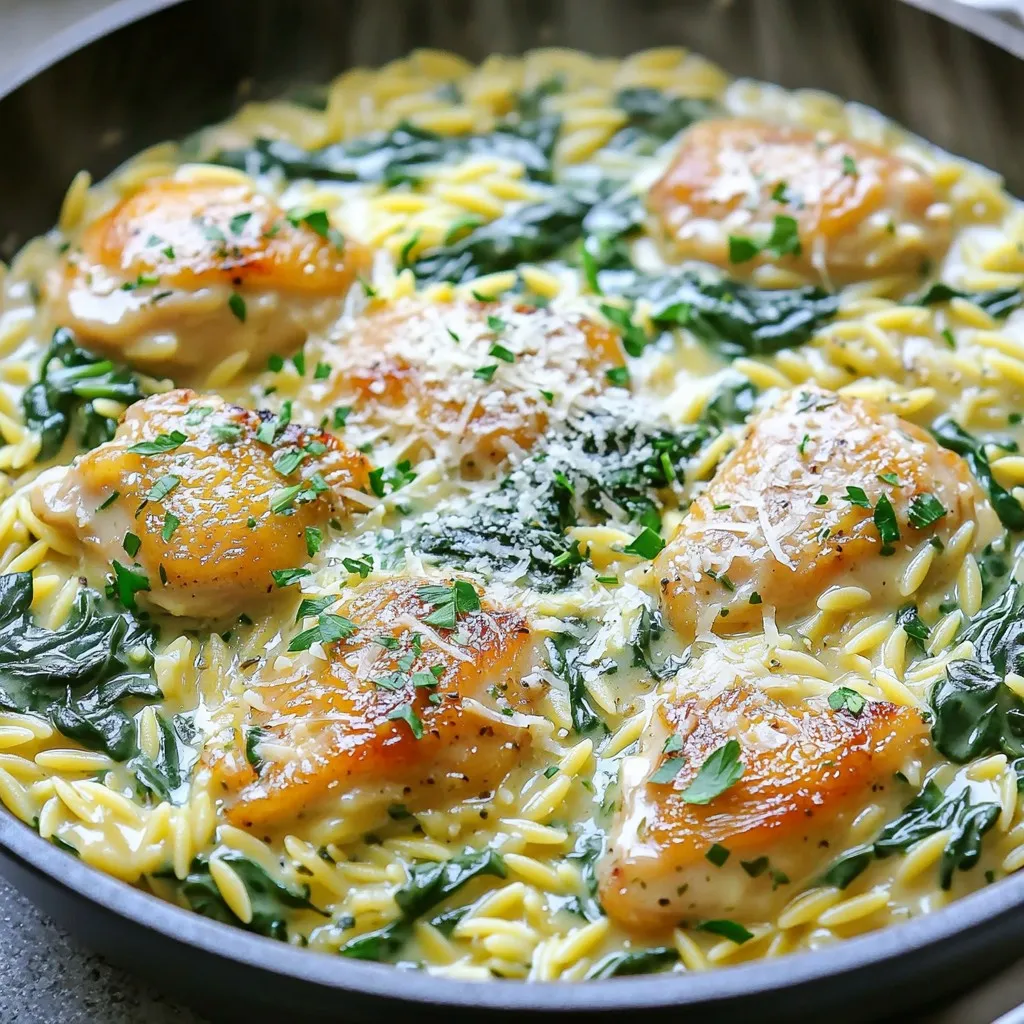
Are you ready to whip up a dish that’s creamy, savory, and loaded with flavor? The Creamy Garlic Herb Chicken Orzo Skillet is your new go-to recipe. This easy one-pan …
Are you ready to whip up a dish that’s creamy, savory, and loaded with flavor? The Creamy Garlic Herb Chicken Orzo Skillet is your new go-to recipe. This easy one-pan …
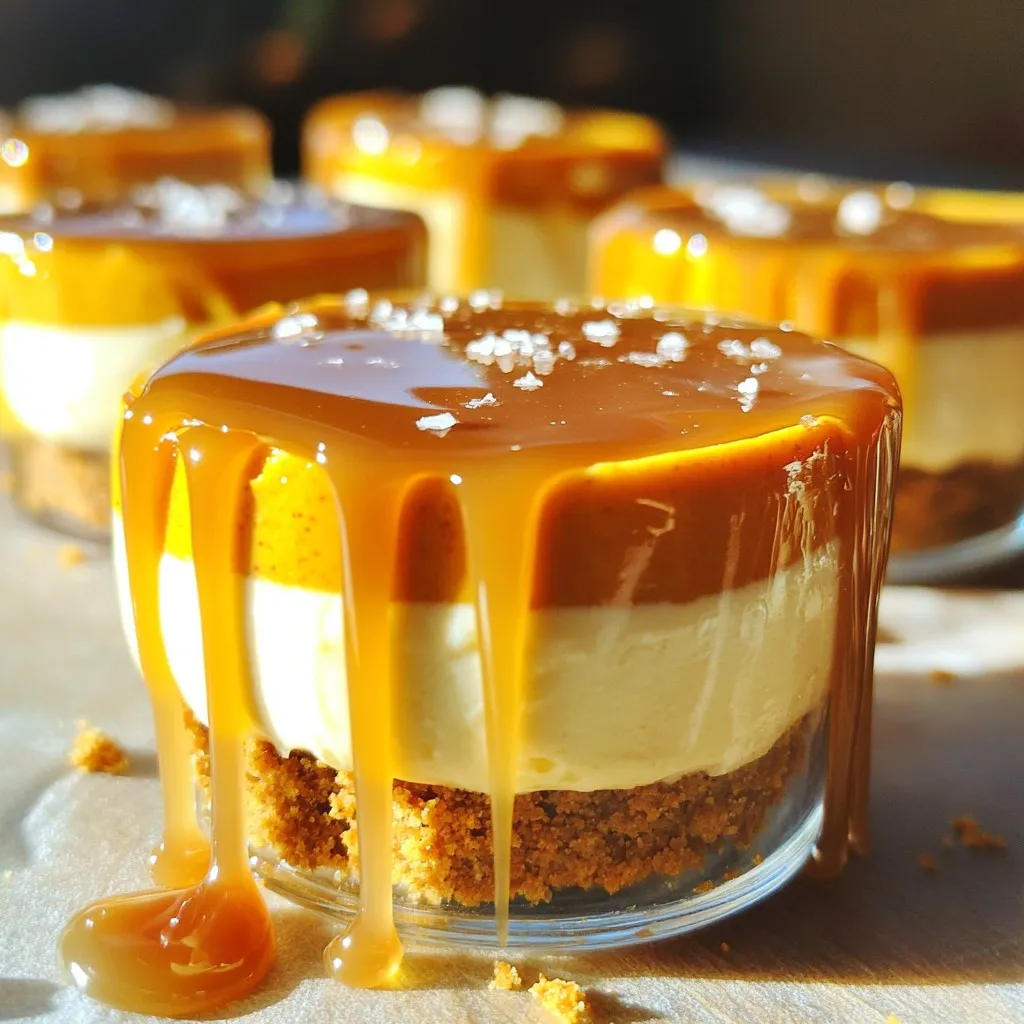
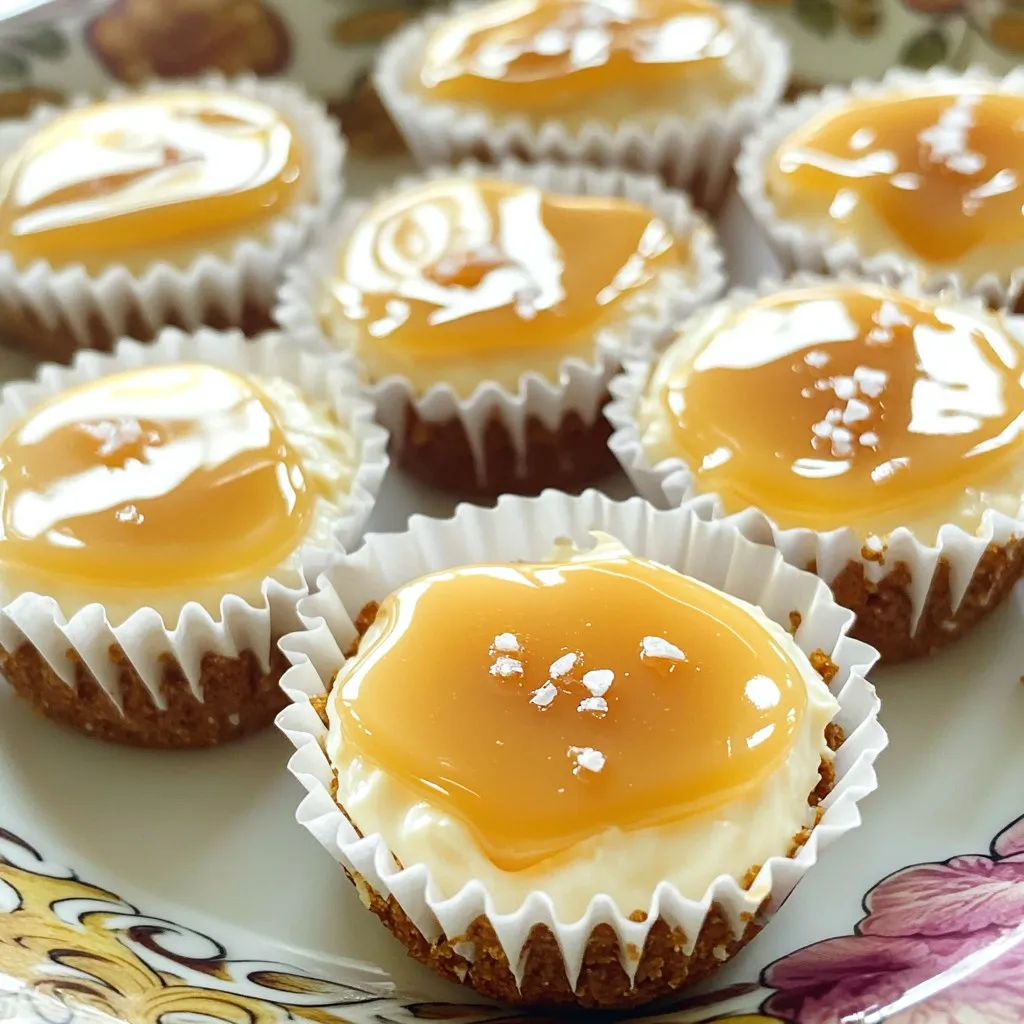
Looking for a dessert that wows with little effort? These No-Bake Salted Caramel Pumpkin Cheesecake Cups are perfect! Creamy pumpkin filling, a crunchy graham cracker base, and drizzles of salted …
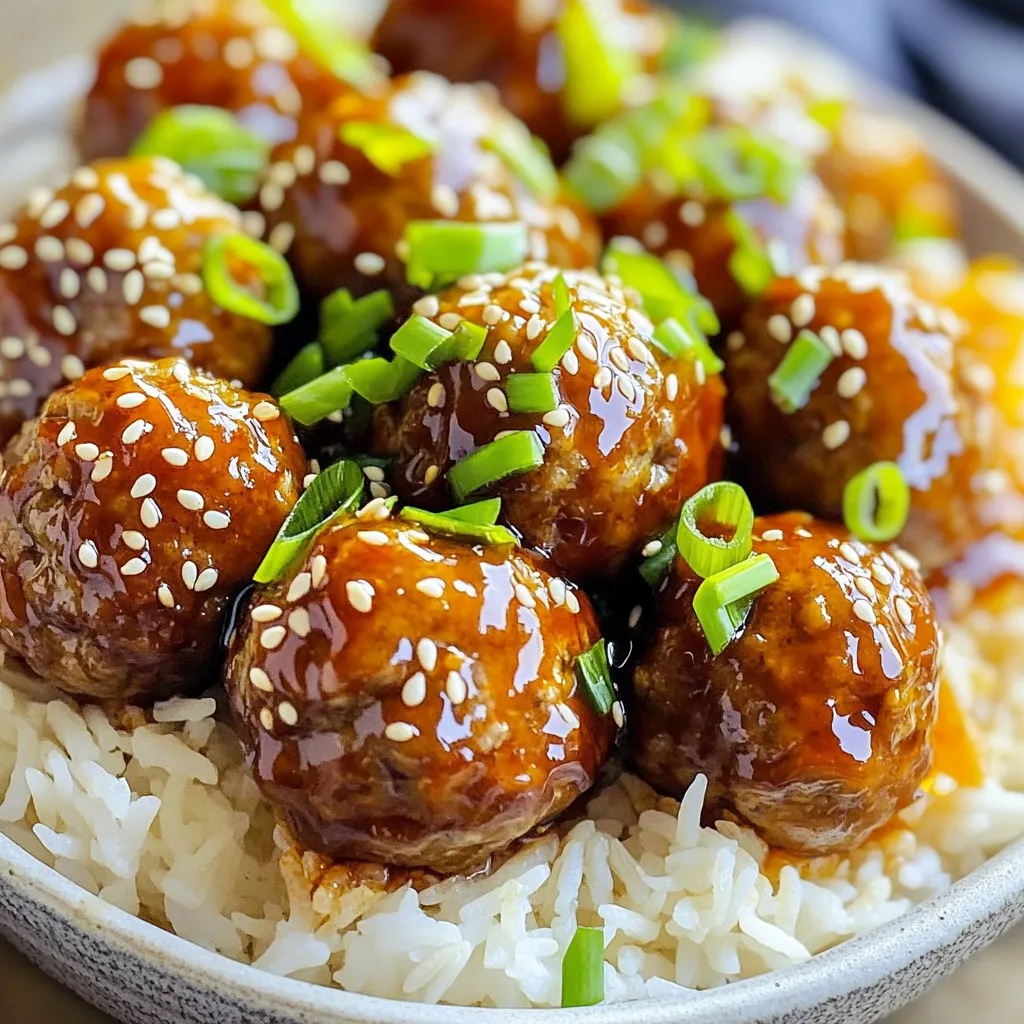
Are you ready to enjoy a tasty dinner with minimal effort? Slow Cooker Honey Garlic Meatballs are easy to make and full of flavor. With just a few simple ingredients, …
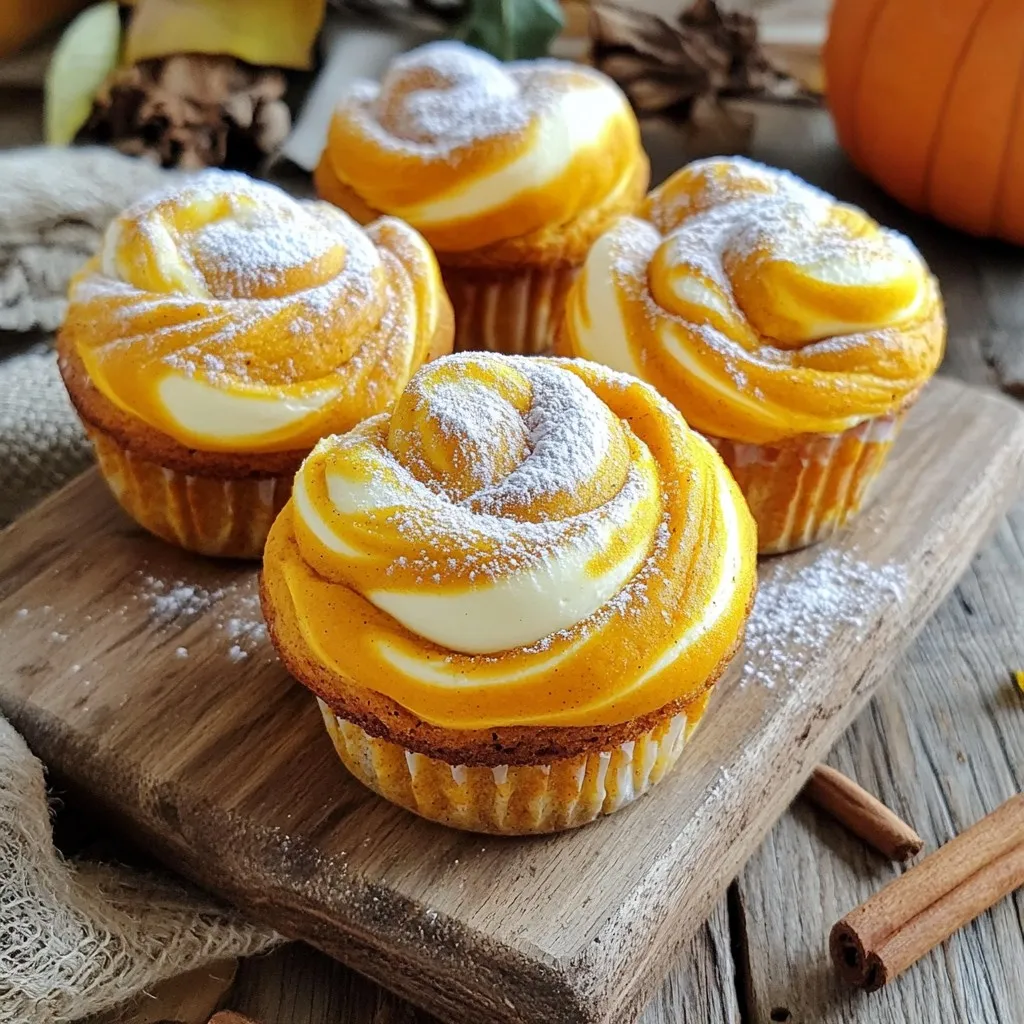
Are you ready to dive into a warm slice of autumn bliss? My Pumpkin Cream Cheese Muffin Bread combines rich pumpkin flavor with a creamy, dreamy surprise. Imagine biting into …
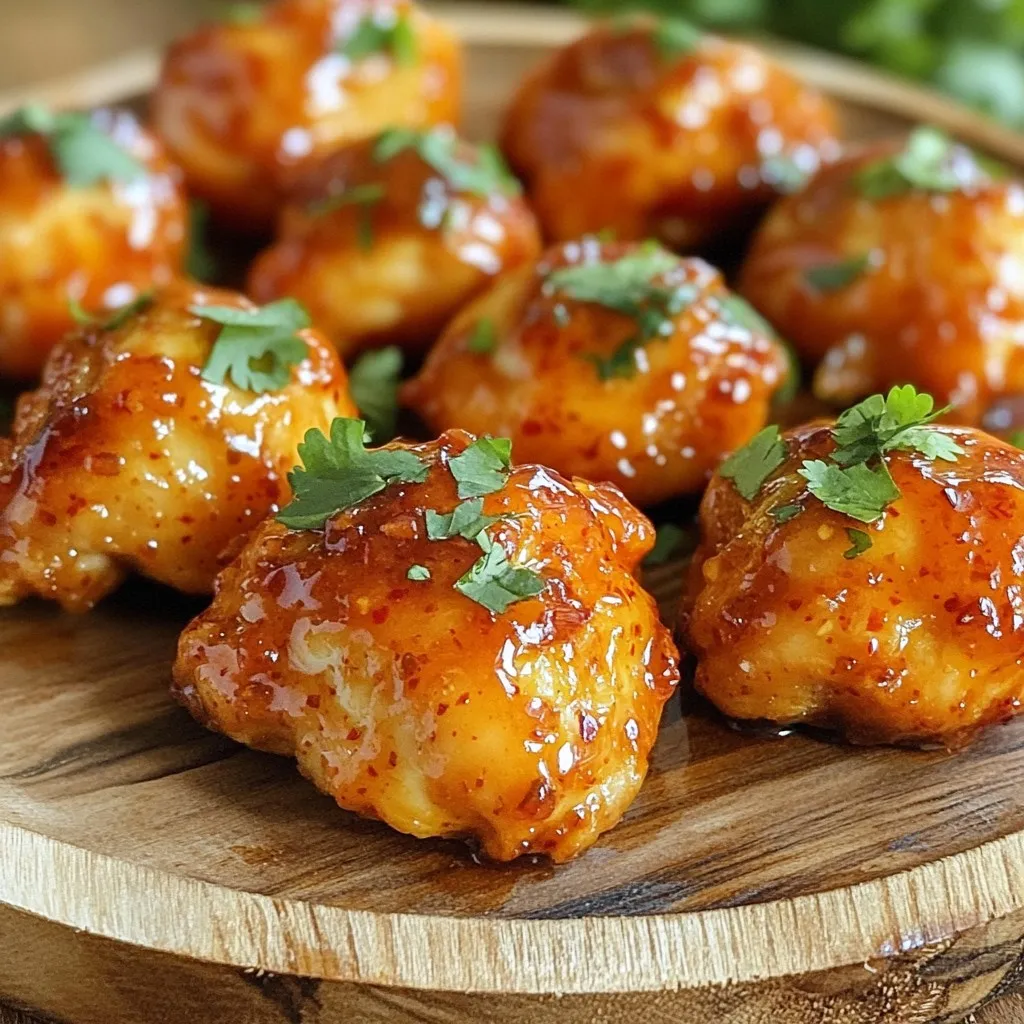
Get ready to indulge in a crispy treat with my Air Fryer Sweet Chili Chicken Bites! This recipe is not just easy; it’s packed with flavor. In just a few …
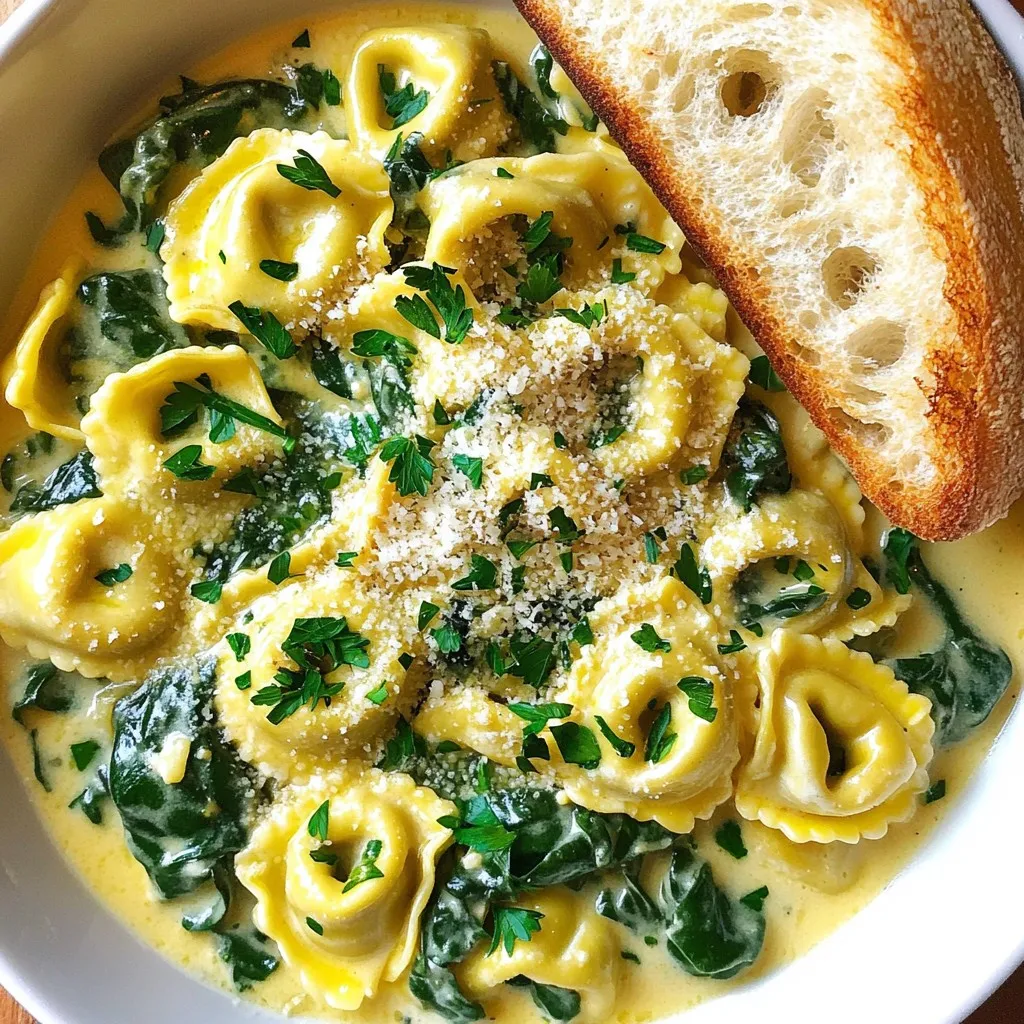
Welcome to my kitchen! Today, I’m excited to share my One-Pot Garlic Parmesan Tortellini & Spinach Delight. This dish combines rich flavors with simple steps, making it perfect for busy …
Are you ready to indulge in a sweet treat that’s simple and delicious? My no-bake salted caramel pretzel cheesecake bites are the perfect snack for any occasion. With their creamy …
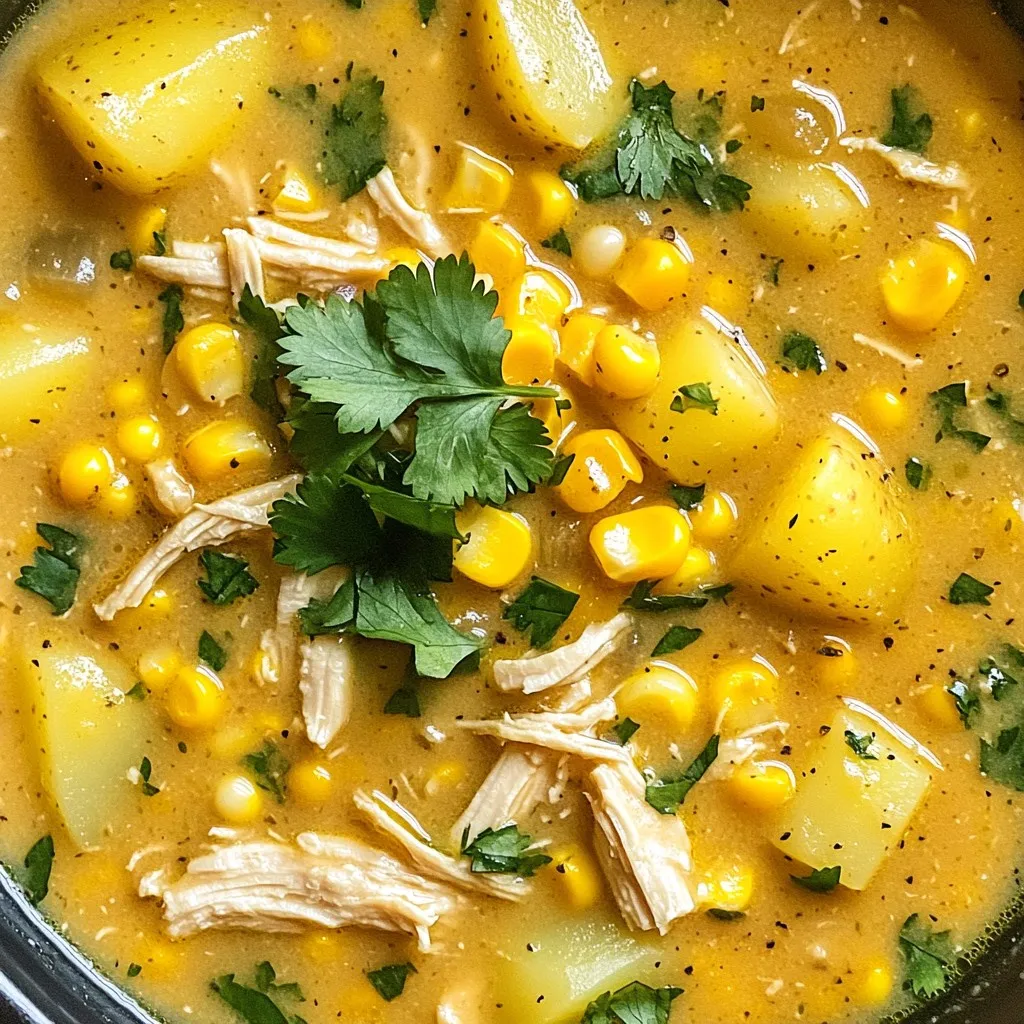
Are you ready to warm up your dinner table? This Savory Slow Cooker Chicken Corn Chowder recipe is perfect. Packed with flavor, it’s creamy, hearty, and simple to make. You’ll …
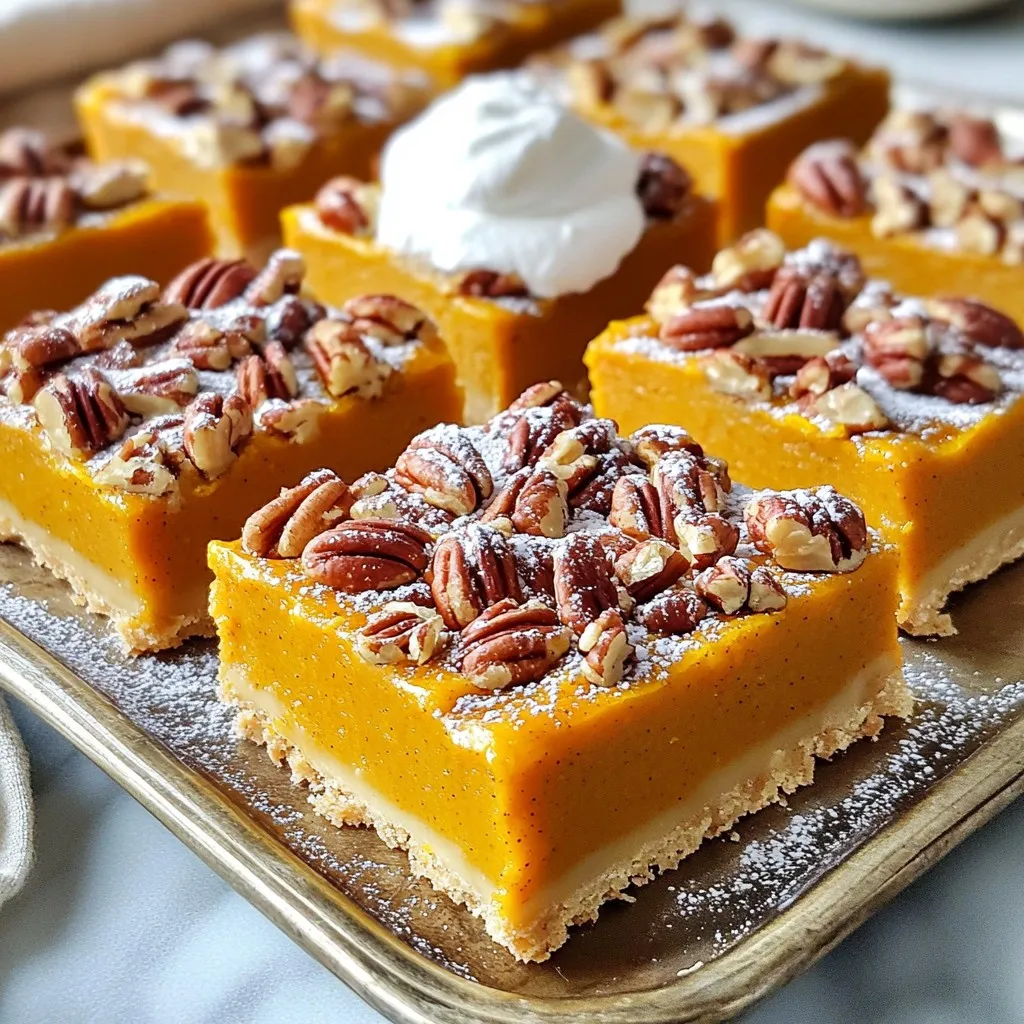
Looking for a dessert that combines the warmth of fall flavors with a simple recipe? You’re in the right place! My Pumpkin Pecan Pie Bars are not only tasty but …
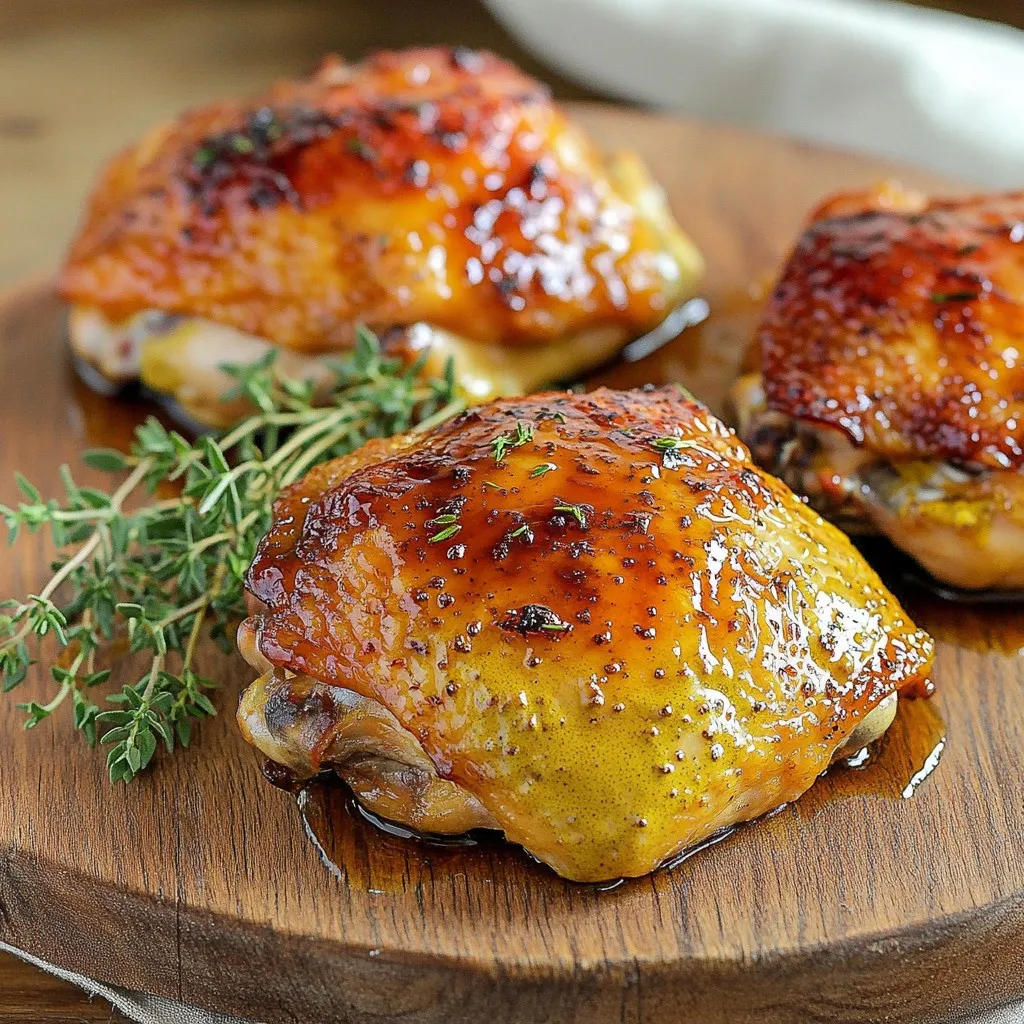
Get ready to elevate your dinner game with my Air Fryer Maple Dijon Chicken Thighs! This flavorful recipe combines tender chicken with a sweet and tangy marinade made from maple …