Skip to content
Roasted Flavors
  • Home
  • Appetizers
  • Desserts
  • Salads
  • Breakfast
  • Dinner
  • Privacy Policy
  • Contact
  • About

Chef Remy

Savory Buffalo Chicken Pasta Recipe You Will Love

May 11, 2025 by Chef Remy
To make this tasty dish, gather these key ingredients: - 8 oz (225 g) penne pasta - 2 cups cooked chicken, shredded (use rotisserie chicken for better flavor) - 1/2 cup buffalo sauce (choose the heat level you like) - 1 cup cream cheese, softened - 1 cup shredded sharp cheddar cheese - 1/2 cup ranch dressing (homemade or store-bought) - 1/2 tsp garlic powder - 1/2 tsp onion powder - Salt and pepper to taste These ingredients create a rich and creamy sauce that blends perfectly with the pasta and chicken. For the finishing touch, consider these garnishes: - 2 green onions, sliced finely - Fresh parsley, chopped These garnishes add color and freshness to your dish, making it even more appetizing. You can easily adjust the recipe to fit different diets: - Gluten-free: Use gluten-free pasta instead of penne. - Dairy-free: Substitute cream cheese and cheddar with plant-based options. - Low-carb: Replace pasta with zucchini noodles or spaghetti squash. These substitutions let anyone enjoy this dish without missing out on flavor. To see the full recipe, check it out here: [Full Recipe]. Start by boiling water in a large pot. Use about 4 quarts of water and add salt. Once it boils, add 8 oz of penne pasta. Cook for 10-12 minutes until it is al dente. Drain the pasta in a colander and set it aside. This pasta will hold the sauce nicely. In a large skillet, heat shredded chicken with 1/2 cup buffalo sauce over medium heat. Stir the chicken well, making sure it is fully coated. Heat the chicken for 3-4 minutes. This lets the chicken soak up the flavor of the sauce. Reduce the heat to low. Add 1 cup of softened cream cheese into the skillet with the chicken. Stir with a spatula until the cream cheese is melted. This makes the sauce creamy and smooth. Once melted, add 1 cup of shredded sharp cheddar cheese and 1/2 cup of ranch dressing. Mix until the cheese melts and the sauce is smooth. Then add 1/2 tsp garlic powder and 1/2 tsp onion powder. Season with salt and pepper to taste. Now, add the drained pasta to the skillet. Gently toss the pasta in the sauce. Make sure every piece is coated well with the creamy buffalo mixture. Cook for another 2-3 minutes on low heat, stirring often. This heats everything through and blends the flavors. Taste the pasta and adjust seasoning if needed. Serve hot in bowls, garnished with sliced green onions and fresh parsley. Enjoy your buffalo chicken pasta! To boost flavor in your buffalo chicken pasta, think about layering tastes. Use fresh herbs like parsley or chives. They add brightness to the dish. Also, consider adding a splash of lemon juice. It can cut through the richness of the cream cheese. If you enjoy heat, try using spicy cheese or adding jalapeños. You can even mix in some diced celery for a nice crunch. Cooking techniques can change how your dish turns out. When cooking the pasta, remember to salt the water. This adds flavor right from the start. For the sauce, keep the heat low when adding cream cheese. This helps it melt without burning. Always stir gently to combine the ingredients well. This way, you keep the sauce creamy and smooth. One common mistake is overcooking the pasta. Aim for al dente to keep the texture. Drain the pasta well, but don’t rinse it. Rinsing can wash away the starch, which helps the sauce stick. Another mistake is not tasting the sauce. Always taste as you go. Adjust with more buffalo sauce or seasoning if needed. Trust your taste buds to guide you! {{image_4}} You can make a delicious vegetarian version of Buffalo Chicken Pasta. Instead of chicken, use roasted cauliflower or chickpeas. Both options add a nice texture. Toss them in buffalo sauce just like you would with chicken. This keeps the dish spicy and flavorful. You still get the creamy sauce by using the same ingredients. Cream cheese, ranch, and cheddar cheese work great. This way, you can enjoy the full buffalo flavor, minus the meat. If you like it spicy, add more buffalo sauce. You can also mix in some hot sauce. For a milder dish, use less buffalo sauce. Mixing in a bit of blue cheese dressing can balance out the heat. Always taste as you go. This way, you find the perfect heat level for your palate. Everyone's taste is different, so adjust to what you like best. Penne pasta is great, but you can use other shapes too. Bowtie, rotini, or even spaghetti works well. The key is to pick a pasta shape that holds sauce well. Each shape brings a different texture and bite. Just make sure to cook it al dente for the best results. This keeps your pasta from getting mushy in the creamy sauce. Experiment with your favorite shapes for fun and variety! For more details, check out the Full Recipe. To store your buffalo chicken pasta, let it cool completely. Place it in an airtight container. This helps keep flavors fresh. You can store it in the fridge for up to 3 days. If you want to keep it longer, consider freezing. To reheat your leftovers, use the microwave or a skillet. If using a microwave, heat on medium power. Stir every minute until it is hot. If using a skillet, add a splash of water or broth. Heat over low heat, stirring often, until warm. This keeps the pasta from drying out. You can freeze buffalo chicken pasta for up to 3 months. Use a freezer-safe container or heavy-duty freezer bag. Make sure to remove as much air as possible. When ready to eat, thaw it overnight in the fridge. Then, reheat it using the instructions above. Check the Full Recipe for more delicious ideas! To make Buffalo Chicken Pasta from scratch, you follow these simple steps. First, cook the penne pasta in salted water until al dente. Drain the pasta and set it aside. In a skillet, mix shredded chicken with buffalo sauce. Heat it for a few minutes. Then, add cream cheese to the mixture. Stir until it melts into a creamy sauce. Next, mix in shredded cheddar cheese and ranch dressing. Season with garlic powder, onion powder, salt, and pepper. Finally, combine the pasta with the sauce and serve hot. For the full recipe, check out the details above. The best sides for Buffalo Chicken Pasta include a fresh salad, garlic bread, or steamed veggies. A crunchy green salad adds a nice contrast. Garlic bread helps soak up the sauce. You can also serve it with celery sticks or carrot sticks for a cool crunch. Yes, you can make Buffalo Chicken Pasta ahead of time. Prepare the dish and let it cool. Store it in an airtight container in the fridge. It stays good for up to three days. When ready to eat, reheat it in the microwave or on the stovetop. Buffalo Chicken Pasta can be healthy, depending on your ingredients. Using whole-grain pasta boosts fiber. Adding more veggies increases nutrients. However, the cream cheese and ranch dressing can add calories. Balance it with fresh ingredients or lighter sauces if you want a healthier option. To make Buffalo Chicken Pasta spicier, add more buffalo sauce. You can also mix in red pepper flakes or hot sauce. Chopped jalapeños or sliced habaneros bring extra heat too. Just remember to taste as you go to find your perfect spice level! Buffalo chicken pasta is a fun and tasty dish. We covered its key ingredients, from the base pasta to yummy garnishes. I shared simple steps to cook and combine everything right. Remember the tips to avoid mistakes and enhance the taste. You can also explore variations for different diets and heat levels. Store leftovers well for future meals. With these easy steps, you can create your own buffalo chicken pasta at home. It's a dish that brings joy to any table. Enjoy making it your way!

Are you ready to spice up your dinner routine with a dish you’ll crave again and again? This Savory Buffalo Chicken Pasta Recipe combines tender chicken, creamy sauce, and a …

Read more

Categories Dinner

Taco Bell Chicken Quesadilla Recipe Simple and Tasty

May 11, 2025 by Chef Remy
- 2 cups cooked chicken, shredded - 1 cup shredded cheddar cheese - 1 cup shredded Monterey Jack cheese - 1/2 cup cream cheese, softened to room temperature - 1/4 cup salsa (choose your preferred spice level) - 1 teaspoon taco seasoning - 4 large flour tortillas - 2 tablespoons olive oil, divided - 1/4 cup fresh cilantro, finely chopped (for garnish) - Sour cream and guacamole (for serving) The main star here is the chicken. Use cooked, shredded chicken to add protein and flavor to your quesadilla. The blend of cheddar and Monterey Jack cheeses brings a rich, creamy texture. Cream cheese keeps the filling smooth and binds everything together. Salsa adds a zesty kick. You can pick your salsa based on how spicy you want it. Taco seasoning gives that classic taco taste, making each bite full of flavor. Flour tortillas are essential for wrapping up all the goodness. You can boost the flavor with more ingredients. Try adding jalapeños for heat or black beans for extra texture. Bell peppers lend a sweet crunch, and corn adds some freshness. If you love herbs, a sprinkle of lime juice brightens everything up. First, gather all your ingredients. You need cooked chicken, cheeses, cream cheese, salsa, taco seasoning, tortillas, and olive oil. In a bowl, combine the shredded chicken with cheddar cheese, Monterey Jack cheese, cream cheese, salsa, and taco seasoning. Mix until creamy and well combined. This filling will make your quesadilla rich and tasty. Heat a non-stick skillet over medium heat. Add 1 tablespoon of olive oil, coating the skillet well. Place one tortilla in the skillet. On one half, spread about 1/4 of your chicken and cheese mixture. Fold the tortilla in half and press it down with a spatula. Cook for 3-4 minutes until it turns golden brown on one side. Then, flip it carefully and cook the other side for another 3-4 minutes, adding more oil if needed. When both sides are golden and the cheese is melted, take it out of the skillet. Let it cool for a minute and slice it into wedges. Watch for a golden brown color on both sides of the quesadilla. The cheese should be melted and ooze slightly when you cut it. If you see steam coming out, that means the cheese is melting perfectly. This is how you know your quesadilla is just right! To get the best flavor, use fresh ingredients. Fresh cilantro adds a bright taste. Use your favorite salsa for a kick. A little lime juice can also enhance the flavors. Mixing different cheeses, like cheddar and Monterey Jack, gives a creamy texture. Taco seasoning adds a wonderful depth, so don’t skip it. For crispy quesadillas, heat your skillet well before cooking. Use enough olive oil to coat the pan. This helps achieve that golden crunch. Flip the quesadilla carefully. Use a spatula to press it down slightly. This allows the cheese to melt well and hold everything together. Cook each side until golden brown for the best result. Meal prep can be simple. You can prepare the chicken filling in advance. Store it in the fridge for up to three days. This saves time on busy days. When ready to cook, just grab the filling and tortillas. You can even freeze the filling for later use. Just thaw it before cooking. This way, you can enjoy tasty quesadillas anytime! For the full recipe, click here. {{image_4}} To spice up your chicken quesadilla, add diced jalapeños to the filling. You can also use spicy salsa instead of mild. If you crave heat, try adding a pinch of cayenne pepper to the mix. This adds a nice kick without overpowering the dish. Remember, balance is key. You want heat, but not so much that you can't enjoy the flavors. You can easily make a vegetarian quesadilla. Replace the chicken with black beans or grilled veggies. Bell peppers, onions, and mushrooms work well. Use the same cheese blend for a creamy texture. For a protein boost, add some quinoa or chickpeas. These choices make the quesadilla filling and delicious without meat. Toppings can enhance your quesadilla experience. Try adding fresh avocado slices or pico de gallo for a burst of flavor. You can also drizzle some hot sauce for extra heat. For dips, sour cream and guacamole are classics. If you want something unique, consider a zesty cilantro-lime crema. Each topping adds a new twist, making every bite exciting. To keep your chicken quesadilla fresh, start by letting it cool. Once cool, wrap each quesadilla in plastic wrap or aluminum foil. This helps keep moisture in and prevents drying. Store them in an airtight container. You can keep them in the fridge for up to three days. If you want to keep them longer, freezing is a great option. When you're ready to enjoy your leftovers, I recommend using a skillet for the best flavor. Heat a non-stick skillet over medium heat. Place the quesadilla in the skillet and cover it with a lid. This helps warm it through without burning. Cook for about 3-4 minutes on each side. You can also use a microwave for quick reheating. Just place it on a microwave-safe plate and heat for 1-2 minutes. If you want to prep for the week, freezing is a smart choice. Make sure to wrap each quesadilla tightly before placing it in a freezer-safe bag. You can freeze them for up to three months. When you’re ready to eat, thaw in the fridge overnight. Then, reheat as described above for the best taste. This method ensures you always have a tasty meal ready to go! Taco Bell's quesadilla stands out because of its creamy filling and flavorful spices. The blend of cheeses creates a rich taste that melts in your mouth. They use a unique salsa that adds a kick, enhancing every bite. The crispy tortilla adds texture, making it a complete dish. I love how the quesadilla is easy to eat and perfect for any meal. Yes, you can use various cheeses to make your quesadilla unique. For example, pepper jack cheese adds spice and creaminess. Gouda or fontina can give a smoky flavor. If you prefer a milder taste, mozzarella works well. Mixing cheeses can create a delicious twist on the classic. Just remember to ensure they melt well for that gooey texture. To make your quesadilla healthier, start with whole wheat tortillas. You can use grilled chicken instead of fried for less fat. Adding vegetables like spinach or bell peppers boosts nutrition. Try using less cheese or low-fat options to reduce calories. You can also serve it with salsa and fresh veggies instead of sour cream. These small changes can make a big difference. This article covers everything you need for a great quesadilla. We discussed ingredients, preparation, cooking tips, and variations. You learned how to make it crispy and flavorful. Remember to store leftovers properly and follow reheating tips for the best taste. Use options like spicy or vegetarian ingredients to personalize your dish. With these insights, you can enjoy delicious quesadillas anytime. I hope you feel ready to impress your family and friends with your cooking skills. Enjoy every bite!

Craving a Taco Bell Chicken Quesadilla but don’t want to leave home? You’re in luck! I’ll show you how to make this cheesy, spicy delight right in your kitchen. This …

Read more

Categories Dinner

Easy Street Corn Chicken Rice Bowl Recipe Delight

May 11, 2025 by Chef Remy
To make this tasty dish, you need the following items: - 2 cups cooked jasmine rice - 1 pound boneless, skinless chicken breasts, diced - 1 cup frozen sweet corn, thawed - 1 red bell pepper, diced - 1 small red onion, finely chopped - 1 ripe avocado, sliced - 1/4 cup fresh cilantro, finely chopped - 2 tablespoons extra-virgin olive oil - 1 teaspoon smoked paprika - 1 teaspoon garlic powder - 1 teaspoon ground cumin - Sea salt and freshly ground black pepper to taste - Juice of 1 fresh lime - Crumbled feta cheese (optional, for garnish) You can add these extra ingredients to boost the flavor: - Sliced jalapeños for heat - Chili flakes for a spicy kick - A dollop of sour cream for creaminess - Black beans for extra protein While jasmine rice is great, you can also try these options: - Basmati rice for a nutty flavor - Brown rice for a healthier choice - Quinoa if you want a gluten-free option This dish is all about fresh flavors and easy steps. Check the full recipe to get started! To start, heat olive oil in a large skillet over medium heat. When the oil shimmers, add the diced chicken. Sprinkle in smoked paprika, garlic powder, ground cumin, sea salt, and black pepper. Sauté the chicken for 6-7 minutes. Stir often until the chicken turns golden brown and reaches 165°F (74°C). This step brings out great flavor. Once the chicken is cooked, add the diced red bell pepper, chopped red onion, and thawed sweet corn. Cook for another 3-4 minutes. This will soften the veggies and make them fragrant. You want the colors to brighten, which also adds to the dish’s visual appeal. In a separate pot, warm the cooked jasmine rice over low heat. Squeeze the juice of one fresh lime into the rice. Fold in half of the chopped cilantro as you mix. This adds a zesty kick and enhances the overall taste. The lime juice really wakes up the rice! To put it all together, start with a layer of lime-infused rice in each bowl. Next, add the sautéed chicken and vegetable mixture on top. Arrange the sliced avocado artfully over the chicken. Finally, sprinkle the rest of the cilantro on the bowl. This makes each bowl a feast for the eyes and the taste buds. For an extra treat, consider adding crumbled feta cheese on top. For the full recipe, refer to the instructions above. To get tender chicken, start with fresh chicken breasts. Cut them into small pieces. This helps them cook evenly. Use medium heat and add olive oil to the pan. Season the chicken with smoked paprika, garlic powder, and cumin. These spices add great flavor. Cook until the chicken is golden brown and reaches 165°F. This ensures it's safe to eat. Letting it rest for a few minutes after cooking can keep it juicy. When selecting an avocado, look for one that feels slightly soft. Gently press it in your palm. If it yields to the touch, it’s ripe. Avoid ones with dark spots or bruises. You can also check the stem. If it comes off easily and is green underneath, the avocado is ready to eat. If it’s too hard, leave it at room temperature for a few days to ripen. To make your rice bowl look great, start with the rice at the bottom. Use a scoop to keep it neat. Layer the chicken and veggies on top. For a pop of color, add sliced avocado on the side. Sprinkle fresh cilantro for a burst of green. A lime wedge adds a nice touch and a squeeze of juice. If you like cheese, crumbled feta can add flavor and style. Present your bowl with care, and it will be as pleasing to the eyes as it is to the tummy. {{image_4}} You can easily make this dish vegetarian. Instead of chicken, use black beans or chickpeas. Both options add protein and flavor. Just sauté them with the same spices. They will soak up the taste and keep the dish hearty. If you like heat, add jalapeños or chili flakes. You can mix these into the chicken or sprinkle on top. For a different twist, try adding diced poblano peppers. They give a nice kick without being too hot. Want an easy cleanup? Use a large pan for everything. Cook the chicken first, then add the veggies. After that, mix in the rice right in the pan. This method saves time and keeps your kitchen tidy. For the complete recipe, check out the Full Recipe. After enjoying your Easy Street Corn Chicken Rice Bowl, you may have some leftovers. To keep them fresh, place them in an airtight container. Make sure to cool the bowl to room temperature first. This way, you lock in the flavor and texture. Store the container in the fridge. The leftovers are good for up to three days. When you want to enjoy your leftovers, reheating is simple. Place the rice bowl in a microwave-safe dish. Add a splash of water to keep it moist. Cover it with a damp paper towel. Heat it in the microwave for one to two minutes. Stir halfway through for even heating. If you prefer, you can reheat it on the stove. Just add a little oil in a skillet and warm it on medium heat. If you want to save some for later, freezing works well. You can freeze the chicken and vegetable mix separately from the rice. Use freezer-safe bags or containers. Remove as much air as possible to avoid freezer burn. The chicken and veggies can last up to three months in the freezer. Rice can also freeze, but it’s best used within one month for the best taste. When ready to eat, thaw overnight in the fridge before reheating. For the full recipe, check the detailed instructions above! You can use basmati rice or long-grain white rice. Both have a nice texture. Brown rice is another option, but it takes longer to cook. If you want a low-carb choice, try cauliflower rice. It cooks quickly and adds great flavor. All the ingredients in this recipe are naturally gluten-free. Just avoid any sauces that may contain gluten. Always check labels if you use pre-made items. You can enjoy this bowl without worry about gluten. Yes, you can prep many ingredients ahead of time. Cook the chicken and veggies, then store them in the fridge for up to three days. You can also cook the rice in advance. Just warm it up before serving. This makes meal prep easy. You can add toppings like sliced jalapeños or pickled red onions for extra flavor. A dollop of sour cream or Greek yogurt adds creaminess. For crunch, try crushed tortilla chips or toasted pumpkin seeds. Experiment and find what you love! This blog post covered how to make an Easy Street Corn Chicken Rice Bowl. We looked at key ingredients, cooking tips, and variations for different diets. You now know how to prepare tender chicken and cook flavorful rice. Remember, you can add your favorite toppings or substitute ingredients for extra flair. I hope you enjoy making this dish as much as I do. It’s simple, tasty, and always a hit!

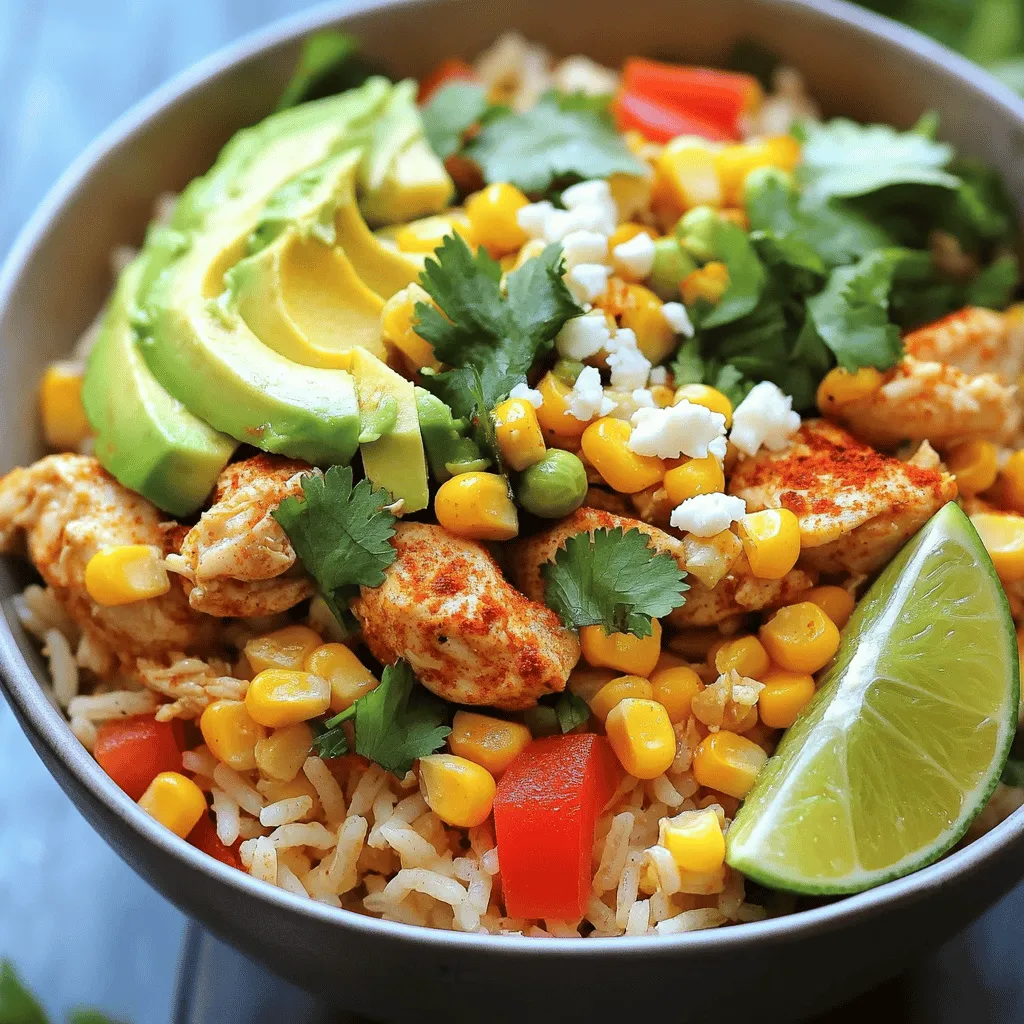
Looking for an easy and tasty meal? The Easy Street Corn Chicken Rice Bowl Recipe is just what you need! This bowl combines juicy chicken, sweet corn, and zesty lime-infused …

Read more

Categories Dinner

Korean Ground Beef Bowl Flavorful Dinner Delight

May 11, 2025 by Chef Remy
To make a Korean Ground Beef Bowl, you need simple and tasty ingredients. Each one adds flavor and depth to the dish. Here’s what you need: - 1 lb ground beef - 2 tablespoons soy sauce - 1 tablespoon sesame oil - 2 tablespoons brown sugar - 2 cloves garlic, minced - 1 tablespoon fresh ginger, grated - 1 teaspoon red pepper flakes - 2 green onions, finely chopped - 1 cup cooked jasmine rice - 1 cup steamed broccoli florets - 1 tablespoon sesame seeds for garnish These ingredients work together to create a satisfying meal. The ground beef is rich and savory. Soy sauce adds umami, and sesame oil brings a nutty flavor. Brown sugar balances the saltiness with sweetness. Garlic and ginger provide warmth and depth. The red pepper flakes give a nice kick. Green onions add freshness and color. Jasmine rice serves as a fluffy base. Lastly, steamed broccoli adds health and crunch. If you follow the Full Recipe, you can whip up this flavorful dinner delight quickly. 1. Start by heating a large skillet over medium-high heat. 2. Once the skillet is hot, add the ground beef. 3. Use a wooden spoon to break the beef apart as it cooks. 4. Cook until it’s browned, about 5 to 7 minutes. 1. After cooking, drain any excess fat from the skillet. 2. Carefully keep the tasty juices that add flavor. 3. Now, add the minced garlic and grated ginger to the beef. 4. Sauté these aromatics for 1 minute until fragrant. 5. Lower the heat and pour in the soy sauce and sesame oil. 6. Add the brown sugar and red pepper flakes. 7. Mix everything until the beef is coated in the sauce. 8. Cook for an additional 2 to 3 minutes to blend flavors. 1. Remove the skillet from the heat. 2. Gently fold in the chopped green onions. 3. Scoop fluffy jasmine rice into a bowl as a base. 4. Top the rice with a generous serving of the beef mixture. 5. Add steamed broccoli florets on the side. 6. Finish by sprinkling sesame seeds on top for a nice crunch. Following these steps makes a Korean Ground Beef Bowl that is simple and tasty. For the full recipe, check the detailed instructions above. Enjoy your cooking! To make your Korean ground beef bowl perfect, adjust the spice levels to your taste. Start with one teaspoon of red pepper flakes. You can always add more if you like heat. If you want less spice, use half a teaspoon or skip it altogether. For more umami flavor, try adding a splash of fish sauce. It gives depth to the dish. You can also mix in a bit of miso paste for extra richness. Both options boost the savory taste without overpowering the other flavors. When serving, use deep bowls for a cozy feel. It helps keep everything together. Layer the jasmine rice at the bottom, then add the beef mixture on top. Contrast is key for visual appeal. Bright green broccoli stands out against the brown beef. You can also sprinkle some sesame seeds on top for a nice touch. If you have furikake seasoning, it adds more color and flavor. To achieve perfect browning on your ground beef, keep the heat at medium-high. This helps create a nice crust. Break the meat apart with a wooden spoon as it cooks. When adding the sauce, pour it evenly over the beef. Stir well to coat every piece. This method ensures that each bite is full of flavor. Try to avoid letting the sauce sit too long without stirring, as it can burn. {{image_4}} You can change the protein in your Korean Ground Beef Bowl for variety. Ground turkey or chicken works well. These meats are leaner but still absorb the sauce's flavors. They offer a lighter option if you're watching your fat intake. If you prefer a meatless meal, try plant-based meat. Options like lentils or soy crumbles can replace ground beef. They provide a similar texture and soak up the tasty sauce. This way, everyone can enjoy the dish, no matter their diet! Not all kitchens have the same ingredients. You can use tamari instead of soy sauce. Tamari is gluten-free and has a similar taste. This swap is perfect for people with gluten sensitivities. You can also explore rice options. While jasmine rice is a classic choice, you can use brown rice for added fiber. Quinoa is another great alternative. It cooks quickly and adds a nutty flavor to your bowl. Serving your Korean Ground Beef Bowl with different vegetables can change the meal. Try adding bell peppers, snap peas, or carrots for color and crunch. Steamed or sautéed greens like bok choy or spinach also work well. You can elevate your dish by adding eggs or kimchi. A fried egg on top adds richness. Kimchi brings a tangy flavor and extra spice. These toppings make your meal more exciting and full of flavor. For the full recipe, check out the complete instructions above! To keep your Korean Ground Beef Bowl fresh, store leftovers in airtight containers. This helps prevent spoilage and keeps flavors intact. Make sure the beef is fully cooled before sealing it. Aim to eat your leftovers within three days for the best taste. If you plan to keep it longer, freezing is a great option. You can freeze portions of the Korean Ground Beef Bowl for later use. Divide the meal into single-serving containers. This makes it easy to grab a meal when you're short on time. To thaw, place the container in the fridge overnight. For quick reheating, use the microwave or a skillet over low heat. Add a splash of water if it seems dry. In the fridge, leftovers will last for about three to four days. If you freeze them, they can last for up to three months. Always check for signs of spoilage, like off smells or discoloration. With proper storage, you can enjoy this tasty dish multiple times! For the complete cooking process, refer to the Full Recipe. You can pair your Korean Ground Beef Bowl with many tasty sides. Here are some ideas: - Kimchi: This spicy fermented dish adds a nice kick. - Cucumber Salad: A cool salad balances the rich flavors. - Pickled Vegetables: These add crunch and tang. - Eggs: A fried or poached egg on top makes it special. - Noodles: Serve with cold soba noodles for a twist. These sides enhance the meal and make it even more enjoyable. Yes, you can adjust the spice level to suit your taste. Here’s how: - Red Pepper Flakes: Start with less if you prefer mild. Add more for heat. - Gochujang: This Korean chili paste adds depth and spice. Mix in a spoonful for more heat. - Fresh Chilis: Add sliced fresh chilis to the beef during cooking for extra kick. Adjusting spice makes this dish fun and personal. Absolutely! This recipe is great for meal prep. Here’s why: - Batch Cooking: Make a larger batch and store it in containers. - Reheat Easily: The beef reheats well in the microwave or skillet. - Versatile: Pair with different sides each day to keep it fresh. Meal prepping saves time and keeps your meals exciting. You can easily modify this dish to be low-carb. Here are some tips: - Swap Rice: Use cauliflower rice instead of jasmine rice for fewer carbs. - Add More Veggies: Increase broccoli or add zucchini noodles for bulk. - Skip the Sugar: Use a low-carb sweetener instead of brown sugar. These changes keep the dish delicious while lowering the carbs. For the complete recipe, check out the Full Recipe. This blog post explained how to make a tasty Korean Ground Beef Bowl. You learned about the key ingredients, from ground beef to fresh veggies. We broke down the cooking process into easy steps. With tips and variations, you can personalize it to your taste. Remember, this dish is great for meal prep and can fit any diet. Enjoy cooking and sharing your delicious creation with others!

Craving a tasty, quick dinner? You’re in the right place! My Korean Ground Beef Bowl is a delightful mix of flavors that’s both satisfying and easy to make. With simple …

Read more

Categories Dinner

Baked Feta Pasta Easy and Flavorful Recipe

May 11, 2025 by Chef Remy
To make Baked Feta Pasta, gather these items: - 200g block of feta cheese - 300g cherry tomatoes, halved - 3 cloves garlic, finely minced - 2 tablespoons extra virgin olive oil - 250g pasta of your choice (penne or rigatoni work well) - 1 teaspoon dried oregano - 1/2 teaspoon chili flakes (optional) - Salt and freshly ground black pepper to taste - Fresh basil leaves for garnish - Zest of 1 lemon, for brightness These ingredients serve about four people. You can add a few items to boost flavor or make it fun: - Red pepper flakes: Add more for heat. - Spinach: Stir in fresh spinach for added greens. - Olives: Black or green olives can add a briny flavor. - Pine nuts: Toasted pine nuts give a nice crunch. - Parmesan cheese: Grate some on top for extra richness. These optional ingredients make your dish more exciting and colorful. Each adds a unique twist to your baked feta pasta. 1. Preheat your oven to 200°C (400°F). This step is crucial for even cooking. 2. Gather your kitchen tools: a medium baking dish, a pot, a fork, and a colander. 3. Place the block of feta cheese in the center of the baking dish. 4. Surround the feta with the halved cherry tomatoes. They will burst and add flavor. 5. Sprinkle the minced garlic over the feta and tomatoes. This adds a nice aroma. 6. Drizzle the olive oil on top. Add dried oregano, chili flakes, salt, and black pepper. 1. Put the baking dish in the preheated oven and bake for about 30 minutes. 2. The feta should turn golden, and the tomatoes will burst with juices. 3. While it bakes, fill a large pot with salted water and bring it to a boil. 4. Once boiling, add the pasta and cook according to the package instructions. 5. Aim for an al dente texture, where the pasta is firm but cooked. 6. After cooking, drain the pasta and set it aside until the feta is ready. 1. After 30 minutes, take the baking dish out of the oven. 2. Use a fork to mash the baked feta into the burst tomatoes. This creates a creamy sauce. 3. Combine the cooked pasta with the creamy feta-tomato mix. Toss well to coat all the pasta. 4. Taste the dish and add more seasoning if needed. 5. Serve the pasta hot, topped with fresh basil leaves and lemon zest for brightness. 6. For presentation, use large bowls or a platter. Drizzle olive oil on top for an extra touch. For the full recipe, check out the Baked Feta Pasta Delight. Enjoy your cooking! To get the best results with baked feta pasta, timing is key. Bake the feta and tomatoes for about 30 minutes at 200°C (400°F). This allows the cheese to melt and the tomatoes to burst. While the feta bakes, cook your pasta in salted water. Aim for al dente, which gives a nice bite. For a creamy sauce, mash the baked feta with the tomatoes well. This makes the texture smooth and rich. Don’t forget to season! Taste your mixture and adjust the salt and pepper to fit your liking. A little extra olive oil can make it even better. Watch out for overcooking the pasta. If it’s too soft, it won’t hold up in the dish. Also, be careful not to skip the garlic. It adds a great flavor. If you don’t have feta cheese, try goat cheese. It gives a nice tang, but the taste will change. If you want to make it spicy, use more chili flakes. But start small; you can always add more heat later. Herbs can really boost this dish. Fresh basil is a classic, but you can try oregano or thyme too. These herbs add a fresh taste that pairs well with the creamy sauce. For a pretty finish, sprinkle some lemon zest on top before serving. It adds brightness and a lovely aroma. You might also drizzle a bit of olive oil for shine. This makes the dish look even more inviting and delicious. For the full recipe, check the earlier section! {{image_4}} You can switch up your pasta for this dish. While penne and rigatoni are popular, consider using farfalle, fusilli, or even spaghetti. Each shape adds a unique touch. Farfalle holds sauce well, while fusilli twirls it up nicely. Spaghetti offers a classic feel. These choices change the way the dish feels and tastes. Don’t hesitate to mix your ingredients. If you want a different cheese, try goat cheese or ricotta. They bring unique flavors to the dish. You can also add veggies like spinach, bell peppers, or zucchini. For a vegan version, swap feta for a plant-based cheese. Use gluten-free pasta for a gluten-free meal. These swaps keep the dish fresh and exciting. Change your recipe with the seasons. In spring, add fresh asparagus or peas. Summer is great for zucchini and basil. In fall, use roasted squash or kale. Winter calls for hearty greens or root veggies. These seasonal choices bring new life to every bite. You can also try different herbs, like thyme in winter or mint in summer. This way, your baked feta pasta stays delicious all year round. For the full recipe, check out the Baked Feta Pasta Delight. To keep your Baked Feta Pasta fresh, store leftovers in an airtight container. Place it in the fridge within two hours of cooking. The dish stays fresh for up to three days. Always check for any signs of spoilage before eating. Yes, you can freeze Baked Feta Pasta. To do this, let it cool completely. Then, pack it in a freezer-safe container. This way, it can last for up to three months. When you want to eat it, thaw it overnight in the fridge. To reheat, use the oven for the best texture. Preheat it to 180°C (350°F) and cover the dish with foil. Heat for about 20 minutes or until warm. If using a microwave, heat in short bursts. Stir often to prevent cold spots. For extra flavor, add a splash of olive oil before serving. Baked Feta Pasta is a simple dish made with baked feta and tomatoes. This dish became popular on social media for its creamy texture and rich flavors. You bake a block of feta with cherry tomatoes, garlic, and herbs. When baked, the cheese becomes soft and mixes with the tomatoes to create a sauce. It’s easy to make and takes just 40 minutes. You can use crumbled feta, but the texture will change. Block feta melts better and creates a creamier sauce. Crumbled feta may not blend as well with the tomatoes. The dish will still taste good, but the sauce may not be as smooth. To add heat, use more chili flakes in the recipe. You can also add diced fresh chilies or hot sauce. Start with a small amount and taste as you go. This way, you can adjust the spice level to what you like. Baked Feta Pasta pairs well with a green salad or garlic bread. You might also enjoy it with roasted vegetables or a light soup. These sides add freshness and balance to the meal. Baked Feta Pasta has about 400-600 calories per serving, depending on the portion size and ingredients used. The pasta and feta contribute most of the calories. Using whole grain pasta or adding more vegetables can change the count. For the full recipe, check the details above. Baked Feta Pasta is a simple and delicious dish. We explored key ingredients, cooking steps, and tips for success. You learned how to enhance flavors and avoid common mistakes. This recipe is versatile, allowing for easy swaps and seasonal variations. With proper storage and reheating methods, leftovers can stay tasty. Now you can create your perfect Baked Feta Pasta meal. Enjoy your cooking journey!

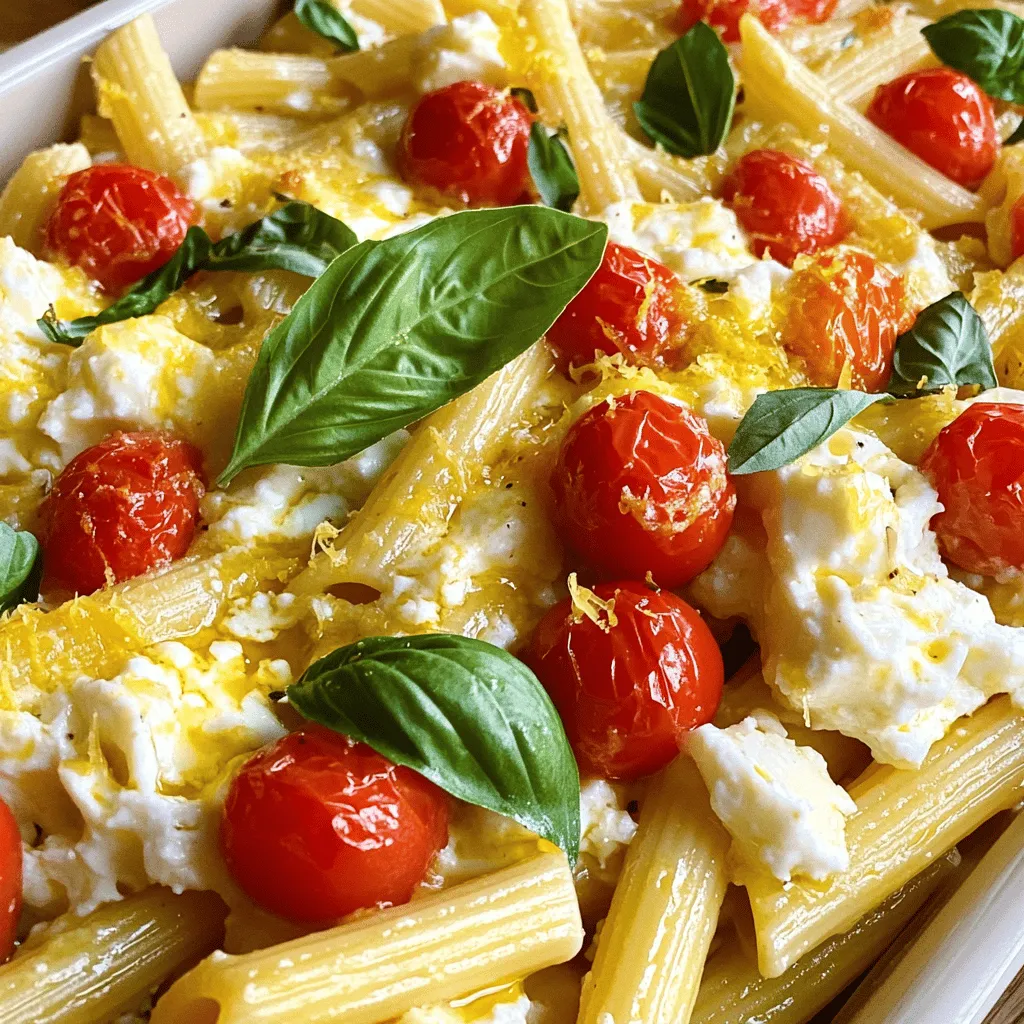
Get ready to delight your taste buds with Baked Feta Pasta, a dish that combines creamy feta and juicy tomatoes for a burst of flavor! This easy recipe is perfect …

Read more

Categories Dinner

Mouthwatering Honey Garlic Salmon Bites Delightful Dish

May 11, 2025 by Chef Remy
- 1 lb fresh salmon fillet - 1/4 cup honey - 3 tablespoons soy sauce - 3 cloves garlic - 1 tablespoon fresh ginger - 1 tablespoon sesame oil - 2 green onions for garnish - 1 tablespoon sesame seeds - Salt and freshly cracked pepper Marinating the salmon is key for great flavor. The honey adds sweetness, while the soy sauce gives it a savory touch. Garlic and ginger bring warmth and depth. Salt and pepper enhance all these flavors. You should let the salmon sit in the marinade. This makes the dish taste even better. Aim for at least 20 to 30 minutes in the fridge. To start, mix honey, soy sauce, garlic, ginger, and sesame oil. Each ingredient plays a key role in the flavor. Honey adds sweetness, while soy sauce brings saltiness. Garlic and ginger give a warm kick. Sesame oil adds a nutty taste, tying all the flavors together. This marinade creates a perfect balance for the salmon. Next, take your salmon cubes and coat them well with the marinade. Make sure every piece is covered. This helps the salmon absorb the flavors. Cover the bowl with plastic wrap and place it in the fridge. Let it marinate for 20-30 minutes. This time allows the flavors to blend into the fish. You can cook the salmon in two ways: baking or pan-frying. If you bake, set your oven to 400°F (200°C). Line a baking sheet with parchment paper for easy cleanup. Arrange the salmon in a single layer. Bake for 12-15 minutes. If you prefer pan-frying, heat a non-stick skillet over medium-high heat. Cook the salmon for 8-10 minutes. Flip the pieces halfway through for even cooking. Both methods will give you tasty, caramelized bites. To make sure your salmon cooks evenly, flip each piece halfway through the cooking time. This simple step helps prevent overcooking on one side. For those caramelized edges, avoid crowding the pan or baking sheet. Leave space between each salmon bite to allow heat to circulate well. For a stunning presentation, serve the salmon on a colorful plate. You can also add toothpicks for easy eating at parties. A bed of mixed greens adds a nice touch of color. Pair these bites with a fresh salad or steamed veggies. A light white wine or iced tea complements the flavors well. If you find your salmon is still undercooked, return it to the heat for a few more minutes. Keep an eye on it so you don’t overcook. If you want to adjust the marinade taste, add more honey for sweetness or soy sauce for saltiness. This flexibility lets you create a dish that fits your taste. For the complete recipe, check the section above. {{image_4}} You can easily change the flavor of your honey garlic salmon bites. Want some heat? Add red pepper flakes to the marinade. Just a pinch gives a nice kick. You can also swap honey for maple syrup. This adds a rich, deep sweetness that works well with salmon. If you want to switch proteins, chicken or tofu are great choices. For chicken, use boneless breast and cut it into bite-sized pieces. You can use the same marinade. Just ensure you cook it until it reaches 165°F. For tofu, use firm or extra-firm tofu. Cut it into cubes and press out excess water. Cook it the same way as the salmon, adjusting the time to get a nice crisp. Using seasonal garnishes can elevate your dish. In spring, try fresh herbs like dill or chives. In fall, add roasted pumpkin seeds for crunch. You can also mix in seasonal veggies. Try adding bell peppers or asparagus to the baking sheet. They cook well with the salmon and soak up the marinade flavor. For the full recipe, check out the detailed steps above. To keep your honey garlic salmon bites fresh, place them in an airtight container. Make sure the container is sealed tightly to avoid any odors from the fridge. These salmon bites will last up to three days in the fridge. If you want to enjoy them later, freezing is a great option. To freeze salmon bites, let them cool completely first. Lay them in a single layer on a baking sheet and freeze until solid. Once frozen, transfer them to a freezer-safe bag or container. Remove as much air as possible to prevent freezer burn. Properly stored, they can last up to three months. When you're ready to eat, move them to the fridge to thaw overnight for best results. When reheating, aim to keep the flavor and texture intact. The best method is to use an oven set at 350°F (175°C). Place the salmon bites on a baking sheet and heat for about 10 minutes. You can also reheat them in a skillet over medium heat, flipping gently to avoid overcooking. Be mindful not to cook them too long, as this can dry them out. Enjoy the deliciousness with each bite! For the full recipe, check out the [Full Recipe]. You should marinate the salmon for 20 to 30 minutes. This time is just right for the flavors to soak in. If you marinate too long, the fish can become mushy. I like to cover the bowl with plastic wrap and place it in the fridge. This keeps the salmon fresh and helps the marinade stick. Yes, you can use frozen salmon! Just make sure to defrost it first. The best way is to place it in the fridge overnight. If you're in a hurry, you can submerge it in cold water for about an hour. Be sure to pat it dry before marinating. This helps the marinade stick better and gives you a nice, tasty bite. You can serve honey garlic salmon bites with many delicious sides. Here are some ideas: - Steamed broccoli or asparagus - Rice or quinoa for a filling option - A fresh salad with mixed greens - Sliced cucumbers or carrots for crunch These sides balance the sweet and savory flavors of the salmon. Enjoy your meal! For a complete recipe, check the Full Recipe section. This blog covered how to make delicious honey garlic salmon bites. We discussed key ingredients, like fresh salmon, honey, and garlic. You learned about marinating, cooking options, and tips for perfect results. I shared variations using different proteins and spices to keep things exciting. Finally, we covered storage tips to make sure leftovers stay tasty. Creating this dish can be fun and rewarding. Enjoy making your own honey garlic salmon bites!

Are you ready to impress your taste buds? These Honey Garlic Salmon Bites are a must-try! With just a few simple ingredients, like fresh salmon, honey, and garlic, you can …

Read more

Categories Appetizers

Crispy Bang Bang Salmon Bites Flavorful Delight Within

May 10, 2025 by Chef Remy
- Salmon fillet preparation: Use 1 lb of fresh salmon fillet. Remove the skin and cut it into bite-sized cubes. This ensures even cooking and a great texture. - Coating elements: You will need three main items for the coating: - 1 cup panko breadcrumbs - 1/2 cup all-purpose flour - 2 large eggs, beaten Each of these elements plays a key role. The flour helps the egg stick, while the panko gives a nice, crispy finish. - Mayonnaise and Sweet Chili Sauce: Blend together 1/2 cup of mayonnaise and 2 tablespoons of sweet chili sauce. This mix creates a creamy and slightly sweet base. - Adjusting spice levels: Add 1 tablespoon of Sriracha and 1 tablespoon of lime juice to tailor the heat. If you like it spicier, add more Sriracha. Taste your sauce and adjust the salt as needed. By combining these ingredients, you get a rich, zesty sauce that complements the salmon perfectly. For the full recipe, check it out [here]. To start, you need to dry the salmon cubes. This step is key for a crispy bite. Moisture makes the coating soggy. Use paper towels to remove any water. Once dry, season the salmon with salt and black pepper. This simple seasoning enhances the fish's natural flavors. Next, set up your breading station. You will need three shallow bowls. In the first bowl, mix all-purpose flour, garlic powder, smoked paprika, salt, and black pepper. In the second bowl, beat the eggs. The third bowl holds the panko breadcrumbs. To bread the salmon, take a cube and dip it in the flour mix. Make sure to coat it well, then shake off excess flour. Next, dip it in the beaten eggs. Let any extra egg drip off. Finally, roll the salmon in the panko breadcrumbs. Press lightly to help the coating stick. Now it’s time to fry! In a skillet, add enough oil to be about 1/2 inch deep. Heat the oil over medium-high heat. To check if the oil is ready, drop in a small piece of bread. If it sizzles right away, it’s hot enough. Carefully add the breaded salmon bites in small batches. If you crowd the pan, the oil cools down. Fry for 3-4 minutes on each side until golden brown. Use a slotted spoon to remove the bites and place them on a paper towel-lined plate. This helps drain any extra oil. To get that perfect crunch, oil temperature matters. Heat the oil to medium-high before frying. If it's too cold, the salmon bites will become soggy. Fry in small batches. This keeps the oil hot and allows even cooking. You want each piece to fry beautifully without steaming. Using a slotted spoon helps drain excess oil. Once the salmon is golden brown, lift it out with this spoon. Place the bites on a paper towel-lined plate. This step is key to keeping them crispy and not greasy. Garnishing can elevate your dish. Use lime wedges to add a fresh pop of color. Finely chopped herbs like cilantro or green onions also look great. They make the dish inviting and add flavor. For serving, arrange the crispy salmon bites on a vibrant platter. Drizzle the Bang Bang sauce over them or serve it in a small bowl on the side. This makes it easy for guests to dip. A well-presented dish is sure to impress everyone at your table. {{image_4}} You can change the flavor with different sauces. Try honey mustard or a garlic aioli. Both add a tasty twist. If you like spice, add more Sriracha to your Bang Bang sauce. You can also mix in lime zest for extra zing. To customize the sauce, start with the basic recipe. Then, taste it as you go. Adjust the spice level to match your taste. This way, you can create a sauce that fits your mood. If salmon isn't your favorite, you can use chicken or tofu. Both will work well in this recipe. For chicken, use bite-sized pieces of boneless breast or thighs. For tofu, use firm tofu cut into cubes. When using chicken, cook it longer. Fry chicken for about 5-7 minutes until it’s golden and cooked through. Tofu needs less time, about 3-4 minutes, until it’s crispy. Each protein adds its unique flavor and texture. For the full recipe, check the cooking times and adjust as needed! To keep your crispy salmon bites fresh, store them in an airtight container. This method helps preserve their flavor and texture. Place a paper towel inside the container to absorb moisture. Try to eat the leftovers within three days for the best taste. When it's time to reheat, the oven is your best friend. Preheat it to 350°F (175°C) and place the salmon bites on a baking sheet. Bake them for about 10 minutes. This method keeps the bites crispy. If you only have a microwave, use it with caution. Microwave them for 30 seconds, then check. Repeat as needed, but this may make them less crispy. Enjoy your leftover crispy Bang Bang salmon bites just as much as when they were fresh! Yes, you can prepare the salmon bites ahead. To do this, follow these steps: - Prepare the Salmon: Cut and season the salmon as needed. - Breading: Complete the breading process but do not fry them yet. - Storage: Place the breaded bites in a single layer on a baking sheet. Cover with plastic wrap and refrigerate. This way, they stay fresh and crispy. When ready to cook, simply heat your oil and fry them until golden. For crispy salmon bites, fresh salmon fillet is ideal. Here are some great options: - Sockeye Salmon: Rich flavor and firm texture. - Coho Salmon: Mild taste, great for frying. - King Salmon: Buttery and high in fat, very delicious. These types ensure your bites are tasty and juicy. To kick up the heat in your Bang Bang sauce, try these tips: - Add More Sriracha: Start with a teaspoon more, then taste. - Include Red Pepper Flakes: Mix in a pinch for extra spice. - Use Hot Chili Sauce: Substitute sweet chili sauce with a spicier version. These changes can help you find the perfect level of heat. Many places serve dishes like Crispy Bang Bang Salmon Bites. Here are some suggestions: - Asian Fusion Restaurants: They often have creative seafood dishes. - Seafood Restaurants: Look for specialty salmon bites on the menu. - Tapas Bars: They may have small plates similar to these bites. Exploring these venues can lead to delicious finds. Yes, baking is a healthier option. Here’s how you can do it: - Preheat your oven to 400°F (200°C). - Prepare a baking sheet: Line it with parchment paper. - Place Salmon Bites: Arrange the breaded bites in a single layer. - Bake for 12-15 minutes, flipping halfway: This helps them crisp up. Baking will give you a lighter version while still being tasty. For the complete recipe, check out the [Full Recipe]. In this blog post, we explored how to make Crispy Bang Bang Salmon Bites, from ingredients to cooking tips. You learned about key ingredients, including salmon, coating elements, and the tasty Bang Bang sauce. We covered the frying techniques for perfect crispiness and shared storage information for leftovers. Using these steps, you can impress your friends with a delicious dish. Remember, you can experiment with sauces and proteins. Enjoy the process and make it your own!

Are you ready to elevate your snack game with Crispy Bang Bang Salmon Bites? These bites are a delightful mix of crunchy coating and savory flavor. I’ll share the secret …

Read more

Categories Appetizers

Bang Bang Chicken Simple and Tasty Recipe Guide

November 13, 2025May 9, 2025 by Chef Remy
To make Bang Bang Chicken, you need: - 1 pound chicken breast, diced into bite-sized pieces - 1 cup cornstarch - 2 large eggs, whisked - 1 cup panko breadcrumbs - ½ teaspoon salt - ½ teaspoon black pepper - ½ teaspoon garlic powder - ½ teaspoon cayenne pepper (adjust to your desired spice level) - Oil for frying These ingredients create a crispy, flavorful chicken that shines in this dish. The sauce gives Bang Bang Chicken its name. For the sauce, gather: - ½ cup mayonnaise - 2 tablespoons sweet chili sauce - 1 tablespoon sriracha (adjust to your desired spice level) - 1 teaspoon honey - 1 teaspoon soy sauce - 1 teaspoon lime juice - 1 tablespoon finely chopped green onions (for garnish) Mixing these ingredients results in a creamy, spicy, and sweet flavor. You can find great substitutes if you lack any ingredients: - Chicken breast can be swapped for chicken thighs for more flavor. - If you want a gluten-free option, use gluten-free breadcrumbs. - You can replace mayonnaise with Greek yogurt for a lighter sauce. - Instead of sriracha, try chili garlic sauce for a different kick. These swaps allow you to customize the recipe to your taste. {{ingredient_image_2}} Start by taking 1 pound of chicken breast. Dice it into bite-sized pieces. In a mixing bowl, season the chicken with ½ teaspoon salt, ½ teaspoon black pepper, ½ teaspoon garlic powder, and ½ teaspoon cayenne pepper. Toss the chicken well to coat it evenly. Let it sit for a few minutes to soak up the flavors. Grab three shallow bowls and place them in a row. In the first bowl, add 1 cup of cornstarch. In the second bowl, whisk 2 large eggs until they are smooth. In the third bowl, pour in 1 cup of panko breadcrumbs. This setup makes it easy to bread the chicken. First, take a piece of chicken and roll it in the cornstarch. Make sure it is fully coated. Shake off any extra cornstarch. Next, dip it into the beaten eggs. Let any excess egg drip back into the bowl. Finally, roll the chicken in the panko breadcrumbs. Press down gently to make sure the breadcrumbs stick. In a large skillet, heat enough oil for frying. It should be about ½ inch deep. Heat the oil over medium-high heat until it shimmers. Add the breaded chicken in small batches. Fry them for about 4-5 minutes per side until they are golden brown. Use a slotted spoon to move the chicken to a plate lined with paper towels. In a clean mixing bowl, combine ½ cup mayonnaise, 2 tablespoons sweet chili sauce, and 1 tablespoon sriracha. You can add more sriracha if you like it spicier. Also, add 1 teaspoon honey, 1 teaspoon soy sauce, and 1 teaspoon lime juice. Whisk until the sauce is smooth and creamy. Once the chicken is fried, place it in a large mixing bowl. Drizzle half of the Bang Bang sauce over the chicken. Gently toss it to coat all the pieces. Now, transfer the chicken to a serving platter. Drizzle the rest of the sauce on top. For a fresh look, sprinkle 1 tablespoon of finely chopped green onions as a garnish. Enjoy your tasty Bang Bang Chicken! For the best coating, use cornstarch first. It helps the egg stick better. Make sure each chicken piece is covered in cornstarch. Shake off the extra before dipping it in the egg. This step is key for a crispy finish. After the egg dip, roll the chicken in panko breadcrumbs. Press them down gently to stick well. This gives you a thick, crunchy layer. Choose a good oil for frying. I recommend using canola or vegetable oil. These oils can handle high heat without burning. Fill your pan with about half an inch of oil. Heat it until it shimmers but isn't smoking. This ensures even cooking and a golden color. Fry in small batches for the best results. Too many pieces at once can lower the oil's temperature. Spice levels can be adjusted easily. For a milder dish, reduce the cayenne in the chicken mix. You can also cut back on sriracha in the sauce. Taste the Bang Bang sauce as you mix. Add more sriracha for heat or honey for sweetness. This way, you make a sauce just right for your taste! Pro Tips Perfectly Fried Chicken: Ensure the oil is hot enough before adding the chicken. This prevents the chicken from absorbing too much oil and becoming greasy. A temperature of about 350°F (175°C) is ideal. Flavor Boost: Marinate the chicken for at least 30 minutes, or even overnight, to enhance the flavor. This allows the spices to penetrate the meat more deeply. Extra Crunch: For an even crunchier coating, double dip the chicken. After the first coating of panko, dip it back in the egg and then in the breadcrumbs again. Bang Bang Sauce Variations: Feel free to customize the Bang Bang sauce by adding ingredients like lime zest, garlic powder, or even a dash of sesame oil for extra depth of flavor. {{image_4}} You can make a baked version of Bang Bang Chicken. This option uses less oil. Instead of frying, coat the chicken and bake it in the oven. Preheat your oven to 400°F (200°C). Line a baking sheet with parchment paper. Place your breaded chicken on the sheet and spray it lightly with cooking oil. Bake for about 20-25 minutes, flipping halfway. The chicken will still be crispy and tasty. While the Bang Bang sauce is fantastic, you can try other sauces. A spicy peanut sauce adds a nutty flavor. Mix peanut butter, soy sauce, and a bit of lime juice for a twist. You could also use a sweet and sour sauce. Just combine equal parts of ketchup and vinegar for a simple blend. Experimenting with sauces keeps your meals exciting. You can make Bang Bang Chicken even better by adding veggies or other proteins. Try tossing in bell peppers, broccoli, or snap peas. They add color and crunch. For a protein twist, use shrimp or tofu instead of chicken. Treat them the same way and coat them with the same spices and sauce. This makes for a fun and filling meal. To store Bang Bang Chicken, let it cool first. Place the chicken in an airtight container. Make sure to separate the chicken from the sauce. This helps keep the chicken crispy. Store it in the fridge for up to three days. When you’re ready to eat, reheat the chicken in a skillet. Heat it over medium heat for about 5-7 minutes. This keeps it crispy and warm. You can also microwave it, but it may lose some crunch. If using the microwave, heat it in short bursts to avoid overcooking. You can freeze Bang Bang Chicken for later. Place the cooled chicken in a freezer-safe bag or container. Be sure to remove as much air as possible. It can last in the freezer for up to three months. When you're ready to eat, thaw it in the fridge overnight and reheat as mentioned before. Bang Bang Chicken comes from Chinese cuisine. It is known for its bold flavors and crispy texture. The name reflects the sound of the cooking method. It mixes fried chicken with a spicy sauce. This dish is popular in Asian restaurants worldwide. Yes, you can make Bang Bang Chicken gluten-free. Use gluten-free cornstarch and gluten-free breadcrumbs. You can also find gluten-free soy sauce. Check all labels to ensure they meet your needs. Great side dishes include: - Steamed rice - Fried rice - Stir-fried vegetables - Asian-style slaw - Fresh cucumber salad These sides balance the flavors and make a complete meal. To reduce spice, use less cayenne pepper in the chicken. For the sauce, cut back on sriracha. You can also add more mayonnaise to tone down heat. Taste as you go to reach your perfect spice level. Yes, you can use frozen chicken. Just make sure to thaw it first. Cut the chicken into bite-sized pieces before cooking. This helps ensure even cooking and a crispy texture. We covered how to make Bang Bang Chicken, from ingredients to serving. I shared key tips for a perfect coating and frying method. If you're looking for variation, healthier options exist too. Proper storage helps keep leftovers tasty. Lastly, exploring FAQs deepens your dish knowledge. Enjoy making this dish your own!

Are you ready to try a dish that bursts with flavor? Bang Bang Chicken is easy to make and oh-so-tasty! In this guide, I’ll walk you through simple steps to …

Read more

Categories Appetizers

Baked Cream Cheese Chicken Taquitos Savory Delight

November 12, 2025May 4, 2025 by Chef Remy
- 2 cups cooked chicken, shredded - 8 oz cream cheese, softened - 1 cup shredded cheddar cheese - 1/2 cup green onions, finely chopped - 1 teaspoon garlic powder - 1 teaspoon ground cumin - 1/2 teaspoon salt - 1/4 teaspoon ground black pepper - 10-12 corn tortillas - Cooking spray To make Baked Cream Cheese Chicken Taquitos, you need a few simple items. The main star is cooked chicken. You can use leftovers or rotisserie chicken. Cream cheese adds a rich texture. Shredded cheddar gives a nice cheesy flavor. Green onions add a fresh crunch. Garlic powder and cumin bring warmth to the mix. Salt and pepper balance everything out. Corn tortillas hold the filling together. A quick spray of cooking spray helps them crisp up nicely. - Sour cream - Salsa - Sliced avocado These toppings add extra flavor and fun. Sour cream cools the spicy notes. Salsa gives a zesty kick. Sliced avocado adds creaminess and freshness. You can mix and match these to suit your taste. If you need to swap ingredients, it’s easy. Use cream cheese with herbs for extra flavor. Any cheese works if you prefer something different. You can substitute chicken with cooked turkey or beans for a veggie option. If you want a gluten-free version, try corn tortillas instead of flour. Just be sure to check the labels for any hidden gluten. {{ingredient_image_2}} Start by preheating your oven to 400°F (200°C). This step is vital as it ensures your taquitos bake evenly and become crispy. Next, gather your ingredients. In a large bowl, mix together 2 cups of shredded chicken and 8 ounces of softened cream cheese. Add in 1 cup of shredded cheddar cheese, 1/2 cup of finely chopped green onions, 1 teaspoon of garlic powder, 1 teaspoon of ground cumin, 1/2 teaspoon of salt, and 1/4 teaspoon of black pepper. Stir everything until smooth. This mixture is where the magic happens! Now, let’s soften the tortillas. Place 10 to 12 corn tortillas in a microwave-safe dish. Cover them with a damp paper towel and heat for about 30 seconds. This makes the tortillas easy to roll without cracking. Once softened, lay one tortilla flat. Spoon about 2-3 tablespoons of the filling along one edge. Carefully roll the tortilla around the filling, starting from the edge with the mixture. Tuck in the sides as you roll to keep the filling inside. Repeat this for each tortilla until all are rolled. Line a baking sheet with parchment paper to stop sticking. Place the rolled taquitos seam-side down. Lightly spray the tops with cooking spray for extra crispiness. Bake them in the preheated oven for 20-25 minutes. Look for a golden brown color. Let them cool for a few minutes before serving. Enjoy! - Use warm tortillas. This keeps them soft and easy to roll. - Mix the filling well. Make sure all flavors blend together. - Don’t overfill. Use just enough filling to roll without spilling. - Skipping the softening step. This can cause cracks in the tortillas. - Not preheating the oven. A hot oven ensures a crispy texture. - Forgetting to spray with cooking spray. This step helps achieve golden brown taquitos. - Use a light coat of cooking spray on top. This helps with browning. - Bake on a parchment-lined sheet. This prevents sticking and helps crisp. - Flip the taquitos halfway through baking. This promotes even crispiness on both sides. Pro Tips Fresh Ingredients: Using fresh green onions and quality chicken can enhance the flavor of your taquitos significantly. Opt for rotisserie chicken for convenience and added taste. Cheese Variations: Feel free to mix different types of cheese like pepper jack for a spicy kick or mozzarella for a gooey texture. Experiment to find your favorite combination! Storing Leftovers: If you have leftover taquitos, store them in an airtight container in the fridge. Reheat in the oven to maintain their crispiness before serving. Make Ahead: Prepare the filling and roll the taquitos a day in advance. Just keep them covered in the fridge until you’re ready to bake for an easy meal option! {{image_4}} You can make these taquitos lighter. Use Greek yogurt instead of cream cheese. This swap cuts fat but keeps creaminess. You can also use low-fat cheese for a healthier twist. Swap corn tortillas for whole grain ones to add fiber. These small changes can make a big difference. If you want to switch up the protein, try using turkey instead of chicken. Shredded pork works well too. For a unique flavor, use spicy chorizo. Each option adds its own taste to the dish. Feel free to get creative with your protein choice. To make these taquitos vegetarian, replace chicken with black beans or lentils. Use a vegan cream cheese for a dairy-free version. You can also add veggies like spinach or bell peppers for extra nutrition. This way, you keep the flavors while catering to different diets. After enjoying your taquitos, let them cool down. Place leftovers in an airtight container. Store them in the fridge for up to three days. If you plan to eat them soon, this method keeps them fresh. To freeze, wrap each taquito tightly in plastic wrap. Place them in a freezer-safe bag. They can last for up to three months in the freezer. When you're ready to eat, simply thaw them in the fridge overnight. Reheat your taquitos in the oven for the best texture. Preheat the oven to 375°F (190°C). Place the taquitos on a baking sheet and heat for about 10-15 minutes. This will keep them crispy and tasty. You can also use an air fryer for a quicker option. Enjoy your delicious leftovers! Yes, you can use flour tortillas. They are soft and easy to roll. However, corn tortillas give a nice crunch. If you choose flour, make sure to warm them. This helps prevent tearing. To spice up the filling, add diced jalapeños or hot sauce. You can also mix in some cayenne pepper or chili powder. Start with a small amount. Taste the mixture before you add more heat. This way, you control the spice level. Serve these taquitos with sour cream and salsa for dipping. Guacamole is another great choice. Fresh veggies like sliced cucumbers or a simple salad pair well too. They add a fresh crunch and balance the flavors. Enjoy your meal! We covered the key steps to making tasty baked taquitos. You learned about the main ingredients, options for toppings, and substitutions. I shared step-by-step instructions to help you bake perfect taquitos. Tips and common mistakes were also outlined. Lastly, we discussed storage and reheating methods. Enjoy trying different variations, like healthy swaps or vegetarian options. Remember, practice makes perfect. Keep experimenting and enjoy your delicious creations!

Are you ready to take your snack game to the next level? Baked Cream Cheese Chicken Taquitos are here to impress! These savory bites combine creamy cheese with tender chicken, …

Read more

Categories Appetizers

Chickpea Feta Avocado Salad Flavorful and Fresh Mix

November 13, 2025April 10, 2025 by Chef Remy
- 1 can (15 oz) chickpeas, thoroughly rinsed and drained - 1 large ripe avocado, diced into bite-sized pieces - 1 cup cherry tomatoes, halved for a burst of sweetness - 1 small cucumber, peeled and diced for crunch - 1/2 red onion, finely chopped for a zesty kick - 1/2 cup crumbled feta cheese for creaminess - 1/4 cup fresh parsley, finely chopped for a herbal note - 3 tablespoons extra virgin olive oil for richness - 2 tablespoons freshly squeezed lemon juice for brightness - Salt and freshly cracked black pepper to taste - 1/2 teaspoon red pepper flakes (optional, for a hint of heat) This salad is not just tasty; it is also good for you. Each serving is packed with protein, fiber, and healthy fats. Here’s a quick look at what you get per serving: - Calories: About 250 - Protein: 8g - Fiber: 10g - Healthy Fats: 15g - Carbs: 20g Chickpeas provide protein and fiber. Avocado adds healthy fats. Feta gives a creamy touch. Tomatoes, cucumber, and parsley boost vitamins and minerals. You can change things up based on what you have. Here are some options: - Use black beans instead of chickpeas for a different flavor. - Swap feta with vegan cheese for a dairy-free option. - Try lime juice in place of lemon for a new twist. - Replace red onion with green onion if you prefer a milder taste. - Use spinach instead of parsley for a different herb taste. These swaps keep the dish fresh and fun while still being healthy! {{ingredient_image_2}} Start by rinsing and draining one can of chickpeas. This helps remove extra salt and liquid. Next, grab a large bowl and add the chickpeas. Now, dice one large avocado into bite-sized pieces. Add the avocado to the bowl. Halve one cup of cherry tomatoes and add them for sweetness. Peel and dice one small cucumber for a nice crunch. Chop half a red onion finely and add it for a zesty kick. With a gentle touch, stir all the ingredients in the bowl. Be careful not to mash the avocado. You want it to stay chunky. This adds a creamy texture to the salad. Once mixed, it should look colorful and fresh. In a small bowl, whisk together three tablespoons of extra virgin olive oil and two tablespoons of freshly squeezed lemon juice. Add salt and black pepper to taste. If you like heat, toss in half a teaspoon of red pepper flakes. Whisk until everything blends together smoothly. Drizzle the dressing over the salad mixture. Gently toss the salad to coat all the ingredients without breaking the avocado. Now, fold in a quarter cup of finely chopped fresh parsley for extra freshness. Taste the salad and adjust the seasoning if needed. Let it sit at room temperature for about ten minutes. This time lets the flavors meld together nicely. Enjoy your vibrant and tasty Chickpea Feta Avocado Salad! Keeping your avocado fresh is easy. First, use lemon juice. Squeeze some over the cut avocado. The acid slows browning. If you have leftover avocado, store it in an airtight container. Place it with the pit still inside. This helps keep it green longer. Wrap it in plastic wrap if you want extra protection. Balancing flavors makes your salad shine. You want a mix of salty, sweet, and tangy. The feta adds saltiness, while the cherry tomatoes bring sweetness. The lemon juice gives a bright, tangy kick. Always taste as you go. Add a pinch of salt or a dash of pepper if needed. If you like heat, sprinkle in some red pepper flakes. This adds a nice zing! Want to save time? Prep your ingredients ahead. Chop the veggies and store them in the fridge. You can also drain your chickpeas a day early. When it’s time to make the salad, just mix everything. Another trick is to use pre-crumbled feta. This cuts down on prep time too. Enjoy your quick and tasty salad! Pro Tips Choose Ripe Avocados: Make sure your avocados are perfectly ripe for the best creamy texture. They should yield slightly to gentle pressure when squeezed. Season Gradually: Start with a little salt and pepper, then adjust to taste. You can always add more, but it's hard to fix an overly salty dish. Experiment with Herbs: Feel free to swap parsley for other fresh herbs like cilantro or basil for a different flavor profile. Perfect for Meal Prep: This salad keeps well for a day in the fridge, making it a great option for meal prepping. Just keep the dressing separate until ready to serve! {{image_4}} You can easily boost the protein in your Chickpea Feta Avocado Salad. Here are some great choices: - Grilled Chicken: Dice cooked chicken for a hearty touch. - Shrimp: Add cooked shrimp for a seafood twist. - Tofu: Use firm tofu for a plant-based option. - Quinoa: Mix in cooked quinoa for extra fiber and protein. Each of these options adds a new flavor and texture. Try them out to fit your taste! Seasonal swaps can keep this salad fresh and exciting. Use what's in season: - Spring: Add fresh peas for a sweet crunch. - Summer: Toss in diced bell peppers for color and sweetness. - Fall: Include diced apples or pears for a sweet contrast. - Winter: Use roasted butternut squash for warmth and richness. These ingredients make the salad more fun and keep it vibrant all year round! You can make this salad vegan or dairy-free without losing flavor. Here are some swaps: - Vegan Feta: Use a plant-based feta for creaminess. - Nutritional Yeast: Sprinkle this for a cheesy flavor. - Avocado: If you want more creaminess, add more avocado. These swaps keep the essence of the dish while catering to different diets. You won't miss the dairy at all! To keep your Chickpea Feta Avocado Salad fresh, store it in an airtight container. Make sure to cover it tightly. This way, the salad lasts up to three days in the fridge. If the avocado starts to brown, you can add a splash of lemon juice. This helps keep it green and bright. I don't recommend freezing this salad. The texture of the avocado and feta changes when frozen. They become mushy and lose their charm. Instead, enjoy the salad fresh. If you have extra chickpeas, you can freeze those separately. They can easily be added to future meals. If you happen to have a small portion left, simply let it sit at room temperature for about 10 minutes. This helps it warm up slightly. Avoid using a microwave; it can ruin the creamy texture of the avocado. Always serve the salad fresh for the best taste! Yes, you can make this salad ahead of time. Prepare it and store it in the fridge. However, I suggest adding avocado just before serving. This keeps the avocado fresh and green. If the salad sits too long, the avocado can turn brown. This salad pairs well with many dishes. You can serve it with grilled chicken or fish for protein. It also goes well with pita bread or crackers for added crunch. You can use it as a side for a light lunch or dinner. To add some heat, mix in red pepper flakes. You can also use fresh jalapeños or a dash of hot sauce. Start with a little, then taste it. Adjust the spice level to fit your taste. Enjoy the kick it adds! In this blog post, we explored how to make a Chickpea Feta Avocado Salad. We discussed the complete ingredients and their nutrition. You learned how to prepare the salad step-by-step, from making the dressing to mixing it all together. Tips on keeping avocados fresh and balancing flavors help you enhance your dish. We also covered healthy variations and storage options for leftovers. With these insights, you can easily create a delicious and fresh salad any time. Enjoy your cooking!

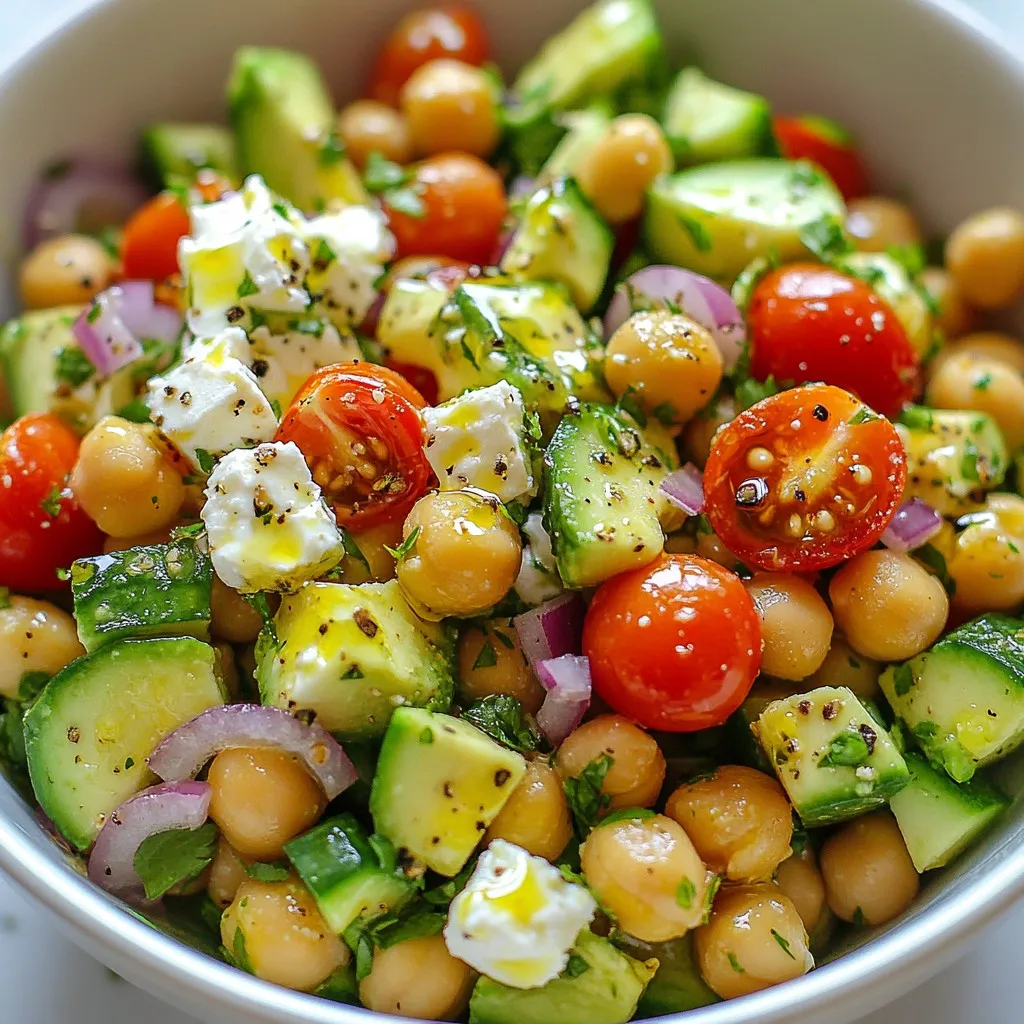
Are you ready to enjoy a fresh and tasty dish? My Chickpea Feta Avocado Salad is the perfect mix of flavors and textures. Packed with healthy ingredients, this salad is …

Read more

Categories Salads
Older posts
Newer posts
← Previous Page1 … Page127 Page128 Page129 Page130 Next →

ROASTED RECIPES

Where bold flavors meet everyday meals. Warm, vibrant, and made to share. 🔥🥗🍴

PAGES

Home About Contact Privacy Policy Terms & Conditions Cookie Policy GDPR Policy Copyright Policy Disclaimer

CATEGORIES

Appetizers Desserts Salads Breakfast Dinner

Contact

  • Pinterest
  • Mail
Copyright © 2025 Roasted Flavors. All rights reserved.