Skip to content
Roasted Flavors
  • Home
  • Appetizers
  • Desserts
  • Salads
  • Breakfast
  • Dinner
  • Privacy Policy
  • Contact
  • About

Chef Remy

Mini Crème Brûlée Cheesecakes Delightful and Easy Recipe

May 17, 2025 by Chef Remy
- 1 cup graham cracker crumbs - 3 tablespoons unsalted butter, melted - 2 tablespoons granulated sugar - 16 oz cream cheese, softened at room temperature - 1 cup granulated sugar - 1 teaspoon vanilla extract - 2 large eggs, room temperature - 1 cup heavy cream - 2 tablespoons brown sugar (for the brûlée topping) You can switch ingredients for different flavors. Try using digestive biscuits or vanilla wafers for the crust. Coconut cream can replace heavy cream for a lighter version. For a sugar-free option, use a sugar substitute in the filling and topping. If you want a different flavor, add lemon zest or almond extract instead of vanilla. Choose fresh cream cheese for the best taste. Look for blocks, not tubs, for a richer flavor. When picking eggs, choose large, organic eggs for creaminess and richness. Always select heavy cream with at least 36% fat for a smooth texture. For the best crust, make sure your butter is unsalted and fresh. Quality ingredients make your mini crème brûlée cheesecakes shine! Start by preheating your oven to 325°F (163°C). This sets the stage for perfect baking. Prepare a standard muffin tin by lining it with 12 paper liners. This keeps your cheesecakes from sticking. In a medium bowl, mix these ingredients: - 1 cup graham cracker crumbs - 3 tablespoons unsalted butter, melted - 2 tablespoons granulated sugar Use a fork or your hands to combine. Make sure the crumbs get coated well with butter. Next, press the crumb mixture into the bottom of each liner. Use your fingers or the back of a measuring cup to create a firm layer. Bake this for 10 minutes, then allow it to cool completely. In a large bowl, beat 16 oz of softened cream cheese. Use an electric mixer on medium speed until it is smooth. Gradually add in 1 cup of granulated sugar. Mix this until fully blended. Next, stir in 1 teaspoon of vanilla extract. Then add 2 large eggs, one at a time. Make sure each egg blends in well before adding the next. This step is key for a creamy texture. Slowly pour in 1 cup of heavy cream while mixing on low speed. Keep mixing until the batter is smooth and free of lumps. Carefully pour the cheesecake filling into the prepared crusts. Fill each liner about two-thirds full. This allows space for the cheesecakes to expand. Place the muffin tin in the oven and bake for 25-30 minutes. The centers should set but still jiggle slightly. Once baked, take the tin out of the oven and let it cool at room temperature. Transfer the cooled cheesecakes to the refrigerator. Chill them for at least 4 hours, or overnight if you can. This step helps the flavors come together and sets the cheesecakes fully. When you're ready to serve, sprinkle a thin layer of brown sugar on top of each cheesecake. Using a kitchen torch, caramelize the sugar until it turns golden and crisp. If you don’t have a torch, you can place them under the broiler for a couple of minutes. Keep a close eye to prevent burning. You now have a delightful mini crème brûlée cheesecake ready to impress! For the complete details, check the Full Recipe. When making mini crème brûlée cheesecakes, watch out for these common mistakes: - Overmixing the batter: This can add too much air and cause cracks. - Not chilling long enough: Chilling helps the flavors blend and sets the texture. - Skipping the crust prep: A solid crust gives your cheesecakes a great base. To get that perfect creamy texture, focus on these key points: - Use room temperature cream cheese: Cold cream cheese can cause lumps. - Mix gently: Avoid overmixing after adding the eggs to keep it smooth. - Don’t overbake: The centers should jiggle a bit; they will set as they cool. Having the right tools makes this recipe easier: - Muffin tin: This holds the mini cheesecakes perfectly. - Electric mixer: It makes blending the cream cheese simple and quick. - Kitchen torch or broiler: Use this for caramelizing the sugar topping. Follow these tips, and you will create delightful mini crème brûlée cheesecakes every time! For the full recipe, check out the previous section. {{image_4}} You can change the flavor of your mini crème brûlée cheesecakes easily. Try adding chocolate for a rich twist. Just mix in ½ cup of melted chocolate after you beat the cream cheese. For a fruity flavor, consider adding pureed strawberries or raspberries. Use about ½ cup of fruit puree. This will give your cheesecakes a fresh and vibrant taste! While brown sugar is great for the classic brûlée topping, you can mix it up. Use crushed nuts for a crunchy layer. Almonds or pistachios work well. You can also drizzle chocolate or fruit sauces on top. This adds color and flavor. Fresh fruit, like berries or slices of kiwi, adds a nice touch, too. Make your mini cheesecakes stand out at parties. Use pretty plates or cake stands to display them. Add a mint leaf on each one for a pop of color. You can also sprinkle edible flowers on top. This makes your dessert look extra special. For themed events, match the toppings with colors or flavors for a fun twist. For the full recipe, check out the details above. Enjoy making these delightful treats! You can store mini crème brûlée cheesecakes in the fridge. Place them in an airtight container. They will stay fresh for up to five days. If you cover them well, they won’t dry out or absorb odors from your fridge. You can also freeze these mini cheesecakes. Wrap each one tightly in plastic wrap. Then, place them in a freezer-safe bag. They can stay frozen for up to three months. To thaw, move them to the fridge overnight before enjoying. When you want to eat a cheesecake, you can simply remove it from the fridge. Let it sit at room temperature for about 30 minutes before serving. This helps it regain its creamy texture. If you prefer it warm, you can microwave it for about 10-15 seconds. Just be careful not to overheat it! Crème brûlée is a creamy custard topped with caramelized sugar. Cheesecake, on the other hand, blends cream cheese and sugar for a rich, dense dessert. Both are delicious, but their textures and flavors are quite different. Crème brûlée has a smooth, silky base, while cheesecake is thick and rich. You can enjoy both, but they create unique experiences when you eat them. Yes, you can! These mini cheesecakes are perfect for making ahead. You can prepare them a day or two in advance. Just chill them in the fridge until you are ready to serve. This helps the flavors develop even more. When you're ready to serve, simply caramelize the sugar topping for a fresh finish. Cracks can happen for many reasons. The most common cause is baking at too high a temperature. If you see cracks, don’t worry! You can cover them with the caramelized sugar topping. This way, they look pretty and taste great. If you want to avoid cracks, try baking your cheesecakes at a lower temperature and use a water bath. No kitchen torch? No problem! You can use your oven broiler instead. Just sprinkle the brown sugar and place the cheesecakes under the broiler for a couple of minutes. Watch them closely to avoid burning. Move them around if needed for even caramelization. This method works well and gives you a nice, crispy topping. Absolutely! You can use gluten-free graham cracker crumbs or crushed nuts for the crust. Almond flour or gluten-free cookies also work well. Just substitute them in the same amount as the regular crumbs. This way, everyone can enjoy these mini crème brûlée cheesecakes! You've learned how to create mini crème brûlée cheesecakes with care. We covered the best ingredients, tips for selection, and easy steps for baking. I shared common mistakes to avoid and ways to get the right texture. With variations and storage tips, these cheesecakes fit any occasion. Remember, practice makes perfect. Each time you bake, you'll improve your skills. Enjoy the process and treat yourself to this delicious dessert!

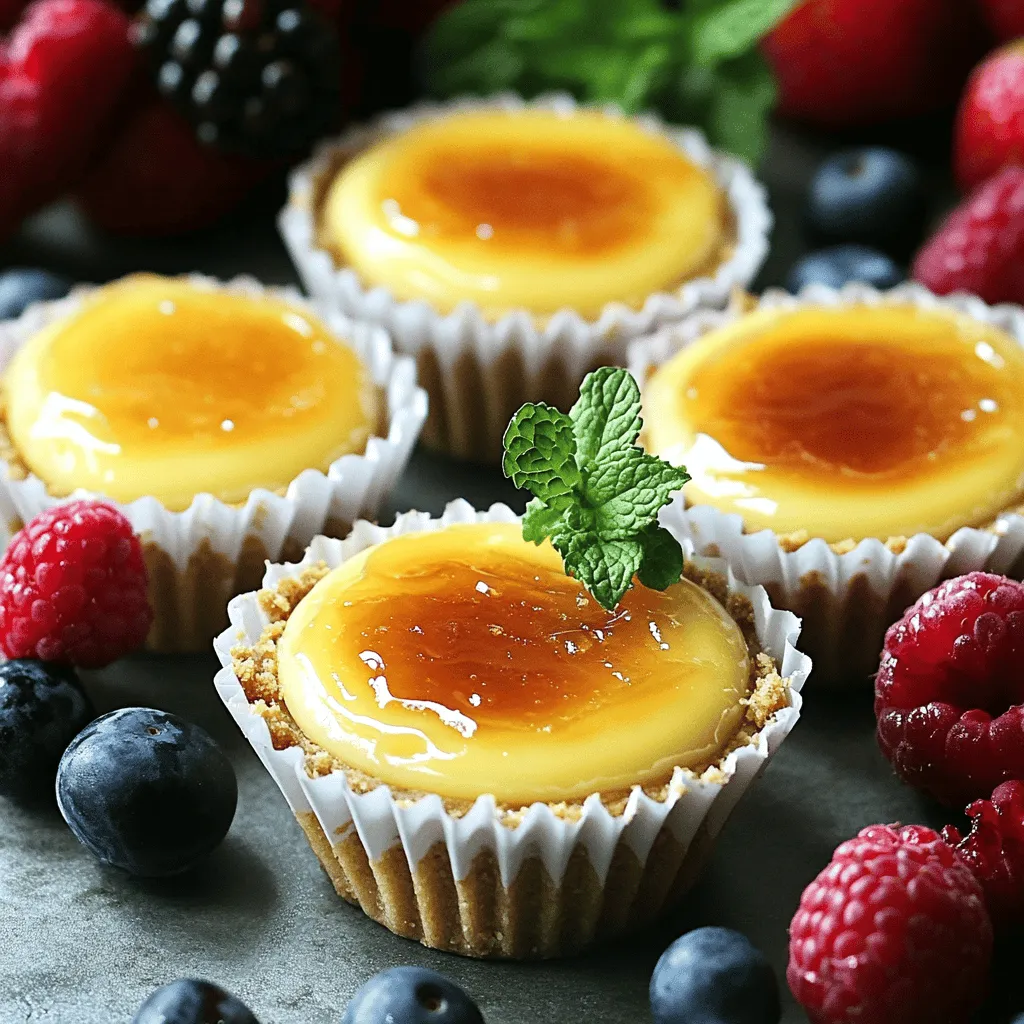
If you love the creamy richness of cheesecake and the crunchy top of crème brûlée, this recipe is for you! Mini Crème Brûlée Cheesecakes are not only delightful but also …

Read more

Categories Desserts

Caramelized Onion Tart Simple Flavorful Delight

May 17, 2025 by Chef Remy
- 1 sheet of puff pastry, thawed - 4 large onions, thinly sliced - 2 tablespoons olive oil - 2 tablespoons unsalted butter - 2 tablespoons brown sugar - 1 teaspoon fresh thyme leaves (or 1/2 teaspoon dried thyme) - 1/2 cup goat cheese, crumbled - Salt and pepper to taste - 1 egg, beaten (for egg wash) To make a great caramelized onion tart, use fresh ingredients. Choose onions that are firm and heavy. Sweet onions, like Vidalia or Walla Walla, work best. They offer a lovely sweetness when caramelized. For the puff pastry, I suggest buying pre-made sheets. It saves time and gives a nice flaky texture. Goat cheese adds a rich creaminess. However, feel free to swap it with feta or cheddar if you prefer. When making a larger tart, you can double the recipe. For a smaller one, halve the amounts. This makes it easy to adjust for your needs. To make the tart gluten-free, use gluten-free puff pastry. Most stores offer this option now. Ensure all other ingredients are gluten-free as well. The best places to buy fresh ingredients are local farmers' markets. They often have seasonal onions and herbs. Grocery stores also work, but check for freshness. Quality matters in flavor. Fresh onions bring out the sweetness in the tart. Good cheese adds a nice richness. Always choose quality over price for the best results. To begin, preheat your oven to 400°F (200°C). This step is crucial for a perfect bake. While the oven warms up, prepare your onions. Take 4 large onions and slice them thinly. This ensures even cooking and caramelization. Next, you will cook the onions. In a large skillet, combine 2 tablespoons of olive oil and 2 tablespoons of unsalted butter. Heat this over medium heat until the butter melts. Add the sliced onions and a pinch of salt. Cook for about 15 minutes. Stir occasionally. The onions should become soft and translucent. Now, it’s time to caramelize. Sprinkle 2 tablespoons of brown sugar and 1 teaspoon of fresh thyme leaves over the onions. Continue to cook for another 15-20 minutes. Stir occasionally to prevent burning. The onions should turn a rich, deep caramel color. This step is key. It develops flavor and sweetness. Once done, remove the skillet from heat and let the mixture cool slightly. Prepare your puff pastry next. Roll out 1 sheet of thawed puff pastry on a floured surface. Make it large enough for your tart pan. Press the pastry into the greased pan. Trim any excess pastry from the edges for a neat finish. Now, assemble the tart. Spread the caramelized onion mixture evenly over the puff pastry. Crumble 1/2 cup of goat cheese over the top. This adds a creamy texture and rich taste. For a golden crust, apply a beaten egg wash around the pastry edges. This step is simple but important. It helps the pastry brown nicely. Finally, place your tart in the preheated oven. Bake for 25-30 minutes. The pastry should puff up and turn a lovely golden brown. Once baked, let it cool slightly before slicing into wedges. Always taste and adjust seasoning with more salt and pepper if needed. For the complete process, refer to the Full Recipe. To get rich flavor in your caramelized onion tart, focus on a slow cook. Start with medium heat. If the heat is too high, the onions can burn. Stir them often, every few minutes. This helps cook them evenly. Aim for a soft, golden color. This process usually takes 30 to 40 minutes. Avoid common mistakes like cooking too fast or not using enough fat. Olive oil and butter together give the best taste. Don't rush the sugar addition; wait until the onions are soft. If they are not soft enough, they won’t caramelize well. To make your tart look amazing, serve it warm. Place it on a nice platter. Use fresh thyme sprigs to garnish. This adds color and freshness. A drizzle of balsamic reduction can enhance the look too. It adds a shiny finish and a tasty contrast. You can also cut the tart into small squares for a fun appetizer. Arrange them on a wooden board for a rustic feel. This makes sharing easy and adds to the charm. For side dishes, a simple salad with vinaigrette works well. The tart’s richness pairs great with crisp greens. You can also serve it with roasted vegetables for added flavor. For drinks, a light white wine like Sauvignon Blanc is perfect. It balances the tart's sweetness. If you prefer non-alcoholic, try sparkling water with a slice of lemon. This keeps things refreshing and light. For the full recipe, check out the Caramelized Onion Delight Tart. {{image_4}} You can change the taste of your caramelized onion tart easily. Adding new herbs and spices can bring fresh flavors. Try using rosemary, dill, or even a pinch of nutmeg to add warmth. You can also mix in vegetables like bell peppers or mushrooms for extra texture and taste. These small changes can make a big difference. If you want to switch up the cheese, there are plenty of options. Instead of goat cheese, try feta or ricotta for a different creaminess. For a dairy-free option, look for plant-based cheeses made from nuts or soy. These swaps keep your tart tasty while catering to different diets. While puff pastry is classic, you can use other crusts too. A whole grain crust adds a nutty flavor. You can even make your own tart crust using flour, butter, and water. This can be a fun way to personalize your tart. Just make sure to roll it out thin for a crisp bite. Explore these variations to find your favorite twist on the classic caramelized onion tart. For more detailed steps, check the Full Recipe. Store leftover caramelized onion tart in an airtight container. This keeps it fresh and tasty. Place the tart in the fridge within two hours of baking. If you store it before baking, wrap the unbaked tart in plastic wrap. This helps preserve its texture until you are ready to bake. To freeze tart slices, wrap each slice in plastic wrap. Then, place them in a freezer-safe bag. This prevents freezer burn and keeps the flavor. When you're ready to eat, thaw the slices in the fridge overnight. Reheat in the oven for about 10-15 minutes at 350°F (175°C) for the best texture. The caramelized onion tart stays fresh in the fridge for about 3-4 days. If stored properly in the freezer, it can last up to 2 months. Signs of spoilage include an off-smell or mold. Always check before eating. For the full recipe, visit the designated section. You will know the onions are ready when they turn a deep brown color. They should be soft and sweet. Stir them often to avoid burning. It usually takes about 30-40 minutes to reach this stage. Yes, you can prepare the tart ahead of time. You can caramelize the onions and assemble the tart. Then, cover it and store it in the fridge. Bake it just before serving for the best results. If you do not have goat cheese, try using feta or ricotta cheese. These cheeses add creaminess and flavor. For a dairy-free option, use cashew cheese or a vegan cream cheese alternative. Yes, you can make this tart vegan easily. Use a vegan puff pastry for the crust. Substitute the goat cheese with a plant-based cheese. Instead of the egg wash, brush the crust with a little almond milk for color. In this post, we explored how to create a delicious tart. We covered ingredients like puff pastry, various cheeses, and preparation steps. You learned how to convert measurements for different quantities and create a gluten-free option. We also shared tips for caramelizing onions, assembling, and baking your tart. Remember, using fresh, quality ingredients enhances flavor. Stay creative with variations and enjoy your culinary journey!

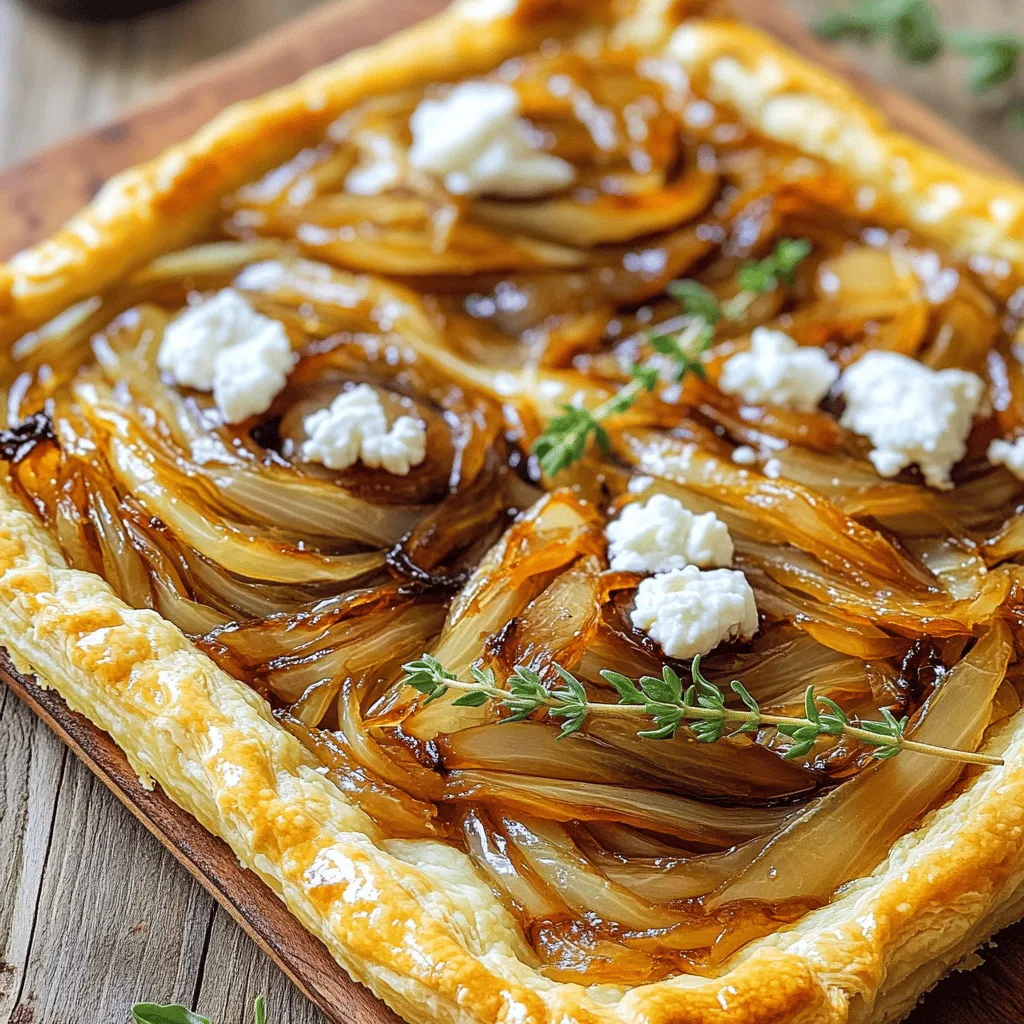
If you crave a dish that’s both rich in flavor and easy to make, you’ll love my Caramelized Onion Tart! This simple recipe combines sweet onions, flaky pastry, and creamy …

Read more

Categories Appetizers

Campfire S’mores Easy Guide to Delicious Treats

May 17, 2025 by Chef Remy
To make the best campfire s'mores, you need a few key items. These are: - 1 sleeve of graham crackers - 1 cup of mini marshmallows - 1 cup of chocolate bars (milk chocolate or dark chocolate) - Skewers or roasting sticks These four ingredients create the classic s'more taste that everyone loves. The graham crackers provide a crunchy base. The chocolate adds a rich flavor. The marshmallows give that sweet, gooey texture. To make your s'mores even better, consider adding these fun extras: - 1 ripe banana, sliced - ¼ teaspoon ground cinnamon - ½ cup chopped nuts (optional) The ripe banana adds a unique twist. It brings a fruity taste that pairs well with chocolate. A sprinkle of cinnamon gives a warm spice. Chopped nuts add crunch and more flavor. You can mix and match these add-ins to suit your taste. Having the right tools makes s'mores easy and fun to prepare. Here’s what you need: - Skewers or roasting sticks for toasting marshmallows - A small plate for assembling your s'mores - A campfire or fire pit With these tools, you’ll be ready to enjoy your delicious treats. The skewers allow you to hold the marshmallows over the fire safely. A plate helps keep your workspace tidy while you build your s'mores. Start your campfire by gathering wood and kindling. Light the fire safely and let it burn down. Wait until you see glowing coals; this is the best time to cook. The heat will be even, making it perfect for roasting. While waiting, you can enjoy the fresh air and relax. Now, let’s build those tasty s'mores. First, break your graham crackers into squares. You’ll need two pieces for each s'more. Place one square on a clean surface. On top of it, add a piece of your favorite chocolate. You can use milk or dark chocolate. Next, slice a ripe banana and place a few slices on the chocolate. A sprinkle of ground cinnamon adds a nice touch too! Top it off with mini marshmallows. Make sure to pile them high for a gooey treat. Finally, place the other graham cracker square on top, pressing gently to hold everything together. Now comes the fun part—roasting the marshmallows! Take a skewer or roasting stick and carefully pierce your s'more. Hold it above the fire, but not too close. Rotate it slowly over the glowing embers. Keep an eye on it; you want the marshmallows to turn golden brown and start to bubble. This process takes about 1-2 minutes. Be careful not to let them catch fire! Once they are perfectly toasted, take your s'more off the fire. Allow it to cool for a few seconds before taking a big bite. If you want more crunch, roll the edges in chopped nuts. Enjoy your delicious campfire treat! For the complete Campfire S'mores Delight recipe, check out the [Full Recipe]. To roast marshmallows well, start by holding them away from the flames. Aim for the glowing embers; they heat evenly. Rotate your marshmallow slowly to achieve a nice golden color. If it catches fire, blow it out quickly. This will help avoid that burnt taste. A perfect marshmallow should be gooey on the inside. Safety is key when cooking over a fire. Always have a bucket of water or sand nearby. This helps in case the fire spreads or if you need to cool down hot items. Never leave the fire unattended, especially with kids around. Use long skewers to keep hands safe from heat. Wear closed shoes to protect your feet from hot coals. Cleanup can be simple with a few tricks. Bring trash bags to collect waste. Keep your area tidy as you cook. Use foil to wrap leftover food scraps. This keeps your site neat and makes it easier to carry home. After the fire cools, make sure to fully extinguish it. Pour water over the ashes and stir until cold. This way, you leave no trace behind. {{image_4}} You can use many kinds of chocolate for s'mores. Instead of milk chocolate, try dark chocolate or white chocolate. Each type gives a unique taste. If you want something fun, consider peanut butter cups or caramel-filled chocolates. They melt nicely and add a sweet twist. S'mores are not just about chocolate and marshmallows. You can mix flavors! Try adding fruit like strawberries or raspberries for a fresh touch. You can also spread peanut butter on your graham cracker before adding chocolate. This makes the s'mores rich and creamy. Don't forget spices! A pinch of sea salt or cinnamon can boost the taste. If you have food needs, you can still enjoy s'mores. Use gluten-free graham crackers if you're avoiding gluten. For a vegan option, swap out the chocolate for dairy-free chocolate and use vegan marshmallows. You can also replace graham crackers with rice cakes or cookies. These choices keep the fun alive while respecting your diet. For more fun ideas, check the Full Recipe! To keep your s'mores ingredients fresh, store them in airtight containers. This method will help maintain their flavor and texture. For graham crackers, place them in a sealed bag or container. Chocolate bars can stay in their wrappers, but a container adds extra protection. Mini marshmallows should also go in a sealed bag. Make sure to keep them in a cool, dry spot. You can prep some ingredients ahead of time for easy assembly. Break graham crackers into squares and store them in a container. Slice bananas and put them in a bowl with a bit of lemon juice. This keeps them from browning. You can also pre-portion your chocolate and nuts into small bags. This way, you save time when it’s time to make s'mores. - Graham crackers: They last about 6 months if stored properly. - Chocolate bars: They can stay fresh for up to a year. - Mini marshmallows: They usually last around 8 months. - Bananas: Use them fresh, as they don’t store well. By following these tips, you’ll enjoy your campfire s'mores at their best! For complete details on making this delicious treat, check the Full Recipe. If you can’t find graham crackers, use cookies or biscuits. Shortbread or digestive biscuits work well too. They add a nice crunch and sweetness to your s'mores. You can even try rice cakes for a gluten-free option. Just choose something that can hold the gooey filling well. Yes, you can make s'mores indoors! Use a microwave or an oven. For the microwave, stack your s'more on a microwave-safe plate. Heat it for about 10-15 seconds until the marshmallow puffs up. If using an oven, preheat it to 350°F (175°C). Bake your s'mores on a baking sheet for 5 minutes. This method gives you that tasty, melty goodness without a campfire. To toast marshmallows perfectly, hold them above the glowing embers, not the flames. Rotate them slowly for even cooking. Aim for that golden brown color. If they start to burn, move them further away from the heat. It takes practice, but you’ll get it right! Enjoy the sweet, melted marshmallow in your s'mores. Check out the Full Recipe for more tips on making delicious s'mores! S'mores are a fun and tasty treat that anyone can make. We covered all the key ingredients, tools, and steps to craft perfect s'mores over a campfire. I also shared tips to roast marshmallows safely and easily clean up afterward. Plus, we explored variations and storage methods to keep your ingredients fresh. Enjoy experimenting with flavors and sharing fun s'mores moments with friends. Remember, whether indoors or out, s'mores bring smiles to every gathering. Happy s'moring!

Get ready to explore the sweetest campfire treat: S’mores! In this guide, I’ll show you how to craft these gooey, chocolatey wonders. From essential ingredients to expert tips, you’ll learn …

Read more

Categories Desserts

White Chocolate Raspberry Cheesecake Balls Delight

May 17, 2025 by Chef Remy
- 8 oz cream cheese, softened to room temperature - 1/2 cup granulated sugar - 1 teaspoon pure vanilla extract - 1 cup crushed graham crackers, plus extra for rolling - 1/2 cup fresh raspberries, gently mashed - 8 oz white chocolate, finely chopped and melted - 1 tablespoon coconut oil (for thinning the chocolate) - Pinch of salt Each ingredient plays a key role in making these cheesecake balls a delight. The cream cheese provides a rich and creamy base. Granulated sugar adds sweetness, while vanilla extract brings warmth and flavor. Crushed graham crackers give a lovely crunch and hint of nostalgia. Fresh raspberries add a burst of tartness that perfectly balances the sweetness. White chocolate creates a smooth, dreamy coating that wraps around each ball. The coconut oil helps thin the chocolate for easy dipping. A pinch of salt enhances the overall flavors, making each bite even more enjoyable. Gather all these ingredients before you start. It makes the process quick and fun. For the full recipe, check out the detailed steps to enjoy your homemade white chocolate raspberry cheesecake balls! 1. In a large mixing bowl, combine the softened cream cheese, granulated sugar, and vanilla extract. 2. Beat the mixture with a hand mixer until it is smooth and creamy. This step is key. You want a fluffy base for your cheesecake balls. The cream cheese must be soft to mix well. 1. Carefully fold in the crushed graham crackers and gently mashed raspberries with a spatula. 2. Mix until just combined; avoid over-mixing to keep some raspberry pieces intact. Folding keeps the texture light. You want those sweet raspberry bits to pop in every bite. 1. Take a small portion of the mixture and roll it into bite-sized balls, about 1 inch in diameter. 2. Place each ball on a baking sheet lined with parchment paper for easy removal. Rolling the balls makes them fun to eat. The parchment paper helps later when you want to take them off the tray. 3. Transfer the baking sheet with the formed balls to the refrigerator. 4. Chill for about 30 minutes to allow the balls to firm up. Chilling is important. It helps them hold their shape when you coat them in chocolate. 1. In a microwave-safe bowl, combine the chopped white chocolate and coconut oil. 2. Microwave in 30-second intervals, stirring after each session, until the mixture is completely smooth. The coconut oil thins the chocolate. This makes it easier to coat the cheesecake balls. 1. Remove the chilled cheesecake balls from the fridge. 2. Using a fork, dip each ball into the melted chocolate, ensuring an even coat. 3. Allow any excess chocolate to drip off before placing them back on the parchment-lined baking sheet. Coating requires patience. Make sure each ball is evenly coated for the best flavor. 1. Immediately roll each coated ball in the extra crushed graham crackers. 2. This creates a delightful crunch. The graham cracker adds texture. It balances the creamy cheesecake and sweet chocolate. 3. Once all the balls are coated, return them to the refrigerator or let them sit at room temperature for 15-20 minutes to allow the chocolate to set properly. Setting is the final touch. It ensures that the chocolate hardens into a perfect shell. For the complete recipe, refer to the Full Recipe section. Using softened cream cheese is key. It helps the mixture blend smoothly. Cold cream cheese can create lumps. A smooth texture makes each bite creamy and delightful. Avoid over-mixing the batter when adding the raspberries. You want some chunks of fruit for bursts of flavor. This keeps the texture interesting and fun to eat. Present your cheesecake balls on a beautiful platter. Use garnishes like whole raspberries and mint leaves for color. Drizzling leftover melted white chocolate over the balls adds flair. You can create lovely patterns. This makes your dessert look fancy and inviting. Want to enhance taste? Try adding lemon zest for a bright kick. A dash of almond extract can also add depth. Both options bring out the sweetness of the raspberries. Experimenting with flavors keeps the recipe exciting and unique. {{image_4}} You can switch up the fruit to make these cheesecake balls even more fun. Try using strawberries or blueberries instead of raspberries. Both have a sweet flavor that pairs well with the cream cheese. You could also add some citrus accents. Lime or orange zest can brighten the taste and add a fresh twist. Want to change the chocolate? Dark or milk chocolate works great instead of white chocolate. You can also add extra textures. Try mixing in crushed nuts or colorful sprinkles for a fun crunch. These variations keep the recipe exciting and let you find your favorite flavor. If you need gluten-free options, swap the graham crackers for crushed nuts or gluten-free cookies. This way, everyone can enjoy these treats. For those who prefer vegan options, you can use non-dairy cream cheese. This simple swap makes the recipe suitable for various diets without losing the amazing taste. To keep your cheesecake balls fresh, store them in an airtight container. Line the container with parchment paper to avoid sticking. Arrange the balls in a single layer. If you need more space, use a piece of wax paper between layers. This will help them last longer. For longer shelf life, freezing is a great option. Place the cheesecake balls on a baking sheet in a single layer. Freeze until solid, about 1-2 hours. Once frozen, transfer them to a freezer-safe container. They can last up to three months in the freezer. When you are ready to serve, take them out and let them thaw in the fridge. This keeps them from getting too soft too fast. You can also let them sit at room temperature for about 30 minutes before serving. In the fridge, your cheesecake balls will stay fresh for about 5 days. If you freeze them, they can last up to three months. Always check for signs of spoilage before eating. Keeping them properly stored makes sure every bite is just as delicious as the first. To keep your cheesecake balls firm, chill them well. After you shape them, place them in the fridge for about 30 minutes. This helps them hold their shape. If they seem too soft, try chilling them longer. The cream cheese needs to be softened but not too warm. Use a good amount of crushed graham crackers to add structure. This balance keeps them nice and round. Yes, you can use frozen raspberries. They work well, but they do change the texture. Frozen berries have more water, which can make the mixture a bit runny. This may affect how well the balls hold together. If you choose frozen, drain excess juice before mixing them in. This helps keep the flavor strong and the texture right. If you need a substitute for cream cheese, there are options. For a lactose-free choice, try using dairy-free cream cheese. It has a similar texture and taste. For a vegan option, look for cashew cream. Blend soaked cashews with some lemon juice and a bit of salt. This mix gives a nice creaminess and flavor. These cheesecake balls need about 15 to 20 minutes to set after coating. If you chill them longer, they will firm up more. After coating with chocolate, place them back in the fridge. This step is key to getting that nice, hard shell. If you’re in a hurry, just let them sit at room temperature for a short time. You can make these cheesecake balls ahead of time. Prepare them a day or two before serving. Keep them in an airtight container in the fridge. They stay fresh and tasty. If you want to store them longer, freeze them. Just make sure to wrap them tightly. When you're ready to serve, let them thaw in the fridge for a few hours. You can follow the Full Recipe for detailed steps. These cheesecake balls combine creamy, sweet, and fruity flavors. We covered key steps, from mixing cream cheese to coating with chocolate. Remember to chill the balls for the best texture. Get creative with your flavors, using different fruits or chocolates. Proper storage ensures they stay fresh longer. Whether for parties or a sweet treat, these bites are fun and easy to make. Try these tips and enjoy the delicious results!

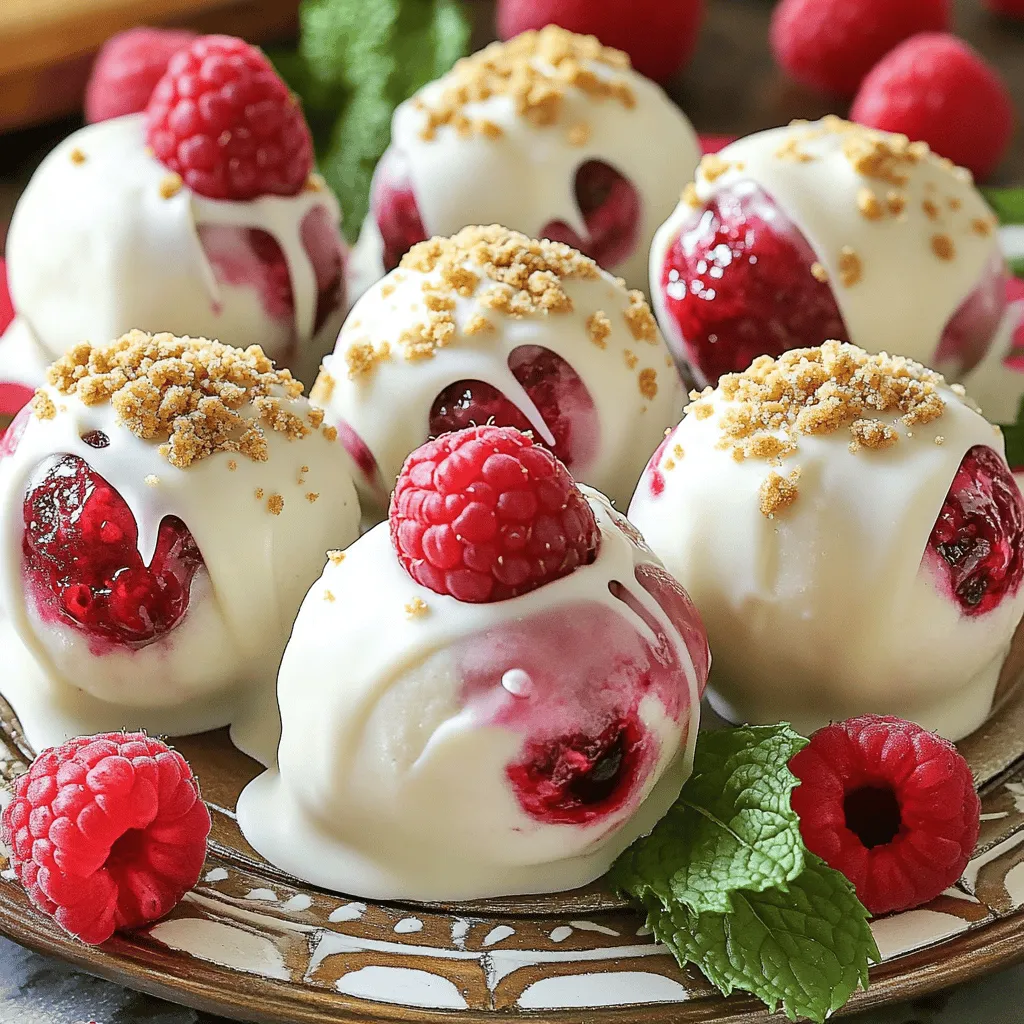
If you’re craving a sweet treat that blends tangy berries with rich white chocolate, you’re in for a delight! These White Chocolate Raspberry Cheesecake Balls are not just easy to …

Read more

Categories Desserts

Gooey Salted Caramel Cupcakes Irresistible and Sweet

May 17, 2025 by Chef Remy
Gooey Salted Caramel Cupcakes are a sweet dream come true. They combine fluffy cake with rich caramel. Each bite offers a burst of flavor. This recipe is easy to follow and yields 12 cupcakes. - 1 ½ cups all-purpose flour - 1 teaspoon baking powder - ½ teaspoon baking soda - ½ teaspoon salt - ½ cup unsalted butter, softened at room temperature - 1 cup granulated sugar - 2 large eggs, at room temperature - 1 teaspoon pure vanilla extract - ½ cup buttermilk, at room temperature - ½ cup salted caramel sauce (store-bought or homemade) - Sea salt flakes for topping For the best results, I recommend using these brands: - All-purpose flour: King Arthur Flour - Unsalted butter: Challenge Butter - Granulated sugar: Domino Sugar - Salted caramel sauce: Ghirardelli or homemade These brands ensure quality and flavor. Using high-quality ingredients makes a big difference in taste. First, set your oven to 350°F (175°C). This helps the cupcakes bake evenly. Next, grab a standard muffin tin and line it with fun cupcake liners. This makes cleanup easy and adds a nice touch to your cupcakes. In a medium bowl, combine the dry ingredients: 1 ½ cups all-purpose flour, 1 teaspoon baking powder, ½ teaspoon baking soda, and ½ teaspoon salt. Use a whisk to mix them well. This step ensures that all the leavening agents work together when you bake. In a large bowl, take ½ cup of softened unsalted butter and 1 cup of granulated sugar. Using an electric mixer, cream them together on medium speed for about 3-4 minutes. The mix should look light and fluffy. This step adds air to your batter, making your cupcakes soft. Add the eggs one at a time to the fluffy butter and sugar mix. Make sure to mix well after each egg. Then, stir in 1 teaspoon of pure vanilla extract. Gradually add the dry mix and ½ cup of buttermilk, starting and ending with the flour. Mix until combined. Be careful not to overmix, as it can make the cupcakes tough. Now for the fun part! Carefully fold in ½ cup of salted caramel sauce into the batter. This creates a beautiful marbled effect. Next, fill each muffin liner about two-thirds full with the batter. Place the muffin tin in the oven and bake for 18-20 minutes. They are ready when a toothpick comes out clean or with a few moist crumbs. After baking, cool them in the tin for 5 minutes before moving to a wire rack. Finally, drizzle more salted caramel on top and sprinkle sea salt flakes. Enjoy your gooey salted caramel cupcakes! Check out the Full Recipe for all the details. To get the best texture, measure your ingredients carefully. Use a kitchen scale if you can. Make sure your butter is soft, not melted. Cream the butter and sugar well until light and fluffy. This adds air and makes your cupcakes rise. When mixing the wet and dry ingredients, combine them gently. Overmixing can make the cupcakes tough. One common mistake is not using room temperature ingredients. Cold eggs and milk can lead to uneven mixing. Another error is filling the cupcake liners too much. Aim for two-thirds full to allow space for rising. Be sure to check the baking time. Ovens can vary, so a toothpick test is key. If it comes out clean, your cupcakes are ready! Presentation matters! Once your cupcakes are cool, drizzle extra salted caramel on top. It adds a nice look and flavor. Use a piping bag for a neat design. You can also sprinkle sea salt flakes on top for a gourmet touch. For a fun display, arrange them on a colorful platter. Serve with a small pitcher of salted caramel sauce for fun. For the complete recipe, check the Full Recipe section above. {{image_4}} You can play with flavors in gooey salted caramel cupcakes. For a twist, use chocolate cake batter instead of vanilla. This rich flavor pairs well with caramel. You can also add a hint of espresso powder for a coffee kick. It boosts the flavor and gives a lovely depth. Another option is to mix in some chopped nuts, like pecans or walnuts. They add a nice crunch and a nutty flavor to your cupcakes. If you love fruit, try adding fresh raspberries or banana slices. Their sweetness contrasts nicely with the salty caramel. You can still enjoy these cupcakes with gluten-free flour. Use a 1:1 gluten-free flour blend. Look for blends that contain xanthan gum. This gives your cupcakes the same texture. Just follow the same measurements in the Full Recipe. Make sure to check all other ingredients. Some brands of baking powder and sugar may contain gluten. Always read the labels carefully to ensure everything is safe. To make vegan gooey salted caramel cupcakes, replace eggs with flax eggs. Mix one tablespoon of ground flaxseed with three tablespoons of water. Let it sit for five minutes to thicken. For butter, use coconut oil or vegan butter. Substitute buttermilk with plant-based milk mixed with a splash of vinegar. This gives you a similar acidity. Lastly, choose dairy-free caramel sauce for drizzling on top. These variations keep the spirit of gooey salted caramel cupcakes while catering to different diets. To keep your gooey salted caramel cupcakes fresh, store them in an airtight container. Place a piece of wax paper between layers to prevent sticking. Keep them at room temperature for up to three days. If you want to enjoy them later, refrigeration is an option. Just remember to let them sit out for a bit before eating. Freezing these cupcakes is easy and smart. Wrap each cupcake tightly in plastic wrap. Then, place them in a freezer-safe bag or container. They can last up to three months in the freezer. Just make sure to label the bag with the date. When you're ready to enjoy, let them thaw at room temperature. To reheat your cupcakes, use a microwave. Heat them for about 10 to 15 seconds. This warms them without drying them out. You can also place them in a preheated oven at 350°F (175°C) for a few minutes. This method revives the texture and flavor nicely. Drizzle with extra salted caramel sauce before serving for a delicious touch! You can tell the cupcakes are done when a toothpick inserted in the center comes out clean or with a few moist crumbs. The edges will also look golden brown. If you see wet batter on the toothpick, give them a few more minutes. Remember, they will continue to cook a bit after you take them out. Yes, you can absolutely use homemade salted caramel sauce! In fact, it can add an extra touch of love to your cupcakes. Just make sure it's thick enough to hold its shape. You want it to swirl beautifully in the batter and on top. If you don’t have buttermilk, you can easily make a substitute. Mix one cup of milk with one tablespoon of white vinegar or lemon juice. Let it sit for about five minutes until it thickens slightly. This will give you that tangy flavor and moisture that buttermilk provides. You can bake the cupcakes a day in advance. Store them in an airtight container at room temperature. For longer storage, freeze them. Wrap each cupcake in plastic wrap and then place them in a freezer-safe bag. When you're ready to enjoy, let them thaw at room temperature. Drizzle with salted caramel just before serving for the best taste! In this post, we covered all you need to know to make amazing cupcakes. We discussed the full recipe, the best ingredients, and how to mix them properly. I shared tips for texture and common mistakes to avoid. You also found ways to customize flavors, learn storage tips, and answered frequent questions. Remember, the joy of baking is all about experimentation. Try new flavors and have fun with it! Enjoy your baking journey!

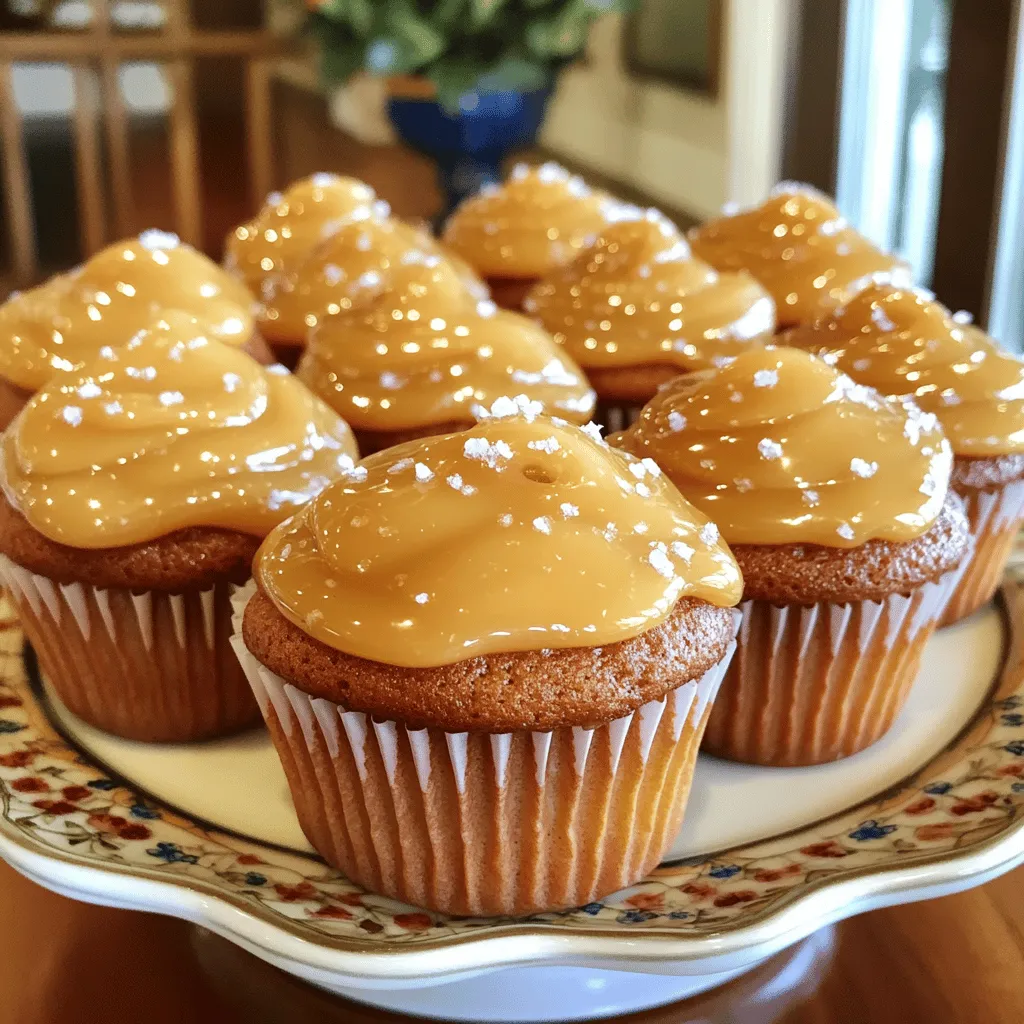
If you love sweet treats, you’re in for a delight! These gooey salted caramel cupcakes are the perfect blend of rich flavors and soft textures. Picture biting into a fluffy …

Read more

Categories Desserts

Strawberry Cheesecake Crunch Bites Delightful Treat

May 17, 2025 by Chef Remy
- 1 cup fresh strawberries - 8 oz cream cheese Fresh strawberries bring bright flavor and color to the bites. Choose ripe, sweet strawberries for the best taste. The cream cheese gives that creamy, rich texture we all love in cheesecake. Make sure it is softened to mix easily. - 1 tablespoon granulated sugar - 1/4 cup powdered sugar - 1 teaspoon pure vanilla extract Use granulated sugar to sweeten the strawberries. This helps release their juices, creating a nice syrup. The powdered sugar adds smoothness to your cheesecake filling. Pure vanilla extract gives it a warm, inviting flavor that makes everything better. - 1 cup graham cracker crumbs - 2 tablespoons unsalted butter - 1/2 teaspoon ground cinnamon - Pinch of salt Graham cracker crumbs form the base of these bites. Mix them with melted butter for a rich taste. Ground cinnamon adds warmth, while a pinch of salt balances the sweetness. This combination creates a delightful crunch. - 1/4 cup mini chocolate chips (optional) If you want a chocolate twist, add mini chocolate chips. They add extra sweetness and a fun crunch. This option makes the bites even more exciting. Don't hesitate to play with flavors! For the full recipe, check out [Full Recipe]. Start by tossing 1 cup of finely chopped strawberries with 1 tablespoon of granulated sugar. This step helps the strawberries create a sweet syrup as they sit. Allow this mixture to rest for about 10 minutes. The sugar will draw out their juices, making them juicy and sweet. In a medium bowl, beat 8 ounces of softened cream cheese until it's smooth and creamy. Next, add in 1/4 cup of powdered sugar and 1 teaspoon of pure vanilla extract. Mix until everything is combined and fluffy. Gently fold in 1/2 cup of whipped cream with a spatula. This makes the filling light and airy. In a separate bowl, mix 1 cup of finely crushed graham cracker crumbs with 2 tablespoons of melted butter, 1/2 teaspoon of ground cinnamon, and a pinch of salt. Stir until all ingredients come together. You want the mixture to clump when you press it between your fingers. This will form a great crust. Line a mini muffin tin with cupcake liners. Take a tablespoon of the graham cracker mixture and press it firmly into the bottom of each liner. This forms the first layer. Then, spoon a generous layer of the sugared strawberries over the crust. Follow this by adding the cheesecake filling on top, smoothing it out with a spatula. Place the muffin tin in the refrigerator and let the bites chill for at least 2 hours. This allows them to set and firm up. Once chilled, carefully lift each cheesecake bite from the muffin tin. You can serve them in their cupcake liners for a fun look or on a platter for a classy touch. Don't forget to check out the Full Recipe for more details! To get the best cheesecake bites, start with softened cream cheese. If it’s cold, it won’t mix well. You want it smooth and creamy. This makes your filling light and fluffy. When you fold in whipped cream, do it gently. Use a spatula and lift from the bottom. This keeps air in the mixture, making it fluffy and light. If you stir too hard, the cream will deflate. For leftovers, keep them in an airtight container. This keeps them fresh for up to four days. You can also use plastic wrap. Just make sure it’s sealed tight. To prevent a soggy crust, use parchment paper in the muffin tin. This helps keep moisture away. You can also chill the crust before adding the filling. This helps it stay crunchy. Garnish your bites with a sprig of fresh mint. It adds a nice pop of color. You can also drizzle strawberry syrup over them for sweetness. These tasty bites pair well with coffee or dessert wine. The flavors blend nicely, making each bite a delight. Enjoy your treats with a warm drink or a sweet sip! {{image_4}} You can change the fruit in these bites. Raspberries or blueberries work well. They add a fresh twist. You can also try citrus flavors. Lemon or lime zest brings a bright taste. Just mix these fruits in the same way as the strawberries. The crust can be fun to switch up. Using chocolate graham crackers gives a rich flavor. You can also try gluten-free crust options. Almond flour or oat flour works well for a gluten-free base. Just mix with butter, and you’re set! If you want a vegan version, use cream cheese substitutes. Look for brands made from cashews or soy. For whipped cream, choose a plant-based alternative. Coconut cream or almond whipped cream are great choices. These swaps keep the flavor while making it dairy-free. For the full recipe, check the main section! Store your Strawberry Cheesecake Crunch Bites in the fridge for up to five days. Keep them fresh in an airtight container. This helps maintain their flavor and texture. I recommend using a glass container for the best results. It lets you see the bites and keeps them safe from other odors. Yes, you can freeze these cheesecake bites! They freeze well and make a great treat later. To freeze, place them in a single layer on a baking sheet. Once frozen, transfer them to a freezer-safe bag. Remove as much air as possible before sealing. This keeps them fresh for about three months. To thaw, simply move a few bites to the fridge for a few hours. You can also let them sit at room temperature for about 30 minutes. Serve them cool for the best taste. You can check the Full Recipe for more details on preparing and serving these bites! To make Strawberry Cheesecake Crunch Bites, follow these key steps: 1. Prepare the Strawberries: Mix chopped strawberries with sugar. Let them sit to make syrup. 2. Make the Cheesecake Filling: Beat cream cheese until smooth. Add powdered sugar and vanilla. Fold in whipped cream gently. 3. Combine Crust Ingredients: Mix graham cracker crumbs, melted butter, cinnamon, and salt until clumpy. 4. Assemble: Layer the crust, add strawberries, and top with cheesecake filling. 5. Chill: Refrigerate for at least 2 hours to set. These steps create a tasty treat that is fun to share. You can find the full recipe for more details. Yes, you can use frozen strawberries! Just thaw and drain them first. This helps to avoid excess liquid. Fresh strawberries taste great, but frozen ones work well too. The flavor will still be sweet and delicious. If you lack graham crackers, try these alternatives: - Digestive biscuits: They offer a similar crunch. - Vanilla wafers: These add a nice flavor twist. - Oatmeal cookies: Crushed oatmeal cookies can work too for a chewy texture. Get creative with your crust! To make Strawberry Cheesecake Crunch Bites healthier: - Reduce the sugar: Use less granulated and powdered sugar. - Swap cream cheese: Try low-fat or Greek yogurt. - Use whole grain crumbs: Choose whole wheat or oat crumbs instead. These tweaks help cut calories while keeping the flavor! Yes! You can adapt these bites for special diets: - Gluten-Free: Use gluten-free graham crackers or alternative crusts. - Dairy-Free: Substitute with dairy-free cream cheese and whipped cream. These options make it easy for everyone to enjoy a sweet treat! These strawberry cheesecake crunch bites are both simple and delicious. You learned how to make them using fresh strawberries, cream cheese, and a crunchy crust. I shared tips for perfect texture and storage. Plus, you can adapt this recipe with different fruits or crusts. With easy variations, everyone can enjoy these bites. So, gather your ingredients and start making a sweet treat today! Trust me; they will impress your friends and family. Enjoy the process and the tasty results!

Craving a sweet treat that’s easy to make and delicious? Dive into my Strawberry Cheesecake Crunch Bites! These bites combine fresh strawberries, creamy cheesecake, and a crunchy crust for a …

Read more

Categories Desserts

Crab & Cheese Stuffed Crescent Puffs Savory Delight

May 17, 2025 by Chef Remy
- 1 can (8 oz) refrigerated crescent roll dough - 1 cup lump crab meat, drained and flaked - 1 cup cream cheese, softened - 1/2 cup shredded sharp cheddar cheese - 1/4 cup green onions, finely chopped - 1 tablespoon freshly squeezed lemon juice - 1 teaspoon garlic powder - 1/2 teaspoon Old Bay seasoning (optional) - Salt and pepper to taste - 1 egg, beaten (for egg wash) To make Crab & Cheese Stuffed Crescent Puffs, you need simple yet delicious ingredients. The star is the lump crab meat. It brings a sweet and ocean-fresh taste. The cream cheese gives a creamy texture that balances the dish. Sharp cheddar adds a nice kick, while green onions bring a bit of crunch and flavor. You might wonder about the Old Bay seasoning. It adds a hint of spice and depth. Feel free to skip it if you prefer. The lemon juice brightens the filling, making every bite refreshing. - Spices to enhance taste - Alternative cheeses (e.g., mozzarella) You can play with spices if you want. Try adding cayenne for heat or dill for a fresh taste. If you love cheese, swap in mozzarella for a gooey texture. - Baking sheet - Parchment paper - Mixing bowl - Pastry brush Using the right tools makes cooking easier. A baking sheet lined with parchment paper helps with clean-up. A mixing bowl is essential for blending the filling. Don’t forget a pastry brush for that golden egg wash! This recipe is all about making cooking fun and easy. Check the Full Recipe for more details on how to put it all together. - Preheat the oven to 375°F (190°C). - Unroll the crescent roll dough. Separate it into triangles along the pre-scored lines. - In a bowl, combine the crab meat, cream cheese, cheddar cheese, green onions, lemon juice, garlic powder, and Old Bay seasoning (if using). - Mix gently until well blended. This helps all the flavors come together. - Place a generous 1-2 tablespoons of the filling on the wide end of each triangle. - Roll the dough from the wide end to the tip. Pinch the edges firmly to seal the filling inside. - Arrange the stuffed puffs on a baking sheet lined with parchment paper. - Brush the tops with the beaten egg to give them a nice golden color. - Bake for 12-15 minutes until puffed and golden brown. You can find the full recipe in the previous section. Enjoy your cooking journey! To achieve the best texture, focus on the dough. Use fresh crescent roll dough for fluffy puffs. Roll the dough gently around the filling. This keeps air inside, making them light and airy. Make sure to pinch the edges tightly. This prevents any filling from leaking out during baking. Use a small amount of filling; too much can cause spills. Garnishing ideas can elevate your dish. A sprinkle of fresh parsley adds color and freshness. You can also use chives or dill for a twist. Pair these puffs with tasty dipping sauces. Cocktail sauce offers a nice tang. Lemon aioli brings a creamy, zesty flavor that complements the puffs well. Ovens can vary, so check your puffs as they bake. If your oven runs hot, reduce the bake time slightly. For even cooking, rotate the baking sheet halfway through. This helps all sides cook perfectly. If you use multiple trays, bake them one at a time for the best results. Follow the Full Recipe for step-by-step guidance. {{image_4}} You can switch up the main protein in these puffs. For a tasty twist, use shrimp or cooked chicken instead of crab. Both will bring their unique flavors while still being creamy and delicious. If you want a meat-free option, try a filling made of spinach and feta. This mix gives you a fresh taste and a nice texture, making it a great choice for vegetarians. Cheese is key to making these puffs creamy and rich. While cream cheese is a classic choice, feel free to explore other options. You can mix in mozzarella for a milder flavor or even pepper jack for a bit of spice. Combining different cheeses can create a new taste every time. If you need a dairy-free option, use a cream cheese alternative made from nuts. It still gives that creamy texture without the dairy. Want to kick up the heat? You can add spicy seasonings to the filling. Things like cayenne pepper or chili powder can make a big difference. If you love heat, consider adding jalapeños or a splash of hot sauce. This will give your puffs a spicy flair that many will enjoy. Adjust the spice to match your taste; it’s all about what you like! For the full recipe, check out the Crab & Cheese Stuffed Crescent Puffs. Store leftover puffs in the fridge. Place them in an airtight container. This helps keep them fresh. You can also wrap them in plastic wrap. Make sure to seal it well. This prevents air from getting in. Leftover puffs taste best within three days. You can freeze the puffs before baking. To do this, assemble the puffs and place them on a baking sheet. Freeze them for about an hour. Once frozen, transfer them to a freezer bag. Seal the bag tightly and label it. You can also freeze baked puffs. Let them cool, then place in a container. Use the same method as above. When you are ready to eat, reheat them in the oven at 350°F (175°C) for about 10-15 minutes. In the fridge, the puffs last about three days. If you freeze them, they can last up to three months. Check for signs of spoilage before eating. Look for strange smells or changes in color. If the puffs feel sticky or slimy, it’s best to throw them away. Proper storage keeps your crab & cheese stuffed crescent puffs tasting great. Look for a golden brown color on top. The puffs should be puffy and firm. If they are still pale, give them a couple more minutes. You can also check the bottom; it should be slightly crispy. Yes, you can make the filling a day in advance. Just store it in the fridge in a sealed container. When ready to use, let it sit at room temperature for a bit before filling the dough. This helps it spread easily in the puffs. There are many fun ways to use leftover filling. You can spread it on crackers for a snack. Try mixing it with pasta for a creamy dish. You can even use it in a sandwich or wrap for a tasty lunch. Absolutely! You can use puff pastry for a flakier texture. Phyllo dough is another option for a lighter bite. Just keep in mind that baking times may change, so watch them closely. Check the [Full Recipe] for more details. You learned how to make delicious Crab & Cheese Stuffed Crescent Puffs. We covered the ingredients needed, step-by-step instructions, and tips for perfecting your dish. Don’t forget that you can switch up ingredients for different flavors or save leftovers. Enjoy making these tasty bites for any occasion. Your family and friends will love them, and you’ll feel proud of your cooking skills. Try these today and savor every bite!

Are you ready to impress your guests with a mouthwatering appetizer? Crab & Cheese Stuffed Crescent Puffs are a quick, easy, and delicious choice. With golden, flaky dough and a …

Read more

Categories Appetizers

Spinach and Feta Puff Pastry Twists Quick Delight

May 16, 2025 by Chef Remy
- 1 sheet of puff pastry (thawed) - 2 cups fresh spinach, finely chopped - 1 cup feta cheese, crumbled - 1/2 cup ricotta cheese - 1 tablespoon olive oil - 1/2 teaspoon garlic powder - 1/2 teaspoon salt - 1/4 teaspoon black pepper - Sesame seeds (optional, for garnish) - Prep Time: 15 minutes - Cook Time: 20 minutes - Total Time: 35 minutes - Servings: 12 twists Each ingredient plays a key role in making these puff pastry twists a hit. The puff pastry offers a light, flaky texture. Fresh spinach brings color and nutrition. Feta adds a salty, creamy bite, while ricotta gives a smooth richness. For seasoning, olive oil enhances flavor and moisture. Garlic powder adds depth. Salt and black pepper balance the taste. If you like, sprinkle sesame seeds on top for a crunchy finish. With just 15 minutes of prep, you can make these delightful twists in no time. They are perfect for a snack, appetizer, or party dish. Enjoy creating these tasty treats! For the complete recipe, check out the Full Recipe section. - Preheat your oven to 400°F (200°C). - Line a baking sheet with parchment paper. - Combine spinach, feta, ricotta, olive oil, garlic powder, salt, and black pepper in a bowl. - Mix until ingredients are balanced. This mixture brings a creamy, salty taste. - Dust a surface with flour and roll out the puff pastry. - Cut the pastry into 1-inch wide strips. Keep the edges neat for a nice look. - Place filling on each strip and fold over. Don't overfill; it will burst. - Twist and place on the baking sheet. This step adds flair to your dish. - Brush with beaten egg and sprinkle sesame seeds. This gives a nice shine. - Bake for 15-20 minutes or until golden brown. Keep an eye on them! - Cool the twists briefly before serving. This makes them easier to handle. - Serve warm for the best taste. Enjoy these delightful bites! For the complete recipe, refer to the section above. To make great puff pastry twists, start with cold ingredients. Cold butter helps create those lovely layers. When you handle the pastry, work quickly. This keeps it from getting too warm. If you see a tear, don’t worry. Just press the edges back together gently. For even baking, place the twists on parchment. This keeps them from sticking and helps them rise. Make sure to leave space between each twist. They need room to puff up nicely. Want to make your twists pop? Add herbs like dill or parsley. A little lemon zest also brightens the flavors. If you want to switch cheeses, try goat cheese for a tangy twist. Mozzarella gives a creamy taste, while cheddar adds sharpness. Serve these twists warm. They look great on a colorful platter. Add a sprig of fresh spinach for a nice touch. Pair them with a yogurt dip for creaminess. A side of marinara sauce works too. This adds a fun twist for dipping. {{image_4}} To make these twists more varied, you can swap out spinach and feta. Try using kale or Swiss chard instead of spinach. For cheese, consider goat cheese or a blend of cream cheese and herbs. You can also add other vegetables into the filling. Bell peppers, mushrooms, or artichokes work well. Just make sure to chop them finely and sauté them first to reduce moisture. This way, your twists won’t get soggy. Feeling adventurous? You can add meat or seafood to the filling. Cooked chicken, ground beef, or shrimp can enhance the flavor. If you choose to incorporate these proteins, you need to adjust the cooking time. Make sure any meat is fully cooked before mixing it with the cheese and spinach. This will ensure your twists are safe to eat. If you're gluten-free, look for gluten-free puff pastry options. These are often available in stores or online. They may require slight adjustments in baking time, so keep an eye on them. For a vegan version, replace the cheese with a plant-based alternative. You can also use a mixture of silken tofu and nutritional yeast for a cheesy flavor. Instead of the egg wash, brush the pastries with plant-based milk for a nice finish. For more details, check the Full Recipe. To keep your spinach and feta puff pastry twists fresh, store them in the refrigerator. Place them in an airtight container. This helps to avoid moisture loss and keeps them crispy. When reheating, use an oven instead of a microwave. The oven helps restore the crispy texture. Heat them at 350°F (175°C) for about 10 minutes. This way, they stay delicious! If you want to save time later, freeze the twists before baking. Place them on a baking sheet first. Once frozen, transfer them to a freezer bag. This way, they don’t stick together. When ready to bake, no need to thaw. Just pop them straight into the oven. Bake for about 20-25 minutes, adding a few extra minutes if needed. This keeps their lovely texture. Cooked twists stay fresh in the fridge for about 3 days. Make sure to check for any signs of spoilage. If they smell off or look moldy, it's best to toss them. Trust your senses! Keeping them in an airtight container helps extend their life. To make spinach and feta puff pastry twists, start by preheating your oven to 400°F (200°C). Then, prepare a baking sheet with parchment paper. In a bowl, mix together chopped spinach, crumbled feta, ricotta, olive oil, garlic powder, salt, and black pepper. Roll out the puff pastry and cut it into strips. Place filling on each strip, fold over, and twist. Bake for 15-20 minutes until golden brown. You can find the detailed steps in the Full Recipe. Yes, you can use frozen spinach. Frozen spinach is convenient and saves prep time. It also keeps well and can be stored for long. However, it can be watery. Make sure to drain it well before using. Fresh spinach has a bright flavor and crunch but requires washing and chopping. Choose based on your time and taste preferences. Spinach and feta twists pair well with many dips and sides. Here are some ideas: - Creamy yogurt dip - Tzatziki sauce - Hummus - Marinara sauce - A fresh salad These options add flavor and make your meal more enjoyable. These spinach and feta puff pastry twists are simple to make and tasty. You need just a few main ingredients like puff pastry, spinach, and cheese. Follow the steps to bake these golden delights quickly. You can even switch up the filling or make them vegan. Store them easily for later snacking. Use this recipe to impress your guests or enjoy a treat at home. I hope you enjoy making and sharing these delicious twists!

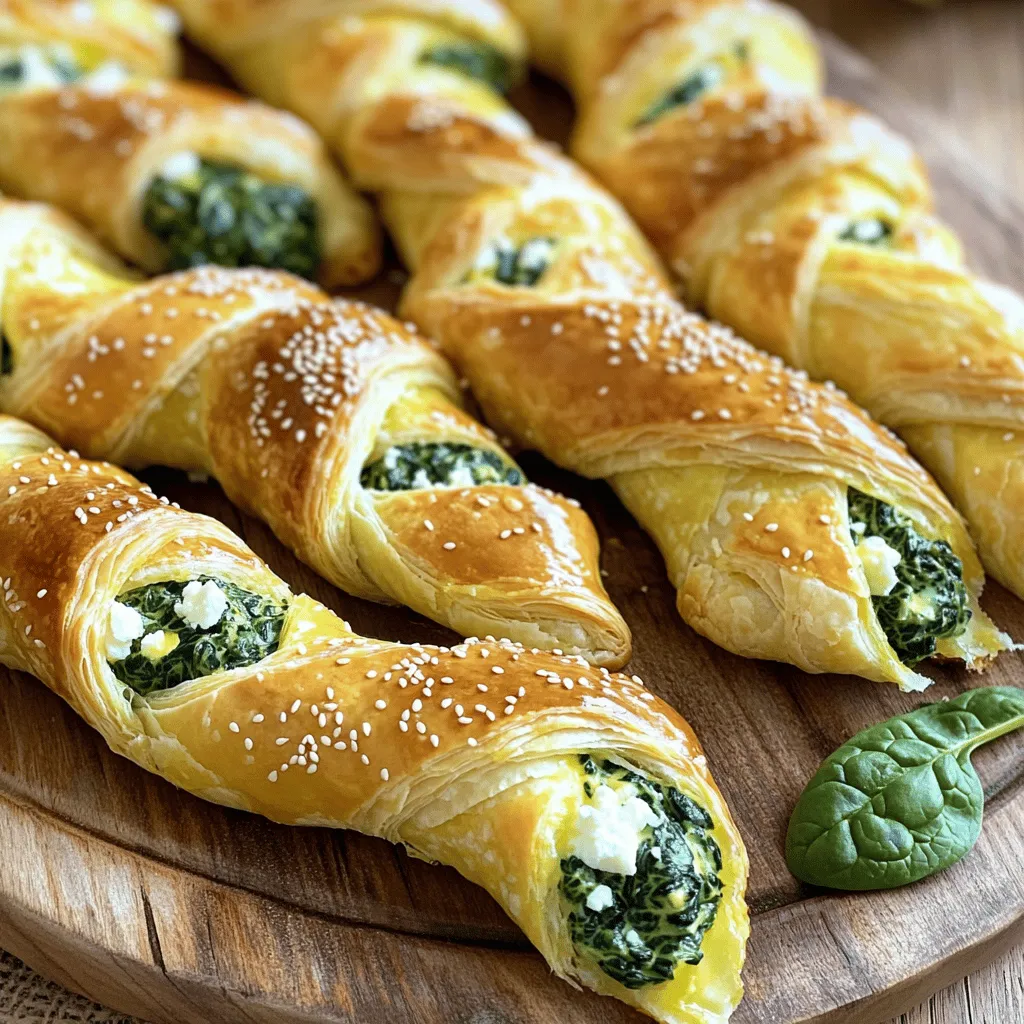
Craving a tasty snack that’s easy to make? You’ll love my Spinach and Feta Puff Pastry Twists. This quick delight combines flaky pastry with savory spinach and creamy feta in …

Read more

Categories Appetizers

Easy Shrimp Rangoon Crispy and Flavorful Snack

May 16, 2025 by Chef Remy
To make shrimp rangoon, you need a few key items. Here’s what you’ll need: - 8 oz cream cheese, softened to room temperature - 1 cup cooked shrimp, finely chopped - 2 green onions, finely sliced - 1 teaspoon garlic powder - 1 teaspoon light soy sauce - 1 package of wonton wrappers (about 30 sheets) - Vegetable oil, for deep frying - Salt and freshly cracked pepper, to taste These ingredients blend well together, creating a creamy and savory filling. The shrimp adds a nice touch of ocean flavor, while the cream cheese makes everything rich and smooth. You can enhance your shrimp rangoon with a few extra ingredients. Try adding: - 1 teaspoon of ginger, grated - A dash of hot sauce for spice - Fresh herbs like cilantro or parsley These options can brighten up the flavors. A little heat can make the rangoon exciting, while fresh herbs add a pop of color and taste. To ensure your dish tastes great, focus on freshness. Here are some tips: - Use fresh shrimp and check for quality. - Choose cream cheese that is smooth and creamy. - Store wonton wrappers in the fridge until you use them. Fresh ingredients make a big difference in taste. Using quality products will elevate your shrimp rangoon, making every bite delicious. For the full recipe, check out the details above! To start, gather your ingredients. You will need cream cheese, shrimp, green onions, garlic powder, and soy sauce. In a medium bowl, mix the softened cream cheese with the finely chopped shrimp. Add the sliced green onions and garlic powder. Drizzle in the soy sauce, then season with salt and pepper. Use a fork to blend everything well. The filling should be creamy and smooth. Now, let’s assemble the rangoon. Lay the wonton wrappers on a clean surface. Place about 1 teaspoon of the shrimp filling in the center of each wrapper. Moisten the edges of the wrapper with a little water using your finger. Fold the wrapper over to form a triangle, sealing the edges tightly. Make sure no air bubbles are trapped inside. This step is key to keeping your rangoon crispy. Next, it's time to fry! Heat about 2-3 inches of vegetable oil in a deep frying pan over medium-high heat. To test if the oil is hot enough, drop in a small piece of wonton wrapper. It should sizzle immediately. Once ready, carefully add a few rangoon to the oil. Do not overcrowd the pan. Fry each side for about 2-3 minutes, until golden brown. Use a slotted spoon to remove them and place on paper towels. This helps soak up any extra oil. Continue frying until all the rangoon are done. Enjoy your crispy shrimp rangoon warm with a tasty dipping sauce! One common mistake is overfilling the wonton wrappers. Filling them too much can lead to bursting during frying. Make sure to use just about one teaspoon of the mixture. Another mistake is not sealing the edges well. If air gets trapped, the rangoon may pop open in the oil. Always press the edges firmly to avoid this. To get that perfect crispy texture, make sure the oil is hot enough. The ideal temperature is around 350°F. You can test this by dropping a small piece of a wrapper in the oil. If it sizzles, you’re ready to fry. Frying in small batches helps keep the oil temperature steady, ensuring every rangoon gets that golden crunch. For a tasty dip, I recommend sweet and sour sauce. Its sweetness pairs well with the savory rangoon. Soy sauce is another great choice, adding a salty kick. If you want something spicy, try a chili sauce. Each of these sauces enhances the flavor of your crispy shrimp rangoon. For the full recipe, check out the instructions above. {{image_4}} You can swap shrimp for other proteins. Chicken or crab work well in this dish. Finely chop cooked chicken or crab meat. Mix them with the cream cheese like you do with shrimp. This lets you try new flavors while keeping the same creamy texture. If you want a meat-free version, use a mix of vegetables. You can try spinach, mushrooms, or even artichokes. Cook them first to remove excess water. Then, chop them finely and mix them with cream cheese. This way, you keep the same rich flavor without seafood. Want to spice it up? Add herbs or spices to your filling. Fresh cilantro or parsley can brighten the taste. A dash of hot sauce adds a nice kick, too. You can also try a squeeze of lime for a zesty twist. Customize your rangoon to suit your taste! For the full recipe, check out the Crispy Shrimp Rangoon Delight. To keep your leftover shrimp rangoon fresh, place them in an airtight container. Make sure they cool down to room temperature before storing. You can keep them in the fridge for up to three days. If you want to enjoy them later, freezing is a great option. For long-term storage, freeze your shrimp rangoon before frying. Lay them out on a baking sheet in a single layer. Freeze them for about one hour. Once frozen, transfer them to a freezer-safe bag. Remove as much air as possible before sealing. This way, they can last for up to three months in the freezer. When you’re ready to enjoy your shrimp rangoon, reheat them in an oven for the best result. Preheat your oven to 375°F. Place the rangoon on a baking sheet and bake for about 10 minutes. This keeps them crispy. You can also use an air fryer to reheat them for about 5-7 minutes at 350°F. Avoid using a microwave, as it can make them soggy. Yes, you can prepare Shrimp Rangoon ahead of time. You can mix the filling and assemble the rangoons. Store them in the fridge for up to 2 hours. If you want to keep them longer, freeze them in a single layer. Once frozen, transfer them to a bag for easy storage. Just fry them straight from the freezer when you’re ready. Many sauces make great pairings. Here are some of my favorites: - Sweet and sour sauce - Soy sauce - Spicy mayo - Hoisin sauce - Peanut sauce These sauces add extra flavor and enhance the crispy snack. To test the oil's heat, drop a small piece of wonton wrapper into the oil. If it sizzles, the oil is ready. The ideal temperature for frying is around 350°F. If the oil is too hot, the rangoons will burn. If it’s too cool, they will turn soggy. Yes, you can bake Shrimp Rangoon for a healthier option. Preheat your oven to 375°F. Place the rangoons on a baking sheet lined with parchment paper. Brush them lightly with oil. Bake for about 15-20 minutes, flipping halfway, until golden and crispy. Cooked Shrimp Rangoon taste best on the same day. However, you can store leftovers in the fridge for up to 2 days. Reheat them in the oven to regain some crispiness. You should cook shrimp before using it in the filling. Cooked shrimp adds flavor and ensures food safety. Finely chop the cooked shrimp and mix it with the cream cheese and seasonings. You can add ingredients like: - Chopped bell peppers - Diced water chestnuts - Cream cheese with herbs - A dash of hot sauce These additions can make your Shrimp Rangoon even more delicious. For the full recipe, check out the detailed instructions above! You can create easy shrimp Rangoon at home with simple ingredients and clear steps. Focus on fresh shrimp and quality wrappers for the best taste. Pay attention to frying techniques to get that perfect crunch. Explore variations like vegetarian options or different proteins for fun twists. Store leftovers well to keep them fresh. With these tips, you’ll impress your friends and family. Enjoy making this tasty dish and experimenting with flavors!

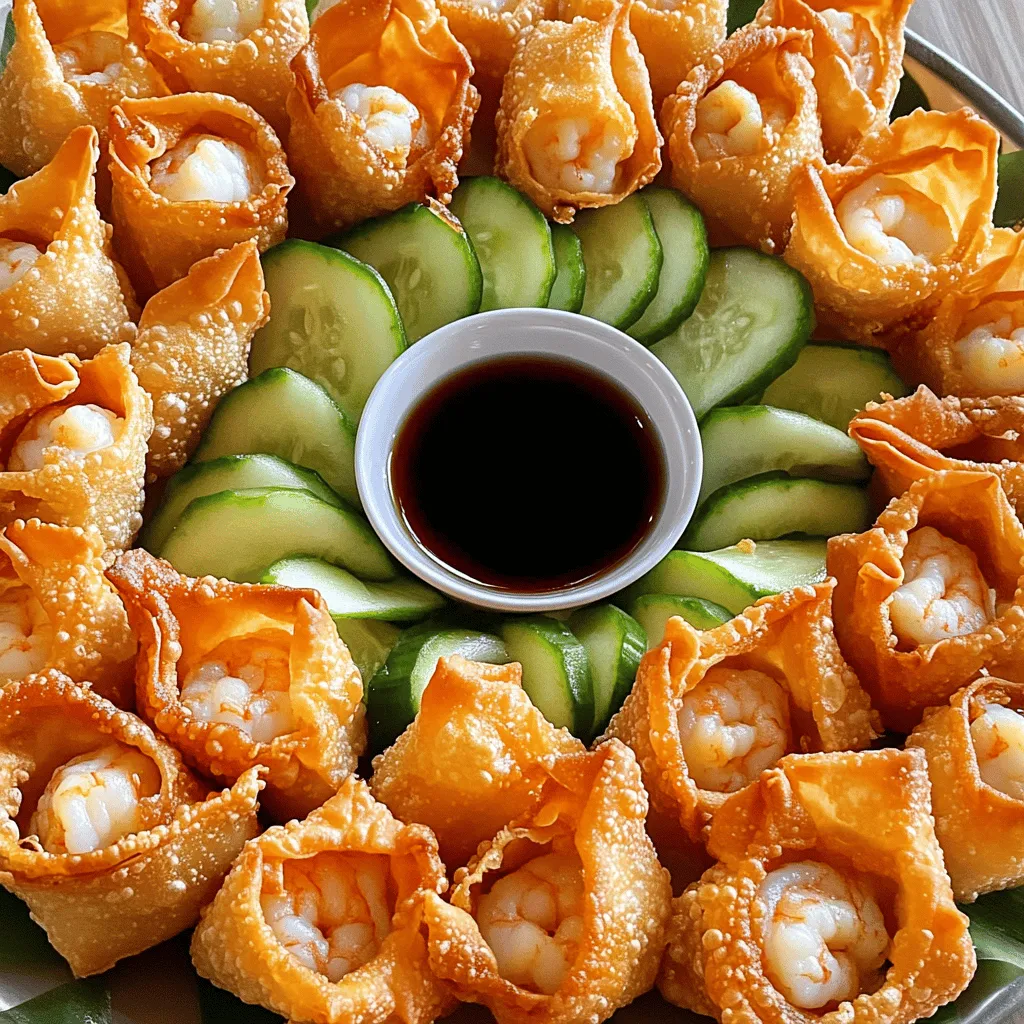
Love crispy snacks that burst with flavor? You’re in for a treat with my Easy Shrimp Rangoon recipe! This quick guide will walk you through the must-have ingredients, simple steps, …

Read more

Categories Appetizers

Cheesecake Crescent Rolls Casserole Easy and Tasty Treat

May 16, 2025 by Chef Remy
- 2 cans (8 oz each) crescent roll dough - 16 oz cream cheese, softened to room temperature - 1 cup granulated sugar - 3 large eggs, room temperature The main ingredients for the Cheesecake Crescent Rolls Casserole are simple and easy to find. You need crescent roll dough for a flaky base. The cream cheese creates a rich filling. Granulated sugar adds sweetness to the mix. Finally, eggs bring everything together and help set the filling. - Fresh berries - Powdered sugar For a lovely touch, consider adding fresh berries. They add color and taste. You can use strawberries, blueberries, or raspberries. A quick dusting of powdered sugar gives a sweet finish. These garnishes make your casserole look beautiful and inviting. For the Full Recipe, check the details above. Start by preheating your oven to 350°F (175°C). This temperature helps the casserole bake evenly. Next, grab a 9x13 inch baking dish. Grease it well with cooking spray or a thin layer of butter. This step prevents the casserole from sticking, making it easier to serve later. Now, open one can of crescent roll dough. Unroll it carefully and lay it flat in the greased baking dish. Be sure to press the seams together. This creates a solid base for your casserole. Next, let’s make the cheesecake filling. In a large bowl, mix the softened cream cheese, granulated sugar, vanilla extract, and lemon zest. Use a hand mixer on medium speed to blend these ingredients until smooth. Then, add the eggs one by one, mixing well after each addition. This ensures a creamy filling. Finally, gently fold in the sour cream until there are no lumps. Now, pour the cheesecake mixture over the crescent roll layer in the baking dish. Spread it out evenly with a spatula. Take the second can of crescent roll dough. Unroll it and tear it into smaller pieces. Scatter these over the cheesecake layer. This gives your casserole a rustic look and helps it bake evenly. Place the baking dish in your preheated oven. Bake for 35-40 minutes. Look for a golden brown top and a filling that is set and not jiggly. Once baked, remove it from the oven. Let it cool for at least 10 minutes. This cooling time helps the casserole firm up. Before serving, dust the top lightly with powdered sugar for added sweetness. Enjoy your delicious Cheesecake Crescent Rolls Casserole warm or chilled, topped with fresh berries for a burst of flavor. For the complete recipe, check the Full Recipe. To get the best cheesecake texture, follow these simple steps. First, mix the cream cheese well. Use a hand mixer to beat it until smooth. This helps break up lumps. You want a creamy base for your filling. Next, use room temperature ingredients. Cold cream cheese can be hard to mix. It may lead to a lumpy texture. Let your cream cheese and eggs sit out for about 30 minutes before you start. Room temperature eggs blend better too. You can add fun flavors to your cheesecake. Try mixing in chocolate or fruit purees. Adding a bit of almond or coconut extract can change the taste too. This makes your casserole special. For a great look, garnish your dish. Fresh berries add color and taste. Use strawberries, blueberries, or raspberries on top. A light dusting of powdered sugar gives it a sweet touch. It makes the casserole look more inviting. For the full recipe to create this delicious Cheesecake Crescent Rolls Casserole, check out the main article. {{image_4}} You can mix things up with your cheesecake casserole by adding new flavors. Try adding chocolate or fruit purees. For chocolate, melt some dark chocolate and swirl it into the cheesecake filling before baking. This makes it rich and tasty. For fruit purees, blend fresh berries or peaches until smooth. You can mix these into the filling or drizzle them on top after baking. The fruit gives a nice touch and a burst of flavor. You can also experiment with different extracts. While vanilla is classic, almond or lemon extract can give a fun twist. Just use a small amount to start, as some extracts are strong. If you need gluten-free options, you can use gluten-free crescent roll dough. Many brands offer tasty alternatives that work well. Just check the packaging to ensure it fits your needs. For low-sugar alternatives, swap granulated sugar for a sugar substitute like stevia or erythritol. These sweeteners can help cut calories without losing flavor. Always check the package for the right amount to use. By making these simple changes, you can enjoy this cheesecake crescent rolls casserole in many ways. Whatever your taste or diet, there’s a version just for you. For the complete recipe, check out the Full Recipe. To keep your cheesecake crescent rolls casserole fresh, you should refrigerate it. Place any leftovers in an airtight container. This helps it stay moist and tasty. It can last for about 3 to 5 days in the fridge. If you want to keep it longer, freezing is a great option. Slice the casserole into portions for easy use later. Wrap each piece tightly in plastic wrap, then in aluminum foil. This prevents freezer burn. You can freeze it for up to 2 months. When it’s time to enjoy your leftovers, the best method is to reheat in the oven. Preheat your oven to 350°F (175°C). Place the casserole in an oven-safe dish and cover it with foil. Heat for about 15 to 20 minutes. You can also use a microwave for quick reheating. Heat on low power in 30-second bursts. Check often to avoid overheating. To keep the texture nice, avoid high heat. This helps maintain that creamy filling and soft crescent dough. Enjoy your delicious treat again! Can I use different types of cheese? Yes, you can! Cream cheese is best for a rich taste. However, you can mix in mascarpone or ricotta for a twist. These cheeses can add unique flavors and textures. Just ensure they blend well with your other ingredients. How do I know when it's done baking? The casserole is done when the top turns golden brown. The filling should not jiggle when you shake the dish. A toothpick inserted in the center should come out clean. This means the cheesecake is set and ready to enjoy. What can I use instead of sour cream? Greek yogurt is a great substitute for sour cream. It adds creaminess and a slight tang. You can also use plain yogurt or cottage cheese. Just blend it well to keep the right texture. Alternatives for crescent roll dough? If you want a different dough, puff pastry works well. You can also try phyllo dough for a lighter texture. Just be sure to layer it properly so it holds the filling. Best toppings and pairings Top your casserole with fresh berries like strawberries or blueberries for a fruity kick. A drizzle of chocolate sauce or caramel can also enhance the dish. You can even add a dollop of whipped cream for extra indulgence. How to serve for special occasions For special events, serve the casserole warm right out of the oven. Dust it with powdered sugar for elegance. You can also arrange the berries in a nice pattern on top for a beautiful presentation. Guests will love this tasty treat! For the Full Recipe, check out the detailed instructions and enjoy making this delightful dish! This blog post covered everything you need for making Cheesecake Crescent Rolls Casserole. We discussed key ingredients like crescent roll dough and cream cheese. You learned how to prepare your baking dish and assemble the layers. I shared tips for a creamy texture and fun flavor variations. Plus, we explored storage and reheating methods. Now, you can easily enjoy this dessert any time. Have fun making it your own!

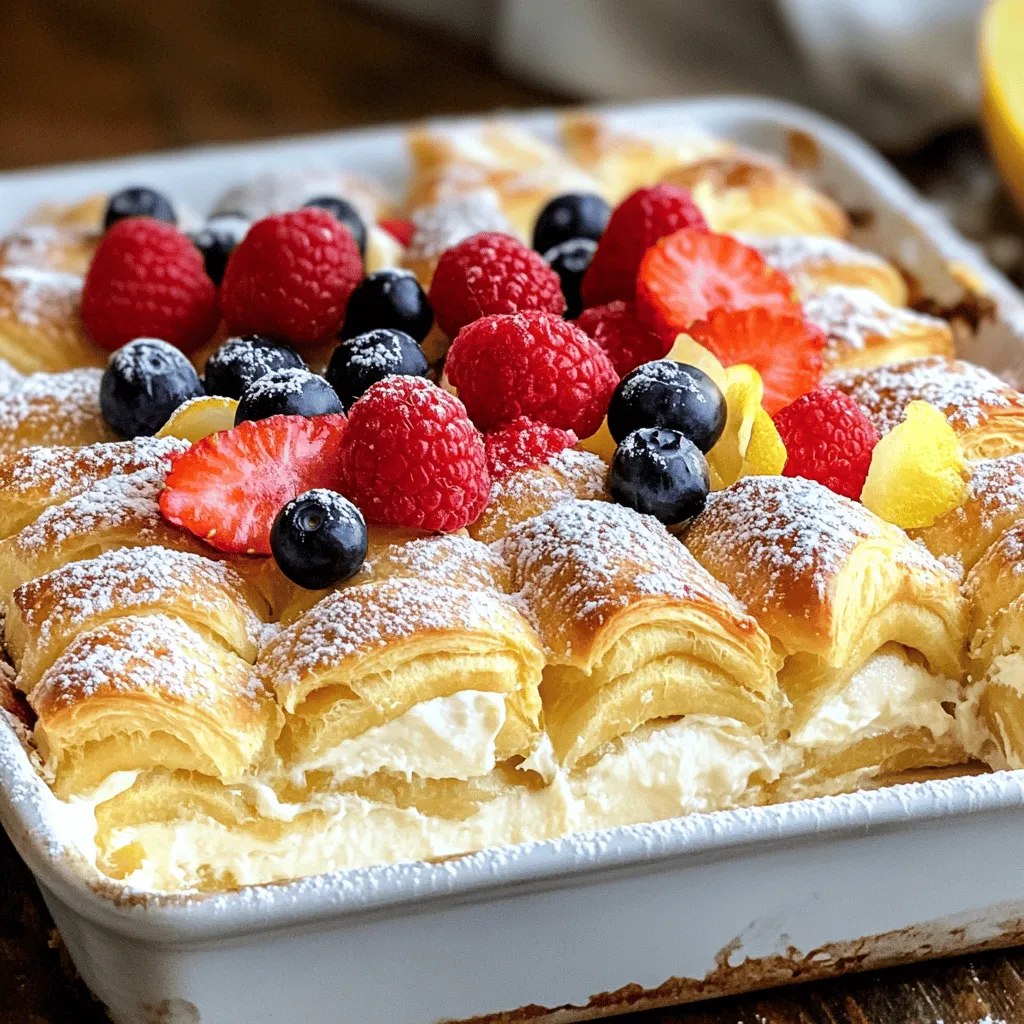
If you crave a sweet treat that’s simple yet delicious, you’ve found it! This Cheesecake Crescent Rolls Casserole is my go-to dessert, combining soft crescent rolls and rich cheesecake filling. …

Read more

Categories Desserts
Older posts
Newer posts
← Previous Page1 … Page120 Page121 Page122 … Page130 Next →

ROASTED RECIPES

Where bold flavors meet everyday meals. Warm, vibrant, and made to share. 🔥🥗🍴

PAGES

Home About Contact Privacy Policy Terms & Conditions Cookie Policy GDPR Policy Copyright Policy Disclaimer

CATEGORIES

Appetizers Desserts Salads Breakfast Dinner

Contact

  • Pinterest
  • Mail
Copyright © 2025 Roasted Flavors. All rights reserved.