Skip to content
Roasted Flavors
  • Home
  • Appetizers
  • Desserts
  • Salads
  • Breakfast
  • Dinner
  • Privacy Policy
  • Contact
  • About

Chef Remy

Irresistible Blueberry Sour Cream Coffee Cake Recipe

May 21, 2025 by Chef Remy
To bake a delicious blueberry sour cream coffee cake, gather these key ingredients: - 2 cups all-purpose flour - 1 teaspoon baking powder - 1 teaspoon baking soda - ½ teaspoon salt - 1 cup granulated sugar - ½ cup unsalted butter, softened to room temperature - 1 cup sour cream - 2 large eggs, at room temperature - 1 teaspoon pure vanilla extract - 2 cups fresh blueberries (or frozen blueberries, thawed and drained) - ½ teaspoon ground cinnamon (for topping) - 1 tablespoon packed brown sugar (for topping) Each of these ingredients plays a vital role in creating the moist, rich texture of the cake. The blueberries bring a burst of flavor and color, while sour cream adds creaminess and tang. You will need a few essential tools to make this recipe: - 9x13 inch baking dish - Mixing bowls (medium and large) - Electric mixer or whisk - Spatula - Measuring cups and spoons - Toothpick (for testing doneness) - Wire rack (for cooling) These tools help ensure you mix and bake your coffee cake perfectly. If you need to make substitutions, here are some tips: - Use Greek yogurt instead of sour cream for a similar tang. - Swap in coconut oil for butter if you want a dairy-free option. - Try almond flour for a gluten-free version, but adjust the liquid. These substitutions can help you adapt the recipe while keeping it tasty. For the complete recipe, check the full recipe link. Start by gathering all your ingredients. You will need: - 2 cups all-purpose flour - 1 teaspoon baking powder - 1 teaspoon baking soda - ½ teaspoon salt - 1 cup granulated sugar - ½ cup unsalted butter, softened - 1 cup sour cream - 2 large eggs - 1 teaspoon pure vanilla extract - 2 cups fresh blueberries - ½ teaspoon ground cinnamon - 1 tablespoon packed brown sugar Next, preheat your oven to 350°F (175°C). Prepare a 9x13 inch baking dish by greasing and flouring it or using parchment paper. This will help with easy removal later. In a medium bowl, whisk together the flour, baking powder, baking soda, and salt. This mixture sets the base for your cake. Set it aside for later. In a large bowl, use an electric mixer to blend the granulated sugar and softened butter. Mix until it is light and fluffy, about 3-4 minutes. This helps create a nice texture. Add the eggs to the butter mixture one at a time. Make sure to mix well after each egg. Then, add the sour cream and vanilla extract. Blend until everything is smooth. Now, slowly add the dry ingredients to the wet mixture. Stir gently until just combined. Be careful not to overmix, or your cake will be dense. Gently fold in the blueberries. Make sure they are evenly mixed without breaking them. This will keep your cake looking beautiful and fruity. Pour the batter into your prepared baking dish. Use a spatula to spread it evenly. In a small bowl, mix the ground cinnamon and brown sugar. Sprinkle this mixture evenly over the cake batter. This adds a sweet touch. Place the baking dish in your preheated oven. Bake for 40-45 minutes. Check if it's done by inserting a toothpick into the center. If it comes out clean, it’s ready. Let the coffee cake cool in the pan for about 10 minutes. Then, move it to a wire rack to cool completely. Enjoy your baking! For the full recipe, check out the details above. To get a soft and moist cake, use room temperature ingredients. This includes butter, eggs, and sour cream. They mix better and create air pockets. When you add dry ingredients, mix until just combined. Overmixing makes the cake dense. Remember, lumps are okay! One mistake is not measuring flour correctly. Too much flour makes the cake dry. Always spoon flour into a measuring cup and level it off with a knife. Another mistake is not preheating the oven. This can lead to uneven baking. Lastly, avoid opening the oven door too often. This lets heat escape and can affect the cake's rise. You can boost the flavor of your blueberry sour cream coffee cake in fun ways. Try adding lemon zest for a bright twist. It pairs well with blueberries. You could also mix in nuts like walnuts or pecans for crunch. If you love spices, add a pinch of nutmeg along with the cinnamon. These small additions can make a big difference in taste. For the full recipe, check out the complete guide. {{image_4}} You can switch up the blueberries for other fruits. Raspberries, blackberries, or chopped strawberries work great. These fruits give a new taste to the cake. They all add a touch of sweetness and tartness. You can also mix different fruits together. This gives your cake a colorful twist. The key is to keep the fruit fresh or frozen and well-drained. While cinnamon and brown sugar are classic, try other toppings. A crumble topping made from flour, oats, and butter adds great texture. You can also use sliced almonds or walnuts for a nutty crunch. For a sweet touch, drizzle with a glaze made from powdered sugar and milk. This adds a nice shine and a sweet finish to your coffee cake. You can make this coffee cake gluten-free with a simple swap. Use a 1:1 gluten-free flour blend. Ensure it has xanthan gum for the right texture. For a dairy-free version, substitute sour cream with coconut yogurt or a non-dairy alternative. Use dairy-free butter or coconut oil for the fat. These adjustments keep the cake moist and delicious while fitting different diets. For the full recipe, check out the details I shared earlier. To keep your blueberry sour cream coffee cake fresh, store it in an airtight container. Make sure it cools completely first. If you plan to eat it within a few days, you can store it at room temperature. For longer storage, keep it in the fridge. Freezing is a great way to save leftovers. First, let the cake cool fully. Then, slice it into pieces. Wrap each piece tightly in plastic wrap. Place the wrapped slices in a freezer-safe bag or container. This way, you can enjoy your coffee cake later! To reheat, simply take a slice out of the freezer and let it thaw in the fridge overnight. If you’re in a hurry, you can use the microwave. Heat it for 15-20 seconds until warm. Enjoy it with a fresh cup of coffee for a delightful treat! Yes, you can make this coffee cake ahead of time. Bake it a day in advance and store it in an airtight container at room temperature. This cake stays moist and flavorful. If you plan to serve it later, you can also refrigerate it for up to three days. Just remember to bring it back to room temperature before serving for the best taste. To check if your coffee cake is done, use a toothpick. Insert it into the center of the cake. If it comes out clean or with a few crumbs, the cake is ready. If the toothpick has wet batter on it, the cake needs more time. Keep an eye on it during the last few minutes of baking. Serve this coffee cake warm or at room temperature. It pairs well with coffee or tea. For a special touch, add a dollop of whipped cream or a scoop of vanilla ice cream. You can also sprinkle some fresh blueberries on top for extra flavor and color. This makes a lovely treat for breakfast or dessert. For the full recipe, check the details above. You learned about making blueberry sour cream coffee cake, from key ingredients to storage tips. I showed you how to mix the batter, avoid common mistakes, and try fun variations. Each step helps you bake a great cake. Remember, practice makes perfect. Don't worry if your first cake isn't perfect. Enjoy the process and share this treat with your family! Happy baking!

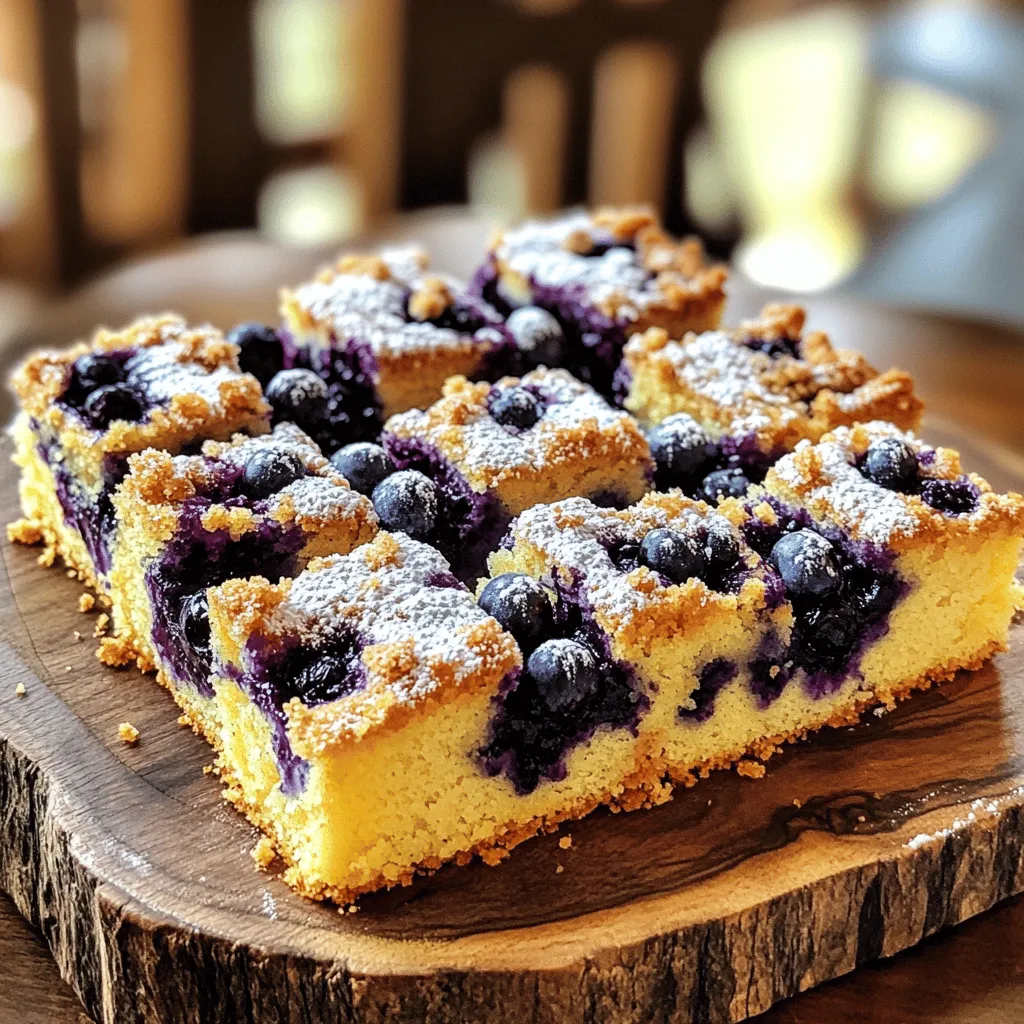
If you’re craving a sweet treat that’s both delicious and easy to make, look no further! This Irresistible Blueberry Sour Cream Coffee Cake will have you reaching for seconds. Packed …

Read more

Categories Desserts

Lemon Blueberry Fluff Delightful and Easy Dessert Recipe

May 21, 2025 by Chef Remy
- 2 cups fresh blueberries - 1 cup heavy whipping cream - 1/2 cup lemon curd - 1/2 cup powdered sugar - 1 teaspoon pure vanilla extract - Zest of 1 lemon - Fresh mint leaves for garnish For this Lemon Blueberry Fluff recipe, fresh ingredients are key. Using ripe blueberries gives a sweet burst of flavor. The heavy cream adds richness, while the lemon curd brings a bright tang. You will also need some pantry staples. Powdered sugar sweetens the fluff without adding graininess. Pure vanilla extract enhances the overall taste. If you want to elevate your dessert, consider optional garnishes. Lemon zest adds a refreshing aroma and bright color. Fresh mint leaves offer a beautiful touch and a hint of freshness. For the full recipe and more details, check out the [Full Recipe]. Enjoy creating this delightful treat! First, take a large mixing bowl. Add the heavy whipping cream and vanilla extract. Use a handheld mixer or a stand mixer with a whisk attachment. Whip the cream on medium-high speed. Keep going until soft peaks form, which takes about 2-3 minutes. Once soft peaks form, sprinkle the powdered sugar in slowly. Continue to whip until you see stiff peaks. Be careful not to overwhip the cream. Overwhipping can make it grainy, and no one wants that! In a separate medium bowl, mix the lemon curd and lemon zest. Stir them well until they combine smoothly. Next, gently fold this lemon mixture into the whipped cream. Use a spatula for this step. Be careful to avoid deflating the whipped cream. Keep folding until you see no streaks of lemon. Now it's time to add the fresh blueberries. Gently mix them into the lemon cream. Ensure all the blueberries are evenly spread throughout the fluff. If you want, save a few blueberries for garnish later. To prevent deflation, use a light hand while mixing. Folding is key here. This step keeps your dessert light and fluffy, just like the name suggests! For the complete method, check out the Full Recipe. To make the best Lemon Blueberry Fluff, avoid whipping the cream too long. Overwhipping can make it grainy and less creamy. You want soft peaks first, then stiff peaks. This texture is key for a light and airy feel. Once you've mixed the cream, let it chill. Chilling for at least 30 minutes helps the flavors blend well. This waiting time is crucial for a tasty dessert. The flavors will meld, giving you a refreshing bite with every spoonful. When it's time to serve, think about how to present your fluff. Use clear dessert bowls or elegant glasses to show off those bright blueberries. This makes your dish look more appealing. For extra flavor, add toppings. A drizzle of lemon curd on top can enhance the taste. You could also sprinkle more lemon zest for a vibrant look. Fresh mint leaves make a great garnish too. They add color and a nice aroma that brightens the dish. {{image_4}} You can switch things up with this recipe. Instead of lemon curd, try lime curd. Lime gives a nice twist. You can also use orange curd for a sweeter taste. If you want more depth, add a hint of almond or coconut extract. A little can make a big difference. Just a few drops will elevate the flavors. Experiment and find your favorite mix! If you have a larger crowd, you can easily scale this recipe. Just double or triple the ingredients. This dish works well for parties or family gatherings. For smaller servings, consider using mini dessert cups. This way, everyone can have their own small treat. You’ll impress your guests with these cute, individual servings. For the full recipe, check the complete instructions above. To keep your Lemon Blueberry Fluff fresh, use clear containers with tight lids. Glass or plastic containers work well. Always let the fluff cool down before you seal it. This helps avoid condensation inside the container. Store it in the fridge to keep it safe and tasty. You can store Lemon Blueberry Fluff in the fridge for about three days. After that, it may lose its fluffiness. Look out for any changes in smell or color. If you see any signs of spoilage, like mold or an off smell, it’s best to toss it. Enjoy your dessert while it’s fresh for the best taste! Can I use frozen blueberries instead of fresh? Yes, you can use frozen blueberries. They work well in this recipe. However, frozen blueberries may release more juice. This can change the fluff's texture slightly. You might get a bit more color too. If you use frozen, let them thaw first. Drain any excess juice to keep the fluff thick. How to make Lemon Blueberry Fluff dairy-free? To make this fluff dairy-free, use coconut cream instead of heavy whipping cream. You can also use a dairy-free lemon curd. This keeps the same great flavor while making it suitable for those who avoid dairy. What is the best way to whip cream effectively? To whip cream well, start with cold equipment. Chill your bowl and beaters in the fridge for 10 minutes. This helps the cream whip faster. Beat on medium-high speed until soft peaks form. Add sugar slowly to prevent graininess. Keep whipping until stiff peaks form, but don’t overwhip. Can leftovers be frozen for later use? You can freeze leftovers, but the texture may change. Thaw them in the fridge before serving. The fluff might lose some of its lightness. For best results, enjoy it fresh. In this post, we explored how to make Lemon Blueberry Fluff. We covered all essential ingredients, from fresh blueberries to rich vanilla. I shared step-by-step instructions to whip cream and combine flavors. We also discussed variations, serving tips, and storage methods. This dessert is not just tasty; it's flexible too. You can adapt it to your own taste and needs. Enjoy making this easy and delightful treat!

Looking for a simple yet delicious dessert? This Lemon Blueberry Fluff combines fresh blueberries, creamy whipped cream, and zesty lemon curd for a delightful treat. You can whip it up …

Read more

Categories Desserts

Cannoli with Mascarpone Filling Delightfully Simple Recipe

May 21, 2025 by Chef Remy
To make the perfect cannoli shells, you need simple ingredients. Here’s what you’ll need: - 1 cup all-purpose flour - 2 tablespoons unsweetened cocoa powder - 1 tablespoon granulated sugar - 1/4 teaspoon sea salt - 3 tablespoons unsalted butter, softened - 1 large egg yolk - 1/4 cup cold water - Vegetable oil for frying These ingredients create a crispy, delicious shell that holds the filling perfectly. The filling makes cannoli truly special. For the creamy filling, gather these items: - 1 cup mascarpone cheese - 1/2 cup ricotta cheese, well-drained - 1/4 cup powdered sugar - 1 teaspoon pure vanilla extract - 1/4 cup mini chocolate chips - Zest of 1 orange The blend of mascarpone and ricotta gives a rich and smooth texture. The orange zest adds a fresh twist. To make your cannoli shine, consider these garnishes: - Extra powdered sugar for dusting - Fresh orange zest for a pop of color - Mint leaves for a fresh touch - Melted dark chocolate drizzle These little touches enhance not just the look but the taste too. They make your cannoli even more inviting. You can find the full recipe to guide you through each step. First, you need to make the dough. In a big bowl, whisk together the flour, cocoa powder, sugar, and salt. Then, add the softened butter. Mix it with your fingers until it looks like crumbs. In a small bowl, combine the egg yolk and cold water. Gradually add this to the flour mix. Knead the dough until it's smooth. Now, wrap it in plastic and put it in the fridge for about 30 minutes. This resting time helps the dough become easier to roll. After the dough rests, it’s time to roll it out. On a floured surface, roll the dough until it is 1/8 inch thick. Next, use a round cutter to make circles about 4 inches wide. Gather any leftover dough, re-roll it, and cut more circles. This process is fun and makes sure you have enough shells for your filling. Now, you will fry the shells. Heat vegetable oil in a deep pan to 350°F (175°C). Take a dough circle and wrap it around a metal cannoli mold, overlapping the edges slightly. Use a bit of water on the seam to seal it. Gently lower the wrapped shells into the hot oil using a slotted spoon. Fry them for about 2-3 minutes until they turn golden brown. Once done, remove them and let them drain on paper towels. Carefully slide the shells off the molds while they are warm. For the filling, grab a medium bowl. Combine the mascarpone cheese, ricotta cheese, powdered sugar, vanilla extract, and orange zest. Add the mini chocolate chips for extra flavor. Use a hand mixer or spatula to blend until it is creamy and smooth. This filling is rich and delicious, making your cannoli special. When the shells are cool, it's time to fill them. Take a piping bag fitted with a large round tip and fill it with the mascarpone mixture. Pipe the filling into each shell from both ends until they are fully stuffed. This makes each bite a delightful surprise. Finally, dust the filled cannoli with powdered sugar to add sweetness and a beautiful touch. Enjoy your delicious creation! For the full recipe, check out Decadent Cannoli Delights. To get crispy cannoli shells, use cold water in your dough. This helps the shells fry up nice and crunchy. Roll your dough thin, about 1/8 inch. Thicker dough can lead to chewy shells. Fry them in hot oil at 350°F (175°C) to achieve that perfect golden color. Fry in small batches so they cook evenly. Once fried, let them cool completely before filling. A common mistake is sealing the shells poorly. Make sure to press the edges firmly when wrapping the dough around the molds. Use water or egg wash to help seal them tight. If you don't, they may pop open during frying. Also, avoid overfilling the cannoli. If you pack too much filling in, it can ooze out. Fill them just to the edge for the best results. For a stunning presentation, arrange your filled cannoli on a nice platter. A sprinkle of powdered sugar adds a sweet touch. You can drizzle melted chocolate over them for an extra flair. A sprinkle of orange zest or small mint leaves can give your dish a bright pop of color. These simple steps will make your cannoli look as good as they taste. {{image_4}} You can make chocolate-dipped cannoli for a fun twist. After you fill the shells, melt some dark chocolate. Dip one end of each cannoli into the chocolate. Let the chocolate set on wax paper. This adds a rich flavor and extra sweetness. You can switch up the filling to keep things exciting. Try adding lemon zest for a bright taste. For a coffee flavor, mix in espresso powder. If you like fruit, consider blending in pureed strawberries or raspberries. Each flavor gives a new spin to this classic treat. For vegan or dairy-free cannoli, use coconut cream instead of mascarpone. Replace ricotta with blended tofu or cashews. Use maple syrup for sweetness. These changes keep the taste rich while making it suitable for different diets. Enjoy delicious cannoli that everyone can savor! For the full recipe, check out the complete guide above. Store unfilled cannoli shells in an airtight container. Keep them at room temperature. They will stay fresh for about three days. If you want to keep them longer, you can freeze them. Wrap each shell in plastic wrap, then place them in a freezer-safe bag. They can last up to two months in the freezer. Filled cannoli taste best when eaten fresh. If you have leftovers, place them in the fridge. Use an airtight container to keep them fresh. They will stay good for about one day. However, the shells may soften over time due to the filling. To keep your cannoli tasting great, fill them right before serving. If you need to prepare ahead, store the shells and filling separately. Only combine them when you're ready to eat. This way, you ensure a crispy shell with creamy filling. Dust with powdered sugar just before serving for the best look and taste. You can use cream cheese as a substitute for mascarpone. Cream cheese has a thicker texture. Mix it with a bit of heavy cream to make it smoother. This blend gives you a creamy filling that tastes good. To check if the oil is hot, drop a small piece of dough into the oil. If it sizzles and bubbles, the oil is ready. You can also use a thermometer. Aim for 350°F (175°C) for perfect frying. Yes, you can make cannoli shells ahead of time. After frying, let them cool completely. Store them in an airtight container at room temperature. They will stay fresh for a few days, ready for filling. Cannoli taste best when served fresh. If you make them ahead, fill them just before serving. This keeps the shells crispy and the filling fresh. Filled cannoli can get soggy if left too long. To avoid leaks, make sure your shells are sealed well before frying. After frying, let them cool completely. Fill them only right before serving, and pipe the filling from both ends to ensure even distribution. You now have the tools to create your own delicious cannoli. We covered the key ingredients for the shells and filling. The step-by-step guide helps you fry and assemble them perfectly. I shared tips on making them crispy and avoiding common mistakes. Don’t forget the fun variations and how to store them properly. Whether you enjoy classics or try new ideas, making cannoli can be easy and fun. Embrace your creativity, and enjoy every bite of your tasty treats.

Are you ready to impress your friends and family with a treat that’s both simple and delicious? In this recipe, I’ll guide you through making cannoli with creamy mascarpone filling. …

Read more

Categories Desserts

Toasted Ravioli Crispy Delight for Every Meal

May 21, 2025 by Chef Remy
- 12 oz frozen cheese ravioli - 1 cup all-purpose flour - 2 large eggs, beaten - 1 cup Italian-style breadcrumbs - 1/2 cup grated Parmesan cheese - 1 tablespoon Italian seasoning - 1 teaspoon garlic powder - Salt and pepper to taste - Marinara sauce (for dipping) - Use a neutral oil like canola or vegetable oil for frying. - Heat oil to 350°F for best results. To test, drop a few breadcrumbs in. If they sizzle, the oil is ready. Toasted ravioli is a fun dish that can please everyone. You can use frozen cheese ravioli from the store. It saves time and tastes great! For a crisp texture, you need flour, eggs, and breadcrumbs. The Parmesan cheese adds a nice touch of flavor. Don't forget the seasonings! Italian seasoning and garlic powder give your ravioli a tasty kick. A pinch of salt and pepper can really make a difference. To enjoy, serve them hot with marinara sauce for dipping. For frying, make sure to choose the right oil. Canola or vegetable oil works best. Heat the oil properly to ensure your ravioli gets crispy and golden. It’s all about the right ingredients and preparation. Enjoy the process and the delicious results! Start by boiling a large pot of salted water. Once the water boils, add 12 oz of frozen cheese ravioli. Cook them for 4-5 minutes. You want them al dente, which means they should be firm to the bite. After cooking, drain the ravioli carefully. Let them cool on a plate. Cooling helps the ravioli hold their shape during frying. Next, prepare your breading station. You need three shallow dishes. In the first dish, add 1 cup of all-purpose flour. In the second dish, whisk 2 large eggs until blended. In the third dish, mix 1 cup of Italian-style breadcrumbs, 1/2 cup of grated Parmesan cheese, 1 tablespoon of Italian seasoning, 1 teaspoon of garlic powder, salt, and pepper. This mixture gives great flavor to the ravioli. Now it’s time to fry the ravioli. Pour enough cooking oil into a large skillet to cover the bottom by about 1/2 inch. Heat the oil over medium heat. To check if it's ready, drop in a small pinch of breadcrumbs. If they sizzle, the oil is hot enough. Carefully place the breaded ravioli into the pan. Fry them in small batches to avoid overcrowding. Fry for 2-3 minutes on each side. You want them golden brown and crispy. After frying, use a slotted spoon to transfer them to a plate lined with paper towels. This helps absorb the excess oil. These steps will lead you to crispy, delicious toasted ravioli that everyone will love. For more details, check the Full Recipe. Toasted ravioli need the right oil temperature for that perfect crunch. Aim for 350°F (175°C). To check, drop a few breadcrumbs in the oil. If they sizzle, your oil is ready. If the oil is too cool, the ravioli will absorb oil and become soggy. If it’s too hot, the outside will burn before the inside cooks. Frying time is key. For frozen cheese ravioli, fry each side for 2-3 minutes. If you use fresh or homemade ravioli, adjust the time. They may need less time, so keep an eye on them. A great presentation makes your dish more fun. Place the crispy ravioli on a large platter. Garnish with fresh parsley and a sprinkle of Parmesan cheese for color and flavor. You can also serve them with marinara sauce in a small bowl for dipping. This adds a nice touch for parties and gatherings. Think about using toothpicks for easy serving. Guests can grab and dip without any mess. You can even pair them with a salad or some roasted veggies for a full meal. One big mistake is overcooking the ravioli. This can turn them mushy instead of crispy. Stick to the recommended frying time and check them often. Another mistake is using too little oil. If the oil doesn’t cover the ravioli, they will stick to the pan. This can ruin the crust. Make sure to use enough oil to allow the ravioli to float a bit while frying. For the complete recipe, check out the Full Recipe. {{image_4}} You can fill your ravioli with many tasty ingredients. Try spinach and ricotta for a fresh twist. Meat lovers might enjoy ground beef or sausage. For a vegan option, use mushrooms or roasted vegetables. You can use homemade or store-bought ravioli based on your time and skill. Store-bought saves time, but homemade lets you control flavors and textures. Instead of regular breadcrumbs, consider panko. Panko gives a crispier texture. It’s lighter and airier than regular breadcrumbs. If you need a gluten-free option, use crushed cornflakes or gluten-free breadcrumbs. These choices keep the crunch while accommodating dietary needs. Marinara sauce is classic, but don’t stop there! Try ranch dressing, garlic aioli, or a spicy sriracha mayo. These sauces add unique flavors and excitement. Pair your toasted ravioli with a simple salad or roasted vegetables. This balance adds freshness to your meal. For more ideas, check the Full Recipe for inspiration. To store cooked toasted ravioli, let them cool completely. Place them in an airtight container. This keeps the ravioli fresh. You can store them in the fridge for up to three days. To reheat and keep them crispy, use an oven or air fryer. Set the oven to 350°F and bake for about 10 minutes. This method helps restore some crunch. You can freeze both uncooked and cooked ravioli. If you freeze uncooked ravioli, spread them on a baking sheet first. Freeze them for about an hour. Once frozen, transfer them to a freezer bag. If you freeze cooked ravioli, let them cool, then place them in a container. To thaw, move them to the fridge overnight. For quick thawing, use the microwave but be careful not to overheat. Cooked toasted ravioli can last up to three days in the fridge. Look for signs of spoilage like an off smell or mold. If you see any of these signs, it’s best to throw them away. Keeping an eye on your leftovers helps avoid wasting food. Enjoy your crispy delight fresh, but know how to store it well! To keep your toasted ravioli crispy, follow these tips: - Drain well: After boiling, make sure to drain the ravioli completely. - Cool before breading: Let them cool down for a few minutes. - Use hot oil: Fry in oil heated to the right temperature. - Don’t overcrowd the pan: Fry in small batches for even cooking. - Drain properly: Place them on paper towels after frying to remove excess oil. These steps help maintain that delightful crunch you crave. Yes, you can make toasted ravioli in an air fryer! Here are some adjustments: - Preheat the air fryer: Set it to 375°F (190°C). - Use less oil: Spray the ravioli lightly with cooking oil instead of submerging. - Adjust cooking time: Cook for about 8-10 minutes, flipping halfway through. This method gives you a healthier option while still keeping that crispy texture. Toasted ravioli has roots in St. Louis, Missouri. Italian immigrants created it as a way to use leftover ravioli. They would fry the pasta, making it a tasty snack or appetizer. Today, it stands as a beloved dish in St. Louis cuisine. It symbolizes the blend of cultures and creativity in food. Yes, you can use homemade ravioli! Just keep a few things in mind: - Thickness: Ensure the pasta dough is rolled thin for even cooking. - Filling moisture: Avoid wet fillings, as they can make the ravioli soggy. - Cooking time: Homemade ravioli may cook faster than store-bought. Using homemade can add a personal touch and unique flavor to your toasted ravioli. For the Full Recipe, check out the detailed steps above. Toasted ravioli are a delicious treat you can easily make at home. This post covered key ingredients, cooking steps, and tips for crispiness. I shared how to avoid common mistakes and offered tasty variations. Remember to store leftovers properly and enjoy a variety of sauces. With practice, you'll master toasted ravioli and impress your friends at any gathering. Happy cooking!

Are you ready to elevate your meals with a crunchy twist? Toasted ravioli offers a delightful crunch that can brighten any dish. In this article, I’ll guide you through simple …

Read more

Categories Appetizers

Crispy Jalapeno Popper Egg Rolls Flavorful Snack Treat

May 21, 2025 by Chef Remy
- 8 oz cream cheese, softened to room temperature - 1 cup shredded sharp cheddar cheese - 1/2 cup jalapeños, diced (fresh or pickled for a tangy kick) - 1/4 cup green onions, finely chopped - 1 teaspoon garlic powder - 1/2 teaspoon onion powder - 10-12 egg roll wrappers - Vegetable oil, for frying For these crispy jalapeño popper egg rolls, you need some key ingredients. First, cream cheese brings a rich, creamy texture. Sharp cheddar cheese adds a nice bite. Jalapeños provide that classic heat and flavor. Next, we have green onions. They add a fresh crunch to the mix. Garlic powder and onion powder enhance the taste with savory notes. You can adjust these spices to match your heat level. Finally, you need egg roll wrappers. They hold everything together and become crispy when fried. Vegetable oil is essential for frying. It helps achieve that golden, crunchy outside. When you gather these ingredients, you set the stage for a tasty snack. This dish is perfect for parties or game nights. For the full recipe, follow along with the steps to create these delicious treats! To start, you need to mix the cheeses and seasoning. In a medium bowl, combine 8 oz of cream cheese and 1 cup of shredded sharp cheddar cheese. Stir until smooth. Then add 1/2 cup of diced jalapeños, 1/4 cup of chopped green onions, 1 teaspoon of garlic powder, 1/2 teaspoon of onion powder, and salt and pepper to taste. Mix everything well until the filling is smooth and creamy. Next, it's time to wrap the egg rolls. Position one egg roll wrapper on your surface so one corner is facing you. Spoon about 2 tablespoons of the filling into the center of the wrapper. Fold the bottom corner over the filling, tucking it in gently. Fold the left and right corners in toward the center. Roll the wrapper tightly upwards until you reach the top corner. To seal it, dip your finger in water and wet the edge before pressing it down. Repeat this with the rest of the wrappers and filling. Now, let’s fry the egg rolls. Heat vegetable oil in a deep skillet over medium-high heat. Ensure the oil is deep enough to submerge the egg rolls halfway. Once the oil is hot, you can test it by dropping in a small piece of filling. If it sizzles, it’s ready. Carefully add the egg rolls in batches, frying them for about 2-3 minutes on each side. Cook until they are golden brown and crispy. Remove the egg rolls and place them on paper towels to drain any extra oil. You can serve the crispy jalapeño popper egg rolls warm with your favorite dipping sauces. For more details, check the Full Recipe. To make crispy jalapeno popper egg rolls, the oil temperature matters. Heat the vegetable oil to about 350°F. You can test this by dropping a small piece of filling into the oil. If it sizzles, you're ready. To avoid soggy egg rolls, do not overcrowd the pan. Fry them in small batches. This helps keep the oil hot and the egg rolls crispy. Once cooked, place them on paper towels to soak up extra oil. Kick up the flavor with some extra seasonings. Try adding smoked paprika or cayenne pepper for a spicy twist. A squirt of lime juice just before you serve adds a burst of freshness. You can also mix in some cooked bacon bits for a smoky crunch. This adds a layer of flavor that pairs well with the creamy cheese and spicy jalapeños. For dipping sauces, ranch dressing is a classic choice. It cools the heat of the jalapeños. Spicy mayo also works great for those who like a kick. When serving, arrange the egg rolls on a large platter. Garnish with chopped green onions or cilantro for a pop of color. This makes your dish look even more inviting and tasty. For the full recipe, visit the recipe section. {{image_4}} You can swap cheeses to change the flavor. Cream cheese works well, but you can also try goat cheese for a tangy taste. For a lighter option, use ricotta cheese. If you want a different heat level, try using mild peppers like bell peppers or sweet banana peppers. If you prefer spicy, add more jalapeños or use serrano peppers instead. You can bake these egg rolls instead of frying them. Preheat your oven to 400°F. Place the rolled egg rolls on a baking sheet lined with parchment paper. Brush them lightly with oil for a crisp finish. Bake for 15-20 minutes, flipping halfway through. Keep an eye on them until they turn golden brown. For a vegetarian twist, use mashed tofu or black beans instead of cream cheese. You can also add veggies like corn, spinach, or bell peppers to the filling for extra taste. This change makes the egg rolls colorful and packed with nutrients. These variations still taste amazing and keep the crunch you love. You can find the Full Recipe to guide your cooking journey! After making these crispy jalapeño popper egg rolls, you may want to save some for later. To keep them fresh, store the egg rolls in an airtight container. Place a paper towel at the bottom to absorb moisture. This will help keep them crispy. You can refrigerate them for up to three days. If you want to save the egg rolls for a longer time, freezing is a great option. First, lay the fried egg rolls on a baking sheet. Make sure they are not touching. Freeze them for about an hour. Once frozen, transfer them to a freezer bag or container. They will last up to three months in the freezer. When it's time to eat, simply reheat them in the oven. Bake at 375°F (190°C) for 10-15 minutes until they are hot and crispy again. These egg rolls can last in the fridge for about three days. In the freezer, they can stay good for up to three months. Watch for signs of spoilage, like mold or a strange smell. If you see any, it’s best to throw them away. Enjoy your crispy jalapeño popper egg rolls while they are fresh! For the full recipe, check it out above. Yes, you can prepare these egg rolls ahead of time. After assembling them, place the egg rolls on a baking sheet. Cover them with plastic wrap and refrigerate for up to 24 hours. This keeps them fresh and ready for frying. If you want to freeze them, lay them on a sheet, freeze until firm, then transfer to a freezer bag. When you're ready to enjoy, fry them straight from the freezer. Just add a minute or two to the cooking time. Dipping sauces enhance the flavor of the egg rolls. Popular choices include: - Ranch dressing: Creamy and cool. - Spicy mayo: A mix of mayonnaise and Sriracha. - Sweet chili sauce: Adds a sweet and tangy flavor. - Guacamole: For a fresh twist. You can also mix soy sauce with lime juice for a zesty dip. These options make your snacking experience even more delightful. You want to look for a golden brown color on the egg rolls. They should be crispy on the outside. A good test is to check if they float in the oil. If they rise to the top, they are close to being done. You can also cut one open to check if the filling is hot and bubbly. Enjoy the crunchy texture and creamy filling for the best taste! You now know how to make crispy jalapeño popper egg rolls. We covered the key ingredients, from cream cheese to jalapeños, and discussed cooking steps. You learned important tips for crispiness and tasty variations. Remember to store them properly to keep them fresh. These egg rolls not only pack flavor but are fun to make. Enjoy serving them at your next gathering or as a snack. Your family and friends will love them!

Craving a snack that packs a punch? Look no further than Crispy Jalapeno Popper Egg Rolls! You’ll love this tasty treat that combines creamy cheeses and spicy jalapeños all wrapped …

Read more

Categories Appetizers

Italian Crescent Casserole Tasty Family Favorite Meal

May 21, 2025 by Chef Remy
- 1 can refrigerated crescent roll dough - 1 pound ground beef (or ground turkey for a lighter option) - 1 small onion, finely chopped - 2 cloves garlic, minced - 1 bell pepper (any color), diced - 1 can (15 oz) marinara sauce - 1 teaspoon Italian seasoning - 1 cup ricotta cheese - 2 cups shredded mozzarella cheese (divided) - Salt and black pepper to taste - Fresh basil leaves for garnish When I create the Italian Crescent Casserole, I focus on quality ingredients. The dough is the base. I often use refrigerated crescent roll dough for its ease and buttery flavor. Ground beef or turkey adds protein and heartiness. I finely chop a small onion and mince garlic to build a strong flavor foundation. To enhance the dish, I add a diced bell pepper, which gives a fresh crunch. A can of marinara sauce brings the Italian taste we all love. I sprinkle in Italian seasoning to deepen the flavors. The creamy part is essential. I mix ricotta cheese with shredded mozzarella for richness. I always add salt and pepper to balance the flavors. Finally, fresh basil leaves on top add color and aroma. This combination makes the casserole not just tasty, but also beautiful. You can find the Full Recipe to make this delicious dish! - Preheat oven to 375°F (190°C). - Brown ground beef, onion, and garlic in a skillet. Start by preheating your oven so it's ready when you finish the prep. Use a large skillet over medium heat. Add one pound of ground beef, one small chopped onion, and two minced garlic cloves. Cook until the meat is brown and the onion is clear, about 5-7 minutes. If you see too much fat, drain some off. - Sauté diced bell pepper with beef mixture. - Stir in marinara sauce and Italian seasoning. Next, toss in a diced bell pepper. This adds color and crunch. Sauté for another 3-4 minutes. Then, pour in one can of marinara sauce and one teaspoon of Italian seasoning. Let it simmer for about 5 minutes so all the flavors blend well. - Combine ricotta and half of mozzarella in a bowl. In a separate bowl, mix one cup of ricotta cheese with one cup of shredded mozzarella. Stir until it’s smooth and creamy. This will add richness to your casserole. - Lay crescent dough in baking dish and spread beef mixture. - Dollop ricotta mixture on top and fold dough edges. Open a can of crescent roll dough and lay it flat in a greased 9x13 inch baking dish. Press the seams together to form one sheet. Spread your beef mixture evenly over the dough. Then, dollop your ricotta mixture on top. Finally, fold the edges of the dough over the filling to seal it in. - Sprinkle remaining mozzarella and bake for 20-25 minutes. Sprinkle the last cup of mozzarella on top. Place the dish in the preheated oven and bake for 20-25 minutes. You’ll know it’s done when the dough is golden brown and the cheese is melted and bubbly. - Let cool for a few minutes and garnish with basil leaves. Once you take it out of the oven, let it cool for a few minutes. Then, garnish with fresh basil leaves. This adds a lovely touch and fresh flavor to your dish. Enjoy your Italian Crescent Casserole! For the full recipe, check out the details provided earlier. - Ensure the crescent dough is sealed well for even baking. A good seal keeps the filling inside and helps it cook evenly. - Use a thermometer to check cheese doneness. Aim for around 160°F (71°C) to confirm it’s fully cooked. - Experiment with different cheeses for added flavor. Swap mozzarella for provolone or gouda to change the taste. - Add crushed red pepper for some spice. A little heat can elevate the dish and excite your taste buds. - Cut the casserole into squares and garnish for an attractive serving. Fresh basil leaves or a drizzle of olive oil really enhances the look. {{image_4}} You can switch up the protein in your casserole for fun flavors. Use ground chicken if you want a lighter option. Ground sausage adds a nice kick, too. For a meat-free meal, try vegetarian meat alternatives. They work well and keep the dish hearty. Adding veggies is a great way to boost nutrition. Spinach and zucchini blend nicely with the other ingredients. They add color and flavor. Mushrooms are another excellent choice if you want an earthy taste. They give the dish extra depth and texture. Cheese makes everything better! You can swap ricotta for cottage cheese. This change gives a different texture and taste. Experiment with various mozzarella types, too. Smoked mozzarella adds a unique flavor that elevates the dish. Don’t be afraid to get creative! For the full recipe, check out the link above. Store any leftover Italian Crescent Casserole in an airtight container. It will keep fresh for up to 3 days. This makes it easy to enjoy your delicious meal later in the week. Just remember to let it cool before you store it. You can freeze an unbaked casserole for up to a month. Wrap it tightly in plastic wrap and then foil to prevent freezer burn. If you bake the casserole, it can be frozen for up to 2 months. Just let it cool completely before packing it up for the freezer. For the best texture, reheat your casserole in the oven. Preheat your oven to 350°F (175°C) and bake for about 20 minutes, or until heated through. You can also use a microwave if you're in a hurry. Just be aware that the texture may change a bit. It might not be as crispy, but it will still taste great! Yes, you can prepare and assemble the casserole and store it in the fridge overnight before baking. This saves time on busy nights. Just remember to cover it well with plastic wrap. When you’re ready, bake it straight from the fridge. It will taste fresh and delicious. Puff pastry or bread dough can be used as alternatives. Puff pastry gives a flaky texture. Bread dough creates a heartier base. Both options work great in this casserole. You can modify the flavor and texture to your liking. Baking times may vary; check for golden brown dough and bubbling cheese as indicators. If you use a larger dish, it might take a bit longer. If smaller, it could bake faster. Always look for that golden color and melted cheese to know it's done. Yes, the flavors are mild and appealing for children. The combination of meat, cheese, and sauce makes it a hit. Kids love the gooey cheese and soft dough. It’s a perfect meal for families. Absolutely, store-bought sauce works well for convenience and flavor. Many brands have great taste without extra work. You can even try different flavors to find your favorite. Just pour it right into the skillet when needed. This blog post covered how to make a tasty Italian Crescent Casserole. We explored ingredients like crescent roll dough, ground beef, and ricotta cheese. I shared easy steps to prepare, bake, and serve your dish. Remember, feel free to mix in your favorite veggies or switch the meat. With these tips, you can create a dish that's both fun and flavorful. Enjoy your cooking adventure!

Looking for a quick, tasty meal your whole family will love? Look no further than the Italian Crescent Casserole! Bursting with flavor, this dish combines savory beef, cheesy goodness, and …

Read more

Categories Dinner

Melt In Your Mouth Chicken Tasty and Easy Recipe

May 21, 2025 by Chef Remy
This melt-in-your-mouth chicken recipe is simple and delicious. You will need basic ingredients to make it shine. This dish balances flavors and textures, ensuring a meal that everyone will love. - 4 boneless, skinless chicken breasts - 1 cup buttermilk - 1 tablespoon garlic powder - 1 teaspoon smoked paprika - 1 teaspoon onion powder - 1 teaspoon salt - 1/2 teaspoon black pepper - 1 cup all-purpose flour - 1/2 cup grated Parmesan cheese - 1/2 teaspoon dried oregano - 1/4 teaspoon cayenne pepper (optional for heat) - 1/4 cup unsalted butter - Fresh parsley, chopped (for garnish) If you don't have buttermilk, use regular milk mixed with lemon juice. For a gluten-free option, swap all-purpose flour with almond flour. You can replace Parmesan with another cheese like mozzarella. If you want a different spice, try adding chili powder instead of cayenne. Each swap keeps the dish tasty and fun! First, we need to marinate the chicken to make it tender and flavorful. In a bowl, whisk together: - 1 cup buttermilk - 1 tablespoon garlic powder - 1 teaspoon smoked paprika - 1 teaspoon onion powder - 1 teaspoon salt - 1/2 teaspoon black pepper Once mixed, add the 4 boneless, skinless chicken breasts to the bowl. Make sure they are covered by the marinade. Cover the bowl with plastic wrap and place it in the fridge. Let the chicken marinate for at least 1 hour, but overnight is best. This time allows the flavors to soak in. While the chicken marinates, let's prepare the coating. In a shallow dish, combine: - 1 cup all-purpose flour - 1/2 cup grated Parmesan cheese - 1/2 teaspoon dried oregano - 1/4 teaspoon cayenne pepper (optional) Mix these ingredients well. This mixture creates a crispy and tasty crust for the chicken. Now it's time to cook! Preheat your oven to 400°F (200°C). This ensures the chicken cooks perfectly. After marinating, take the chicken out of the fridge. Let any extra buttermilk drip off. Dredge each piece in the flour mixture, pressing lightly to coat well. Next, heat a large oven-safe skillet over medium-high heat. Add 1/4 cup unsalted butter and let it melt. Once hot, add the coated chicken breasts. Sear them for about 4-5 minutes on each side until golden brown. After searing, transfer the skillet to the oven. Bake the chicken for 20-25 minutes. Check that the internal temperature reaches 165°F (75°C) to ensure it is fully cooked. The chicken should be juicy and tender. Once done, take the skillet out of the oven. Let the chicken rest for about 5 minutes. This keeps the juices inside. You can sprinkle some chopped fresh parsley on top for a fresh touch before serving. Enjoy your melt-in-your-mouth chicken! Marinades are key for flavor. They add depth and make your chicken juicy. For this recipe, use buttermilk as the base. It makes the chicken tender and adds a slight tang. Mix buttermilk with garlic powder, smoked paprika, onion powder, salt, and black pepper for the best flavor. Let the chicken soak in this mixture for at least one hour. For even better results, marinate it overnight. The longer it sits, the more flavor it absorbs. The right texture is crucial for Melt In Your Mouth Chicken. Start by coating the marinated chicken in a flour mixture. This mixture includes all-purpose flour, grated Parmesan cheese, and dried oregano. This gives a crispy crust. Make sure to press the coating onto the chicken well. When you sear it in butter, it locks in moisture and flavor. Baking it afterward keeps it juicy inside while the outside gets golden and crispy. Many cooks make simple mistakes that ruin the chicken. One common mistake is not marinating long enough. A short soak won’t let the flavors develop. Another mistake is not letting the excess buttermilk drip off before coating. This can lead to a soggy crust. Lastly, don’t skip the resting time after baking. Letting it rest for 5 minutes helps the juices settle. This way, when you cut into it, the chicken stays moist and delicious. {{image_4}} To spice things up, add cayenne pepper to the coating. You can use 1/2 teaspoon for a mild kick or more if you like it hot! This will give your Melt In Your Mouth Chicken a nice, fiery twist. You can also mix in some hot sauce into the buttermilk marinade. It adds depth and heat, making each bite exciting. If you enjoy fresh flavors, try adding herbs. Dried thyme, basil, or rosemary can enhance the taste. Mix these herbs into the coating for a fragrant touch. You can also add fresh chopped herbs directly to the buttermilk. This will give your chicken a lovely, garden-fresh flavor. Not in the mood for baking? You can grill or air fry your chicken! For grilling, preheat your grill and cook the chicken for about 6-8 minutes per side. This gives a smoky flavor and nice grill marks. If you prefer air frying, set your air fryer to 375°F (190°C) and cook for about 15-18 minutes. This method keeps the chicken juicy while making it crispy without much oil. Each method brings a unique flavor and texture to this great dish. After you make Melt In Your Mouth Chicken, let it cool first. Once it's cool, place it in an airtight container. This keeps the chicken fresh. Store it in the fridge for up to three days. If you want to keep it longer, consider freezing it. To reheat, take the chicken out of the fridge or freezer. If frozen, let it thaw overnight in the fridge. Preheat your oven to 350°F (175°C). Place the chicken on a baking sheet. Heat it for about 15 to 20 minutes, or until it’s warm inside. You can also use a microwave, but the oven keeps the texture better. If you want to freeze the chicken, wrap it tightly in plastic wrap first. Then, place it in a freezer-safe bag or container. Label it with the date. It can last up to three months in the freezer. When you’re ready to eat, simply thaw it in the fridge and reheat as mentioned. This way, you can enjoy your delicious meal later! For the best taste, marinate the chicken for at least one hour. This helps the flavors soak in. If you can, marinate it overnight. This longer time allows the buttermilk to tenderize the meat. The garlic and spices mix well, giving your chicken a rich flavor. Yes, you can use bone-in chicken. It adds flavor and moisture. However, bone-in pieces may take longer to cook. Make sure to adjust your cooking time. Always check that the internal temperature reaches 165°F (75°C). This keeps the chicken safe and juicy. Many sides go well with this chicken. Try mashed potatoes for a comforting meal. Steamed vegetables add color and nutrients. A fresh salad can balance the richness of the chicken. Rice or quinoa also make great choices. These sides complete your meal nicely. In this post, we covered how to make Melt In Your Mouth Chicken. We discussed the needed ingredients and offered substitutions. You learned step-by-step cooking methods, like marinating and baking. I shared tips to enhance flavor and texture. We also explored fun variations, storage techniques, and common questions. Cooking this dish can be simple and fun. Enjoy experimenting with the recipe and make it your own!

If you’re craving chicken that melts in your mouth, you’re in for a treat! This tasty and easy recipe will make your dinner simple and unforgettable. With just a few …

Read more

Categories Dinner

Easy Cowboy Butter Chicken Linguine Flavorful Delight

May 21, 2025 by Chef Remy
- 8 oz linguine pasta - 2 boneless, skinless chicken breasts - 4 tablespoons unsalted butter - 3 cloves garlic, finely minced For this dish, you want to pick good-quality ingredients. The linguine pasta is the base of your meal. I love using fresh, high-quality chicken breasts. They cook up juicy and tender. Unsalted butter gives the sauce a rich flavor, and fresh garlic brings in a nice aroma. - 1 teaspoon smoked paprika - ½ teaspoon cayenne pepper - 1 teaspoon dried oregano - 1 teaspoon dried thyme These seasonings make the dish pop! Smoked paprika adds a deep, smoky essence. Cayenne pepper gives it a nice kick, but you can adjust it to your taste. Dried oregano and thyme add herbal notes that brighten the dish. - ½ cup low-sodium chicken broth - 1 cup cherry tomatoes - Salt and pepper to taste - Fresh parsley for garnish Chicken broth adds moisture and depth to the sauce. Cherry tomatoes burst with flavor and add sweetness. Don’t forget salt and pepper—they help bring out all the flavors. Fresh parsley is perfect for a bright, fresh finish on your plate. For the full recipe, check out the link. Enjoy cooking! To start, fill a large pot with water and add salt. Bring the water to a boil. This step is key for tasty pasta. Once boiling, add the linguine. Cook the pasta for 8-10 minutes until it is al dente. You want it firm, not mushy. Stir the pasta occasionally to prevent sticking. Once done, drain the linguine and set it aside in a warm bowl to keep it nice and cozy. Next, we focus on the chicken. Heat 2 tablespoons of butter in a large skillet over medium heat. Once melted, add the chicken pieces. Season them well with salt and pepper. This gives the chicken great flavor. Cook for about 5-7 minutes. You want the chicken to be golden brown and cooked through. To check for doneness, cut a piece in half. It should be white all the way through. Remove the chicken from the skillet and keep it warm on a plate. Now it’s time for the magic sauce! In the same skillet, add the last 2 tablespoons of butter. Let it melt, then add the minced garlic. Stir in smoked paprika, cayenne pepper, dried oregano, and thyme. Cook for about a minute. The garlic should smell amazing and turn light golden. This is where a lot of flavor comes from. Return the cooked chicken to the skillet and mix it into the sauce. Then, add the drained linguine. Toss everything together until the pasta is well coated. Make sure each strand gets that buttery sauce. Taste and adjust with more salt and pepper if needed. You want it to be just right. For a lovely plate, twirl a serving of pasta using a fork and spoon. This makes it look fancy. Add extra cherry tomatoes on top for color. Drizzle a bit of olive oil for richness. Finally, sprinkle freshly chopped parsley over the dish. This adds a nice touch and a burst of flavor. Your Easy Cowboy Butter Chicken Linguine is now ready to impress! For the full recipe, you can check the complete instructions. To make the best linguine, always start with salted water. Salt helps the pasta absorb flavor. Bring a large pot of water to a rolling boil. Add 1 tablespoon of salt for every quart of water. Cook the linguine according to the package instructions for al dente. This usually takes 8 to 10 minutes. To avoid sticky pasta, stir the pasta occasionally while it cooks. Drain the pasta well but do not rinse it. Rinsing removes the starch that helps the sauce stick. Keeping chicken juicy is key to great flavor. Cut the chicken into bite-sized pieces for even cooking. Season the chicken with salt and pepper before cooking. Sauté it in a hot skillet for about 5 to 7 minutes. This will give it a nice golden color. After cooking, let the chicken rest on a plate for a few minutes. This resting time helps the juices stay inside when you slice it. Fresh herbs can greatly improve your dish. They add a bright flavor that dried herbs often lack. Use fresh parsley when garnishing for a pop of color. If you use dried herbs instead, make sure to add them early in the cooking process. For a delicious cowboy butter, use unsalted butter, garlic, and spices. You can make it at home by mixing softened butter with your favorite herbs and spices. This adds a rich flavor to your dish, making it truly special. For the full recipe, check out the details above. {{image_4}} You can easily change the protein in Easy Cowboy Butter Chicken Linguine. For a seafood twist, try shrimp. Cook them until they turn pink. If you want a plant-based option, use tofu. Just press it to remove water and then sauté until golden. Adding veggies boosts flavor and nutrition. Try spinach for a pop of color. You can also toss in bell peppers for crunch and sweetness. These swaps make the dish more fun and adaptable. If you need gluten-free options, look for gluten-free linguine. Many brands make pasta from rice or corn. They cook similarly, so you won't lose the dish's charm. For dairy-free adjustments, swap out butter with a plant-based alternative. Coconut oil or vegan butter work well. These changes keep the dish creamy without dairy. Pair Easy Cowboy Butter Chicken Linguine with a light salad. A simple green salad with lemon dressing complements the rich pasta. You could also serve it with garlic bread for a hearty meal. For meal prep, this dish stores well. Divide it into containers for easy lunches. Just reheat and enjoy! It’s a simple and satisfying option for busy days. After you enjoy your Easy Cowboy Butter Chicken Linguine, store any leftovers in an airtight container. Place the container in the fridge within two hours of cooking. This keeps the dish fresh and safe to eat later. Leftovers will stay good for 3 to 4 days. Always check for any signs of spoilage before eating. To enjoy your leftovers, reheating is key. The best way is on the stovetop. Use a medium heat and add a splash of chicken broth to keep it moist. Stir often until heated through. If you use a microwave, place the pasta in a microwave-safe dish. Cover it with a lid or damp paper towel. Heat in short bursts, stirring in between. This helps prevent dry spots. Yes, you can freeze Cowboy Butter Chicken Linguine! It’s a great way to save extra meals. First, let the dish cool completely. Then, scoop it into a freezer-safe container. Make sure to leave some space at the top for expansion. Seal it tightly and label with the date. It will stay fresh for up to 3 months. To thaw, transfer it to the fridge overnight. Reheat it gently on the stovetop or in the microwave for the best flavor. To make Cowboy Butter, you need a few simple ingredients. You will need unsalted butter, minced garlic, smoked paprika, cayenne pepper, dried oregano, and dried thyme. Start by melting the butter in a pan. Then, add the garlic and spices. Cook for about a minute until the garlic smells good. This quick method gives you a rich, flavorful sauce for your pasta. Yes, you can! While I recommend linguine, other types work well too. Spaghetti, fettuccine, or even penne can be great choices. Just make sure to cook them until they are al dente. This way, they hold their shape and texture in the dish. Adjusting the spice level is easy. If you like it mild, cut back on the cayenne pepper. You can even leave it out. For more heat, add an extra pinch of cayenne or more smoked paprika. Just remember to taste as you go to find the right balance for you. Great side dishes can make your meal shine. A fresh garden salad pairs nicely. You can also serve garlic bread for a tasty addition. Roasted vegetables, like asparagus or zucchini, go well too. These sides add color and flavor to your plate. Yes, you can make this dish ahead of time! Cook the chicken and sauce, then store them separately from the pasta. Keep everything in airtight containers in the fridge. When you're ready to eat, just reheat and combine. This way, dinner is quick and easy! For the full recipe, check back for all the details. This blog post detailed how to create a delicious Cowboy Butter Chicken Linguine. You learned about the main ingredients, cooking methods, and tips for the best flavor. I shared variations for different diets and discussed storage options for leftovers. My final thought is simple: cooking can be fun and tasty. Try this recipe, and enjoy the results. You’ll impress everyone at the table with your skills.

Craving a dish that combines rich flavors and hearty ingredients? Look no further! The Easy Cowboy Butter Chicken Linguine is your next go-to meal, promising comfort with every bite. With …

Read more

Categories Dinner

Spicy Mexican Corn Bites Flavorful and Crispy Snack

May 21, 2025 by Chef Remy
For Spicy Mexican Corn Bites, you need these key ingredients: - 2 cups fresh corn kernels (or 2 cups thawed frozen corn) - 1/2 cup all-purpose flour - 1/2 cup cornmeal - 1/2 teaspoon baking powder - 1 teaspoon ground cumin - 1 teaspoon chili powder - 1/2 teaspoon smoked paprika - 1/4 teaspoon salt - 1/4 teaspoon black pepper - 1 large egg - 1/4 cup milk (dairy or plant-based) - 1/4 cup finely chopped fresh cilantro - 1 jalapeño, seeded and finely chopped - 1/2 cup finely grated cheese (like Cotija or cheddar) - Oil for frying (vegetable or canola oil) These ingredients come together to create a tasty snack that packs a punch. You can easily tweak this recipe. If you want a different flavor, here are some ideas: - Use sweet corn instead of fresh. - Swap out all-purpose flour for gluten-free flour. - Try adding chopped bell peppers for extra crunch. - If you like more heat, throw in an extra jalapeño. These swaps give you room to play with flavors and textures. To adjust the spice level, consider these options: - For mild bites, remove the seeds from the jalapeño and use less. - For medium heat, keep some seeds but only use half a jalapeño. - For a fiery kick, add crushed red pepper flakes to the mix. These adjustments help you customize the heat to fit your taste buds. Enjoy playing with flavors! For the full recipe, check out the cooking instructions above. Start with fresh corn or frozen corn. If using fresh, slice the kernels off the cob. A sharp knife works best. Aim to get about 2 cups of kernels. If you choose frozen corn, make sure it is fully thawed and drained. This keeps the batter from getting too watery. You want the corn to shine in these bites. In a large bowl, combine the dry ingredients first. Mix the flour, cornmeal, baking powder, cumin, chili powder, smoked paprika, salt, and black pepper. Whisk them together until they are well blended. In a separate bowl, whisk the egg and milk together. Add in the chopped cilantro and diced jalapeño. Mix it well, so the flavors combine nicely. This will create a tasty base for your bites. Now, it's time to fry! Heat about half an inch of oil in a skillet over medium heat. To check if the oil is ready, drop a small spoonful of batter in. It should sizzle right away. Next, use a spoon or small scoop to drop the batter into the hot oil. Fry the bites for about 3-4 minutes on each side. They should turn golden brown and crispy. Avoid overcrowding the pan; fry in batches if needed. Once done, place them on paper towels to absorb extra oil. Serve warm with your favorite dipping sauce. For the full recipe, check the details above! To get the best texture for your Spicy Mexican Corn Bites, use fresh corn. Fresh corn gives a sweet crunch that frozen corn can't match. If you use frozen corn, make sure to thaw it completely. Drain any extra moisture before mixing it into the batter. This keeps the bites from getting soggy. Mixing dry and wet ingredients gently helps maintain air in the batter. This results in a light and fluffy inside, while the outside stays crispy. Frying is the key to a perfect texture. Use a heavy skillet for even heat. Fill it with oil to about half an inch deep. Heat the oil to medium before frying. To test if it's ready, drop a small piece of batter in. If it sizzles right away, you're good to go. Fry the corn bites in small batches. This prevents them from steaming and keeps them crisp. Cook them until they are golden brown, about 3-4 minutes on each side. Presentation makes food more appealing. Arrange the warm corn bites on a bright platter. Garnish with a sprig of fresh cilantro for a pop of color. Serve them with small bowls of dipping sauces. Creamy avocado crema or spicy salsa work great here. This adds a fun touch and invites guests to dig in. For an extra touch, sprinkle some chopped cilantro over the bites before serving. It looks beautiful and adds more flavor. Check the [Full Recipe] for more details on making these tasty snacks! {{image_4}} You can easily make these bites vegetarian. Simply skip the cheese or use a plant-based cheese. This keeps the flavor tasty while making it suitable for all diets. You can also add other veggies like bell peppers or zucchini. Just chop them finely and mix them into the batter. This adds more texture and flavors. If you want to change the cheese, you have options! Try mozzarella for a milder taste. Feta adds a salty flavor that pairs well with corn. You could also use goat cheese for a tangy kick. Each cheese gives a unique twist. Experiment to find your favorite! Using seasonal ingredients can make your corn bites even better. In summer, fresh herbs like basil or dill can brighten the flavor. In fall, add diced pumpkin or sweet potato for a sweeter taste. You can even mix in cooked spinach in winter. Seasonal swaps keep your bites fresh and exciting throughout the year! Try these variations to make the Spicy Mexican Corn Bites your own. For the complete recipe, check the Full Recipe section. Store your Spicy Mexican Corn Bites in an airtight container. Place a paper towel at the bottom to absorb moisture. This keeps them crisp for longer. They last up to 3 days in the fridge. When ready to eat, take out the bites and let them sit at room temperature for a few minutes. To reheat, use an oven or an air fryer. Preheat the oven to 350°F (175°C). Place the bites on a baking sheet. Heat for about 10 minutes. This helps maintain their crispiness. If using an air fryer, heat at 350°F (175°C) for 5-7 minutes. Avoid using a microwave, as it makes them soggy. You can freeze these bites for later enjoyment. Let them cool completely before freezing. Arrange the bites in a single layer on a baking sheet. Freeze until solid, then transfer to a freezer-safe bag. They can last up to 3 months in the freezer. To cook from frozen, follow the reheating instructions but add a few extra minutes to the time. For the full recipe, check the earlier sections. To make Spicy Mexican Corn Bites gluten-free, swap the all-purpose flour with a gluten-free flour blend. Many blends work well in recipes. You can also use almond flour or coconut flour. Make sure the cornmeal is gluten-free too. This way, everyone can enjoy the snack. Yes, you can use canned corn for this recipe. Just drain and rinse it well. Canned corn has a softer texture, so your corn bites may be less crunchy. Fresh corn or frozen corn usually gives the best results. Experiment and see what you like best! Several dipping sauces go great with Spicy Mexican Corn Bites. Here are some tasty options: - Creamy avocado crema - Zesty spicy salsa - Cool sour cream with lime - Cilantro yogurt dip Feel free to mix and match! These sauces add extra flavor and fun to your snack. Enjoy! You now have a clear guide for making tasty Spicy Mexican Corn Bites. We covered key ingredients, prep steps, and valuable tips. Remember, you can adjust spice levels and explore fun variations. Store your bites properly to keep them fresh. Enjoy experimenting with sauces that pair well. Making Corn Bites at home can be fun and rewarding. With these instructions, you’ll impress anyone who tastes your dish. Try it out, and enjoy every delicious bite!

Are you ready to take your snack game to the next level? These Spicy Mexican Corn Bites are not only flavorful, but they’re also crispy and easy to make! In …

Read more

Categories Appetizers

Homemade Stromboli Tasty and Easy Dinner Recipe

May 21, 2025 by Chef Remy
- 1 pound pizza dough (store-bought or homemade) - 1 cup mozzarella cheese, shredded - 1/2 cup provolone cheese, shredded - 1/2 cup pepperoni slices - 1/2 cup cooked Italian sausage, crumbled To make a great Stromboli, you need a good base. Pizza dough serves as the perfect foundation. You can use store-bought dough or make your own. Both work well! Next, you'll need cheese. Mozzarella brings that classic taste, while provolone adds a nice sharpness. The filling is where the fun begins! Pepperoni and Italian sausage give it a hearty flavor. - 1/2 cup bell peppers, thinly sliced (both red and green for color) - 1/4 cup black olives, sliced - 1 teaspoon Italian seasoning - 1/2 teaspoon garlic powder - 1 egg, beaten (for egg wash) - Olive oil, for brushing the top - Marinara sauce, for dipping Feel free to get creative! Add bell peppers for crunch and color. Black olives add a briny taste. Seasoning is key, so sprinkle Italian seasoning and garlic powder for extra flavor. You can brush the top with olive oil and use an egg wash for a nice golden color. Don’t forget the marinara sauce for dipping. This adds a tasty touch to every bite. For the full recipe, check it out! Preheat Oven and Prepare Baking Sheet Start by preheating your oven to 400°F (200°C). This helps the Stromboli cook evenly. While the oven heats, line a baking sheet with parchment paper. This will keep the Stromboli from sticking. Roll Out Dough Next, take your pizza dough and place it on a clean, lightly floured surface. Use a rolling pin to roll the dough into a rectangle, about 1/4 inch thick. Make sure it is even all around. This helps it bake nicely. Add Cheeses and Layer Fillings Now, sprinkle the shredded mozzarella and provolone cheeses evenly over the rolled-out dough. Leave a one-inch border along the edges. This will stop the filling from spilling out later. On top of the cheese, layer your pepperoni slices, crumbled Italian sausage, thinly sliced bell peppers, and black olives. Spread them out so every bite has a bit of everything. Season and Roll the Dough Sprinkle the Italian seasoning and garlic powder over the toppings. This will boost the flavor. Then, carefully roll the dough from one long side to the other, forming a tight log. Tuck in the edges as you roll to keep the filling inside. Seal Edges and Transfer Pinch the seams and ends of the rolled dough to seal it well. This step is key to keeping all the tasty filling in. Then, place the Stromboli seam side down on your baking sheet. Prepare for Baking and Bake in Oven Brush the top of the Stromboli with olive oil for extra flavor. Next, use the beaten egg wash to give it a golden look as it bakes. Make several diagonal slashes on top with a sharp knife. This helps steam escape during baking. Put the baking sheet in the preheated oven and bake for 25-30 minutes. Look for a golden brown color on the dough. Once it’s done, let it cool for a few minutes. Then, slice it up and serve with marinara sauce for dipping. Enjoy your homemade Stromboli! To make the best dough, keep it simple. Use warm water when mixing. This helps the yeast grow. Knead the dough until it feels smooth and elastic. It should bounce back when you poke it. Let it rise in a warm spot. Cover it with a damp cloth to keep moisture in. For storing dough, wrap it tightly in plastic wrap. It can stay in the fridge for up to three days. If you want to freeze it, place it in a freezer bag. It will stay fresh for about three months. Just thaw it in the fridge overnight before using. Spices can make a big difference. I recommend mixing oregano, basil, and a pinch of red pepper flakes for a kick. These spices bring warmth and depth. You can even try adding a bit of smoked paprika for a twist. When it comes to cheese, get creative! Besides mozzarella and provolone, try using cheddar or gouda for a unique taste. Mixing different cheeses can give your Stromboli a rich flavor. Dipping sauces can elevate your meal. Marinara sauce is a classic choice. You can also try ranch or garlic butter for a new taste. Each sauce adds a different layer of flavor. For garnishing, use fresh herbs. Chopped basil or parsley adds color and flavor. You can also sprinkle some grated Parmesan on top after baking. It gives a nice finish to your Stromboli. For the full recipe, check out the complete guide to homemade Stromboli. {{image_4}} You can make Stromboli in many ways. I enjoy mixing and matching ingredients. Here are two popular options. - Vegetarian Options: For a meat-free meal, use lots of veggies. Spinach, mushrooms, and artichokes work great. Add ricotta or feta cheese for creaminess. Don’t forget to sprinkle in some Italian herbs for added flavor. - Meat Lovers' Stromboli: If you love meat, this one is for you! Combine pepperoni, salami, and ham. Add cooked sausage for a savory punch. Use extra cheese to make it rich and gooey. This option is a hearty choice for a filling dinner. Stromboli can also take on flavors from around the world. Here are two fun ideas to try. - Mexican-Inspired Stromboli: Switch up the usual ingredients with taco meat, black beans, and corn. Top with cheddar cheese and jalapeños for a kick. Serve with salsa or guacamole for dipping. It’s a fiesta in every bite! - Mediterranean Flavors: Use ingredients like grilled chicken, sun-dried tomatoes, and olives. Add feta cheese and a drizzle of olive oil. This twist gives you a taste of the Mediterranean right at home. Pair it with tzatziki sauce for a refreshing touch. These variations let you create a Stromboli that fits your taste. Each option brings something new to the table. For a complete guide on making different types, check out the Full Recipe. To store leftover Stromboli, wrap it tightly in plastic wrap. This keeps moisture in and prevents it from drying out. You can also place it in an airtight container. Your Stromboli will stay fresh for about 3 to 4 days in the fridge. For the best taste, eat it within two days. If you want to save your Stromboli for later, freezing is an excellent option. First, let the Stromboli cool completely. Then, wrap it in plastic wrap and aluminum foil. This layering keeps it safe from freezer burn. You can freeze it for up to three months. To reheat, remove the wrapping and place the Stromboli on a baking sheet. Preheat your oven to 350°F (175°C). Bake for about 20-25 minutes or until heated through. You can also slice it and heat it in the microwave for 1-2 minutes. Just make sure to cover it to keep it from getting tough. Enjoy your meal with some marinara sauce! For the full recipe, check out the link provided. Can I use store-bought dough? Yes, you can use store-bought dough. It saves time and works great. I often use it for quick meals. Just roll it out and follow the same steps. How do I know when the Stromboli is done? The Stromboli is done when it turns golden brown. You can also check the inside. Use a thermometer; it should read 190°F. If it’s golden and hot, it’s ready to eat! Why is my Stromboli leaking filling? Leaking can happen if the dough is not sealed well. Make sure to pinch the edges tightly. Also, avoid overfilling it. Less is more when it comes to filling. What to do if the dough is too sticky? If your dough is sticky, sprinkle a bit of flour on it. Use your hands to knead in the flour gently. This helps make it easier to roll out without sticking. Caloric Content and Macros One serving of Stromboli has about 350 calories. It includes 15 grams of protein, 20 grams of fat, and 30 grams of carbs. This makes it a tasty and hearty meal. Allergen Information This recipe contains gluten, dairy, and meat. If you have allergies, you can modify it. Use gluten-free dough and dairy-free cheese for a safe option. You learned how to make Stromboli from scratch. Remember the main ingredients: dough, cheeses, and fillings. Following the steps for prep, filling, and baking is key. Use my tips to perfect your dough and add great flavor. Don’t forget the fun variations you can try, like Mexican or vegetarian styles. Proper storage keeps your Stromboli fresh. I hope you feel ready to create a tasty Stromboli that suits your taste! Enjoy the process and the delicious results.

Want an easy and tasty dinner? Let’s make homemade Stromboli together! This delicious dish combines warm, gooey cheese and savory fillings, all wrapped in a crispy dough. In this article, …

Read more

Categories Dinner
Older posts
Newer posts
← Previous Page1 … Page117 Page118 Page119 … Page130 Next →

ROASTED RECIPES

Where bold flavors meet everyday meals. Warm, vibrant, and made to share. 🔥🥗🍴

PAGES

Home About Contact Privacy Policy Terms & Conditions Cookie Policy GDPR Policy Copyright Policy Disclaimer

CATEGORIES

Appetizers Desserts Salads Breakfast Dinner

Contact

  • Pinterest
  • Mail
Copyright © 2025 Roasted Flavors. All rights reserved.