Skip to content
Roasted Flavors
  • Home
  • Appetizers
  • Desserts
  • Salads
  • Breakfast
  • Dinner
  • Privacy Policy
  • Contact
  • About

Chef Remy

Oreo Dessert Cups Irresistible No-Bake Treats

May 22, 2025 by Chef Remy
- Oreos - Cream Cheese - Powdered Sugar - Vanilla Extract - Whipped Cream - Mini Chocolate Chips - Additional Oreos (for topping) Gathering these ingredients is the first step to making your Oreo dessert cups. Each item plays an important role in creating that perfect blend of flavors and textures. - Oreos: The star of this dessert! Use them for both the base and the topping. - Cream Cheese: This adds richness and creaminess. Make sure it’s at room temperature for easy mixing. - Powdered Sugar: It sweetens the filling just right without adding graininess. - Vanilla Extract: This enhances the overall flavor. A little goes a long way! - Whipped Cream: Use it to lighten the dessert. You can use store-bought or make your own. - Mini Chocolate Chips: These add a fun crunch and extra chocolate flavor. - Additional Oreos: Crumble them for a visually appealing topping. - Mixing Bowls - Hand Mixer or Spatula - Zip-Top Bags - Food Processor (optional) - Serving Cups Having the right tools makes the process easier. A mixing bowl helps you combine ingredients. A hand mixer or spatula ensures a smooth mixture. Use a zip-top bag to crush the Oreos quickly. If you want, a food processor can save time. Finally, serving cups show off your beautiful dessert layers! This recipe is quick and fun. It uses simple ingredients and tools. You can find the full recipe details, and it will guide you through each step to create these delicious treats. - Crushing the Oreos: Start by placing 16 Oreos in a zip-top bag. Use a rolling pin to crush them. You can also use a food processor. Aim for fine crumbs. Save 2 tablespoons of crumbs for later. - Mixing with Cream Cheese: In a large bowl, mix the crushed Oreos with 1 cup of room temperature cream cheese. Add 1/2 cup of powdered sugar and 1 teaspoon of pure vanilla extract. Blend until smooth. - Layering the Oreo Mixture: Take your serving cups and start with a layer of the Oreo mix. Fill each cup halfway with this mixture. - Adding Whipped Cream Layers: Next, add a generous layer of whipped cream on top. Repeat the layering with more Oreo mix and whipped cream. Leave a little space at the top. - Garnishing with Crumbled Oreos: Use the reserved Oreo crumbs to sprinkle on top of each cup. Add mini chocolate chips for a fun crunch. - Chilling the Dessert Cups: Cover the cups with plastic wrap. Chill them in the fridge for at least 30 minutes. This helps the flavors mix and the dessert firm up. Follow the Full Recipe to create these tasty treats! To get the best Oreo dessert cups, start with the cream cheese. Make sure it is softened. This helps it mix easily. If your cream cheese is cold, it can clump. To soften it, leave it out for about 30 minutes before use. Next, fold in the whipped cream correctly. Use a gentle motion. This keeps the mixture light and fluffy. If you stir too hard, the whipped cream loses its air, and your cups won’t be as creamy. Take your time with this step for the best texture. When serving Oreo dessert cups, think about the presentation. Use clear cups to show off the layers. Add a dollop of whipped cream on top. Place half an Oreo on the cream for a nice touch. This makes the dessert look more inviting. You can pair these cups with other desserts too. They go well with fruits like strawberries or raspberries. This adds a fresh taste to balance the rich flavors. You can also serve them alongside chocolate cake or brownies. This gives your guests a variety of sweet options during any celebration. {{image_4}} You can easily switch up the filling in your Oreo dessert cups. Try using peanut butter for a rich twist. It pairs great with Oreos. Another option is to mix in some cream cheese with melted chocolate. This gives a fun taste that kids will love. You can also swap out the whipped cream for yogurt, which adds a healthy spin. For a gluten-free version, use gluten-free Oreos. They taste just as good! You won’t miss the regular ones. If you want a vegan treat, try dairy-free cream cheese. Combine it with coconut whipped cream for a creamy texture. Both options keep your dessert delicious and friendly for all diets. Adding fresh fruit can enhance your dessert cups. In summer, berries like strawberries or raspberries add a bright touch. In fall, consider using pumpkin puree or apple pie spice. These flavors change the whole vibe of the dessert. Top with seasonal fruits to keep it fresh and exciting. To keep your Oreo dessert cups fresh, place them in an airtight container. This helps to lock in the flavors and keep them safe from fridge odors. It is best to store them in the fridge. The cold will help maintain their creamy texture. Aim to eat them within three days for the best taste. You can freeze these dessert cups if you want to save some for later. First, wrap each cup tightly in plastic wrap. This prevents freezer burn and keeps them safe. Place the wrapped cups in a freezer-safe bag or container. When you're ready to enjoy them, take them out of the freezer. Let them thaw in the fridge for about two hours before serving. This way, they will taste fresh and creamy again. Oreo dessert cups can last in the fridge for up to 3 days. Store them in an airtight container to keep them fresh. After that, the whipped cream may lose its texture, and the flavors may fade. Yes! You can use many other cookies. Try using chocolate sandwich cookies, vanilla wafers, or even graham crackers. Each cookie will change the flavor and texture slightly. Experiment to find your favorite! Absolutely! This recipe is safe for kids to help with. However, you should supervise them while using kitchen tools. Mixing the ingredients is a great way for kids to learn cooking skills. You can find pre-made Oreo dessert cups in many grocery stores. Check the dessert aisle or the bakery section. They may also be available at specialty dessert shops or online. If you want a quick and easy treat, this is a great option! For the full recipe, check out the details above. Oreo dessert cups are simple and fun to make. You need just a few ingredients and tools. Start with crushing Oreos and mixing with cream cheese. Layer the base and whipped cream for tasty cups. You can experiment with variations and make it your own. Remember to store leftovers properly to keep them fresh. These dessert cups are sure to impress at any gathering. Enjoy making these delicious treats and share them with your friends and family!

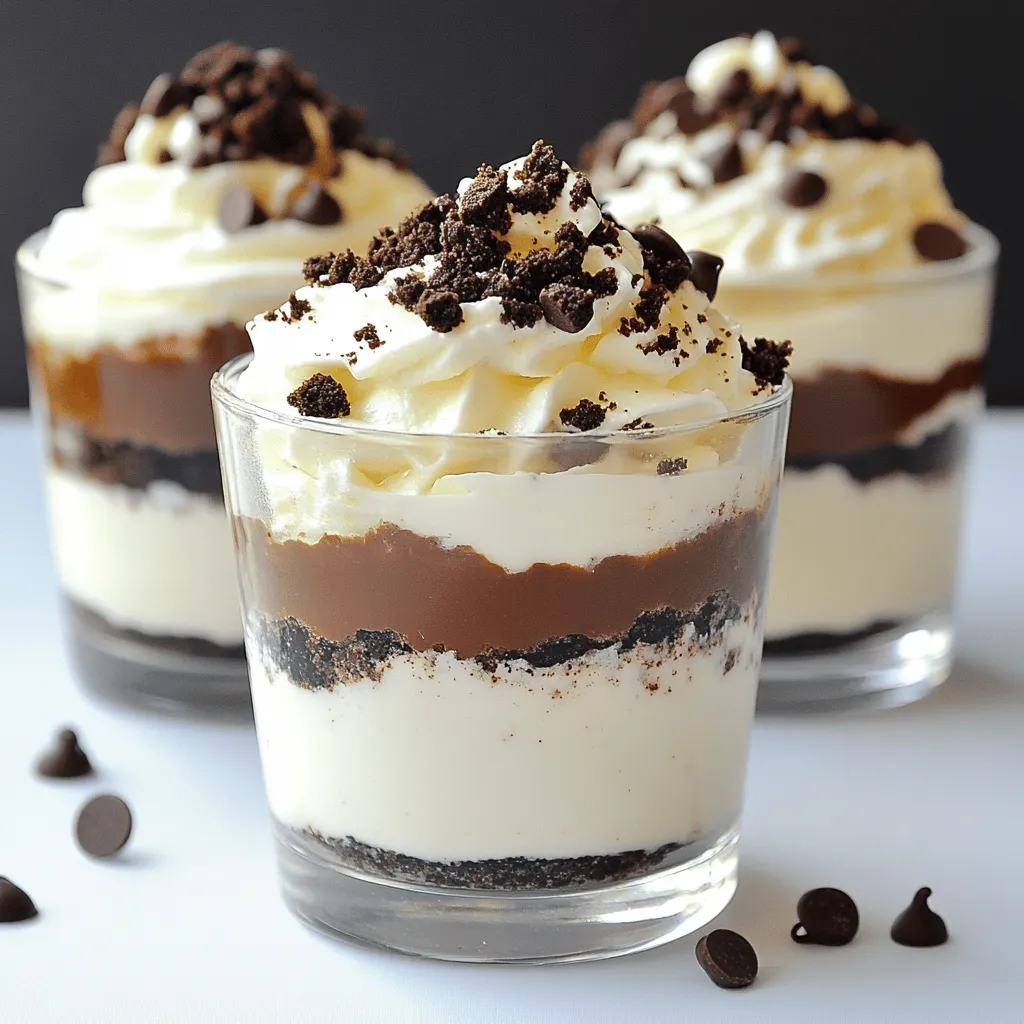
Indulging in sweet treats has never been easier with these Oreo Dessert Cups. They’re delicious, creamy, and completely no-bake! Perfect for gatherings or a fun night in, these treats are …

Read more

Categories Desserts

Spring Mix Salad with Balsamic Honey Dressing Delight

May 21, 2025 by Chef Remy
- 6 cups fresh spring mix greens - 1 cup cherry tomatoes, halved - 1 cucumber, diced into bite-sized pieces - 1/2 red bell pepper, thinly sliced - 1/4 red onion, finely sliced - 1/4 cup feta cheese, crumbled - 1/4 cup walnuts, roughly chopped for crunch - 1/4 cup high-quality balsamic vinegar - 2 tablespoons natural honey - 1/4 cup extra virgin olive oil - Salt and freshly cracked black pepper to taste Creating this salad is all about fresh ingredients. The spring mix gives a vibrant base. You can’t go wrong with cherry tomatoes. Their sweetness brightens the dish. The cucumber adds a nice crunch. I love the taste of red bell pepper. It gives a pop of color and flavor. Red onion adds a bit of zing too. Feta cheese brings a creamy touch. It contrasts well with the crunch of walnuts. Together, these ingredients create a delightful mix. Now, let’s talk about the dressing. Balsamic vinegar gives a rich flavor. The honey adds just the right sweetness. Extra virgin olive oil makes it smooth. Don't forget to season with salt and pepper. This dressing enhances the salad beautifully. For the full recipe, check out the details above. This salad is not just tasty; it’s colorful and healthy too! - First, wash 6 cups of fresh spring mix greens under cold water. - Dry the greens using a salad spinner or a clean towel. - In a large mixing bowl, combine the washed greens with 1 cup of halved cherry tomatoes, 1 diced cucumber, 1/2 thinly sliced red bell pepper, and 1/4 finely sliced red onion. - Gently toss the vegetables to mix them well, being careful not to bruise the greens. - In a small bowl, mix 1/4 cup of balsamic vinegar with 2 tablespoons of honey. - Whisk the mixture until it blends smoothly. - Slowly drizzle in 1/4 cup of extra virgin olive oil while whisking. This helps emulsify the dressing. - Season the dressing with salt and freshly cracked black pepper to taste. - Drizzle the dressing over the salad mixture. - Toss the salad gently to coat all the ingredients with the dressing. - Top the salad with 1/4 cup of crumbled feta cheese and 1/4 cup of roughly chopped walnuts for added flavor and crunch. - For the best taste, serve the salad immediately or chill it for up to 30 minutes to let the flavors blend. This recipe is perfect for a light meal or as a side dish. For the complete details, check the Full Recipe. To wash and dry greens effectively, start by rinsing the spring mix under cold water. This removes dirt and helps keep your salad fresh. I like using a salad spinner to dry the greens. If you don’t have one, gently pat them dry with a clean kitchen towel. Both methods work well. When sequencing ingredients, add the heartier items first, like cucumbers and bell peppers. This protects the delicate greens from bruising. Tossing gently keeps the flavors intact. Don't forget to sprinkle the feta and walnuts on top for the best presentation. Achieving the right texture for your dressing is key. Combine balsamic vinegar and honey first. Then, whisk in the olive oil slowly. This helps emulsify the dressing, making it creamy and smooth. If you have leftover dressing, store it in an airtight container in the fridge. It will last for about a week. Before using it again, give it a good shake. If it has thickened, add a small splash of water to restore the texture. {{image_4}} You can easily add protein to your salad. Grilled chicken or shrimp works great. These add flavor and make the salad more filling. Simply chop the grilled meat and toss it in. For a vegetarian option, consider adding beans. Chickpeas or black beans are excellent choices. They add protein and a nice texture to the salad. Just drain and rinse the beans before mixing them in. Using seasonal ingredients makes your salad even better. Fresh fruits like strawberries or apples can add a sweet touch. Just slice them thin and sprinkle them on top. Different nuts can also change the flavor. Try pecans or almonds instead of walnuts. They add a nice crunch and pair well with the dressing. Cheese is another fun option. You can swap feta for goat cheese or blue cheese. Each type brings its own unique taste. Explore these variations to delight your taste buds. For the full recipe, check out the details above. Enjoy your creative salads! To store leftovers, place the salad in an airtight container. This keeps all the flavors fresh. Try to eat it within two days for the best taste. The greens can wilt quickly, so it’s best to keep them as fresh as possible. Prepping ingredients ahead of time saves you lots of effort. Wash and chop the veggies and store them separately. This way, you can quickly assemble your salad. If you want an easy meal, keep the dressing in a small jar. Just shake it up when you are ready to eat. With these tips, you can enjoy your Spring Fling Salad anytime! For the full recipe, check back to see how to make this delightful dish. To make this salad, start by washing the spring mix greens. Rinse them under cold water to get rid of dirt. Then dry them with a salad spinner or a clean towel. In a large bowl, mix the greens with halved cherry tomatoes, diced cucumber, sliced red bell pepper, and red onion. In a small bowl, whisk balsamic vinegar and honey together. Slowly add olive oil while whisking to make the dressing creamy. Season with salt and black pepper. Drizzle the dressing over the salad, toss gently, and top with crumbled feta cheese and walnuts. For the best taste, serve the salad right away. You can also chill it for up to 30 minutes to enhance the flavors. For the full recipe, check out Spring Fling Salad. Yes, you can use store-bought dressing if you're short on time. Look for a balsamic dressing that has simple ingredients. The best ones contain balsamic vinegar, olive oil, and little sugar. Avoid those with added preservatives or too many flavors. Check the label to ensure it fits your taste. Store-bought dressings can save time but may not match the freshness of homemade. If you prefer not to use feta, there are many good alternatives. Goat cheese is a great choice; it adds creaminess and tang. You can also use crumbled blue cheese for a stronger flavor. For a dairy-free option, try avocado slices or sunflower seeds for a creamy texture. Each option brings its unique taste, so choose what you love most! You learned how to make a fresh spring mix salad with balsamic honey dressing. We covered all the tasty ingredients, from greens to crunchy walnuts. I shared tips to wash greens and store leftovers, helping you enjoy your salad for days. You also saw variations to add protein or seasonal fruits. Remember, a colorful salad not only tastes great but also brings joy to your table. Enjoy creating your salad masterpiece!

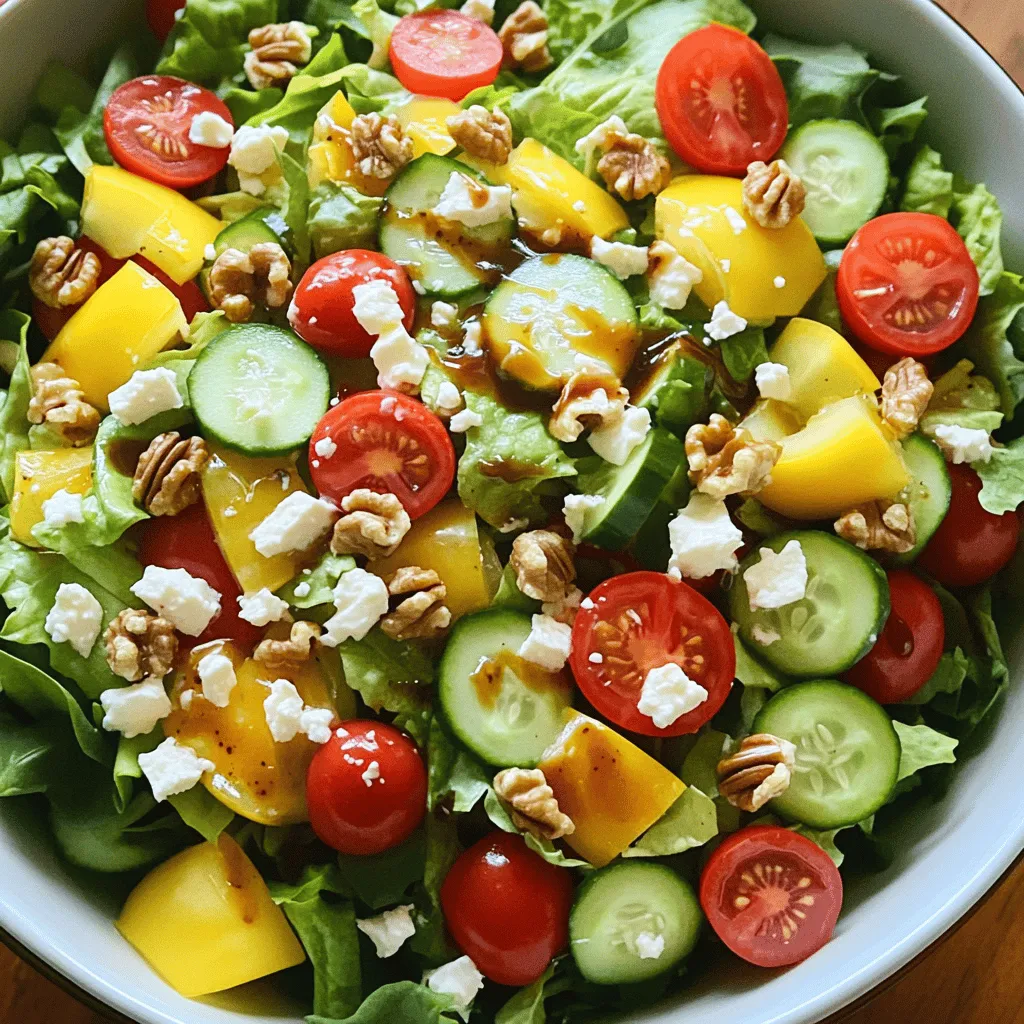
Are you ready to brighten up your meals this spring? This Spring Mix Salad with Balsamic Honey Dressing is the perfect blend of fresh flavors and crunchy textures. With vibrant …

Read more

Categories Salads

Irresistible Chicken Marsala Pasta Easy Weeknight Meal

May 21, 2025 by Chef Remy
- Chicken: Use 2 boneless, skinless chicken breasts. Slice them into thin strips. This helps the chicken cook evenly and absorb flavors well. - Pasta: Choose 8 ounces of fettuccine pasta. This type holds sauce nicely and pairs well with the dish. - Vegetables: Include 2 cups of cremini mushrooms, sliced, and 1 small onion, finely diced. Add 3 cloves of minced garlic for a robust flavor. - Herbs and spices: Use 1 teaspoon of dried thyme. Season with salt and freshly ground black pepper to taste. These enhance the dish's flavor profile. - Sauces and condiments: Incorporate 1 cup of chicken broth and 1 tablespoon of balsamic vinegar. These ingredients create a rich sauce that ties everything together. - Cooking utensils: You will need a large pot for boiling pasta and a spacious skillet for sautéing. A wooden spoon or spatula will help mix well. - Kitchen appliances: Have a stove ready for cooking. A strainer is useful for draining the pasta when it’s done. This dish combines simple ingredients and equipment for a delightful weeknight meal. For the full recipe, check out the detailed steps in the article. To cook the pasta, use a large pot. Fill it with water and add salt. Bring the water to a rolling boil. Add the fettuccine and cook it according to the package instructions. Aim for al dente texture, which means it should be firm but not hard. When done, drain the pasta but save a little pasta water. This will help later. For the chicken, heat a spacious skillet over medium-high heat. Add one tablespoon of olive oil. Season the chicken strips with salt and pepper. Place the chicken in the skillet in a single layer. Cook for about 5 to 6 minutes. Look for a golden brown color. Once cooked, take the chicken out and set it aside. In the same skillet, add the remaining olive oil and one tablespoon of butter. Let it melt. Then, add the diced onion and minced garlic. Sauté them for about 2 minutes. You want them soft and fragrant. Next, add the sliced mushrooms. Stir and cook them for about 5 to 7 minutes. They should turn golden and tender. Now, pour in the chicken broth and balsamic vinegar. Stir well to mix the flavors. Add the dried thyme, salt, and pepper. Let this simmer for 3 to 4 minutes. This helps the sauce reduce and concentrate. Return the cooked chicken to the skillet. Add the fettuccine and toss everything together. If it feels dry, splash in some reserved pasta water. For a nice touch, remove from heat. Garnish with freshly chopped parsley and a sprinkle of grated Parmesan cheese. Serve the Chicken Marsala Pasta in deep bowls for that cozy feel. To make your Chicken Marsala Pasta shine, consider these simple swaps: - Ingredient substitutions: Use white wine instead of balsamic vinegar for a different taste. You can swap cremini mushrooms for button mushrooms if needed. They work just as well. - Spice adjustments: If you want more heat, add red pepper flakes. For a fresh twist, try adding a squeeze of lemon juice at the end. Many people make a few key mistakes when cooking this dish: - Overcooking chicken: Cook the chicken just until it is golden and no longer pink. Overcooked chicken can turn tough and dry, ruining your meal. - Undercooking pasta: Always cook pasta until it is al dente. This means it should be firm to the bite. Undercooked pasta can ruin the texture of your dish. You can easily lighten up this dish with these tips: - Lower calorie options: Use whole wheat pasta instead of regular pasta. This adds fiber and nutrients without sacrificing flavor. You can also use less oil or butter in the recipe. - Adding extra vegetables: Toss in some spinach or zucchini for added nutrition. They cook quickly and blend well with the other flavors. {{image_4}} You can use more than just fettuccine for this dish. Other pasta types add fun textures. Try spaghetti or penne for a change. Each shape holds the sauce differently and can make the meal unique. If you're gluten-free, there are great options. Look for pasta made from rice or chickpeas. These can mimic the taste and feel of traditional pasta. They work well with the Chicken Marsala sauce, too. If you want a vegetarian dish, swap the chicken for mushrooms or tofu. Portobello mushrooms add a rich flavor. Tofu absorbs the sauce and gives you a nice texture. Both options keep the meal hearty and satisfying. Seafood can also be a great choice. Shrimp or scallops work perfectly in this recipe. Cook them just like the chicken, and they add a light, fresh taste. Chicken Marsala has Italian roots, but you can add your twist. Try using different herbs like basil or oregano. These can enhance the flavor and give it a new flair. You can also mix in some sun-dried tomatoes or olives for a Mediterranean touch. For fusion ideas, think about adding Asian flavors. Use soy sauce instead of chicken broth, and add bok choy or snap peas. This twist offers a bright and fresh take on the classic dish. For the full recipe, visit the Chicken Marsala Pasta Delight page to explore all the delicious possibilities! To keep your Chicken Marsala Pasta fresh, you need to store it right. First, let it cool down to room temperature. Then, pack it into an airtight container. This helps keep moisture in and air out. Place the container in the fridge. It can stay good for up to three days. If you want to save it longer, consider freezing it. For freezing, use freezer-safe bags or containers. Squeeze out as much air as you can before sealing. This prevents freezer burn. When it's time to reheat, do it gently. The best method is using the stove. Just add a splash of water or broth in a skillet. Heat on low, stirring often. This keeps the pasta from getting dry. If you use a microwave, cover it with a damp paper towel. Heat in short bursts, stirring in between. This helps it warm evenly. How long can your Chicken Marsala Pasta last? In the fridge, it can stay fresh for about three days. In the freezer, it can last up to three months. When checking for spoilage, look for changes in color or smell. If it smells sour or looks off, throw it away. Always trust your senses! You can pair Chicken Marsala Pasta with many tasty sides. Here are some ideas: - Garlic Bread: This classic option adds a crunchy texture and rich flavor. - Caesar Salad: The crisp greens and creamy dressing balance the pasta's richness. - Roasted Vegetables: Seasonal veggies bring color and nutrition to your meal. - Steamed Asparagus: This adds a fresh touch and pairs well with the dish. For drinks, consider these wine pairings: - Chardonnay: Its buttery notes complement the creamy sauce. - Pinot Noir: This light red wine enhances the savory flavors without overpowering them. - Sangiovese: This Italian wine matches the dish's earthy mushrooms perfectly. Yes, you can make Chicken Marsala Pasta ahead of time. Here are some tips: - Make-ahead tips: Cook the pasta and sauce separately. Combine them just before serving. Store them in airtight containers in the fridge. - Storage timelines: You can keep the cooked pasta in the fridge for 3 to 5 days. The sauce lasts about the same time. If you want to store it longer, freeze it for up to 3 months. This recipe stands out for a few reasons: - Unique flavor profiles: The mix of chicken, mushrooms, and Marsala wine creates a rich taste. The balsamic vinegar adds a nice touch of sweetness. - Authentic preparation methods: I use fresh ingredients and classic techniques. This ensures a dish full of flavor and warmth. Chicken Marsala Pasta has Italian roots. Here’s a bit of history: - Historical context: The dish comes from Sicily, Italy. It uses Marsala wine, which has been produced there for centuries. - Regional aspects of the dish: Each area in Italy offers its twist. In some places, they add capers or olives for extra zest. This recipe honors tradition while adding a fun pasta twist. For the full recipe, check out Chicken Marsala Pasta Delight. This blog post covered the basic ingredients and steps to make Chicken Marsala Pasta. We discussed the main ingredients like chicken, pasta, and vegetables, plus important seasonings. I shared tips for cooking each component right. I highlighted ways to enhance flavor and avoid common cooking mistakes. You learned about delicious variations and best storage methods. Cooking can be fun and rewarding. With these tips, you can create a great meal. Enjoy your cooking journey and the tasty results!

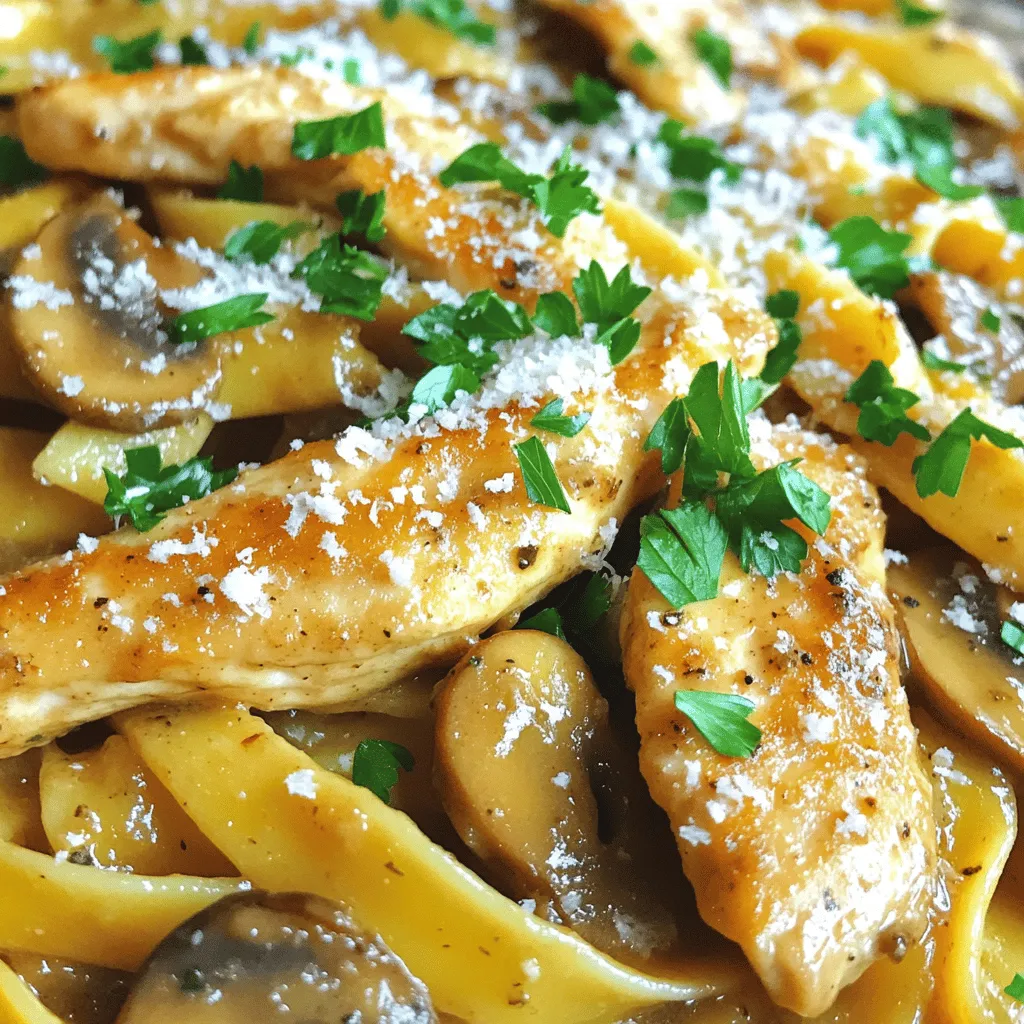
Looking to spice up your weeknight dinners? My Irresistible Chicken Marsala Pasta recipe will transform your evenings! This dish combines tender chicken, rich Marsala sauce, and perfectly cooked pasta for …

Read more

Categories Dinner

Mediterranean Tuna Salad Quick and Healthy Delight

May 21, 2025 by Chef Remy
- Tuna (canned in olive oil) - Fresh vegetables (cherry tomatoes, cucumber, red onion) - Kalamata olives and feta cheese - Capers and parsley Let’s dive into the main ingredients. First, I love using tuna canned in olive oil. It adds a rich flavor. Next, fresh vegetables like cherry tomatoes, cucumber, and red onion bring crunch and color. Kalamata olives and feta cheese give the salad a salty kick. I also add capers for a briny taste and parsley for freshness. - Extra virgin olive oil - Fresh lemon juice - Seasonings (salt and pepper) Now, let’s talk about the dressing. I use extra virgin olive oil for its fruity taste. Fresh lemon juice adds brightness. Finally, I season with salt and pepper to enhance all the flavors. - Overview of calorie count and macro breakdown - Health benefits of the primary ingredients This salad is not only tasty but also healthy. On average, one serving has about 300 calories. It’s packed with protein from the tuna. You also get healthy fats from the olive oil and olives. Veggies add fiber and essential vitamins. This meal is great for your heart and helps you feel full. Enjoy this delightful dish while knowing you’re eating well! Combining the salad ingredients Start by gathering your ingredients. In a large mixing bowl, add the drained tuna, halved cherry tomatoes, diced cucumber, finely chopped red onion, halved Kalamata olives, crumbled feta cheese, rinsed capers, and chopped parsley. Use a fork to gently break up the tuna as you mix. This helps blend all the flavors together. Preparing the dressing In a small bowl, whisk together extra virgin olive oil, freshly squeezed lemon juice, salt, and pepper. Mix well until the dressing is smooth and combined. This dressing adds a bright flavor that enhances the salad. Tossing the salad and ensuring even coating Pour the dressing over the tuna mixture. Gently toss everything together until all the ingredients are well coated. Be careful not to break up the feta cheese too much. You want those nice, creamy bites in every scoop. Adjusting seasoning according to taste Take a moment to taste your salad. If you feel it needs more flavor, add more salt, pepper, or lemon juice. This is your chance to make it perfect for you. Importance of allowing flavors to meld Let the salad rest for about 10 minutes at room temperature. This time allows the flavors to blend nicely. It makes a big difference in taste. Optimal time for resting Ten minutes is just right. It’s enough time for the ingredients to soak in the dressing without getting soggy. Enjoy the wait; the result will be worth it! When making Mediterranean tuna salad, the right ingredients matter. For tuna, I recommend using canned tuna packed in olive oil. It adds rich flavor and moisture. Look for brands that source fish sustainably. This choice can enhance taste and support the environment. For olives, choose Kalamata olives. They bring a bold taste that pairs well with tuna. Check for pitted olives to save time. You can find them in jars or from the deli section. When it comes to cheese, feta adds creaminess. Look for blocks of feta rather than crumbled for better texture. Freshness is key, so check the expiration date. For tomatoes and cucumbers, choose ripe options. Ripe cherry tomatoes should feel slightly soft but not mushy. Pick cucumbers that are firm and vibrant green. The flavor will be much better in your salad! To serve your salad, pair it with crusty bread. A nice baguette or pita can soak up the flavors. If you enjoy wine, a crisp white wine complements the dish nicely. For a beautiful display, serve the salad on a large platter. Arrange the ingredients in sections for a colorful look. Garnish with fresh parsley and lemon wedges. This adds a burst of color and invites people to dig in! Balancing flavors is essential for a tasty salad. Start with the dressing. Use a good amount of lemon juice to brighten the dish. The acidity of the lemon pairs well with the rich tuna and feta. Try adding a pinch of red pepper flakes for a touch of heat. This small addition can elevate the whole dish. For garnishes, consider adding capers on top for a salty kick. A few extra parsley leaves will also add a fresh touch. These small details can make your Mediterranean tuna salad stand out. For the full recipe, check the section above. {{image_4}} You can switch up the fish in this salad. Try using salmon or sardines instead of tuna. Both add unique flavors and nutrients. You can also change the cheese. Swap feta for goat cheese or even cheddar. Mix in roasted peppers or artichokes for added taste. Each choice gives the salad a new twist. If you need a gluten-free option, this salad is perfect. Just stick to the fresh ingredients. For a low-carb version, skip the olives or cheese. If you're vegan, use tofu or chickpeas. Both options provide protein and a good texture. This makes the salad filling without meat or dairy. You can adjust the salad based on the seasons. In spring, add fresh herbs like dill or mint. In summer, include sweet corn or snap peas for crunch. Fall is great for roasted squash or pumpkin seeds. Winter calls for hearty greens like kale. These changes keep your salad fresh and exciting all year round. To keep your Mediterranean tuna salad fresh, store it in an airtight container. This helps prevent moisture and air from spoiling it. The salad lasts in the fridge for about 3 days. After that, the ingredients might lose their crunch and flavor. You can freeze this salad, but it’s not ideal. Tuna can change texture when frozen. The olives and vegetables may become mushy. If you still want to freeze it, place it in a freezer-safe container. Label it with the date. Use it within a month for the best taste. To reheat, avoid using a microwave, as it can make the salad soggy. Instead, let it sit at room temperature for about 20 minutes. This helps bring back some texture. If you need warmth, serve it on a plate and warm it gently in a skillet. Add a splash of olive oil to keep it moist. Enjoy your Mediterranean tuna salad as if it were fresh! You can add grains or proteins to make this salad more filling. Here are some tips: - Quinoa: Cooked quinoa adds fiber and protein. - Chickpeas: Canned chickpeas are a great source of protein and easy to add. - Brown rice: This adds bulk and a nutty flavor. - Hard-boiled eggs: Chopped eggs give extra protein and richness. Adding any of these options will keep the salad tasty and healthy. Yes, you can use canned tuna in water. However, there are some flavor differences. Tuna in olive oil is richer and has a distinct taste. It also adds healthy fats. Tuna in water is lighter and lower in calories. If you choose water-packed tuna, consider adding more olive oil in the dressing for flavor. Yes, this salad is great for meal prep. Here are some guidelines: - Make in advance: You can prepare the salad a day before. - Store in the fridge: Keep it in an airtight container. - Add dressing later: Wait to add the dressing until just before eating. This helps keep the salad fresh. Following these tips will keep your Mediterranean tuna salad tasty and ready to enjoy throughout the week. Mediterranean tuna salad brings together fresh flavors and healthy ingredients. We covered essential ingredients like tuna, fresh veggies, olives, and feta. The simple dressing of olive oil and lemon juice elevates the dish. Nutritional insights showed its health benefits and low calories. Consider trying different fish or veggie options for variety. This salad is perfect for meal prep and offers great storage tips. Trust me, you’ll love how easy it is to make a dish that tastes fantastic and nourishes your body. Enjoy every bite!

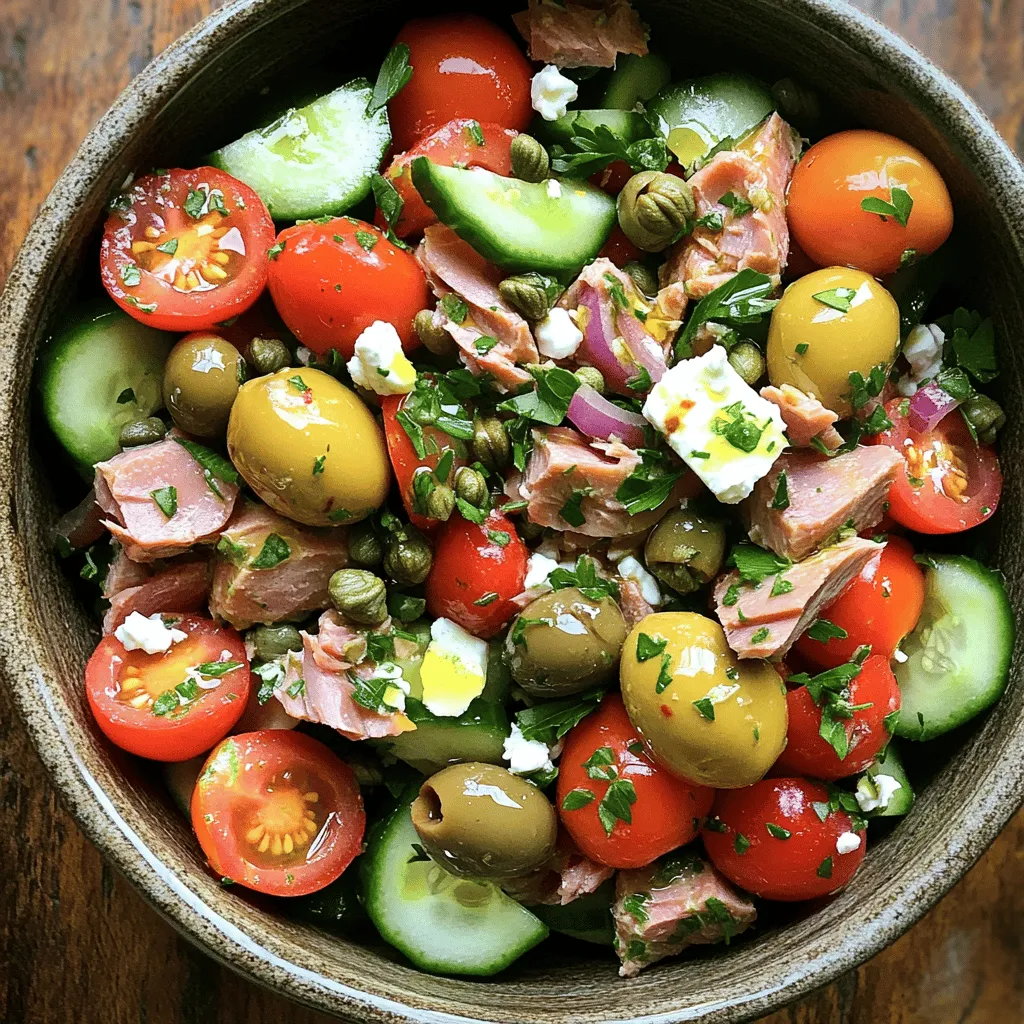
Are you craving a light, healthy meal that bursts with flavor? My Mediterranean Tuna Salad is the perfect choice. Packed with fresh veggies, zesty dressing, and protein-rich tuna, this dish …

Read more

Categories Salads

Blueberry Lemon Cookie Bars Delightful and Easy Treat

May 21, 2025 by Chef Remy
- 1 cup unsalted butter, softened to room temperature - 1 cup granulated sugar - 1 cup packed brown sugar - 2 large eggs, at room temperature - 2 teaspoons pure vanilla extract The main ingredients give these cookie bars their rich flavor and soft texture. Softened butter makes it easy to blend with sugars. Using both granulated and brown sugar adds depth to the sweetness. The eggs bind everything together, while vanilla adds warmth. - 3 cups all-purpose flour - 1 teaspoon baking powder - 1/2 teaspoon baking soda - 1/2 teaspoon fine sea salt For the dry ingredients, all-purpose flour is key for structure. Baking powder and baking soda help the bars rise. Sea salt balances the sweetness and enhances flavors. - Zest of 1 large lemon - 1/4 cup freshly squeezed lemon juice - 2 cups fresh blueberries, rinsed and patted dry - Powdered sugar, for dusting (optional) Lemon zest and juice give a bright, fresh taste. They bring out the blueberries' sweetness. Fresh blueberries add juicy bursts in every bite. You can dust the bars with powdered sugar for a pretty finish. Check out the Full Recipe for precise measurements and baking tips! 1. Preheat your oven: Set your oven to 350°F (175°C). This helps the bars bake evenly. 2. Prepare the baking pan: Use a 9x13-inch pan. Grease it lightly or line it with parchment paper. This makes it easy to remove the bars later. 3. Cream the butter and sugars: In a large bowl, beat the softened butter, granulated sugar, and brown sugar. Mix until it's light and fluffy. This process takes about 3-4 minutes. 4. Incorporate eggs and flavorings: Add the eggs, one at a time. Mix well after each egg. Then, add the vanilla extract and lemon zest. Mix until everything is well combined. 1. Whisk dry components: In a separate bowl, whisk together the flour, baking powder, baking soda, and sea salt. This step ensures your dry ingredients are well mixed. 2. Combine wet and dry ingredients: Slowly add the dry mix to the butter-sugar mix. Stir until just combined. Avoid overmixing to keep the bars tender. 1. Pour batter into the pan: Pour the batter into your prepared pan. Use a spatula to smooth the top evenly. This helps with even baking. 2. Baking time: Place the pan in the oven. Bake for about 30-35 minutes. Check for doneness by inserting a toothpick in the center. It should come out clean. 3. Cooling down: Once baked, remove the pan from the oven. Let the bars cool in the pan for 10 minutes. Then, transfer them to a wire rack to cool completely. Enjoy making these delightful Blueberry Lemon Cookie Bars with the full recipe! To make the best blueberry lemon cookie bars, avoid overmixing the dough. Overmixing can make the bars tough. You want a soft, tender texture. Mix just until the flour disappears. When adding blueberries, gently fold them in. Use a spatula to lift and turn the batter. This way, you keep the blueberries intact. You want bursts of juicy fruit in every bite! For a great presentation, serve your cookie bars on a colorful platter. Add fresh blueberries and thin lemon slices on top. It not only looks nice but also adds a pop of flavor. Pair these cookie bars with a scoop of vanilla ice cream or a dollop of whipped cream. The creaminess balances the tartness of the lemon. It makes every bite even more delightful! If your cookie bars are too dry, try adding a little more lemon juice next time. This can add moisture and flavor. If they are too wet, you might have added too much liquid. Reduce the lemon juice in your next batch. Adjusting sweetness is easy. If the bars are too sweet, cut back on the sugar. You can also use less brown sugar for a lighter taste. Try these tips to get your perfect cookie bars just right! For the full recipe, check the details above. {{image_4}} You can swap out some ingredients in these cookie bars to suit your taste. For flour, try almond flour or a gluten-free mix. These options work well and can change the texture. If you want to mix up the fruit, think about using raspberries or strawberries instead of blueberries. Each fruit brings its own flavor and charm. Want to add a surprise? Consider using fresh herbs like basil. It adds a fresh taste that pairs well with lemon. You can also stir in nuts like walnuts or pecans for crunch. If you love chocolate, throw in some chocolate chips for a sweet twist. These changes can make your cookie bars stand out. If you are vegan, you can still enjoy these cookie bars! Use flax eggs instead of regular eggs. For a low-sugar option, cut back on the sugars or try a sugar substitute. Both options allow you to enjoy a treat while meeting your dietary needs. Get creative and make it your own! For the full recipe, check out the details above. To keep your blueberry lemon cookie bars fresh, wait until they cool completely. Then, slice them into squares or rectangles. Place them in an airtight container. You can also use a cake keeper for best results. Always store the bars at room temperature. If you live in a humid area, you may want to refrigerate them. This helps prevent them from getting too soft. If you want to save some cookie bars for later, freezing is a great choice. Wrap each bar in plastic wrap. Then, place them in a freezer bag or container. They can last up to three months in the freezer. When you’re ready to eat them, take out the bars and let them thaw at room temperature. If you want a warm treat, pop them in the microwave for about 10-15 seconds. When stored properly, blueberry lemon cookie bars can last up to a week. After that, they may start to lose their flavor. Check for signs of spoilage. If you notice any mold or an off smell, it’s best to throw them away. Keeping an eye on your treats helps ensure you enjoy them at their best! For the full recipe, check out the link provided. Can I use frozen blueberries instead of fresh? Yes, you can use frozen blueberries. Just make sure to thaw and drain them first. This keeps the batter from getting too wet. Frozen blueberries might burst when mixed in, so handle them gently. How do I know when the cookie bars are done baking? Check the edges. If they turn golden brown, that’s a great sign. You can also insert a toothpick into the center. If it comes out clean, the bars are ready! Can I make this recipe dairy-free? Yes, you can use dairy-free butter or coconut oil instead of regular butter. Also, check your egg substitute if you want it vegan. There are many good options, like flax eggs or applesauce. What's the best way to adjust the recipe for larger batches? To make more cookie bars, simply double the recipe. Use a larger pan, like a 12x18-inch sheet pan. Keep an eye on the baking time; it might need a few extra minutes. What beverages pair well with these cookie bars? These cookie bars go well with lemonade or iced tea. A nice cup of coffee also makes a great match! Can I use this recipe for different types of pans? Yes! You can use round or square pans, but adjust the baking time. A round pan may need a bit longer, while a smaller pan might bake faster. Enjoy the fun of experimenting with different shapes! For the complete recipe, check out the Full Recipe section. You learned how to make tasty Blueberry Lemon Cookie Bars from scratch. We covered the key ingredients, preparation steps, and tips for great results. With variations and storage info, you can adapt the recipe to your tastes. Baking should be fun and rewarding. Don’t be afraid to try new flavors and ingredients. Enjoy sharing these sweet treats with family and friends. Happy baking!

Are you ready to indulge in a sweet, tangy treat? These Blueberry Lemon Cookie Bars are a delightful and simple dessert you can whip up in no time. With fresh …

Read more

Categories Desserts

Blueberry Lemon Crème Cake Delightful and Fresh Treat

May 21, 2025 by Chef Remy
- 1 ½ cups all-purpose flour - 1 teaspoon baking powder - ¼ teaspoon baking soda - ¼ teaspoon salt - ½ cup unsalted butter, softened - 1 cup granulated sugar - 2 large eggs - 2 tablespoons lemon zest - ½ cup sour cream - 1 teaspoon vanilla extract - 1 cup fresh blueberries - 1 tablespoon lemon juice These ingredients create a lovely balance of sweet and tart. The blueberries burst with flavor, while the lemon adds a bright note. - 1 cup heavy whipping cream - 2 tablespoons powdered sugar - 1 teaspoon vanilla extract - 1 tablespoon lemon zest This topping is rich and creamy. It complements the cake perfectly. The lemon zest in the crème adds an extra pop of flavor. When baking, accurate measurements matter. Use dry measuring cups for flour and sugar. Spoon flour into the cup, then level it off with a knife. This way, you avoid packing in too much flour. For blueberries, fresh is best. They have a burst of juice and flavor. If you can't find fresh ones, frozen blueberries work too. Just remember to thaw and drain them first. This keeps your batter from getting too wet. For the full recipe, refer to the section above. Enjoy baking this delightful treat! 1. Preheat your oven to 350°F (175°C). 2. Prepare a 9-inch round cake pan. Grease it with butter or spray. You can also line the bottom with parchment paper. This helps the cake come out easily. 3. In a medium bowl, mix together the all-purpose flour, baking powder, baking soda, and salt. Whisk these until well blended. Set this aside for later. 1. In a large bowl, use an electric mixer to cream the softened butter and sugar. Mix until it is light and fluffy, about 3-4 minutes. 2. Add the eggs one at a time. Mix well after each egg. 3. Next, add the lemon zest, sour cream, and vanilla extract. Blend until everything is smooth. 4. Gradually add the flour mixture to the wet ingredients. Stir gently until just combined. Do not overmix; this keeps the cake tender. 5. Carefully fold in the fresh blueberries and lemon juice. Be gentle so you do not smash the berries. 1. Pour the cake batter into the prepared pan. Use a spatula to spread it evenly. 2. Place the pan in the preheated oven. Bake for 30-35 minutes. 3. To check if the cake is done, insert a toothpick in the center. If it comes out clean, the cake is ready. 4. After baking, remove the cake from the oven. Let it cool in the pan for about 10 minutes. Then, transfer it to a wire rack to cool completely. Follow these steps for a perfect Blueberry Lemon Crème Cake. For the complete details, check the Full Recipe. To get the best cake, do not overmix the batter. Overmixing makes the cake dense. Mix just until you see no dry spots. This helps keep the cake light and fluffy. Use a spatula to fold in the blueberries gently. This way, you won't squish them. For a beautiful presentation, add garnishes on top. Fresh blueberries and lemon zest make it pop. You can also add a sprig of mint for color. When serving, pair the cake with tea or lemonade. Both drinks match the cake's fresh flavors. If the cake sinks, it may be due to overmixing or an oven that’s too hot. To fix a dense cake, check your measurements. Use a kitchen scale for accuracy. If you live at a high altitude, adjust your baking time. You may need to lower the oven temperature slightly. For the full recipe and more details on making this delightful cake, check the Full Recipe section. {{image_4}} You can change the fruits in this cake for a new taste. Try using raspberries or strawberries instead of blueberries. These fruits add their own unique flavor. You can also mix fruits for a fun twist. Adding spices can change the whole cake. A little cinnamon gives warmth. Nutmeg adds a nice depth to the cake. Start with small amounts, then taste the batter to adjust. To make a gluten-free version, swap the all-purpose flour. I recommend using almond flour or a gluten-free blend. These options keep the cake moist. You may need to adjust the amount slightly. Add an extra egg for better structure. It helps the cake rise while keeping it soft. Making the cake dairy-free is simple. Use coconut cream instead of heavy cream. For a vegan version, replace eggs with flaxseed or applesauce. You can also use non-dairy milk for sour cream. To lower sugar, substitute with honey or maple syrup. Just remember that these sweeteners can change the cake's texture. Adjust as needed to find the right balance. For the full recipe, check the earlier sections. To keep your Blueberry Lemon Crème Cake fresh, place it in an airtight container. Store it in the fridge, where it can last for about four days. If you want to freeze the cake, slice it into individual pieces. Wrap each piece tightly in plastic wrap, then place them in a freezer bag. For the crème topping, store it in a separate container in the fridge. It’s best to add the crème just before serving for the best taste. In the fridge, your cake stays good for about four days. If it stays longer, check for signs of spoilage. Mold is a clear sign that it’s no longer safe to eat. If the cake smells sour or has a dry texture, it's also best to toss it out. When reheating, use the oven to keep the cake's texture. Preheat your oven to 350°F (175°C). Place a slice on a baking sheet and warm it for about 10 minutes. This way, the cake stays soft and moist. If you have leftovers, serve them with fresh blueberries or a drizzle of lemon juice for extra zing. Enjoying it cold is also a great option! How do you ensure the blueberries don’t sink in the batter? To keep blueberries afloat, toss them in flour before adding them to the batter. This light coating helps them stay suspended during baking. Also, gently fold the blueberries in, rather than stirring hard. This method protects the berries and keeps the cake light. Can I use a different type of cream for the topping? Yes, you can use whipped coconut cream or cream cheese. Both options add a unique flavor. Just ensure they are whipped well to achieve a nice texture. Adjust sweeteners if needed, as some creams may be sweeter than heavy whipping cream. Can I make this cake ahead of time? Absolutely! You can bake the cake a day in advance. Just store it in an airtight container at room temperature. Wait to add the crème topping until the day you serve it. This keeps it fresh and prevents sogginess. What is the best way to adjust the recipe for a larger batch? To make a larger batch, simply double the ingredients. Use bigger pans or multiple pans. Ensure to adjust baking time as needed. Check doneness with a toothpick. If baking in multiple pans, rotate them halfway through for even cooking. What does it mean to fold in ingredients? Folding in means to mix gently. Use a spatula to lift the batter from the bottom and over the top. This method keeps air in the mixture, making your cake fluffy. It’s perfect for adding delicate ingredients like blueberries or whipped cream. How to properly cream butter and sugar for baking? Start with softened butter at room temperature. Beat it with sugar until it's light and fluffy. This process takes about 3-4 minutes. Proper creaming incorporates air, which helps the cake rise well. It’s a key step for texture in baked goods. This blog post covered how to make a delicious blueberry cake. We discussed key ingredients, precise measurements, and tips for perfecting texture. Remember, mixing gently leads to a lighter cake. Explore variations, like gluten-free options or different fruits. Store leftovers properly to maintain freshness. Use the FAQs for quick answers to common questions. Baking is fun and rewarding. Follow these steps, and you’ll impress everyone with your cake! Enjoy your baking journey and keep experimenting.

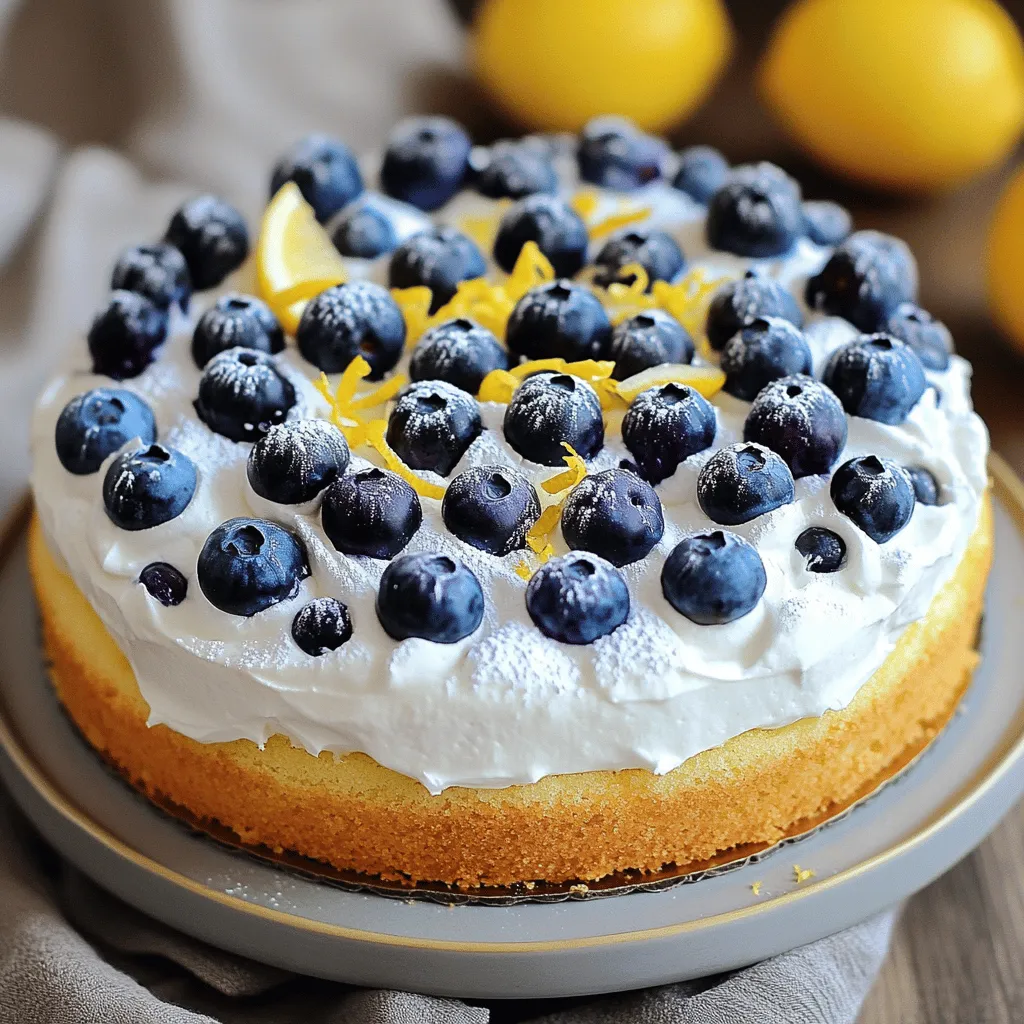
If you’re craving a dessert that bursts with flavor, look no further than this Blueberry Lemon Crème Cake. Combining fresh blueberries with zesty lemon, this cake is both delightful and …
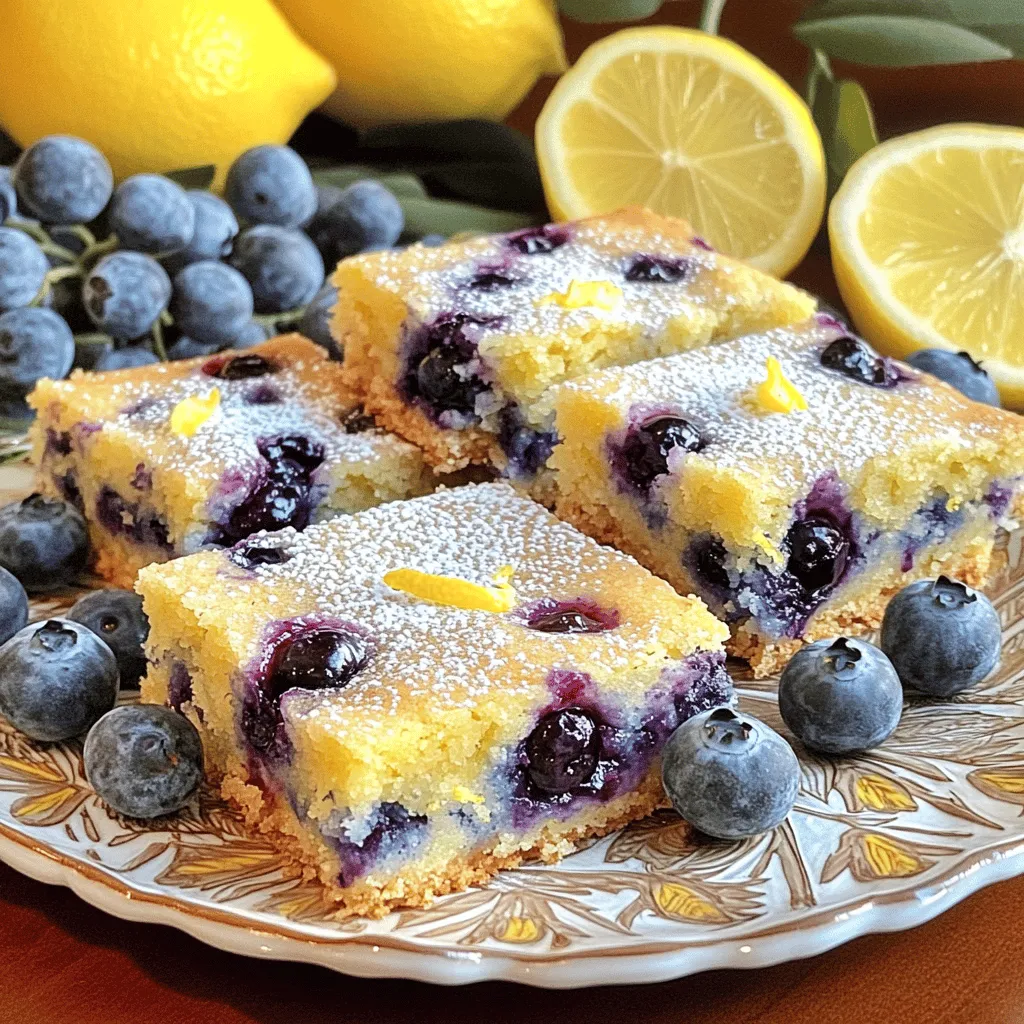
Read more

Categories Desserts

Blueberry Lemon Blondies Delightful Sweet Treat

May 21, 2025 by Chef Remy
To make delicious blueberry lemon blondies, gather these simple items: - 1 cup unsalted butter, melted - 1 ½ cups packed brown sugar - 2 large eggs - 2 teaspoons vanilla extract - 1 teaspoon baking powder - ½ teaspoon baking soda - ½ teaspoon sea salt - 2 cups all-purpose flour - Zest of 1 large lemon - 1 cup fresh blueberries (or frozen if needed) - ½ cup white chocolate chips (optional) You can easily swap some ingredients. If you need a dairy-free option, use coconut oil instead of butter. For a lighter flavor, try using light brown sugar. Eggs can be replaced with flax eggs or applesauce for a vegan version. If fresh blueberries are not available, frozen ones work well too. They might make the batter a bit moister but still taste great! When measuring flour, spoon it into the cup and level it off. This keeps your blondies from being too dense. For the lemon zest, use a fine grater to get the oils and flavor. When mixing, be gentle. Over-mixing can change the texture. Always check for doneness by inserting a toothpick. If it comes out with a few moist crumbs, your blondies are ready! For the best taste, serve them after they cool completely. Enjoy your baking! 1. First, preheat your oven to 350°F (180°C). Line a 9x13 inch baking pan with parchment paper. Leave some paper hanging over the sides. This helps you lift the blondies out later. 2. In a large bowl, mix the melted butter and packed brown sugar. Whisk them until smooth. 3. Add the eggs one at a time. Make sure each one mixes in well before adding the next. Then stir in the vanilla extract. 4. In another bowl, mix the baking powder, baking soda, sea salt, and all-purpose flour. Gradually add this dry mix to the wet mixture. Stir gently until just combined. Don't over-mix, or the blondies may turn out tough. 5. Use a spatula to fold in the lemon zest, fresh blueberries, and white chocolate chips if you choose to add them. Make sure they spread evenly in the batter. 6. Pour the batter into the prepared pan. Spread it out evenly with your spatula. 7. Bake for about 25-30 minutes. The edges should turn golden, and the center should set. A toothpick inserted in the middle should come out with some moist crumbs but not wet batter. 8. Let the blondies cool in the pan for 15 minutes. Use the parchment paper to lift them out onto a wire rack. Let them cool completely before cutting into squares. - Large mixing bowls - Whisk - Spatula - 9x13 inch baking pan - Parchment paper - Toothpick or cake tester - Wire rack - Prepping the pan: 5 minutes - Mixing wet ingredients: 5 minutes - Mixing dry ingredients: 5 minutes - Combining mixtures: 5 minutes - Baking: 25-30 minutes - Cooling: 15 minutes - Total time: Approximately 45 minutes Enjoy your delicious Blueberry Lemon Blondies by following this simple guide. For the complete recipe, check out the Full Recipe. To bake perfect blueberry lemon blondies, follow these tips: - Use room temperature ingredients. This helps mix everything well. - Do not over-mix the batter. Stir gently to keep it light and fluffy. - Check the oven temperature. Use an oven thermometer if needed. - Use parchment paper. It makes it easy to lift out the blondies. Here are some common mistakes when baking blondies: - Using cold eggs or butter. This can make the batter hard to mix. - Not measuring flour correctly. Too much flour can make blondies dry. - Overbaking. Check them a few minutes early for the best texture. - Skipping the lemon zest. It adds essential flavor and brightness. To make your blondies even better, try these ideas: - Add nuts. Walnuts or pecans give a nice crunch. - Mix in spices. A pinch of cinnamon or nutmeg can add warmth. - Use flavored chocolate. White chocolate with lemon or blueberry flavors can enhance sweetness. - Serve with a drizzle. A lemon glaze can add a zesty touch. For the full recipe, check out the [Full Recipe]. {{image_4}} You can change the flavor of your blondies by using different fruits. In summer, try using peaches or cherries. They add a sweet and juicy burst. In fall, you might want to use apples or pears for a cozy taste. Each fruit gives a new twist, making it fun to experiment. If you want gluten-free blondies, swap all-purpose flour for almond or coconut flour. These flours work well and keep the blondies moist. For vegan options, replace eggs with flax eggs. Mix one tablespoon of ground flaxseed with three tablespoons of water. Let it sit for five minutes. Use plant-based butter in place of regular butter for a rich flavor. You can make your blondies even more special with fun mix-ins. Try adding nuts like walnuts or pecans for crunch. You can also mix in shredded coconut for a tropical vibe. If you love chocolate, consider adding dark chocolate chips or chunks. Each choice adds a new layer of taste to your blondies. For the full recipe, check out the Berry Zesty Lemon Blondies 🫐. To keep your Blueberry Lemon Blondies fresh, store them in an airtight container. Place a piece of parchment paper between layers to prevent sticking. They will stay good at room temperature for about three days. If you want to keep them longer, consider refrigerating them. This will extend their freshness to about a week. Freezing is a great option for long-term storage. Start by letting the blondies cool completely. Then, cut them into squares. Wrap each piece tightly in plastic wrap. Place the wrapped blondies in a freezer-safe bag or container. They can last up to three months in the freezer. When you want to enjoy them, just take out the amount you need. Reheating your blondies can make them taste fresh again. For the best result, preheat your oven to 350°F (180°C). Place the blondies on a baking sheet and cover them with foil. Heat for about 10 to 15 minutes. If you prefer a microwave, heat one piece at a time for about 15 seconds. Enjoy them warm for a cozy treat! Blueberry lemon blondies have a soft and chewy texture. They are dense yet moist. You will love the slight crispness on the edges. The middle stays soft, thanks to the butter and sugar. The blueberries add little bursts of juiciness throughout. The lemon zest gives a nice, bright flavor that balances the sweetness. To check if the blondies are done, look for golden edges and a set center. Insert a toothpick into the middle. It should come out with a few moist crumbs, not wet batter. If the toothpick is clean, it may be overbaked. Bake for about 25-30 minutes, but keep an eye on them towards the end. Yes, you can use frozen blueberries in this recipe. Just make sure to add them straight from the freezer. Do not thaw them, as this can make the batter too wet. Frozen blueberries might bleed a bit more color, making your blondies look even more inviting. They pack the same great flavor and will still taste amazing. For the complete recipe, check the Full Recipe section. You learned how to make tasty blueberry lemon blondies. We covered ingredients, cooking steps, and essential tips. Remember the importance of using fresh fruits and avoiding common mistakes. Try different variations to suit your taste. Store them properly to enjoy later. These blondies are fun and easy to bake! Enjoy sharing them with friends and family. Happy baking!

Craving a sweet treat that bursts with flavor? Let me introduce you to Blueberry Lemon Blondies! These delightful bites blend juicy blueberries with fresh lemon zest for a tasty twist …

Read more

Categories Desserts

Ultimate Blueberry Coffee Cake Delightful and Easy Treat

May 21, 2025 by Chef Remy
- 1 cup all-purpose flour - 1 cup whole wheat flour - 1 cup granulated sugar - ½ cup unsalted butter, softened at room temperature - 2 large eggs, at room temperature - 1 cup buttermilk, at room temperature - 2 teaspoons baking powder - 1 teaspoon baking soda - ½ teaspoon salt - 1 teaspoon pure vanilla extract - 2 cups fresh blueberries, rinsed and drained - 1 teaspoon freshly grated lemon zest - ½ cup packed light brown sugar - ½ teaspoon ground cinnamon - ½ cup chopped pecans (optional) Using the right measurements is key. Use a dry measuring cup for flour and sugar. Level off the top with a straight edge for accuracy. For butter, soften it to room temperature to ensure it creams well with sugar. This helps create air pockets, making your cake light. The eggs should also be at room temperature to mix evenly. It’s best to measure the buttermilk accurately as it adds moisture to the cake. You will need a few tools to make this cake. A large mixing bowl works well for combining ingredients. An electric mixer is great for creaming butter and sugar quickly. Use a spatula for folding in the blueberries gently. A 9x13 inch baking pan is perfect for baking. Don't forget a toothpick to test for doneness! Finally, a cooling rack helps the cake cool evenly after baking. If you want the full recipe, check out the details above! Start by preheating your oven to 350°F (175°C). This step is key for even baking. Next, grab a 9x13 inch baking pan. Lightly grease it with butter and dust it with flour. This helps the cake not stick. In a large mixing bowl, put the softened butter and granulated sugar. Use an electric mixer on medium speed. Mix until the mixture looks light and fluffy. This should take about 3 to 5 minutes. In another bowl, whisk together the all-purpose flour, whole wheat flour, baking powder, baking soda, and salt. Make sure all the dry ingredients blend well. Then, add this mix to the butter and sugar. Alternate with the buttermilk. Start and end with the flour mix. Mix just until no dry flour shows. This keeps your cake tender. Now it's time for the blueberries! Gently fold them into the batter with a spatula. Be careful not to mash them. Pour half of this batter into your prepared pan. Spread it evenly. In a small bowl, mix half of the brown sugar and ground cinnamon. Sprinkle this mix over the batter. Then, pour the rest of the batter on top and spread it out. Finally, add the remaining brown sugar and cinnamon mix on the surface. Place the pan in the oven and bake for 40 to 45 minutes. To check if it’s done, insert a toothpick in the center. It should come out clean or with a few moist crumbs. Once baked, let the cake cool in the pan for at least 15 minutes before slicing. Enjoy your ultimate blueberry coffee cake! For the full recipe, refer to the earlier section. To make your coffee cake soft and moist, use room-temperature ingredients. This helps them mix better. Mix the butter and sugar until light and fluffy. This adds air and makes the cake rise. Avoid overmixing when you add the flour. Overmixing can make your cake tough. Keep an eye on baking time. Every oven is different, so check early to avoid overbaking. You can change the recipe to fit your taste. For a twist, try adding a cup of chopped apples or peaches. You can also swap blueberries for raspberries or blackberries. If you want a nutty flavor, use walnuts instead of pecans. For a dairy-free option, replace buttermilk with almond milk mixed with vinegar. Serve your coffee cake warm for the best taste. Dust it with powdered sugar for a sweet look. Pair it with fresh whipped cream for a treat. A scoop of vanilla ice cream is great too. This cake goes well with a cup of coffee or tea. Enjoy it for breakfast, brunch, or dessert. For the full recipe, check out the Ultimate Blueberry Coffee Cake. {{image_4}} You can swap blueberries for other fruits in this coffee cake. Strawberries, raspberries, or blackberries work well. Just make sure to adjust the quantity to about two cups. This change can create a fun twist on the flavor. To make the coffee cake gluten-free, use a gluten-free flour blend. You can find many good options at stores. Also, check if your baking powder is gluten-free. This switch allows everyone to enjoy this treat. Seasonal fruits can add unique tastes. In fall, try adding diced apples and a pinch of nutmeg. In winter, consider using cranberries for a tart kick. You can blend flavors to create your own seasonal favorites. This way, each bite remains exciting and fresh. For the full recipe, check the link. To keep your coffee cake fresh, place it in an airtight container. This helps maintain its moist texture. Store it at room temperature for up to three days. If you need to keep it longer, refrigerate it. Just remember, refrigeration may dry it out a bit. Freezing is a great option for coffee cake. First, let it cool completely. Then, wrap it tightly in plastic wrap. After that, place it in a freezer-safe bag or container. It can stay fresh in the freezer for up to three months. When you're ready to enjoy it, just thaw it at room temperature. Reheating your coffee cake can bring back its fresh taste. To reheat, preheat your oven to 350°F (175°C). Place the cake in the oven for about 10-15 minutes. This warms it through and keeps it soft. If you're in a hurry, you can use the microwave. Heat it in short bursts of 10-15 seconds until warm. Enjoy every bite of your Ultimate Blueberry Coffee Cake! If you do not have buttermilk, you can make a quick substitute. Mix 1 cup of milk with 1 tablespoon of white vinegar or lemon juice. Let it sit for about 5 minutes. This will create a tangy milk that works well in baking. You can also use plain yogurt or sour cream, thinned with a little milk. To add moisture, consider a few options. Use more buttermilk or add an extra egg. You can also include a bit of applesauce or yogurt in the batter. These ingredients not only add moisture but also enhance the flavor. Remember to avoid overmixing the batter to keep the cake tender. Yes, you can use frozen blueberries. Just make sure to rinse them under cold water and drain them well. Do not thaw them before adding them to the batter. This helps them keep their shape and prevents the batter from turning blue. The cake will still taste great with frozen berries. To check for doneness, insert a toothpick into the center of the cake. If it comes out clean or with a few moist crumbs, your cake is ready. If it comes out wet with batter, bake it a little longer. The edges will also start to pull away from the pan when it is done. You learned about making a delicious coffee cake. We covered ingredients, measurements, and tools. I detailed the steps for prepping, mixing, and baking. You also found tips for better texture and flavor. Plus, we explored fun variations and storage methods. With this guide, you can bake with confidence. Enjoy sharing your coffee cake!

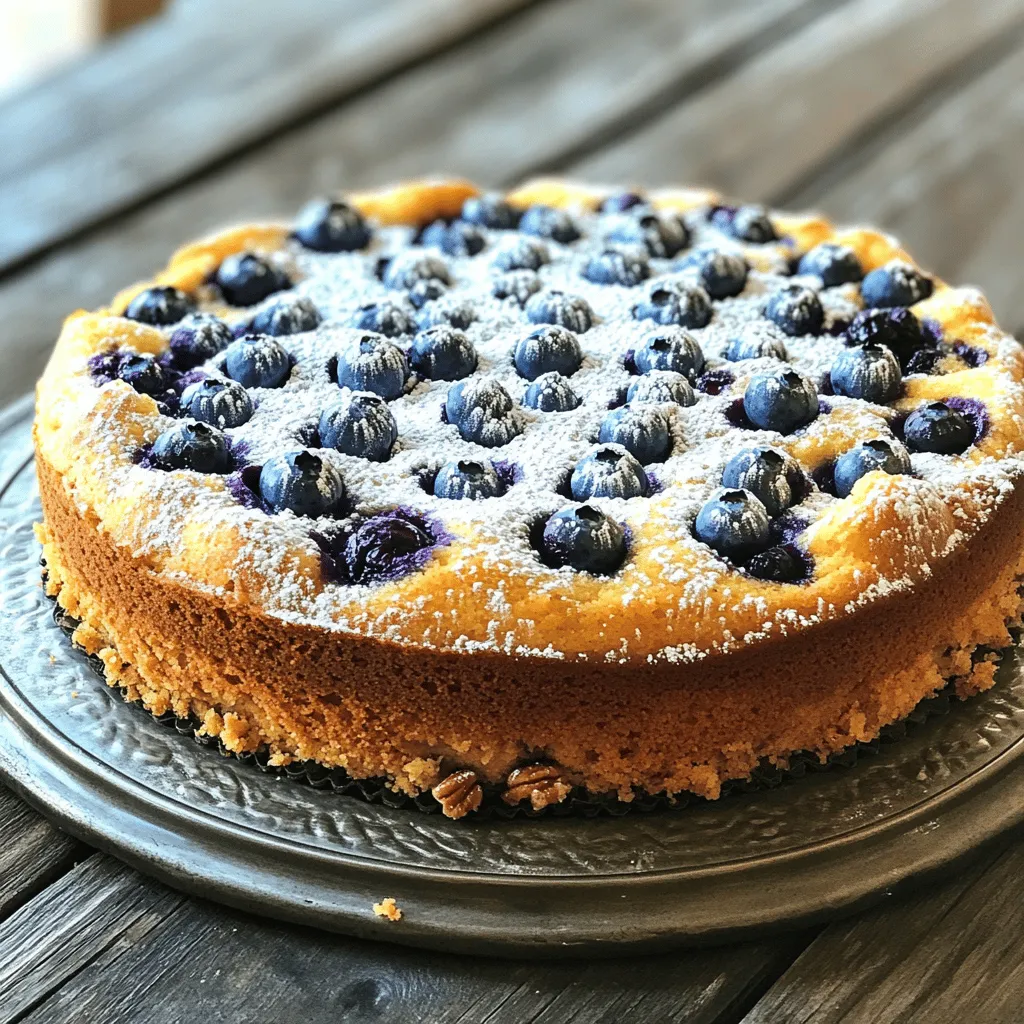
Do you crave a warm, sweet treat that pairs perfectly with your morning coffee? Look no further! My Ultimate Blueberry Coffee Cake is here to satisfy those taste buds. This …

Read more

Categories Desserts

Blueberry Muffin Cake Simple and Delightful Recipe

May 21, 2025 by Chef Remy
- 2 cups all-purpose flour - 1 cup granulated sugar - 1 tablespoon baking powder - 1/2 teaspoon salt - 1/2 cup unsalted butter, melted - 1 cup whole milk - 2 large eggs - 1 teaspoon pure vanilla extract - 2 cups fresh blueberries - 1 teaspoon freshly grated lemon zest - 1/2 teaspoon ground cinnamon - 1/4 cup coarse sugar for topping Gather all these ingredients first. This makes cooking easy and fun. You can find most items in your kitchen or local market. If you don’t have certain ingredients, don’t worry! You can swap them out. - Alternative sweeteners: You can use honey or maple syrup in place of sugar. - Dairy-free options: Substitute almond or oat milk for whole milk. Use coconut oil instead of butter. - Gluten-free flour alternatives: Try almond flour or a gluten-free blend instead of all-purpose flour. - Mixing bowls - Whisk - Baking pan (9x13 inch) - Spatula Having the right tools makes a big difference. A good baking pan helps the cake bake evenly. A whisk mixes the batter well. A spatula ensures you get every bit of the batter into the pan. Following this list helps you feel ready to bake. With these simple ingredients and tools, you can create a delicious blueberry muffin cake! For the full recipe, check out the details above. - Preheat the oven to 350°F (175°C). - Grease a 9x13 inch baking pan or line it with parchment paper. - In a large bowl, combine: - 2 cups all-purpose flour - 1 cup granulated sugar - 1 tablespoon baking powder - 1/2 teaspoon salt - 1/2 teaspoon ground cinnamon Mix these well to ensure even distribution. - In another bowl, blend together: - 1/2 cup unsalted butter, melted - 1 cup whole milk - 2 large eggs - 1 teaspoon pure vanilla extract - 1 teaspoon freshly grated lemon zest Whisk until smooth and creamy. - Pour the wet mixture into the dry ingredients. - Stir gently until just combined. It’s fine if the batter has lumps; avoid overmixing. - Carefully fold in: - 2 cups fresh blueberries Make sure not to crush the blueberries. - Transfer the batter to the greased baking pan. - Smooth the top with a spatula. - Sprinkle 1/4 cup coarse sugar on top for a nice crunch. - Bake for 40-45 minutes. Check by inserting a toothpick in the center; it should come out clean. This is how you create a delicious blueberry muffin cake. For the full recipe, refer to the main guide. To avoid undercooked centers, always check your oven temperature. Use an oven thermometer to ensure it heats properly. When baking, place the cake in the center. This helps it bake evenly. If the top browns too fast, cover it loosely with foil. This keeps the inside moist. For measuring flour, use the scoop and level method. Scoop flour into your measuring cup without packing it down. Then, level it off with a straight edge. This gives you the right amount. Too much flour can make your cake dense. To enhance the flavor, consider adding spices like nutmeg or ginger. These warm spices add depth to the cake. You can start with a 1/4 teaspoon of either spice, and adjust to your taste. Incorporating citrus zest can brighten the flavor. Lemon zest works great, but orange zest can be fun too. Just a teaspoon adds a nice touch without overpowering the blueberries. Pair the cake with ice cream or whipped cream for a treat. The creaminess balances the cake's sweetness. You can also serve it with a scoop of vanilla or a dollop of fresh whipped cream. For beverages, hot tea or coffee works well. A light herbal tea can complement the flavors. Lemonade is a refreshing choice too, especially in summer. For the full recipe, check out the Blueberry Muffin Cake Bliss. {{image_4}} You can add a twist to your blueberry muffin cake. One option is to make a lemon blueberry muffin cake. Simply add a little extra lemon zest and juice. This will brighten the flavors and give a fresh taste. Another fun idea is to create a cinnamon streusel topping. Mix brown sugar, flour, and cinnamon. Sprinkle it over the batter before baking. This adds a crunchy texture and rich flavor. For those who follow a vegan diet, you can easily adapt this recipe. Use plant-based milk and substitute eggs with flaxseed meal or applesauce. This vegan blueberry muffin cake will still be moist and tasty. If you want a low-sugar version, try using a sugar substitute or reduce the sugar amount. The cake will still be sweet and delicious. You can also change the flavors with the seasons. In the winter, add nutmeg or cranberries for a holiday twist. These spices and fruits can warm up your cake. During summer, mix in other fresh fruits like strawberries or peaches with the blueberries. These seasonal variations make the cake fun and exciting. For the full recipe, check out the Blueberry Muffin Cake Bliss section. To keep your blueberry muffin cake fresh at room temperature, store it in an airtight container. This helps maintain its moisture and flavor. If you don’t have a container, cover the cake with plastic wrap or foil. Make sure the cake is cool before wrapping it. This prevents steam from making it soggy. For long-term storage, freezing is your best option. Slice the cake into pieces, then wrap each piece tightly in plastic wrap. Place the wrapped slices in a freezer bag or container. This keeps them fresh for up to three months. When you’re ready to eat, remove a slice and let it thaw at room temperature. You can also warm it up in the oven for a few minutes. Check for spoilage by looking for mold or an off smell. If the cake feels dry or crumbly, it may not taste good anymore. To keep your cake fresh longer, always store it properly. If you notice any signs of spoilage, it’s best to throw it away. To make blueberry muffin cake from scratch, follow these steps: 1. Preheat your oven to 350°F (175°C). Grease a 9x13 inch baking pan. 2. In a large bowl, mix 2 cups of flour, 1 cup of sugar, 1 tablespoon of baking powder, 1/2 teaspoon of salt, and 1/2 teaspoon of cinnamon. 3. In another bowl, whisk together 1/2 cup of melted butter, 1 cup of milk, 2 eggs, 1 teaspoon of vanilla extract, and 1 teaspoon of lemon zest. 4. Pour the wet mix into the dry mix. Stir until just combined. Don't overmix. 5. Fold in 2 cups of blueberries gently. 6. Pour the batter into the greased pan and smooth the top. 7. Sprinkle 1/4 cup of coarse sugar on top. 8. Bake for 40-45 minutes. Use a toothpick to check if it comes out clean. Yes, you can use frozen blueberries. They are great for this recipe. Frozen berries are often picked at peak ripeness. They are also convenient and save time. Just be sure to fold them in gently to avoid crushing them. If you want to replace eggs, here are some options: - 1/4 cup unsweetened applesauce per egg. - 1/4 cup yogurt or buttermilk can work too. - You can use a flaxseed meal: mix 1 tablespoon of flaxseed with 2.5 tablespoons of water. Let it sit for 5 minutes. You can serve this cake in many ways: - Slice it into squares and place on a nice plate. - Dust with powdered sugar for a sweet touch. - Add fresh blueberries or mint leaves as a garnish. - Pair it with whipped cream or ice cream for extra delight. Yes, you can store the cake easily. - At room temperature, it lasts for 2-3 days. - Cover it with plastic wrap to keep it fresh. - For longer storage, you can freeze it. Wrap slices tightly in foil or plastic. It can last up to 3 months in the freezer. To check if your cake is done: - Insert a toothpick into the center. - If it comes out clean, your cake is ready. - You can also gently press the top; it should spring back. - If it feels soft or leaves an indentation, it needs more time. In this post, we explored the key ingredients, tools, and steps needed to make blueberry muffin cake. I shared tips for variations and storage methods to keep your cake fresh. Whether you stick to the original recipe or try new flavors, you can easily customize this treat. With simple alternatives and enhancements, you can create a version that fits your taste. Now, grab your ingredients and get baking! Enjoy every moist and delicious bite.

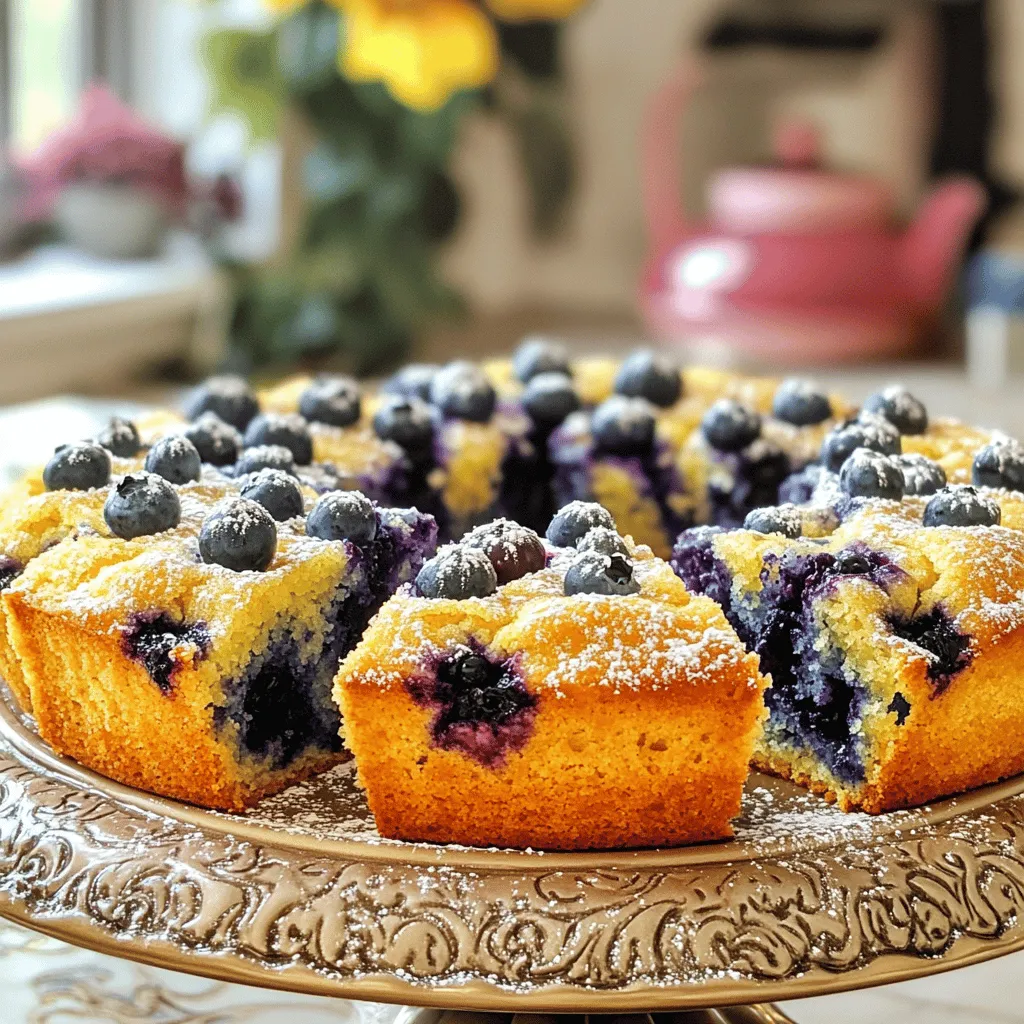
Are you ready to bake a treat that’s simple yet oh-so-delightful? This Blueberry Muffin Cake is just that! With juicy blueberries and a hint of lemon zest, it’s perfect for …

Read more

Categories Desserts

Mediterranean Greek Lentil Salad Flavorful and Healthy

May 21, 2025 by Chef Remy
To make a tasty Mediterranean Greek lentil salad, you'll need: - 1 cup green or brown lentils, thoroughly rinsed and drained - 1 small red onion, finely diced - 1 cup cherry tomatoes, halved - 1 medium cucumber, diced into bite-sized pieces - 1 bell pepper (choose either red or yellow), diced - 1/2 cup kalamata olives, pitted and sliced - 1/4 cup fresh parsley, finely chopped - 1/4 cup feta cheese, crumbled (optional for a creamy finish) - 3 tablespoons extra virgin olive oil - 2 tablespoons fresh lemon juice - 1 teaspoon dried oregano - Salt and freshly cracked pepper to taste If you want to mix things up, here are some swaps: - Use black lentils instead of green or brown for a different taste. - Try red onion with green onions for a milder flavor. - Substitute grape tomatoes for cherry tomatoes if you prefer. - Replace feta with avocado or omit it for a vegan option. - Use apple cider vinegar in place of lemon juice for a tangy twist. Each serving of this salad is packed with nutrition: - Calories: 250 - Protein: 12g - Carbohydrates: 30g - Fiber: 10g - Fat: 10g - Sodium: 150mg This Mediterranean Greek lentil salad offers a balance of protein, healthy fats, and fiber. It’s a great choice for a light meal or side dish. Don't forget to check the full recipe for step-by-step guidance on making this delightful dish! Start by rinsing your lentils well. This helps remove dust and debris. Next, bring three cups of water to a boil in a medium pot. Add the lentils and lower the heat. Let them simmer for 20-25 minutes. You want them tender but firm. After cooking, drain the lentils and spread them on a plate to cool. While the lentils cook, chop your veggies. In a large bowl, mix the finely diced red onion, cherry tomatoes, diced cucumber, and bell pepper. Add the sliced kalamata olives and chopped parsley. Toss everything gently to combine. Now, let’s make the dressing. In a small bowl, whisk together olive oil, lemon juice, dried oregano, salt, and pepper. This will add bright flavor to your salad. Once the lentils cool, add them to the veggie mix. Stir gently to blend everything. Drizzle your dressing over the salad and toss gently. If you like, finish with crumbled feta cheese for a creamy touch. To cook lentils just right, remember these tips. Use fresh lentils for the best taste. Don’t skip rinsing; it makes a difference. Keep an eye on the time. Overcooked lentils turn mushy. Aim for a firm texture for a delightful bite. If you want extra flavor, add a bay leaf to the cooking water. Assembling the salad is easy and fun. Once you mix in the lentils and dressing, ensure everything is coated well. This way, every bite is flavorful. For serving, use a large, shallow bowl. It looks nice and gives room for the salad to spread. Top with extra parsley for color. You can also add lemon wedges for a fresh zest. If you want to explore more, check the full recipe for additional tips and twists! Using fresh ingredients makes a big difference in taste. Choose firm, ripe tomatoes. Look for cucumbers that feel crisp. For herbs, pick parsley with bright green leaves. Fresh olives enhance the salty flavor. Always rinse your lentils before cooking. This helps remove any dust or debris. To boost flavor, add more herbs like dill or mint. A splash of balsamic vinegar adds depth. For heat, consider a pinch of red pepper flakes. This salad loves lemon, so use fresh juice instead of bottled. If you add feta cheese, it brings a creamy touch. Mixing in some avocado can also add richness. Serve this salad chilled or at room temperature. It pairs well with grilled chicken or fish. For a full meal, add pita bread on the side. You can also serve it in lettuce cups for a fun twist. This salad shines at picnics and potlucks. Try serving it in a large bowl for a family-style meal. For extra flair, garnish with lemon wedges or more fresh herbs. Check out the Full Recipe for all the details! {{image_4}} You can easily add more Mediterranean flavors to your salad. Try adding roasted red peppers for a smoky touch. Artichoke hearts bring a briny taste that enhances the dish. You might also enjoy tossing in some capers for a tangy kick. Fresh herbs like mint or basil brighten the flavors, too. Each of these additions gives a new twist to your Greek lentil salad. To make this salad vegan, simply skip the feta cheese. The salad remains tasty without it. You may add a dollop of hummus for creaminess and flavor. This adds more protein and gives a rich texture. Another option is to use nutritional yeast. It will give a cheesy flavor without any dairy. You still get a delicious meal without losing taste. If you want to change up the base, try using quinoa or farro instead of lentils. Quinoa adds a nutty flavor and is gluten-free. Farro has a chewy texture that pairs well with the veggies. Both grains offer a hearty bite, making the salad filling. You can even mix lentils with one of these grains for a unique combination. This way, you keep the salad exciting with different tastes and textures. To store your Mediterranean Greek lentil salad, put it in an airtight container. Keep it in the fridge. Make sure to cover it tightly. This helps keep the flavors fresh. If you have a lot left, divide it into smaller portions. This way, you can grab a quick meal later. You can enjoy this salad cold or warm. If you prefer it warm, place it in a microwave-safe bowl. Heat it for 30 seconds at a time. Stir after each interval to ensure even warming. Do not overheat; you want the veggies crisp and fresh. When stored correctly, this salad lasts about 3-4 days in the fridge. If you notice any off smells or changes in color, it’s best to toss it. Always trust your senses. Freshness is key to enjoying every bite. For the best taste, eat it within the first two days. For the full recipe, check out the vibrant Mediterranean Greek lentil salad. Yes, you can prepare this salad ahead of time. It keeps well in the fridge for up to three days. Making it early helps flavors blend together. Just store it in an airtight container. When ready to eat, stir gently and enjoy. Lentils should be soft but still hold their shape. They usually take about 20-25 minutes to cook. To test, bite one; it should feel tender. If they are mushy, they are overcooked. Keep an eye on them for the best texture. This salad pairs well with grilled chicken or fish for added protein. You can also add pita bread for a satisfying crunch. For a vegetarian option, serve with hummus or falafel. Enjoy this salad as a light meal or a side dish. For the full recipe, check out the vibrant Mediterranean Greek Lentil Salad! This blog post guides you through making a Mediterranean Greek Lentil Salad. We covered essential ingredients, substitutions, and nutritional values. You learned step-by-step cooking instructions, along with tips for perfect lentils. I shared helpful storage methods and answered common questions. Incorporating fresh ideas or variations can elevate your salad. Enjoy this tasty and healthy dish, knowing you can make it your own. Simple changes can enhance both flavor and nutrition. Happy cooking!

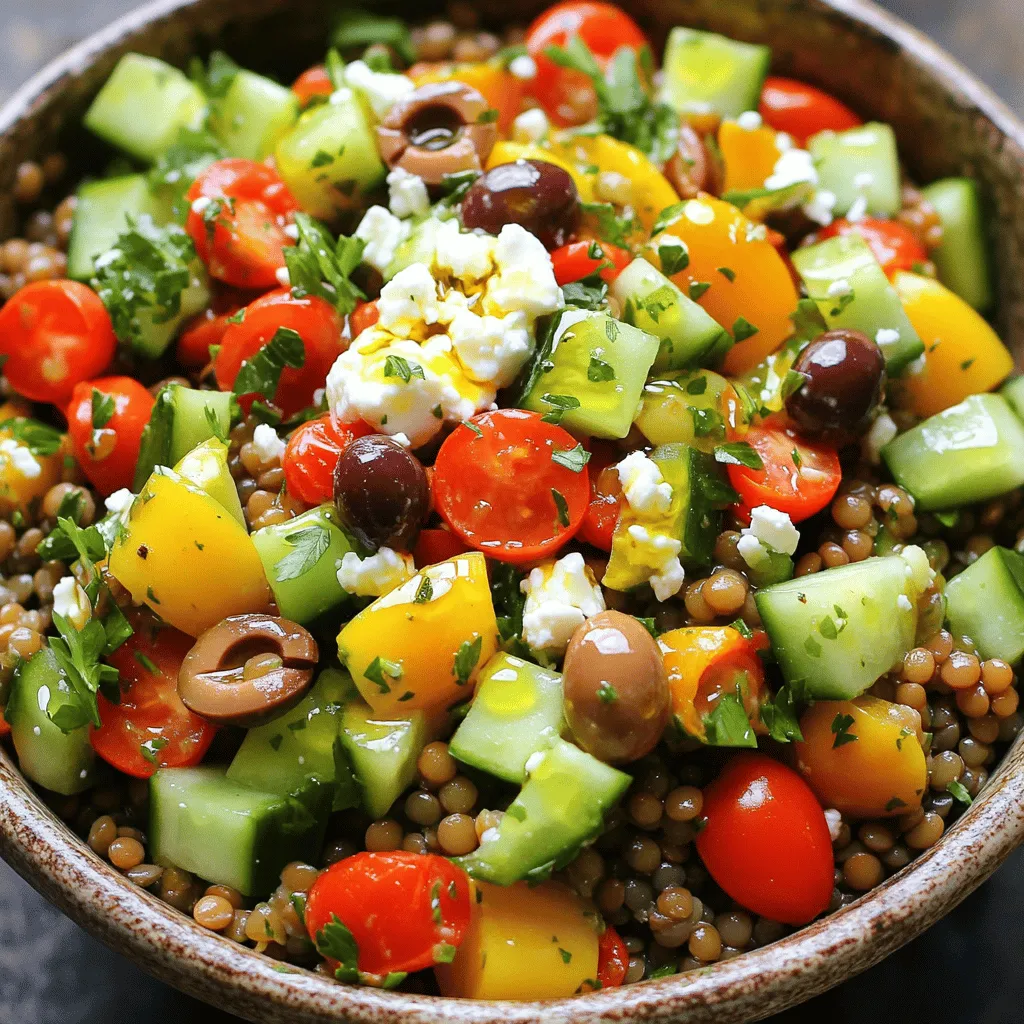
Get ready for a healthy twist on a classic salad! My Mediterranean Greek Lentil Salad is packed with flavor and nutrients. This dish combines lentils, fresh veggies, and vibrant herbs …

Read more

Categories Salads
Older posts
Newer posts
← Previous Page1 … Page116 Page117 Page118 … Page130 Next →

ROASTED RECIPES

Where bold flavors meet everyday meals. Warm, vibrant, and made to share. 🔥🥗🍴

PAGES

Home About Contact Privacy Policy Terms & Conditions Cookie Policy GDPR Policy Copyright Policy Disclaimer

CATEGORIES

Appetizers Desserts Salads Breakfast Dinner

Contact

  • Pinterest
  • Mail
Copyright © 2025 Roasted Flavors. All rights reserved.