Skip to content
Roasted Flavors
  • Home
  • Appetizers
  • Desserts
  • Salads
  • Breakfast
  • Dinner
  • Privacy Policy
  • Contact
  • About

Chef Remy

Chocolate Raspberry Cake Easy and Flavorful Recipe

May 22, 2025 by Chef Remy
- 1 ¾ cups all-purpose flour - 1 ½ cups granulated sugar - ¾ cup unsweetened cocoa powder - 1 ½ teaspoons baking powder - 1 ½ teaspoons baking soda - 1 teaspoon salt - 2 large eggs, at room temperature - 1 cup whole milk, at room temperature - ½ cup vegetable oil - 2 teaspoons pure vanilla extract - 1 cup boiling water - 1 cup fresh raspberries (plus extra for decoration) - ½ cup dark chocolate chips Gathering the right ingredients is key for a great chocolate raspberry cake. The flour gives the cake structure, while sugar adds sweetness. Cocoa powder provides that rich chocolate flavor we all love. Baking powder and baking soda help the cake rise, making it light and fluffy. You need eggs for moisture and to bind everything together. Milk adds creaminess, while vegetable oil keeps the cake moist. Pure vanilla extract enhances the flavor. Boiling water helps to dissolve the cocoa and gives the cake a tender crumb. Fresh raspberries add a burst of tartness, and dark chocolate chips bring extra richness and texture. - Mixing bowls and electric mixer - 9-inch round cake pans - Spatula and wire racks Having the right tools makes baking easier and more fun. Use mixing bowls to combine your ingredients. An electric mixer is great for quickly blending the batter. Round cake pans help shape the cake perfectly. A spatula is useful for folding in raspberries and chocolate chips without breaking them. Lastly, wire racks allow the cakes to cool evenly, which prevents sogginess. - Gluten-free alternatives - Vegan substitutions If you want a gluten-free cake, use a gluten-free flour blend. This swap works well and keeps the texture light. For a vegan version, replace eggs with flaxseed meal mixed with water or applesauce. Use almond or soy milk in place of whole milk, and choose a vegetable oil that fits your diet. This way, everyone can enjoy a slice of this tasty cake! First, preheat your oven to 350°F (175°C). This step is key for even baking. Next, grab two 9-inch round cake pans. Grease them well with butter or cooking spray. This helps the cakes come out easily. After greasing, dust the pans lightly with flour. Tap out the excess flour. This step ensures no cake sticks to the pan. Now, let’s mix the batter. In a large bowl, sift together the dry ingredients. Combine 1 ¾ cups of flour, 1 ½ cups of sugar, ¾ cup of cocoa powder, 1 ½ teaspoons of baking powder, 1 ½ teaspoons of baking soda, and 1 teaspoon of salt. Mix these until they look airy. Next, add the wet ingredients. Crack in 2 large eggs, pour in 1 cup of whole milk, and add ½ cup of vegetable oil. Don’t forget 2 teaspoons of vanilla extract. Beat these together with an electric mixer on medium speed for about 2 minutes. The batter should be smooth and well mixed. Now, it’s time to add the boiling water. Carefully pour in 1 cup of boiling water. Stir gently until the batter is thin and mixed well. Trust me, the runny texture is just right. Finally, fold in 1 cup of fresh raspberries and ½ cup of dark chocolate chips with a spatula. Be gentle to keep the raspberries whole. Next, divide your batter evenly between the two prepared pans. Give each pan a gentle tap on the counter to release air bubbles. Place the pans in your preheated oven. Bake for 30-35 minutes. Check for doneness by inserting a toothpick into the center. If it comes out clean, your cakes are ready. After baking, remove the cakes from the oven. Let them cool in the pans for about 10 minutes. Then, move them to wire racks to cool completely. You can find the full recipe for more detailed steps. Using room temperature ingredients makes a big difference. It helps the batter mix well. Cold eggs or milk can lead to lumps. Always take them out early to warm up. When adding raspberries and chocolate chips, do it gently. Use a spatula to fold them in. This keeps the raspberries whole and juicy. Overmixing can break them and make the cake dense. Chocolate frosting pairs perfectly with this cake. You might also try cream cheese frosting for a tangy twist. Both add rich flavors that complement the chocolate. For decoration, use fresh raspberries on top. You can also sprinkle chocolate shavings for a fancy touch. Arrange the raspberries in a circle for a beautiful look. One common mistake is overmixing the batter. This can make your cake tough. Mix just until combined for a light texture. Another mistake is not cooling the cakes properly. Let them cool in the pans for ten minutes. Then transfer them to wire racks to cool completely. This prevents sogginess and helps the layers stay intact. For the [Full Recipe], dive into these tips for a perfect bake! {{image_4}} You can add espresso powder to the batter for a mocha twist. Just one tablespoon will do. It gives a deep, rich flavor that pairs well with chocolate and raspberries. You can also swap in other fruits. Strawberries and blueberries work great in this cake. They add a fresh taste and look beautiful. If you want to change up the frosting, consider cream cheese frosting. It adds a tangy flavor that contrasts nicely with chocolate. Another option is whipped ganache. It’s rich and creamy, perfect for chocolate lovers. You can also try buttercream for a sweet and smooth finish. To make mini cakes, use a cupcake pan or a 6-inch cake pan. Fill each cup or pan with batter, but don’t overfill. Bake the cupcakes for about 18-20 minutes. For a small cake, check it at 25-30 minutes. The cakes are ready when a toothpick comes out clean. These mini versions are perfect for parties or individual treats. For the full recipe, check out my detailed guide. To keep your cake fresh, store it in the fridge. Use an airtight container to seal it well. This helps keep moisture in and prevents it from drying out. If you want to save it longer, freezing is a good option. Wrap the cake tightly in plastic wrap, then place it in a freezer bag. This keeps out air and prevents freezer burn. When you’re ready to enjoy it again, just thaw it in the fridge overnight. To reheat a slice of cake, place it in the microwave for 10-15 seconds. This warms it without drying it out. If you want a little extra flavor, top your slice with whipped cream or ice cream. You can also use leftover cake to make a trifle. Layer pieces of cake with pudding and fresh raspberries for a fun dessert. At room temperature, your cake lasts about 2-3 days. Make sure to keep it covered to prevent it from getting stale. If you store it in the fridge, it can last up to a week. Watch for signs of spoilage, like changes in smell or texture. If the cake starts to feel hard or has mold, it's best to toss it out. You can use several egg replacements to keep the cake moist. Here are some great options: - Flaxseed meal: Mix 1 tablespoon of flaxseed meal with 3 tablespoons of water. Let it sit for 5 minutes. This works well for binding. - Applesauce: Use ¼ cup of unsweetened applesauce for each egg. This adds moisture and a hint of sweetness. - Yogurt: Substitute ¼ cup of yogurt for each egg. It adds creaminess and keeps the cake soft. - Silken tofu: Blend ¼ cup of silken tofu until smooth. This works great for a dense cake texture. These options keep your cake tasty and moist, just like the original recipe! Yes, you can use frozen raspberries in your cake. However, they may change the cake's texture and flavor. Here are some points to consider: - Frozen raspberries tend to be softer once thawed. This means they may break apart more in the batter. - They release extra juice, which can make the batter wetter. You may need to adjust the flour a bit. - If you want to use them, let them thaw first and drain any excess liquid. Using frozen raspberries is fine, but fresh ones give a better texture and flavor. If you want a less sweet cake, here are some tips to adjust the sweetness: - Reduce the sugar: Cut down the granulated sugar by ¼ to ½ cup. The cake will still be sweet enough with the raspberries. - Use unsweetened cocoa powder: This will balance the sweetness from the sugar. - Add more raspberries: Fresh raspberries bring a tart flavor that helps cut through the sweetness. - Try a sugar substitute: Consider using stevia or erythritol as a sweetener. These changes will give you a cake that fits your taste better! Yes, you can adapt this recipe to fit many dietary needs. Here are some ideas: - Gluten-free: Swap all-purpose flour with a gluten-free flour blend. Make sure it includes xanthum gum for structure. - Vegan: Use plant-based milk and replace eggs as mentioned above. This makes the cake dairy-free and egg-free. - Nut allergies: Check the labels of your ingredients. Use vegetable oil instead of any nut oils. These simple swaps can make the cake suitable for different diets while still tasting great! The chocolate raspberry cake is a modern classic. It combines rich chocolate with tart raspberries. This dessert has roots in French pastry traditions, where chocolate and fruit pair well. Raspberry cakes have been popular since the late 19th century. Chocolate became famous in desserts in the 20th century. Combining the two flavors created a fresh twist that many enjoy today. Today, this cake is a favorite for birthdays and special events. It’s loved for its beautiful look and delicious taste, making it a true crowd-pleaser. You’ve learned how to make a delicious chocolate raspberry cake from scratch. We explored key ingredients, tools, and step-by-step instructions. I shared tips to avoid common mistakes and offered storage advice for leftovers. The variations allow you to customize the cake to your taste. Remember, baking is both science and art. Enjoy the process, share your creations, and have fun experimenting with flavors. This cake can bring joy to any occasion. Keep baking and enjoy every sweet bite!

If you love chocolate and berries, you’re in for a treat! This Chocolate Raspberry Cake recipe is simple and packed with flavor. With just a few key ingredients like fresh …

Read more

Categories Desserts

Garlic Butter Honey BBQ Beef Tacos Delicious Meal

May 22, 2025 by Chef Remy
To make these Garlic Butter Honey BBQ Beef Tacos, you will need some key ingredients. Here’s what you need: - 1 lb ground beef - 3 tablespoons unsalted butter - 4 cloves garlic, minced - 1/4 cup honey - 1/4 cup BBQ sauce (your favorite brand) - 1 teaspoon smoked paprika - 1 teaspoon ground cumin - 1/2 teaspoon chili powder - Salt and freshly ground black pepper to taste - 8 small corn or flour tortillas - 1 cup shredded lettuce - 1 cup diced tomatoes - 1 cup shredded cheese (cheddar or Mexican blend preferred) - Fresh cilantro sprigs, for garnish - Lime wedges, for serving These ingredients create a rich and sweet flavor in your tacos. The ground beef gives protein, while the garlic and butter add depth. Honey and BBQ sauce bring sweetness and tang. Don’t forget the spices! They add warmth and character to the dish. Use fresh toppings to add crunch and color. Shredded lettuce, tomatoes, and cheese make the tacos pop. Cilantro gives a fresh finish, while lime adds a zesty kick. For the full recipe, check out the [Full Recipe]. Enjoy cooking! 1. Start by melting the unsalted butter in a large skillet over medium heat. Once it melts, add the minced garlic. Sauté the garlic for 1-2 minutes. Watch it closely so it doesn't brown. You want the garlic to release its lovely aroma. 2. Next, add the ground beef to the skillet. Break it apart with a spatula. Cook it for about 5-7 minutes. You want it fully browned and crumbly. Drain any extra grease. This keeps your tacos from being too oily. 3. Now, it's time to add some flavor! Stir in the honey and BBQ sauce. Then, add the smoked paprika, cumin, chili powder, and season with salt and black pepper. Mix everything well. Let it simmer on low heat for 5-10 minutes. This allows the flavors to blend nicely. 4. While the beef mixture simmers, warm the tortillas in a separate dry skillet. Heat them for about 30 seconds on each side. This step makes them warm and pliable. It helps when you assemble the tacos. 5. To put the tacos together, take a warm tortilla. Scoop a generous amount of the BBQ beef mixture into the center. Top each taco with shredded lettuce, diced tomatoes, and a sprinkle of cheese. 6. For the final touch, garnish with fresh cilantro. Serve with lime wedges on the side. This adds a zesty kick. Your Garlic Butter Honey BBQ Beef Tacos are now ready to enjoy! For the full recipe, check the details above. How to achieve perfectly browned beef To get perfectly browned beef, start with a hot skillet. Use medium heat and let the pan warm up. Add the ground beef, breaking it into small pieces. This helps it brown evenly. Cook without stirring too much. Let it sit for a minute, then stir. This gives the beef a nice crust. Drain any excess grease after cooking. This keeps your tacos from being too oily. Best practices for sautéing garlic Sautéing garlic is simple but needs care. First, melt the butter over medium heat. Once the butter is bubbly, add the minced garlic. Stir it for just 1-2 minutes. Watch closely so it doesn’t brown. Brown garlic can taste bitter. You want it fragrant and soft. This step adds a rich flavor to your beef. Arranging tacos on a platter For a great look, use a colorful platter. Place each taco neatly side by side. This makes the dish inviting. You can also stack them slightly for a fun effect. Adding lime wedges around the tacos boosts color and freshness. It makes your meal more appealing. Using lime wedges for garnish Lime wedges are not just for looks. They add a zesty kick to your tacos. Squeeze the lime over the taco just before eating. This brightens the flavors and enhances the taste. It’s a simple trick that takes your dish to the next level! For the full recipe, check out the detailed steps provided earlier. {{image_4}} You can swap out the ground beef if needed. Ground turkey, chicken, or even lentils work well. Each option adds its own flavor. For BBQ sauce, don’t feel limited to one type. Sweet, spicy, or smoky sauces can change the taste. Try a mustard-based sauce for a unique twist. Make it your own! If you want to keep it light, use lettuce wraps instead of tortillas. They are crunchy and fresh. Simply fill the lettuce leaves with the beef mixture and toppings. For a heartier option, create burrito-style tacos. Use larger tortillas and add more beef and toppings. Fold them tightly, and you have a filling meal. Enjoy customizing your tacos! To keep your leftover beef mixture fresh, first let it cool to room temperature. Then, place it in an airtight container. Refrigerate the container for up to three days. If you want to keep it longer, you can freeze the beef mixture. Just make sure to use a freezer-safe container. It can last for up to three months in the freezer. When it comes to storing assembled tacos, it’s best to keep them separate. If you store them together, the tortillas will get soggy. Instead, wrap each taco in foil or plastic wrap. Then, place them in the fridge. Use them within two days for the best taste. To reheat the beef, use a skillet over medium heat. Stir the beef often until it is heated through. This method keeps the meat juicy and flavorful. You can also microwave it in a bowl. Just cover it with a damp paper towel to keep it moist. For the tortillas, you want to keep them fresh too. Heat them in a dry skillet for about 30 seconds on each side. You can also wrap them in a damp paper towel and microwave them for about 20 seconds. This keeps them soft and easy to fold. Enjoy your meal made from the Full Recipe! Yes, you can make the beef mixture ahead of time. Cook it and let it cool. Store it in an airtight container in the fridge for up to three days. When you're ready to serve, just reheat it in a skillet. This makes dinner quick and easy. The best toppings are fresh and bright. I love to use: - Shredded lettuce - Diced tomatoes - Shredded cheese (cheddar or Mexican blend) - Fresh cilantro sprigs - Lime wedges These toppings add crunch and flavor to your tacos. To make it less spicy, skip the chili powder. You can also use mild BBQ sauce. Adding more honey will balance the heat too. Always taste as you go to find your perfect blend. This blog post covered all you need for tasty garlic butter honey BBQ beef tacos. You learned about the key ingredients, step-by-step cooking, and clever tips for serving. We discussed variations, storage methods, and answered common questions. Now you can create delicious tacos that impress your friends and family. Enjoy experimenting with flavors and make this dish your own! The joy of cooking is in trying new things, so have fun with it!

Craving a tasty twist on taco night? Try my Garlic Butter Honey BBQ Beef Tacos! This easy recipe combines succulent beef with rich garlic butter and sweet honey BBQ sauce. …

Read more

Categories Dinner

German Potato Pancakes Crispy and Flavorful Recipe

May 22, 2025 by Chef Remy
- 4 medium-sized russet potatoes - 1 small onion - 2 large eggs - 1/4 cup all-purpose flour - 1 teaspoon baking powder - Salt and pepper - 1/4 teaspoon smoked paprika - Vegetable oil for frying - Optional accompaniments like sour cream - Applesauce as a traditional pairing The heart of German potato pancakes is in the ingredients. You start with russet potatoes. They give a nice texture and flavor. Grating the potatoes is key. It helps create that crispy edge. Use a box grater or a food processor to make this easier. Next, you need a small onion. Grate this onion finely. It adds sweetness and depth to the pancakes. The eggs help bind everything together. They also add moisture. All-purpose flour is essential too. It gives structure to your pancakes. You should also add baking powder. This will help them puff up a little. Don’t forget to season! A pinch of salt and pepper makes a big difference. Smoked paprika adds a nice twist. It brings a subtle smoky flavor. For frying, use vegetable oil. It has a high smoke point, which is perfect for frying. When serving, you can add sour cream or applesauce. Sour cream gives a creamy touch. Applesauce adds sweetness and balance. This combination is classic and makes the dish even better. For the full recipe, you can find all the steps outlined clearly. Enjoy making these crispy delights! Start by peeling the russet potatoes. I like to use a simple vegetable peeler for this. Next, grate the potatoes into fine shreds using a box grater or a food processor. This helps create the right texture. After grating, transfer the shredded potatoes to a clean kitchen towel. Gather the edges and twist it to remove excess moisture. This step is key for crispy pancakes. Too much moisture leads to soggy results. In a spacious mixing bowl, combine the grated potatoes and finely grated onion. The onion adds great flavor. Now, pour in the beaten eggs. Stir until the mixture blends well. Next, add the all-purpose flour and baking powder. Don’t forget to add a pinch of salt and pepper too. For a flavorful twist, stir in smoked paprika. Mix everything until you have a smooth batter. Heat a large cast-iron skillet or a non-stick frying pan over medium heat. Add enough vegetable oil to coat the bottom of the pan. Wait until the oil shimmers. This shows it's hot enough. Scoop about 1/4 cup of the potato mixture and place it in the skillet. Gently flatten it with the back of a spatula. Repeat this until the skillet is full, but avoid overcrowding. Fry the pancakes for about 3-4 minutes on each side, until they turn golden brown and crispy. If needed, add more oil during cooking. Once done, transfer the pancakes to a plate lined with paper towels to absorb excess oil. Enjoy them hot! For serving, I recommend sour cream and applesauce. It makes a great contrast. To make your German potato pancakes crispy, moisture removal is key. After grating the potatoes, place them in a clean kitchen towel. Wring it out well to get rid of excess water. This ensures your pancakes won't be soggy. Next, fry them at the right temperature. Use medium heat so they cook evenly. If the oil is too hot, the outside may burn before the inside cooks. Spices can elevate your potato pancakes. Consider adding garlic powder for a savory kick. A dash of cayenne pepper can bring in some heat. For a fresh touch, try dill or chives. Both herbs add a lovely flavor that pairs well with potatoes. The right tools make a big difference. I recommend using a cast-iron skillet for even heat. A non-stick frying pan can also work well. Just ensure it’s high-quality. Good pans help prevent sticking and promote browning. Don’t forget to have a spatula handy for flipping those pancakes! {{image_4}} You can change the type of potatoes in the recipe. I love using Yukon Gold potatoes. They add a creamy texture and rich flavor. You can also try red potatoes for a sweeter taste. If you need a gluten-free option, use almond flour or rice flour. Both work well in the batter. They keep the pancakes light and crispy. Just ensure the flour is certified gluten-free. For a cheesy twist, mix in shredded cheese. I recommend sharp cheddar or Gruyère. This addition makes the pancakes even more delicious. You can also top your pancakes with different sauces. Try sour cream, applesauce, or even a spicy salsa. Each option gives a unique taste. In Germany, potato pancakes vary by region. Some areas add carrots or zucchini for extra flavor. Others may include herbs like chives or parsley. These additions reflect the local ingredients and tastes. Potato pancakes, or Kartoffelpuffer, hold cultural significance in Germany. They are often served during festivals and special occasions. Each family may have its own recipe passed down through generations. Enjoying these pancakes connects us to rich traditions and shared meals. To keep your German potato pancakes fresh, place them in an airtight container. Layer them with parchment paper to avoid sticking. Store them in the fridge for up to three days. After that, they may lose their crispiness and taste. When you want to enjoy your leftovers, reheating is key. The oven is best for keeping them crispy. Preheat your oven to 400°F (200°C). Place the pancakes on a baking sheet and heat for about 10-15 minutes. This method keeps them nice and crunchy. If you're in a hurry, you can use the microwave. However, this may make them soft. To avoid that, place a paper towel under the pancakes. Yes, you can freeze potato pancakes! To do this, allow them to cool completely. Then, layer them with parchment paper in a freezer-safe bag. They can stay frozen for up to two months. When you want to eat them, take them out and thaw in the fridge overnight. Reheat them in the oven to regain that crispy texture. This method is perfect for quick meals anytime. German potato pancakes are called Kartoffelpuffer or Reibekuchen. These tasty treats use grated potatoes as the main ingredient. You mix them with onions, eggs, and flour. Then, you fry them until they are golden and crispy. Kartoffelpuffer can be enjoyed as a snack or part of a meal. They are popular in Germany and loved for their rich flavor and texture. Yes, you can prepare these pancakes in advance. To do this, make the batter and store it in the fridge for a few hours. You can also fry the pancakes ahead and keep them warm in the oven. Just set the oven to a low temperature. This way, you can enjoy them later without losing their crunch. The best accompaniments for German potato pancakes are sour cream and applesauce. The coolness of sour cream balances the warm, crispy pancakes. Applesauce adds a sweet touch that pairs well with the savory taste. You can also try serving them with a side salad or sauerkraut for extra flavor. To make potato pancakes crispy, remove as much moisture as possible from the grated potatoes. Use a clean kitchen towel to squeeze out the liquid. Fry the pancakes in hot oil, ensuring they are not crowded in the pan. This method allows them to cook evenly and develop a golden crust. Yes, you can make potato pancakes without eggs. Use alternatives like mashed bananas or applesauce to bind the mixture. You can also use flaxseed meal mixed with water. This will help hold the ingredients together and still give you a tasty pancake. German potato pancakes are easy to make and delicious. We covered the main ingredients you'll need, like russet potatoes and eggs, and learned the steps for perfect pancakes. Tips on texture and variations help you add your twist. You can store leftovers and reheat them for another meal. Enjoy creating and sharing these tasty treats with your loved ones. They’re sure to please everyone!

Discover the delicious world of German potato pancakes with my tasty, crispy recipe! These golden brown treats, known as Kartoffelpuffer, are easy to make and perfect for any meal. With …

Read more

Categories Dinner

Easy Amish Apple Fritter Bread Delicious and Simple Recipe

May 22, 2025 by Chef Remy
- 2 cups all-purpose flour - 1 tablespoon baking powder - ½ teaspoon salt - 1 teaspoon ground cinnamon - ½ cup granulated sugar - 1 large egg - 1 cup milk - 1 teaspoon vanilla extract - 2 tablespoons unsalted butter, melted - 2 cups apples, peeled, cored, and chopped (preferably Granny Smith) - ½ cup brown sugar (for topping) - 1 teaspoon ground cinnamon (for topping) - 1 cup powdered sugar (for glaze) - 2 tablespoons milk (for glaze) The mix of these ingredients creates a perfect balance. The apples add a nice tartness. The cinnamon gives warmth, while the sugars add sweetness. This blend makes the bread soft and delicious. When picking apples, I suggest Granny Smith. They keep their shape and add a fresh flavor. For the glaze, use powdered sugar for a smooth finish. The milk helps it drizzle beautifully on top. You can find the full recipe to see how to combine all this goodness. Enjoy! - Preheat the oven to 350°F (175°C). - Grease a 9x5-inch loaf pan with butter or non-stick spray. - In a large bowl, combine 2 cups of all-purpose flour, 1 tablespoon of baking powder, ½ teaspoon of salt, and 1 teaspoon of ground cinnamon. Mix these dry ingredients well. - In another bowl, whisk together 1 large egg, 1 cup of milk, 1 teaspoon of vanilla extract, and 2 tablespoons of melted butter until smooth. - Pour the wet mixture into the dry ingredients. Stir gently with a spatula or wooden spoon. Don’t overmix; a few lumps are okay. - Gently fold in 2 cups of chopped apples. Granny Smith apples add a nice tartness. - Pour half of the batter into the greased loaf pan, spreading it evenly. - In a small bowl, mix ½ cup of brown sugar and 1 teaspoon of cinnamon. Sprinkle half over the batter. - Add the rest of the batter, spreading it gently. Sprinkle the remaining cinnamon-sugar mixture on top. - Use a knife or skewer to swirl through the batter lightly. This creates a lovely marbled effect. - Bake in the oven for 50-60 minutes. The bread is done when a toothpick comes out clean or with a few crumbs. Enjoy making this delightful Amish Apple Fritter Bread! For the full recipe, refer to the instructions above. How do I check for doneness? To check if your bread is done, insert a toothpick into the center. If it comes out clean or with a few moist crumbs, it’s ready. This simple test ensures your bread is baked perfectly. Why is it important not to overmix the batter? Overmixing makes the bread tough. You want a tender crumb. Mix until just combined, leaving a few small lumps. This keeps your bread soft and fluffy. How do I achieve the perfect glaze consistency? For the glaze, whisk together powdered sugar and milk. Aim for a smooth, pourable texture. If it's too thick, add a bit more milk. If it’s too runny, add more sugar. What are some drizzling techniques for presentation? Use a spoon or a small pitcher to drizzle the glaze. Start from the center and let it flow to the edges. This creates a beautiful, tasty waterfall effect over your bread. What are the best ways to serve Amish apple fritter bread? Serve it warm, sliced, and drizzled with extra glaze. This makes for a lovely treat. You could also add a sprinkle of cinnamon for extra flavor. What are some great pairings for breakfast or dessert? Pair this bread with coffee or tea for breakfast. For dessert, enjoy it with a scoop of vanilla ice cream. Both options enhance the sweet, apple flavors in the bread. {{image_4}} You can easily switch up the flavor of this bread. Adding nuts like walnuts or pecans gives it a nice crunch. Chopped nuts mix well with the apples. You can also use dried fruits. Dried cranberries or raisins add sweetness and chewiness. Just make sure to chop them small. This way, they blend nicely into the batter. If you need gluten-free options, use almond flour or a gluten-free blend. These choices work well in place of all-purpose flour. For those who are vegan, you can replace the egg with flaxseed meal mixed with water. Swap the milk for almond or oat milk too. Both changes keep the bread moist and tasty. Different apples bring unique flavors to your bread. For a sweeter taste, try Fuji or Honeycrisp apples. If you crave a spicier kick, add seasonal spices like nutmeg or allspice. These spices enhance the cozy feel of the bread. You can even mix in pumpkin spice for a fall twist. Each option allows you to enjoy this bread all year long. For the full recipe, check out the section above. To keep your Amish Apple Fritter Bread fresh, store it at room temperature. Place the bread in an airtight container. You can also use a plastic wrap to cover it. This will help retain moisture. Avoid placing it in the fridge, as this can dry it out. For longer preservation, freezing is the best option. Wrap the cooled bread tightly in plastic wrap. Then, place it in a freezer bag or container. This will prevent freezer burn. To thaw, remove the bread from the freezer. Let it sit at room temperature for about 2-3 hours. You can also thaw it overnight in the fridge for best results. To reheat, slice the bread first. This helps it warm evenly. Use an oven set to 350°F (175°C). Place the slices on a baking sheet and warm them for about 10 minutes. You can also use a microwave. Heat slices for 15-20 seconds. This keeps the bread soft and moist. Serve warm, and enjoy the flavors! Can I make this bread ahead of time? Yes, you can make this bread ahead of time. Bake it, cool it, and store it in an airtight container. It stays fresh for up to three days at room temperature. For longer storage, freeze it. Wrap it well in plastic wrap and foil. When you are ready to eat, thaw it overnight in the fridge. What type of apples work best for this recipe? I recommend using Granny Smith apples. They are tart and hold their shape well. Other options include Honeycrisp or Fuji apples. These also add a nice sweet flavor to the bread. How do I prevent the apples from sinking in the batter? To keep the apples from sinking, coat them lightly with flour before adding them to the batter. This helps them stay suspended. You can also layer them in the batter, so they are more evenly distributed. What to do if the bread is too dense? If your bread is too dense, it may be due to overmixing the batter. Mix just until combined. Also, check your baking powder for freshness. Expired baking powder can cause density issues. Fixing a glaze that’s too thick or too runny If your glaze is too thick, add a little more milk until it reaches the right consistency. If it’s too runny, add more powdered sugar to thicken it up. Can I substitute other fruits? Yes, you can use other fruits like pears or berries. Just make sure to chop them small and adjust the sugar according to their sweetness. Is there a way to make a mini version of this recipe? Absolutely! Use a smaller loaf pan, like a 5x3-inch one. Adjust the baking time to about 30-35 minutes. Keep an eye on it, as smaller loaves can bake faster. For the full recipe, check the details above. You learned how to make delicious Amish Apple Fritter Bread. We covered the key ingredients, step-by-step instructions, and helpful tips. You can tweak the recipe with flavors, dietary needs, and seasonal favorites. Remember to store your bread right to keep it fresh. This tasty treat is great any time of day. I hope you try this recipe to enjoy with friends and family.

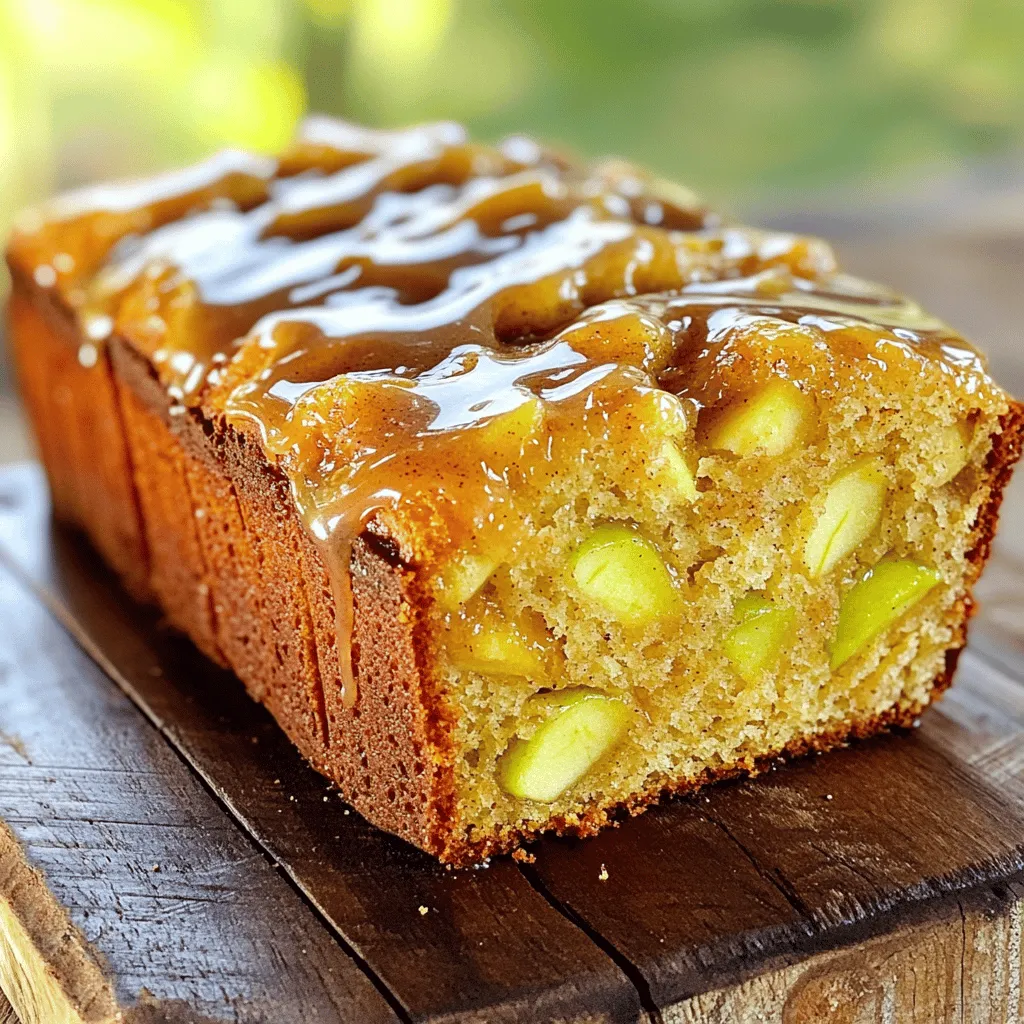
Are you ready to bake a treat that will delight your family and friends? This Easy Amish Apple Fritter Bread recipe combines warm spices and sweet apples into a soft, …

Read more

Categories Desserts

Shrimp and Avocado Bowls with Mango Salsa Delight

May 22, 2025 by Chef Remy
- 1 lb raw shrimp, peeled and deveined - 2 ripe avocados, diced into chunks - 1 cup cherry tomatoes, halved - 1/2 cup red onion, finely chopped - 1 ripe mango, diced - 1 jalapeño, minced - Juice of 1 lime - 2 tablespoons extra virgin olive oil - Fresh cilantro leaves, for garnish When you start making shrimp and avocado bowls, gather all your main ingredients first. The shrimp adds protein, while the avocados bring creaminess. I love how the cherry tomatoes add a burst of freshness. Next, find your complementary ingredients. The red onion gives a nice crunch, and the mango adds sweetness. You can adjust the heat with the jalapeño; just remove the seeds if you want it milder. For seasoning, the lime juice brightens the dish. The extra virgin olive oil helps the shrimp cook nicely. The fresh cilantro at the end adds flair and flavor. To see the full recipe, check out the complete instructions and tips. Enjoy making this vibrant dish! Start by marinating the shrimp. In a medium bowl, mix the raw shrimp with olive oil, garlic powder, ground cumin, salt, and pepper. This marination adds flavor. Let the shrimp sit for about 15 minutes. This time is key. It lets the shrimp absorb the spices. In another bowl, combine diced mango, halved cherry tomatoes, finely chopped red onion, and minced jalapeño. Squeeze lime juice over the mixture and add a pinch of salt. Mix well. Let the salsa sit for about 10 minutes. This time helps the flavors blend nicely. Heat a non-stick skillet on medium-high heat. Once hot, add the marinated shrimp in a single layer. Cook them for 2-3 minutes on each side. They should turn pink and opaque. This means they are cooked just right. Remove the skillet from heat once done. To assemble, place cooked quinoa or brown rice in each bowl. Next, add diced avocado. Then, layer the perfectly cooked shrimp on top. Finish with a scoop of the mango salsa. For a great look, serve on a large platter with lime wedges and extra cilantro. This adds a fresh touch. Enjoy your Shrimp and Avocado Bowls with Mango Salsa! For the full recipe, check the details above. To avoid overcooking shrimp, watch the color change. Cook them until they turn pink and opaque. This usually takes about 2-3 minutes per side. If you cook them too long, they become rubbery and tough. Choose a non-stick skillet for cooking shrimp. It helps make flipping easy and reduces sticking. A hot skillet is key for a good sear. Heat the skillet on medium-high before adding shrimp. You can customize mango salsa to fit your taste. Try adding diced bell peppers for extra crunch. Chopped cucumber also adds freshness. If you prefer a sweeter salsa, add more mango. Adjust spice levels by adding more or less jalapeño. For a milder salsa, remove the seeds. If you like heat, keep the seeds in or add a pinch of cayenne pepper. Serve shrimp and avocado bowls with a side of tortilla chips. They add crunch and fun to the meal. You can also pair them with a light salad or grilled veggies for balance. For drinks, try serving with a chilled white wine. A light beer or sparkling water with lime also works well. These pair nicely with the fresh flavors of the bowls. For the full recipe, check out the earlier section. {{image_4}} You can switch shrimp for chicken or tofu. For chicken, use boneless, skinless breasts or thighs. Cook chicken in the same way as shrimp, but increase the cooking time to about 6-7 minutes per side. If you use tofu, press it to remove water, then cube it. Sauté it for about 5-6 minutes until golden. If you want a low-carb option, try cauliflower rice. It cooks quickly and has a light flavor. Whole grains like farro or barley are also great. They add texture and extra nutrients. Using different grains can change the taste and health benefits of your bowl. Seasonal vegetables can enhance your dish. In summer, add bell peppers or zucchini for crunch. In fall, try roasted butternut squash or sweet potatoes for warmth. You can also adapt the recipe for special occasions, like using pomegranate seeds during the holidays for a festive touch. To store leftovers for maximum freshness, place the shrimp, avocado, and salsa in separate containers. This keeps each ingredient at its best. You can keep them in the fridge for up to three days. If you mix them, the avocado may brown quickly. When reheating, warm the shrimp in a skillet over medium heat. This helps keep them juicy. For quinoa or rice, add a splash of water before microwaving. This keeps them from drying out. Avoid reheating salsa; it tastes best cold. You can freeze the cooked shrimp, but avoid freezing the assembled bowls. They lose texture when thawed. To freeze shrimp, cool them first, then place in an airtight container. For thawing, move shrimp to the fridge overnight before using. Yes, you can prepare some parts ahead. Cook the shrimp and make the mango salsa. Store them in separate containers in the fridge. When you are ready to serve, just warm the shrimp and assemble the bowls. This way, your meal stays fresh and tasty. To keep shrimp tender, avoid overcooking them. Cook for just 2-3 minutes on each side. Marinate them for at least 15 minutes. The olive oil and spices help boost flavor and moisture. Always use fresh shrimp for the best results. If you want something different, try cauliflower rice or couscous. Both are light and pair well with shrimp. They also add unique flavors. Cauliflower rice is low in carbs, while couscous is quick to cook. Choose what fits your diet best. Yes, this recipe is gluten-free. Shrimp, avocado, and fresh veggies do not contain gluten. Just make sure to check any packaged ingredients. If you swap out quinoa or brown rice, confirm that your choice is gluten-free too. Enjoy this bowl worry-free! In this blog post, we explored how to create shrimp and avocado bowls. We detailed the key ingredients, from fresh shrimp and avocados to lime juice and cilantro. I provided step-by-step instructions for marinating, cooking, and assembling your bowl, along with tips to keep shrimp juicy and tender. You can customize the recipe with different proteins, grains, and seasonal veggies. Remember to store leftovers correctly to maintain freshness. Enjoy your flavorful shrimp and avocado bowls, and feel free to make them your own!

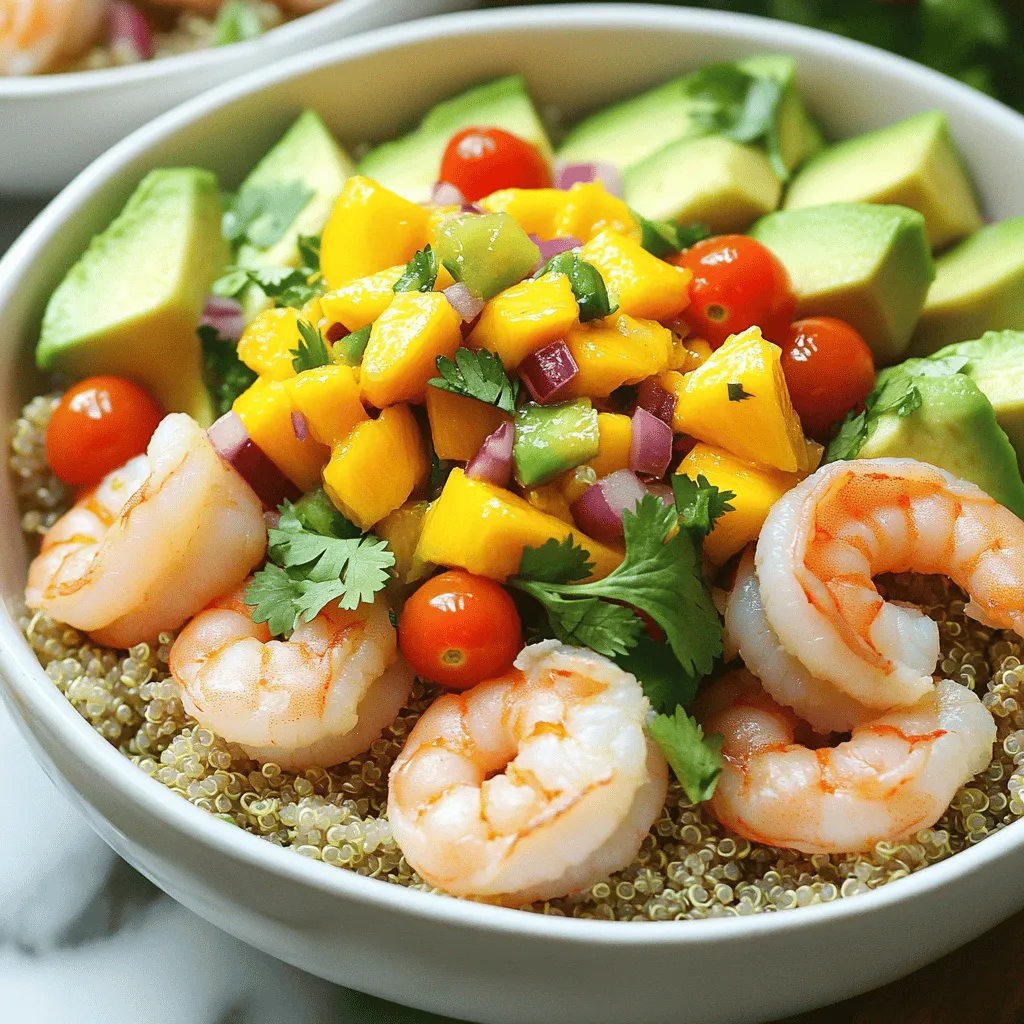
Are you ready to enjoy a burst of fresh flavors? My Shrimp and Avocado Bowls with Mango Salsa Delight are all about bright, delicious ingredients that come together in a …

Read more

Categories Dinner

Maple Donut Bars Simple and Delicious Recipe

May 22, 2025 by Chef Remy
- 1 ½ cups all-purpose flour - 1 teaspoon baking powder - ½ teaspoon baking soda - ½ teaspoon salt - ½ teaspoon ground cinnamon - ¼ teaspoon ground nutmeg - ½ cup unsalted butter, softened - ½ cup brown sugar, packed firmly - ½ cup granulated sugar - 2 large eggs, room temperature - ½ cup buttermilk, room temperature - 1 teaspoon pure vanilla extract - ½ cup maple syrup (plus extra for drizzling) - 1 cup powdered sugar (for glaze) These ingredients create a soft and sweet treat. The mix of flours, sugars, and spices gives the bars a warm flavor. The maple syrup adds a nice, rich sweetness. - Ground cinnamon and nutmeg - Types of sugars to use - Flavor variations with extracts You can add spices like cinnamon and nutmeg for extra warmth. Brown sugar brings out a caramel-like taste. You can also try different extracts like almond or maple to change the flavor. Each addition makes these bars even more special. For the full recipe, follow the steps to make these delicious Maple Donut Bars! 1. Preheat your oven to 350°F (175°C). 2. Grease an 8x8 inch baking pan with butter or spray. 3. Line the bottom and sides with parchment paper. 4. In a bowl, whisk together: - 1 ½ cups all-purpose flour - 1 teaspoon baking powder - ½ teaspoon baking soda - ½ teaspoon salt - ½ teaspoon ground cinnamon - ¼ teaspoon ground nutmeg 1. In a large bowl, cream together: - ½ cup unsalted butter, softened - ½ cup brown sugar, packed - ½ cup granulated sugar 2. Use an electric mixer on medium speed. Beat until fluffy. 3. Add in 2 large eggs, one at a time. Mix well after each. 4. Stir in: - ½ cup buttermilk - 1 teaspoon pure vanilla extract - ½ cup maple syrup 5. Gradually mix in the dry ingredients. Use low speed. 6. Don’t overmix. A few lumps are okay. 1. Pour the batter into the prepared pan. Spread evenly. 2. Bake for 25-30 minutes. Check with a toothpick until it comes out clean. 3. Cool in the pan for 10 minutes. 4. Lift out using the parchment overhang. 5. Transfer to a wire rack to cool completely. 6. To make the glaze, mix: - 1 cup powdered sugar - ½ cup maple syrup 7. Drizzle the glaze over the bars once they cool. 8. Cut into squares or rectangles. Enjoy your Maple Donut Bars! For the full recipe, refer to the previous section. To make your maple donut bars moist, pay close attention to your ingredients. Start with room temperature ingredients. This helps everything mix well and creates a smoother batter. I suggest using buttermilk. It adds a nice tenderness to your bars, making them soft and fluffy. Don't forget this step: let your bars cool before glazing. Cooling helps the glaze stick better and keeps your bars from getting soggy. Making the perfect glaze is simple. Combine powdered sugar and maple syrup in a bowl. Mix until it's smooth. If you want a thicker glaze, add more powdered sugar. For a thinner glaze, just add more syrup. When you’re ready to glaze, use a spoon or a piping bag. This gives your bars a nice, clean look. You can also add fun toppings. Chopped nuts or colorful sprinkles add flavor and texture to your treats. Your bars will look and taste amazing! {{image_4}} You can easily change the flavor of your maple donut bars. Here are some fun ideas: - Adding nuts like pecans or walnuts: Chopped nuts add crunch. Mix in ½ cup of your favorite nuts into the batter for a tasty twist. The nuts pair well with the maple flavor. - Experimenting with chocolate or caramel: If you love chocolate, swirl in some melted chocolate. For caramel lovers, drizzle warm caramel over the glaze. Both options create a rich flavor that feels indulgent. - Seasonal variations for holidays: For fall, add pumpkin spice to the batter. In winter, try peppermint extract. These small changes can make your bars festive and fun. You can adjust the recipe to fit different diets. Here are some ideas to make it work for you: - Gluten-free alternatives: Use a gluten-free flour blend instead of all-purpose flour. This swap keeps the texture soft and moist without the gluten. - Dairy-free adjustments: Replace unsalted butter with a dairy-free option like coconut oil. Use almond or soy milk in place of buttermilk. These swaps keep the bars rich and tasty. - Low-sugar version ideas: To reduce sugar, use a sugar substitute like stevia or monk fruit. This change can help cut calories while keeping the sweet flavor. For the full recipe, check out the ingredients and instructions above. Enjoy experimenting with these variations! To keep your maple donut bars fresh, store them in an airtight container. Set the container in a cool, dry place away from direct sunlight. This way, they stay soft and tasty for up to five days. If you want to keep them even longer, you can freeze them. Wrap each bar tightly in plastic wrap and then place them in a freezer-safe bag. They can last up to three months in the freezer. When you are ready to eat a bar, let it thaw at room temperature. If you want a warm treat, pop it in the microwave for about 10-15 seconds. This method restores the soft texture. For a special treat, top it with a bit more maple syrup before serving. You can enjoy them straight from the fridge, too! They still taste great when cold, and the flavors are even more pronounced. To make Maple Donut Bars, follow these simple steps: - Preheat your oven to 350°F (175°C). - Grease an 8x8 inch baking pan with butter. - Whisk together flour, baking powder, baking soda, salt, cinnamon, and nutmeg. - In another bowl, cream butter, brown sugar, and granulated sugar. - Add eggs one at a time, mixing well after each. - Stir in buttermilk and vanilla extract. - Gradually mix in dry ingredients. - Pour the batter into the pan and bake for 25-30 minutes. - Cool in the pan, then glaze with maple syrup. For exact measurements, check the Full Recipe. Yes, you can use different syrups for your bars. Maple syrup is the star here, but you can try: - Honey for a floral sweetness. - Agave for a mild flavor. - Molasses for a rich depth. Each syrup adds a unique twist to the flavor. Maple syrup gives that classic taste, while honey adds a light touch. Maple Donut Bars can last up to 5 days when stored properly. To keep them fresh: - Store them in an airtight container. - Keep them at room temperature. Check for signs of spoilage, like mold or an off smell. If they look or smell funny, it’s time to toss them. Making maple donut bars is simple and fun. We explored the essential ingredients and optional enhancements. The step-by-step instructions guide you from mixing to baking. Tips helped us achieve moist bars with just the right glaze. Variations opened the door to different flavors and dietary needs, making this recipe versatile. In the end, you can enjoy this treat your way. Experiment with flavors and storage options. Now, you are ready to bake and share these delicious bars with others!

Ready to make your taste buds dance? I’m excited to show you how to whip up simple and delicious Maple Donut Bars! This guide covers everything from essential ingredients to …

Read more

Categories Desserts

Korean BBQ Meatballs with Spicy Mayo Perfectly Tasty

May 22, 2025 by Chef Remy
- 1 lb ground beef or ground chicken - 1/4 cup breadcrumbs (preferably panko for added crunch) - 1/4 cup green onions, finely chopped - 2 tablespoons soy sauce - 1 tablespoon sesame oil - 2 teaspoons freshly grated ginger - 2 cloves garlic, minced - 1 tablespoon brown sugar - 1/2 teaspoon freshly ground black pepper - 1/4 teaspoon red pepper flakes (adjust to your heat preference) - Sesame seeds and sliced green onions - 1 teaspoon fresh lime juice for spicy mayo - Additional serving suggestions like a lime wedge When making Korean BBQ meatballs, I focus on quality and flavor. The main ingredients are simple but essential. Ground beef or chicken forms the base. Breadcrumbs add texture, and green onions bring freshness. Soy sauce and sesame oil create a savory depth. Spice is key to these meatballs. Fresh ginger and garlic give a warm, aromatic touch. Brown sugar balances the flavors with sweetness. Black pepper offers heat, while red pepper flakes add that extra kick. Adjust these spices to fit your taste. For garnishing, I love using sesame seeds and green onions. They add a nice crunch and visual appeal. Don't forget to mix lime juice into your spicy mayo. It brightens the dish and enhances the flavors. You can find the complete cooking steps in the Full Recipe. Enjoy crafting these tasty bites! - Preheat your oven to 400°F (200°C). This ensures even cooking for your meatballs. - Combine all meatball ingredients in a bowl. This includes: - 1 lb ground beef or ground chicken - 1/4 cup breadcrumbs (preferably panko for added crunch) - 1/4 cup green onions, finely chopped - 2 tablespoons soy sauce - 1 tablespoon sesame oil - 2 teaspoons freshly grated ginger - 2 cloves garlic, minced - 1 tablespoon brown sugar - 1/2 teaspoon freshly ground black pepper - 1/4 teaspoon red pepper flakes (adjust to your heat preference) Use a fork or your hands to mix. Make sure everything is evenly mixed, but do not overmix. - Shape meatballs and arrange on a baking sheet. Each meatball should be about the size of a golf ball. - Bake until golden brown and fully cooked. This usually takes 15-20 minutes. Use a meat thermometer to check for doneness. They should reach 165°F (74°C). - Whisk together mayonnaise, sriracha, and lime juice. Mix until smooth. Taste it and add more sriracha if you want more heat. - Drizzle spicy mayo over meatballs and garnish. You can add sesame seeds and sliced green onions for color. Enjoy your tasty treat! For the full recipe, check out the details provided above. To make great meatballs, avoid overmixing the meat mixture. When you mix too much, the meatballs can turn tough. Use your hands or a fork to blend the ingredients just until combined. This keeps them soft and tender. Also, use a meat thermometer for doneness. Meatballs should reach 165°F (74°C) inside. This ensures they are safe to eat and perfectly cooked. Adjust spice levels to suit your taste. If you like it hot, add more red pepper flakes or sriracha. For a milder flavor, cut back on these spices. Fresh ingredients make a big difference too. Use fresh ginger and garlic instead of powdered versions. Fresh green onions will also add a pop of flavor. They help make your meatballs taste vibrant and full of life. Creative plating can elevate your dish. Arrange the meatballs on a decorative platter. Drizzle the spicy mayo over the top for a nice touch. You can also serve them with toothpicks for easy eating. If you want a fresh twist, add a lime wedge on the side. This gives a zesty kick and brightens up the look. These small details make your dish more fun for gatherings. {{image_4}} You can switch up the meat in your Korean BBQ meatballs. Try using ground turkey or pork instead of beef or chicken. Each protein brings a unique taste. Turkey is leaner, while pork adds richness. Both options pair well with the bold flavors of Korean BBQ. Adjust cook times as needed; turkey may cook faster than beef. If you need a gluten-free version, substitute regular breadcrumbs. Use gluten-free breadcrumbs made from rice or corn. You can also try crushed gluten-free crackers as an alternative. For binding the meatballs, consider using ground oats or almond flour. Both will help hold the mixture together without gluten. Don’t hesitate to play with flavors! Different sauces can change the whole dish. Try adding teriyaki or hoisin sauce for a sweet twist. You can even mix in some gochujang for extra heat. Adding chopped vegetables like bell peppers or carrots can also boost nutrition and flavor. Just make sure to chop them small to blend well with the meat. For the full recipe, you can refer to the main section. To keep Korean BBQ meatballs fresh, let them cool first. Place them in an airtight container. Store them in the fridge for up to three days. Make sure the lid seals well to prevent air from getting in. If you want extra flavor, you can drizzle some spicy mayo on top before sealing. This adds a nice kick when you eat them later. If you want to save some meatballs for later, freezing is a great option. First, let them cool completely. Then, arrange them on a baking sheet in a single layer. Freeze them for about an hour, or until they are firm. After that, transfer them to a freezer-safe bag or container. Label it with the date. You can freeze them for up to three months. When you're ready to eat, thaw them in the fridge overnight before reheating. To reheat your meatballs, there are a few methods you can use. The oven is great for keeping the meatballs crispy. Preheat your oven to 350°F (175°C) and bake for about 10-15 minutes. You can also reheat them in the microwave. Just place them on a plate and cover with a damp paper towel. Heat in short bursts of about 30 seconds until warm. If you choose the stovetop, warm them in a skillet over low heat. Add a splash of water to keep them moist. Enjoy them with the spicy mayo for the best flavor! Yes, you can make meatballs in advance. Here are some tips: - Mix the meatball ingredients: Combine everything but don’t bake them yet. - Shape the meatballs: Roll them into balls and place them on a baking sheet. - Cover and chill: Wrap the baking sheet in plastic wrap and store in the fridge for up to 24 hours. - Freeze for longer storage: If you want to store for longer, freeze the shaped meatballs. Once frozen, transfer them to a freezer bag. - Thaw before cooking: When ready to cook, thaw in the fridge overnight. Korean BBQ meatballs pair well with many sides. Here are some ideas: - Steamed rice: A simple side that soaks up sauce well. - Kimchi: Adds a spicy and tangy flavor contrast. - Vegetable stir-fry: Bright veggies add color and crunch. - Asian slaw: A fresh salad with a tangy dressing. - Noodles: Serve with sesame noodles for a filling meal. To spice up your meatballs, try these methods: - Increase red pepper flakes: Add more to the meat mixture. - Use spicy sauce: Swap sriracha for a hotter sauce. - Add fresh chili: Mix in finely chopped fresh chili peppers. - Spice up the mayo: Blend in more sriracha or a dash of hot sauce. - Experiment with spices: Try cayenne or chili powder for extra heat. To keep your meatballs juicy, follow these tips: - Don’t overmix: Mix until just combined to keep them tender. - Use breadcrumbs: They help absorb moisture and add texture. - Add wet ingredients: Things like soy sauce and sesame oil keep them moist. - Check doneness: Use a meat thermometer; aim for 165°F (74°C). - Let them rest: After baking, let them sit for a few minutes to keep juices in. You now have a tasty guide to make Korean BBQ meatballs. Start with simple ingredients like ground beef and fresh spices. Follow clear steps to mix, roll, and bake your meatballs perfectly. Use tips to adjust flavors and enhance texture. Don’t forget about storage tips for leftovers and reheating. With these instructions, you can impress your guests or enjoy a great meal at home. Get creative with variations and enjoy every bite!

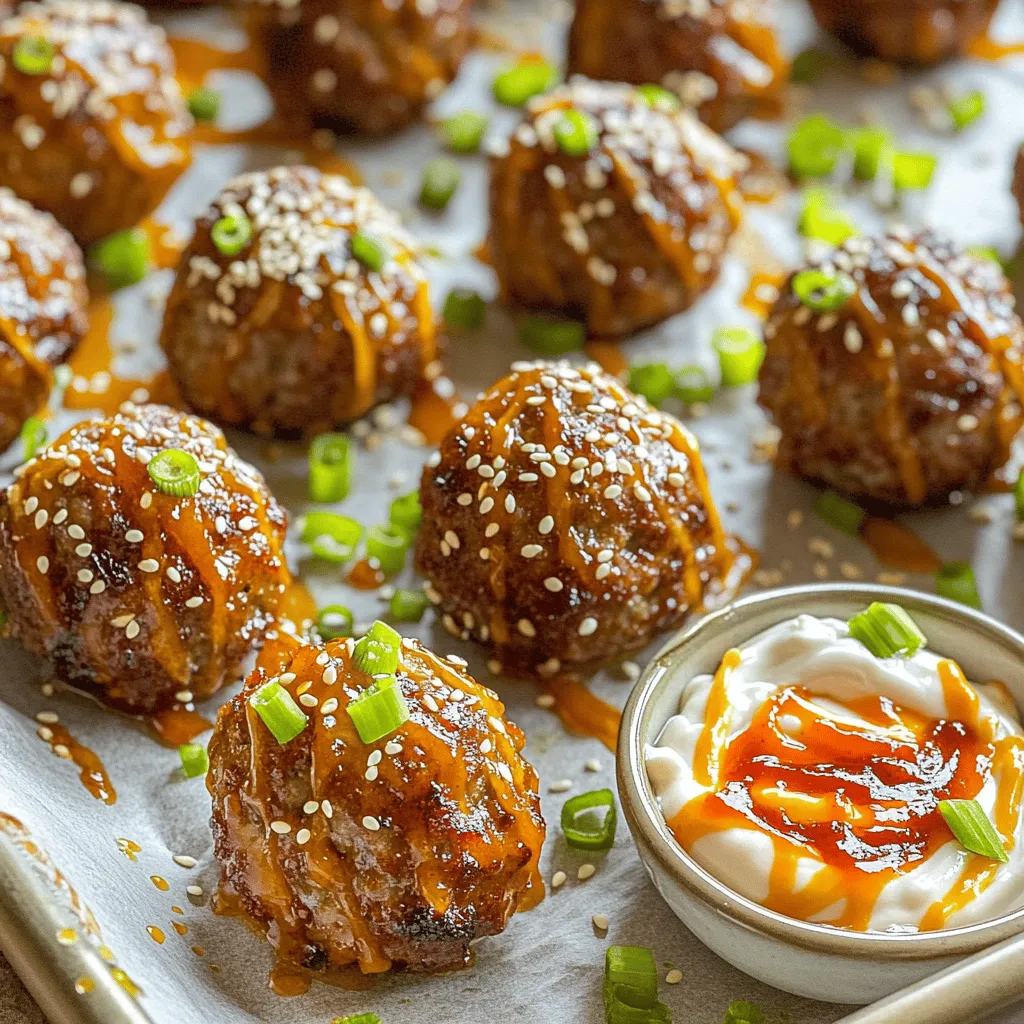
Get ready to spice up your dinner with my easy recipe for Korean BBQ meatballs with spicy mayo! These juicy meatballs are packed with flavor from fresh ginger and black …

Read more

Categories Appetizers

Hawaiian Chicken Sheet Pan Delightful Easy Recipe

May 22, 2025 by Chef Remy
Cooking our Hawaiian Chicken Sheet Pan is easy with the right ingredients. Here’s what you need: - 4 boneless, skinless chicken thighs - 1 cup fresh pineapple, diced - 1 red bell pepper, sliced into strips - 1 yellow bell pepper, sliced into strips - 1 red onion, cut into wedges - 3 cloves garlic, minced - 3 tablespoons soy sauce (or tamari for a gluten-free option) - 2 tablespoons honey - 1 tablespoon fresh ginger, grated - 1 tablespoon sesame oil - Salt and freshly ground black pepper, to taste - Fresh cilantro, chopped, for garnish Each ingredient plays a big role in creating flavor. Chicken thighs give a juicy and tender bite. The fresh pineapple adds sweetness and tang. The bell peppers and onion bring color and crunch. The marinade blends soy sauce, honey, ginger, and garlic for a bright taste. Use fresh ingredients for the best results. This is key to making your dish shine. For the full recipe, check the details above. Enjoy the cooking process! Marinating the chicken Start by preheating your oven to 400°F (200°C). Grab a large mixing bowl. In it, whisk together soy sauce, honey, minced garlic, grated ginger, and sesame oil. Add a pinch of salt and black pepper to taste. Place the chicken thighs into the bowl and coat them well. Let the chicken marinate for about 15 minutes. This step boosts the flavor and makes the chicken juicy. Preparing the vegetables While the chicken marinates, wash and chop your vegetables. In another bowl, mix diced pineapple, red and yellow bell peppers, and red onion. Drizzle a bit of olive oil over the veggies. Season with salt and pepper, then toss until they are all coated. This will add a nice sweetness and crunch to your dish. Baking the dish Line a large sheet pan with parchment paper for easy cleanup. Arrange the marinated chicken thighs on one side of the pan. On the other side, spread the vegetable and pineapple mix evenly. Place the sheet pan in your preheated oven. Bake for 25 to 30 minutes. You want the chicken to reach an internal temperature of 165°F (75°C) and the veggies to be tender. After baking, let the pan rest for a few minutes. This allows the juices to soak back into the chicken. For a fresh touch, garnish with chopped cilantro before serving. Enjoy this tropical delight! You can find the Full Recipe for more details. For great flavor, marinate your chicken thighs. Use a bowl to mix soy sauce, honey, garlic, ginger, and sesame oil. This blend creates a tasty marinade. - Let the chicken soak for at least 15 minutes. For more flavor, try marinating longer, up to 2 hours if you can. - Always keep the chicken covered in the fridge while marinating. This helps keep it safe and fresh. If you want to add more flavor, try these ideas: - Citrus Twist: Add the juice of a lime or orange to the marinade. This adds a zesty flavor. - Heat It Up: Add a pinch of red pepper flakes for a spicy kick. Getting the chicken cooked right is key. Use a meat thermometer to check the chicken's temperature. It should reach 165°F (75°C) for safety. - Place the chicken on one side of the sheet pan. Give it space so it cooks evenly. - Bake for 25-30 minutes. Check the chicken after 20 minutes to ensure it isn’t overcooking. To caramelize your vegetables: - Cut them into equal sizes for even cooking. - Drizzle with olive oil and sprinkle with salt and pepper before baking. This helps them brown nicely. - Keep an eye on them during the last few minutes. They should be tender and lightly browned. Using these tips will help you create a delicious Hawaiian Chicken Sheet Pan that shines with flavor. Enjoy your cooking! For the full recipe, check out [Full Recipe]. {{image_4}} You can change the protein in this dish. Try tofu or shrimp for a fun twist. Both options soak up the marinade well. They add a unique taste and texture. For vegetables, feel free to mix and match. Use zucchini, broccoli, or snap peas instead. These options add color and crunch. You can even add carrots or mushrooms for more flavor. Each choice brings its own taste to the meal. Be creative! Adjusting the marinade opens new flavor doors. If you want a spicy kick, add red pepper flakes or chili sauce. This gives the dish a nice heat. For a sweeter touch, try brown sugar instead of honey. You can also mix in fresh herbs. Basil or mint can brighten the dish. Toss in some lime zest for a citrus boost. Each change can make a big difference. Enjoy experimenting with your flavors! To keep your Hawaiian chicken fresh, store leftovers in the fridge. Use an airtight container. This helps seal in moisture and flavor. You can keep the chicken for up to three days. For longer storage, consider freezing. Just let the dish cool before packing it away. Use freezer-safe bags or containers. Label them with the date. You can freeze it for up to three months. You can easily reheat your Hawaiian chicken in the oven or microwave. To reheat in the oven, set it to 350°F (175°C). Place the chicken in a baking dish, cover it with foil, and heat for about 15-20 minutes. This helps keep the chicken moist. If using a microwave, place the chicken on a microwave-safe plate. Cover it loosely and heat in short bursts. Check every 30 seconds until warm. For best results, try to maintain the texture and flavor. Avoid overheating, as this can dry it out. A splash of water or broth can help keep it juicy. Enjoy your meal just like the first time! Yes, you can use chicken breasts instead of thighs. Chicken breasts are leaner and may cook faster. Adjust your cooking time to ensure they reach 165°F. Check them a bit earlier than thighs to avoid dryness. You can serve Hawaiian chicken with rice or quinoa. These grains soak up the tasty sauce. You might also enjoy it with a fresh green salad or coleslaw for crunch. Grilled veggies make a great side, too. You can marinate the chicken for 15 to 30 minutes. This time gives the chicken great flavor. If you want even more depth, you can marinate it up to 2 hours in the fridge. Avoid marinating too long to keep the chicken tender. For the full recipe, check out the Tropical Hawaiian Chicken Sheet Pan. In this article, you learned how to prepare a delicious dish with chicken thighs and vegetables. We covered the marinating process, cooking tips, and storage ideas. You can also explore ingredient swaps and flavor variations to keep meals exciting. Remember, cooking is about experimenting and having fun. Use these tips to create your version of this dish. Enjoy every bite, and don’t hesitate to make it your own!

Looking for a quick and tasty meal? My Hawaiian Chicken Sheet Pan recipe is here to save your dinner time! You’ll love how easy it is to make juicy chicken …

Read more

Categories Dinner

Garlic Butter Chicken Bites with Pasta Delight

May 22, 2025 by Chef Remy
- 1 lb boneless, skinless chicken breasts, cut into bite-sized pieces - 3 tablespoons unsalted butter, divided - 4 cloves garlic, minced - 1 teaspoon smoked paprika - 1 teaspoon Italian seasoning - Salt and pepper to taste - 8 oz pasta (preferably fettuccine or linguine) - 1 cup cherry tomatoes, halved - 1/2 cup grated Parmesan cheese - Fresh parsley, chopped, for garnish - Zest of 1 lemon I love picking fresh ingredients for this dish. The chicken breasts are the star here. They get tender and juicy when cooked right. Unsalted butter adds richness, while garlic gives a bold flavor. For seasonings, smoked paprika and Italian herbs make the chicken pop. Don't forget salt and pepper; they elevate all the flavors. When it comes to pasta, I prefer fettuccine or linguine. They hold the sauce well. Cherry tomatoes add a sweet burst, and Parmesan cheese brings a savory touch. Fresh parsley adds color and freshness. The lemon zest ties it all together with brightness. For the full recipe, check the details above. Enjoy cooking! Start by filling a large pot with water. Add a good pinch of salt to it. Turn on the heat and bring the water to a rolling boil. Once it boils, add the pasta. Cook it according to the package directions until it is al dente. This usually takes about 8-10 minutes. After cooking, drain the pasta but save 1/2 cup of the pasta water for later. In a large skillet, set the heat to medium. Add 1 tablespoon of unsalted butter and let it melt. Once melted, add bite-sized chicken pieces. Season the chicken with smoked paprika, Italian seasoning, salt, and pepper. Cook the chicken for about 5-7 minutes. Stir it occasionally until it turns golden brown and is fully cooked. When done, transfer the chicken to a plate and set it aside. Now, use the same skillet. Lower the heat to low and add the remaining 2 tablespoons of butter. As the butter melts, add minced garlic. Sauté the garlic for about 1-2 minutes. Make sure to stir it often. You want the garlic to be fragrant, not brown. Burning the garlic will give it a bitter taste. Return the cooked chicken to the skillet. Add the halved cherry tomatoes too. Gently toss the chicken and tomatoes in the garlic butter. Heat everything together for about 2 minutes. This helps to mix the flavors nicely. Add the drained pasta to the skillet. Toss it well with the chicken and tomato mix. If it looks dry, add a splash of the reserved pasta water. Stir until you reach your desired sauce consistency. This step makes the dish creamy and flavorful. Once everything is mixed, remove the skillet from the heat. Stir in the grated Parmesan cheese and lemon zest. Taste and adjust the flavors with more salt and pepper if needed. This final touch will elevate the dish. - To keep chicken tender, don’t overcook it. Cook until golden brown. - Use a meat thermometer. Aim for 165°F (75°C) for safe chicken. - Let the chicken rest for a few minutes before cutting. This helps keep juices in. - To boost garlic flavor, add more cloves than the recipe suggests. - Sauté garlic on low heat. This makes it fragrant without bitterness. - For a stronger taste, consider using roasted garlic. It adds a sweet depth. - Pair your dish with a fresh garden salad. It balances the richness of the pasta. - Serve with crusty bread to soak up the garlic butter sauce. A great addition! - For a drink, try a crisp white wine like Sauvignon Blanc. It complements the flavors well. - If you prefer non-alcoholic, serve with sparkling water and lemon. It’s refreshing! - For a creative plate, stack the pasta in the center. This gives a nice height. - Use a fork to twirl pasta. Place it neatly on the plate for a fancy look. - Add a sprinkle of grated cheese on top. It adds flavor and a nice touch. - Don’t forget fresh parsley! It adds color and freshness to your dish. {{image_4}} You can switch chicken for shrimp or tofu. Shrimp cooks fast, so check it closely. Sauté shrimp for about 3-4 minutes until it's pink. Tofu is a great option too. If you choose tofu, use firm tofu and press it first. Cut it into cubes and sauté for about 5-7 minutes until golden. Try whole wheat or gluten-free pasta to suit your needs. Whole wheat adds a nutty flavor and more fiber. Gluten-free pasta is great for those with allergies. You can also use different shapes, like penne or farfalle. Each shape holds sauce differently, which can change your dish's feel. Want to spice things up? Add red pepper flakes for heat or fresh basil for a sweet touch. Both can brighten the dish. For a creamier sauce, mix in some heavy cream. This gives a rich texture that pairs well with the garlic butter. Each variation brings new life to your garlic butter chicken bites with pasta. Explore what you love! Check the Full Recipe for more ideas. After enjoying your garlic butter chicken bites with pasta, it's key to store any leftovers properly. First, let the dish cool down to room temperature. This step is important as it helps prevent bacteria growth. Once cooled, transfer the leftovers into airtight containers. I recommend using glass or plastic containers with tight-fitting lids. You can store the dish in the fridge for about 3 to 4 days. If you want to keep it for a longer time, consider freezing it. In that case, use freezer-safe containers. Properly stored, this dish can last up to 2 months in the freezer. Just remember to label your containers with the date! Reheating your pasta dish can be simple and effective. The best method is to use the stovetop. Start by adding a little water or broth to a skillet. Heat it on low to medium heat. Once warm, add your pasta and chicken mixture. Stir gently to avoid sticking. Alternatively, you can use the microwave. Place your leftovers in a microwave-safe bowl. Add a splash of water to keep it moist. Cover the bowl with a lid or microwave-safe wrap. Heat in 30-second intervals, stirring in between, until it’s warmed through. To ensure even heating and avoid drying out, check the dish often. Enjoy your meal just as delicious as when you first made it! Making Garlic Butter Chicken Bites with Pasta takes about 30 minutes. You spend 10 minutes prepping the ingredients. The cooking time lasts around 20 minutes. This quick process makes it perfect for busy nights. Yes, you can make this dish ahead of time. Cook the chicken and pasta, then store them separately in the fridge. When ready to eat, just reheat and combine. This method keeps the flavors fresh and tasty. If you're allergic to garlic, try using shallots or chives. Both options offer a mild flavor. You could also use garlic-infused oil for a hint of garlic taste without the actual garlic. To keep your chicken juicy, don’t overcook it. Use a meat thermometer to check for 165°F (75°C) inside. Let the chicken rest for a few minutes before cutting. This helps the juices stay locked in. Fettuccine and linguine are great choices for this dish. They hold the garlic butter sauce well. You can also try penne or rotini, which add a fun twist to the meal. Yes, adding vegetables is a great idea! Try spinach, bell peppers, or zucchini. Just sauté them with the chicken. This adds nutrition and color to your dish. This blog post covered everything you need to make delicious Garlic Butter Chicken Bites with pasta. We explored main ingredients, seasonings, and tasty garnishes. We detailed step-by-step instructions to ensure perfect results. Also, helpful tips, variations, and storage info make this dish flexible and easy to enjoy later. With the right ingredients and methods, you can impress anyone at your table. Now, it’s time to gather your ingredients and create a meal that brings joy. Happy cooking!

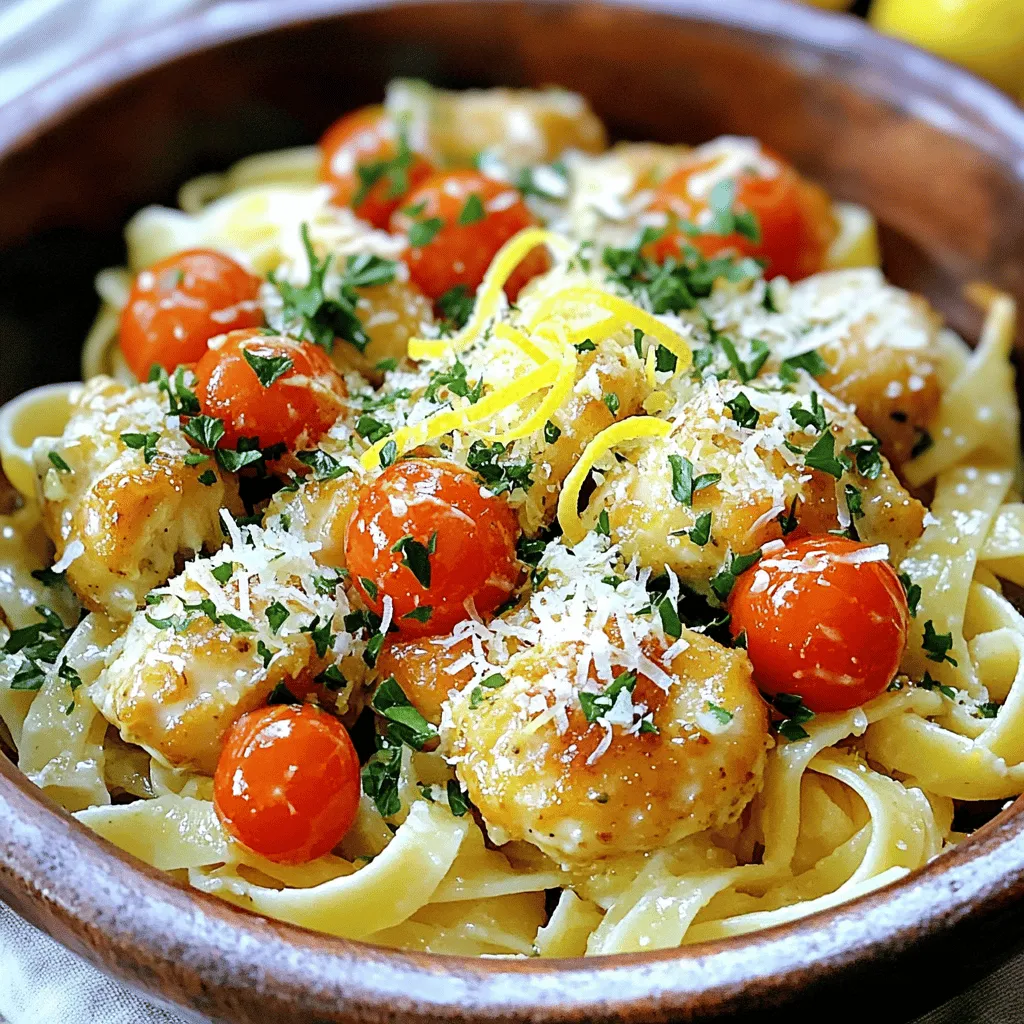
Are you ready for a dish that brings comfort and flavor together? Garlic Butter Chicken Bites with Pasta Delight is the perfect choice! With juicy chicken, rich garlic butter, and …

Read more

Categories Dinner

Grilled Shrimp Bowl with Avocado Fresh and Tasty Dish

May 22, 2025 by Chef Remy
- 1 pound large shrimp, peeled and deveined - 2 ripe avocados, diced - 1 cup cooked quinoa - 1 cup cherry tomatoes, halved - 1/2 red onion, finely chopped - 1 cup baby spinach - 2 tablespoons olive oil - 1 tablespoon fresh lime juice - 1 teaspoon smoked paprika - 1 teaspoon garlic powder - Salt and pepper to taste - Fresh cilantro, chopped, for garnish The main ingredients for the grilled shrimp bowl are simple yet flavorful. The large shrimp provide a nice protein base. You want to choose shrimp that is fresh, firm, and pink. The ripe avocados add a creamy texture. They should be soft but not mushy. The cooked quinoa serves as a great base. It fills you up and adds a nutty flavor. The additional ingredients bring color and freshness to the dish. Halved cherry tomatoes add sweetness. The finely chopped red onion gives a nice bite. Baby spinach adds a nutrient boost and a touch of green. For the marinade, I use a mix of olive oil, lime juice, smoked paprika, and garlic powder. This blend adds depth to the shrimp. Salt and pepper are key for seasoning. Fresh cilantro makes a lovely garnish. It adds a pop of color and a fresh taste. Remember to check out the Full Recipe for detailed steps! This dish is not just about taste; it’s about how fresh ingredients come together. Enjoying this meal is easy when you have all the right parts ready. To start, grab a medium bowl. In this bowl, mix the shrimp with the marinade ingredients. This includes olive oil, fresh lime juice, smoked paprika, garlic powder, salt, and pepper. Make sure to toss the shrimp well. You want each piece to get coated evenly with the marinade. Once mixed, set the bowl aside. Let the shrimp marinate for 10 to 15 minutes. This step enhances the flavor and makes the shrimp juicy. Next, preheat your grill or grill pan to medium-high heat. You want it hot enough to sizzle when the shrimp touch the surface. Carefully lay the marinated shrimp on the grill. Cook them for about 2 to 3 minutes on each side. You'll know they are done when they turn pink and opaque. Once cooked, remove the shrimp and set them aside. Now it’s time to build your bowl. Start by layering cooked quinoa as the base. Spread it evenly across the bottom of a large serving bowl. Next, add a layer of fresh baby spinach. Then, place the grilled shrimp on top of the spinach. Arrange them neatly for a nice look. After that, sprinkle diced avocados, halved cherry tomatoes, and finely chopped red onion over everything. For added flavor, drizzle a little more lime juice on top. Season lightly with extra salt and pepper. Gently toss all the ingredients together. Be careful not to mash the avocados. This keeps the texture nice and fresh. Finally, finish by garnishing with chopped cilantro. This adds a pop of color and taste before serving. For the full recipe, check out the Grilled Shrimp Bowl with Avocado. To know if your shrimp are perfectly cooked, look for vibrant pink color. They should also be opaque and firm. If they feel tough or chewy, they are overcooked. To avoid rubbery shrimp, keep the cooking time short. Grill shrimp for 2-3 minutes on each side. Remove them as soon as they turn pink. To prevent browning, use lime juice on your avocado. The acid slows down the browning process. Choose ripe avocados for the best flavor. A ripe avocado yields slightly when you press it. If it feels hard, leave it out to ripen for a few days. Serve your grilled shrimp bowl in individual bowls for a fun touch. This makes it easy for everyone to enjoy. Adding lime wedges on the side lets guests add extra zing to their bowls. The fresh taste of lime pairs perfectly with shrimp and avocado. {{image_4}} You can switch shrimp with other proteins. Chicken breast works well. Cut it into bite-sized pieces and grill it like shrimp. Tofu is a great vegetarian option. Use firm tofu and press it to remove extra moisture. Then, marinate and grill it just like you would with shrimp. If you want to change the quinoa, try using brown rice or farro. Both give a nice texture. For seasonal vegetables, consider adding bell peppers, zucchini, or corn. These add color and crunch to your bowl. You can play with spices in this dish. Try adding cumin or chili powder for some heat. Marinades can also change the flavor. A honey-soy mix gives a sweet touch. You can add sauces like sriracha or a yogurt dressing for extra zing. For the full recipe, check the Grilled Shrimp Bowl with Avocado section. Store leftover grilled shrimp in an airtight container. Keep it in the fridge. It stays fresh for about two days. The key is to cool the shrimp first before sealing it. For best taste, eat shrimp cold or at room temperature. When reheating, do not microwave shrimp. Instead, warm it gently in a pan. This helps avoid rubbery texture. You can add a splash of water or broth to keep it moist. Make meal prep easy with this dish. You can prepare many parts ahead of time. Cook the quinoa and let it cool. Store it in the fridge for up to five days. Chop the veggies and store them in separate containers. You can also marinate the shrimp a day before. Keep it sealed in the fridge until you are ready to grill. Assemble the bowls quickly on busy days. Just layer your ingredients for a fresh meal. You can freeze grilled shrimp. Place it in a freezer bag. Squeeze out the air and seal it tight. It lasts for up to three months. When ready to eat, thaw it in the fridge overnight. For quinoa and veggies, store them in separate bags. They also freeze well. Just make sure to label them with dates. This way, you can enjoy this tasty dish later. For the full recipe, check out the details above! Cook shrimp for about 2-3 minutes on each side. You want them to turn pink and opaque. If they curl tightly, they are likely overcooked. Use a timer to avoid guesswork. This way, you'll get perfectly grilled shrimp every time. Yes, you can use frozen shrimp. Just make sure to thaw them properly. Place the shrimp in cold water for about 20 minutes. You can also leave them in the fridge overnight. This ensures they cook evenly on the grill. If you don't have quinoa, try brown rice or farro. These grains provide a nice texture and flavor. For a gluten-free option, use rice or even cauliflower rice. Each choice will add a unique taste to your bowl. To spice up your dish, add cayenne pepper or chili flakes. You can also mix in some diced jalapeños. For a tasty twist, try a spicy marinade. Just remember to balance the heat with lime juice to keep it fresh. This blog post introduced a fresh shrimp and quinoa bowl. We covered key ingredients, grilling tips, and tasty variations. Remember the importance of perfectly cooked shrimp and ripe avocados. This dish is not only healthy but also easy to prepare. Feel free to mix and match ingredients based on your taste. Enjoy this meal as a quick lunch or a light dinner. It’s simple, delicious, and can be prepped in minutes. Take your time and make it your own!

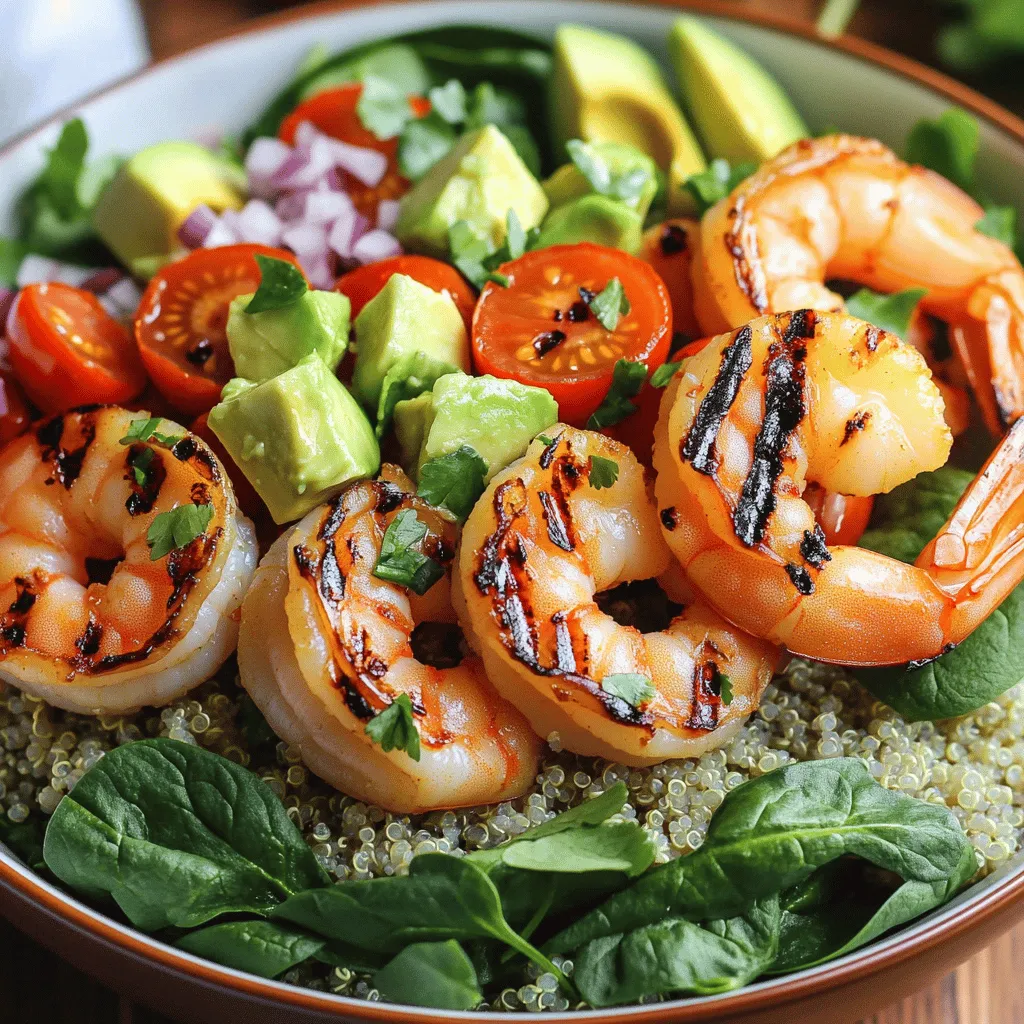
If you’re looking for a fresh and tasty dish, let me introduce you to my Grilled Shrimp Bowl with Avocado. This vibrant meal is packed with flavor, healthy fats, and …

Read more

Categories Dinner
Older posts
Newer posts
← Previous Page1 … Page115 Page116 Page117 … Page130 Next →

ROASTED RECIPES

Where bold flavors meet everyday meals. Warm, vibrant, and made to share. 🔥🥗🍴

PAGES

Home About Contact Privacy Policy Terms & Conditions Cookie Policy GDPR Policy Copyright Policy Disclaimer

CATEGORIES

Appetizers Desserts Salads Breakfast Dinner

Contact

  • Pinterest
  • Mail
Copyright © 2025 Roasted Flavors. All rights reserved.