Skip to content
Roasted Flavors
  • Home
  • Appetizers
  • Desserts
  • Salads
  • Breakfast
  • Dinner
  • Privacy Policy
  • Contact
  • About

Chef Remy

Best Birria Tacos Flavorful and Easy to Enjoy

May 22, 2025 by Chef Remy
If you want the best birria tacos, start with top-rated restaurants. These places pride themselves on quality. They use fresh ingredients and time-tested recipes. Some popular spots serve birria in a cozy atmosphere. You can enjoy a warm meal with friends. Look for places with high ratings and lots of happy reviews. A few famous eateries even have long lines, showing their popularity. Food trucks can be treasure troves for birria tacos. They often serve unique flavors that stand out. Many trucks focus on traditional recipes with a twist. You might find specials that change often. These trucks offer tasty options at great prices. Plus, you can enjoy your tacos outdoors. Check local food truck events or markets to discover new favorites. Hidden gems often serve the best birria tacos. These are small, local spots that many people overlook. They may not have fancy signs, but their flavors shine. Talk to locals to find these secret spots. Many times, you can find family-owned restaurants with recipes passed down for generations. These gems offer a true taste of culture and tradition. If you're adventurous, exploring these places can lead to unforgettable meals. For a delicious birria taco experience, try the Full Recipe. It captures the essence of this flavorful dish. People love birria tacos! Many diners rave about their rich flavor and tender meat. The combination of spices creates a dish that warms the soul. Customers often comment on how the tacos are both hearty and satisfying. They enjoy the crispy tortillas, which add a nice crunch. Overall, ratings are high, showing that birria tacos please many palates. If you visit a restaurant, look for their birria tacos. These tacos are often served with a side of broth, perfect for dipping. You might also find variations with different meats, like goat or lamb. Some places offer birria quesadillas, which are also tasty. You can’t go wrong with these flavorful dishes. They highlight the best of Mexican cuisine. The vibe at birria taco spots is often lively. Many places have bright colors and festive decorations. You might hear lively music playing in the background. The friendly staff often makes you feel welcome. Sharing a meal of birria tacos with friends or family adds to the fun. Overall, the experience is warm and inviting, making it a great place to enjoy good food. The best birria tacos start with tender meat and a rich sauce. For this recipe, you can use beef chuck roast or goat meat. This choice impacts flavor, so pick what you like best. The spices are key. Dried guajillo and ancho chiles bring warmth and depth. Fresh onion and garlic add a nice kick. Here’s what you need for the full recipe: - 2 lbs beef chuck roast or goat meat, cut into 1-inch chunks - 4 dried guajillo chiles, stems and seeds removed - 2 dried ancho chiles, stems and seeds removed - 1 medium onion, finely chopped - 4 cloves garlic, minced - 1 teaspoon ground cumin - 1 teaspoon freshly ground black pepper - 1 tablespoon dried oregano - 2 cups beef broth, divided - 1 tablespoon apple cider vinegar - Salt, to taste - Corn tortillas - Fresh cilantro, chopped (for garnish) - Diced white onions (for garnish) - Lime wedges (for serving) To make birria tacos, you need a few tools. Start with a good blender. This will help mix the sauce smoothly. A large pot or Dutch oven is also essential for cooking the meat. You can use a skillet for frying the tacos. A sharp knife and cutting board will make chopping easy. Having a fine sieve is handy for straining the broth. 1. Toast the Chiles: Heat a dry skillet over medium heat. Add guajillo and ancho chiles. Toast for about 2 minutes until fragrant. Don’t let them burn. Then, place them in a blender. 2. Prepare the Sauce: In the blender, add chopped onion, minced garlic, cumin, black pepper, oregano, vinegar, and 1 cup of beef broth. Blend until smooth, using more broth as needed. 3. Combine Ingredients: In a large pot, add beef chunks. Pour the blended mixture over the meat. Add the remaining beef broth and salt. Mix well to coat the meat. 4. Cooking: Cover the pot. Let it simmer on low heat for 3-4 hours until the meat is tender. You can also use a slow cooker for 6-8 hours. 5. Shred the Meat: Once cooked, remove the beef and shred it with two forks. Discard large fat pieces. Strain the broth to reserve it for later. 6. Prepare the Tacos: Heat a skillet over medium-high heat. Dip a corn tortilla in the reserved broth. Place shredded meat on one half. Fold the tortilla and cook for 2 minutes per side until crispy. 7. Repeat: Keep making tacos until you use all tortillas and meat. 8. Serve: Serve hot tacos with cilantro, diced onions, and lime wedges on the side. Enjoy the burst of fresh flavors! {{image_4}} For birria tacos, beef chuck roast or goat meat are the best choices. Both meats turn tender and juicy when cooked slowly. Beef chuck has a rich flavor that fits perfectly with the spices. Goat meat offers a unique taste for those who want to try something different. Always cut the meat into 1-inch chunks to ensure even cooking. Corn tortillas are traditional and work best for birria tacos. They soak up the rich broth without falling apart. Look for fresh, soft tortillas for the best taste. You can also lightly toast them for added texture. For a fun twist, try using flour tortillas if you prefer a softer taco. Garnishes bring your tacos to life. Fresh cilantro adds a bright flavor. Diced white onions give a nice crunch and bite. Squeeze some lime juice for a zesty kick that balances the richness of the meat. You can also serve your tacos with a side of the reserved broth for dipping. This adds another layer of flavor and keeps each bite exciting. For the full recipe, check out the complete guide to making these delicious tacos! You can enjoy birria tacos even if you don't eat meat. For a vegetarian option, use mushrooms. They have a great texture and soak up flavors well. Cook the mushrooms with spices just like you would with meat. For a vegan twist, try using jackfruit. It shreds easily and takes on the rich flavors of the sauce. Use the same spices and broth from the full recipe to create a tasty sauce. While beef and goat are traditional, other meats work too. Chicken is a great choice if you want something lighter. It cooks faster and absorbs flavor well. Pork also makes a delicious birria taco. Use pork shoulder for a juicy, tender bite. Each meat brings its own unique taste, so feel free to experiment! The spice level can change the whole taco experience. If you love heat, add more chiles to the sauce. Guajillo and ancho chiles can be mild, but adding arbol chiles gives a nice kick. If you prefer mild tacos, stick to just the guajillo and ancho chiles. You can always serve hot sauce on the side for those who want extra spice. Birria tacos are a tasty Mexican dish. They consist of soft corn tortillas filled with rich, slow-cooked meat. The meat is usually beef or goat, cooked in a mix of spices and chiles. This dish comes from the Jalisco region of Mexico. The final touch? Dipping the tacos in the delicious broth, called "consomé." This adds extra flavor and makes each bite more enjoyable. You can find birria tacos served with garnishes like onions, cilantro, and lime. They are perfect for any meal, but especially great for gatherings! To reheat leftover birria tacos, I recommend using a skillet. Heat it over medium heat. Place the tacos in the skillet for about 2-3 minutes on each side. This keeps the tortillas crispy and warms the meat nicely. You can also add a splash of broth to the skillet to keep the tacos moist. If you prefer, you can use an oven. Wrap the tacos in foil and heat them at 350°F for about 10-15 minutes. Enjoy them warm, just like when they were fresh! Yes, you can make birria in advance! It actually tastes even better the next day. Prepare the meat and sauce, then let it cool. Store it in an airtight container in the fridge for up to three days. When you’re ready to serve, simply reheat it on the stove or in the oven. You can also freeze the birria for up to three months. Just thaw it in the fridge overnight before reheating. This makes meal prep easy and delicious! For the full recipe, check out my guide to savory birria tacos. In this article, we explored the best places for birria tacos, from top-rated restaurants to hidden gems. We discussed reviews, signature dishes, and the dining experience. I shared a homemade recipe and essential cooking tools to make your own. Tips on choosing meat, tortillas, and garnishes helped refine your skills. Finally, we covered variations, including vegetarian options. Whether dining out or cooking at home, birria tacos offer a tasty adventure. Enjoy these delicious tacos and let your taste buds celebrate!

Looking to dive into the world of birria tacos? You’re in for a treat! In this guide, I’ll share the best places to enjoy these flavorful delights, including top-rated restaurants, …

Read more

Categories Dinner

Yum Yum Sushi Bowl Flavorful and Fresh Recipe Guide

May 22, 2025 by Chef Remy
- 2 cups sushi rice - 2 ½ cups water - 1 ripe avocado, sliced - 1 cucumber, julienned - 1 medium carrot, grated - 4 oz cooked shrimp, crab, or diced tofu Sushi rice is the star here. It is sticky and perfect for holding everything together. You can choose fresh vegetables like avocado, cucumber, and carrots. These add crunch and nutrients. For protein, you can use shrimp, crab, or tofu. Tofu is great for a vegetarian option and absorbs flavors well. - 1 tablespoon rice vinegar - 1 tablespoon granulated sugar - 1 teaspoon fine sea salt - 2 tablespoons soy sauce - 2 tablespoons mayonnaise (preferably Japanese Kewpie mayo) - 1 teaspoon sriracha The right seasoning makes the dish pop. Mix rice vinegar, sugar, and salt to flavor the rice. This blend adds a sweet and tangy touch. For the sauce, whisk mayonnaise and sriracha together. Adjust the sriracha to your heat liking. This yum yum sauce brings everything together with a creamy texture. - Sesame seeds - Nori strips Garnishes add flair. Sesame seeds provide a nutty crunch. Nori strips give an extra layer of flavor and texture. They make the bowl look more appealing too. These small touches can elevate your yum yum sushi bowl from simple to stunning. Don’t skip them! For the full details on making this dish, check the Full Recipe. - Rinsing the rice Rinse 2 cups of sushi rice under cold water. Keep rinsing until the water runs clear. This step helps wash away excess starch. Drain the rice well. - Cooking process In a medium saucepan, mix the rinsed rice with 2 ½ cups of water. Bring it to a boil over medium heat. Once it boils, lower the heat and cover the pot. Let it simmer for about 18 minutes. All the water should absorb. - Seasoning the rice After cooking, take the pot off the heat but keep it covered. Let it sit for 10 minutes. Mix 1 tablespoon of rice vinegar, 1 tablespoon of sugar, and 1 teaspoon of salt in a bowl. Stir until dissolved. Gently fold this mix into the warm rice using a spatula. - Slicing avocado Take 1 ripe avocado and slice it into thin wedges. Make sure the slices are even for a nice look. - Julienne cucumber Grab 1 cucumber and slice it into thin matchstick pieces. This adds a fresh crunch to your bowl. - Grating carrot Use 1 medium carrot. Grate it into fine shreds. This will add color and sweetness to your dish. - Layering the ingredients Spoon the seasoned sushi rice into serving bowls. Neatly arrange the avocado, cucumber, and grated carrot on top. - Adding yum yum sauce Whisk together 2 tablespoons of mayonnaise and 1 teaspoon of sriracha in a small bowl. Drizzle this yum yum sauce generously over the ingredients. - Finishing touches Sprinkle sesame seeds on top for garnish. If you like, add nori strips for extra crunch. Enjoy your colorful and tasty Yum Yum Sushi Bowl! For the complete recipe, check out the Full Recipe section. To make great sushi rice, start by rinsing it well. Rinse the rice under cold water until the water runs clear. This step removes extra starch. If the rice is too starchy, it can turn mushy. After rinsing, drain the rice thoroughly to avoid excess water. For simmering, combine the rinsed rice with water in a medium saucepan. Bring it to a boil on medium heat. Once it’s boiling, turn the heat down low. Cover the pot and let it simmer for about 18 minutes. The rice will absorb the water and become tender. After cooking, let the rice sit off the heat for 10 minutes. This resting time helps the rice to finish cooking evenly. You can make your sushi bowl unique by changing the protein. Instead of shrimp or crab, try using diced tofu. Tofu is a great vegetarian option and soaks up flavors well. You can even mix proteins. For a fun twist, add grilled chicken or spicy tuna. Adjust the spice levels by adding more or less sriracha in your yum yum sauce. If you like it mild, use just a little. For heat lovers, go wild with the sriracha. You can also add more spices or toppings like pickled ginger for extra zing. When serving your Yum Yum Sushi Bowl, think about pairings. Serve it with seaweed salad or edamame for a nice touch. These sides add flavor and texture to your meal. For presentation, use colorful bowls to make your dish pop. Arrange the toppings neatly on the rice. This makes each bowl look inviting. You can also sprinkle sesame seeds on top for extra crunch. If you use nori strips, it adds a fun element and a bit of crunch. Feel free to explore the full recipe to make your own Yum Yum Sushi Bowl! {{image_4}} For a vegetarian Yum Yum Sushi Bowl, tofu works great as a protein. You can use firm tofu for the best texture. Simply cut the tofu into cubes and pan-fry it until golden brown. This adds a nice crunch. You can also add a variety of fresh vegetables. Try bell peppers, radishes, or edamame for extra color and taste. Each vegetable brings a unique flavor and crunch. Feel free to mix and match based on what you like! To make a spicy tuna variant, start with fresh sushi-grade tuna. Dice the tuna into small pieces. In a bowl, mix the tuna with a bit of soy sauce and sesame oil for taste. For the yum yum sauce, increase the sriracha to make it spicier. You can also add a dash of lime juice for a zesty kick. This twist adds a wonderful umami flavor that tuna lovers will enjoy. You can switch up the sauces for your sushi bowl. Try using a sesame dressing for a nutty flavor. A ponzu sauce can add a citrusy twist. Experiment with spicy mayo or a sweet chili sauce for different tastes. Each sauce can change the entire flavor profile of the bowl. Get creative and find your favorite combination! For a complete guide, check out the Full Recipe. When you have leftovers, store them right. Use an airtight container. Keep the sushi bowl in the fridge. It stays fresh for about two days. To keep your ingredients fresh: - Separate the rice from the toppings. - Wrap sliced avocado in plastic wrap to stop browning. - Use a paper towel to keep cucumbers crisp. You can freeze some parts of the sushi bowl. The rice can be frozen. However, avoid freezing fresh veggies and sauces. They do not freeze well. To defrost safely: - Move frozen rice to the fridge overnight. - Heat it gently in a microwave or on the stove. For reheating rice, use low heat. Add a splash of water to keep it moist. Cover it while heating. This helps heat evenly. Serve cold ingredients straight from the fridge. They taste fresh and crispy. Enjoy your Yum Yum Sushi Bowl! For more details, check out the Full Recipe. A Yum Yum Sushi Bowl is a fun dish that mixes sushi flavors in a bowl. It has rice, fresh veggies, and protein like shrimp or tofu. You can top it with a creamy yum yum sauce. This dish comes from Japanese sushi but puts a twist on it. It makes sushi easy to enjoy at home. Yes, you can prepare some parts ahead of time. Cook the sushi rice and let it cool. Store it in the fridge for up to two days. You can also slice the veggies and keep them in a container. The yum yum sauce can be made in advance, too. This way, when you’re ready to eat, you only need to assemble your bowl. If you don't have sushi rice, you have options. You can use short-grain rice or even quinoa. Short-grain rice will still give a nice sticky texture. Quinoa adds a nutty flavor and is full of protein. Each option changes the bowl's taste, so pick what you like best. For the full recipe, check the detailed steps above. This blog post outlined the key elements of making a delicious sushi bowl. We covered the main ingredients, including sushi rice, fresh veggies, and protein options. You learned how to season the rice and prepare toppings, with tips for perfecting your bowl. Don’t forget the unique variations, like spicy tuna or vegetarian options. In summary, making a sushi bowl is easy and fun. Customizing your bowl lets you be creative. Enjoy crafting your next yummy meal!

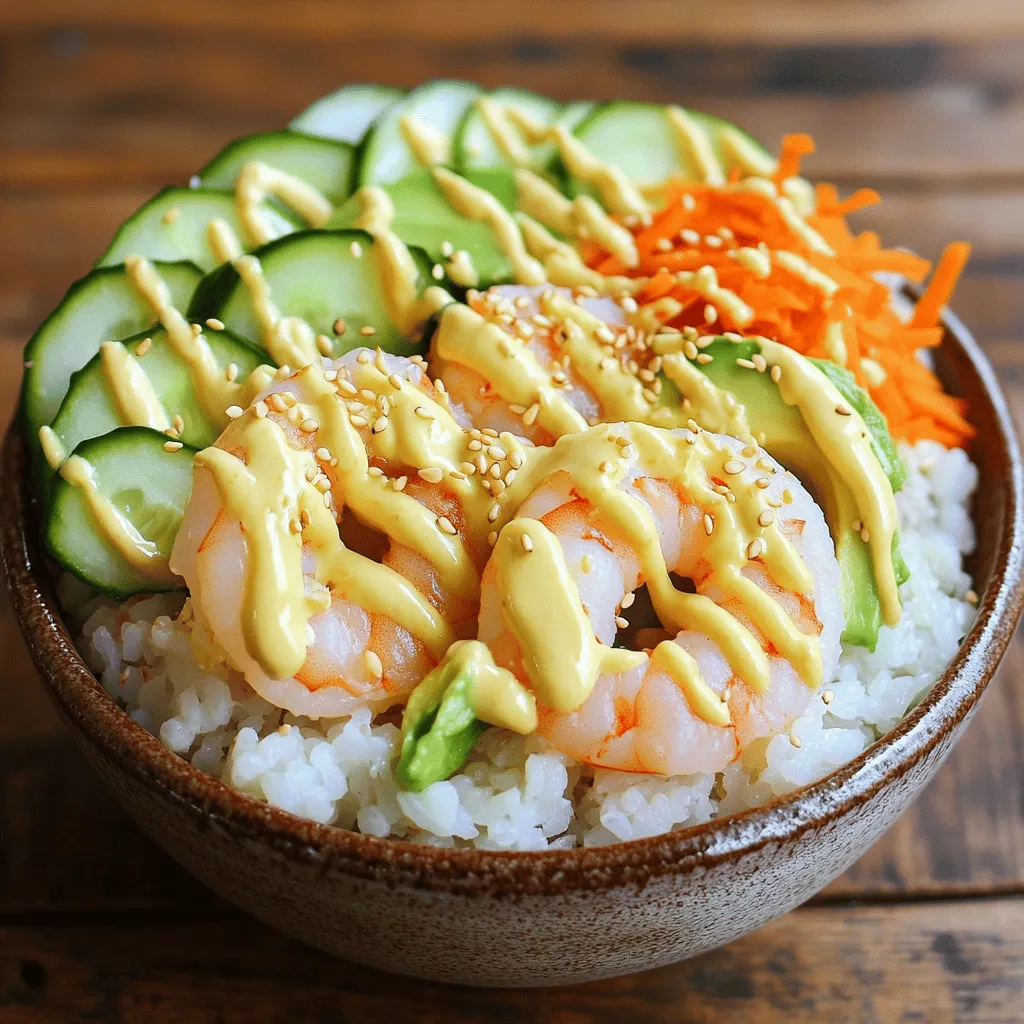
Are you ready to create a delicious Yum Yum Sushi Bowl? This fresh recipe guide will take you step-by-step through making this amazing dish. You’ll learn how to prepare sushi …

Read more

Categories Dinner

Lemon Garlic Shrimp and Asparagus Tasty Dinner Recipe

May 22, 2025 by Chef Remy
This dish is easy and quick. You need a few fresh ingredients. It takes just 20 minutes to cook. You can serve it for dinner or lunch. Here’s what you need for the zesty lemon garlic shrimp and asparagus: - 1 pound large shrimp, peeled and deveined - 1 bunch asparagus, trimmed and cut into 2-inch pieces - 4 cloves garlic, finely minced - 3 tablespoons extra virgin olive oil - Zest and juice of 1 large lemon - 1 teaspoon red pepper flakes (optional for heat) - Salt and freshly ground black pepper, to taste - Fresh parsley, finely chopped (for garnish) - Lemon wedges, for serving These ingredients make each bite bright and full of flavor. The shrimp cook fast, while the asparagus adds a nice crunch. You can also add more flavors. Consider these options: - Cherry tomatoes for sweetness - Spinach for extra greens - A splash of white wine for depth These add-ins make your dish more varied and fun. Mix and match to find your favorite twist! If you want to try the full recipe, check it out for more details. First, gather all your ingredients. You need: - 1 pound large shrimp, peeled and deveined - 1 bunch asparagus, trimmed and cut into 2-inch pieces - 4 cloves garlic, finely minced - 3 tablespoons extra virgin olive oil - Zest and juice of 1 large lemon - 1 teaspoon red pepper flakes (optional for heat) - Salt and freshly ground black pepper, to taste - Fresh parsley, finely chopped (for garnish) - Lemon wedges, for serving Next, prep the shrimp and asparagus. Rinse the shrimp and pat them dry. Trim the asparagus and cut it into pieces. Mince the garlic finely. Now, heat 2 tablespoons of olive oil in a large skillet over medium heat. Wait until the oil shimmers. Add the minced garlic and, if you like spice, the red pepper flakes. Sauté for about 1 minute. Stir constantly to prevent the garlic from browning. Increase the heat to medium-high. Add the shrimp to the skillet in a single layer. Season with salt and freshly ground black pepper. Cook the shrimp for 2-3 minutes on each side. They should turn pink and opaque when done. Use a slotted spoon to remove the shrimp. Place them on a plate and set aside. In the same skillet, add the remaining tablespoon of olive oil and the asparagus. Sauté for about 4-5 minutes. The asparagus should be bright and tender but still crisp. Return the cooked shrimp to the skillet. Add the lemon zest and juice. Toss everything gently to combine. Sauté for another 1-2 minutes to heat through. Taste your dish. Adjust the seasoning with more salt, pepper, or lemon juice if needed. Remove the skillet from the heat. Sprinkle finely chopped parsley on top for a fresh touch. Serve your lemon garlic shrimp and asparagus on a vibrant platter. Add lemon wedges for extra flair. This dish pairs well with rice or quinoa. Enjoy this tasty meal with family and friends! For the complete recipe, check out the Full Recipe. To make your lemon garlic shrimp and asparagus shine, use fresh ingredients. Fresh garlic packs more punch than dried. The zest of the lemon adds a bright, bold flavor. Keep the shrimp and asparagus crisp for the best taste. Adjust salt and pepper for a balanced flavor. If you like heat, add red pepper flakes. They give a nice kick without overpowering. Cook shrimp quickly to keep them tender. Overcooking makes shrimp rubbery. Sauté them just until they turn pink. For asparagus, aim for a bright green color. They should be tender yet still crisp. Use a large skillet to avoid crowding. This way, everything cooks evenly. A beautiful plate makes the meal special. Serve the shrimp and asparagus on a large, colorful platter. Garnish with fresh parsley for a pop of color. Add lemon wedges on the side for a fresh touch. For a complete meal, serve it over rice or quinoa. This adds texture and makes the dish more filling. Enjoy this tasty dinner recipe for a delightful experience! You can find the full recipe above. {{image_4}} You can swap shrimp for other proteins. Chicken breast works well. Cut it into small pieces. Cook until golden brown. Firm fish like salmon or cod is tasty too. Just adjust cooking time as needed. If you prefer plant-based options, try tofu or chickpeas. They soak up flavors nicely. Asparagus shines in this dish, but you can use other veggies. Broccoli or green beans add a nice crunch. Bell peppers give a pop of color and sweetness. Zucchini or snap peas provide freshness. Mix and match to keep it exciting and colorful. Change the flavor to suit your mood. Add herbs like basil or cilantro for a fresh twist. Use lime juice instead of lemon for a zesty kick. Try adding a splash of soy sauce for umami depth. Experiment with spices like cumin or curry powder for a unique touch. Each variation brings new life to the dish, so don’t be afraid to explore! Store any leftover lemon garlic shrimp and asparagus in an airtight container. Make sure to cool it down first. Place the container in the fridge. It will stay fresh for about 2 to 3 days. Keep the shrimp and asparagus together. This will help keep the flavors intact. To reheat, use a skillet over medium heat. Add a splash of olive oil to help with moisture. Stir the shrimp and asparagus gently for about 5 minutes. You want them warm but not overcooked. This will keep the shrimp tender and asparagus crisp. You can freeze this dish, but it’s best to do it before reheating. Place cooled shrimp and asparagus in a freezer-safe bag. Remove as much air as possible before sealing. The dish will last up to 2 months in the freezer. When ready to eat, thaw in the fridge overnight and reheat as described above. Enjoy your meal again with fresh flavors! For the complete recipe, check out the Full Recipe section. Yes, you can use frozen shrimp! Just remember to thaw them first. Place the shrimp in a bowl of cold water for about 15-20 minutes. You want them to be fully thawed before cooking. This helps them cook evenly. Frozen shrimp often work well in recipes like Lemon Garlic Shrimp and Asparagus. Many side dishes pair nicely with this dish. Here are a few ideas: - Fluffy rice: White or brown rice soaks up the flavors. - Quinoa: This adds a nutty taste and is very healthy. - Garlic bread: A crunchy side to enjoy with the shrimp. - Mixed greens salad: A fresh salad adds brightness to the meal. These sides balance the rich flavors of the shrimp and asparagus. To add heat, use red pepper flakes, as listed in the recipe. You can adjust the amount based on your taste. For even more spice, try these ideas: - Cayenne pepper: A little goes a long way for heat. - Hot sauce: Drizzle some on top before serving for an extra kick. - Sliced jalapeños: Add fresh jalapeños while cooking for a bold taste. These options will spice up your Lemon Garlic Shrimp and Asparagus dish. For the full recipe, check out the earlier section. This blog post covered the key ingredients and steps to make Lemon Garlic Shrimp and Asparagus. We explored the main ingredients, optional add-ins, and tips for enhancing flavor. You learned cooking techniques and ways to present your dish. Variations also let you personalize the recipe, while storage tips ensure freshness. Remember, cooking is fun and creative. Try new flavors and make this dish your own! Enjoy your cooking!

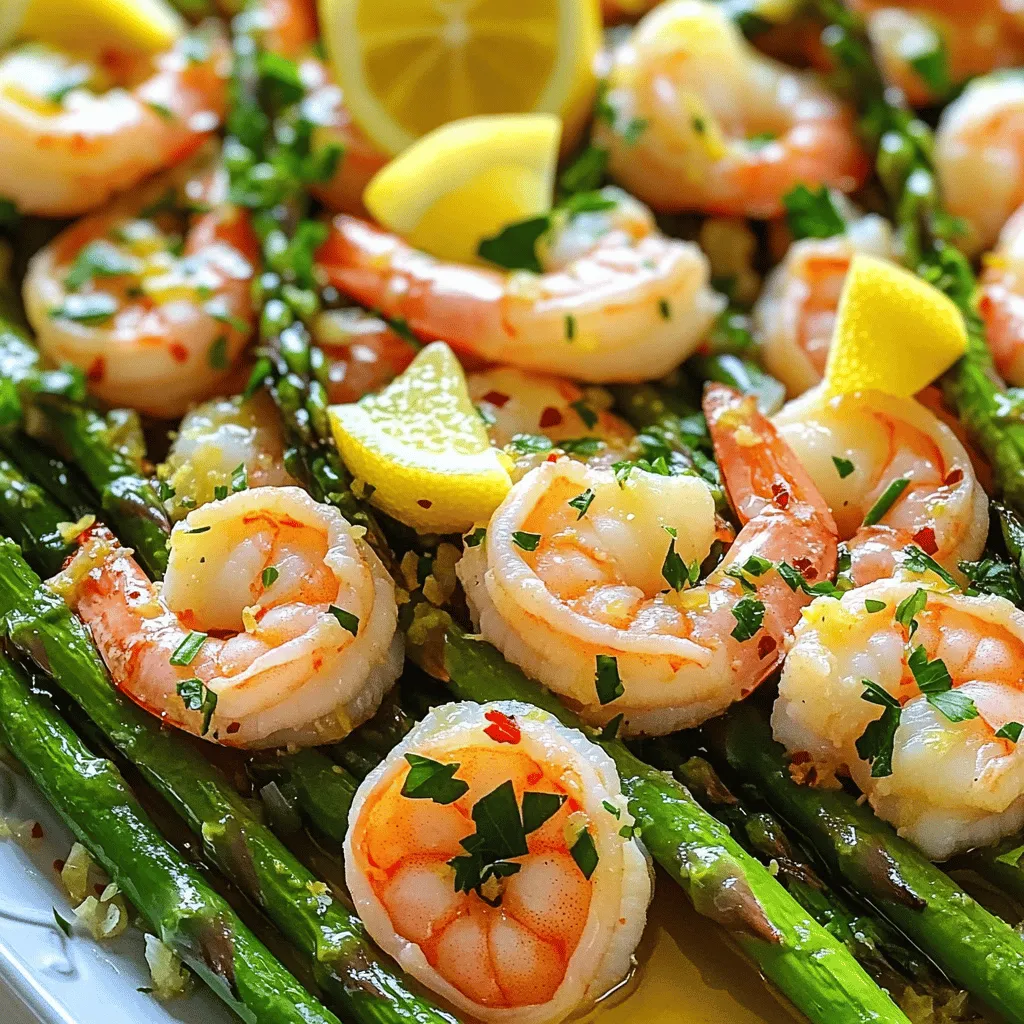
Looking for a quick and tasty dinner idea? In this Lemon Garlic Shrimp and Asparagus recipe, you’ll discover a dish that’s both easy and delicious. With fresh shrimp, vibrant asparagus, …

Read more

Categories Dinner

No-Bake Oreo Cheesecake Minis Delightful and Easy Treat

May 22, 2025 by Chef Remy
When making No-Bake Oreo Cheesecake Minis, having the right ingredients is key. Let’s take a look at what you’ll need. - 24 Oreo cookies, finely crushed (plus extra for topping) - 4 tablespoons unsalted butter, melted - 8 oz cream cheese, softened at room temperature - 1/2 cup powdered sugar - 1 teaspoon pure vanilla extract - 1 cup heavy whipping cream, chilled - 1/4 cup chocolate ganache (optional for drizzling) Each ingredient plays a role in creating that creamy texture and rich flavor. The Oreo cookies form the perfect sweet crust and topping. The unsalted butter helps bind the crust together and adds richness. Cream cheese is the star of the show, offering a creamy base that is hard to resist. Powdered sugar adds sweetness without grittiness, while vanilla extract enhances the overall flavor. Heavy whipping cream brings lightness to the filling, making it fluffier. If you want to elevate your treats, a drizzle of chocolate ganache is a delightful option. For the full recipe, check the recipe section. Remember, fresh ingredients yield the best results. Enjoy gathering these items; it’s the first step to making a delicious dessert! To start, take 24 Oreo cookies and crush them well. You want fine crumbs for the crust. Next, mix these crumbs with 4 tablespoons of melted butter. Stir until the mixture feels like wet sand. Now, grab a mini muffin tin and line each cup with cupcake liners. Spoon about 1 tablespoon of the Oreo mixture into each liner. Use your fingers or the back of a spoon to press the mixture firmly down. This helps form a strong crust. Set the tin aside to let it firm up as you move on to the filling. In a large bowl, place 8 oz of softened cream cheese. Beat it with an electric mixer until it is smooth. This should take around 2-3 minutes. Next, sift in 1/2 cup of powdered sugar. Add 1 teaspoon of pure vanilla extract at the same time. Continue mixing until everything is well combined and free of lumps. Now it’s time to make it fluffy! In another bowl, pour in 1 cup of chilled heavy whipping cream. Whip it on high speed until you see stiff peaks form. This will take about 3-5 minutes. Carefully fold the whipped cream into the cream cheese mixture using a spatula. Be gentle to keep it airy. Once combined, scoop the cheesecake filling into each crust. Fill them right to the top. Use a spatula to smooth the tops. Cover the muffin tin with plastic wrap and chill in the fridge for at least 4 hours. This step helps the cheesecakes set up perfectly. Add crushed Oreo cookies on top before you serve them. You can also drizzle with chocolate ganache for extra fun. For the full recipe and more details, check out the [Full Recipe]. To get the best texture for your No-Bake Oreo Cheesecake Minis, start with the cream cheese. Beat it well until it’s smooth. Use a medium speed on your mixer for about 2-3 minutes. This helps to avoid lumps. Next, chill your heavy whipping cream before using it. Cold cream whips better and adds fluffiness. When you whip it, aim for stiff peaks. This will give your cheesecake a light and airy feel. For a beautiful presentation, place the cheesecake minis on a nice platter. You can add crushed Oreos on top for style. You could also sprinkle some mint leaves or chocolate shavings around them. Pair these treats with coffee or dessert wines. The rich creaminess of the cheesecake balances well with a nice cup of coffee. One common mistake is overmixing the cream. When you fold the whipped cream into the cream cheese, do it gently. This keeps the texture airy. Another mistake is not chilling the cheesecake long enough. Make sure to refrigerate for at least 4 hours. This helps the cheesecakes set properly and hold their shape. Following these tips will help you create perfect mini cheesecakes every time. For the full recipe, check the earlier section. {{image_4}} You can easily switch up the flavors of your No-Bake Oreo Cheesecake Minis. One fun way is by adding different extracts. For example, almond extract gives a nice twist. Just use a half teaspoon for that extra touch. You can also mix in other cookies like chocolate chip. This change adds fun and new tastes to your treats. If you need gluten-free options, swap out the regular Oreo cookies for gluten-free ones. Many brands now offer this choice, so it’s easy to find. For vegan alternatives, use vegan cream cheese and coconut cream instead of heavy whipping cream. These changes keep the taste great while meeting dietary needs. You can make larger cheesecakes if you prefer. Just use a springform pan instead of a mini muffin tin. Adjust the baking time and use the same filling. If you want a traditional cheesecake look, pour the filling into a pie dish. This way, you can serve slices instead of minis. For the full recipe, check the main article. To keep your No-Bake Oreo Cheesecake Minis fresh, place them in an airtight container. This helps to lock in moisture and flavor. Store them in the fridge for up to 5 days. If you want to keep them longer, consider freezing them for up to 3 months. Just make sure to wrap each mini well in plastic wrap before placing them in a freezer bag. You don’t need to reheat these treats. They taste best chilled. If you freeze them, allow them to thaw in the fridge overnight. This way, they regain their creamy texture. For serving, just take them out of the fridge, add your toppings, and enjoy! These cheesecake minis last about 5 days in the fridge. Store them in an airtight container. This keeps them fresh and tasty. Before serving, check for any signs of spoilage. Always use clean utensils to avoid contamination. Yes, you can use low-fat cream cheese. However, it may alter the taste and texture. The cheesecake might be less creamy and rich. It can still work, but the flavor may not be as bold. Choosing full-fat cream cheese gives the best results. Absolutely! You can make these cheesecake minis a day before your event. This saves time and stress on the day of the party. Just be sure to store them in the fridge. They will set perfectly and taste great the next day. To make these gluten-free, use gluten-free Oreo cookies. This simple swap keeps all the flavors while avoiding gluten. Check the labels on the cream cheese and toppings to ensure they are also gluten-free. Enjoy these treats without worry! For the full recipe, follow the steps above. You now have all the steps to make No-Bake Oreo Cheesecake Minis. Start with your crust using Oreo cookies and butter. Then, create a smooth filling with cream cheese, powdered sugar, and whipped cream. Remember the tips on texture and serving ideas. You can personalize your recipe with flavors or dietary options. With the right storage, these treats will stay fresh and tasty. Enjoy making these fun desserts for your next gathering! Your friends will love them. Keep experimenting and savoring each bite!

Craving a delicious dessert that’s easy to make? Look no further! These No-Bake Oreo Cheesecake Minis are the perfect treat for any occasion. With a simple crust made from Oreo …

Read more

Categories Desserts

Honey Sriracha Salmon Bowls Flavorful and Easy Meal

May 22, 2025 by Chef Remy
- 2 salmon fillets (6 oz each) - 2 tablespoons honey - 2 tablespoons sriracha sauce - 1 tablespoon soy sauce - 1 cup cooked jasmine rice (or brown rice) - 1 cup steamed broccoli florets - 1 cup shredded carrots - 1 ripe avocado, sliced - 1 tablespoon sesame seeds - Fresh cilantro, chopped, for garnish - Other vegetables (e.g., bell peppers, snap peas) - Different grains (e.g., quinoa or farro) - Nuts or seeds for extra crunch The Honey Sriracha Salmon Bowls are packed with flavor and easy to make. You need fresh salmon fillets, honey, and sriracha. The honey adds sweetness, while the sriracha gives heat. Soy sauce adds umami depth, making every bite special. You can serve this over jasmine or brown rice for added texture. For toppings, I love using steamed broccoli and shredded carrots. They add color and nutrients. Sliced avocado brings creaminess, while sesame seeds add a nice crunch. Fresh cilantro gives a burst of flavor and liveliness to the dish. You can also make it your own with optional add-ins. Try bell peppers or snap peas for extra color and taste. Quinoa or farro can change up the base grain. For more texture, toss in some nuts or seeds. Explore these choices to make your meal unique and satisfying. For the full recipe, check out the detailed instructions to create your own Honey Sriracha Salmon Bowls! - Preheat your oven to 400°F (200°C). - Line a baking sheet with parchment paper for easy cleanup. - In a bowl, whisk together: - 2 tablespoons honey - 2 tablespoons sriracha sauce - 1 tablespoon soy sauce This glaze will add that sweet and spicy kick to the salmon. - Place the salmon fillets skin-side down on the baking sheet. - Brush the glaze generously over each fillet. Make sure they are well-coated. - Bake in the oven for 12-15 minutes. The salmon is ready when it flakes easily with a fork. - Start by dividing 1 cup of cooked jasmine rice between two bowls. - Add 1 cup of steamed broccoli florets and 1 cup of shredded carrots on top of the rice. - Slice 1 ripe avocado and place it in each bowl. - Once the salmon is done, add one fillet to each bowl. - Drizzle any leftover glaze from the baking sheet over the salmon for more flavor. - Finally, sprinkle sesame seeds and chopped cilantro on top. Serve with lime wedges for a zesty touch. This recipe is simple and full of flavor. You can find the Full Recipe for more details. Enjoy your meal! To check if your salmon is done, use a fork. Gently poke the fillet. If it flakes easily, it’s ready. The fish should be opaque and not translucent. This means it’s cooked through. For a caramelized surface, brush on extra glaze before baking. The honey helps create a nice crust. You can also broil the salmon for the last few minutes. This adds color and a bit of crunch. Just keep an eye on it to avoid burning. You can prepare many components ahead of time. Cook the rice and steam the broccoli a day before. Store them in airtight containers in the fridge. This saves time on busy days. For leftovers, cool the salmon and veggies first. Then, place them in a container. To keep them fresh, eat leftovers within three days. Reheat gently in the microwave or oven. Want to add more flavor? Try mixing in a bit of lime juice with the glaze. It gives a zesty kick. You can also sprinkle on some chili flakes for heat. Pair your bowls with a side salad or pickled vegetables. They add crunch and balance to the meal. You can also serve with a dash of soy sauce for extra umami. {{image_4}} To make this dish gluten-free, simply swap out the soy sauce for tamari. Tamari tastes similar but is made without wheat. This change allows everyone to enjoy the sweet and spicy flavors without worrying about gluten. If you prefer a vegan version, replace the salmon with tofu. Choose firm tofu for the best texture. Cut the tofu into thick slices and follow the same glazing and baking steps. Adjust cooking times, as tofu may need a bit more time to crisp up. Aim for about 20 minutes in the oven, checking for a golden color. Want more heat? You can easily modify the amount of sriracha. Start with one tablespoon and taste the glaze. If you like it spicier, add more sriracha a little at a time. You can also add fresh chili slices or red pepper flakes for extra kick. Just be careful; it’s easy to make it too hot! To keep your Honey Sriracha Salmon Bowls fresh, store them in airtight containers. This helps prevent moisture loss and keeps flavors intact. Make sure to let the salmon cool before sealing. I recommend using glass containers. They don’t stain and are easy to clean. Reheating salmon can be tricky. To avoid drying it out, use the oven. Preheat it to 275°F (135°C). Place the salmon on a baking sheet and cover it with foil. Heat for about 15 minutes or until warm. For the rice and veggies, microwave them in a bowl with a splash of water. Cover with a damp paper towel and heat for 1-2 minutes. If you want to freeze your salmon bowls, do it right after cooking. Use freezer-safe containers to avoid freezer burn. Label them with the date. When ready to eat, move the bowl to the fridge overnight to thaw. Reheat as mentioned above for the best taste. Yes, you can prep these bowls ahead. Cook the salmon and rice in advance. Store them separately in the fridge. You can also chop the veggies early. Just add them when you're ready to eat. This saves time on busy days. If you want to change the fish, try using tilapia or trout. These options cook similarly. You can also use chicken or tofu. Both will soak up the honey sriracha glaze well. Adjust cooking times for these proteins. To reduce spice, use less sriracha in the glaze. Try mixing honey with soy sauce only. You can also add a bit of lime juice. This adds flavor without too much heat. For a milder kick, use sweet chili sauce instead. To wrap it up, we explored how to make delicious Honey Sriracha Salmon Bowls. We covered the main ingredients, like salmon and honey sriracha, and how to prep them. I shared tips on baking salmon and assembling your meal with veggies and toppings. You learned about meal prep and storage to keep your food fresh. Don't hesitate to try variations, whether gluten-free, vegan, or less spicy. Enjoy these bowls as a flexible dish that fits many tastes and preferences! Dive in and make a meal that you'll love!

Craving a quick and tasty meal? Honey Sriracha Salmon Bowls are just what you need! This dish blends sweet and spicy flavors, making it an exciting option for lunch or …

Read more

Categories Dinner

Cajun Potato Soup Hearty and Comforting Dish

May 22, 2025 by Chef Remy
- 4 medium Yukon gold potatoes, peeled and diced - 1 medium onion, finely chopped - 2 cloves garlic, minced - 1 bell pepper (red or green), diced - 2 celery stalks, chopped - Fresh parsley, chopped for garnish - 4 cups vegetable broth - 1 cup heavy cream (or coconut milk) - 2 tablespoons Cajun seasoning - 1 teaspoon smoked paprika - Salt and pepper - 2 tablespoons olive oil If you want a dairy-free soup, you can use coconut milk instead of heavy cream. You can also swap Yukon gold potatoes for russets if you prefer. For gluten-free needs, check your broth for gluten-free options. If you want less spice, use less Cajun seasoning. Adjust to make it fit your taste. This recipe is all about flavor and comfort. You can find the Full Recipe to get the complete details. Start by washing the Yukon gold potatoes. Peel them and cut them into small pieces. This helps them cook evenly. Next, chop the onion finely. This adds sweetness to the soup. Mince the garlic cloves to boost the flavor. Dice the bell pepper into small bits for color. Finally, chop the celery stalks for extra crunch. In a large pot, heat the olive oil on medium heat. Add the chopped onion, minced garlic, diced bell pepper, and chopped celery. Cook these for about 5-7 minutes. Stir occasionally until the veggies soften. Then, add the diced potatoes, Cajun seasoning, and smoked paprika. Stir everything for about 2 minutes. This toasts the spices and brings out their flavors. Now, pour in the vegetable broth and bring it to a boil. Once boiling, lower the heat and let it simmer for 20-25 minutes. This makes the potatoes tender and flavorful. After simmering, it’s time to blend the soup. Use an immersion blender to mix it until smooth. If you like some chunks, save a few potato pieces first. Stir them back in after blending for a nice texture. Next, mix in the heavy cream or coconut milk. Heat the soup for about 5 minutes. Taste and adjust the salt and pepper as needed. Now, your Cajun potato soup is ready to enjoy! For the full recipe, check out the detailed instructions. For the best flavor, start by sautéing the onion, garlic, bell pepper, and celery. This step builds a strong base. Use medium heat and stir often. Let the veggies soften and caramelize slightly. This adds sweetness and depth. Toast the Cajun seasoning and smoked paprika with the potatoes. This step brings out their full flavors. To adjust the spice level, add more or less Cajun seasoning. For a milder soup, use less. You can also add a splash of lemon juice for brightness. For creaminess, use heavy cream or coconut milk. You can add more cream if you like it richer. Blend the soup until smooth for a creamy texture. If you prefer some chunks, reserve a few potato pieces before blending. Serve your Cajun potato soup in deep bowls. Garnish with fresh parsley for a pop of color. A sprinkle of extra Cajun seasoning adds flair. Pair it with crusty bread or a side salad for a full meal. You can also serve it with grilled cheese for a comforting touch. Enjoy your hearty bowl of soup! For the complete recipe, check out the Full Recipe. {{image_4}} To make Cajun potato soup dairy-free or vegan, swap out the heavy cream. Use coconut milk instead. It gives a creamy texture. You can also try almond milk or cashew cream. Each option brings a unique flavor. Just keep in mind that coconut milk adds a slight sweetness. This will balance well with the spices. Want to boost the taste and nutrition? Add some greens! Spinach or kale works great. Toss them in during the last few minutes of cooking. For protein, consider adding cooked chickpeas or shredded tofu. These options help make the soup more filling. You can also add corn or diced tomatoes for extra sweetness and texture. Toppings make the soup fun and flavorful! Try crispy bacon bits for crunch. They add a nice smoky flavor. Or use chopped green onions for a fresh bite. A dollop of sour cream or vegan yogurt can provide creaminess. You might also sprinkle some Cajun seasoning on top for a bold kick. Fresh parsley or cilantro gives a great pop of color, too. After enjoying your Cajun potato soup, let it cool to room temperature. Pour any leftovers into an airtight container. Make sure to store the soup in the fridge. It will stay fresh for about three to five days. If you want to keep it longer, freezing is a great option. When you're ready to enjoy your soup again, reheat it on the stove. Pour the soup into a pot over medium heat. Stir often to prevent sticking. Heat until it is warm throughout. You can also use the microwave. Place the soup in a microwave-safe bowl, cover it loosely, and heat in short bursts. Stir between each burst to ensure even warming. To freeze Cajun potato soup, use freezer-safe containers. Leave some space at the top of each container for expansion. The soup can last up to three months in the freezer. When you’re ready to eat it, thaw it in the fridge overnight. After thawing, reheat it on the stove or in the microwave until hot. For best taste, avoid freezing the soup with cream; it may separate when thawed. Cajun potato soup is a warm and creamy dish. It blends Yukon gold potatoes with spices. Cajun seasoning gives it a unique kick. The soup is hearty and fills you up. You can taste the flavors of onion, garlic, and bell pepper. Each spoonful offers comfort and warmth. This soup is perfect for chilly days or family gatherings. Yes, you can use regular potatoes. Russets or red potatoes work well too. Yukon gold potatoes add a creamy texture. They also have a buttery flavor. If you choose other types, the soup will still taste great. Just be mindful of the cooking time. Different potatoes may cook at different rates. To spice up your soup, add more Cajun seasoning. You can also include diced jalapeños or hot sauce. A pinch of cayenne pepper can boost the heat. Start with small amounts to avoid overpowering the dish. Taste as you go to find your perfect spice level. Adjusting spice can make the soup exciting and bold. For the full recipe, check the section above. Cajun Potato Soup is delicious and easy to make. We covered fresh ingredients and pantry staples you need. I shared tips for cooking and blending for the perfect texture. You learned serving ideas to enhance each bowl. Variations offer options for everyone, including dairy-free choices and new toppings. Keep these storage tips in mind to enjoy it later. Try it, tweak it, and make it your own. Enjoy your soup adventure!

Welcome to the world of Cajun Potato Soup, a dish that warms your heart and fills your belly! This hearty and comforting recipe is packed with bold flavors and simple …

Read more

Categories Dinner

Brown Sugar Pineapple Chicken Flavorful and Easy Recipe

May 22, 2025 by Chef Remy
- 4 boneless, skinless chicken thighs - 1 cup fresh pineapple chunks - 1/2 cup packed brown sugar - 1/4 cup soy sauce - 2 tablespoons olive oil - 3 cloves garlic, minced - 1 teaspoon fresh ginger, finely grated - 1/2 teaspoon ground black pepper - 1/2 teaspoon salt - 2 green onions, finely chopped (for garnish) - Sesame seeds (for garnish) To make tasty Brown Sugar Pineapple Chicken, gather these simple ingredients. The chicken thighs stay juicy and tender. Fresh pineapple adds a sweet twist. Packed brown sugar gives it a rich flavor, while soy sauce adds a savory depth. For flavor, use olive oil to cook the chicken. Minced garlic and fresh ginger boost the taste even more. Season with ground black pepper and salt for balance. Finally, garnish with green onions and sesame seeds for a touch of crunch and color. Follow the [Full Recipe] to bring all these ingredients together. Enjoy making this delightful dish! - Prepare the marinade: In a medium bowl, mix the brown sugar, soy sauce, minced garlic, and grated ginger. Stir until the sugar mostly dissolves. This marinade packs in lots of flavor. - Marinate the chicken: Place the chicken thighs in a resealable bag or dish. Pour the marinade over the chicken. Make sure every piece is coated. Seal the bag or cover the dish. Let it sit in the fridge for at least 30 minutes. For more flavor, marinate for up to 2 hours. - Preheat the cooking surface: While the chicken marinates, preheat your grill or skillet over medium-high heat. Add olive oil, letting it heat until it shimmers. - Cook the chicken and pineapple: Remove the chicken from the marinade. Let excess liquid drip off and save the marinade for later. Place the chicken in the hot grill or skillet. Cook for about 5-7 minutes on each side until it reaches 165°F (75°C). The outside should look brown and caramelized. Add fresh pineapple chunks to the grill or skillet in the last few minutes. Cook until they caramelize, about 3-4 minutes. - Thicken the marinade: While the chicken cooks, pour the reserved marinade into a small saucepan. Bring it to a boil over medium heat, then lower to a simmer. Cook for about 5 minutes until it thickens slightly. - Garnish and serve: Once the chicken is done, drizzle the thickened marinade over the chicken and pineapple. Transfer to a serving platter. Top with chopped green onions and sesame seeds for a beautiful finish. This recipe makes a tasty and vibrant dish that looks as good as it tastes. For the full recipe, check out the details above. How long should you marinate chicken? For the best flavor, marinate the chicken for at least 30 minutes. If you have more time, go for 2 hours. This lets the chicken soak up all the tasty marinade. What are some marinating alternatives? You can mix in some lime juice or chili sauce for a fun twist. These options add a zesty kick to your chicken, making it even more delicious. Should you grill or use a skillet? Both methods work great! Grilling gives the chicken nice grill marks and a smoky flavor. Skillet cooking is faster and easier to control. Choose what fits your style. How can you check if the chicken is done? Use a meat thermometer to ensure it reaches 165°F (75°C). This guarantees the chicken is safe to eat and juicy. What side dishes go well with this chicken? Steamed white rice or fluffy quinoa are perfect. They soak up the yummy sauce. You can also serve a fresh salad for a light touch. How can you present the dish? Arrange the chicken and caramelized pineapple on a large plate. Garnish with chopped green onions and sesame seeds for color. It makes the dish look as good as it tastes! {{image_4}} You can change things up with different fruits. Try mango or peach for a sweet twist. You can also use canned pineapple if fresh ones are hard to find. If you want to swap chicken, turkey breasts or firm tofu work well. Each swap can create a new flavor. You can bake this dish for a hands-off approach. Preheat your oven to 375°F (190°C). Place the marinated chicken and pineapple in a baking dish. Bake for about 30 minutes, or until the chicken is cooked through. Another option is a slow cooker. Add the chicken, pineapple, and marinade to the slow cooker. Cook on low for 4-6 hours. This method makes the chicken tender and fills your kitchen with great smells. Feel free to add spices for more depth. A pinch of cayenne or paprika can bring a nice kick. You can also mix in some soy sauce for a more savory note. Try adding a tablespoon of honey for extra sweetness. This dish works well with both sweet and savory flavors, so experiment to find your favorite combo. For more tips, check the Full Recipe. To store leftovers, place the chicken and pineapple in an airtight container. This keeps the dish fresh and tasty. You can store it in the fridge for up to three days. After that, the flavor may fade. Always let the dish cool before sealing it for storage. This helps keep the texture and moisture intact. For freezing, wrap the chicken and marinade in plastic wrap or foil. You can also use a freezer bag. Make sure to remove as much air as possible. This helps prevent freezer burn. The chicken can last up to three months in the freezer. When you're ready to use it, thaw the chicken in the fridge overnight. This keeps it safe and maintains its flavor. To reheat the chicken, use an oven or stovetop for best results. Avoid the microwave, as it may dry out the meat. Preheat your oven to 350°F (175°C) and place the chicken in a baking dish. Heat until the internal temperature reaches 165°F (75°C). This ensures it's warm and juicy. If you want extra moisture, add a splash of water or broth before covering the dish with foil. To make Brown Sugar Pineapple Chicken, follow these simple steps: 1. Mix Marinade: In a bowl, combine brown sugar, soy sauce, garlic, ginger, black pepper, and salt. 2. Marinate Chicken: Put chicken thighs in a bag or dish. Pour marinade over chicken and let it soak. 3. Heat Your Pan: Preheat a skillet with olive oil over medium-high heat. 4. Cook Chicken: Remove chicken from marinade. Cook for 5-7 minutes on each side until done. 5. Thicken Marinade: In a saucepan, boil reserved marinade, then simmer until thick. 6. Add Pineapple: Add pineapple chunks in the last few minutes of cooking. 7. Serve: Drizzle thickened sauce over chicken and pineapple. Garnish with green onions and sesame seeds. Yes, you can use canned pineapple. Here are the pros and cons: - Pros: Canned pineapple is convenient and saves time. It also has a long shelf life. - Cons: Canned pineapple can be softer and less sweet than fresh. It may not caramelize as well when cooked. For best results, drain canned pineapple to reduce excess moisture. Brown Sugar Pineapple Chicken is a tasty dish with a good balance of nutrients. Here is an overview of calories and macros per serving: - Calories: About 350-400 calories - Protein: Around 28 grams - Carbohydrates: Roughly 30 grams - Fat: Approximately 15 grams This dish offers protein and some healthy fats, along with a burst of flavor from the pineapple. Enjoy it with rice or quinoa for a balanced meal! In this article, we explored the tasty Brown Sugar Pineapple Chicken. We discussed main ingredients like chicken thighs, pineapple, and soy sauce. The step-by-step instructions help you prepare and cook the dish just right. We also shared tips on marinating, cooking methods, and serving ideas. You learned about variations and storage, too. This dish is simple and full of flavor. Enjoy making it your own with different ingredients and methods. Cooking should be fun and satisfying, so get creative and dig in!

Craving a dish that’s both sweet and savory? Brown Sugar Pineapple Chicken is your answer! This flavorful and easy recipe combines tender chicken thighs with juicy pineapple and a rich …

Read more

Categories Dinner

Satisfying Chicken Avocado Ranch Burritos Recipe

May 22, 2025 by Chef Remy
- 2 cups cooked chicken breast, shredded - 1 ripe avocado, perfectly mashed - 1 cup crisp shredded lettuce - 1 cup vibrant diced tomatoes - ½ cup shredded cheese (choose between cheddar or a Mexican blend) - ½ cup creamy ranch dressing - 4 large flour tortillas These main ingredients form the base of our delicious chicken avocado ranch burritos. Each item plays a key role. The chicken brings protein. The avocado adds creaminess. Lettuce and tomatoes give freshness. Cheese adds flavor and richness. Ranch dressing ties everything together with its tangy taste. - Fresh cilantro - Lime juice - Salt and pepper You can use these optional ingredients to enhance your burritos. Fresh cilantro adds a burst of flavor. Lime juice brings brightness that cuts through the richness. Salt and pepper help balance the flavors. Feel free to adjust these to fit your taste. - Mixing bowl - Skillet - Serving platter These tools make the cooking process easy. A mixing bowl combines the filling well. A skillet helps achieve that crispy texture. A serving platter makes your burritos look inviting. You can find these tools in most kitchens. They are essential for preparing and presenting your meal. For the full recipe, check out the link above. First, gather your ingredients. In a large mixing bowl, combine the cooked chicken, mashed avocado, lime juice, and ranch dressing. Mix them well until the filling is smooth and creamy. Taste the mixture and add salt and pepper as needed. This step boosts the flavor and makes it truly delicious. Next, grab a flour tortilla. Lay it flat on a clean surface. Scoop about ½ cup of the chicken mixture into the center. On top, add a handful of shredded lettuce, a good amount of diced tomatoes, and a sprinkle of cheese. This combination creates a burst of flavors in every bite. Now, it’s time to fold the burrito. Bring the sides of the tortilla inward over the filling. Then roll it tightly from the bottom up. Make sure the filling stays inside the tortilla. Repeat this process with the other tortillas and filling until you have a nice stack. To make the burritos crispy, heat a skillet over medium heat. Place the burritos seam-side down in the skillet. Cook them for about 2-3 minutes on each side. Look for a golden-brown color and a crispy texture. This step adds a satisfying crunch. Once cooked, carefully remove the burritos from the skillet. Let them rest for about a minute. Then, slice each burrito in half for a great presentation. Serve them warm and enjoy every mouthful of your Chicken Avocado Ranch Burritos. For the full recipe, check out the details above. You can save time by prepping your filling ahead. Combine the shredded chicken, mashed avocado, lime juice, and ranch dressing in a bowl. Mix well and store it in the fridge for up to two days. This way, you have a tasty filling ready when you're hungry. To store assembled burritos, wrap each one in plastic wrap or foil. Keep them in the fridge for up to three days. When you're ready to eat, just heat them in a skillet or microwave. This makes a quick meal for busy days. You have a choice in how you cook these burritos. Grilling them adds a smoky flavor. Just place the burritos on a hot grill for about 3-4 minutes on each side. This gives a nice char and crispy texture. If you prefer skillet cooking, heat a bit of oil in a pan. Cook the burritos seam-side down for 2-3 minutes until golden. You can also bake them in the oven. Preheat it to 350°F (175°C) and bake for 15-20 minutes. This method heats them evenly. To spice things up, consider adding extra ingredients. A bit of cumin or chili powder can give a nice kick. You can also top the burritos with jalapeños or fresh salsa for more flavor. Don’t forget about cheese! You can mix it up by using Monterey Jack or pepper jack instead of cheddar. This small change can make a big difference in taste. Customizing your burritos adds fun and flavor to each bite. For the full recipe, check out the earlier section! {{image_4}} You can switch things up with different proteins. For a heartier option, use shredded beef or turkey. They add rich flavors and textures. If you want a vegetarian twist, try black beans or pinto beans. These beans are filling and pair well with the other ingredients. To add some excitement, mix in Southwest spices. A touch of cumin or smoked paprika can really boost the flavor. You can also experiment with dressings or sauces. Try a spicy chipotle sauce for a kick, or even a zesty salsa to change things up. If you're looking for lighter options, consider lettuce wraps. They are fresh and crunchy, perfect for a low-carb meal. For those avoiding gluten, gluten-free tortillas are a great choice. They hold all the tasty fillings just as well as regular tortillas. You can enjoy your burrito without worry! For the full recipe, check out the complete guide to making Chicken Avocado Ranch Burritos. To keep your burritos fresh, wrap them tightly in plastic wrap. Place them in an airtight container. This method helps prevent drying out. You can store them in the fridge for up to three days. After that, they may lose some taste and texture. To freeze burritos, follow these steps: 1. Wrap each burrito in foil or plastic wrap. 2. Place them in a freezer-safe bag. 3. Squeeze out as much air as possible before sealing. This method keeps them fresh for up to three months. When you're ready to eat, thaw them in the fridge overnight. For quick thawing, you can use the microwave on a low setting. For the best texture, reheat your burritos in the oven. Preheat the oven to 350°F (175°C). Wrap the burrito in foil and heat for 15-20 minutes. This step keeps the tortilla warm and the filling moist. To avoid sogginess, skip the microwave. If you must use it, heat in short bursts. Check every 30 seconds to avoid overcooking. Enjoy your tasty Chicken Avocado Ranch Burritos! Yes, you can skip ranch dressing. Try using sour cream or yogurt instead. You can also make a simple homemade ranch. Just mix buttermilk, mayonnaise, garlic powder, and a pinch of salt. This gives a nice flavor too. The total time for Chicken Avocado Ranch Burritos is about 30 minutes. You need around 15 minutes to prep the ingredients. Cooking the burritos will take an extra 15 minutes. This makes it easy to fit into a busy day. Yes, you can. Look for gluten-free tortillas at your local store. They come in many brands and flavors. Just make sure to check the label. You can also make your own using gluten-free flour for a homemade touch. You can serve these burritos with a side of crispy tortilla chips. A fresh salsa or guacamole pairs well too. For a light side, try a simple green salad. These options complete the meal and add flavor. For the full recipe, check the link above. This blog post walks you through making delicious Chicken Avocado Ranch Burritos. You learned about the main and optional ingredients, the tools you need, and step-by-step instructions. I shared tips for making ahead, cooking variations, and flavor enhancements. You can explore variations with different proteins and wraps, plus storage and reheating tips. Burritos can be a fun meal for any occasion. Customize them to fit your taste or diet. Enjoy making these tasty treats!

Looking for a tasty meal that’s easy to make? These Chicken Avocado Ranch Burritos are just what you need! Packed with flavor and fresh ingredients, they offer a satisfying mix …

Read more

Categories Dinner

Death by Chocolate Cake Decadent and Rich Delight

May 22, 2025 by Chef Remy
- 1 ¾ cups all-purpose flour - 1 ¾ cups granulated sugar - ¾ cup unsweetened cocoa powder - 1 ½ teaspoons baking powder - 1 ½ teaspoons baking soda - 1 teaspoon salt - 2 large eggs - 1 cup whole milk - ½ cup vegetable oil - 2 teaspoons vanilla extract - 1 cup boiling water - 1 cup semi-sweet chocolate chips - ½ cup heavy whipping cream (for ganache) - 1 cup dark chocolate (finely chopped, for ganache) Starting with quality ingredients makes a big difference. You want your cake to taste great. Use fresh cocoa powder for a rich flavor. Choose high-quality chocolate for the ganache. Good eggs and milk will enhance the taste. Each ingredient plays a crucial role. The flour gives structure. Sugar adds sweetness and moisture. Cocoa powder provides that deep chocolate flavor. Baking powder and baking soda help the cake rise. The eggs help bind everything. Milk adds moisture and richness. Vegetable oil keeps the cake soft. Vanilla extract brings out the chocolate taste. Boiling water helps melt the cocoa, making the batter smooth. Chocolate chips add pockets of melted chocolate in every bite. The ganache, made from heavy cream and dark chocolate, adds a shiny finish. It also makes each slice decadent. Using the right ingredients sets you up for success. Trust me, your Death by Chocolate Cake will be a hit! For the complete recipe, check the Full Recipe section above. First, preheat your oven to 350°F (175°C). This step is key to a great cake. While the oven heats, prepare two 9-inch round cake pans. Grease the pans well with butter. Then dust them lightly with flour. This prevents the cake from sticking later. Now, it's time to mix the batter. In a big bowl, combine the dry ingredients. Use 1 ¾ cups of all-purpose flour, 1 ¾ cups of granulated sugar, ¾ cup of unsweetened cocoa powder, 1 ½ teaspoons of baking powder, 1 ½ teaspoons of baking soda, and 1 teaspoon of salt. Whisk until there are no lumps. Next, add the wet ingredients. This includes 2 large eggs, 1 cup of whole milk, ½ cup of vegetable oil, and 2 teaspoons of vanilla extract. Beat this mixture on medium speed for about 2 minutes. It should be smooth and well-mixed. Now, stir in 1 cup of boiling water. The batter will be thin, but this makes the cake moist. Finally, gently fold in 1 cup of semi-sweet chocolate chips. Make sure they are evenly spread throughout the batter. Divide the batter between the two prepared pans. Bake them in the preheated oven for 30-35 minutes. To check if they are done, insert a toothpick into the center. If it comes out clean, the cakes are ready. After baking, let the cakes cool in the pans for 10 minutes. Then, carefully remove them and place them on a wire rack to cool completely. This cooling step is important for a perfect texture. For the full recipe, don’t forget to check the detailed instructions! To get a perfect cake texture, use room temperature ingredients. Cold ingredients can lead to uneven mixing and a dense cake. Let your eggs and milk sit out for 30 minutes before baking. Next, measure your flour and cocoa powder correctly. Use a spoon to fluff the flour in its container, then scoop it into your measuring cup. Level it off with a knife. This method avoids adding too much flour, keeping your cake light. Making smooth ganache is key for a rich topping. Heat the cream until it just simmers, then remove it from the heat. Add the chopped dark chocolate and stir until it melts. If your ganache is too thin, let it cool a bit before using. For thicker ganache, use less cream or add more chocolate. Adjust to your desired thickness for the perfect pour. Serve your Death by Chocolate Cake with a scoop of vanilla ice cream. The cold ice cream balances the rich cake. You can also add whipped cream for a lighter touch. For a pretty look, decorate the cake with chocolate shavings or curls. This adds a fancy touch that makes it even more special. Enjoy each bite! {{image_4}} I love to add coffee to my Death by Chocolate Cake. A splash of brewed coffee boosts the chocolate flavor. It makes the cake taste richer and deeper. You can add 1/2 cup of strong coffee to the batter. It blends nicely and makes every bite special. Another fun twist is to add nuts or fruit layers. Chopped walnuts or hazelnuts add crunch. You can also use fresh raspberries or cherries between the layers. This adds a fruity contrast to the chocolate. Get creative and mix flavors you love! While ganache is great, you can try cream cheese frosting. Cream cheese adds a tangy flavor. It balances the sweetness of the cake well. Whipped buttercream is another option. It’s light and fluffy. You can tint it with food color for fun designs. If you want more flavor, consider flavored ganache. Add a splash of vanilla or orange zest to the mix. You can even use flavored chocolate, like mint or raspberry. Each option gives a unique twist to your cake. If you need a gluten-free cake, you can substitute flour easily. Use a gluten-free flour blend instead of all-purpose flour. Make sure it includes xanthan gum for better texture. This keeps the cake moist and soft. To maintain moisture, add an extra egg or use applesauce. This helps keep the cake from drying out. With these swaps, you can enjoy the same rich taste in a gluten-free version! To keep your Death by Chocolate Cake fresh, wrap it tightly. Use plastic wrap or aluminum foil for best results. Store it in the fridge if you have leftovers. This keeps the cake moist and tasty. - Place the cake in an airtight container. - Use parchment paper between layers to avoid sticking. - For extra moisture, add a slice of bread inside the container. Freezing is a great way to save this cake for later. Follow these steps to freeze it properly: 1. Let the cake cool completely. 2. Cut it into slices or leave it whole. 3. Wrap each slice tightly in plastic wrap. 4. Place the wrapped slices in a freezer bag. You can freeze the cake for up to three months. To thaw, simply take it out and leave it in the fridge overnight. Enjoy your cake as if it was just baked! Death by Chocolate Cake is a rich, layered dessert. It features deep chocolate flavor and moist texture. This cake often has chocolate ganache and chocolate chips. It looks beautiful with dark, glossy frosting. People love it for its intense chocolate experience. Yes, you can make this cake ahead of time. Bake the cakes and let them cool completely. Wrap each layer in plastic wrap. Store them in the fridge for up to three days. You can also freeze the layers for up to three months. Just remember to let them thaw before frosting. This way, the cake stays fresh and tasty. To check if the cake is done, look for a few signs. The edges should pull away from the sides of the pan. The cake should spring back when lightly touched. You can also test with a toothpick. Insert it into the center; if it comes out clean, the cake is ready. If it has wet batter, bake it a little longer. In this post, we explored how to create the perfect Death by Chocolate Cake. We covered key ingredients, mixing and baking steps, and how to achieve the best texture. You learned tips for a smooth ganache and serving ideas to impress. Variations and storage techniques ensure your cake stays fresh and delicious. Remember, quality ingredients and careful measuring make all the difference. Enjoy creating this rich, chocolate delight for your next celebration!

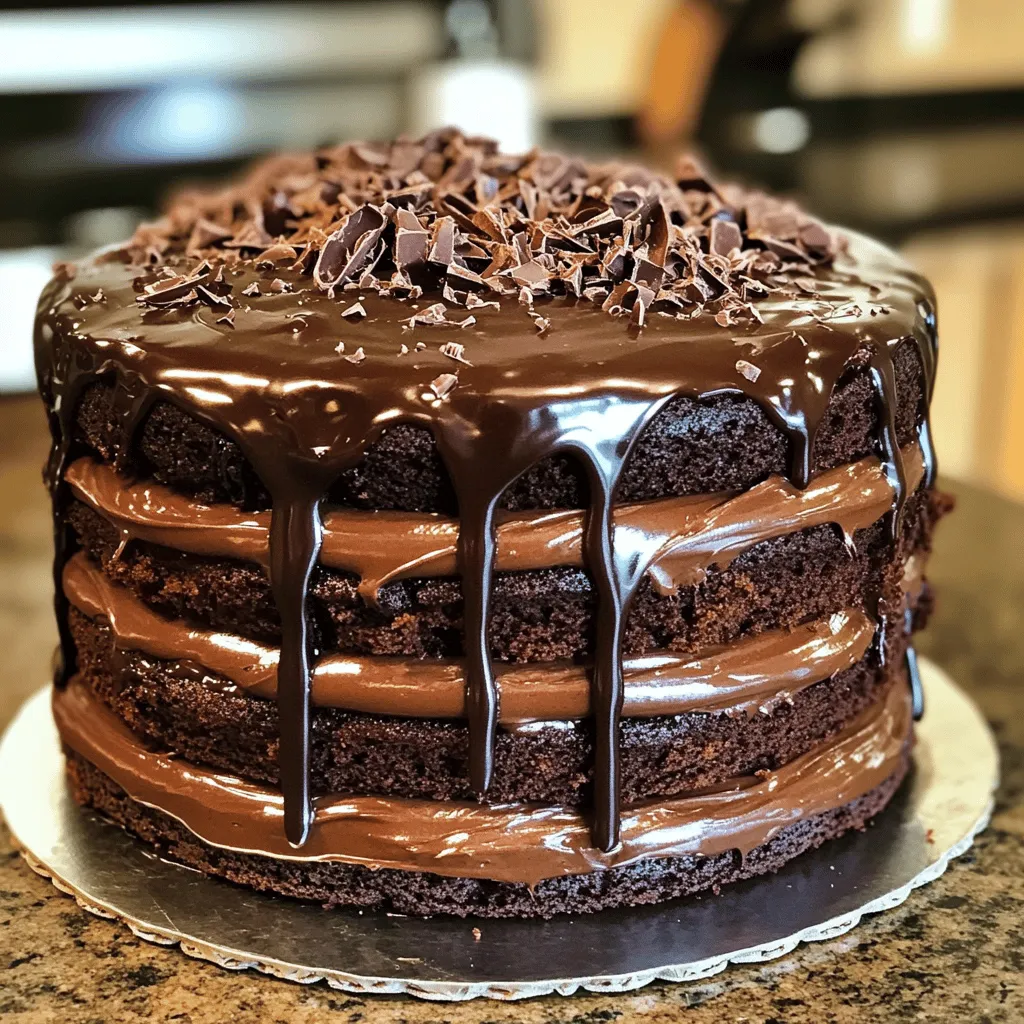
Are you ready to dive into a chocolate lover’s dream? Death by Chocolate Cake is the ultimate treat for anyone who craves rich, velvety goodness. In this post, I’ll guide …

Read more

Categories Desserts

French Silk Pie Cake Delightful and Simple Recipe

May 22, 2025 by Chef Remy
To make French Silk Pie Cake, you need the following key ingredients: - 1 cup all-purpose flour - 1/2 cup unsweetened cocoa powder - 1/2 teaspoon baking powder - 1/4 teaspoon salt - 1/2 cup unsalted butter, softened - 1 cup granulated sugar - 2 large eggs - 1 teaspoon pure vanilla extract - 1 cup heavy cream, chilled - 1/4 cup powdered sugar - 1/2 cup semi-sweet chocolate chips - Whipped cream (for topping) - Chocolate shavings (for garnish) Want to elevate the taste? Consider adding: - A splash of espresso for a richer chocolate flavor - A teaspoon of almond extract for a nutty twist - A pinch of sea salt to enhance sweetness No worries if you are missing some items. Here are some swaps: - Use whole wheat flour instead of all-purpose flour for added fiber. - Coconut oil can replace unsalted butter for a dairy-free option. - Substitute maple syrup for granulated sugar for a natural sweetener. - For a lighter texture, yogurt can replace heavy cream. These substitutions keep the cake's essence while catering to different needs. Remember, cooking is about creativity and experimenting! For the full recipe, check out the details above. Gather all your ingredients first. This helps you stay organized. You will need: - 1 cup all-purpose flour - 1/2 cup unsweetened cocoa powder - 1/2 teaspoon baking powder - 1/4 teaspoon salt - 1/2 cup unsalted butter, softened to room temperature - 1 cup granulated sugar - 2 large eggs - 1 teaspoon pure vanilla extract - 1 cup heavy cream, chilled - 1/4 cup powdered sugar - 1/2 cup semi-sweet chocolate chips - Whipped cream (for topping) - Chocolate shavings (for garnish) Preheat your oven to 350°F (175°C). Grease and flour a 9-inch round cake pan. This step is very important to avoid sticking. In a medium bowl, sift together the flour, cocoa powder, baking powder, and salt. This ensures no lumps in your cake. In a large bowl, cream the softened butter with the granulated sugar using an electric mixer. Beat until it looks light and fluffy, about 3-5 minutes. Add the eggs one by one, mixing well after each. Stir in the vanilla extract to add flavor. Now, slowly mix the dry ingredients into the wet mixture on low speed. Make sure you do not overmix. Pour the batter into your prepared cake pan. Bake for 25-30 minutes. To check if it’s done, insert a toothpick in the center. If it comes out clean, the cake is ready. Let it cool in the pan for 10 minutes before transferring it to a wire rack. In a small saucepan, melt the semi-sweet chocolate chips over low heat. Stir until smooth and then let it cool for a few minutes. In another bowl, whip the heavy cream and powdered sugar until you see soft peaks. This will make your filling light and fluffy. Gently fold the cooled melted chocolate into the whipped cream. Mix it carefully until fully combined. You should have a rich, airy chocolate filling ready to go! Once the cake is completely cool, slice it in half horizontally with a serrated knife. Spread half of the chocolate filling on the bottom layer. Place the top layer back on and then spread the remaining filling on top. Cover the cake with plastic wrap and chill it in the fridge for at least 1 hour. This allows the filling to set and firm up. When you're ready to serve, top it with whipped cream and sprinkle chocolate shavings for decoration. You can find the full recipe for this delightful cake to ensure you don’t miss any steps! To make the best French Silk Pie Cake, focus on the cake texture. Use room temperature butter for easy mixing. This helps create a light and fluffy batter. Be careful not to overmix when combining wet and dry ingredients. Overmixing can lead to a dense cake. Aim for a smooth batter with small lumps. This gives you a tender cake that rises well. Whipping cream is key for that dreamy texture. Start with heavy cream that is very cold. Chill your mixing bowl, too, for better results. Use an electric mixer on medium speed. Mix until soft peaks form. This means the cream should hold its shape but still look soft. Add powdered sugar gradually to sweeten it. For a flavor twist, add a splash of vanilla extract. Presentation is all about fun and flair. After chilling the cake, top it with whipped cream. Use a spatula or piping bag for a pretty design. Then, sprinkle chocolate shavings on top. They add a nice touch and make it look fancy. Serve slices on decorative plates to impress your guests. Enjoy the delight of every bite! {{image_4}} You can switch up the flavors in your French Silk Pie Cake. Instead of cocoa powder, try using matcha powder for a fun twist. This gives a green tea flavor that surprises everyone. You can also add orange zest to the batter for a bright citrus note. Almond extract is another great option for a nutty flavor. If you need a gluten-free version, swap the all-purpose flour for almond flour or a gluten-free blend. Make sure to check the baking powder and cocoa powder labels for gluten-free certification. This way, you can still enjoy this delicious cake without gluten. To make this cake vegan, you can replace the eggs with flax eggs. Mix one tablespoon of flaxseed meal with three tablespoons of water. Let it sit until it thickens, then use it in place of each egg. Use coconut cream instead of heavy cream for the filling. It whips up nicely and adds a rich flavor. For the Full Recipe, you can find detailed steps and ingredients to guide you through making this delightful cake. Store leftover French Silk Pie Cake in an airtight container. This keeps it fresh and moist. If you don’t have a container, wrap the cake tightly in plastic wrap. Place it in the fridge to maintain its flavor and texture. This method works best for a few days. You can freeze this cake for longer storage. First, let the cake cool completely. Then, wrap each slice in plastic wrap tightly. Next, place the wrapped slices in a freezer bag. Be sure to label the bag with the date. The cake can last up to three months in the freezer. When ready to enjoy, thaw it in the fridge overnight. The shelf life of your cake depends on how you store it. When kept in the fridge, it lasts about 5 to 7 days. If you freeze it, the flavor remains great for up to three months. Just remember, the sooner you eat it, the better it tastes! French Silk Pie Cake is a dreamy dessert that blends cake and pie. It features a rich chocolate filling that mimics the classic French silk pie. The cake is soft, moist, and topped with whipped cream. Each bite offers a sweet chocolate flavor that melts in your mouth. It’s perfect for any occasion or simply as a treat. Yes, you can make this cake ahead of time. Just prepare the cake and chill it in the fridge. It stays fresh for a few days. This makes it a great choice for parties or gatherings. You can simply take it out before serving and add the whipped cream topping. To prevent sticking, grease and flour your pan well. Use a non-stick spray or butter to coat the inside. Dust the pan with flour, shaking out the excess. This will help the cake release easily after baking. If you follow these steps, you should have no issues. You can serve this cake with a dollop of whipped cream on top. Fresh berries, like strawberries or raspberries, add a nice touch. You can also drizzle chocolate sauce for extra sweetness. Each side offers a different flavor that pairs well with the cake. Enjoy experimenting with your favorite toppings! This blog post shared key steps to make a French Silk Pie Cake. We discussed essential and optional ingredients, plus tasty substitutions. I led you through preparation, mixing, and baking. You learned how to create a rich filling and assemble your cake. Tips on texture, whipped cream, and presentation helped enhance your skills. We also explored variations for different diets and how to store leftovers effectively. Remember, this cake is versatile and can delight any crowd. Enjoy your baking journey!

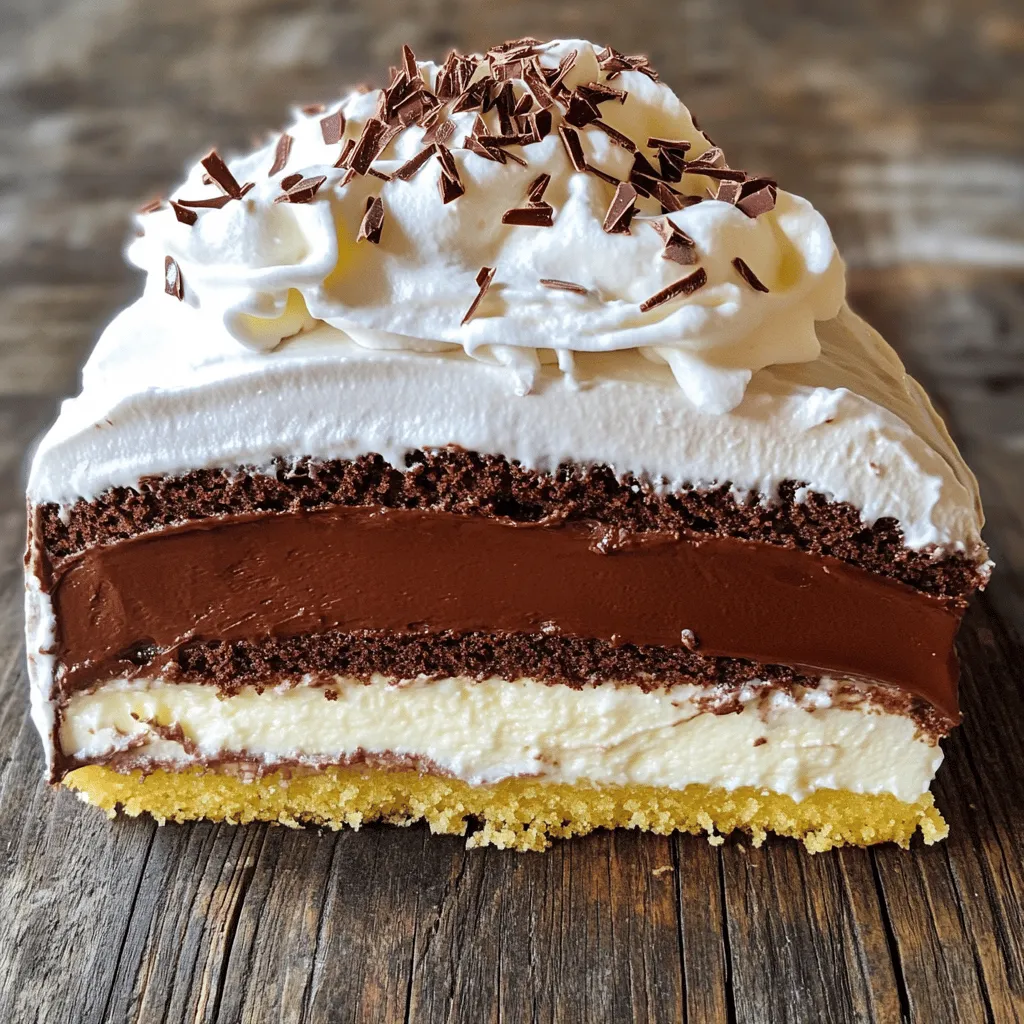
If you’re craving a dessert that’s both elegant and easy to make, you’re in for a treat! The French Silk Pie Cake combines rich chocolate flavor with a fluffy texture …

Read more

Categories Desserts
Older posts
Newer posts
← Previous Page1 … Page114 Page115 Page116 … Page130 Next →

ROASTED RECIPES

Where bold flavors meet everyday meals. Warm, vibrant, and made to share. 🔥🥗🍴

PAGES

Home About Contact Privacy Policy Terms & Conditions Cookie Policy GDPR Policy Copyright Policy Disclaimer

CATEGORIES

Appetizers Desserts Salads Breakfast Dinner

Contact

  • Pinterest
  • Mail
Copyright © 2025 Roasted Flavors. All rights reserved.