Big Mac Salad Bowl Savory and Healthy Meal Idea
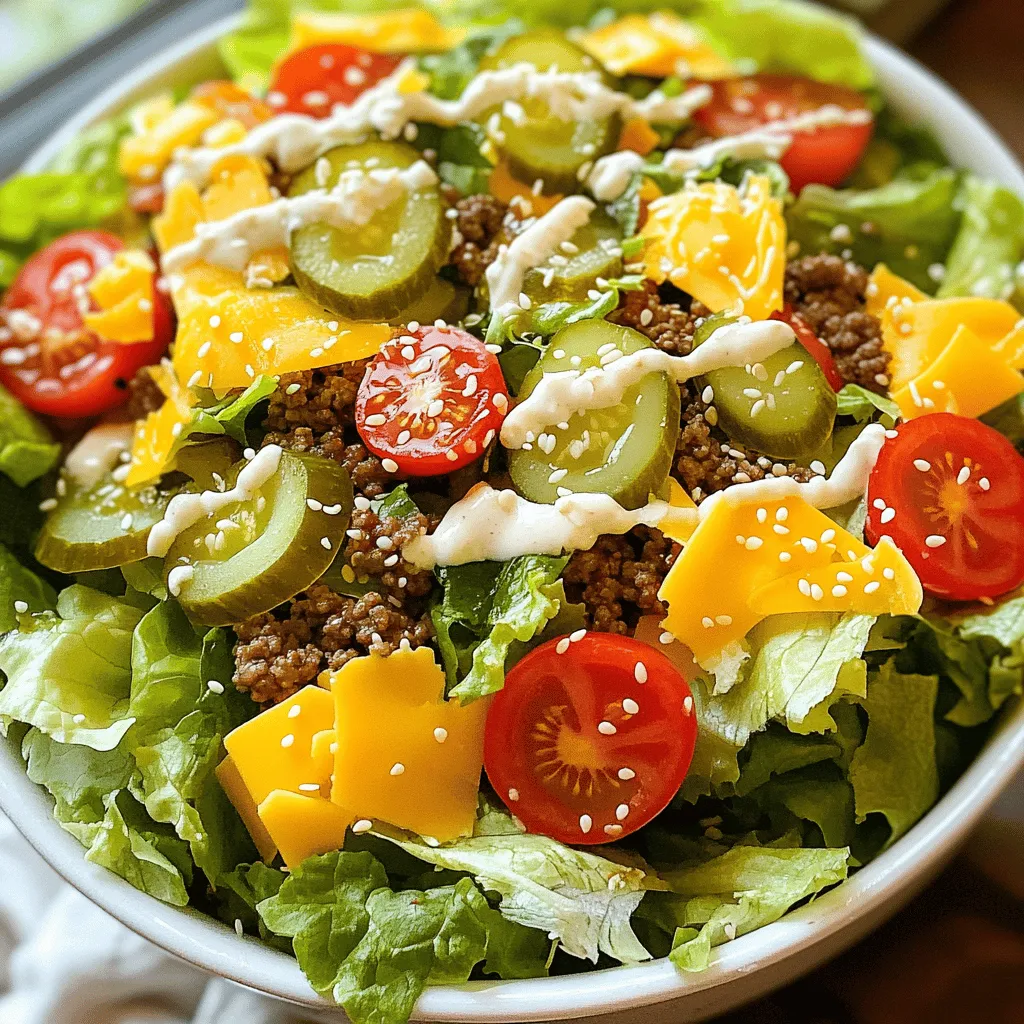
Looking for a tasty and healthy meal idea? The Big Mac Salad Bowl combines all your favorite flavors into one fresh dish. Imagine the classic taste of a Big Mac …
Looking for a tasty and healthy meal idea? The Big Mac Salad Bowl combines all your favorite flavors into one fresh dish. Imagine the classic taste of a Big Mac …
![Let's dive into the tasty ingredients you'll need for Jalapeno Popper Corn Salad. This dish is full of flavor and easy to whip up. - 3 cups fresh corn kernels (or 2 cans of corn, well-drained) - 1 cup diced jalapeños (fresh or pickled) - 1 cup cream cheese, softened - 1 cup shredded sharp cheddar cheese - ½ cup crumbled feta cheese - ½ cup green onions, finely chopped - ¼ cup mayonnaise - 2 tablespoons fresh lime juice - 1 teaspoon garlic powder - Salt and black pepper, to taste - Optional: ¼ cup crispy tortilla strips for garnish Each ingredient plays a vital role in shaping the salad's flavor. Fresh corn brings sweetness and crunch. Jalapeños add heat, while cream cheese and cheddar give that rich, creamy texture. Feta lends a tangy note, and lime juice brightens everything up. Don't forget the green onions for a fresh kick. If you want extra crunch, consider adding crispy tortilla strips as a garnish. They make the dish look appealing and fun. For the full recipe, you'll find clear steps to combine these ingredients into a delightful salad. Enjoy making this dish! 1. First, grab a spacious mixing bowl. Combine 1 cup of softened cream cheese and ¼ cup of mayonnaise. Mix them until smooth and creamy. This base gives your salad a rich texture. 2. Next, add 2 tablespoons of fresh lime juice, 1 teaspoon of garlic powder, and a pinch of salt and black pepper. Stir well to blend all the flavors. The lime juice adds a nice zing. 3. Now, gently fold in 1 cup of diced jalapeños, 3 cups of fresh corn kernels, 1 cup of shredded sharp cheddar cheese, ½ cup of crumbled feta cheese, and ½ cup of finely chopped green onions. Mix until everything is well coated in the creamy base. 4. Cover the bowl with plastic wrap and chill the salad in the fridge for at least 30 minutes. This helps the flavors blend together. 5. Before serving, taste the salad. Adjust the seasoning with more salt or pepper if needed. 6. For a crunchy finish, garnish with ¼ cup of crispy tortilla strips. You can either fold them in or sprinkle them on top. Enjoy this Jalapeno Popper Corn Salad with friends! For the full recipe, click here. To make your Jalapeno Popper Corn Salad more exciting, adjust the spice levels. If you want heat, use fresh jalapeños. For a milder taste, pickled jalapeños work well. Remember, the seeds hold most of the spice, so remove them if you want less heat. Chilling the salad is key. Let it rest in the fridge for at least 30 minutes. This step helps the flavors mix and deepen. The coolness also makes it refreshing, especially on warm days. You can also integrate extra toppings for more texture. Consider adding crispy tortilla strips right before serving. They add a nice crunch that contrasts with the creamy base. You could also sprinkle some extra green onions or crumbled feta on top for added flavor. When serving, use a colorful decorative bowl. A bright bowl makes your salad pop and draws attention. To enhance the look, add vibrant garnishes. Sprinkle extra cheese and diced jalapeños on top for color and texture. You can also arrange crispy tortilla strips around the edge of the bowl. This adds a delightful crunch and makes the dish look appealing. The more inviting it looks, the more people will want to dig in. Enjoy making your Jalapeno Popper Corn Salad shine! For the complete recipe, check out the [Full Recipe]. {{image_4}} You can change the cheese in this salad for a new taste. Try using Monterey Jack or pepper jack for added spice. Cream cheese adds creaminess, but you could swap it for Greek yogurt for a healthier option. Adding protein is simple. Diced grilled chicken or crispy bacon can make your salad heartier. Both options work well with the creamy dressing and bright flavors. For those who enjoy heat, you can alter spice levels. Use poblano peppers for milder heat or serrano peppers for a stronger kick. These changes can help you customize the salad to your liking. For a fun twist, make it Southwestern-style by adding black beans. They add fiber and make the dish more filling. Mix in drained, rinsed black beans with the corn and cheese. You can also try a Mediterranean spin. Add sliced olives and fresh herbs like parsley or dill. This will give the salad a fresh and bright flavor. Both variations keep the essence of the original while making it unique. Explore these variations to find your favorite version of Jalapeno Popper Corn Salad. For the full recipe, check the earlier section. To keep your Jalapeno Popper Corn Salad fresh, use an airtight container. This prevents air from spoiling the flavors. You can store it in the fridge for up to three days. After that, the taste and texture may change. If you want to freeze the salad, try this tip. Place it in a freezer-safe container. Make sure to leave some space at the top, as it will expand. You can freeze it for up to a month. When you’re ready to eat, move it to the fridge to thaw overnight. For the best texture, avoid refreezing it after thawing. Enjoy it fresh for the best flavor! How can I make Jalapeno Popper Corn Salad spicier? You can add more diced jalapeños to the salad. If you like heat, use fresh jalapeños. You can also mix in some diced serrano or habanero peppers for an extra kick. Adjust the spice to fit your taste! Can I make this salad ahead of time? Yes, you can make this salad a day before serving. Just store it in the fridge, covered. This way, the flavors blend well, and you save time. Just give it a quick stir before you serve it. What can I serve with Jalapeno Popper Corn Salad? This salad pairs well with grilled chicken, tacos, or burgers. It also goes great with a side of tortilla chips or as a topping for nachos. You can serve it at parties or barbecues for a fun twist. Can I use frozen corn instead of fresh? Yes, frozen corn works well! Just thaw it first and drain any excess water. This saves time and still gives you great flavor and texture. Is there a substitute for cream cheese? If you want a lighter option, use Greek yogurt or cottage cheese. You can also try using a dairy-free cream cheese for a vegan twist. Just make sure it has a similar texture to keep the salad creamy. For the full recipe, check out the [Full Recipe]. You now have a simple guide to making Jalapeno Popper Corn Salad. We covered the ingredients, easy steps, and clever tips to boost flavor. Feel free to switch ingredients or add new ones for your taste. Storing this salad is easy, whether in the fridge or freezer. This dish is festive, creamy, and full of flavor. It’s perfect for any gathering. Enjoy making it and sharing it with friends and family. You can customize it to fit your style!](https://roastedflavors.com/wp-content/uploads/2025/05/45e2c56f-3bdb-4aa0-8b4f-c8364c6c6b95.webp)
If you love bold flavors and easy cooking, you’re in for a treat! My Jalapeno Popper Corn Salad brings all the deliciousness of a classic appetizer right to your table. …
![To create a vibrant and refreshing Pineapple Cucumber Lime Salad, you need some fresh ingredients. Each one adds unique flavor and texture. Here’s what you will need: - 2 cups fresh pineapple, diced into bite-sized pieces - 1 medium cucumber, peeled and diced - 1 red bell pepper, diced - 1/4 red onion, finely chopped - 1 jalapeño, deseeded and minced (optional for a spicy kick) - 1/4 cup fresh cilantro, roughly chopped - Juice of 2 fresh limes - 1 tablespoon honey (or agave syrup for a vegan option) - Sea salt and freshly cracked black pepper, to taste These ingredients mix well together and create a tasty salad. The sweet pineapple balances with the cool cucumber. The red bell pepper adds crunch, while the onion gives a bit of bite. If you want heat, add the jalapeño. Fresh cilantro brings a nice herb flavor, and lime juice adds a zesty twist. Honey or agave syrup sweetens the dish, making it a perfect summer treat. For the full recipe, check the detailed instructions. Enjoy making this light and refreshing salad! 1. Start with the fresh pineapple. Cut it into bite-sized pieces. Aim for about 2 cups. 2. Next, peel and dice your cucumber. A medium cucumber works best here. 3. In a large mixing bowl, combine the diced pineapple and cucumber. 4. Add 1 diced red bell pepper and 1/4 finely chopped red onion. Mix gently with a spatula. 5. If you like it spicy, add minced jalapeño. Adjust the amount to fit your taste. 1. In a small bowl, squeeze the juice from 2 fresh limes. 2. Add 1 tablespoon of honey or agave syrup. Whisk until smooth and well combined. 3. This dressing adds great flavor to your salad! 1. Drizzle the lime dressing over the salad mixture. Toss gently to coat all ingredients. 2. Fold in 1/4 cup of roughly chopped fresh cilantro. Season with sea salt and black pepper to taste. 3. Let the salad rest at room temperature for about 10 minutes. This helps the flavors blend well. For the complete recipe, check out the [Full Recipe]. Enjoy your refreshing summer dish! Adjusting Heat Level with Jalapeño If you like a kick, add jalapeño. Start with a small amount. You can always add more if you want it spicier. Remove the seeds to reduce the heat. This way, you can control the spice level. Just remember to mix it well with the other ingredients for an even flavor. Substituting Ingredients for Variety Feel free to swap ingredients based on what you have. Want to add mango? Go ahead! You can also try bell peppers of different colors. Each change brings a new taste. This salad is very flexible. Using what you have makes cooking fun and easy. Serving Suggestions and Garnishes Serve this salad in a colorful bowl. It makes the dish pop! You can add lime wedges on the side. A sprig of cilantro on top adds a nice touch. These little steps make your dish look fancy and inviting. Bowl Selection for Visual Appeal Choose a bowl that matches the bright colors of the salad. A clear glass bowl shows off the layers and colors. A vibrant bowl adds charm and makes your salad stand out. Presentation plays a big role in how we enjoy food. Health Advantages of Fresh Ingredients This salad is packed with vitamins. Pineapple is rich in vitamin C, while cucumber is hydrating. Fresh veggies boost your health and energy. Eating colorful foods is great for your body. Each bite offers nutrition and fresh taste. Low-Calorie and Nutrient-Dense Options This dish is low in calories but high in nutrients. It fills you up without heavy ingredients. Perfect for a light summer meal! You can enjoy it guilt-free and feel good about what you eat. Eating healthy can be both tasty and enjoyable. {{image_4}} You can switch up the fruits in this salad. Try adding mango or kiwi for a sweet twist. Both fruits add a burst of color and flavor. Mango gives a tropical vibe, while kiwi adds a tart note. You can also include avocado for creaminess. Avocado brings a rich texture that balances the crispness of cucumber. It makes the salad a bit heartier without losing its light feel. Herbs can really change the flavor of your salad. Experiment with mint or basil for a refreshing touch. Mint adds a cool taste, while basil gives a warm, sweet aroma. You can also add other greens like arugula or spinach. These greens add a peppery flavor and extra nutrients. Play around to find the mix you love best! Try different dressings to give your salad new life. A citrus vinaigrette made with orange or lemon juice can be bright and zesty. You can also use honey, maple syrup, or agave syrup for sweetness. Each sweetener gives a different flavor profile. This way, you can customize the salad to fit your tastes. For the full recipe, check out the link! To keep your pineapple cucumber lime salad fresh, use airtight containers. This helps prevent air from wilting the veggies. Glass or plastic containers work well. Make sure they seal tightly. Store the salad in the fridge right after making it. Keep the salad in the refrigerator at 40°F (4°C) or lower. Storing it cold helps preserve its taste and texture. Avoid leaving the salad out for more than two hours. If it's hot outside, limit that time to one hour. Your salad is best when eaten fresh. It stays good for 1 to 2 days in the fridge. After that, the ingredients may lose their crunch. Look for signs of spoilage. If the salad looks slimy or has an off smell, it’s time to toss it. Discoloration is also a red flag. Trust your senses; when in doubt, throw it out. Enjoy your fresh salad while it lasts! For more details, check the Full Recipe. To make this salad vegan, you can easily swap honey for agave syrup. Agave syrup is a great vegan-friendly sweetener. It adds sweetness without any animal products. You can also try maple syrup or coconut sugar. Both will work well in this refreshing dish. Yes, you can prepare this salad ahead of time. To keep it fresh, store it in an airtight container. Make sure to add the dressing right before serving. If you do mix the dressing in early, the salad may get soggy. Cut the ingredients a day ahead and keep them in the fridge. This salad pairs well with many dishes. You can serve it with grilled chicken or fish for a light meal. It also goes great with tacos or burgers. For a vegetarian option, try it with quinoa or a veggie wrap. Each pairing will enhance the bright flavors of the salad. This blog post shared a simple, fresh salad recipe using fruits and vegetables. You learned how to prepare it step-by-step. We discussed tips for flavor, presentation, and nutrition. You can customize this salad with different fruits and herbs. You also found best practices for storing and serving. I hope you feel inspired to try this refreshing salad. Enjoy the bright flavors and stay healthy!](https://roastedflavors.com/wp-content/uploads/2025/05/24f4b5b5-84fa-4009-9c02-f36e9e15a4d4.webp)
Looking for a light and zesty dish that screams summer? This Pineapple Cucumber Lime Salad is your answer! Bursting with fresh flavors and crunchy textures, it’s the perfect side for …
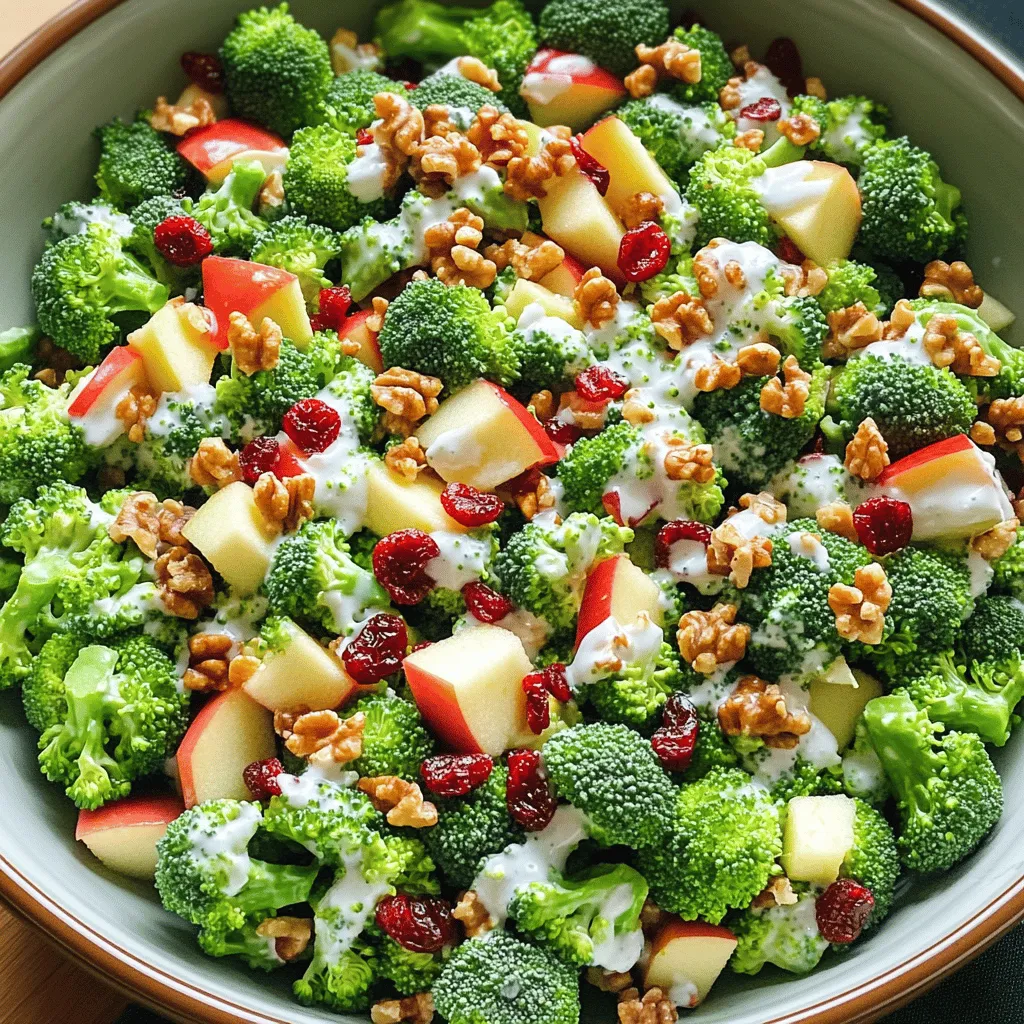
Are you ready to enjoy a salad that’s both fresh and crunchy? This Honeycrisp Apple Broccoli Salad packs vibrant flavors and textures in every bite. With crisp broccoli, sweet Honeycrisp …
![- 4 cups green cabbage, thinly sliced - 1 cup carrots, grated - 1 cup cucumber, diced - ½ cup red bell pepper, finely chopped - ¼ cup green onions, sliced - ¼ cup fresh cilantro, roughly chopped - 1 teaspoon honey - 2 tablespoons apple cider vinegar - 1 tablespoon extra virgin olive oil - Sea salt and freshly ground black pepper to taste - Toasted sesame seeds Cabbage salad is simple and packed with nutrients. First, let’s talk about the main ingredients. Fresh green cabbage forms the base. It gives crunch and fiber. The carrots add sweetness and color. Cucumbers keep the salad refreshing. Red bell pepper adds a splash of bright flavor. Green onions give it a mild bite. Finally, cilantro introduces an herbal note. You can add honey for a touch of sweetness, but it’s optional. Apple cider vinegar brings tanginess, while olive oil adds a smooth richness. Season with sea salt and black pepper for balance. Toasted sesame seeds give a nice crunch and nutty flavor. This salad is not just healthy; it’s also versatile. You can mix and match these ingredients based on what you love or have on hand. For the full recipe, check out the Crunchy Cabbage Delight 🥗 section above. Enjoy experimenting with this delightful mix! - Start by washing all your veggies well. - Take 4 cups of green cabbage and slice it thin. - Grate 1 cup of carrots and dice 1 cup of cucumber. - Chop ½ cup of red bell pepper finely. - Slice ¼ cup of green onions. - Put all the chopped veggies into a large mixing bowl. - Grab a small bowl for the dressing. - Whisk together 2 tablespoons of apple cider vinegar. - Add 1 tablespoon of extra virgin olive oil. - If you like it sweet, mix in 1 teaspoon of honey. - Season with a pinch of sea salt and black pepper. - Whisk until everything is well combined. - Drizzle the dressing over the veggies in the large bowl. - Use tongs or a large spoon to toss everything gently. - Make sure all the veggies get coated with the dressing. - Fold in ¼ cup of roughly chopped cilantro. - Sprinkle 1 teaspoon of toasted sesame seeds on top. - Let the salad sit at room temperature for 10 minutes. - This helps the flavors blend well before serving. For a full recipe, check out the *Full Recipe* section. Enjoy your fresh and tasty cabbage salad! To keep your cabbage salad fresh, use an airtight container. Place it in the fridge right away. The salad can last for three days. If the salad gets soggy, add fresh cabbage before serving. This keeps the crunch alive. You can make cabbage salad ahead for the week. Start by chopping all the veggies. Store them in separate containers. Prepare the dressing and keep it in a jar. Mix everything together when you are ready to eat. This way, your salad stays crisp and tasty all week. Want to boost the taste? Try adding fresh herbs like dill or parsley. You can also use spices like cumin or paprika. A squeeze of lemon juice brightens up the flavors too. Experiment with these ideas to find your perfect mix. {{image_4}} You can switch up your cabbage choice for this salad. Red cabbage adds a vibrant color and a slightly sweet taste. Napa cabbage has a tender texture and a mild flavor. Both options give your salad a fun twist. Try using one or mix them for a colorful dish. To make your salad filling, think about adding protein. Grilled chicken is a great choice if you want meat. Tofu is perfect for a plant-based option. Chickpeas are another fantastic addition. They boost fiber and protein, keeping you full and satisfied. Using seasonal veggies can bring new flavors to your salad. In spring, add radishes for a crisp bite. Summer is great for fresh corn or tomatoes. In fall, consider adding roasted squash. These veggies not only taste good but also add fun textures. Enjoy exploring different combinations! For the complete recipe, check out the [Full Recipe]. To keep your cabbage salad fresh, store it in an airtight container. It lasts in the fridge for up to three days. After that, the veggies may lose their crispness. If you notice extra water at the bottom, drain it before serving. This helps maintain texture and taste. Can you freeze cabbage salad? I don’t recommend it. Freezing can change the texture of the vegetables. When thawed, they may become mushy. If you want to prepare it ahead, store only the dressing separately. Mix it in when you're ready to eat. This keeps your salad fresh and crunchy. What should you look for in cabbage salad? If the colors fade or vegetables become slimy, it’s time to toss it. A sour smell is another sign of spoilage. Always trust your senses. If in doubt, throw it out. It's better to be safe than sorry. Cabbage is low in calories. One cup of raw cabbage has only 22 calories. It is also high in fiber. Fiber helps you feel full. This can reduce your overall food intake. Cabbage is packed with vitamins too. It has vitamin C and K. These vitamins support your health as you lose weight. Eating cabbage can help you stay on track with your goals. Yes, you can make the salad ahead of time. Prepare it a day in advance. Just store it in the fridge. Keep the dressing separate until serving. This keeps the veggies fresh and crunchy. Toss the dressing in right before you eat. This way, the salad stays tasty and crisp. Many dressings go well with cabbage salad. You can try a sesame dressing for a nutty flavor. A sweet vinaigrette works great too. Olive oil and lemon juice make a light option. You can also use a yogurt-based dressing for creaminess. Feel free to mix and match until you find your favorite. The total calories in cabbage salad depend on the ingredients. The basic salad has around 150 calories per serving. This includes the veggies and simple dressing. If you add nuts or fruits, the calories may increase. It’s great for light meals while keeping your calorie count low. Yes, adding fruits can enhance flavor and nutrition. Apples add sweetness and crunch. You can add oranges for a citrus twist. Diced pears also work well. For a tropical flair, try mango or pineapple. Fruits not only taste good, but they also boost vitamins in your salad. This blog post covers how to make a tasty cabbage salad. We explored the main and optional ingredients, including simple dressings and spices. I offered tips on storage and meal prep, plus fun variations to suit your taste. To wrap up, cabbage salad is healthy, flexible, and great for meals. It’s easy to prepare and store, making it a perfect option for busy days. Enjoy experimenting with your own ingredients and flavors. The options are endless!](https://roastedflavors.com/wp-content/uploads/2025/05/749fa659-ec9f-424f-9148-1a5a0d7a9594.webp)
Are you looking for a tasty way to lose weight? Cabbage salad is a smart choice! With its crunchy texture and fresh taste, this salad not only supports your health …

Looking for an easy way to whip up delicious chicken tenderloin meals? You’ve landed in the right spot! Today, I’ll guide you through tasty recipes, simple steps, and helpful tips. …

Get ready to spice up your dinner routine with my Flavorful Cowboy Butter Chicken! This dish is not only quick to make but bursting with rich flavors. In this article, …
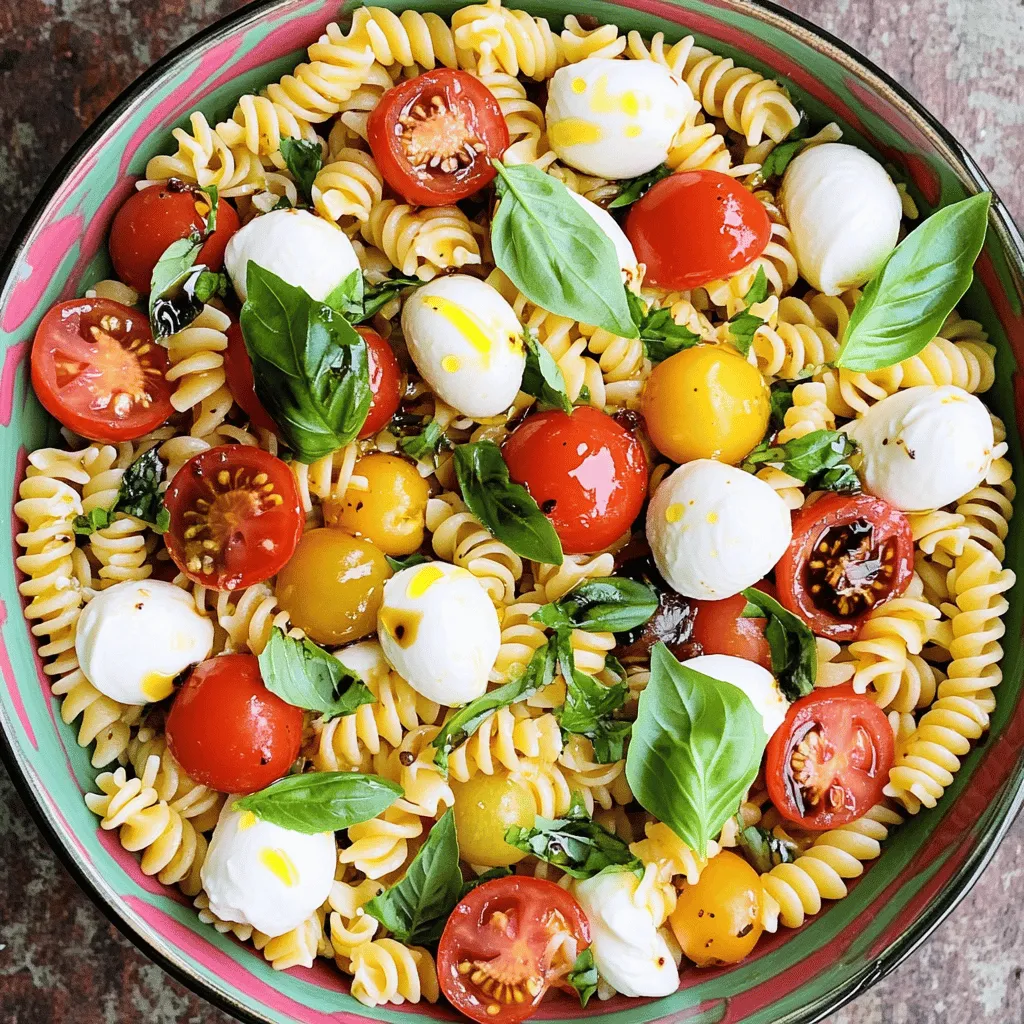
Are you ready to elevate your pasta game? The Best Caprese Pasta Salad is here to impress with its vibrant flavors and fresh ingredients. Whether you’re planning a picnic or …

Are you ready to crunch into a world of flavor with Crispy Chicken Katsu? This dish is a true crowd-pleaser, featuring tender chicken coated in a crispy, golden crust. I’ll …
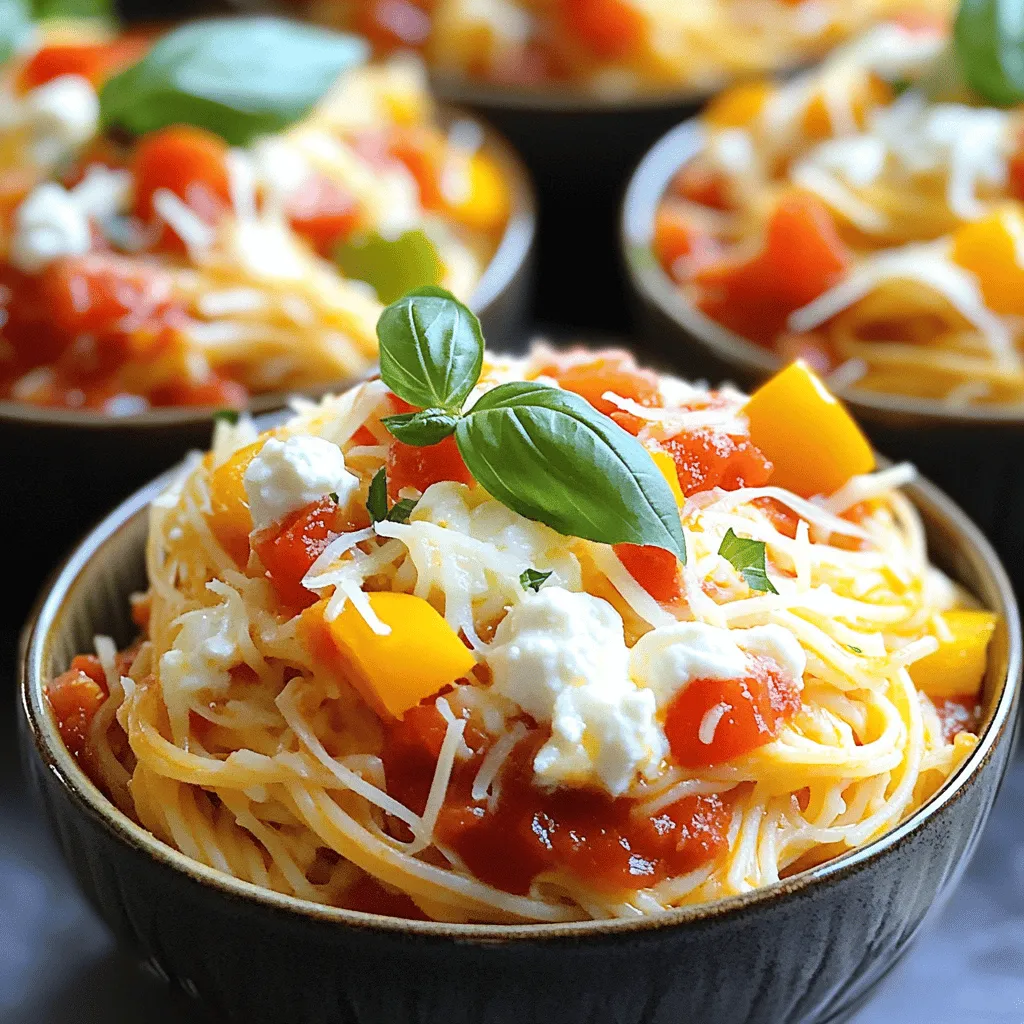
Welcome to Savory Slow Cooker Spaghetti Casserole Delight! If you’re looking for an easy and tasty dinner, this recipe is for you. I will guide you on how to make …