Garlic Butter Shrimp and Broccoli Flavorful Delight
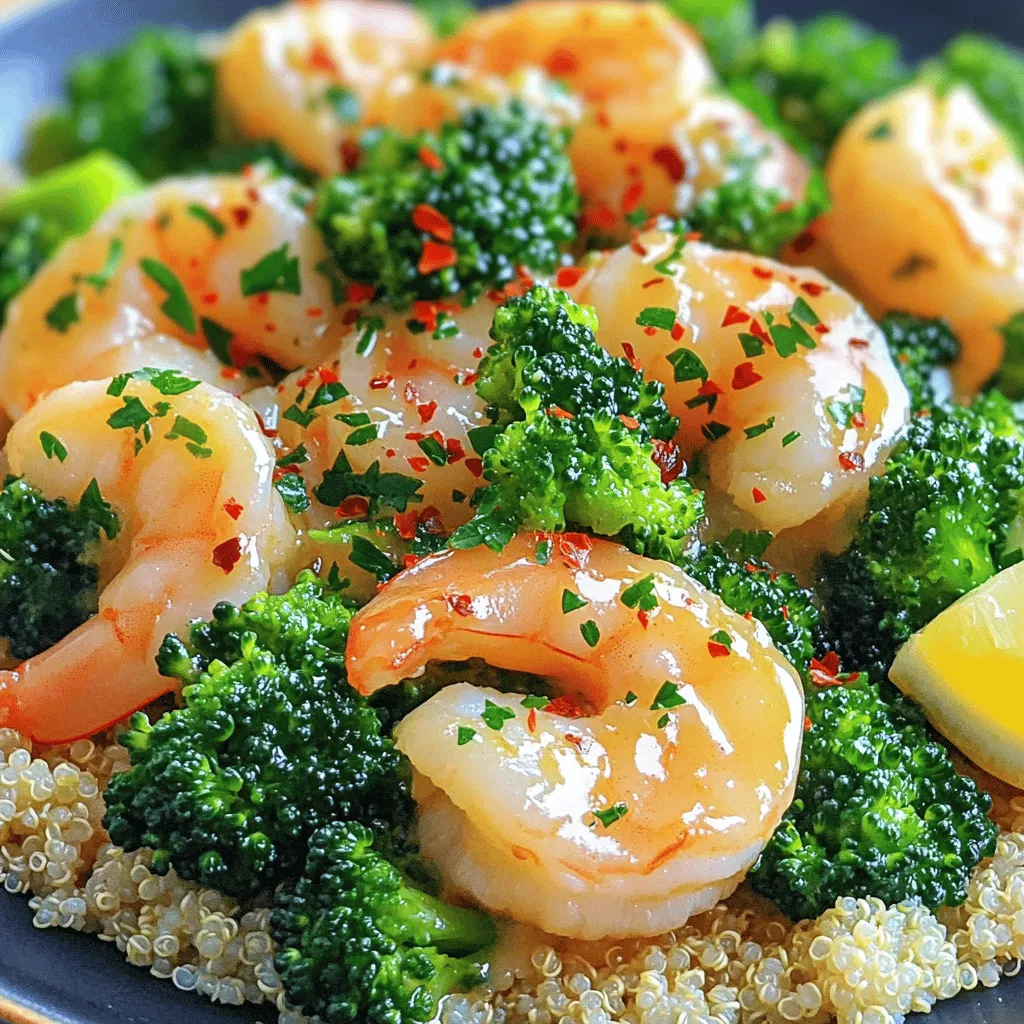
Are you ready to whip up a dish that’s as tasty as it is simple? Garlic Butter Shrimp and Broccoli is perfect for a quick weeknight meal or a cozy …
Are you ready to whip up a dish that’s as tasty as it is simple? Garlic Butter Shrimp and Broccoli is perfect for a quick weeknight meal or a cozy …
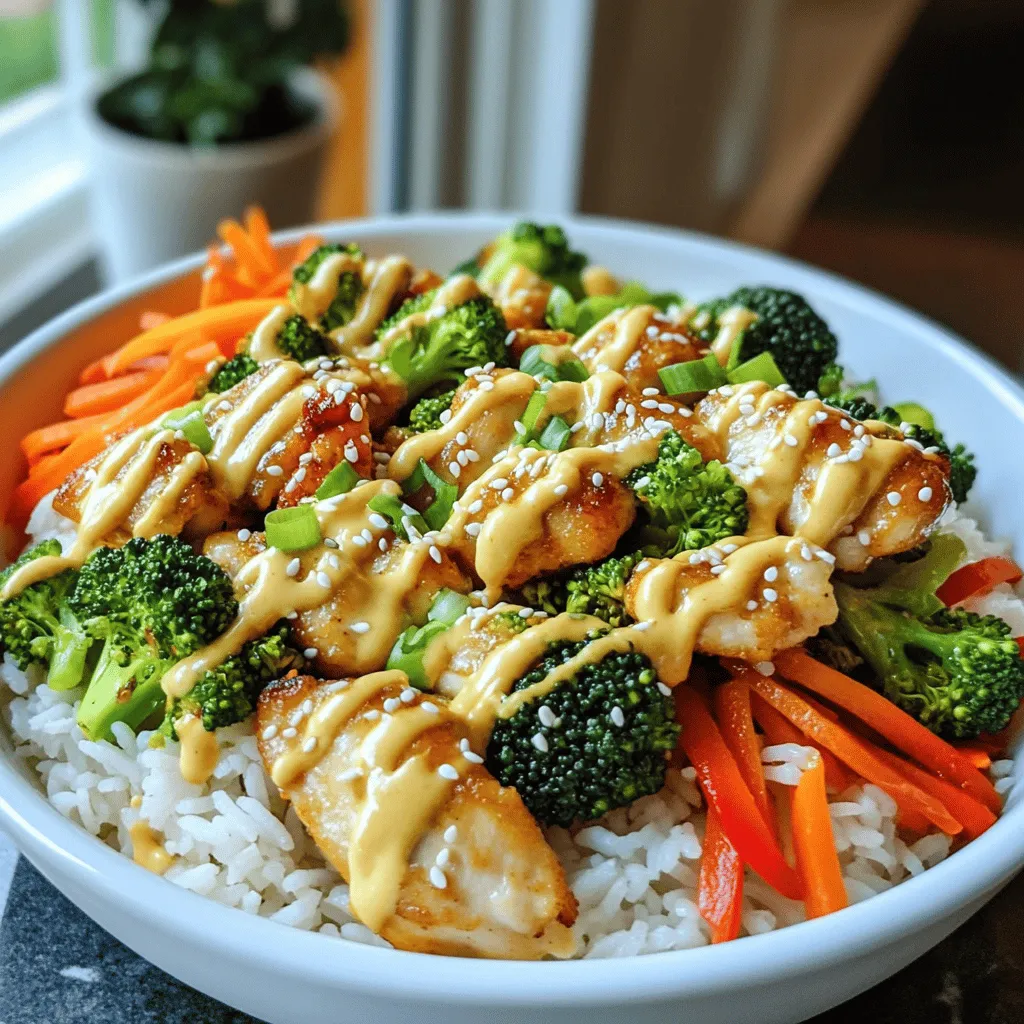
Looking for a quick and tasty meal? My Bang Bang Chicken Bowl recipe has you covered! This dish is packed with flavor and easy to make. Whether you’re a busy …
. To enjoy a milder bite, remove the seeds from the jalapeños. The seeds hold most of the heat. If you want a different pepper, try using banana or Anaheim peppers. They have less heat and can still pack a flavorful punch. You can change up the taste by using different cheeses. Cream cheese is great, but try pepper jack for a kick or mozzarella for a milder flavor. Adding fresh herbs like cilantro or parsley can also lift the dish. A squeeze of lemon juice adds brightness and balance. When serving, place the stuffed jalapeños on a colorful platter. This makes the dish pop. You can garnish with extra chopped green onions or a sprinkle of paprika for color. Drizzle some hot sauce on top for extra flair and flavor. {{image_4}} If you want a meat-free dish, swap shrimp with mushrooms or tofu. Mushrooms add a nice, earthy flavor. Tofu absorbs all the spices well. This option is perfect for plant lovers. Just sauté the mushrooms or tofu until golden before mixing. Mix things up by using pepper jack or blue cheese. Pepper jack brings a spicy kick to the dish. Blue cheese adds a rich and bold flavor. You can use one or a mix of both. Cheese lovers will enjoy the depth of flavor in each bite. For a fun twist, add corn or black beans to the filling. Both ingredients boost flavor and texture. They also add some color, making your dish pop. Corn brings sweetness, while black beans give you protein. This twist keeps the dish exciting and fresh. For the full recipe, check out the detailed instructions above. To store leftovers, place the stuffed jalapeños in an airtight container. Keep them in the fridge for up to three days. When you want to enjoy them again, simply reheat in a 350°F (175°C) oven. This method helps maintain their crispy texture. Heat for about 10-15 minutes or until warm throughout. You can freeze stuffed jalapeños for longer storage. After baking, let them cool completely. Arrange them on a baking sheet and freeze until solid. Then, transfer them to a freezer bag. This way, they won't stick together. They can last up to three months in the freezer. To thaw, move them to the fridge overnight. You can also cook them straight from frozen. If cooking from frozen, add an extra 10-15 minutes to your baking time. This method ensures they heat through without drying out. For the full recipe, check the earlier section. To reduce the heat, remove the seeds and membranes from the jalapeños. This step makes a big difference. You can also choose milder peppers, like Anaheim or poblano, for a gentler bite. Another option is to mix in more cream cheese to balance the spice. Adding a bit of sugar can help cut through the heat, too. Yes, you can! To make them ahead, prepare the stuffed jalapeños and place them in the fridge. Cover them tightly with plastic wrap. You can store them like this for up to 24 hours. When ready, bake them straight from the fridge. Just add a few minutes to the baking time to ensure they heat through properly. These stuffed jalapeños pair well with many sides. Try serving them with a fresh salad, like a simple green or a spicy coleslaw. Rice dishes, such as Cajun rice or cilantro lime rice, also complement the flavors nicely. For a fun twist, serve with tortilla chips and salsa for a complete feast. Check the Full Recipe for more ideas! You now have all the tools to make Cajun shrimp stuffed jalapeños. We covered ingredients, preparation, and baking steps. You also learned how to customize the heat and flavor. Remember to experiment with variations like vegetarian options or different cheeses. For storage, save leftovers in the fridge or freeze them for later. Enjoy your creation as a savory snack or fun party dish! You can impress your friends and family with this delicious recipe. Happy cooking!](https://roastedflavors.com/wp-content/uploads/2025/05/a720fe4c-9b73-4163-bffa-cbe3c3cd17ce.webp)
If you crave bold flavors and a kick of spice, you’ll love my Fiery Cajun Shrimp Stuffed Jalapeños! This tasty recipe combines the heat of jalapeños with savory shrimp and …
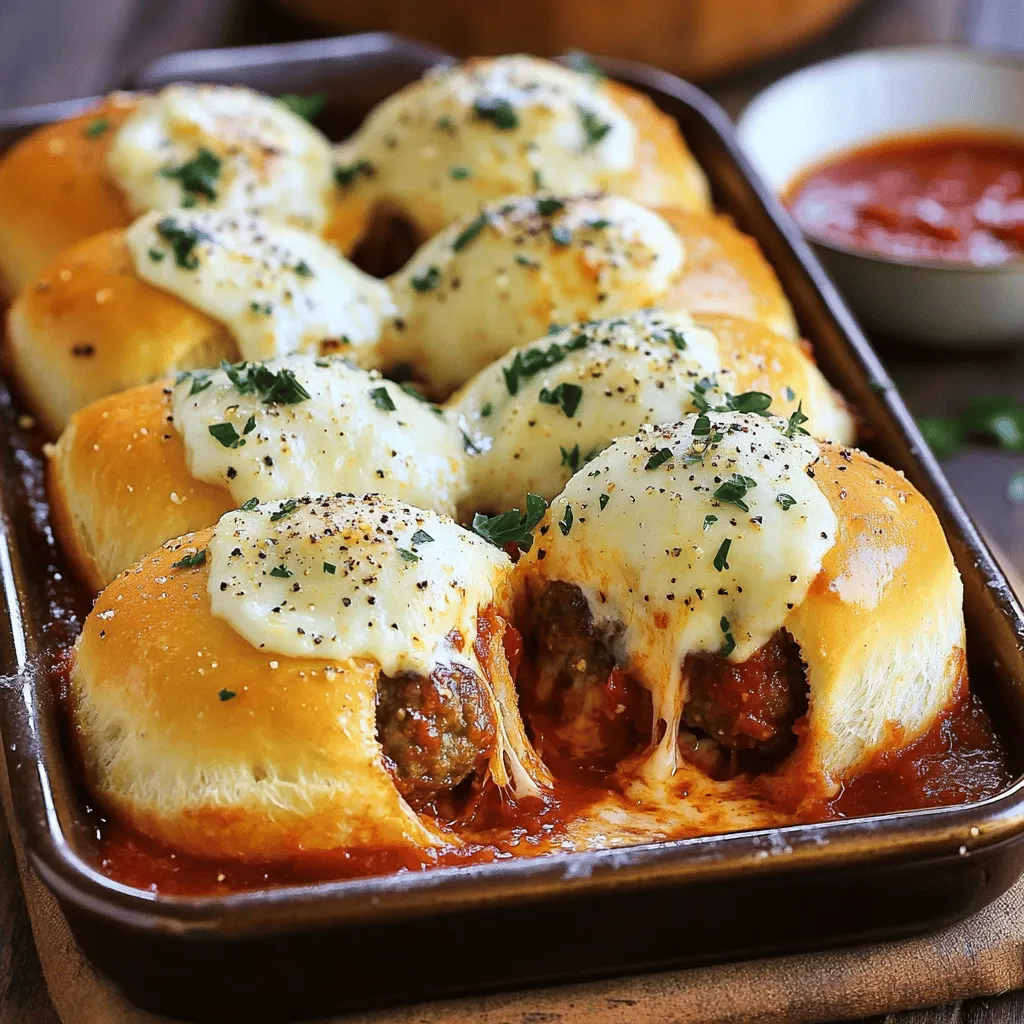
Craving a tasty treat that’s easy to make and fun to eat? Look no further! These Pull-Apart Meatball Sliders with Garlic Parmesan Butter are a game-changer. Succulent meatballs, gooey cheese, …

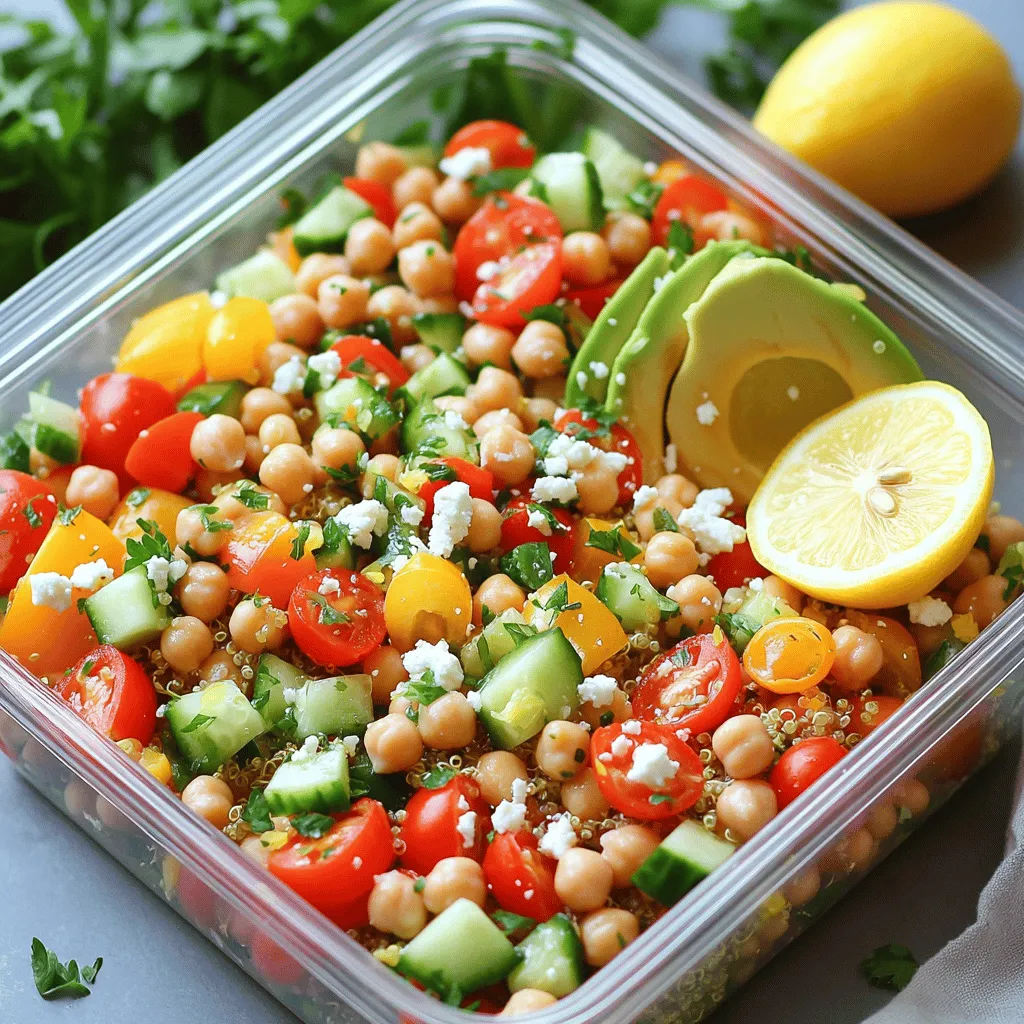
Are you ready to spice up your meals with a burst of flavor? Today, I’ll show you how to make Feta & Cranberry Chickpeas with a Zesty Lemon Boost. This …
Looking to boost your meal prep game with tasty and healthy options? High protein salads are the perfect solution. Packed with nutrients and flavor, these salads keep you full and …
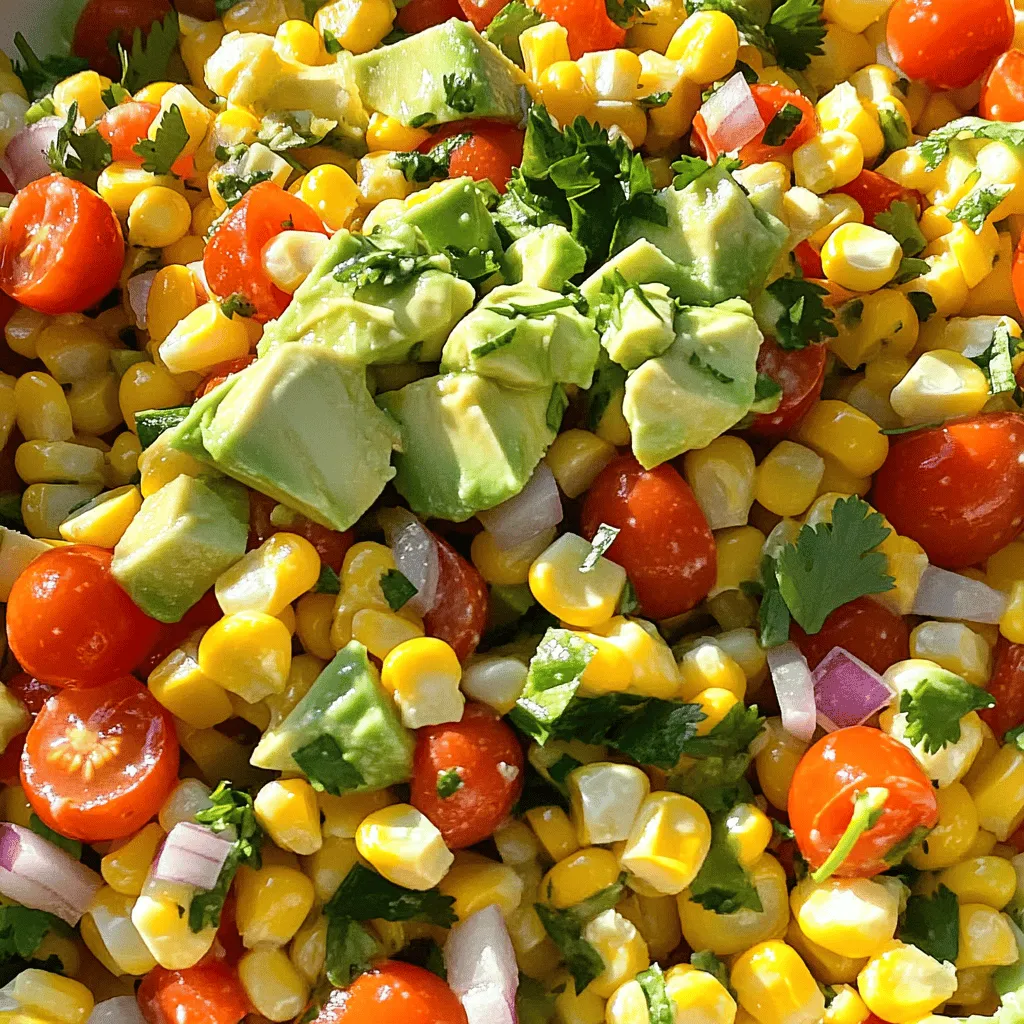
Are you ready to enjoy a bright and tasty Corn Salad? This fresh Corn Salad Delight combines sweet corn with crisp veggies and zesty dressing. In this article, you’ll learn …
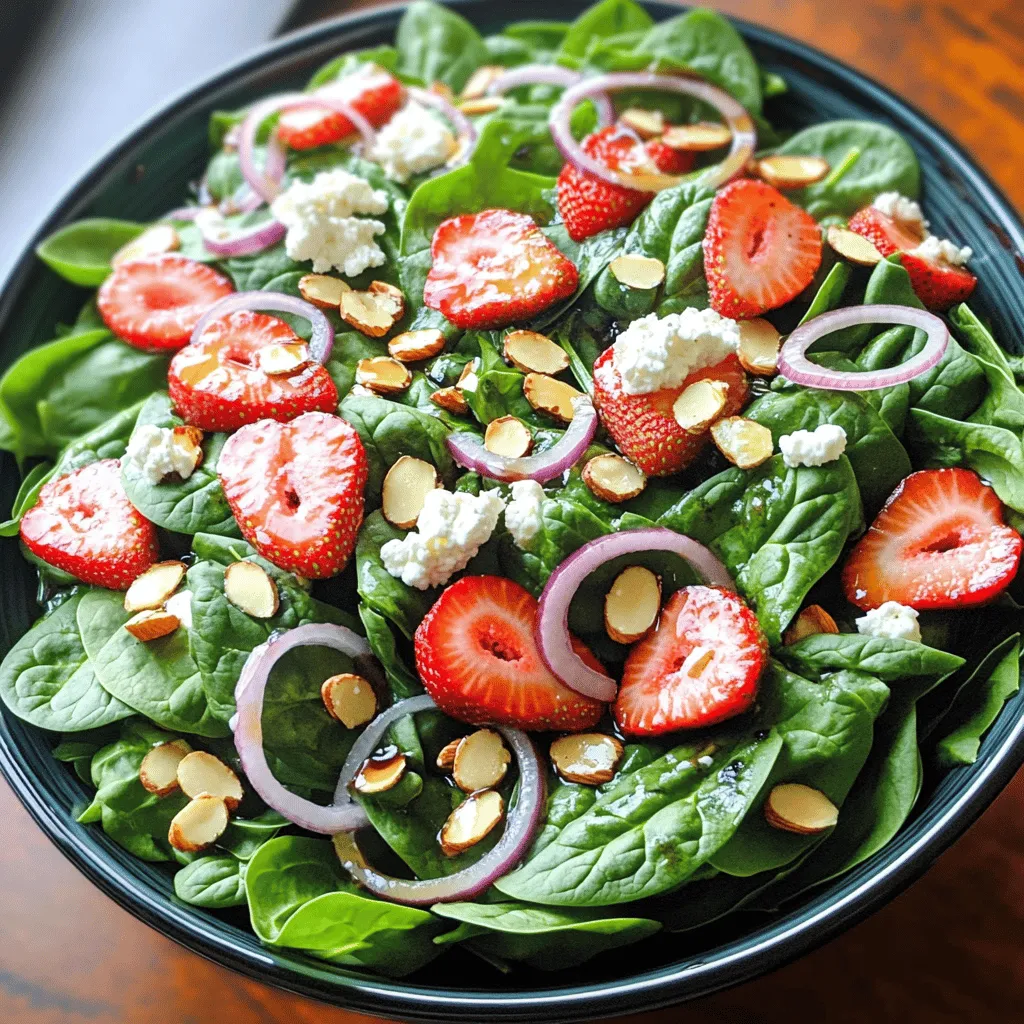
Are you ready to elevate your salad game? This Spinach Strawberry Salad is fresh and full of flavor. It’s perfect for warm days and easy to make. With sweet strawberries, …
![- 20 large pasta shells - 2 cups fresh spinach, finely chopped - 1 cup ricotta cheese - 1 cup shredded mozzarella cheese, divided - 1/2 cup grated Parmesan cheese - 1 large egg - 2 cloves garlic, minced - 1 teaspoon dried oregano - Salt and black pepper to taste - 3 cups marinara sauce - Fresh basil leaves, for garnish To make Easy Spinach and Ricotta Stuffed Shells, start with fresh ingredients. I love using large pasta shells because they hold a lot of the tasty filling. You want them to be big enough to stuff well, yet not too big to handle. Spinach adds a nice color and flavor. I always chop it finely so it mixes well with the cheeses. Ricotta is creamy and gives a rich taste. Mixing it with mozzarella creates a gooey texture that melts nicely when baked. Don’t forget the Parmesan! It adds a salty kick and depth to the filling. One egg binds everything together. You need it to keep the mixture from falling apart. For seasoning, garlic gives a strong flavor. Oregano adds warmth, while salt and pepper balance it all out. Marinara sauce is the perfect base. I suggest using a good quality sauce for the best taste. Finally, fresh basil leaves make a lovely garnish. They add a nice color and a fresh taste that brightens up the dish. Check out the Full Recipe for step-by-step instructions on how to bring it all together! - Boil and cook the pasta shells until al dente. - Cool the cooked shells on a clean kitchen towel. To begin, I boil a large pot of salted water. I cook the pasta shells, following the package instructions. I want them firm but not hard. Once cooked, I drain the shells gently and spread them on a clean kitchen towel to cool. This helps prevent them from sticking together. - Sauté garlic and spinach mixture. - Combine ricotta, mozzarella, Parmesan, egg, and spices. Next, I heat a skillet over medium heat. I add a tablespoon of olive oil and let it warm. Then, I toss in minced garlic and sauté it for about one minute. It should smell nice. After that, I add the chopped spinach. I cook it for 2-3 minutes until it wilts. Then, I remove the skillet from heat to cool. In a mixing bowl, I combine ricotta cheese, half of the mozzarella, grated Parmesan, and a large egg. I also add the wilted spinach, dried oregano, and a bit of salt and black pepper. I mix everything well until smooth. - Spread marinara sauce in the baking dish. - Stuff the shells and arrange them in the dish. - Cover with remaining marinara and mozzarella. Now, I take a 9x13 inch baking dish and spread one cup of marinara sauce on the bottom. This helps keep the shells from drying out. I carefully stuff each shell with the ricotta filling. I place them open side up in the dish for a nice look. Once they are all arranged, I pour the remaining marinara sauce over the shells. I sprinkle the leftover mozzarella cheese on top. - Cover with foil and bake. - Remove foil for finishing bake. Next, I cover the dish tightly with aluminum foil. I place it in my preheated oven at 375°F (190°C). I bake for 25 minutes. After that, I remove the foil and bake for another 10-15 minutes. I want the cheese to be bubbly and golden brown. Once done, I let it cool a bit before serving. For a fun touch, I garnish with fresh basil leaves. If you want the full recipe, check the [Full Recipe]. To cook the pasta shells without breaking, follow these steps: - Use plenty of salted water for boiling. - Stir the shells gently while cooking. - Cook the shells until they are al dente. This keeps them firm. For a creamy filling, make sure to: - Mix the ricotta cheese well with the spinach. - Add a little egg to bind the filling. - Avoid over-mixing, which can make the filling too runny. To amp up the taste, consider these seasonings: - Try adding a pinch of red pepper flakes for heat. - Mix in fresh herbs like basil or parsley for a fresh kick. - Use a touch of lemon zest for brightness. When it comes to marinara, I recommend: - Making your own for deeper flavor. - If using store-bought, choose a brand with no added sugars. - A good sauce enhances the stuffed shells greatly. For side dishes, think about these ideas: - Garlic bread pairs well with the dish. - A simple green salad adds freshness. - Roasted vegetables can bring more color to your plate. For plating, aim for elegance: - Place a shell in the center of the plate. - Drizzle some marinara around it for contrast. - Sprinkle grated Parmesan cheese on top for a lovely finish. Explore the [Full Recipe] for more details on making these delicious stuffed shells! {{image_4}} You can make these stuffed shells even better for you. Here are a few swaps: - Whole wheat or gluten-free pasta: This change adds fiber and nutrients. - Low-fat cheese options: Try using low-fat ricotta or mozzarella. You get the same flavor with fewer calories. Want to change things up? Here are some tasty ideas: - Adding ground meat or sausage: Mix in cooked meat for a heartier filling. It adds protein and a savory taste. - Experimenting with herbs and spices: Add fresh basil, thyme, or a pinch of red pepper flakes for a kick. Each herb brings a unique flavor. If you want to keep it meat-free, consider these options: - Incorporating mushrooms or zucchini: Both add a nice texture and flavor. Just sauté them before mixing with the cheese. - Vegan adaptations using plant-based cheese: Use cashew or almond cheese instead of dairy. You can still enjoy creamy stuffed shells! For the full recipe, check out the easy spinach and ricotta stuffed shells. To keep your stuffed shells fresh, place them in an airtight container. This helps keep moisture in and prevents the shells from drying out. You can store them in the fridge for up to three days. This way, you can enjoy leftovers without losing taste or texture. If you want to save some for later, freezing is a great option. First, let the shells cool completely. Then, place them in a freezer-safe container. You can also use plastic wrap to keep them safe from freezer burn. Properly frozen shells last for about three months. When you’re ready to eat, thaw in the fridge overnight. Reheat them in the oven at 350°F (175°C) until heated through. You can prepare the shells in advance for busy days. Cook the pasta and make the filling a day or two ahead. Store them separately in the fridge. When you’re ready to cook, stuff the shells and bake. This way, you have a quick and easy meal ready to go! Yes, you can prepare these shells in advance. After you stuff the shells, cover them and refrigerate for up to 24 hours. This saves time on busy nights. Just bake them when you're ready to eat. You may need to add a few extra minutes to the bake time. Great side dishes include: - Garlic bread - Simple green salad - Steamed vegetables - Roasted broccoli These sides balance the meal and add freshness. Absolutely! You can try different cheeses like: - Cottage cheese - Goat cheese - Feta cheese Each cheese adds a unique flavor. Mix and match to find your favorite! To keep your shells from sticking, follow these tips: - Cook them al dente. - Rinse them gently with cold water after cooking. - Lay them out on a clean towel. These steps help them stay separate. If you want to switch up the sauce, consider these options: - Alfredo sauce - Pesto sauce - A simple olive oil and garlic mix These alternatives add new flavors to your dish. In this blog post, we explored making easy Spinach and Ricotta Stuffed Shells. We covered the key ingredients, from pasta shells to cheese, and detailed each cooking step. I shared tips for perfect texture and flavor, plus variations to fit your taste. Finally, we discussed storage and meal prep for leftovers. Enjoying this dish can be simple and fun. You can adjust flavors and ingredients to make it your own. Embrace this recipe for a tasty meal any night!](https://roastedflavors.com/wp-content/uploads/2025/05/ac48cf02-61e8-4cde-ae74-1da7f5f66cbe.webp)
Are you craving a comforting meal that’s easy to prepare? Look no further than these Easy Spinach and Ricotta Stuffed Shells! This tasty dish combines creamy cheese, fresh spinach, and …

Ready to enjoy juicy hamburgers in minutes? With an air fryer, you can make quick and tasty meals that impress everyone. I’ll show you the best ingredients, mouthwatering toppings, and …