Skip to content
Roasted Flavors
  • Home
  • Appetizers
  • Desserts
  • Salads
  • Breakfast
  • Dinner
  • Privacy Policy
  • Contact
  • About

Chef Remy

30-Minute Strawberry Spinach Salad Fresh Delight

June 3, 2025 by Chef Remy
- 4 cups fresh baby spinach - 1 cup fresh strawberries - 1/2 cup feta cheese - 1/4 cup sliced almonds - 1/4 red onion - 1/4 cup balsamic vinegar - 2 tablespoons honey - 2 tablespoons extra virgin olive oil - Sea salt and black pepper - Additional strawberry slices - Extra feta for garnish Gathering the right fresh ingredients is key to a great salad. Start with 4 cups of fresh baby spinach. This leafy green gives a crisp base. Next, add 1 cup of fresh strawberries. Their sweetness pairs well with the spinach. For creaminess, use 1/2 cup of crumbled feta cheese. It adds a salty kick. Next, toss in 1/4 cup of sliced almonds. Toasting them first gives a nice crunch. Finally, include 1/4 of a thinly sliced red onion. This brings a sharp flavor to balance the salad. Now, let's move to the dressing. Combine 1/4 cup of balsamic vinegar, 2 tablespoons of honey, and 2 tablespoons of extra virgin olive oil. This mix creates a sweet and tangy dressing. Don’t forget to season with sea salt and black pepper to taste. For a beautiful finish, consider optional garnishes. Extra strawberry slices can make the dish pop. Adding a sprinkle of feta on top elevates the look. For the full recipe, you can check out the details above. Enjoy your fresh delight! - Step 1: Combine spinach and strawberries Start by placing the fresh baby spinach in a large mixing bowl. Add the sliced strawberries on top. Gently mix them with your hands. This ensures an even spread of flavors. - Step 2: Add feta cheese and almonds Next, sprinkle the crumbled feta cheese over the salad. Then, add the toasted sliced almonds. This adds a nice crunch and flavor to the mix. - Step 3: Mix balsamic vinegar, honey, and olive oil In a small jar, combine the balsamic vinegar, honey, and extra virgin olive oil. This mixture will create a sweet and tangy dressing. - Step 4: Shake or whisk until emulsified Seal the jar tightly and shake it well. If you prefer, you can whisk the ingredients in a bowl. The goal is to mix them until they blend smoothly. - Step 5: Drizzle dressing and toss salad Drizzle the dressing over the salad mixture. Use salad tongs or two forks to toss everything gently. Make sure the spinach and strawberries are coated well. - Step 6: Add red onion and season to taste Toss in the thinly sliced red onion. Season the salad with sea salt and freshly cracked black pepper. Mix lightly again to combine all flavors. This 30-Minute Strawberry Spinach Salad is fresh and quick to make. For the complete recipe, check out the Full Recipe section! To make your dressing sweeter, add more honey. Start with one extra teaspoon and taste. You can always add more if you like it sweeter. For crunch, toast the sliced almonds. Heat a pan on medium heat. Add the almonds and stir for about 3-5 minutes until golden. This brings out their flavor and adds a lovely texture. Serve your salad in deep bowls for a cozy look. A large platter makes it feel festive for a gathering. For a pop of color, garnish with extra strawberry slices on top. A sprinkle of feta cheese also adds a nice touch. You can even add a few fresh mint leaves for a hint of green. Use pre-washed spinach to save time. It cuts down on prep and makes this salad faster to make. If you want to make it ahead, prepare the salad without dressing. Store it in the fridge for up to two hours. Just add the dressing right before serving for the best taste. Enjoy every bite of this fresh delight! {{image_4}} You can make this salad even heartier by adding protein. Grilled chicken is a great option. It adds flavor and makes the meal more filling. Shrimp is another tasty choice. Just grill or sauté them, then toss them in. If you prefer a vegetarian twist, try chickpeas. They are rich in protein and blend well with the salad. Switching out some ingredients can change the taste. If you have nut allergies, try seeds. Sunflower seeds or pumpkin seeds work well. You can also mix up the cheese. If you want a creamier taste, use goat cheese or blue cheese. Each cheese brings a unique flavor that enhances the salad. Fruits can change with the seasons. In summer, add blueberries or peaches for a fruity twist. They bring a burst of sweetness and color. In winter, try using citrus fruits like oranges or mandarins. They add a refreshing zing and brighten up the dish. Remember, using seasonal fruits keeps your salad fresh and exciting. For more details, check out the Full Recipe for this vibrant and delicious salad! To keep your salad fresh, store it in the fridge. Use an airtight container. This helps keep the salad crisp and tasty. If you dress the salad, eat it within a day. Dressed salads lose their crunch faster. If you store it undressed, it can last up to three days. You usually do not need to reheat a salad. But if you have leftovers, you can warm the spinach lightly. This can bring out a new flavor. Use the leftovers in a warm pasta dish or a grain bowl. Toss them with a bit of olive oil or lemon juice for a fresh taste. Freezing spinach is possible but tricky. Fresh spinach can freeze well, but it may change texture. It’s best to blanch it first. This means boiling it for a short time and then cooling it quickly. You can store it in freezer bags. However, avoid freezing the strawberries or dressing. They do not freeze well and will lose flavor. Always use fresh fruits for the best taste in your salad. Yes, you can prepare parts of the salad ahead. Wash and dry the spinach early. Slice strawberries and onions and store them in separate containers. This keeps them fresh. Mix the dressing in advance and keep it in the fridge. Just combine everything right before serving. This way, your salad stays crisp and tasty. If you don’t have balsamic vinegar, use apple cider vinegar or red wine vinegar. Both add a nice tang. For a sweeter twist, try using a fruit vinegar like raspberry. You can also mix lemon juice with a bit of honey to create a light dressing. These options keep the salad fresh and flavorful. The salad lasts about 1 to 2 days in the fridge. If you mix in the dressing, it may wilt faster. To keep it fresh longer, store the salad undressed. Then, add the dressing just before eating. This helps maintain its crispness and flavor. This post covers how to make a fresh and tasty spinach salad. We mixed bright strawberries, creamy feta, and crunchy almonds for great flavor. I shared tips to enhance taste and ideas for protein options. You learned about storage and how to make the salad ahead. Remember, you can play with ingredients or dressings to fit your taste. Enjoy creating your own twist on this salad that’s as delicious as it is colorful.

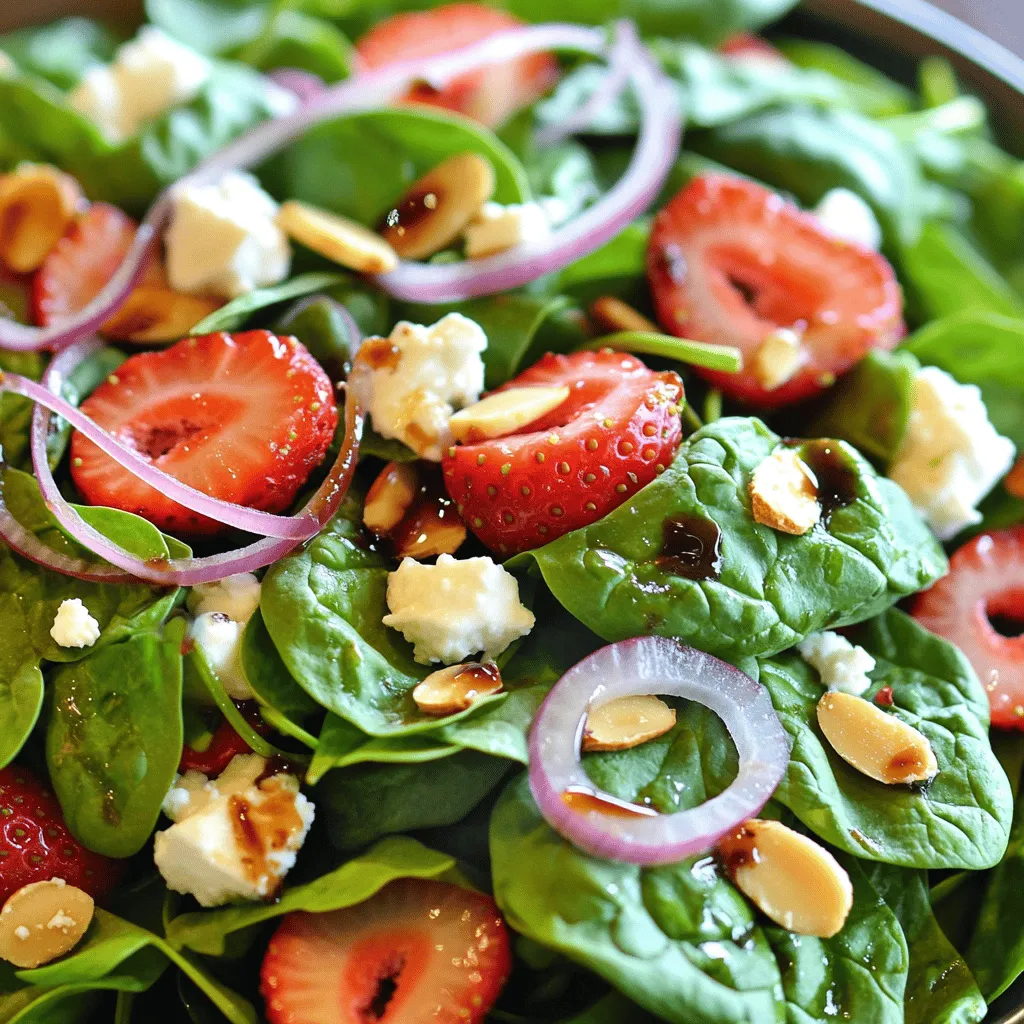
Ready for a fresh and tasty treat? My 30-Minute Strawberry Spinach Salad is the perfect mix of flavors and vibrant colors. With juicy strawberries, crisp spinach, and creamy feta, this …

Read more

Categories Salads

Summer Corn Salad Flavorful and Fresh Recipe Guide

June 3, 2025 by Chef Remy
- Fresh corn kernels (approx. 5-6 ears) - 1 large red bell pepper, diced - 1 cup cherry tomatoes, halved - 1/2 medium red onion, finely chopped - 1/4 cup fresh cilantro, loosely packed and chopped - 1 ripe avocado, diced - 3 tablespoons fresh lime juice - 2 tablespoons extra virgin olive oil - 1 teaspoon honey (or agave syrup for a vegan option) - Sea salt and freshly ground black pepper to taste To make a great summer corn salad, fresh ingredients are key. Corn gives the salad a sweet crunch. Diced red bell pepper adds color and a sweet bite. Cherry tomatoes bring juiciness, while red onion offers a sharp flavor. Fresh cilantro adds a nice herb note. The avocado makes it creamy and rich. The lime juice and olive oil dressing adds brightness. Honey balances the flavors perfectly. - Chili powder for an extra kick - Tips for sourcing organic or locally grown produce If you like a bit of spice, add chili powder for a kick. It gives the salad an exciting twist. When shopping, look for organic or local produce. These options often taste better and support local farms. Fresh, high-quality ingredients make a big difference in this dish. 1. Start by shucking the corn. This means removing the husk and silk. 2. Use a sharp knife to cut the kernels off the cob. Hold the cob upright in a bowl to catch any falling kernels. 3. Next, sauté the corn in a skillet over medium heat. 4. Cook the corn for about 3-4 minutes until tender but still crisp. This step brings out the sweet flavor. 5. Once done, let the corn cool down to room temperature. 1. Grab a large mixing bowl. Combine the cooled corn with diced red bell pepper, halved cherry tomatoes, and chopped red onion. 2. Add in the fresh cilantro and gently stir everything together. This mix makes your salad colorful and fresh. 3. Now, let’s prepare the dressing. In a small bowl, whisk together lime juice, olive oil, honey, sea salt, and black pepper. 4. If you like some heat, add a pinch of chili powder too. Whisk until the dressing is smooth. 1. Drizzle the dressing over the corn mix. Toss gently until all ingredients are coated. 2. Carefully fold in the diced avocado. Be gentle to keep the pieces intact. 3. Serve the salad right away for the best taste. If you need to store it, cover it tightly. You can keep it in the fridge for up to one hour. 4. For serving, place the salad in a vibrant bowl. Garnish with cilantro and lime wedges for a nice touch. 5. Enjoy your colorful and tasty summer corn salad! For the full recipe, check out the Zesty Summer Corn Salad Delight section. When you pick corn, look for bright green husks. The silk should be moist and golden. Feel the kernels through the husk. They should be plump and full. Avoid ears with dry or brown silk. If you can, buy corn from local farms. It tastes sweeter and fresher. Store corn in the fridge. Keep it in a plastic bag. Use it within a few days for the best flavor. If you can’t cook it right away, don’t remove the husk. This helps keep it fresh longer. To bring out the corn's natural sweetness, sauté it. Heat a skillet on medium. Add the corn and cook for about 3-4 minutes. Stir often to prevent burning. The corn should be tender but still crisp. Balance the flavors with your dressing. If it tastes too sour, add a little more honey. If it’s too sweet, add a splash of lime juice. Adjust until the flavors are just right. This makes your salad pop! Serve your salad in a large, colorful bowl. This makes it fun and inviting. You can also use a decorative platter for gatherings. For garnish, add extra cilantro on top. Lime wedges also look lovely and add a fresh touch. A well-presented salad can make your meal feel special. For the full recipe, check out the Zesty Summer Corn Salad Delight. {{image_4}} To make grilled corn salad, start with fresh corn. Grilling gives corn a smoky taste. To grill, husk the corn and soak it in water for 30 minutes. This helps keep it juicy while cooking. Preheat your grill to medium heat. Grill the corn for about 10-15 minutes, turning until golden brown. Let it cool before cutting the kernels off. For added flavor, mix in ingredients like: - Diced jalapeños for heat - Crumbled feta cheese for creaminess - Chopped green onions for crunch For a fun twist, try the Mexican street corn salad. This version uses classic elote toppings. Mix mayo, lime juice, and chili powder for a creamy dressing. After grilling the corn, cut it off the cob. Toss the corn with the dressing, then add: - Crumbled cotija cheese for saltiness - Fresh cilantro for herbiness - Squeeze of lime for brightness This salad captures the street food vibe perfectly. You can easily make this salad vegetarian or vegan. Swap honey for agave syrup to keep it plant-based. For extra creaminess, add: - Mashed avocado for richness - Chopped nuts or seeds for texture - A splash of coconut milk for a different twist These adaptations keep the salad fresh and full of flavor. Enjoy experimenting with these variations! For the complete recipe, check out the Full Recipe. To keep your summer corn salad fresh, use a tight container. Glass or plastic containers with lids work best. If you have leftovers, cover them well. This keeps moisture in and air out. For meal prepping, make the salad a day before serving. Just store the dressing separately. Mix it in right before you eat. This keeps the veggies crisp and bright. The salad lasts about three days in the fridge. After that, it may lose flavor and texture. Look for signs that the salad has gone bad. If it smells sour or has a slimy texture, it's time to toss it. Always trust your senses when it comes to food safety. To make summer corn salad, start by gathering fresh ingredients. You need corn, bell pepper, tomatoes, onion, cilantro, and avocado. Shuck the corn and cut it off the cob. Sauté the corn for about 3-4 minutes. This keeps it sweet and crisp. Allow the corn to cool before mixing it with the chopped veggies. Next, prepare the dressing. Whisk lime juice, olive oil, honey, salt, and pepper in a bowl. Combine the cooled corn with the chopped veggies in a large bowl. Drizzle the dressing over the mixture and toss gently. Finally, fold in the diced avocado. Serve it fresh for the best taste. For the complete guide, check the full recipe. Yes, you can use frozen corn. Frozen corn is quick and easy. It saves time and is often sweet and tender. However, it may lack the fresh taste of seasonal corn. If using frozen corn, thaw it and drain well. Sauté it briefly to enhance flavor. This way, you can still enjoy a delicious salad. Summer corn salad pairs well with grilled meats, fish, or tacos. It adds a fresh touch to any meal. Consider serving it alongside barbecued chicken or steak. You can also enjoy it with a light soup or as a side for sandwiches. The salad’s bright flavors complement many dishes beautifully. Summer corn salad is simple and fun. We covered the essential ingredients, including fresh corn and tomatoes. I shared steps to prepare, mix, and serve the salad. I also included tips on selecting corn and balancing flavors. You can explore variations like grilled corn or vegan options too. Remember, storing properly keeps your salad fresh longer. This versatility makes it a perfect dish for summer meals or gatherings. Enjoy making your tasty corn salad and share it with friends and family!

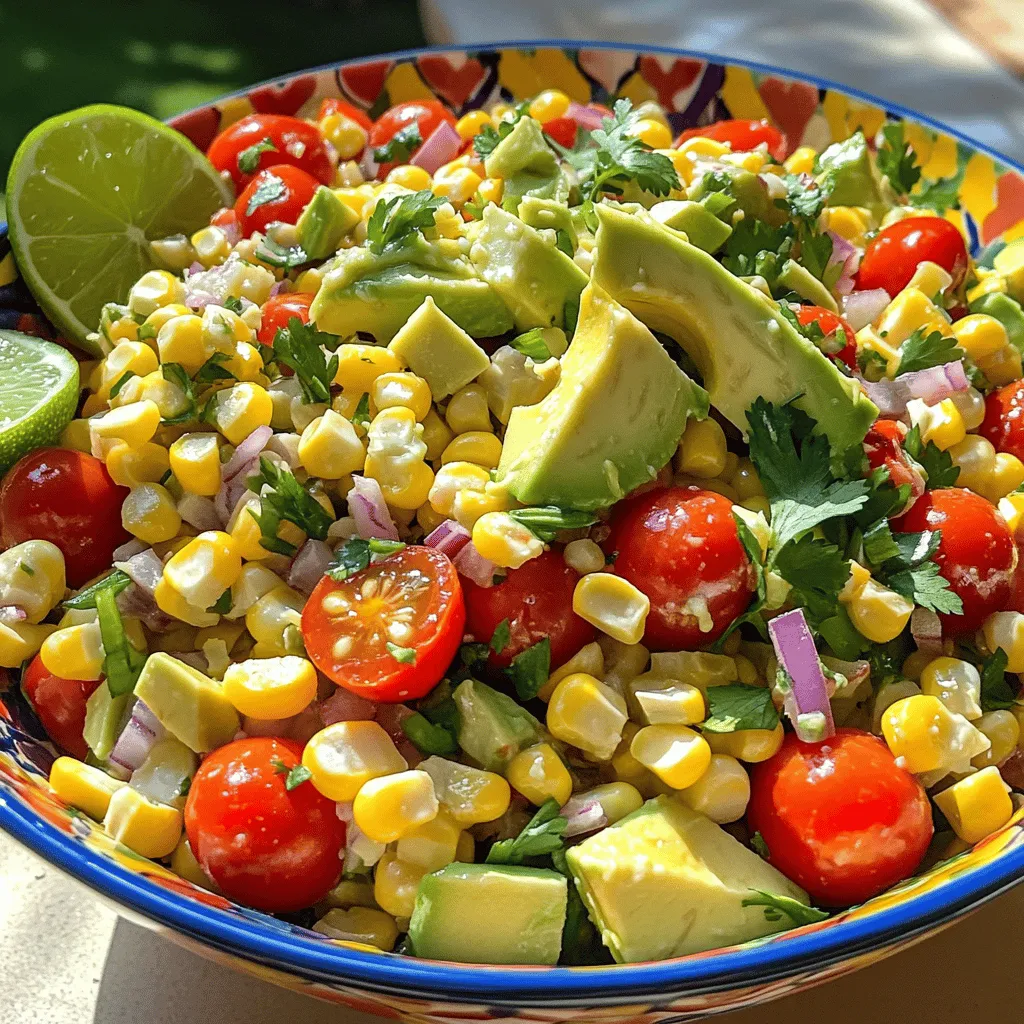
Get ready for a burst of flavor with my Summer Corn Salad! This vibrant dish showcases fresh corn, peppers, and avocado, perfect for sunny days. I’ll guide you through simple …

Read more

Categories Salads

Strawberry Pineapple Fruit Salsa Fresh and Flavorful Delight

June 3, 2025 by Chef Remy
To make strawberry pineapple fruit salsa, gather these fresh ingredients: - 1 cup fresh strawberries, hulled and finely diced - 1 cup fresh pineapple, peeled and diced - 1/4 cup red onion, finely minced - 1 jalapeño, seeded and finely minced - 1/4 cup fresh cilantro leaves, roughly chopped - Juice of 1 ripe lime - 1 tablespoon honey (optional, for a touch of sweetness) - Sea salt and freshly cracked black pepper to taste Fresh ingredients really make this salsa shine. They bring vibrant colors and bold flavors. Using ripe fruit adds natural sweetness and juiciness. Fresh herbs like cilantro boost the taste and aroma. This salsa is all about freshness. It is key to a delicious outcome. Choosing ripe fruit is simple with a few tips. For strawberries, look for bright red color and a sweet scent. The berries should be firm but not too hard. For pineapple, check for a sweet smell at the base and a slight give when pressed. The skin should be golden and free of blemishes. Ripe fruit adds the best taste and texture to your salsa. Start by washing your strawberries well. Hull them and chop them finely. You want small pieces for a good mix. Next, take your fresh pineapple, peel it, and cut it into bite-sized cubes. Fresh fruit makes this salsa pop with flavor. In a medium bowl, combine the diced strawberries and pineapple. This mix creates a colorful base for your salsa. Add finely minced red onion and jalapeño for a nice crunch and a bit of heat. Then, toss in chopped cilantro for a fresh taste. Now, squeeze the juice of one lime over your fruit mix. If you like it sweeter, add honey. Mix everything gently with a spatula. Be careful not to mash the strawberries! Finally, season with sea salt and cracked black pepper. Let your salsa rest at room temperature for about 15 minutes. This helps the flavors combine. For the full recipe, check out the section above. You can serve your strawberry pineapple fruit salsa in many fun ways. Try it with crispy tortilla chips for a tasty snack. You can also use it as a topping on grilled chicken or fish. The sweet and spicy mix adds a fresh twist to any meal. If you want, serve it in small cups for a party. This makes it easy for guests to enjoy! To change the flavor of your salsa, play with the ingredients. If you want it sweeter, add a bit more honey. If you prefer spice, toss in more jalapeño. You can also try adding diced mango for an extra fruity taste. A pinch of cumin can add warmth, while a splash of orange juice gives a nice twist. Taste as you mix to find your perfect balance. A colorful dish is always more inviting. Serve your salsa in a pretty bowl to make it stand out. Add a few extra cilantro leaves on top for color. You can even arrange some lime wedges around the bowl. This adds a pop of green and is a nice touch. The vibrant colors of the strawberries and pineapple will catch everyone’s eye. For a fun twist, try using a clear glass dish to show off the layers. You can find more ideas in the Full Recipe section. {{image_4}} You can change your salsa with fun tropical fruits. Try adding mango or kiwi. Both fruits bring sweetness and color. You can also mix in diced papaya for a unique twist. Each fruit adds its own taste and texture. You can even add shredded coconut for a fun crunch. This makes your salsa even more exciting! If you want less sugar, you have options. Use agave syrup instead of honey. It has a lower glycemic index. Maple syrup is another great choice. It adds a warm, rich flavor. You can also skip sweeteners and let the fruit shine. The natural sweetness of ripe fruit is often enough! Spice is all about balance. If you want a mild salsa, leave out the jalapeño. You can also remove the seeds for less heat. For a spicier kick, add more jalapeño or even a serrano pepper. Fresh diced chili will also work well. Adjust the spice to suit your taste! For the full recipe, check out the details above. Store your leftover strawberry pineapple fruit salsa in an airtight container. This keeps the flavors fresh. Place it in the fridge right after serving. The salsa will stay good for about 2-3 days. If you notice any liquid at the bottom, just stir it back in. To keep your salsa fresh, avoid adding salt until you're ready to serve. Salt draws out moisture and can make the salsa soggy. Also, store it away from strong-smelling foods in the fridge. This way, your salsa retains its bright flavor. You can freeze this salsa if you have too much. Use a freezer-safe bag or container. Leave some space for the salsa to expand as it freezes. It will last for about 2-3 months in the freezer. When you’re ready to eat it, thaw it in the fridge overnight. The texture may change a bit, but the taste will still be great. For the full recipe, check out the earlier section. Enjoy your salsa! Strawberry Pineapple Fruit Salsa lasts about three days in the fridge. Store it in an airtight container. The flavors will get better as it sits, but avoid leaving it too long. After three days, the fruit may start to break down. Yes, you can use frozen fruit! However, fresh fruit gives the best texture. If using frozen fruit, let it thaw and drain any excess juice. This prevents your salsa from being too watery. Frozen fruit works well in a pinch but may lose some crunch. This salsa is super versatile! It goes great with grilled chicken or fish. You can also serve it with tortilla chips for a fun snack. Try it on tacos for a sweet twist. It also adds a fresh touch to salads. Don't be afraid to experiment! In this post, we explored key ingredients for delicious Strawberry Pineapple Fruit Salsa. Fresh, ripe fruits make a difference in taste. We outlined how to prepare and mix them for the best flavor. I shared tips on serving and presentation, along with fun variations to try. Storing leftovers properly keeps your salsa fresh. Remember, you can customize the flavors to suit your taste. Creating fruit salsa can be simple and fun! Enjoy getting creative with your fruit combinations.

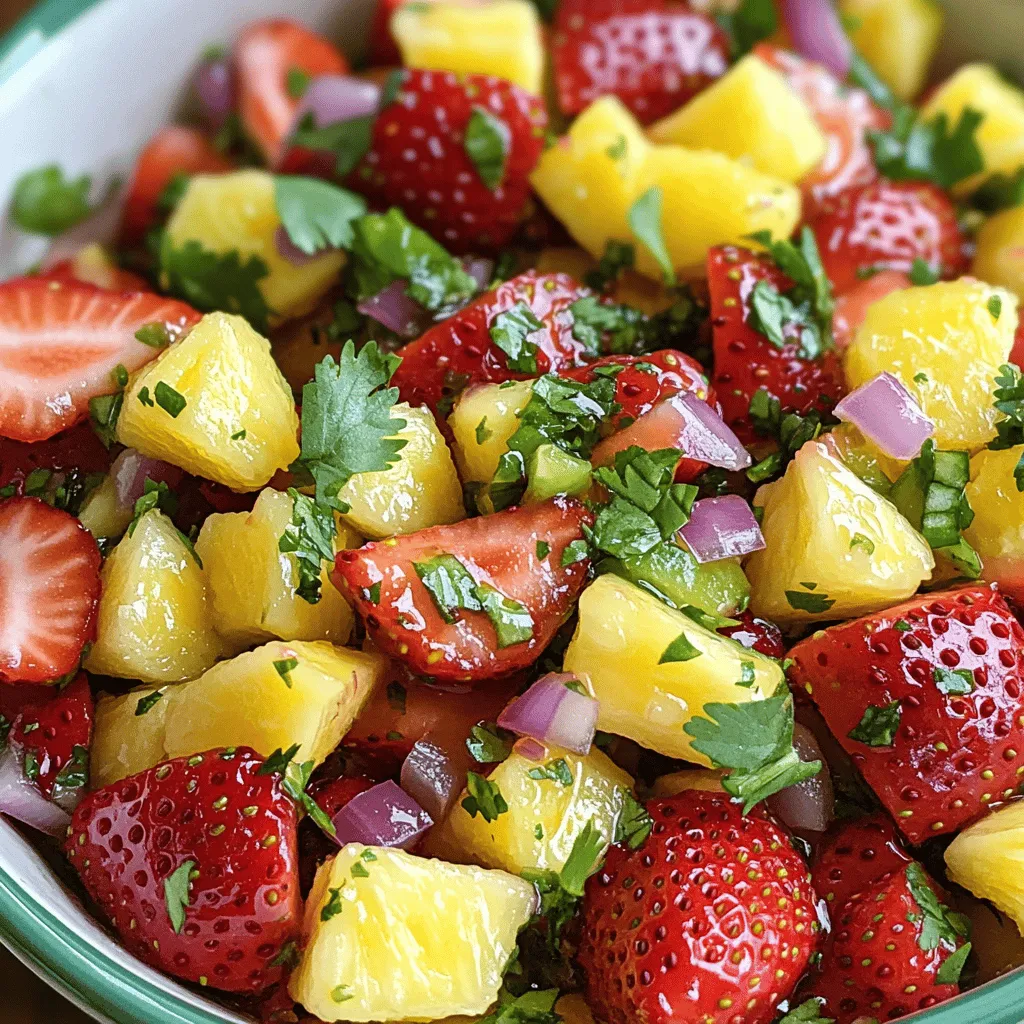
Dive into the refreshing world of Strawberry Pineapple Fruit Salsa—a treat you won’t forget! This bright, colorful salsa is not only packed with flavor but also easy to make. Using …

Read more

Categories Appetizers

Cinnamon Roll French Toast Roll-Ups Easy and Delicious

June 3, 2025 by Chef Remy
To make the best Cinnamon Roll French Toast Roll-Ups, you need a few simple ingredients. Here’s what you’ll need: - 6 slices of white bread (discard crusts for a softer texture) - 1/4 cup granulated sugar - 2 teaspoons ground cinnamon - 1/4 cup cream cheese, softened to room temperature - 2 tablespoons unsalted butter, melted - 2 large eggs - 1/2 cup whole milk - 1 teaspoon pure vanilla extract - Maple syrup (for drizzling) - Powdered sugar (for dusting) Each ingredient plays a key role in creating flavor and texture. The white bread gives a soft base that rolls up easily. The cream cheese adds a rich and creamy touch. Cinnamon and sugar bring warmth and sweetness. Finally, the eggs and milk create a custardy mix that coats the roll-ups perfectly. For the full recipe, you can check the source above. Enjoy making this fun treat! - Prepare the Cinnamon Sugar: Start by mixing 1/4 cup of sugar and 2 teaspoons of cinnamon in a bowl. Stir the two together until they blend well. Set this aside for later. - Flatten the Bread: Take your 6 slices of white bread and use a rolling pin to flatten them. Roll each slice to about 1/4 inch thick. This helps the bread roll up nicely. - Spread Cream Cheese: Grab your softened cream cheese. Use a tablespoon to spread it evenly over one side of each flattened bread slice. Make sure to cover the entire surface for the best flavor. - Roll Them Up: Starting at one edge, roll each slice tightly. Make sure the cream cheese stays inside. Repeat this for all the bread slices. - Prepare the Egg Mixture: In a mixing bowl, whisk together 2 large eggs, 1/2 cup of whole milk, 2 tablespoons of melted butter, and 1 teaspoon of vanilla extract. Mix until it’s smooth. - Coat the Roll-Ups: Dip each rolled bread slice into the egg mixture. Let it soak briefly. Then, roll it in the cinnamon sugar until it's fully coated. - Cook the Roll-Ups: Heat a non-stick skillet over medium heat. Add a small amount of butter. Once it melts, place the roll-ups seam side down in the skillet. Cook them for about 2-3 minutes on each side, until they turn golden brown. - Serve Warm: After cooking, remove the roll-ups from the skillet. Place them on a serving plate. Dust them with powdered sugar and drizzle with maple syrup. - Presentation Tips: For a fun look, arrange the roll-ups on a platter. Add extra maple syrup and fresh berries for color. You can also serve them with whipped cream or more cream cheese for dipping. For the complete details, check out the Full Recipe. Achieving the Perfect Golden Brown To get that perfect golden color, use medium heat. Too high heat will burn the outside before cooking the inside. Keep an eye on the roll-ups as they cook. Flip them when they're golden on one side. This will help them cook evenly. Ensuring Even Cooking Make sure you do not crowd the skillet. Leave space between each roll-up. This helps hot air circulate and cook all sides. If you have many roll-ups, cook in batches. This will give you better results. Alternative Bread Options You can use different types of bread. Try whole wheat or cinnamon raisin bread for more flavor. You can also use gluten-free bread if needed. Just make sure to check the texture after rolling. Some breads may be more fragile. Cream Cheese Variants You can swap cream cheese for other spreads. Try mascarpone for a richer taste. Greek yogurt can work too if you want a lighter option. Just remember to adjust the amount for the right creaminess. Additional Spices to Consider Add a pinch of nutmeg or cardamom for extra warmth. These spices mix well with cinnamon. If you like heat, consider adding a dash of cayenne pepper. This gives a nice twist to the sweet flavors. Sweet vs. Savory Dipping Sauces Maple syrup is a classic choice, but you can try other dips. A vanilla yogurt dip adds creaminess and sweetness. For a savory option, a warm cheese sauce works great. These choices let you customize each bite! {{image_4}} You can easily change the flavors in your roll-ups. Adding fruits makes them fun! Try bananas or strawberries for a fresh twist. Just slice the fruits thin and place them on the cream cheese before rolling up. For chocolate lovers, mix in chocolate chips! Add them inside the roll for a sweet surprise. If you need gluten-free options, use gluten-free bread. Make sure it’s soft and fresh for the best texture. For those wanting vegan alternatives, swap the eggs with a mix of ground flaxseed and water. Use plant-based milk and vegan cream cheese too. These adjustments let everyone enjoy this treat! Mini roll-ups are perfect for brunch. Just cut each roll into bite-sized pieces. They look cute and are easy to share. You can also try casserole-style baking. Place the roll-ups in a dish and pour the egg mixture over them. Bake until golden brown for a fun twist. For the full recipe, check out the details in the main section! To keep your Cinnamon Roll French Toast Roll-Ups fresh, follow these tips: - Best Practices for Refrigeration: Place any leftovers in an airtight container. This keeps them from drying out. Store them in the fridge for up to three days. You can enjoy them again for breakfast or a snack. - Freezing for Future Use: If you want to save them for later, freezing is a great option. Wrap each roll-up in plastic wrap. Then, place them in a freezer-safe bag. They can last up to a month in the freezer. Just remember to label the bag with the date. When you are ready to eat your roll-ups, reheating is simple: - Microwave vs. Oven: You can use either method. The microwave is quick but may make them soft. Heat them for about 30 seconds to a minute. The oven gives better crispiness. Preheat your oven to 350°F (175°C) and bake for about 10-15 minutes. - Tips for Retaining Crispiness: If you use the oven, place the roll-ups on a baking sheet. This helps them get warm and crispy. For the microwave, try placing a paper towel under the roll-ups to absorb moisture. This makes them taste fresh again. For the full recipe, check [Full Recipe]. How to make Cinnamon Roll French Toast Roll-Ups? To make these roll-ups, you start by flattening slices of bread. Next, spread cream cheese on each slice. Roll them up tightly and dip in an egg mixture. Finally, coat them in cinnamon sugar and cook in a skillet until golden. Follow the Full Recipe for detailed steps. Can I prepare these roll-ups ahead of time? Yes, you can prepare the roll-ups in advance. Roll them up and store them in the fridge. Just cook them when you are ready to enjoy. What is the best way to store leftover roll-ups? Store leftover roll-ups in an airtight container in the fridge. They will stay fresh for up to three days. How long do they take to cook? Cooking these roll-ups takes about 6 to 8 minutes. You should cook them for 2 to 3 minutes on each side. Can I use whole grain bread instead? Absolutely! Whole grain bread adds a nice flavor and texture. It works just as well as white bread. What to serve with Cinnamon Roll French Toast Roll-Ups? These roll-ups pair well with fresh fruit, whipped cream, or extra maple syrup. You can also serve them with a side of yogurt for a tasty twist. You now have a clear recipe for delicious Cinnamon Roll French Toast Roll-Ups. We covered ingredients, step-by-step cooking, and serving tips. You can customize the roll-ups with fruits or choose dietary adjustments like gluten-free options. Remember to store leftovers properly and reheat them for the best taste. These roll-ups are fun, easy, and sure to impress at any meal. Enjoy creating your own sweet twist on a breakfast classic!

Are you ready to take your breakfast to the next level? These Cinnamon Roll French Toast Roll-Ups are easy and delicious, perfect for lazy weekend mornings or special occasions. Imagine …

Read more

Categories Breakfast

Sunshine Salad Vibrant and Fresh Flavor Boost

June 3, 2025 by Chef Remy
To make a Sunshine Salad, gather these fresh ingredients: - 2 cups mixed greens (a blend of arugula, spinach, and romaine) - 1 cup cherry tomatoes, halved for sweetness - 1 cup cucumber, diced into refreshing bites - 1 ripe avocado, peeled and diced for creaminess - 1 orange, segmented for a zesty twist - 1/4 cup red onion, thinly sliced for a mild kick - 1/4 cup crumbled feta cheese for saltiness - 1/4 cup sunflower seeds for crunch - 3 tablespoons extra virgin olive oil for richness - 2 tablespoons apple cider vinegar for a bright note - 1 teaspoon honey to balance flavors - Salt and pepper to taste Each ingredient in this salad adds both flavor and health benefits: - Mixed greens: These are low in calories and full of vitamins. - Cherry tomatoes: Packed with antioxidants, they support heart health. - Cucumber: High in water content, cucumbers help keep you hydrated. - Avocado: Full of healthy fats, avocados promote good digestion. - Orange: A great source of vitamin C, oranges boost your immune system. - Feta cheese: This adds protein and calcium for strong bones. - Sunflower seeds: They provide essential fats and add a crunchy texture. - Olive oil: A heart-healthy fat that can lower bad cholesterol. - Apple cider vinegar: It may help control blood sugar levels. You can easily customize your Sunshine Salad: - Greens: Try kale or spinach if you want a different base. - Fruits: Swap in berries or peaches for a sweet twist. - Veggies: Add bell peppers or radishes for extra crunch. - Cheese: Use goat cheese or blue cheese for a unique flavor. - Nuts: Substitute walnuts or almonds for a different crunch. - Dressings: Experiment with lemon juice or your favorite vinaigrette. Feel free to mix and match based on your taste! For the full recipe, check out the Sunshine Salad Delight. To start, gather all your ingredients. Freshness matters here. You need mixed greens, cherry tomatoes, cucumber, avocado, orange, red onion, feta cheese, and sunflower seeds. Having everything ready makes the process smooth. 1. Mix the greens: Place the mixed greens in a large bowl. This is your salad base. 2. Add the veggies: Layer in the halved cherry tomatoes and diced cucumber. This adds color and crunch. 3. Include fruits: Gently add the diced avocado and orange segments. This gives creaminess and zest. 4. Top it off: Sprinkle the thinly sliced red onion and crumbled feta cheese. This brings depth and flavor. When building your salad, think about layers. Place colors next to each other for a vibrant look. Avoid mashing the avocado. It should stay intact. Use tongs or salad servers to toss the salad gently. This helps mix flavors without breaking the ingredients. Now for the dressing. In a small bowl, whisk together: - 3 tablespoons extra virgin olive oil - 2 tablespoons apple cider vinegar - 1 teaspoon honey - Salt and pepper to taste Whisk until smooth. This dressing brightens the salad. Drizzle it over the salad right before serving. Toss gently to coat all the ingredients. For a finishing touch, sprinkle the sunflower seeds on top. They add a satisfying crunch. For the full recipe, check the earlier sections. Enjoy your vibrant and fresh Sunshine Salad! To make your Sunshine Salad shine, mix and match flavors. Try adding fresh herbs like basil or mint for a fragrant touch. A squeeze of lemon juice can brighten every bite. For a spicy kick, add sliced jalapeños or red pepper flakes. These flavors can make your salad pop. When slicing, keep your pieces even. This helps with both looks and taste. For tomatoes, cut them in half to release juices. Dice cucumbers into small cubes for crunch. With avocados, use a sharp knife to avoid browning. Cut each segment with care to keep them intact. This keeps your salad fresh and appealing. Store your salad in an airtight container. This keeps it crisp and tasty. Keep the dressing separate until ready to eat. This prevents soggy greens. If you have leftovers, enjoy them within two days. Freshness makes all the difference in taste. For more details, check out the Full Recipe. {{image_4}} You can easily change the taste of your Sunshine Salad with a few swaps. Try using kale instead of mixed greens for a heartier base. Swap cherry tomatoes for diced bell peppers for a crunchier bite. If you want a sweeter flavor, use mango instead of orange. Instead of feta cheese, try goat cheese for a tangy twist. Each swap brings a new taste to your salad. Seasonal changes offer great chances to switch up your salad. In spring, add fresh peas or asparagus for a vibrant touch. Summer is perfect for ripe peaches or nectarines, giving sweetness. In fall, consider adding roasted butternut squash or apples for warmth. During winter, include pomegranate seeds for a burst of color and flavor. Each season brings new ingredients to enjoy. Boost the nutrition of your Sunshine Salad by adding protein. Grilled chicken or shrimp can make it a full meal. For a plant-based option, add chickpeas or black beans. Tofu or tempeh is another great choice if you prefer a meatless salad. You could even sprinkle in some nuts, like almonds or walnuts, for both protein and crunch. Each option enhances the salad while keeping it fresh and exciting. For the full recipe, check the detailed instructions above. After enjoying your Sunshine Salad, store leftovers in an airtight container. This keeps them fresh. If you have leftover dressing, store it separately. It helps prevent soggy greens. Always use the salad within two days for the best taste. To keep salad ingredients fresh, store them in the fridge. Wrap greens in a damp paper towel. This maintains moisture and crunch. Keep tomatoes and cucumbers in a separate bin. Avoid washing them until you are ready to eat. Mixed greens last about three to five days in the fridge. Cherry tomatoes stay fresh for about a week. Cucumbers can last up to a week as well. Avocados should be eaten within one or two days once cut. Feta cheese normally lasts about five days. For sunflower seeds, they can stay fresh for a few weeks if kept dry. For the full recipe, check out the Sunshine Salad Delight 🥗 section! A Sunshine Salad is packed with nutrients. It has a mix of greens, which are high in vitamins A and C. Cherry tomatoes bring antioxidants that fight free radicals. Cucumbers are hydrating and low in calories. Avocado adds healthy fats that support heart health. Oranges provide vitamin C and help boost your immune system. Feta cheese offers calcium, while sunflower seeds add protein and fiber. Overall, this salad can help you feel good and stay healthy. Yes, you can prepare the salad ahead. However, I suggest waiting to add the dressing. Mix the greens, veggies, and toppings in a bowl. Store them in the fridge for up to a day. You want to keep them fresh and crunchy. When ready to eat, add the dressing and toss. This keeps the salad vibrant and tasty without becoming soggy. Many dressings fit well with a Sunshine Salad. A simple lemon vinaigrette adds a nice zest. A creamy ranch can make it richer. A balsamic glaze offers a sweet touch. You can also try a tahini dressing for a nutty flavor. Experiment with different dressings to find your favorite. Each will give the salad a unique twist. For the full recipe, check the recipe section of this article. In this blog post, we explored how to create a vibrant Sunshine Salad. We discussed the best ingredients and their health benefits. You learned about preparation steps and key techniques for perfect assembly. Our tips provided flavor combinations, slicing techniques, and storage advice. We covered fun variations to suit your taste and protein ideas. Remember to store leftovers properly to maintain freshness. With these insights, you can make a delicious salad that's healthy and exciting. Enjoy creating your own Sunshine Salad and feel great about what you eat!

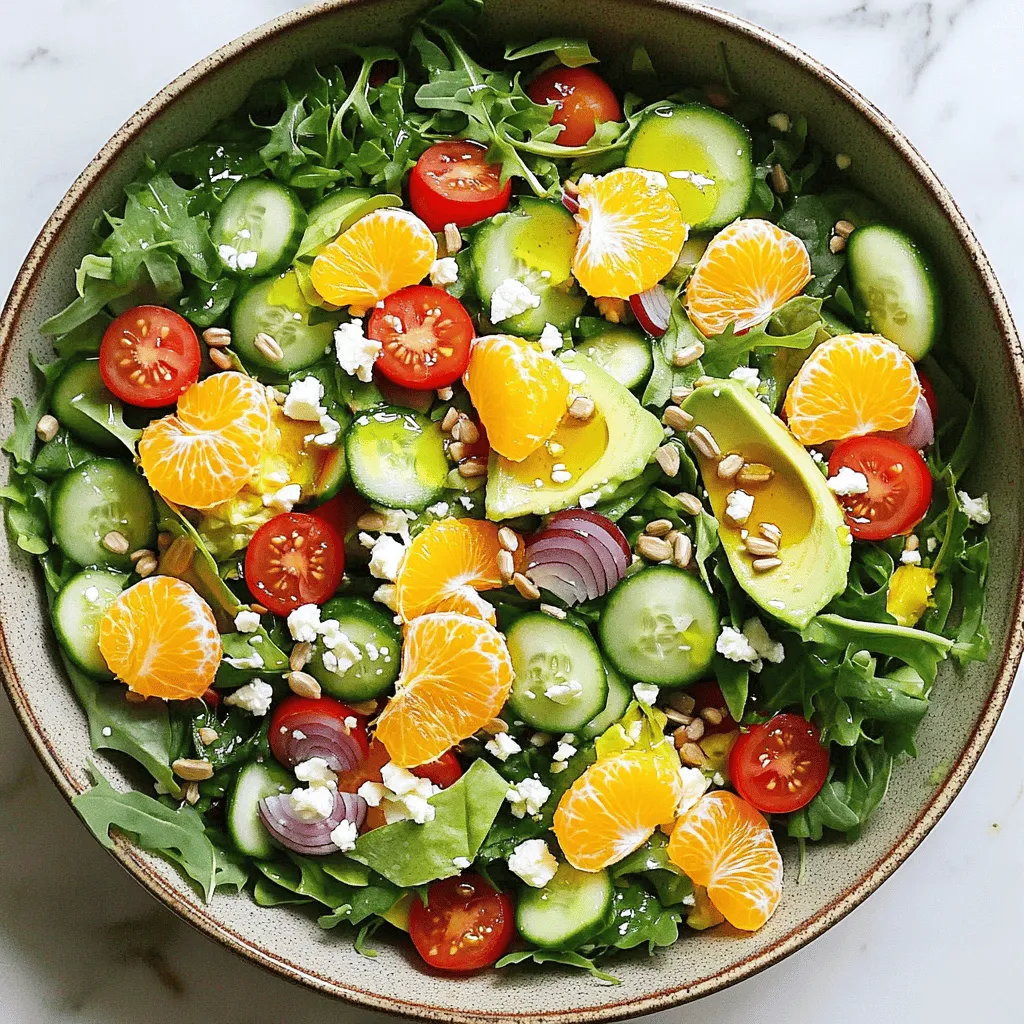
Looking for a salad that shines? Let me introduce you to the Sunshine Salad! This vibrant dish bursts with fresh flavors and great nutrition. I’ll guide you through simple steps, …

Read more

Categories Salads

Italian Grilled Cheese Sandwiches for Tasty Meals

June 3, 2025 by Chef Remy
- Sourdough bread - Cheese varieties (mozzarella and fontina) - Flavor enhancers (sun-dried tomatoes, basil pesto, fresh basil) - Extra virgin olive oil - Sea salt and black pepper The main stars of this dish are the ingredients. I love to start with sourdough bread. Its crusty outside and soft inside give the best texture. Next, I use two cheese varieties: mozzarella and fontina. Mozzarella melts beautifully, while fontina adds a rich, creamy flavor. Together, they create a dreamy cheese blend. For extra flavor, I add sun-dried tomatoes, basil pesto, and fresh basil. Sun-dried tomatoes bring a sweet-tart taste. The basil pesto adds a fresh, herby kick. Fresh basil leaves bring a burst of color and flavor. Lastly, we have our cooking essentials. I use extra virgin olive oil for frying. It gives the bread a golden, crisp finish. Don't forget to season with sea salt and black pepper. They help enhance all the flavors in the sandwich. For the full recipe, check out the detailed instructions to create this delicious meal! 1. Start by heating a non-stick skillet over medium heat. You want it warm but not too hot. 2. While the skillet heats, take your sourdough bread slices. Brush one side of each slice with extra virgin olive oil. This adds flavor and helps create a golden crust. 1. On the non-oiled side of two slices, spread 1 tablespoon of basil pesto on each. This gives the sandwich a fresh kick. 2. Layer fresh mozzarella slices and grated fontina cheese over the pesto. Make sure the cheese covers the pesto evenly. 3. Next, sprinkle finely chopped sun-dried tomatoes and freshly chopped basil on top of the cheese. Season this layer with a pinch of sea salt and freshly cracked black pepper. 1. Place the sandwiches in the heated skillet, oiled side down. Cook until the bread turns a nice golden brown, about 3-4 minutes. 2. Using a spatula, flip the sandwiches carefully. Press down lightly to ensure even cooking. Cook for another 3-4 minutes until the second side is golden brown and the cheese melts. 1. Remove the sandwiches from heat and let them rest for a moment. Slice each sandwich in half diagonally for a nice presentation. 2. Serve the halves on a rustic wooden board and garnish with extra basil leaves for a fresh touch. You can also add a small bowl of extra pesto on the side for dipping. This adds a fun twist to your meal. For the complete recipe, check out the Full Recipe section. To get your Italian grilled cheese just right, start with the skillet. Heat it over medium heat. This helps the bread toast evenly. If it’s too hot, the outside burns while the inside stays cold. While the sandwich cooks, press down lightly with a spatula. This helps the bread stick to the skillet. It also makes sure the cheese melts well. Cheese placement matters. Spread the mozzarella and fontina evenly. This way, every bite is cheesy and delicious. You can also add a little cheese on the edges. That helps create a nice crust. To melt the cheese faster, cover the skillet with a lid. This traps the heat and steam. Your cheese will be gooey in no time. One big mistake is overloading your sandwich with toppings. It’s tempting, but too much can make it hard to cook. Stick to the recipe for the best results. Also, don’t rush the cooking process. Cooking too fast can burn the bread. You want it golden brown, not charred. Enjoy the process; good food takes time. For the full recipe, check out Italian Grilled Cheese Delight. {{image_4}} You can change the cheese for a new taste. Swap mozzarella with provolone for a sharper flavor. Provolone melts well and adds a nice kick. You can also sprinkle grated Parmesan for extra flavor. This cheese adds a salty bite that makes the sandwich pop. Adding extra fillings can make your sandwich unique. Try roasted peppers or fresh spinach. These add color and nutrition to your meal. You can also use different spreads, like tapenade. Tapenade gives a rich, salty taste that pairs well with cheese. You can cook your sandwich in fun ways. A panini press makes it crispy and fast. It also gives nice grill marks. For a healthier option, try oven baking. Just place the sandwiches on a baking sheet and toast them until golden. You still get a crunchy bite without all the oil. For the full recipe, check out the Italian Grilled Cheese Delight. Store your Italian grilled cheese in the fridge. First, let the sandwiches cool down. Then, wrap them in plastic wrap or foil. Place them in an airtight container. This keeps them fresh for up to three days. If you want to keep them longer, consider freezing. To reheat, use a skillet for the best results. Heat it on low to medium. Place the sandwich in the skillet and cover it. This helps the cheese melt without burning the bread. Cook for about 3 to 5 minutes per side. You want a crisp crust and gooey cheese inside. Avoid the microwave, as it can make the bread soggy. You can freeze pre-assembled sandwiches. Wrap each sandwich tightly in plastic wrap. Then, place them in a freezer-safe bag. They can last up to three months in the freezer. When ready to eat, thaw them in the fridge overnight. After thawing, reheat them in a skillet for the best taste. Make sure to enjoy your Italian grilled cheese sandwiches fresh and hot! You can use an oven or a toaster oven instead. Preheat the oven to 375°F (190°C). Assemble your sandwich as usual. Place it on a baking sheet and bake for about 10-15 minutes. Flip halfway through to get both sides crispy. Yes, you can use gluten-free bread. Look for a crusty type to hold up well. This will keep the texture nice and help it stay crispy. Some great sides include: - A simple green salad - Tomato soup - Roasted vegetables - Chips or fries These pair well and add variety to your meal. You can keep leftovers in the fridge for up to three days. Make sure to store them in an airtight container to maintain freshness. Absolutely! You can swap the mozzarella and fontina for other cheeses. Try provolone or cheddar for a twist. You can also add ingredients like roasted peppers or spinach. Try these dips for added flavor: - Marinara sauce - Extra basil pesto - A balsamic reduction These add a delightful touch to each bite! This article shows how to make a tasty Italian grilled cheese sandwich. You learned about the key ingredients like sourdough bread and cheese. I shared step-by-step instructions, plus tips for perfect texture and flavor. You can experiment with cheese and fillings to make it your own. For storage, I covered how to keep your leftovers fresh. Enjoy making this simple dish that’s full of flavor and fun! Now, go gather your ingredients and start cooking!

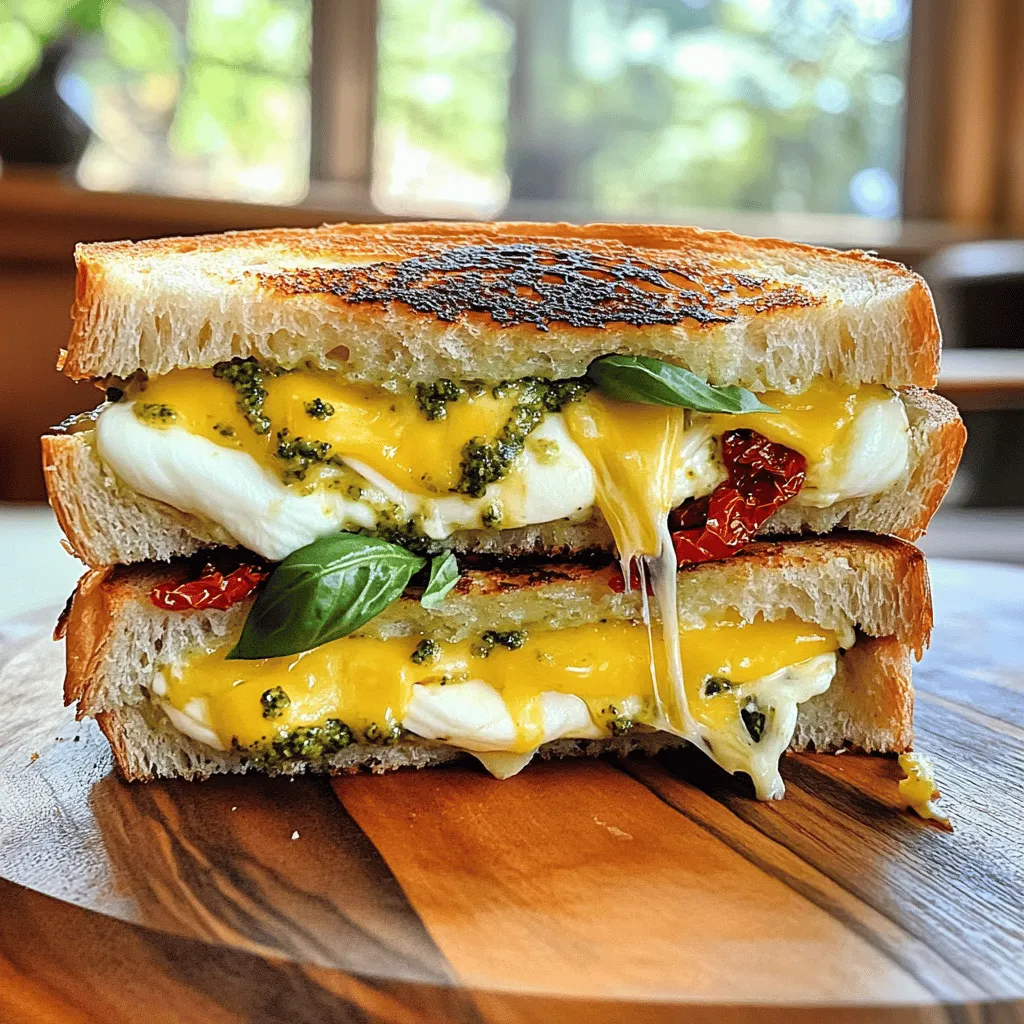
Italian grilled cheese sandwiches are a delightful twist on a classic favorite. With gooey cheese and vibrant flavors, they make every bite a treat. In this guide, I’ll share the …

Read more

Categories Dinner

Pineapple Cucumber Salad Fresh and Flavorful Delight

May 30, 2025 by Chef Remy
- 2 cups fresh pineapple, diced into bite-sized pieces - 1 large cucumber, thinly sliced into half-moons - 1/2 red bell pepper, diced into small cubes - 1/4 red onion, finely chopped - 1/4 cup fresh cilantro, roughly chopped - 2 tablespoons fresh lime juice (about 1 lime) - 1 tablespoon honey or agave syrup for sweetness - 1/2 teaspoon fine salt - 1/4 teaspoon freshly ground black pepper - 1/4 teaspoon chili flakes (optional, for a hint of heat) This recipe serves four. You can easily adjust the amounts. For instance, if you need a smaller salad, use one cup of pineapple and half a cucumber. If you want more heat, add more chili flakes. For a sweeter taste, increase the honey or agave. You can also swap cucumber for zucchini. Each serving of Pineapple Cucumber Salad provides about: - Calories: 100 - Protein: 1g - Total Fat: 0.5g - Carbohydrates: 25g - Fiber: 2g - Sugar: 10g This salad is low in calories and high in vitamins. Pineapple offers vitamin C, while cucumber adds hydration. Enjoy this fresh and tasty dish guilt-free. For the full recipe, check the details above. Start by gathering your fresh ingredients. You will need pineapple, cucumber, red bell pepper, red onion, and cilantro. Dice the pineapple into small, bite-sized pieces. Thinly slice the cucumber into half-moons. Cut the red bell pepper into small cubes. Finely chop the red onion. Roughly chop the cilantro. Keep everything close to your mixing bowl for easy access. In a spacious mixing bowl, add the diced pineapple, sliced cucumber, bell pepper cubes, and chopped onion. Gently toss these ingredients together. Make sure to mix them well so that every piece is included. This blends the flavors and makes each bite tasty. Next, grab a small bowl to prepare the dressing. Whisk together the fresh lime juice, honey or agave syrup, fine salt, black pepper, and chili flakes if you like some heat. Mix until the honey dissolves fully. This dressing adds a sweet and zesty flavor that brightens the salad. Now, drizzle the dressing over the pineapple mixture in the large bowl. Use a large spoon to toss everything gently. Ensure all the ingredients are nicely coated with the dressing. After tossing, fold in the chopped cilantro. Give it another gentle toss to mix the herbs evenly. Let the salad rest for about 10 minutes at room temperature. This resting time allows the flavors to blend beautifully. Serve it chilled or at room temperature for the best taste. Enjoy this fresh and flavorful Pineapple Cucumber Salad! For the full recipe, check out the details above. To make your pineapple cucumber salad pop, focus on fresh ingredients. Use ripe pineapple for sweetness. A juicy cucumber adds crunch. Adding lime juice brightens the flavors. Honey or agave syrup gives a nice touch of sweetness. I often sprinkle a little chili for warmth, but you can skip it if you prefer mild flavors. Make your salad look great! Use a clear bowl to show off the colors. You can also serve it in small cups for a fun touch. Add extra cilantro leaves on top for a fresh look. A lime wedge on the side brightens the plate. These simple changes can make your dish look fancy and inviting. This salad is easy to change for different diets. For a vegan option, stick with agave syrup. If you want more protein, add grilled chicken, shrimp, or tofu. You can also swap the honey for maple syrup. For low-sodium needs, use less salt or a salt substitute. Everyone can enjoy this salad with a few tweaks! Feel free to try these tips when making your dish. Explore the [Full Recipe] for more ideas! {{image_4}} You can add protein to your pineapple cucumber salad for a heartier meal. Chicken works well, especially grilled or roasted. Shrimp adds a light touch and cooks quickly. Tofu is a great choice for a plant-based option. Simply cube your choice and mix it in when you combine the salad. This addition makes the salad filling and boosts its nutrition. While lime and honey create a bright dressing, you can explore other flavors. A sesame vinaigrette adds a nutty taste that pairs well with the salad. You might also try a spicy mango sauce for a fruity twist. Just mix your chosen dressing in the same way as the original. Don’t be afraid to experiment until you find your favorite! Changing the ingredients with the seasons can keep the salad fresh. In summer, add juicy tomatoes for extra color and flavor. In fall, consider diced apples or pears for a sweet crunch. Using seasonal produce not only enhances taste but also supports local farms. This approach keeps your salad exciting and full of variety throughout the year. For the full recipe, check out the Tropical Refreshment: Pineapple Cucumber Salad. To store leftover Pineapple Cucumber Salad, place it in an airtight container. Make sure to remove as much air as possible. This helps keep the salad fresh longer. You can keep it in the fridge for up to three days. If you see any discoloration or mushiness, it’s best to toss it out. For the best taste, eat the salad within the first 24 hours. The longer it sits, the more the ingredients lose their crunch. I recommend keeping the dressing separate. Add it just before serving. This keeps everything fresh and crisp. Use a clean spoon every time you serve to avoid bacteria. Freezing this salad isn't ideal. The texture of cucumber and pineapple changes when frozen. If you must freeze it, consider only freezing the pineapple. Cut the cucumber and store it fresh. When you thaw it, use it in smoothies or other dishes. If you freeze the salad, consume it within a month. Always thaw in the fridge, not at room temperature. This keeps bacteria at bay. You can keep Pineapple Cucumber Salad in the fridge for up to three days. Store it in an airtight container to keep it fresh. After a day, the cucumber may lose some crunch. This is normal but still tasty! Yes, you can make Pineapple Cucumber Salad ahead of time. I suggest preparing it a few hours before serving. It allows the flavors to mix well. Just remember to keep it in the fridge until you are ready to serve. You can serve this salad in many ways. Here are some ideas: - Serve it as a side dish with grilled meats. - Use it as a topping for tacos or burritos. - Pair it with chips for a fresh dip option. - Enjoy it alone for a light lunch. Absolutely! Pineapple Cucumber Salad is great for meal prep. It is easy to pack in lunch boxes. Just keep the dressing separate until you are ready to eat. This keeps the salad fresh and crisp. For the full recipe, check out the Tropical Refreshment: Pineapple Cucumber Salad section! You learned how to make a delicious Pineapple Cucumber Salad in this post. We covered all the ingredients, their measurements, and how to mix them properly. You now know tips for flavor and presentation. You can customize the salad to fit various diets and enjoy different variations. This salad is tasty, fresh, and easy to store. I hope you feel ready to try it. Enjoy this refreshing dish all year round!

Are you ready to enjoy a bright and refreshing dish? This Pineapple Cucumber Salad offers a perfect blend of sweet and crisp flavors. Whether you’re hosting a summer gathering or …

Read more

Categories Salads

Peach Berry Fruit Salad Fresh and Flavorful Delight

May 30, 2025 by Chef Remy
- 3 ripe peaches, diced - 1 cup fresh strawberries, hulled and sliced - 1 cup fresh blueberries, rinsed - 1 cup fresh raspberries, rinsed - 1 tablespoon freshly squeezed lemon juice - 1 tablespoon honey or maple syrup - 1 tablespoon fresh mint leaves, finely chopped - ½ cup Greek yogurt for creaminess - Crushed pistachios for garnish When I make this Peach Berry Fruit Salad, I focus on fresh and ripe fruits. The key is using peaches that are juicy and sweet. Strawberries should be bright red and fragrant. Blueberries and raspberries add a burst of flavor and color. For the dressing, I love freshly squeezed lemon juice. It adds a zesty kick. Honey or maple syrup gives a touch of sweetness. The mint leaves bring a refreshing note that ties everything together. You can add Greek yogurt for a creamy touch. It makes the salad richer and adds protein. Crushed pistachios are great for a crunchy topping. They also add a nice nutty flavor. Each ingredient plays a part in making this salad a fresh and tasty experience. You can find the full recipe above to create your own delightful dish. First, grab a large mixing bowl. Combine the diced peaches, sliced strawberries, blueberries, and raspberries in this bowl. Make sure you use fresh fruit for the best taste. Gently toss the fruits together using a spatula or wooden spoon. Be careful not to bruise the delicate berries. This step helps keep your salad looking beautiful and fresh. Next, take a small bowl for the dressing. Whisk together the freshly squeezed lemon juice and honey (or maple syrup) until the mixture is smooth. This dressing adds a sweet and tangy flavor to your salad. It’s easy to make and takes just a moment. Now, it’s time to bring it all together. Drizzle the lemon-honey dressing over the mixed fruit. Carefully toss the fruit again, ensuring every piece is lightly coated. This dressing gives each bite a burst of flavor. After that, sprinkle the finely chopped mint leaves over the salad. Gently fold them into the fruit mixture for a fresh, herbal touch. If you want a creamier texture, you can serve the salad with a dollop of Greek yogurt. This adds richness and protein to the dish. Finally, finish with a light sprinkle of crushed pistachios on top. This adds a nice crunch that pairs well with the sweet fruit. You can find the full recipe [here]. Layer your salad in clear glass bowls for a vibrant display. This shows off the bright colors of each fruit. Serve immediately for the freshest taste. The fruits shine best right after you make the salad. Consider adding cucumber for added crunch. It gives a nice contrast to the soft fruits. You can also use seasonal fruits for variation. Think of using cherries in summer or apples in fall. Serve with a dollop of Greek yogurt for creaminess. This adds a rich flavor that pairs well with the fruits. You can also enjoy it with a light afternoon tea or picnic foods. It makes a refreshing side dish for any meal. {{image_4}} You can change up the fruits based on the season. Swap peaches for nectarines or plums in summer. Their sweet and juicy flavors work great. In winter, try adding citrus segments, like orange or grapefruit. These fruits give a fresh twist to your salad. If you want to make this salad vegan, skip the Greek yogurt. Use maple syrup instead of honey for sweetness. You can also add nuts or seeds, like almonds or chia seeds. This makes your salad more filling and packed with nutrition. To boost the flavor, add a splash of vanilla extract to the dressing. It adds a warm, sweet note. You can also sprinkle a tiny pinch of salt. This simple trick enhances the sweetness of the fruits. For the full recipe, check out the detailed instructions above. To keep your Peach Berry Fruit Salad fresh, store it in an airtight container in the fridge. This helps protect the fruit from drying out or absorbing other odors. Enjoy your salad within 1-2 days for the best taste and texture. After that, the fruit may start to lose its juicy goodness. If you want to save some fruit for later, think about freezing the fruit before mixing. This method is great for when you want a taste of summer in winter. While the salad is best enjoyed fresh, you can freeze it for up to a month. Just remember that freezing may change the texture, so it’s best for smoothies or quick snacks later on. Yes, but for best flavor, prepare the dressing separately and combine right before serving. This keeps the fruit fresh and prevents sogginess. You can use any berries, apples, or melons for great results. Feel free to mix and match based on what you have. Add granola or nuts to increase texture and nutritional value. This adds crunch and makes the salad hearty. Yes, especially if ingredients are stored separately until ready to serve. This way, all the flavors stay bright and fresh. Modify the amount of honey or use a sugar substitute as desired. Taste as you go to find your perfect balance. For the Full Recipe, refer back to the earlier sections. Enjoy your Peach Berry Fruit Salad! This blog post shared a simple fruit salad recipe with fresh peaches, strawberries, blueberries, and raspberries. The delicious dressing adds a zesty touch with lemon and honey. You’ll love the tips for presentation and storage, like using Greek yogurt for creaminess. Remember, you can switch fruits to suit the season or your taste. Enjoy making this refreshing salad for your next meal or picnic. It’s a crowd-pleaser that’s easy and fun to customize!

Are you craving a refreshing and tasty treat? This Peach Berry Fruit Salad is just what you need! Packed with juicy peaches, sweet strawberries, and vibrant blueberries, every bite bursts …

Read more

Categories Salads

Pan Seared Chimichurri Shrimp Flavorful and Easy Dish

May 30, 2025 by Chef Remy
To make this dish, you will need: - 1 pound large shrimp, peeled and deveined - 1 tablespoon extra virgin olive oil - Sea salt and freshly cracked black pepper to taste - 1 cup fresh parsley, finely chopped - 1/4 cup fresh cilantro, finely chopped - 2 cloves garlic, minced - 1 teaspoon red pepper flakes - 1/2 teaspoon ground cumin - 1/4 cup red wine vinegar (or substitute with fresh lemon juice) - Zest and juice of 1 large lemon - 1/2 teaspoon dried oregano These ingredients create a fresh and flavorful dish. The shrimp are the star, while the chimichurri sauce adds a bright kick. You can change up the dish by adding: - Cherry tomatoes for sweetness - Avocado for creaminess - Red onion for crunch - Mixed bell peppers for color These additions let you customize the dish to your taste. Feel free to experiment and make it your own! To prepare this dish, you'll need a few key tools: - Large skillet for searing - Medium mixing bowl for the chimichurri - Knife for chopping - Cutting board for prep - Paper towels for drying shrimp Having these tools ready makes cooking easy and fun! This dish is quick to make, and you'll love how it turns out. For the complete recipe, check out the [Full Recipe]. First, grab a medium mixing bowl. You will mix fresh herbs here. Chop up one cup of parsley and a quarter cup of cilantro. Add two minced garlic cloves for a nice kick. Then, sprinkle in one teaspoon of red pepper flakes and a half teaspoon of ground cumin. Next, pour in a quarter cup of red wine vinegar or fresh lemon juice. Zest one large lemon and add that zest too. Finally, add a half teaspoon of dried oregano. Mix all the ingredients well. Season with sea salt and fresh black pepper to taste. Set the sauce aside. Let it sit so the flavors can blend. Now, take one pound of large shrimp. Make sure they are peeled and deveined. Use a paper towel to pat them dry. This step is key; dry shrimp will sear better. In a large bowl, drizzle one tablespoon of extra virgin olive oil over the shrimp. Sprinkle sea salt and black pepper generously. Toss the shrimp well to coat them evenly. This will add flavor to every bite. Heat a large skillet on medium-high heat. Once it's hot, place the seasoned shrimp in a single layer. Sear the shrimp for two to three minutes on each side. Watch for the color change to pink and opaque. If your skillet gets crowded, cook the shrimp in batches. This ensures they sear properly. After the shrimp are cooked, turn off the heat. Drizzle the chimichurri sauce over the shrimp. Gently toss the shrimp to coat them evenly. This step brings all the flavors together. For a beautiful presentation, plate the shrimp on a bed of rice. You can use white or brown rice. Serve with colorful grilled veggies for a nice contrast. To add more color, garnish with fresh herbs and lemon wedges. Enjoy your flavorful dish! For the complete cooking process, refer to the Full Recipe. To get that perfect sear, start with dry shrimp. Pat them with a paper towel. This helps them brown nicely. Use a hot skillet. This helps seal in flavors and juices. Cook them in a single layer. Overcrowding makes them steam instead of sear. Sear for about 2-3 minutes per side. Look for a bright pink color. This shows they are ready to flip. Chimichurri sauce is key to this dish. Fresh herbs bring bright flavors. You can add more garlic if you love it. A splash of lemon juice brightens the sauce too. If you want heat, add more red pepper flakes. For a twist, try using fresh basil or mint. These herbs can change the flavor profile. How you serve the dish matters. Use a nice plate to show off the shrimp. A fluffy bed of rice creates a nice contrast. Add colorful grilled veggies on the side. This makes the dish pop. For finishing touches, sprinkle extra herbs or lemon wedges on top. This makes it look fresh and inviting. For the full recipe, check out [Full Recipe]. {{image_4}} You can swap shrimp for other proteins. Chicken works well with chimichurri. Just cut it into bite-sized pieces. Sear it until golden brown. Fish like salmon or tilapia can also shine in this dish. Adjust cooking time as needed. Tofu is a great choice for a vegetarian option. It soaks up flavors nicely. Chimichurri is flexible. Try using basil instead of parsley for a twist. This gives a sweet note to the sauce. You can add mint for a refreshing flavor. Mixing in red onions adds a nice crunch. Don't forget to change the vinegar too. Apple cider vinegar can add a fruity touch. Want more heat? Add more red pepper flakes. You can also use fresh jalapeños for a spicier kick. If you prefer mild, skip the red pepper flakes. Add some honey for a touch of sweetness instead. This dish can adapt to your taste easily. Try different combinations until you find your favorite. For the full recipe, check out the section earlier. After making pan seared chimichurri shrimp, let it cool. Place the shrimp in an airtight container. They can stay fresh in the fridge for up to three days. Always check for any strange smells or changes in color before eating. You can freeze leftover shrimp for later use. First, make sure the shrimp are cool. Place them in a freezer-safe bag or container. Remove as much air as possible to prevent freezer burn. They will keep well for about three months. When ready to eat, thaw them overnight in the fridge for the best results. To reheat the shrimp, use a skillet on low heat. This method helps keep them tender. Add a splash of water or broth to avoid dryness. Heat for about five minutes, stirring gently. You can also use a microwave, but be careful. Heat in short bursts to avoid overcooking. For the best taste, drizzle some fresh chimichurri on top before serving. Cook shrimp for about 2-3 minutes on each side. They turn pink and opaque when done. This quick cooking time keeps them juicy and tender. Overcooking makes them tough, so stay close to your skillet. Yes, you can prepare chimichurri ahead of time. Making it a day before lets the flavors blend well. Just store it in the fridge in a sealed container. Let it sit at room temperature for a bit before serving. You can enjoy shrimp with many sides. Here are some ideas: - Fluffy white or brown rice - Colorful grilled vegetables - A fresh green salad - Crusty bread to soak up extra sauce Avoid cooking shrimp in a crowded pan. This can cause them to steam instead of sear. Always pat them dry before seasoning. This helps them brown nicely. Yes, you can use frozen shrimp. Just make sure to thaw them first. Place them in the fridge overnight, or run them under cold water. This helps them cook evenly and keeps the flavor fresh. For the complete cooking process, check the Full Recipe. This blog post has shown how to make pan-seared chimichurri shrimp. You learned about key ingredients, tools, and step-by-step cooking steps. I shared tips for great flavor and presentation. You also discovered how to store leftovers and found answers to common questions. Enjoy making this dish to impress your family or friends. With a few simple steps, you can create a tasty meal that everyone will love. Happy cooking!

Ready to spice up your dinner routine? This Pan Seared Chimichurri Shrimp recipe is both easy and bursting with bold flavors! In just a few steps, you’ll learn how to …

Read more

Categories Dinner

Crispy Rice with Spicy Salmon Flavorful Delight

May 30, 2025 by Chef Remy
- 2 cups cooked sushi rice - 1 tablespoon rice vinegar - 1 teaspoon sugar - Salt, to taste - 1 pound fresh skinless salmon - 2 tablespoons sriracha - 1 tablespoon mayonnaise (preferably Kewpie for creaminess) - 1 ripe avocado, thinly sliced - 1/4 cup green onions, finely chopped - 1 teaspoon sesame oil - 1 tablespoon panko breadcrumbs - Seaweed sheets, cut into strips for garnish (optional) To make crispy rice with spicy salmon, we need fresh ingredients. Sushi rice is key for texture. Rice vinegar adds a nice tang to the rice. Sugar balances the flavors, while salt brings it all together. Salmon is the star of this dish. Use fresh, skinless salmon for the best taste. Sriracha gives it that spicy kick. Mixing sriracha with mayonnaise makes a creamy sauce. You can add avocado for creaminess and green onions for freshness. Sesame oil adds a nutty flavor, and panko breadcrumbs give crunch. Seaweed strips can be a fun garnish. You can find the full recipe in the next section. This dish is both tasty and fun to make! To start, you need to mix the sushi rice. In a medium bowl, gently combine 2 cups of cooked sushi rice with 1 tablespoon of rice vinegar, 1 teaspoon of sugar, and a pinch of salt. Stir this until all ingredients mix well. Allow the rice to cool a bit. After cooling, take small portions of the rice and shape them into patties. Aim for rectangular shapes about 1-inch thick. Next, it’s time to cook the rice patties. Heat a non-stick skillet over medium heat. Add a light drizzle of sesame oil. Wait until the oil shimmers. Carefully place the rice patties in the skillet. Cook each side for about 3 to 4 minutes. You want them golden brown and crispy. When they finish cooking, take them out and let them drain on a paper towel. This helps absorb extra oil. Now, let’s make the spicy salmon. In a mixing bowl, combine 2 tablespoons of sriracha with 1 tablespoon of mayonnaise. Blend these until smooth. Then, cut 1 pound of fresh skinless salmon into bite-sized cubes. Gently fold the salmon into the spicy mayo. Make sure each piece gets coated well. This adds a nice kick to your dish. For the full recipe, check out the instructions above. To make crispy rice, time and heat are key. Cook your rice patties for about 3-4 minutes on each side. This gives them a golden crust. Make sure your skillet is hot. A non-stick skillet works best and needs a light drizzle of sesame oil. This oil adds flavor and helps the rice crisp. After cooking, let them rest on paper towels. This removes excess oil and keeps them crispy. For sushi rice, mix in rice vinegar, sugar, and a pinch of salt. This adds a nice tang and sweetness. You can also try adding some sesame seeds or a splash of soy sauce to the rice for more depth. For toppings, sliced avocado adds creaminess. Chopped green onions give a fresh taste. Panko breadcrumbs on top add a crunchy finish. When serving, arrange your crispy rice patties on a nice platter. You want them to look appealing. Top each patty with the spicy salmon mix. A slice of avocado on top is both pretty and tasty. Sprinkle green onions for color and flavor. For a fun touch, add edible flowers or sesame seeds as a garnish. You can serve with chopsticks to make it more authentic. Enjoy your flavorful delight! {{image_4}} If you want to mix things up, consider different proteins. You can easily swap salmon for tuna or crab. Both options add their own unique flavor and texture. For a vegan choice, try tofu or tempeh. These plant-based proteins work well with spicy sauces. You can even create plant-based sauces using vegan mayo and sriracha. You can make this dish spicy or mild. If you prefer a kick, add more sriracha or a dash of chili oil. For a milder version, use a light hand with the spice. You can also explore international flavors. Adding soy sauce or wasabi gives a Japanese twist. For a Mexican flair, try pico de gallo or a lime drizzle. Think about how you want to serve this dish. You can cut the crispy rice into smaller pieces for bite-sized appetizers. They’re perfect for parties! Or, you can keep them larger for a main course. For a party platter, arrange them on a big tray. Add colorful garnishes like sliced radishes or edible flowers for an eye-catching display. Try these ideas to create your own version of crispy rice with spicy salmon. For the full recipe, check out the earlier section! To keep your crispy rice with spicy salmon fresh, store it properly. First, let the dish cool down to room temperature. Then, place any leftovers in an airtight container. It’s best to eat them within two days. - Refrigeration guidelines: Store the dish in the fridge. It stays good for about 48 hours. Make sure the container is sealed tight to prevent air from getting in. - Freezing options: You can freeze the rice patties, but the salmon is best fresh. To freeze, wrap the rice patties in plastic wrap and place them in a freezer bag. Use them within one month for the best taste. When reheating, you want to keep that crispy texture. Here are some tips: - Techniques to retain crispness: Use a pan to reheat the rice patties over medium heat. Add a small amount of oil to help regain crispness. Cook each side for about two minutes until they are warm and crispy again. - Avoiding soggy rice: Avoid using the microwave for the rice patties. It makes them soggy. If you must, cover them with a paper towel to absorb moisture, but pan frying is always best. Enjoy your delicious leftovers! To make Crispy Rice with Spicy Salmon, follow these steps: 1. Prepare the sushi rice: Mix cooked sushi rice with rice vinegar, sugar, and salt. 2. Shape the rice: Form this mixture into rectangular patties. 3. Pan-fry the rice: Cook the patties in a skillet with sesame oil until golden brown. 4. Make the spicy salmon: Combine sriracha and mayonnaise, then mix with diced salmon. 5. Assemble the dish: Place the salmon atop the crispy rice patties. 6. Garnish: Add avocado slices and green onions for color. You can find the full recipe in the earlier section. Yes, you can prepare elements ahead of time. Make the sushi rice and form the patties. Store them in the fridge for up to one day. You can also make the spicy salmon mix in advance. Just keep it chilled until you are ready to serve. This dish pairs well with: - Edamame: Lightly salted and steamed. - Seaweed salad: Adds a fresh crunch. - Miso soup: Complements the flavors perfectly. - Pickled vegetables: Provides tang and contrast. To pick fresh salmon, check these points: - Color: Look for bright pink or orange hues. - Texture: The flesh should feel firm and not mushy. - Smell: Fresh salmon has a clean scent, not fishy. - Eyes: If buying whole fish, clear eyes show freshness. Yes, this recipe works well for meal prep. Store the crispy rice and spicy salmon separately to keep the rice crunchy. You can refrigerate them for up to three days. When ready to eat, reheat the rice in a skillet to regain crispiness. This recipe for crispy rice with spicy salmon offers a fun and tasty meal. You learned how to prepare the rice, fry it for crunch, and mix it with salmon. With tips on flavors and storage, you can enjoy this dish for days. Feel free to try variations based on your taste. Cooking can be creative and rewarding. Enjoy every bite and share your masterpiece with friends. Happy cooking!

Are you ready to elevate your dinner game? Crispy Rice with Spicy Salmon is a dish that brings bold flavors and fun textures to your table. Imagine crunchy rice patties …

Read more

Categories Appetizers
Older posts
Newer posts
← Previous Page1 … Page102 Page103 Page104 … Page130 Next →

ROASTED RECIPES

Where bold flavors meet everyday meals. Warm, vibrant, and made to share. 🔥🥗🍴

PAGES

Home About Contact Privacy Policy Terms & Conditions Cookie Policy GDPR Policy Copyright Policy Disclaimer

CATEGORIES

Appetizers Desserts Salads Breakfast Dinner

Contact

  • Pinterest
  • Mail
Copyright © 2025 Roasted Flavors. All rights reserved.