Skip to content
Roasted Flavors
  • Home
  • Appetizers
  • Desserts
  • Salads
  • Breakfast
  • Dinner
  • Privacy Policy
  • Contact
  • About

Chef Remy

Quick & Easy Stuffed Potato Cakes for Busy Days

June 6, 2025 by Chef Remy
To make quick and easy stuffed potato cakes, you need these key ingredients: - 3 large potatoes, peeled and cut into 1-inch cubes - 1 cup shredded cheese (cheddar or mozzarella) - 1/2 cup cooked broccoli, finely chopped - 1/4 cup green onions, thinly sliced - 1/2 teaspoon garlic powder - 1/2 teaspoon onion powder - Salt and pepper to taste - 1/2 cup breadcrumbs - 1/4 cup all-purpose flour - 2 eggs, beaten - Oil for frying You can easily switch up the ingredients to match your taste. Here are some ideas: - Veggies: Use spinach, bell peppers, or zucchini instead of broccoli. - Cheese: Try feta or pepper jack for a different flavor. - Herbs: Add fresh herbs like parsley or dill for a fresh touch. - Spices: Experiment with cumin or paprika for a spicy kick. If you don't have some ingredients, here are good swaps: - Potatoes: Sweet potatoes can work well for a sweeter cake. - Eggs: Use flaxseed meal mixed with water as a vegan binder. - Breadcrumbs: Ground oats or crushed cornflakes can replace breadcrumbs. - Oil: Use olive oil or coconut oil for frying instead of regular oil. Feel free to mix and match based on what you have at home. For the full recipe, check out the details above! Start by boiling 3 large potatoes. Cut them into 1-inch cubes. Put them in a large pot and cover with water. Bring the water to a rolling boil. Cook the potatoes for 15 to 20 minutes until they are fork-tender. Drain them and let them cool for a few minutes. Once cool, mash the potatoes in a bowl until smooth and creamy. In the same bowl, add the filling ingredients. Use 1 cup of shredded cheese, like cheddar or mozzarella. Mix in 1/2 cup of finely chopped cooked broccoli. You can also use any vegetable you love. Add 1/4 cup of thinly sliced green onions. Sprinkle in 1/2 teaspoon of garlic powder and 1/2 teaspoon of onion powder. Don’t forget to add salt and pepper to taste. Stir well until everything is blended nicely. Let the potato mixture cool until it's easy to handle. Take a handful of mixture and shape it into a patty, about the size of your palm. Place about 1 tablespoon of extra filling in the center of each patty. Fold the edges over the filling and press gently to seal it. Repeat this until you shape all the patties. Set up a dredging station with flour, beaten eggs, and breadcrumbs in separate bowls. Roll each cake in flour, dip it in egg, then coat it in breadcrumbs. Heat oil in a large frying pan over medium heat. Once hot, carefully place the potato cakes in the pan. Fry them for 4 to 5 minutes on each side until they are golden brown and crispy. After cooking, transfer the cakes to a plate lined with paper towels. This step helps absorb extra oil. For a fun presentation, serve the potato cakes on a colorful platter. You can sprinkle fresh herbs on top and add a side of sour cream or salsa. Enjoy making and eating these delightful stuffed potato cakes! You can find the full recipe for more details. When making stuffed potato cakes, a few common mistakes can trip you up. First, don’t overcook the potatoes. If you boil them too long, they become mushy. Aim for fork-tender potatoes, about 15 to 20 minutes. Secondly, let the potato mixture cool before shaping. If it's too hot, it will be hard to form patties. Lastly, ensure your oil is hot enough before frying. If the oil is too cool, the cakes will absorb too much oil and lose their crispiness. Yes, you can prep these cakes ahead of time! You can make the potato mixture a day in advance. Store it in the fridge. Shape the patties just before frying. If you want to freeze them, form the cakes and place them on a baking sheet. Freeze until solid, then transfer them to a freezer bag. When ready to cook, fry them straight from frozen. Just add a few extra minutes to the cooking time. Heat management is key to perfect potato cakes. Start with medium heat. This allows the outside to crisp up without burning. If the oil smokes, it’s too hot. Reduce the heat slightly. Fry in batches to avoid crowding. Overcrowding lowers the oil temperature, making the cakes soggy. Flip the cakes gently to keep them intact. This method ensures each bite is deliciously crispy and golden brown. For the full recipe, check out the details above! {{image_4}} For those who prefer plant-based meals, making vegetarian and vegan stuffed potato cakes is easy. Simply swap the cheese for a vegan alternative. Nutritional yeast can add a cheesy flavor without dairy. Use flaxseed meal mixed with water as an egg replacement. This mix binds the cakes just like eggs would. You can also add more veggies, like mushrooms or spinach, to enhance flavor and nutrition. Want to spice things up? You can add cooked bacon bits for a smoky taste. Chopped herbs like parsley or cilantro add freshness. For a kick, try adding chili flakes or paprika. Mixing in sautéed onions can also deepen the flavor. Just remember to keep the add-ins small, so they fit well in the cakes. You can fry, bake, or air-fry your potato cakes. Frying gives a crispy texture, while baking is a healthier option. To bake, place the cakes on a greased baking sheet and cook them at 400°F for about 25 minutes. Flip halfway through to ensure even cooking. If you prefer air-frying, set your air fryer to 375°F and cook for about 15 minutes. Both methods yield delicious results with less oil. Try these variations to make your stuffed potato cakes unique and delightful! For the full recipe, check the linked section above. To keep your stuffed potato cakes fresh, place them in an airtight container. Let the cakes cool to room temperature first. You can store them in the fridge for up to three days. If you want to keep them longer, freezing is a great option. To freeze the potato cakes, first, let them cool completely. Then, line a baking sheet with parchment paper. Place the cakes on the sheet in a single layer, making sure they do not touch. Freeze for about two hours. After they are firm, transfer them to a freezer bag. Label the bag with the date and store it for up to three months. Reheat your potato cakes in a skillet over medium heat. Add a touch of oil to help them crisp up again. Cook each side for about 3-4 minutes until they are warm and golden. You can also use an oven. Preheat it to 375°F (190°C) and bake for about 10-15 minutes. Enjoy your tasty snack without losing the crunch! To make your stuffed potato cakes crispy, focus on the coating. Use breadcrumbs for a crunchy layer. Be sure to heat the oil well before frying. This helps the cakes crisp up quickly. Fry them in small batches, so they have room to cook evenly. Turn them only once to avoid breaking the crust. Yes, you can use instant potatoes. They save time, but they might not be as creamy. Follow the package instructions to prepare them. Then, mix in your fillings as you would with fresh potatoes. Keep in mind that the texture may differ slightly. I love serving stuffed potato cakes with sour cream or tangy salsa. They add a nice contrast to the rich flavors. You can also try a garlic aioli for a creamy twist. Experiment with your favorite sauces to find your perfect match! Potato cakes are done frying when they turn golden brown. This usually takes about 4-5 minutes on each side. Use a slotted spoon to lift one out and check its color. If it looks crispy and golden, it’s ready to enjoy! You learned about the key ingredients and steps to make tasty potato cakes. We explored useful tips to avoid mistakes and how to store leftovers. There are ways to adapt recipes for different diets and cooking methods. Use this guide to create your perfect potato cakes. Enjoy experimenting with flavors and techniques. With practice, you'll master them and impress everyone at your next meal.

Are you busy but still craving a tasty home-cooked meal? You’ve come to the right place! In this post, I’ll guide you through making quick and easy stuffed potato cakes. …

Read more

Categories Appetizers

Air Fryer Honey BBQ Explosion Chicken Delightful Meal

June 4, 2025 by Chef Remy
- 4 boneless, skinless chicken breasts - 1/2 cup honey - 1/2 cup barbecue sauce - 1 tablespoon soy sauce - 1 teaspoon garlic powder - 1 teaspoon onion powder - 1/2 teaspoon smoked paprika - Salt and black pepper to taste - 1/2 cup shredded cheddar cheese - 1/4 cup chopped green onions (for garnish) The main ingredients for Air Fryer Honey BBQ Explosion Chicken are simple yet effective. First, you need four boneless, skinless chicken breasts. They are the star of this dish. The honey and barbecue sauce add a sweet and tangy flavor that makes every bite special. You also need a few additional ingredients to boost the taste. Soy sauce adds depth, while garlic powder and onion powder give a savory kick. These flavors mix well with the chicken. For seasoning and garnish, smoked paprika brings a nice smoky note. Salt and black pepper enhance all the flavors. The shredded cheddar cheese melts over the chicken, making it rich and creamy. Finally, green onions add a pop of color and freshness. To follow this recipe, gather all the items listed above. You can find the full recipe in the section titled Full Recipe. Each ingredient plays an important role to create a delightful meal. To start, combine honey, barbecue sauce, soy sauce, garlic powder, onion powder, smoked paprika, and a pinch of salt and pepper in a medium bowl. Mix well until smooth. This blend gives the chicken its sweet and tangy flavor. Set aside about 1/4 cup of this marinade for later use. Now, take the chicken breasts and put them in a shallow dish or a zip-top bag. Pour the marinade over the chicken. Make sure every piece is coated well. Cover the dish or seal the bag. Refrigerate for at least 30 minutes, but for the best taste, marinate for up to 2 hours. This time helps the flavors soak in. Next, preheat your air fryer to 380°F (193°C) for about 5 minutes. This step is key for even cooking. Lightly spray the air fryer basket with cooking spray. Place the marinated chicken breasts in a single layer in the basket. Avoid overcrowding to ensure they cook well. Cook for 10 to 12 minutes, flipping the chicken halfway. Use a meat thermometer to check that the chicken reaches an internal temperature of 165°F (75°C). Once the chicken is cooked, carefully take the basket out of the air fryer. Drizzle the reserved barbecue sauce over each chicken piece. Then, sprinkle shredded cheddar cheese on top. Return the basket to the air fryer and cook for an additional 2 to 3 minutes. Watch the cheese melt and bubble, creating a delicious topping. To get the best texture, marinate the chicken for at least 30 minutes. For even better flavor, let it sit for up to 2 hours. A longer marinating time allows the spices to soak in. Next, always preheat your air fryer. Set it to 380°F (193°C) for about 5 minutes. This step helps cook the chicken evenly and keeps it juicy. For a unique twist, try making your own BBQ sauce. Mix honey, ketchup, and a splash of apple cider vinegar. You can also add spices like cayenne pepper for heat. A dash of smoked paprika gives a nice depth to the sauce. Experiment with flavors to find what you love! Serve your honey BBQ explosion chicken with crispy fries or a fresh salad. This adds crunch and balance to your meal. For a pretty plate, use a rustic wooden board. Place the chicken on parchment paper for a clean look. Don’t forget to sprinkle extra cheese and green onions on top! For the full recipe, check the detailed instructions above. {{image_4}} You can switch up the protein in this dish. Chicken thighs are a great choice. They stay juicy and have more flavor. If you want a plant-based option, try tofu. Just press it to remove excess water. Then, marinate it just like the chicken. This way, you get the same tasty honey BBQ flavor. Want to change the taste? You can make a spicy honey BBQ version. Add some hot sauce or cayenne pepper to the marinade. If you like citrus, try adding orange juice or zest for a refreshing twist. These changes keep the dish exciting and full of flavor. If you need gluten-free options, look for gluten-free barbecue sauce. You can also check the soy sauce for gluten-free brands. For seasoning, most spices are already gluten-free. This makes it easy to enjoy the meal without worrying about allergies. You can still savor every bite without missing out on flavor. For the full recipe, check out the details above. Store leftovers in an airtight container. This keeps the chicken fresh and tasty. It’s best to refrigerate within two hours of cooking. Your leftover chicken lasts about 3 to 4 days in the fridge. If you want to make it last longer, consider freezing it. Just make sure to wrap it well. Reheating is easy and keeps the chicken yummy. The air fryer works great for this. Set it to 350°F (175°C) and heat for about 5 to 7 minutes. This method makes the chicken crispy again. You can also use an oven. Preheat to 350°F (175°C) and bake for 10 to 15 minutes. Always check that the chicken reaches 165°F (75°C) before eating. Enjoy your Air Fryer Honey BBQ Explosion Chicken! For the complete process, check the Full Recipe. Yes, you can use frozen chicken. Just adjust your cooking time. Cook the chicken for about 15-20 minutes. Flip it halfway through. Check the thickest part for doneness. It should reach 165°F (75°C). Let it rest for a few minutes before serving. This helps keep it juicy. Use a meat thermometer. The safe internal temperature is 165°F (75°C). Insert the thermometer into the thickest part. If it reads that temperature, your chicken is ready. If not, cook it a bit longer. Always ensure it’s fully cooked before serving. You can bake or grill the chicken. For baking, preheat your oven to 375°F (190°C). Place the chicken on a baking sheet. Bake for 25-30 minutes, flipping halfway. For grilling, heat your grill to medium-high. Grill each side for about 6-8 minutes. Check the temperature to ensure safety. Yes, you can make it ahead. Marinate the chicken and grill or bake it later. However, it may lose some crispness. Store the cooked chicken in an airtight container. It stays fresh in the fridge for up to three days. Reheat it gently to keep it moist. There are many great sides for this chicken. Try crispy fries or a fresh salad. Roasted veggies also work well. You can serve with baked beans for a classic touch. Each side adds its own flavor and texture to the meal. Enjoy mixing and matching! For the full recipe, check out Air Fryer Honey BBQ Explosion Chicken. In this post, we explored a simple recipe for BBQ chicken in the air fryer. You learned about the key ingredients like honey, barbecue sauce, and spices. We discussed step-by-step marinating and cooking methods to ensure delicious results. I shared helpful tips for flavor and texture, as well as variations to suit your taste. Remember, great cooking is about fun and creativity. Enjoy making this dish and impressing your friends and family!

Are you ready to spice up your dinner routine? This Air Fryer Honey BBQ Explosion Chicken is a game-changer! With a sweet and savory glaze, each bite bursts with flavor. …

Read more

Categories Dinner

Crispy Chicken Parmesan Recipe Simple and Flavorful Meal

June 4, 2025 by Chef Remy
- 2 large boneless, skinless chicken breasts - Marinara sauce and mozzarella cheese - Panko breadcrumbs and Parmesan cheese - Garlic powder, Italian seasoning, salt, and pepper - Flour and eggs for the breading process - Olive oil for frying To make a great Crispy Chicken Parmesan, gather these fresh ingredients. The chicken is the star, so choose large, high-quality breasts. Marinara sauce brings flavor, and mozzarella adds creaminess. The panko breadcrumbs provide that perfect crunch, while Parmesan gives a rich taste. You will need seasonings to enhance the dish. Garlic powder and Italian seasoning add depth. Salt and pepper ensure the chicken is tasty. For the breading process, flour will help the egg stick, and eggs act as glue for the breadcrumbs. Olive oil is key for frying, making the chicken golden and crispy. Now that you have the ingredients, let’s move to the next steps in preparing this delicious meal. You can find the Full Recipe for more detailed instructions. To get a great crispy coating on your chicken, follow a few key steps. First, make sure to pound the chicken breasts to an even thickness. This helps them cook evenly. Next, set up your breading station with three shallow dishes. Use one for flour, one for beaten eggs, and one for the panko and Parmesan blend. For the breading, use panko breadcrumbs. They are light and airy, which gives your chicken that perfect crunch. The blend of panko and grated Parmesan cheese not only adds flavor but also enhances the texture. This combination makes your chicken golden brown and crispy. To boost the flavor of your chicken Parmesan, think about adding herbs and spices. Fresh basil, oregano, or thyme can elevate the dish. Garlic powder and Italian seasoning are great staples to include, but don't be afraid to get creative. When it comes to marinara sauce, homemade is often the best choice. It can add a fresh taste that store-bought options might lack. However, if you're short on time, a good quality store-bought sauce can still work well. Just look for one with simple ingredients for the best flavor. Pair your Chicken Parmesan with ideal side dishes. A simple green salad with a tangy vinaigrette complements the richness of the chicken. Garlic bread is another classic choice. It helps soak up any extra marinara sauce on your plate. For presentation, serve your Chicken Parmesan on a large platter. Drizzle some marinara sauce around the edges. Add a sprinkle of extra Parmesan cheese and a few fresh basil leaves for a pop of color. This not only looks beautiful but also makes your meal more inviting. For a lighter meal, you can bake the chicken instead of frying it. This change cuts down the oil and fat. You can also swap regular breadcrumbs for whole wheat breadcrumbs. They add fiber and a nutty flavor. Low-fat cheese is another great option. It will still melt well and taste good. If you want to skip the meat, try eggplant or zucchini instead. Slice them thick, coat them the same way as chicken, and bake. This makes a tasty eggplant or zucchini Parmesan. You can also use plant-based cheese to keep it vegan. This way, everyone can enjoy the dish. Want to mix things up? Try adding different cheeses like provolone or goat cheese. They bring unique flavors to the dish. You can also experiment with flavored marinara sauces. Look for garlic, basil, or spicy versions. These small changes can make your Crispy Chicken Parmesan fun and exciting. {{image_4}} To keep your leftover Chicken Parmesan fresh, place it in the fridge right away. Make sure it cools to room temperature first. Then, wrap it tightly in plastic wrap or foil. You can also use an airtight container. This helps keep moisture in and air out. Store it in the fridge for up to three days. The best way to reheat Chicken Parmesan is in the oven. Preheat your oven to 350°F (175°C). Place the chicken on a baking sheet. Cover it loosely with foil to keep it from drying out. Heat for about 15-20 minutes, or until it's warm throughout. If you want to keep it crispy, remove the foil for the last 5 minutes. You can also serve it with extra marinara sauce on the side for added flavor. If you have more leftovers, you can freeze Chicken Parmesan. It’s best to freeze it without the sauce for better texture. Wrap each piece tightly in plastic wrap, then place them in a freezer bag. This method keeps them fresh for up to three months. When you’re ready to eat, thaw the chicken in the fridge overnight. Reheat it in the oven as mentioned before. Enjoy your delicious meal again! To make your chicken extra crispy, you must focus on the breading. Use panko breadcrumbs instead of regular breadcrumbs. Panko gives a lighter, crunchier texture. Here are some key techniques: - Double Breading: Dip the chicken in flour, then egg, and coat it again with breadcrumbs. - Resting Time: Let the breaded chicken sit for a few minutes before frying. This helps the coating stick. - Hot Oil: Make sure the oil is hot before adding chicken. This creates a crispy crust quickly. Yes, you can prepare this dish ahead of time. Here are some tips for meal prepping Chicken Parmesan: - Bread the Chicken: Bread the chicken and store it in the fridge for up to a few hours. This keeps it fresh. - Cook and Store: You can cook the chicken and store it in the fridge. Just reheat it later with the sauce and cheese. - Freezing: You can also freeze the breaded chicken. Just make sure to separate layers with parchment paper. Pairing sides with your Crispy Chicken Parmesan can enhance the meal. Here are some great options: - Pasta: Spaghetti or fettuccine with marinara sauce works well. - Salad: A fresh green salad provides a nice contrast. - Garlic Bread: Crunchy garlic bread offers great flavor and texture. The Crispy Chicken Parmesan Delight involves several simple steps. You start with preparing the chicken and then breading it. Frying gives it a golden crust. Baking with marinara and cheese makes it so tasty. For a beautiful presentation, consider these tips: - Plating: Serve on a large platter with marinara sauce on the side. - Garnish: Add fresh basil leaves and a sprinkle of Parmesan on top for a pop of color. These steps will ensure your meal not only tastes good but looks great, too! Crispy Chicken Parmesan combines simple ingredients with easy steps for a delicious meal. We discussed the right chicken, tasty coatings, and helpful tips for that perfect crunch. You can also explore variations, healthy options, and storage methods to enjoy your dish longer. Remember to experiment with flavors and pairings to make it uniquely yours. Enjoy making this tasty recipe, and share it with those you care about!

If you’re craving a dish that combines crunch and flavor, this Crispy Chicken Parmesan recipe is just for you! With simple ingredients and easy steps, you can create a meal …

Read more

Categories Dinner

Ambrosia Salad Delightful and Refreshing Recipe

June 4, 2025 by Chef Remy
To make a great ambrosia salad, gather these fresh ingredients: - 1 cup mini marshmallows - 1 cup shredded coconut - 1 cup pineapple chunks (fresh or canned, well-drained) - 1 cup mandarin oranges (canned, well-drained) - 1 medium apple, diced (your choice of variety) - 1/2 cup grapes, halved (red or green, to add color) - 1 cup whipped cream (or Cool Whip for a lighter alternative) - 1/2 teaspoon vanilla extract - 1 tablespoon honey (optional, for an extra touch of sweetness) - Chopped nuts (such as walnuts or pecans) for garnish Using fresh fruits is key to a tasty ambrosia salad. Fresh fruits add bright flavors, great texture, and vibrant colors. They make your salad pop. Choose ripe fruits for the best taste. Fresh pineapple and juicy grapes will bring joy to each bite. Canned fruits can work too, but drain them well. They should not make your salad watery. You can add extra flavors to your ambrosia salad. Try these fun options: - Diced strawberries or blueberries for more color - A squeeze of fresh lime juice for a tangy twist - Cream cheese for a richer texture - Chopped nuts mixed in for crunch Each add-in can change the taste and make the dish your own. Feel free to experiment and find what you love! For the full recipe, refer to the previous section. To make ambrosia salad, start by gathering all your ingredients. You need mini marshmallows, shredded coconut, pineapple chunks, mandarin oranges, diced apple, and halved grapes. In a large mixing bowl, combine the mini marshmallows, shredded coconut, pineapple chunks, mandarin oranges, diced apple, and halved grapes. Stir gently. This step is key to avoid crushing the fruits. In a separate bowl, whisk together whipped cream, vanilla extract, and honey until smooth. This creates a light and fluffy mixture. Carefully fold this whipped cream mixture into the fruit mixture using a spatula. Mix until all the fruit is coated. Be cautious to keep the fruit pieces intact. Once everything is mixed, cover the bowl with plastic wrap. Place it in the refrigerator for at least 1 hour. This helps the flavors blend well. To prevent crushing the fruit, use a gentle touch. Start by adding the lighter ingredients first, like marshmallows and coconut. Then, add heavier fruits like pineapple and apples last. When you mix, use a folding motion. This lifts the mixture instead of stirring, keeping the fruit intact. If you do this, your salad will look great and taste fresh. Refrigeration is crucial for flavor. It allows the fruits to release their juices and mix with the cream. One hour is the minimum time, but longer is better. You can chill it overnight for deeper flavor. When you are ready to serve, gently stir it again. This refreshes the ingredients and makes your salad inviting. Enjoy the delightful blend of textures and flavors! To make your ambrosia salad creamy, use fresh whipped cream. It gives a light, fluffy feel. If you want a lower-calorie option, try Cool Whip. Mixing whipped cream with vanilla extract adds flavor. Be gentle when folding it into the fruit. This keeps the fruit intact and avoids mushiness. Serve ambrosia salad in a clear bowl. This shows off the bright colors of the fruit. For a fun touch, add extra nuts on top. You can also place slices of fresh fruit around the dish. This makes it look even more inviting. Chill the salad for at least one hour before serving. It lets the flavors blend well. For a vegan version, use coconut whipped cream. You can skip the honey or use agave syrup. To make it nut-free, leave out the nuts or replace them with seeds. Sunflower seeds add crunch without allergens. Feel free to experiment with fruits based on your diet. You can swap in berries or pears for a fun twist. For the full recipe, check my earlier section! {{image_4}} You can change the fruits in Ambrosia Salad based on what you like. Instead of pineapple, try mango or kiwi for a sweet twist. Swap mandarin oranges with fresh berries for a pop of color. For nuts, walnuts or almonds work well, but pecans add a nice crunch too. These swaps let you create a salad that fits your taste. Want to make Ambrosia Salad unique? Add a splash of yogurt for tanginess. You can mix in a bit of citrus zest for extra flavor. For a tropical vibe, include shredded fresh coconut. You could even add mini chocolate chips for a sweet surprise. These twists keep the dish fun and exciting. Ambrosia Salad shines at holidays. For a winter version, add pomegranate seeds for color. In summer, toss in mint leaves for a refreshing touch. For Thanksgiving, consider adding diced pears and cranberries. These seasonal changes keep your Ambrosia Salad fresh and festive. If you want to try the classic version, check out the Full Recipe for more details on making this delightful dish. To keep your ambrosia salad fresh, always use a clean, airtight container. This will help lock in moisture and prevent it from drying out. I suggest using glass containers, as they do not absorb odors. Make sure to cover the container well with a lid. If you do not have one, plastic wrap works too. Ambrosia salad lasts about 3 to 5 days in the fridge. The fruits stay fresh for this time if stored properly. After a few days, the salad may become watery. This happens as the fruits release juice. If it looks too soggy, you can still eat it, but it may not taste as good. Freezing ambrosia salad is not recommended. The fruits will lose their texture and flavor when thawed. Cream and whipped toppings may also separate, leading to a less appealing dish. It's best to enjoy your ambrosia salad fresh or store it in the fridge for a few days. If you want to make it ahead of time, I suggest preparing the fruits and cream separately. Then mix them just before serving. For the full recipe, check out the Heavenly Ambrosia Salad section above. Ambrosia Salad comes from the southern United States. It dates back to the 19th century. This dish reflects the region's love for fresh fruits and sweets. People made it for special events and holidays. The name "ambrosia" means food for the gods in Greek mythology. This salad is a mix of fruits, cream, and sometimes nuts. Over the years, it has become a classic dish at potlucks and family gatherings. Yes, you can make Ambrosia Salad ahead of time. In fact, it tastes better when chilled. Make it a few hours or even a day before serving. Just store it in the fridge. Keep it covered with plastic wrap or a lid. This helps the flavors blend well. Before serving, stir it gently. This will refresh the ingredients and keep it looking nice. You can make Ambrosia Salad healthier with a few simple swaps. Use low-fat whipped cream or yogurt instead of regular cream. Fresh fruit is always a great choice. You can also skip the mini marshmallows or use a sugar-free version. Adding nuts boosts protein and healthy fats. If you want more fiber, add seeds like chia or flax. These swaps keep the salad tasty while making it better for you. Check the [Full Recipe] for more ideas! In this article, we explored how to make Ambrosia Salad, focusing on fresh ingredients, preparation steps, and serving tips. Quality fruits are key for taste, while optional add-ins can add fun twists. Remember to refrigerate for the best flavor and explore variations to suit all diets. You can enjoy this dish at any time. Whether for a party or a quick snack, Ambrosia Salad is versatile and easy to prepare. Use these tips to create your perfect version today.

Welcome to my delightful world of Ambrosia Salad! This refreshing dish is not just a treat for the taste buds; it’s also full of colorful fruits that brighten any table. …

Read more

Categories Salads

Strawberry Cheesecake Stuffed French Toast Delight

June 4, 2025 by Chef Remy
To make Strawberry Cheesecake Stuffed French Toast, you will need: - 8 slices of thick-cut brioche bread - 8 oz cream cheese, softened to room temperature - 1/4 cup powdered sugar - 1 teaspoon pure vanilla extract - 1 cup fresh strawberries, hulled and finely sliced - 4 large eggs - 1 cup whole milk - 1 teaspoon ground cinnamon - 1 tablespoon unsalted butter (for frying) - Optional: Additional sliced strawberries and whipped cream for serving You can swap some ingredients if needed. Here are some ideas: - Use gluten-free bread if you want a gluten-free option. - For a lighter choice, try low-fat cream cheese. - Maple syrup can replace powdered sugar for a different sweetness. - Almond milk or oat milk works well instead of whole milk. - Any fresh fruit can replace strawberries in the filling. Fresh strawberries make this dish shine. Here are tips to pick the best ones: - Choose berries that are bright red. They should have a shiny look. - Look for strawberries that are firm, not soft or mushy. - Check for a sweet smell. A strong aroma means they are ripe. - Avoid strawberries with green tops or dark spots. - If possible, buy local strawberries in season for the best flavor. For the full recipe, visit the [Full Recipe]. To start, gather your ingredients for the cream cheese filling. In a mixing bowl, combine 8 oz of softened cream cheese, 1/4 cup of powdered sugar, and 1 teaspoon of pure vanilla extract. Use a hand mixer or whisk to blend until smooth. You want a creamy texture with no lumps. Next, gently fold in 1 cup of finely sliced strawberries. This adds a fresh taste. Make sure the strawberries are evenly mixed into the cream cheese. Now, your filling is ready. Now, take four slices of thick-cut brioche bread. Lay them flat on a clean surface. Spread a generous layer of your creamy strawberry filling on each slice. Then, place another slice of brioche on top, pressing down gently. This makes a sandwich. Repeat for all four slices. In a shallow dish, crack 4 large eggs and whisk them together. Add 1 cup of whole milk and 1 teaspoon of ground cinnamon. Mix until it is smooth. Heat a skillet over medium heat and add 1 tablespoon of unsalted butter. Let it melt. Carefully dip each sandwich into the egg mixture. Make sure to coat both sides lightly. Allow any excess to drip off. Place the sandwiches in the skillet and cook for 3-4 minutes on each side. Look for a golden brown color. Remove them from the skillet and set aside. Repeat with the rest of the sandwiches, adding more butter as needed. Enjoy your warm, delicious Strawberry Cheesecake Stuffed French Toast! For the full recipe, check the link provided. To keep your French toast from getting soggy, use thick-cut brioche bread. Fresh bread works best. Make sure to dip the bread quickly in the egg mixture. Let the excess egg drip off before cooking. This helps keep the bread from soaking too much. For a crispy outside, cook on medium heat. If the heat is too low, the bread will not get crispy. Use a non-stick skillet or griddle to avoid sticking. Add a bit of butter for flavor and crispiness. Flip the toast only once to keep it golden brown. Serve your stuffed French toast warm, topped with extra sliced strawberries. A dollop of whipped cream adds a nice touch. You can also drizzle chocolate sauce or maple syrup for sweetness. Arrange the toast on a pretty plate to impress your guests. For added flair, garnish with fresh mint leaves. Consider adding a light dusting of powdered sugar too. Check out the Full Recipe for even more ideas! {{image_4}} You can easily change the fruit in this dish. Instead of strawberries, try ripe bananas or sweet blueberries. Both fruits add a nice flavor. You can also mix and match. For example, use half strawberries and half raspberries for a fun twist. Each fruit gives a new taste and color to your stuffed French toast. Brioche is soft and rich, but other breads work well too. You can use challah for a slightly sweeter taste. Sourdough adds a nice tang and crunch. Even plain white bread can work if that's what you have. Just pick a bread that you love. The bread choice changes the texture and flavor, making it special. You can still enjoy this dish if you avoid dairy. Use vegan cream cheese made from nuts or soy. Swap the milk for almond milk or oat milk. For the eggs, try flaxseed meal mixed with water. This creates a great binding agent. These swaps let you enjoy the same great taste while sticking to your diet. Check out the Full Recipe for more tips on how to adjust the ingredients. To keep your Strawberry Cheesecake Stuffed French Toast fresh, place leftovers in an airtight container. They will stay good in the fridge for up to three days. Make sure to separate layers with parchment paper. This prevents sticking and keeps them intact. When you're ready to enjoy your leftovers, reheat them gently. You can use a skillet over low heat. Cook for about 2-3 minutes on each side until warm. If you want a crispier texture, pop them in a toaster oven. This will give you that fresh, golden crust again. You can freeze these tasty treats too! Wrap each stuffed French toast sandwich tightly in plastic wrap. Then, place them in a freezer-safe bag. They can last in the freezer for up to two months. To reheat, let them thaw overnight in the fridge, then reheat as mentioned before. Yes, you can prepare the cream cheese filling a day in advance. Just keep it in the fridge. You can also assemble the sandwiches ahead of time. Place them in the fridge, but coat them in the egg mix right before cooking. This keeps the bread from getting too soggy. You can top your French toast with: - Additional sliced strawberries - Whipped cream - Maple syrup - Chocolate sauce - A dusting of powdered sugar These toppings add flavor and make the dish look pretty. To make more servings, simply double the ingredients. If you have a larger skillet, you can cook more sandwiches at once. Just keep an eye on the cooking time. Ensure each piece gets golden brown on both sides. You can also make smaller sandwiches if you want to serve more people. If you need the full recipe, you can find it in the article above. You learned about making delicious Strawberry Cheesecake Stuffed French Toast. We covered the right ingredients, helpful tips, and methods for great texture. You also found options for different fillings and storage advice. This dish is fun to make and can please many tastes. With the right prep, you can impress family and friends. So grab those fresh strawberries and start cooking! Enjoy every bite of this sweet treat.

Are you ready to dive into a sweet breakfast treat that combines rich cheesecake flavors with warm French toast? In this post, I’ll guide you through making Strawberry Cheesecake Stuffed …

Read more

Categories Breakfast

Sweet Chili Cauliflower Wings Crispy and Flavorful Dish

June 4, 2025 by Chef Remy
- 1 medium cauliflower, cut into bite-sized florets - 1 cup all-purpose flour - 1 cup water (you can adjust for batter thickness) - 1 teaspoon garlic powder - 1 teaspoon onion powder - 1 teaspoon paprika (smoked for an extra kick, if desired) - Salt and freshly cracked pepper to taste - 1 cup panko breadcrumbs (for that perfect crunch) - 1/2 cup sweet chili sauce (adjust based on preferred sweetness) - 1 tablespoon soy sauce (for umami depth) - 1 teaspoon sesame oil (for added fragrance) The main ingredients bring out the best in these sweet chili cauliflower wings. Cauliflower is a fantastic base since it holds flavors well. The flour and water create a smooth batter that clings to the florets. Garlic powder and onion powder add depth. Paprika gives a mild smoky flavor. Salt and pepper enhance the taste further. Panko breadcrumbs provide the crunch you crave. - 1 tablespoon sesame seeds (for garnish) - Fresh cilantro leaves (for garnish and color) Garnishes like sesame seeds add crunch and flavor. Fresh cilantro gives a pop of color and freshness. These simple touches make your dish look and taste great. - Vegan alternatives for sauces - Gluten-free options for flour If you want a vegan version, use vegan sauces. For gluten-free options, swap all-purpose flour with gluten-free flour. These swaps keep the dish just as tasty for everyone to enjoy. Preheat your oven to 425°F (220°C). This high temperature helps the wings get crispy. Line a large baking sheet with parchment paper. This makes cleanup easy and keeps the wings from sticking. In a mixing bowl, whisk together the all-purpose flour and water. Add garlic powder, onion powder, paprika, salt, and pepper. Mix until you have a smooth batter. You want it to coat the cauliflower florets well. If it’s too thick, add more water. If it’s too thin, add more flour. Take each cauliflower floret and dip it into the batter. Make sure each piece is fully covered. Let any excess batter drip off. Now, roll the floret in panko breadcrumbs. This gives the wings their perfect crunch. Place the breaded florets on the baking sheet with space between them. This helps them stay crispy while baking. Bake the cauliflower wings for 25-30 minutes. Halfway through, flip the florets. This ensures even browning and crispiness. While the wings bake, prepare the sweet chili sauce mixture. In a small saucepan, combine sweet chili sauce, soy sauce, and sesame oil. Heat over medium heat, stirring until warmed and blended. This will enhance the flavor of your wings. Once the wings are golden brown, take them out of the oven. Toss the baked wings in the warm sweet chili sauce mixture in a large bowl. Make sure each piece is well coated. Return the sauced wings to the baking sheet. Bake them for an extra 5-7 minutes. This allows the sauce to deepen in flavor and stick to the wings. After the final bake, take them out of the oven. Let them cool for a minute. Finally, garnish with sesame seeds and fresh cilantro. This adds a burst of flavor and color. For the full recipe, I’ve included all the details you need to make this delicious dish. For the best texture in sweet chili cauliflower wings, focus on the batter consistency. You want a smooth batter that coats the florets well. If it is too runny, the coating will slide off. If it is too thick, it won't stick. Aim for a medium-thick batter. To make them extra crispy, use panko breadcrumbs. They create a nice crunch. Before baking, space your florets apart on the baking sheet. This allows air to circulate and helps them crisp up. To boost flavor, add spices to the batter. Try cayenne for heat or smoked paprika for depth. You can also experiment with dried herbs like oregano or thyme. Marinating the cauliflower in sweet chili sauce before coating can infuse more flavor. Let it sit for at least 30 minutes. This simple step makes a big difference in taste. Serve your wings with tasty dips. Ranch, blue cheese, or extra sweet chili sauce work well. Pair them with fresh veggie sticks for crunch. For a stunning presentation, arrange the wings on a large platter. Drizzle extra sweet chili sauce over them. Add fresh cilantro and sesame seeds for color. This makes it perfect for gatherings or game day! For the full recipe, check out the Sweet Chili Cauliflower Wings 🥦. {{image_4}} You can change up the sweet chili sauce to fit your taste. If you like heat, try adding chili garlic sauce or sriracha. This will give your wings a spicy kick. You can also mix in lime juice or ginger for a fresh twist. Feel free to play with seasonings, too. Try adding smoked paprika for a deeper flavor. A pinch of cayenne can also amp up the spice. Fresh herbs like cilantro or parsley will add brightness. If you want a healthier option, use an air fryer. Coat the cauliflower as usual and place them in the air fryer basket. Cook at 400°F for about 15 minutes. Shake the basket halfway through to ensure even cooking. This method gives you crispy wings with less oil. Grilling is another fun option. Marinate the cauliflower in the sweet chili sauce before grilling. Place them on a hot grill for about 10 minutes, flipping halfway. This adds a smoky flavor that enhances the dish. Making these wings vegan is easy. Just ensure your sweet chili sauce is plant-based. You can also replace the soy sauce with tamari for a gluten-free version. For a low-carb or keto-friendly dish, swap the flour with almond flour. You can also skip the breadcrumbs or use crushed pork rinds for crunch. These changes keep the flavors while fitting your diet. You can find the full recipe for sweet chili cauliflower wings in the earlier sections. To store your sweet chili cauliflower wings, let them cool first. Place them in an airtight container. This keeps them fresh and tasty. You can store them in the fridge for up to three days. When you want to reheat them, preheat your oven to 375°F (190°C). Spread the wings on a baking sheet. Heat for about 10-15 minutes until they are crispy again. This method helps keep their crunch. You can also use an air fryer for about 5-7 minutes. If you want to save your cauliflower wings for later, you can freeze them. First, let them cool completely. Then, place them in a single layer on a baking sheet. Freeze for about an hour. After that, transfer them to a freezer bag. Squeeze out as much air as you can before sealing. To enjoy your frozen wings, take them out of the freezer. Thaw them in the fridge overnight. When ready to eat, preheat your oven to 375°F (190°C). Bake for about 15-20 minutes until heated through. You can also toss them in the air fryer for a quicker option. This keeps them crispy and delicious. For the full recipe and more tips, check out the full recipe. You can tell when the cauliflower wings are done by their color and texture. They should turn a lovely golden brown and feel crispy on the outside. Use a fork to poke them; they should be tender inside. Trust me, the crunch is key to a great bite! Yes, you can make sweet chili cauliflower wings ahead of time. Simply prepare the cauliflower wings as directed and bake them. After baking, let them cool completely. Store them in an airtight container in the fridge. You can reheat them in the oven for a quick snack or meal. These wings pair well with many sides. Try serving them with: - Celery sticks - Carrot sticks - A cool ranch dip - A fresh salad - Rice or quinoa for a fuller meal Absolutely! This recipe works well for meal prep. You can bake the wings in bulk and store them in the fridge. They stay crispy when reheated. Just pack them in your favorite lunch container. They are perfect for quick lunches or snacks throughout the week. Yes, you can easily adjust the spiciness level. To make it milder, use less sweet chili sauce. For more heat, add some red pepper flakes or hot sauce to the sweet chili sauce. Tweak it until it suits your taste. Cooking is all about finding what you love! For the full recipe, check the earlier sections. Enjoy your cooking! These sweet chili cauliflower wings are easy to make and fun to enjoy. We covered ingredients, step-by-step instructions, and tips for the best flavor and texture. You can customize this recipe to fit any diet or preference. Remember, variations allow for creativity, so explore different flavors and cooking methods. Store leftovers properly to enjoy them later. With this guide, you can impress friends and family with a tasty dish that suits everyone. Enjoy your cooking journey and savor every bite!

Looking for a tasty, plant-based snack that impresses? Sweet chili cauliflower wings are your answer! These crispy delights blend the crunch of panko with the kick of sweet chili sauce. …

Read more

Categories Appetizers

Cinnamon Roll French Toast Bites Tasty Weekend Treat

June 4, 2025 by Chef Remy
- 1 can of refrigerated cinnamon rolls - 4 large eggs - 1/2 cup milk - 2 teaspoons vanilla extract - 1 teaspoon ground cinnamon - 1/4 teaspoon ground nutmeg - 1/4 cup pure maple syrup - Powdered sugar - Fresh berries The main ingredients create a sweet and rich flavor. The cinnamon rolls bring warmth, while eggs and milk add creaminess. Vanilla, cinnamon, and nutmeg give depth. Maple syrup adds a sweet twist. Powdered sugar creates a lovely finish, and fresh berries bring a burst of color and freshness. - Dairy-free alternatives - Extra toppings like whipped cream or chocolate sauce For those who prefer dairy-free, use almond or oat milk. You can add whipped cream for a fluffy touch. Chocolate sauce can enhance sweetness and make it more decadent. The choice of toppings can elevate your bites, making them even more special. If you want to check out the full recipe, I highly recommend doing so for the best results! - Preheat your oven to 375°F (190°C). - Lightly grease a baking dish with cooking spray or butter. - Open the can of cinnamon rolls. - Divide each roll into quarters. - Place the bite-sized pieces in a large mixing bowl. - In another bowl, whisk together the eggs, milk, and vanilla extract. - Add ground cinnamon and nutmeg to the mix. - Stir until everything blends. - Pour the egg mixture over the cinnamon roll pieces. - Gently toss with a spatula until all pieces are coated. - Let the mixture sit for about 5-10 minutes. - This helps the cinnamon rolls soak up the egg mix. - Transfer the coated pieces to your greased baking dish. - Spread them out evenly for even cooking. - Drizzle pure maple syrup over the top. - Bake in the preheated oven for 20-25 minutes. - Look for a golden brown color and a set center. - Once done, cool the bites for a few minutes. - Drizzle the icing from the can over the warm bites. - Finish with a dusting of powdered sugar and fresh berries. For the complete guide, check out the Full Recipe. Soaking time is key for a great texture in these bites. I let the cinnamon roll pieces rest in the egg mixture for about 5-10 minutes. This helps each piece soak up all that tasty goodness. If you skip this step, your bites may turn out dry. To avoid over-baking, keep an eye on your bites as they cook. Bake them for 20-25 minutes, or until they are golden brown and set in the center. If they start to brown too much, cover the dish with foil to shield them. You can add spices like nutmeg or allspice to deepen the flavor. A splash of almond extract can also elevate the taste. For syrup, I recommend pure maple syrup for a sweet touch. If you want a twist, try adding a fruit syrup or honey. A light dusting of powdered sugar makes everything feel special. Garnishing with fresh berries like strawberries or blueberries adds color and freshness. Arrange them on top or around the bites for a beautiful plate. Serve these bites with coffee or tea to create a cozy brunch vibe. You can also place them on a nice platter for a fun sharing experience. {{image_4}} You can make these Cinnamon Roll French Toast Bites even more fun with different flavors. Try pumpkin spice cinnamon roll bites. Just add pumpkin puree and a dash of pumpkin spice to the egg mixture. It brings a warm, festive taste that is great for fall. You can also use chocolate chip or fruit-filled alternatives. Simply swap regular cinnamon rolls for ones filled with chocolate or fruit. These options add a rich twist to your bites, making them even more delightful. If you need gluten-free options, look for gluten-free cinnamon rolls available in stores. These work well in the recipe. Just follow the same steps, and you won’t miss a thing. For those who prefer vegan dishes, you can make vegan replacements for eggs and dairy. Use flax eggs or applesauce instead of eggs. For dairy, choose almond or oat milk. Both swaps keep the bites tasty and fluffy. You can turn these bites into a fun brunch platter. Add fresh fruits, yogurt, or even whipped cream on the side. This makes a beautiful spread that everyone will enjoy. Alternatively, serve these bites as a dessert. Pair them with a scoop of ice cream or drench them in chocolate sauce. This sweet twist makes them a perfect treat after dinner. For the full recipe, check out the details above. To keep your Cinnamon Roll French Toast Bites fresh, store them in an airtight container. This helps keep them moist. Place the container in the fridge. They can last for up to three days this way. When you want to reheat the bites, use the microwave or oven. For the microwave, heat them for about 20-30 seconds. If using the oven, preheat it to 350°F (175°C) and warm them for about 10 minutes. This method keeps them nice and tasty. You can freeze these bites before or after baking. If you freeze them before baking, arrange the pieces in a single layer on a baking sheet. Freeze them for two hours, then move them to a freezer bag. This way, they won't stick together. To thaw, just place the frozen bites in the fridge overnight. When ready to bake, follow the original baking instructions. If you freeze them after baking, let them cool first. Wrap them tightly in plastic wrap and then in foil. They can stay in the freezer for up to two months. To reheat frozen baked bites, you can use the oven. Preheat it to 350°F (175°C) and bake for about 15-20 minutes. These steps will help maintain the great taste of your Cinnamon Roll French Toast Bites. For the full recipe, check the earlier section. Yes, you can use homemade cinnamon rolls. They can add a fresh taste and unique flavor. Homemade rolls often have better texture and warmth. Just cut them into small pieces like the store-bought ones. Soaking them in the egg mixture is key. This allows the flavors to blend well. This dish takes about 10 minutes to prepare. The baking time is around 20 to 25 minutes. So, you can enjoy this treat in just 35 minutes. It’s quick and easy, making it perfect for a busy weekend. You can pair these bites with many tasty sides. Fresh fruit like strawberries or blueberries works great. A side of crispy bacon adds a nice salty touch. For drinks, coffee or tea complements the sweetness well. You might even enjoy a glass of orange juice. Yes, this recipe is great for meal prep. You can make it ahead of time and store it. Just prepare the bites and refrigerate them before baking. When you are ready, bake them for a quick breakfast. Reheating in the oven helps keep them warm and soft. Check out the Full Recipe for more details on how to prepare these bites! This recipe for Cinnamon Roll French Toast Bites is easy and fun. You learned about the main and optional ingredients, plus simple steps to make this dish. The tips help create the best texture and flavor. You even discovered ways to vary the recipe for different diets. Remember, storing leftovers correctly keeps them fresh. Enjoy making this tasty treat for brunch or dessert. Each bite will bring smiles to your table. This recipe is sure to be a hit!

Are you ready to transform your weekend breakfast routine? With these Cinnamon Roll French Toast Bites, you’ll enjoy a sweet twist that combines two favorites into one delicious treat. Made …

Read more

Categories Desserts

Quick & Delicious Spaghetti Salad Fresh and Easy Meal

June 4, 2025 by Chef Remy
Gather these simple ingredients to create your vibrant spaghetti salad. Each one adds flavor and color. - 8 oz spaghetti - 1 cup cherry tomatoes, halved - 1 cucumber, diced into bites - 1 bell pepper (red or yellow), diced - 1/2 red onion, finely minced - 1/4 cup black olives, pitted and sliced - 1/4 cup feta cheese, crumbled - 1/4 cup fresh basil leaves, roughly chopped - 3 tablespoons extra virgin olive oil - 2 tablespoons balsamic vinegar - 1 teaspoon garlic powder - Salt and pepper to taste Using fresh ingredients makes this dish pop. The cherry tomatoes bring sweetness, while the cucumber adds crunch. The bell pepper and red onion bring a nice zing. Feta cheese gives a creamy touch. Fresh basil gives it a lovely aroma. You can find the full recipe above, which shows you how to mix these ingredients into a delightful salad. Remember, the balance of flavors is key. Don't shy away from tasting as you go! To start, we need to cook the spaghetti. First, boil a pot of salted water. This step helps the pasta absorb flavor while it cooks. Once the water is bubbling, add the spaghetti. Cook it for about 8 to 10 minutes. You want it to be al dente, or firm to the bite. After the pasta is done, drain it in a colander. Rinse the spaghetti under cold water. This cools it down and stops the cooking process. Set the spaghetti aside while you prepare the veggies. Now, let's get colorful with our salad. Take a large mixing bowl. Chop the salad vegetables into bite-sized pieces. Add 1 cup of halved cherry tomatoes, 1 diced cucumber, and 1 diced bell pepper. You can choose red or yellow, depending on what you like. Next, finely mince half a red onion. Add this to the bowl along with a quarter cup of sliced black olives. Give everything a good stir to mix the flavors. Once the spaghetti is cool, it's time to mix it. Add the spaghetti to the large bowl with your fresh vegetables. Gently fold the spaghetti into the mix. In a separate small bowl, whisk together 3 tablespoons of extra virgin olive oil, 2 tablespoons of balsamic vinegar, and 1 teaspoon of garlic powder. Add a pinch of salt and pepper. This is your dressing! Drizzle it over the spaghetti and vegetables. Toss everything gently to coat. Now, sprinkle a quarter cup of crumbled feta cheese and a quarter cup of roughly chopped basil leaves on top. Lightly toss again to spread the cheese and basil evenly. Taste your salad and adjust the seasoning if needed. Enjoy this vibrant spaghetti salad with friends or family. You can find the full recipe above. To achieve al dente pasta, boil water with salt. Once it’s boiling, add the spaghetti. Cook it for 8 to 10 minutes until tender yet firm. This gives your salad the right texture. Rinsing pasta is key. After draining, run it under cold water. This stops the cooking process and cools the pasta. Rinsing also removes extra starch. This keeps the noodles from sticking together. Adjusting seasoning can change your dish. If you like more spice, add red pepper flakes. For a zesty kick, try lemon juice. Taste as you go and find your perfect balance. Pair fresh herbs to boost flavor. Basil is great, but you can also use parsley or dill. Each herb adds a unique taste. Experiment to find what you love most. Serve your salad in a large bowl for family-style meals. For individual servings, use small plates. This makes each dish look special and inviting. Garnish your salad with extra basil leaves and a sprinkle of feta. This adds color and a fresh touch. A beautiful presentation makes your meal more enjoyable, so take the time to make it shine. For the full recipe, please refer to the earlier section. {{image_4}} You can easily make this salad vegetarian. Swap out vegetables based on the season. Use fresh corn in the summer or roasted squash in the fall. This keeps the salad lively and tasty. For a vegan option, try plant-based cheeses. They add creaminess without dairy. Look for options like almond-based feta or cashew cheese. Want to make your salad more filling? Add protein! Grilled chicken or shrimp works great. Just chop them into bite-sized pieces and mix them in. If you prefer plants, beans are perfect. Black beans or chickpeas add protein and texture. They also make the dish heartier. Don’t be afraid to play with dressings! Try different vinegars, like apple cider or red wine. Each brings a new flavor twist. You can also add spicy elements for a kick. A dash of hot sauce or red pepper flakes can wake up your salad. Mix and match to find your favorite dressing! For more ideas, check the Full Recipe. To store leftover spaghetti salad, place it in an airtight container. This keeps it fresh and tasty. Make sure the salad is cool before sealing it up. You can store it in the fridge for up to three days. When you want to eat it again, give it a little stir. The flavors will mix again and taste great. Yes, you can freeze spaghetti salad! Just make sure to use a freezer-safe container. It can last for about a month in the freezer. To thaw, move it to the fridge for a few hours or overnight. When ready to serve, let it sit at room temperature for about 30 minutes. This makes it easier to eat. If it seems dry, drizzle a little olive oil before you dig in. Enjoy your quick and delicious spaghetti salad from the Full Recipe! You can prepare spaghetti salad in advance with ease. First, cook the spaghetti and let it cool completely. This helps it not stick together. Chop your veggies and store them separately. Combine the spaghetti and veggies just before serving. This keeps everything fresh and crunchy. You can also make the dressing ahead. Just store it in a jar in the fridge. This way, it’s ready when you are. Aside from the recipe’s dressing, you can try Italian dressing for a zesty twist. A simple lemon vinaigrette adds a bright flavor. Ranch dressing also works if you prefer a creamier taste. If you want a kick, a spicy vinaigrette could be fun. Don’t be afraid to mix and match to find your favorite. Yes, you can use gluten-free pasta for this recipe. It cooks just like regular pasta. Just follow the package instructions for the best results. The flavors in the salad will still shine through. It’s a great option for those with gluten sensitivities. Enjoy your meal without worry. This post shared a quick and tasty recipe for spaghetti salad. You learned how to cook the pasta, prepare fresh veggies, and mix them with a flavorful dressing. Remember, you can vary ingredients to suit your taste and season. Storage tips will help keep your leftovers fresh. Overall, this dish is simple, customizable, and perfect for any meal. Enjoy your cooking and sharing this delightful salad!

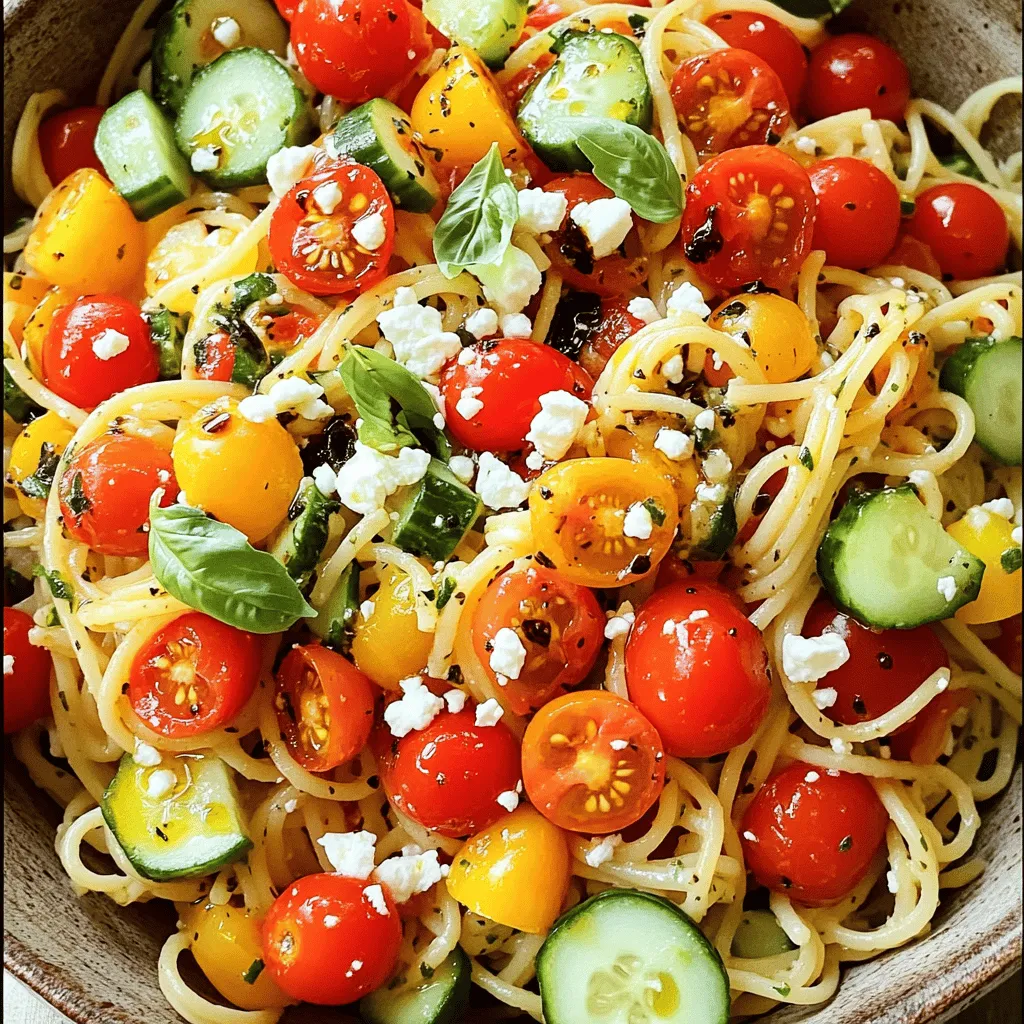
Are you looking for a quick, tasty meal? My Quick & Delicious Spaghetti Salad fits the bill perfectly! In just a few simple steps, you’ll create a fresh and flavorful …

Read more

Categories Salads

Rainbow Orzo Salad Flavorful and Colorful Dish

June 3, 2025 by Chef Remy
To create a vibrant and tasty Rainbow Orzo Salad, gather these fresh ingredients: - 1 cup orzo pasta - 1 cup cherry tomatoes, halved - 1 cup cucumber, diced - 1 bell pepper (any color), diced - 1 cup cooked corn (fresh or canned) - 1/2 red onion, finely chopped - 1/2 cup feta cheese, crumbled - 2 tablespoons olive oil - 1 tablespoon freshly squeezed lemon juice - 1 teaspoon dried oregano - Salt and black pepper to taste - Fresh basil leaves, for garnish Each ingredient adds a splash of color and flavor. The orzo pasta forms the base, while the vegetables bring crunch and sweetness. Cherry tomatoes and cucumbers keep it fresh, and bell peppers add a pop of color. The corn sweetens the mix, and red onion gives it a nice bite. Feta cheese adds creaminess and saltiness, while olive oil and lemon juice create a bright dressing. Dried oregano enhances the flavor, and salt and pepper balance the dish. Fresh basil leaves top it all off, giving a fragrant finish. For the full recipe, follow the instructions carefully. Enjoy making this dish, and let its colors and tastes brighten your table! To start, boil a large pot of salted water. Use about 4 quarts of water for 1 cup of orzo. When the water reaches a rolling boil, add the orzo pasta. Cook it for about 8 to 10 minutes. You want it to be al dente, which means it should still have a little bite. Once cooked, drain the orzo in a fine mesh sieve. Rinse it under cool running water. This stops the cooking and cools the pasta down. While the orzo cooks, focus on your veggies. Cut the cucumber and bell pepper into small, even pieces. Halve the cherry tomatoes so they mix well. If you're using fresh corn, cook it in boiling water for about 2-3 minutes. After cooking, drain the corn and let it cool down. Uniform pieces help the salad look nice and taste great. In a large mixing bowl, combine the chilled orzo with the halved cherry tomatoes, diced cucumber, diced bell pepper, and cooked corn. Add the finely chopped red onion as well. Stir gently to mix everything evenly. You want each bite to be colorful and tasty. Next, make the dressing. In a small bowl, whisk together 2 tablespoons of olive oil, 1 tablespoon of freshly squeezed lemon juice, 1 teaspoon of dried oregano, salt, and black pepper. When it’s well mixed, drizzle the dressing over the salad. Toss the salad gently to coat all the ingredients well. Now, fold in the crumbled feta cheese. Do this carefully to keep the cheese in nice pieces. Taste the salad and adjust the seasoning if needed. You may want a bit more salt or pepper. Transfer your vibrant salad to a serving platter or into bowls. For a finishing touch, garnish with fresh basil leaves. This adds color and a lovely aroma to your dish. Enjoy your Rainbow Orzo Salad, a bright and tasty meal! For the full recipe, be sure to check out the details above. To achieve perfect orzo, cook it for about 8 to 10 minutes. This time helps keep it al dente, which means it has a slight bite. To prevent clumping, rinse the orzo in cold water right after cooking. This step washes away the starch that causes sticking. You can make your dressing more exciting! Try adding a splash of lemon juice or vinegar for zest. Taste your dressing as you mix. Adjust the salt and pepper to match your flavor likes. You can even add herbs like basil or parsley for more freshness. When serving, think about color and style. Use a clear bowl to show off the vibrant salad. Garnish with fresh basil leaves on top for a pop of green. You can also serve it in small cups for a fun twist. A drizzle of olive oil right before serving makes it shine! {{image_4}} You can easily change this dish to fit your taste. Here are a few ideas: - Protein Options: If you want more protein, try adding grilled chicken or chickpeas. They make the salad hearty and filling. - Other Vegetables: Add more veggies for color and crunch. Try shredded carrots, radishes, or snap peas. Mix and match these options to create a salad that you love! You can adjust the Rainbow Orzo Salad to fit different diets. Here’s how: - Making It Gluten-Free: Use gluten-free orzo made from rice or corn. This way, you can enjoy the same great taste without gluten. - Vegan Adaptations: To make it vegan, skip the feta cheese or replace it with a vegan cheese option. You can also add avocado for creaminess. These changes let everyone enjoy this colorful dish! You can find the full recipe for more details. To keep your Rainbow Orzo Salad fresh, store it in an airtight container. This helps prevent air and moisture from spoiling it. Place the salad in the fridge right after serving. The salad stays fresh for 3 to 5 days. If you notice any changes in color or smell, it’s best to discard it. This salad tastes best cold, but if you want to warm it up, do it gently. Use a microwave-safe dish and heat it for short bursts. Stir in between to avoid hot spots. For best quality, enjoy leftovers within 2 days. After that, the flavors may fade, and the veggies might lose their crunch. To save time, you can chop your veggies while the orzo cooks. Use a food processor for quick dicing. You can also buy pre-cooked corn or frozen corn. Just thaw it before adding. This way, you speed up the process without losing taste. Yes, you can! If you don’t have orzo, try ditalini or small shells. They will work well too. Adjust the cooking time based on the pasta you choose. Always check the package for guidance on cooking times. Absolutely! Store the salad in an airtight container. It stays fresh for up to three days. Keep the dressing separate until ready to eat. This keeps the salad crunchy and tasty. You can mix it just before serving for the best flavor. For the full recipe, check out the Rainbow Orzo Salad Delight! In this blog post, I covered how to make a delicious rainbow orzo salad. We explored the key ingredients, from pasta to fresh veggies. I also shared step-by-step cooking instructions, tips for perfect texture, and ideas for customizing flavors. You learned how to store leftovers and adapt the recipe for various diets. The key takeaway is that orzo salad is both simple and versatile. Enjoy making your own tasty variations, and share them with friends!

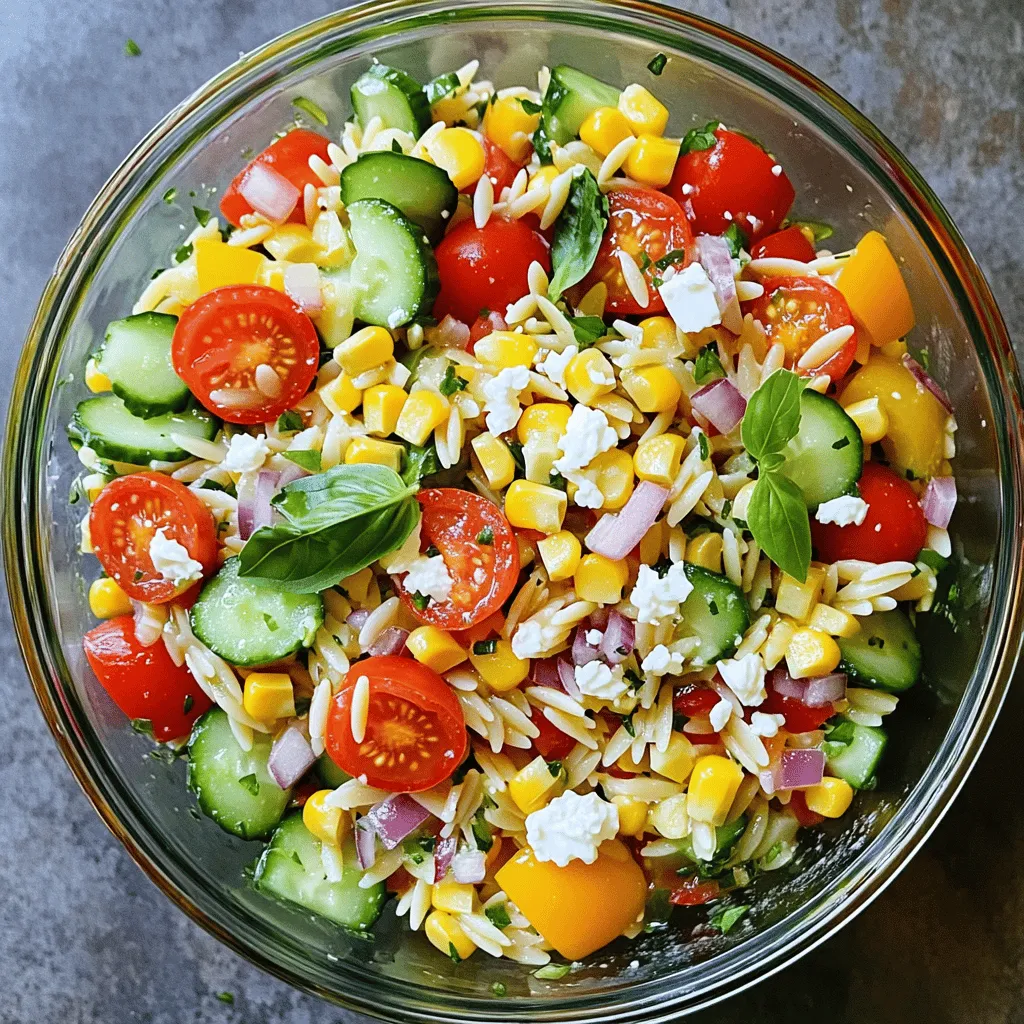
Looking to brighten up your meals? The Rainbow Orzo Salad is here to deliver! This dish combines colorful veggies, tender orzo, and zesty dressing for a feast that’s as tasty …

Read more

Categories Salads

Air-Fryer Asian BBQ Cauliflower Wings Delight

June 3, 2025 by Chef Remy
- 1 large head of cauliflower, cut into bite-sized florets - 1 cup all-purpose flour (or gluten-free flour for a gluten-free option) - 1 cup plant-based milk (such as almond or soy milk) - 1 teaspoon garlic powder - 1 teaspoon onion powder - 1 teaspoon smoked paprika - Salt and freshly cracked pepper, to taste - 1 cup panko breadcrumbs - 1 cup Asian BBQ sauce (store-bought or homemade) - 1 tablespoon sesame oil - 1 tablespoon finely chopped green onions (for garnish) - Toasted sesame seeds (for garnish) When I make these Air-Fryer Asian BBQ Cauliflower Wings, I love how simple the ingredients are. You only need a few items to create something delicious. The cauliflower is the star. It’s crunchy and absorbs flavors well. Flour helps the batter stick. I often use all-purpose flour for a classic touch, but gluten-free flour works too. The seasonings elevate the dish. Garlic powder adds depth, while onion powder gives a nice sweetness. Smoked paprika brings warmth and a smoky taste. Don’t forget salt and pepper to enhance everything. The coating is where the magic happens. Panko breadcrumbs make the wings extra crispy. I find that they give a great crunch. The Asian BBQ sauce is the final touch. It’s sweet, tangy, and full of flavor. Adding sesame oil gives a lovely richness. Lastly, I love garnishing with green onions and sesame seeds. They add freshness and a bit of flair to the dish. For the full recipe, you can check out the link. Get ready to enjoy a fun cooking adventure! Creating the batter Start by getting a large mixing bowl. Whisk together the all-purpose flour and plant-based milk. Add garlic powder, onion powder, smoked paprika, salt, and pepper. Mix until the batter is smooth. It should cling well to the cauliflower. Cutting the cauliflower Next, take a large head of cauliflower. Cut it into bite-sized florets. Make sure the pieces are about the same size for even cooking. Dipping in batter Take each cauliflower floret and dip it into the batter. Make sure to coat it well on all sides. Let any extra batter drip off before moving to the next step. Rolling in panko Now, place the batter-coated florets on a plate with panko breadcrumbs. Roll each piece in the breadcrumbs until they are fully covered. This gives the wings a nice crispy texture. Preheating the air fryer Preheat your air fryer to 375°F (190°C). This takes about 5 minutes. Preheating helps the wings cook evenly and get crispy. Cooking time and temperature Place the panko-coated cauliflower wings in the air fryer basket. Make sure they are in a single layer. Cook them for 12 to 15 minutes. Shake the basket halfway through to help them crisp up nicely. Mixing BBQ sauce with sesame oil While the wings are cooking, grab a bowl. Mix the Asian BBQ sauce with sesame oil. Stir it well so the flavors combine nicely. Coating the cooked wings Once the wings are crispy, transfer them to a large bowl. Pour the BBQ sauce mixture over the hot wings. Gently toss to coat each piece evenly. Additional air frying for extra crispiness For an even crispier finish, place the sauced wings back into the air fryer. Cook them for an extra 5 minutes. This step is optional but worth it for crunch lovers. Plating the wings Carefully arrange the wings on a serving platter. This makes them look great when serving to friends or family. Suggested garnishes Top the wings with chopped green onions and toasted sesame seeds. These add a pop of color and flavor. Enjoy your Air-Fryer Asian BBQ Cauliflower Wings! For the full recipe, check out the details above. To get crispy cauliflower wings, choose the right flour. I recommend using all-purpose flour for the best crunch. Gluten-free flour works, too, if needed. The batter should be thick. This helps it stick to the florets. If it is too thin, the coating will slide off. Aim for a pancake-like consistency for great results. Cooking in batches is key. If you overcrowd the air fryer, the wings won’t crisp well. Place them in a single layer for even cooking. To avoid soggy wings, shake the basket halfway through cooking. This helps the hot air circulate and ensures all sides get crispy. Want to kick up the flavor? Try adding spices like cayenne pepper or smoked paprika for a smoky twist. You can also make your own BBQ sauce. Use soy sauce, honey, and ginger for a tasty blend. This gives your wings a unique touch. For the full recipe, check out the detailed steps in the earlier section. {{image_4}} Want to add some heat? You can easily spice up the wings. Use chili powder or hot sauce. I suggest adding one teaspoon of chili powder to the batter. If you prefer, toss the cooked wings in your favorite hot sauce. This gives you full control over the spice level. You can also mix Sriracha with the Asian BBQ sauce for a zesty kick. If you need a gluten-free option, I've got you covered! Substitute all-purpose flour with gluten-free flour. Make sure to use gluten-free panko breadcrumbs as well. This way, you’ll still enjoy those crunchy, flavorful wings without the gluten. They taste just as good and can easily satisfy your cravings. Not a fan of Asian BBQ sauce? No problem! You can try different BBQ flavors. For a smoky touch, use a chipotle BBQ sauce. If you like sweetness, go for a honey BBQ sauce. You can even create your own sauce by mixing soy sauce, honey, and a splash of vinegar. Get creative and find a sauce that makes you smile. For the full recipe, check out the [Full Recipe]. To store leftover wings, let them cool first. Place the wings in an airtight container. Keep them in the fridge for up to three days. This keeps them fresh and tasty for later meals. The best way to reheat your cauliflower wings is in the air fryer. Set it to 350°F (175°C). Heat wings for about 5-7 minutes. This method helps keep them crispy and delicious. You can also use an oven. Set it to 350°F (175°C) and bake for 10-15 minutes. To freeze your cauliflower wings, wait until they are completely cool. Place them in a freezer bag or container. Remove as much air as possible to prevent freezer burn. They can last for about three months in the freezer. When ready to eat, thaw them overnight in the fridge. Reheat in the air fryer for the best texture. Enjoy your tasty wings again! For the complete recipe, check out the Full Recipe. Yes, you can easily make these wings gluten-free. Use gluten-free flour instead of all-purpose flour. For the breadcrumbs, opt for gluten-free panko breadcrumbs. This will keep the wings crispy and delicious. The wings take about 12 to 15 minutes to cook. Preheat your air fryer to 375°F (190°C). Shake the basket halfway through cooking for even crispiness. You can use regular BBQ sauce, but the flavor will change. Asian BBQ sauce adds a sweet and tangy kick. If you prefer a different taste, try mixing regular BBQ with some soy sauce and ginger. You can try air-frying other veggies like broccoli, Brussels sprouts, or zucchini. They can soak up flavors and get crispy. Just cut them into similar sizes for even cooking. To add heat, mix in chili powder or cayenne pepper into the batter. You can also drizzle hot sauce over the wings after cooking. Adjust heat levels to fit your taste buds. For the detailed recipe, check out the Full Recipe. In this post, we explored how to make tasty air-fryer Asian BBQ cauliflower wings. We covered the essential ingredients, step-by-step instructions, and helpful tips for the right texture. You can customize flavors and even make gluten-free options to suit your needs. Remember, cooking is all about fun and creativity. Enjoy trying new spices and sauces. Keep experimenting to find your perfect cauliflower wing recipe!

Get ready to enjoy a tasty twist on wings with my Air-Fryer Asian BBQ Cauliflower Wings! This dish serves up all the flavor and crunch you love, minus the meat. …

Read more

Categories Appetizers
Older posts
Newer posts
← Previous Page1 … Page100 Page101 Page102 … Page130 Next →

ROASTED RECIPES

Where bold flavors meet everyday meals. Warm, vibrant, and made to share. 🔥🥗🍴

PAGES

Home About Contact Privacy Policy Terms & Conditions Cookie Policy GDPR Policy Copyright Policy Disclaimer

CATEGORIES

Appetizers Desserts Salads Breakfast Dinner

Contact

  • Pinterest
  • Mail
Copyright © 2025 Roasted Flavors. All rights reserved.