No-Bake Biscoff Cheesecake Bars Delicious Dessert Recipe

WANT TO SAVE THIS RECIPE?

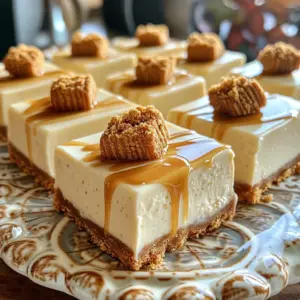
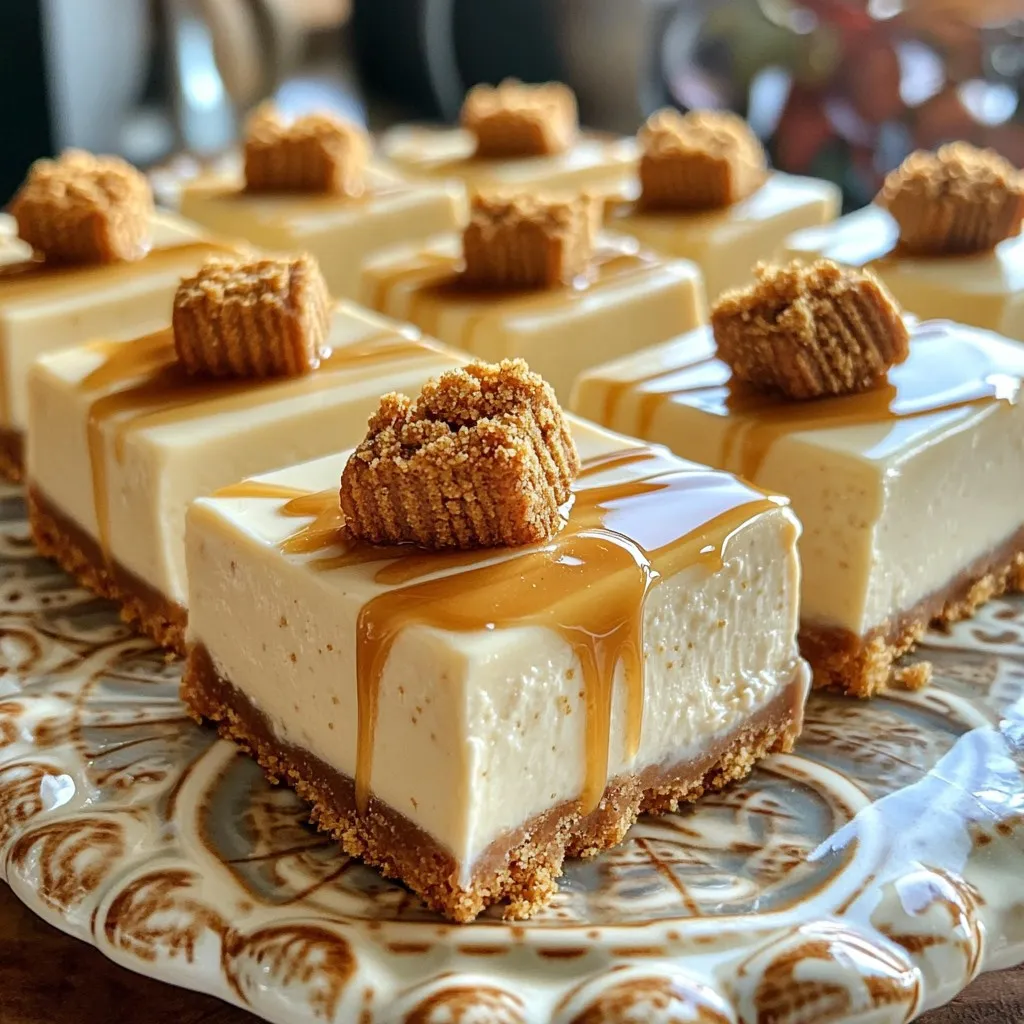
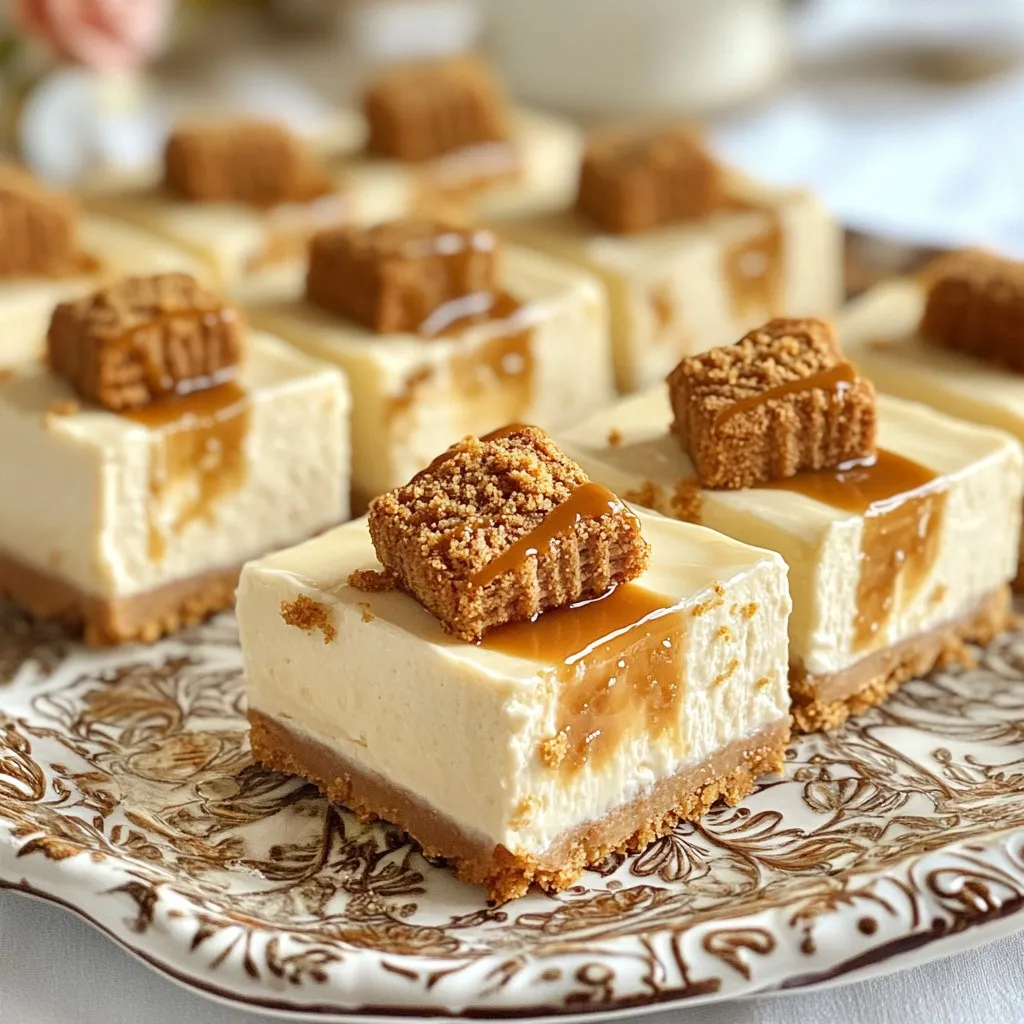
Are you ready to indulge in a dessert that requires no baking? The No-Bake Biscoff Cheesecake Bars are rich, creamy, and bursting with flavor. You can make this delightful treat with just a few simple ingredients. Perfect for any occasion, these bars are sure to impress your friends and family. Follow along as I guide you through each step to create this delicious dessert that everyone will love!

Ingredients

Main Ingredients

– 1 ½ cups Biscoff cookie crumbs

– ½ cup unsalted butter, melted

– 16 oz cream cheese, softened

– 1 cup powdered sugar

– 1 teaspoon pure vanilla extract

– 1 cup heavy cream

– ½ cup Biscoff spread (plus extra for drizzling)

– Optional: Whole Biscoff cookies for topping

To make these No-Bake Biscoff Cheesecake Bars, you need simple ingredients. Biscoff cookie crumbs create a tasty crust. Melted unsalted butter helps bind the crumbs together. Cream cheese adds richness and creaminess to the filling. Powdered sugar sweetens the mix without graininess. Pure vanilla extract gives a lovely flavor. Heavy cream adds lightness when whipped. Biscoff spread mixes in for an extra boost of flavor. If you want, top with whole Biscoff cookies for a fun touch.

Baking Tools Required

– Mixing bowls

– Electric mixer

– Spatula

– Measuring cups and spoons

– 9×9 inch baking dish

Gather your tools before you start. Mixing bowls are essential for combining ingredients. An electric mixer helps smooth out the cream cheese quickly. Use a spatula to fold mixtures without losing air. Measuring cups and spoons ensure accurate portions. A 9×9 inch baking dish is perfect for setting the bars. Having everything ready makes the process smooth and fun.

Step-by-Step Instructions

Preparing the Cookie Crust

1. In a medium mixing bowl, combine 1 ½ cups of Biscoff cookie crumbs with ½ cup of melted unsalted butter.

2. Mix well until it feels like damp sand. You want it evenly moistened.

3. Press this mixture firmly into the bottom of a 9×9 inch baking dish.

4. Use the back of a measuring cup to make it smooth and even.

Making the Cheesecake Filling

1. In a large mixing bowl, beat 16 oz of softened cream cheese until it’s smooth.

2. Gradually add 1 cup of powdered sugar and 1 teaspoon of pure vanilla extract. Mix until fluffy.

3. In another bowl, whip 1 cup of heavy cream until stiff peaks form. This lightens the filling.

4. Carefully fold the whipped cream into the cream cheese mixture in batches.

5. Once mixed, fold in ½ cup of Biscoff spread until it is fully combined.

Assembling the Bars

1. Pour the cheesecake filling over the prepared cookie crust.

2. Smooth the top with a spatula for a nice finish.

3. Cover the dish with plastic wrap and refrigerate for at least 4 hours. Overnight is best.

Cutting and Serving

1. After chilling, take the bars out of the fridge.

2. Cut them into squares with a sharp knife.

3. For toppings, add a whole Biscoff cookie on each square and drizzle extra Biscoff spread if you like.

Tips & Tricks

Perfecting the Cheesecake Bars

To make the best No-Bake Biscoff Cheesecake Bars, start with room temperature ingredients. This ensures that your cream cheese blends smoothly. Cold cream cheese can lead to lumps in your filling. Leave it out for about 30 minutes before mixing.

Next, whip the heavy cream until it forms stiff peaks. This step is key for a light and fluffy texture. When you fold the whipped cream into the cream cheese mixture, do it gently. Use a spatula and a folding motion. This keeps the air in the cream, making your bars airy and delicious.

Presentation Tips

For a stunning finish, drizzle extra Biscoff spread on top. This gives a glossy look and adds extra flavor. You can warm the spread slightly for easier drizzling.

Garnish each bar with a whole Biscoff cookie. This not only looks great but also adds a nice crunch. Serve your cheesecake bars on a pretty platter. Sprinkle a few cookie crumbs around for an eye-catching display. Your guests will love it!

Variations

Flavor Customizations

You can change the flavor of your No-Bake Biscoff Cheesecake Bars. Adding chocolate chips gives a sweet twist. I suggest using semi-sweet or dark chocolate for balance. Mix in about ½ cup of chocolate chips into the cheesecake filling. This adds a rich taste that pairs well with the Biscoff.

Another fun option is to swap Biscoff spread for other nut butters. Almond butter or peanut butter can create new flavors. Choose a creamy nut butter for the best texture. You can use the same amount as the Biscoff spread. This change opens up a world of flavors, making each bite unique.

Dietary Alternatives

If you need gluten-free options, use gluten-free cookies for the crust. Many brands offer gluten-free Biscoff-style cookies. Just crush them like regular cookies. This keeps the same great taste while meeting dietary needs.

For vegan alternatives, use plant-based cream cheese. There are many brands available that taste great. Replace the heavy cream with coconut cream for a creamy texture. By making these swaps, you still enjoy a delicious treat without animal products.

Storage Info

How to Store Cheesecake Bars

To keep your No-Bake Biscoff Cheesecake Bars fresh, refrigeration is key. First, let the bars chill for at least four hours. This helps them set properly. Once they are firm, cover the dish with plastic wrap. If you have leftovers, cut the bars into squares. Place them in an airtight container. This prevents moisture loss and keeps them tasty.

Best practices for refrigeration: Always store your cheesecake bars in the fridge. They taste best cold.

Using airtight containers: Use a container that seals well. This keeps the flavors intact.

Freezing Recommendations

You can freeze these cheesecake bars if you want to save some for later. Freezing is simple and helps maintain their taste. Start by cutting the bars into squares. Wrap each square tightly in plastic wrap. After wrapping, place them in a freezer-safe bag or container.

Steps for freezing the bars: Freeze them for up to three months. Just be sure they are wrapped well.

Thawing tips before serving: When you’re ready to eat, take the bars out of the freezer. Let them thaw in the fridge for a few hours. This will bring them back to their creamy texture. Enjoy!

FAQs

How long do No-Bake Biscoff Cheesecake Bars last in the refrigerator?

No-Bake Biscoff Cheesecake Bars last about five days in the refrigerator. Store them in an airtight container. This keeps them fresh and prevents them from drying out.

Can I make this recipe in advance?

Yes, you can make these bars in advance. Prepare them the day before you plan to serve. This gives them time to chill and set well. Just remember to cover them tightly with plastic wrap to keep them fresh.

What can I substitute for Biscoff spread?

You can use other spreads like Nutella or peanut butter. Almond butter also works well for a different taste. Just choose a spread you enjoy. Each one will change the flavor but still be delicious.

Is it necessary to refrigerate the cheesecake bars?

Yes, refrigerating the bars is crucial. It helps them set properly, making them firm and easy to cut. If you skip this step, they may be too soft. A good chill time is at least four hours, but overnight is best.

These No-Bake Biscoff Cheesecake Bars are easy to make and delicious. We covered the main ingredients, baking tools, step-by-step instructions, and tips to perfect your bars. You can customize flavors and find dietary alternatives too.

In conclusion, this recipe is fun and versatile. Whether you make them for a party or a treat, you will impress everyone. Enjoy your cheesecake bars right from the fridge or freezer. They are sure to be a hit!

- 1 ½ cups Biscoff cookie crumbs - ½ cup unsalted butter, melted - 16 oz cream cheese, softened - 1 cup powdered sugar - 1 teaspoon pure vanilla extract - 1 cup heavy cream - ½ cup Biscoff spread (plus extra for drizzling) - Optional: Whole Biscoff cookies for topping To make these No-Bake Biscoff Cheesecake Bars, you need simple ingredients. Biscoff cookie crumbs create a tasty crust. Melted unsalted butter helps bind the crumbs together. Cream cheese adds richness and creaminess to the filling. Powdered sugar sweetens the mix without graininess. Pure vanilla extract gives a lovely flavor. Heavy cream adds lightness when whipped. Biscoff spread mixes in for an extra boost of flavor. If you want, top with whole Biscoff cookies for a fun touch. - Mixing bowls - Electric mixer - Spatula - Measuring cups and spoons - 9x9 inch baking dish Gather your tools before you start. Mixing bowls are essential for combining ingredients. An electric mixer helps smooth out the cream cheese quickly. Use a spatula to fold mixtures without losing air. Measuring cups and spoons ensure accurate portions. A 9x9 inch baking dish is perfect for setting the bars. Having everything ready makes the process smooth and fun. 1. In a medium mixing bowl, combine 1 ½ cups of Biscoff cookie crumbs with ½ cup of melted unsalted butter. 2. Mix well until it feels like damp sand. You want it evenly moistened. 3. Press this mixture firmly into the bottom of a 9x9 inch baking dish. 4. Use the back of a measuring cup to make it smooth and even. 1. In a large mixing bowl, beat 16 oz of softened cream cheese until it's smooth. 2. Gradually add 1 cup of powdered sugar and 1 teaspoon of pure vanilla extract. Mix until fluffy. 3. In another bowl, whip 1 cup of heavy cream until stiff peaks form. This lightens the filling. 4. Carefully fold the whipped cream into the cream cheese mixture in batches. 5. Once mixed, fold in ½ cup of Biscoff spread until it is fully combined. 1. Pour the cheesecake filling over the prepared cookie crust. 2. Smooth the top with a spatula for a nice finish. 3. Cover the dish with plastic wrap and refrigerate for at least 4 hours. Overnight is best. 1. After chilling, take the bars out of the fridge. 2. Cut them into squares with a sharp knife. 3. For toppings, add a whole Biscoff cookie on each square and drizzle extra Biscoff spread if you like. To make the best No-Bake Biscoff Cheesecake Bars, start with room temperature ingredients. This ensures that your cream cheese blends smoothly. Cold cream cheese can lead to lumps in your filling. Leave it out for about 30 minutes before mixing. Next, whip the heavy cream until it forms stiff peaks. This step is key for a light and fluffy texture. When you fold the whipped cream into the cream cheese mixture, do it gently. Use a spatula and a folding motion. This keeps the air in the cream, making your bars airy and delicious. For a stunning finish, drizzle extra Biscoff spread on top. This gives a glossy look and adds extra flavor. You can warm the spread slightly for easier drizzling. Garnish each bar with a whole Biscoff cookie. This not only looks great but also adds a nice crunch. Serve your cheesecake bars on a pretty platter. Sprinkle a few cookie crumbs around for an eye-catching display. Your guests will love it! {{image_4}} You can change the flavor of your No-Bake Biscoff Cheesecake Bars. Adding chocolate chips gives a sweet twist. I suggest using semi-sweet or dark chocolate for balance. Mix in about ½ cup of chocolate chips into the cheesecake filling. This adds a rich taste that pairs well with the Biscoff. Another fun option is to swap Biscoff spread for other nut butters. Almond butter or peanut butter can create new flavors. Choose a creamy nut butter for the best texture. You can use the same amount as the Biscoff spread. This change opens up a world of flavors, making each bite unique. If you need gluten-free options, use gluten-free cookies for the crust. Many brands offer gluten-free Biscoff-style cookies. Just crush them like regular cookies. This keeps the same great taste while meeting dietary needs. For vegan alternatives, use plant-based cream cheese. There are many brands available that taste great. Replace the heavy cream with coconut cream for a creamy texture. By making these swaps, you still enjoy a delicious treat without animal products. To keep your No-Bake Biscoff Cheesecake Bars fresh, refrigeration is key. First, let the bars chill for at least four hours. This helps them set properly. Once they are firm, cover the dish with plastic wrap. If you have leftovers, cut the bars into squares. Place them in an airtight container. This prevents moisture loss and keeps them tasty. - Best practices for refrigeration: Always store your cheesecake bars in the fridge. They taste best cold. - Using airtight containers: Use a container that seals well. This keeps the flavors intact. You can freeze these cheesecake bars if you want to save some for later. Freezing is simple and helps maintain their taste. Start by cutting the bars into squares. Wrap each square tightly in plastic wrap. After wrapping, place them in a freezer-safe bag or container. - Steps for freezing the bars: Freeze them for up to three months. Just be sure they are wrapped well. - Thawing tips before serving: When you’re ready to eat, take the bars out of the freezer. Let them thaw in the fridge for a few hours. This will bring them back to their creamy texture. Enjoy! No-Bake Biscoff Cheesecake Bars last about five days in the refrigerator. Store them in an airtight container. This keeps them fresh and prevents them from drying out. Yes, you can make these bars in advance. Prepare them the day before you plan to serve. This gives them time to chill and set well. Just remember to cover them tightly with plastic wrap to keep them fresh. You can use other spreads like Nutella or peanut butter. Almond butter also works well for a different taste. Just choose a spread you enjoy. Each one will change the flavor but still be delicious. Yes, refrigerating the bars is crucial. It helps them set properly, making them firm and easy to cut. If you skip this step, they may be too soft. A good chill time is at least four hours, but overnight is best. These No-Bake Biscoff Cheesecake Bars are easy to make and delicious. We covered the main ingredients, baking tools, step-by-step instructions, and tips to perfect your bars. You can customize flavors and find dietary alternatives too. In conclusion, this recipe is fun and versatile. Whether you make them for a party or a treat, you will impress everyone. Enjoy your cheesecake bars right from the fridge or freezer. They are sure to be a hit!

No-Bake Biscoff Cheesecake Bars

Indulge in the ultimate dessert treat with these No-Bake Biscoff Cheesecake Bars! Made with creamy cheesecake and a cookie crumb crust, these bars are perfect for any occasion. With simple steps and delicious Biscoff spread, you can create a show-stopping dessert that your friends and family will love. Click through to discover the full recipe and impress your guests with this easy no-bake delight!

Ingredients
  

1 ½ cups Biscoff cookie crumbs

½ cup unsalted butter, melted

16 oz cream cheese, softened to room temperature

1 cup powdered sugar

1 teaspoon pure vanilla extract

1 cup heavy cream

½ cup Biscoff spread (plus extra for drizzling, if desired)

Optional: Whole Biscoff cookies for topping

Instructions
 

In a medium mixing bowl, combine the Biscoff cookie crumbs with the melted unsalted butter. Mix well until the mixture resembles damp sand and is evenly moistened.

    Press the cookie crumb mixture firmly into the bottom of a 9x9 inch (or similarly sized) baking dish, creating a uniform crust. Use the back of a measuring cup to compress it tightly and ensure even distribution.

      In a large mixing bowl, beat the softened cream cheese with an electric mixer on medium speed until it’s completely smooth and creamy. Scrape down the sides as needed to ensure uniform mixing.

        Gradually add the powdered sugar and vanilla extract while continuing to blend, mixing until everything is well incorporated and the mixture is fluffy.

          In a separate clean bowl, whip the heavy cream using a hand mixer or stand mixer until stiff peaks form. This will give your cheesecake bars a light and airy texture.

            Carefully fold the whipped cream into the cream cheese mixture in batches. Use a spatula to incorporate it gently, preserving as much air as possible to keep the mixture light.

              Once the whipped cream is fully incorporated, fold in the Biscoff spread until evenly mixed, ensuring the delicious flavor is distributed throughout.

                Pour the creamy cheesecake mixture over the prepared cookie crust, smoothing it out evenly with a spatula for a polished finish.

                  Cover the dish with plastic wrap and refrigerate for at least 4 hours, or ideally overnight, to allow the bars to set firmly.

                    Once the bars are set, remove them from the pan and cut into squares for serving.

                      For an elegant presentation, top each bar with a whole Biscoff cookie. If desired, drizzle a bit of extra Biscoff spread over the bars for added sweetness and flair.

                        Prep Time: 20 minutes | Total Time: 4 hours 20 minutes | Servings: 16 bars

                          - Presentation Tips: Serve the bars on a decorative platter, and enhance the visual appeal with a drizzle of additional Biscoff spread and a sprinkle of Biscoff cookie crumbs. This will create a delightful and tempting display for your guests!

                            WANT TO SAVE THIS RECIPE?