Are you ready for a sweet treat that skips the oven? No-Bake Peppermint Chocolate Cheesecake Bars are the perfect holiday dessert! With creamy layers of chocolate and a hint of refreshing peppermint, these bars are a hit at any gathering. In this blog post, I’ll walk you through each step, from mixing the crust to chilling the bars, so you can impress your friends and family with ease. Let’s dive in!
Ingredients
To make No-Bake Peppermint Chocolate Cheesecake Bars, you’ll need a few key ingredients. Each one adds to the rich and festive flavor. Here’s the list:
– 1 ½ cups chocolate cookie crumbs
– ½ cup unsalted butter, melted
– 16 oz cream cheese, softened to room temperature
– 1 cup powdered sugar
– 1 teaspoon peppermint extract
– 1 cup heavy whipping cream
– ½ cup semi-sweet chocolate chips, melted
– ¼ teaspoon salt
– Crushed peppermint candies, for garnish
What do these ingredients do?
– Chocolate cookie crumbs form the crust. They give the bars a sweet, crunchy base.
– Unsalted butter binds the crumbs together. It helps create a firm crust.
– Cream cheese acts as the main filling. Its smooth texture is key to the cheesecake.
– Powdered sugar sweetens the mixture. It makes the dessert extra tasty.
– Peppermint extract adds that fresh minty flavor. It gives the bars a holiday twist.
– Heavy whipping cream creates a light and airy texture. It makes the filling rich and fluffy.
– Semi-sweet chocolate chips provide a chocolatey touch. They bring depth to the flavor.
– Salt balances the sweetness. It enhances all the flavors in the dish.
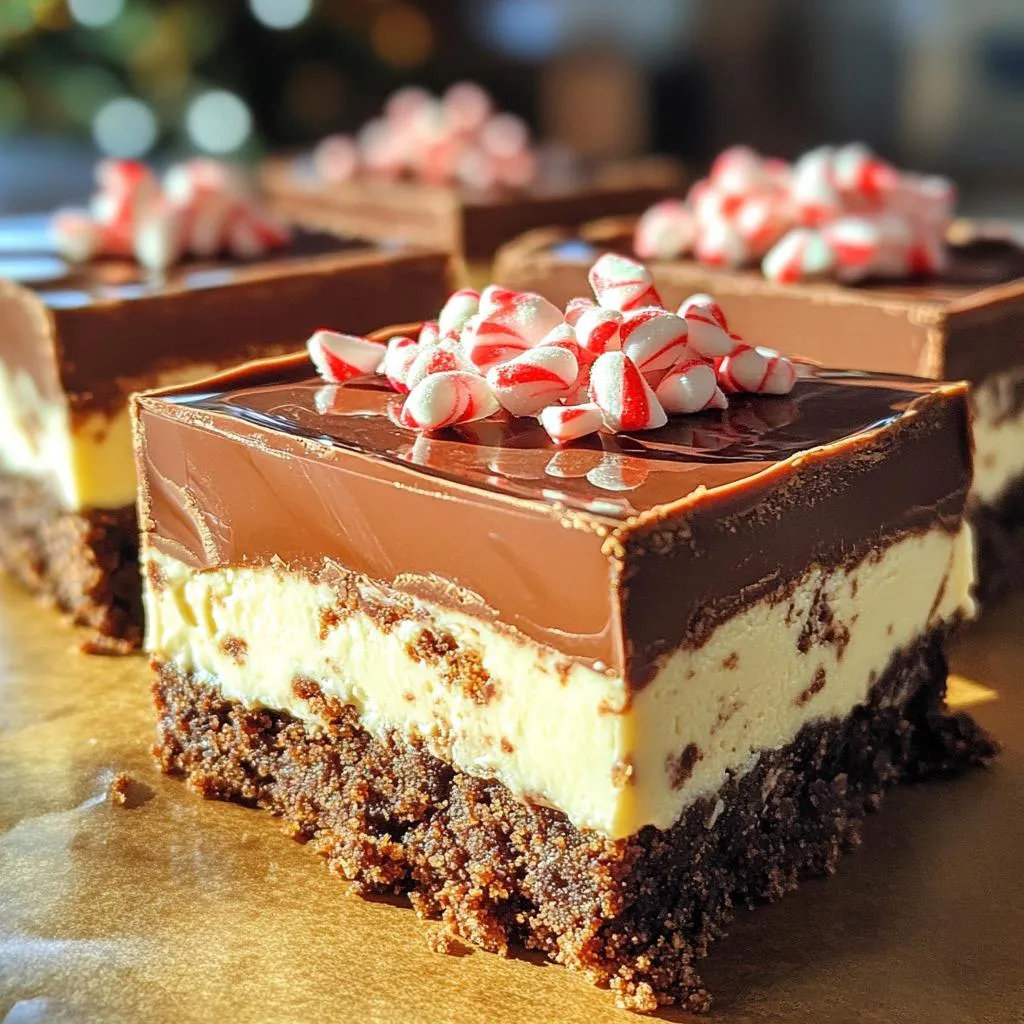
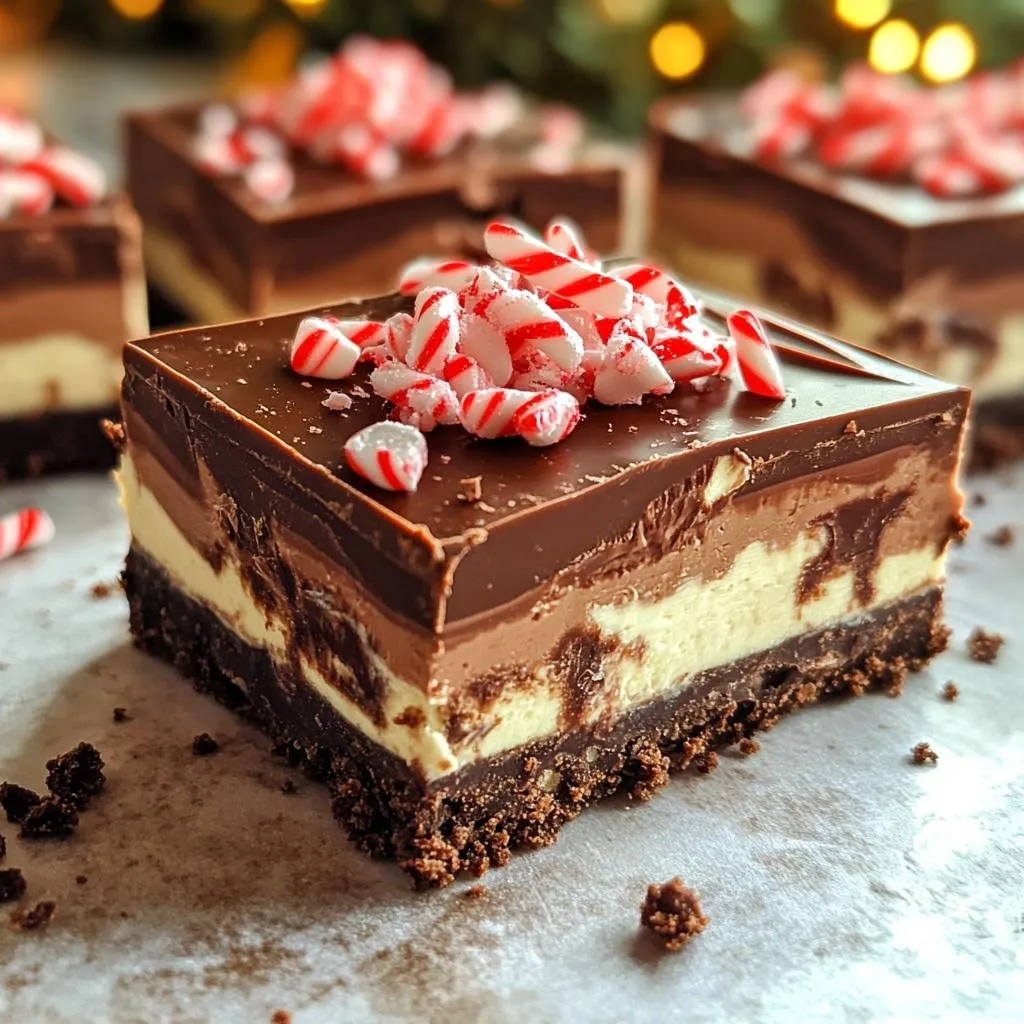
– Crushed peppermint candies add a festive crunch. They make the bars look pretty and taste great.
These ingredients come together to create a delicious treat that is perfect for any occasion!
Step-by-Step Instructions
Preparing the Crust
Start by mixing the chocolate cookie crumbs with melted butter in a medium bowl. Stir until the crumbs soak up the butter and become crumbly. Next, take a lined 9×9 inch baking pan. Firmly press the cookie mixture into the bottom of the pan. This forms a solid base for your cheesecake. Place the pan in the fridge while you prepare the filling.
Making the Cream Cheese Mixture
In a large bowl, beat the softened cream cheese with an electric mixer. Mix until it is smooth and creamy, which should take about 2 minutes. Slowly add the powdered sugar and peppermint extract. Keep mixing until the cream cheese is fluffy and well combined.
Whipping the Heavy Cream
In a separate bowl, whip the heavy cream until stiff peaks form. This usually takes about 2 to 3 minutes. Be careful not to over-whip. Gently fold the whipped cream into the cream cheese mixture. Do this in three additions to keep the whipped cream light and airy.
Layering the Cheesecake
Pour half of the cheesecake mixture over the chilled crust and spread it evenly. Drizzle half of the melted semi-sweet chocolate on top. Use a knife or spatula to swirl the chocolate into the cheesecake layer. Next, pour the remaining cheesecake mixture on top and smooth it out. Drizzle the rest of the melted chocolate over this layer and swirl it again for a nice design.
Chilling the Bars
Cover the pan with plastic wrap. Put it in the fridge for at least 4 hours. This time helps the cheesecake set and become firm.
Slicing and Garnishing
Once set, carefully lift the cheesecake out of the pan using the parchment paper edges. Place it on a cutting board. Cut it into 16 equal squares to serve. For a festive touch, sprinkle crushed peppermint candies on top of each bar. This adds a pop of color and flavor that makes each bite special.
Tips & Tricks
Best Practices for a Perfect Cheesecake
To make the best no-bake peppermint chocolate cheesecake bars, start with cream cheese. Ensure it is at room temperature. Cold cream cheese mixes poorly. A soft texture leads to a smooth filling.
Next, when you fold in the whipped cream, be gentle. This keeps the air in the cream. A light filling will help your bars stay fluffy and delicious.
Common Mistakes to Avoid
One mistake to watch out for is overmixing the cream cheese. Mixing too long can make it too runny. You want a thick, creamy texture for your bars.
Also, don’t skip chilling the cheesecake long enough. If you take it out too early, the bars may fall apart. A minimum of four hours in the fridge is key to a firm set.
Presentation Ideas
When serving, think about how to impress your guests. Use a decorative platter for the bars. Drizzle some extra melted chocolate on top. It adds flair and makes them look fancy.
For garnish, crushed peppermint candies are a classic choice. But you can also try crushed nuts or chocolate shavings. These add variety and color to your dessert.
Variations
Alternative Flavors
You can change the flavor of your cheesecake bars. Try using different extracts. Almond or vanilla extract adds a nice twist. You can also add layers of fruit flavors. Raspberry or strawberry puree works great. Just swirl it into the cheesecake before chilling. This adds both color and taste.
Crust Variations
The crust can be made in many ways. You might use graham crackers or Oreo cookies. Both give a tasty base. For a gluten-free option, use gluten-free cookies. There are many brands that offer great choices. Just crush them like regular cookies and mix with melted butter.
Dairy-Free/Substitutes
If you want a dairy-free version, there are good options. Use cashew cream instead of cream cheese. It blends well and tastes great. For heavy cream, you can try coconut cream. It whips up nicely and adds a hint of coconut flavor. These swaps keep the taste rich while being plant-based.
Storage Info
Best Storage Practices
To store leftover bars, place them in an airtight container. This keeps them fresh and moist. You can also cover the pan with plastic wrap if you prefer. The ideal temperature for storage is the fridge. Keep your cheesecake bars chilled to maintain their texture and flavor.
Freezing Instructions
You can freeze the cheesecake bars for later enjoyment. Cut them into squares and wrap each piece in plastic wrap. Then, place them in a freezer-safe bag or container. For thawing, take them out of the freezer and let them sit in the fridge overnight. This method helps keep the texture creamy and smooth.
Shelf Life
These bars will last about 5 to 7 days in the fridge. Store them properly to ensure their freshness. Watch for signs of spoilage like a sour smell or a change in texture. If you see any mold, it’s best to discard them. Enjoy your delicious treats!
FAQs
Can I make these bars in advance?
Yes, you can make these bars ahead of time. I recommend preparing them a day in advance. This gives the bars time to firm up nicely in the fridge. They taste even better after chilling overnight. Just cover them well to keep them fresh.
Can I use low-fat cream cheese?
You can use low-fat cream cheese, but it changes the texture a bit. The bars may not be as rich or creamy. The flavor might also be less intense. Full-fat cream cheese gives the best results for taste and texture.
What can I substitute for peppermint extract?
If you don’t have peppermint extract, you can use vanilla extract. You can also try almond extract for a different twist. Another option is to add crushed peppermint candies for that minty flavor. Just adjust the amount to your taste.
How should I serve these bars?
Serve these bars chilled for the best flavor. Cut the bars into squares and place them on a pretty plate. Drizzle with extra melted chocolate for a nice touch. Top with crushed peppermint candies for color and crunch. They are great for parties or special events!
This blog post covered how to make delicious cheesecake bars with peppermint flavor. We explored each ingredient, from chocolate cookie crumbs to crushed peppermint candies. You learned step-by-step instructions for preparing, mixing, and layering your cheesecake. Tips helped avoid common mistakes, while variations let you customize your bars. Finally, we shared storage info to keep them fresh.
Get creative and experiment with different flavors. Enjoy each bite of your tasty treat!
