Peppermint Chocolate Lava Cakes Irresistible Delight

WANT TO SAVE THIS RECIPE?

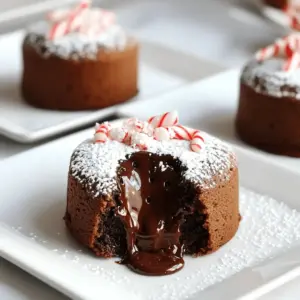
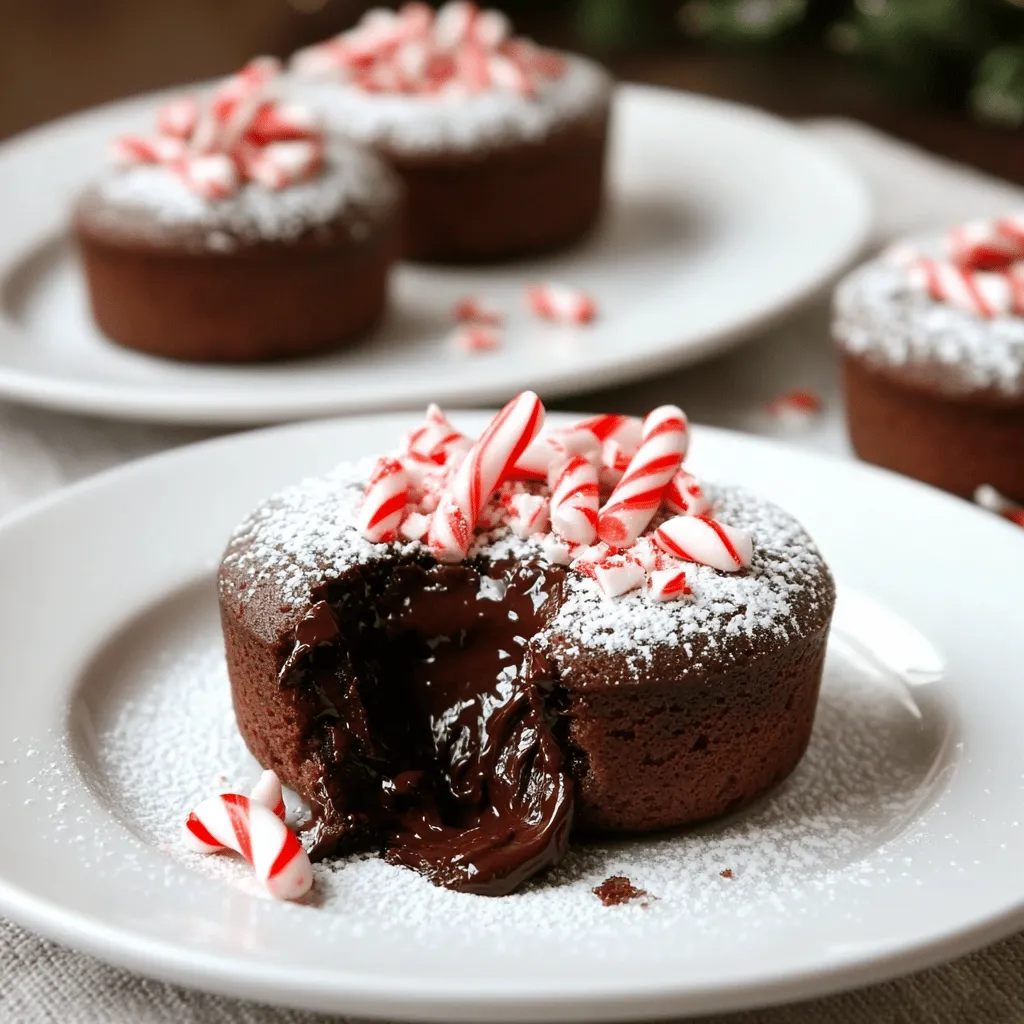
Indulging in Peppermint Chocolate Lava Cakes is pure joy. These little desserts burst with rich chocolate and refreshing peppermint flavor. They have a gooey center that melts in your mouth. In this post, I’ll share simple ingredients, step-by-step instructions, and tips to make your cakes perfect. Whether it’s a festive treat or a cozy night in, this delightful dessert will wow your taste buds. Let’s get baking!

Ingredients

List of Ingredients

– 1/2 cup unsalted butter

– 1 cup semi-sweet chocolate chips

– 2 large eggs

– 2 large egg yolks

– 1/4 cup granulated sugar

– 2 tablespoons all-purpose flour

– 1 teaspoon peppermint extract

– 1/4 teaspoon salt

– Optional: powdered sugar and crushed candy canes for garnish

Measurements and Substitutions

Each ingredient plays a key role in making these cakes. If you need to make changes, here are some tips:

Butter: You can use coconut oil if you want a dairy-free option.

Chocolate Chips: Dark chocolate can replace semi-sweet for a richer taste.

Eggs: Flaxseed meal mixed with water can work as a vegan substitute.

Flour: Gluten-free flour mixes can replace regular flour for a gluten-free option.

Peppermint Extract: You can use vanilla extract if you prefer a milder flavor.

Optional Garnishes

Garnishes make your cakes look nice and add flavor. Here are some ideas:

Powdered Sugar: Sift it on top for a sweet touch.

Crushed Candy Canes: Sprinkle them for a festive crunch.

Mint Sprigs: Add fresh mint for a pop of color and taste.

Ice Cream or Whipped Cream: Serve with a scoop of ice cream or whipped cream for extra creaminess.

These ingredients come together to create a rich, gooey dessert that melts in your mouth. Enjoy the process of making them!

Step-by-Step Instructions

Preparation Steps

1. Preheat your oven to 425°F (220°C).

2. Grease four 6 oz ramekins with unsalted butter.

3. Dust the ramekins lightly with cocoa powder. This helps the cakes slide out easily.

4. In a microwave-safe bowl, combine 1/2 cup unsalted butter and 1 cup semi-sweet chocolate chips.

5. Heat in the microwave for 30 seconds at a time. Stir after each interval until smooth.

6. Let the melted mixture cool for a few minutes.

7. In a bowl, whisk together 2 large eggs, 2 large egg yolks, and 1/4 cup granulated sugar.

8. Whisk until the mix is pale and slightly thick, about 2 minutes.

9. Pour the cooled chocolate mixture into the egg mixture.

10. Add 1 teaspoon peppermint extract and gently fold the mixtures together.

11. Sift in 2 tablespoons all-purpose flour and 1/4 teaspoon salt.

12. Fold until just combined, being careful not to over-mix.

Baking Instructions

1. Divide the batter evenly among the prepared ramekins, filling them about two-thirds full.

2. Place the ramekins on a baking sheet to catch any drips.

3. Bake in your preheated oven for 12 to 14 minutes.

4. The edges should be set, but the center must remain soft and jiggly. This creates the lava effect.

5. After baking, let the ramekins sit for 1 minute.

6. Run a knife around the edges of each ramekin to loosen the cakes.

7. Invert each ramekin onto a plate and lift it off gently.

Plating and Serving Tips

1. Serve the cakes warm for the best experience.

2. Add a scoop of rich vanilla ice cream or a dollop of whipped cream on the side.

3. For a festive touch, dust the tops with powdered sugar.

4. Sprinkle crushed candy canes for added flavor and color.

5. A fresh mint sprig makes the plate pop. Enjoy!

Tips & Tricks

Achieving the Perfect Lava Center

To get that perfect lava center, bake the cakes for just 12 to 14 minutes. The edges should feel set, but the middle must jiggle slightly. This ensures that the center stays gooey. If you bake too long, the lava will disappear, and you’ll have a solid cake. Trust me, you want that rich, warm chocolate flow when you cut into it!

Common Mistakes to Avoid

Avoid over-mixing your batter. If you mix too much, the cakes can become dense. Also, don’t forget to preheat your oven. If it’s not hot enough, the cakes won’t rise properly. Make sure to grease your ramekins well. This step helps the cakes slide out easily. Lastly, watch the baking time closely. Each oven is different, so keep an eye on your cakes.

Making in Advance and Reheating Tips

You can prepare the batter ahead of time. Just fill the ramekins and chill them. When you’re ready to bake, pull them out and add a few extra minutes to the baking time. To reheat leftover cakes, place them in a preheated oven at 350°F for about 5-7 minutes. This warms them up without overcooking the lava center. Enjoy your delicious treat!

Variations

Gluten-Free Options

You can make these cakes gluten-free with a simple swap. Use almond flour or a gluten-free all-purpose blend instead of regular flour. This change keeps the texture rich and gooey. Be sure to check that your chocolate chips are also gluten-free. Enjoy a delicious treat without the gluten!

Alternative Flavor Additions

Want to mix things up? Try adding orange zest for a bright twist. You can also use different extracts like vanilla or hazelnut. For a richer flavor, melt in a tablespoon of coffee or espresso powder. These tweaks will change the flavor while keeping the cake’s charm.

Serving Suggestions for Special Occasions

Serve these cakes warm for the best experience. Place them on a fancy plate for a special touch. Add a scoop of vanilla ice cream or a dollop of whipped cream on top. Finish with a sprinkle of crushed candy canes or chocolate shavings. These details make your dessert shine on any occasion.

Storage Info

How to Store Leftovers

To store leftover peppermint chocolate lava cakes, let them cool first. Then, place each cake in an airtight container. You can keep them in the fridge for up to three days. Make sure to seal them well to avoid drying out.

Freezing Instructions

If you want to freeze these cakes, it’s best to do so before baking. After filling the ramekins, wrap each one tightly in plastic wrap. Then, place them in a freezer bag. They can stay frozen for up to two months. When you’re ready to bake, just take them out and add a few extra minutes to the baking time.

Best Practices for Reheating

To reheat your lava cakes, preheat the oven to 350°F (175°C). Place the ramekins on a baking sheet. Heat them for about 10-12 minutes or until just warm. This method helps keep the lava center gooey. Avoid using the microwave, as it may cook the cakes too much. Enjoy your warm, melting treat again!

FAQs

What are Peppermint Chocolate Lava Cakes?

Peppermint chocolate lava cakes are small, rich cakes with a warm, gooey center. They combine chocolate and peppermint flavors for a festive treat. When you cut into them, warm chocolate flows out like lava. These cakes are perfect for holiday gatherings or cozy evenings at home.

Can I use different types of chocolate?

Yes, you can use different types of chocolate. Dark chocolate gives a richer flavor, while milk chocolate makes it sweeter. Always choose chocolate that you enjoy eating. The key is to keep the texture smooth and creamy. Mixing different chocolates can also create fun flavor combinations.

How do I know when the cakes are done baking?

To check if the cakes are done, look for set edges and a soft center. The center should jiggle slightly when you shake the ramekin. Baking them for 12-14 minutes usually gives the best results. If they bake too long, you may lose that gooey lava effect. Trust your instincts, and don’t be afraid to open the oven to peek!

We covered everything you need for delicious peppermint chocolate lava cakes. You learned about the key ingredients, plus tips for perfect baking. I shared variations to suit different diets and storage info to keep leftovers fresh. Remember to follow the steps and watch for common mistakes. Enjoy making these cakes for special times or just because. Happy baking!

- 1/2 cup unsalted butter - 1 cup semi-sweet chocolate chips - 2 large eggs - 2 large egg yolks - 1/4 cup granulated sugar - 2 tablespoons all-purpose flour - 1 teaspoon peppermint extract - 1/4 teaspoon salt - Optional: powdered sugar and crushed candy canes for garnish Each ingredient plays a key role in making these cakes. If you need to make changes, here are some tips: - Butter: You can use coconut oil if you want a dairy-free option. - Chocolate Chips: Dark chocolate can replace semi-sweet for a richer taste. - Eggs: Flaxseed meal mixed with water can work as a vegan substitute. - Flour: Gluten-free flour mixes can replace regular flour for a gluten-free option. - Peppermint Extract: You can use vanilla extract if you prefer a milder flavor. Garnishes make your cakes look nice and add flavor. Here are some ideas: - Powdered Sugar: Sift it on top for a sweet touch. - Crushed Candy Canes: Sprinkle them for a festive crunch. - Mint Sprigs: Add fresh mint for a pop of color and taste. - Ice Cream or Whipped Cream: Serve with a scoop of ice cream or whipped cream for extra creaminess. These ingredients come together to create a rich, gooey dessert that melts in your mouth. Enjoy the process of making them! 1. Preheat your oven to 425°F (220°C). 2. Grease four 6 oz ramekins with unsalted butter. 3. Dust the ramekins lightly with cocoa powder. This helps the cakes slide out easily. 4. In a microwave-safe bowl, combine 1/2 cup unsalted butter and 1 cup semi-sweet chocolate chips. 5. Heat in the microwave for 30 seconds at a time. Stir after each interval until smooth. 6. Let the melted mixture cool for a few minutes. 7. In a bowl, whisk together 2 large eggs, 2 large egg yolks, and 1/4 cup granulated sugar. 8. Whisk until the mix is pale and slightly thick, about 2 minutes. 9. Pour the cooled chocolate mixture into the egg mixture. 10. Add 1 teaspoon peppermint extract and gently fold the mixtures together. 11. Sift in 2 tablespoons all-purpose flour and 1/4 teaspoon salt. 12. Fold until just combined, being careful not to over-mix. 1. Divide the batter evenly among the prepared ramekins, filling them about two-thirds full. 2. Place the ramekins on a baking sheet to catch any drips. 3. Bake in your preheated oven for 12 to 14 minutes. 4. The edges should be set, but the center must remain soft and jiggly. This creates the lava effect. 5. After baking, let the ramekins sit for 1 minute. 6. Run a knife around the edges of each ramekin to loosen the cakes. 7. Invert each ramekin onto a plate and lift it off gently. 1. Serve the cakes warm for the best experience. 2. Add a scoop of rich vanilla ice cream or a dollop of whipped cream on the side. 3. For a festive touch, dust the tops with powdered sugar. 4. Sprinkle crushed candy canes for added flavor and color. 5. A fresh mint sprig makes the plate pop. Enjoy! To get that perfect lava center, bake the cakes for just 12 to 14 minutes. The edges should feel set, but the middle must jiggle slightly. This ensures that the center stays gooey. If you bake too long, the lava will disappear, and you’ll have a solid cake. Trust me, you want that rich, warm chocolate flow when you cut into it! Avoid over-mixing your batter. If you mix too much, the cakes can become dense. Also, don’t forget to preheat your oven. If it’s not hot enough, the cakes won’t rise properly. Make sure to grease your ramekins well. This step helps the cakes slide out easily. Lastly, watch the baking time closely. Each oven is different, so keep an eye on your cakes. You can prepare the batter ahead of time. Just fill the ramekins and chill them. When you’re ready to bake, pull them out and add a few extra minutes to the baking time. To reheat leftover cakes, place them in a preheated oven at 350°F for about 5-7 minutes. This warms them up without overcooking the lava center. Enjoy your delicious treat! {{image_4}} You can make these cakes gluten-free with a simple swap. Use almond flour or a gluten-free all-purpose blend instead of regular flour. This change keeps the texture rich and gooey. Be sure to check that your chocolate chips are also gluten-free. Enjoy a delicious treat without the gluten! Want to mix things up? Try adding orange zest for a bright twist. You can also use different extracts like vanilla or hazelnut. For a richer flavor, melt in a tablespoon of coffee or espresso powder. These tweaks will change the flavor while keeping the cake's charm. Serve these cakes warm for the best experience. Place them on a fancy plate for a special touch. Add a scoop of vanilla ice cream or a dollop of whipped cream on top. Finish with a sprinkle of crushed candy canes or chocolate shavings. These details make your dessert shine on any occasion. To store leftover peppermint chocolate lava cakes, let them cool first. Then, place each cake in an airtight container. You can keep them in the fridge for up to three days. Make sure to seal them well to avoid drying out. If you want to freeze these cakes, it’s best to do so before baking. After filling the ramekins, wrap each one tightly in plastic wrap. Then, place them in a freezer bag. They can stay frozen for up to two months. When you're ready to bake, just take them out and add a few extra minutes to the baking time. To reheat your lava cakes, preheat the oven to 350°F (175°C). Place the ramekins on a baking sheet. Heat them for about 10-12 minutes or until just warm. This method helps keep the lava center gooey. Avoid using the microwave, as it may cook the cakes too much. Enjoy your warm, melting treat again! Peppermint chocolate lava cakes are small, rich cakes with a warm, gooey center. They combine chocolate and peppermint flavors for a festive treat. When you cut into them, warm chocolate flows out like lava. These cakes are perfect for holiday gatherings or cozy evenings at home. Yes, you can use different types of chocolate. Dark chocolate gives a richer flavor, while milk chocolate makes it sweeter. Always choose chocolate that you enjoy eating. The key is to keep the texture smooth and creamy. Mixing different chocolates can also create fun flavor combinations. To check if the cakes are done, look for set edges and a soft center. The center should jiggle slightly when you shake the ramekin. Baking them for 12-14 minutes usually gives the best results. If they bake too long, you may lose that gooey lava effect. Trust your instincts, and don't be afraid to open the oven to peek! We covered everything you need for delicious peppermint chocolate lava cakes. You learned about the key ingredients, plus tips for perfect baking. I shared variations to suit different diets and storage info to keep leftovers fresh. Remember to follow the steps and watch for common mistakes. Enjoy making these cakes for special times or just because. Happy baking!

Peppermint Chocolate Lava Cakes

Indulge in these mouthwatering Peppermint Chocolate Lava Cakes that are perfect for the holiday season! With a rich, gooey center and a hint of peppermint, these delightful desserts are sure to impress. Learn how to create this festive treat with simple ingredients in just 25 minutes. Surprise your loved ones with a deliciously warm dessert. Click to explore the full recipe and elevate your holiday baking game!

Ingredients
  

1/2 cup unsalted butter

1 cup semi-sweet chocolate chips

2 large eggs

2 large egg yolks

1/4 cup granulated sugar

2 tablespoons all-purpose flour

1 teaspoon peppermint extract

1/4 teaspoon salt

Optional: powdered sugar and crushed candy canes for garnish

Instructions
 

Start by preheating your oven to 425°F (220°C). Grease four 6 oz ramekins with unsalted butter and dust them lightly with cocoa powder to ensure the cakes don’t stick.

    In a microwave-safe bowl, add the unsalted butter and semi-sweet chocolate chips. Heat in the microwave in 30-second intervals, stirring after each session until the mixture is melted and silky smooth. Allow it to cool for a few minutes.

      In a separate mixing bowl, whisk together the whole eggs, egg yolks, and granulated sugar until the mixture becomes pale and slightly thickened, which should take about 2 minutes of vigorous whisking.

        Carefully pour the cooled melted chocolate mixture into your egg mixture. Add the peppermint extract and gently fold the ingredients together until they are combined.

          Using a fine mesh sieve, sift the flour and salt over the chocolate mixture. Gently fold this in until just combined, taking care not to over-mix as this will affect the texture.

            Evenly divide the luscious batter among the prepared ramekins, filling each about two-thirds full. Arrange the ramekins on a baking sheet to catch any drips.

              Bake the cakes in your preheated oven for 12-14 minutes. The edges should be set, whilst the center remains soft and slightly jiggly to guarantee that gooey lava effect.

                Once baked, remove the ramekins from the oven and let them sit for 1 minute. Carefully run a knife around the inner edges of each ramekin to loosen the cakes. Invert each ramekin onto a plate and gently lift it off to reveal the deliciously gooey chocolate lava cakes.

                  Optional: For an extra festive touch, dust the tops with powdered sugar and sprinkle crushed candy canes over them.

                    Prep Time, Total Time, Servings: 15 minutes | 25 minutes | 4 servings

                      - Presentation Tips: Serve these delightful cakes warm, accompanied by a scoop of rich vanilla ice cream or a dollop of whipped cream. A fresh mint sprig on the side adds a bright, inviting pop of color.

                        WANT TO SAVE THIS RECIPE?