Looking for a delightful holiday treat that’s quick and easy? You’ve come to the right place! These No-Bake Eggnog Cheesecake Cups are rich, creamy, and full of festive cheer. I’ll guide you through each step to create these delicious desserts, perfect for your holiday gatherings. Get ready to impress your friends and family with a sweet treat they won’t forget! Let’s dive into the details!
Ingredients
List of Ingredients
– 1 ½ cups graham cracker crumbs
– ¼ cup unsalted butter, melted
– 1 cup cream cheese, softened
– ½ cup powdered sugar
– 1 cup heavy cream, cold
– 1 teaspoon vanilla extract
– ½ teaspoon ground nutmeg
– ½ teaspoon ground cinnamon
– Whipped cream, for topping
– Cinnamon sticks, for garnish (optional)
Measurement and Quality Tips
When measuring ingredients, use dry measuring cups for solids. Pack the graham cracker crumbs lightly. For cream cheese, it should feel soft but not runny. Always use fresh heavy cream for the best whipped texture.
For spices, use fresh ground nutmeg and cinnamon for full flavor. They make a big difference. Make sure your butter is unsalted to control salt levels in your dessert.
Substitutions for Ingredients
If you don’t have graham crackers, use vanilla wafers or crushed cookies. For butter, coconut oil works well as a dairy-free option. If you want to make it lighter, swap cream cheese for Greek yogurt.
You can use maple syrup instead of powdered sugar for a different sweetness. Need a dairy-free option? Try using a dairy-free cream cheese and coconut cream for the whipped part.
Step-by-Step Instructions
Step 1: Prepare the Crust
First, grab a medium bowl. Mix 1 ½ cups of graham cracker crumbs with ¼ cup of melted unsalted butter. Stir well until the crumbs are coated. They should look like wet sand.
Step 2: Form the Crust Layer
Next, take 2 tablespoons of the crumb mixture. Press it down firmly into the bottom of each cup or glass. Make sure it is compact. This gives a strong base for your cheesecake.
Step 3: Make the Cheesecake Mixture
In another bowl, beat 1 cup of softened cream cheese with ½ cup of powdered sugar. Use an electric mixer on medium speed. Mix until it is smooth and creamy. You want no lumps in this mixture.
Step 4: Whip the Cream
Now, pour 1 cup of cold heavy cream into a clean bowl. Use a hand mixer or stand mixer with a whisk attachment. Whip the cream until soft peaks form. Be careful not to over-whip. You want it light and airy.
Step 5: Combine Mixtures
With a spatula, gently fold the whipped cream into the cream cheese mixture. Use a light hand. This keeps the fluffy texture of the whipped cream.
Step 6: Add Flavorings
Next, add 1 teaspoon of vanilla extract, ½ teaspoon of ground nutmeg, and ½ teaspoon of ground cinnamon. Gently fold these into the mixture until it is evenly blended.
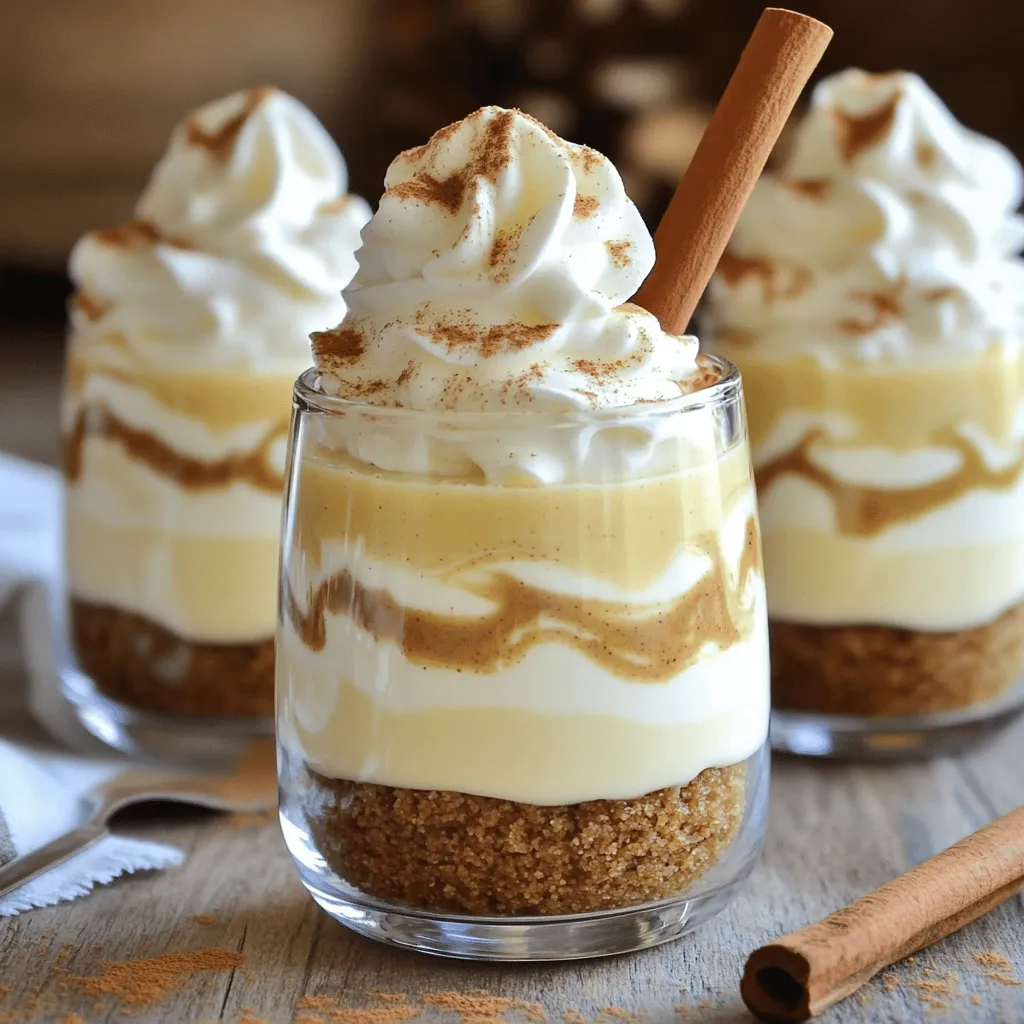
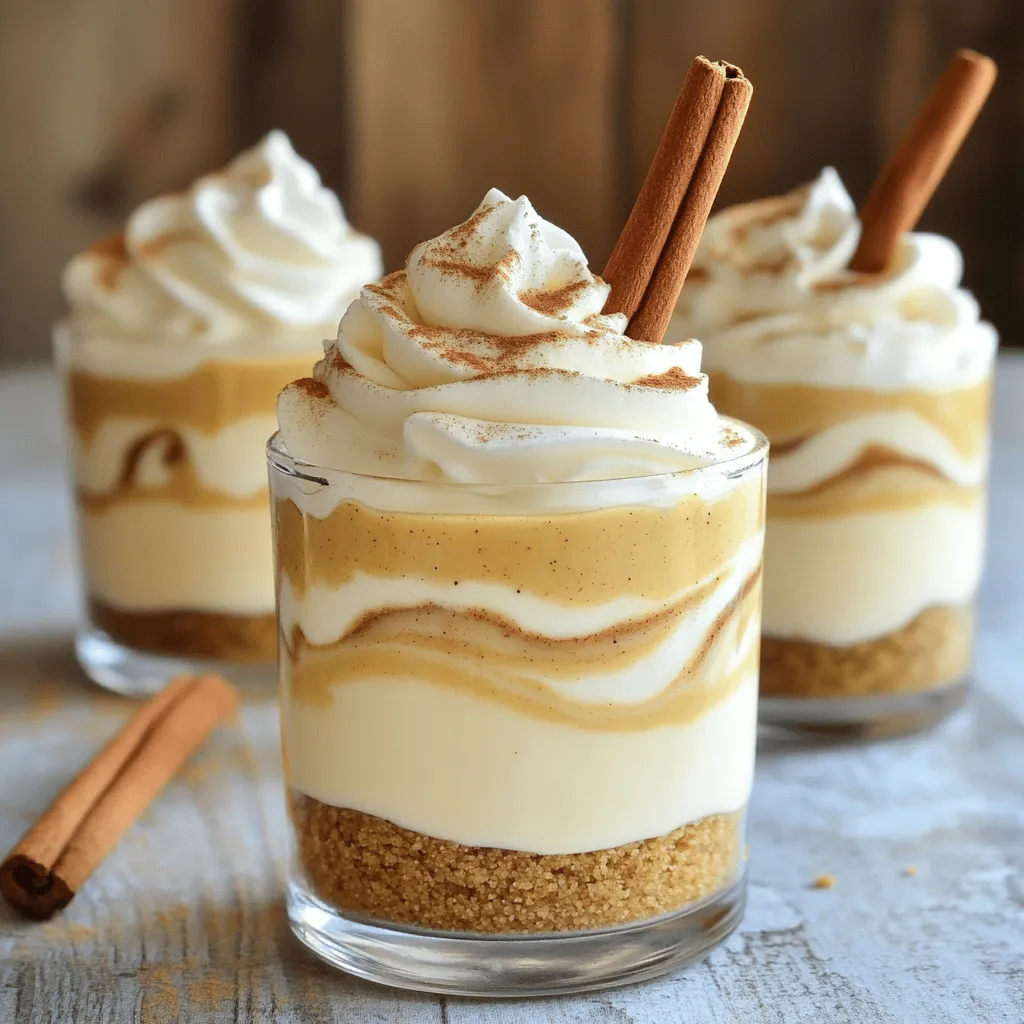
Step 7: Layer the Cheesecake
Using a spoon or piping bag, fill each cup with the cheesecake mixture. Layer it over the crust. Fill the cups to your desired height. Leave some space for the whipped cream on top.
Step 8: Chill
Cover the cups with plastic wrap. Place them in the fridge for at least 4 hours, or overnight if you can. This helps the cheesecake to set and the flavors to mix well.
Step 9: Serve
Right before serving, top each cup with whipped cream. Sprinkle a little nutmeg or cinnamon on top for extra flavor. You can also add a cinnamon stick for a fun garnish.
Tips & Tricks
Best Practices for No-Bake Cheesecakes
To make your no-bake eggnog cheesecake cups shine, follow these tips:
– Use Room Temperature Cream Cheese: This helps avoid lumps in your mixture.
– Chill Your Bowls: If you chill your mixing bowls before whipping cream, your cream will whip better.
– Gentle Folding: Always fold whipped cream into your cream cheese mixture gently. This keeps it light and fluffy.
Troubleshooting Common Issues
Sometimes, things don’t go as planned. Here’s how to fix common problems:
– Lumpy Cheesecake: If your mixture is lumpy, it’s likely the cream cheese was too cold. Always soften it to room temperature.
– Runny Cheesecake: If your mixture doesn’t set, it may not have chilled long enough. Ensure you refrigerate for at least four hours.
– Crust Falling Apart: If the crust crumbles, you may need more melted butter. It should stick together like wet sand.
Serving Suggestions and Pairing Ideas
Pairing makes every dessert better. Here are a few ideas to enhance your cheesecake cups:
– Garnish Generously: Top with whipped cream and a dusting of nutmeg or cinnamon for extra flavor.
– Add a Cinnamon Stick: This adds a fun touch and a subtle flavor boost.
– Serve with Coffee or Tea: The warm drink balances the cool, sweet cheesecake perfectly.
Variations
Different Flavor Profiles
You can change the flavor of your no-bake eggnog cheesecake cups. For a twist, try using pumpkin spice instead of nutmeg and cinnamon. This gives a warm, autumn taste perfect for fall. You can switch up the vanilla extract with almond extract for a nutty flavor. You could even try adding a splash of rum extract for an extra kick, staying true to classic eggnog vibes.
Dietary Modifications
If you need a dairy-free version, use vegan cream cheese and coconut cream instead of heavy cream. This keeps the texture creamy while being kinder to your tummy. You can also substitute graham cracker crumbs with gluten-free crumbs for a gluten-free treat. Just ensure that all your ingredients are labeled gluten-free for safety.
Add-ins and Toppings
Add-ins can make your cheesecake cups even more fun! Try folding in crushed ginger snaps for a spicy crunch. You can also add mini chocolate chips for a sweet surprise. For toppings, consider using crushed candy canes for a festive touch. Drizzle caramel sauce over the whipped cream for added richness. Don’t forget to garnish with cinnamon sticks for a charming look!
Storage Info
How to Store Leftovers
To store your no-bake eggnog cheesecake cups, cover them tightly with plastic wrap. You can also use an airtight container. This keeps them fresh and prevents odors from seeping in. Make sure to refrigerate them right after serving to maintain their creamy texture.
Freezing Instructions
If you want to freeze the cheesecake cups, do it before adding whipped cream. Wrap each cup tightly in plastic wrap, then in foil. This extra layer stops freezer burn. You can freeze them for up to three months. When ready to eat, let them thaw in the fridge overnight.
Shelf Life and Best Use
These cheesecake cups last for about 4 days in the fridge. For the best taste, enjoy them within the first two days. The flavors meld beautifully, giving you that rich, holiday taste. If stored properly, they will maintain their creamy texture and flavors.
FAQs
Can I use a different crust type?
Yes, you can use other crusts. You might try crushed cookies like Oreos or vanilla wafers. These options add unique flavors to your cheesecake cups. Just be sure to adjust the amount of butter based on your crust choice.
How long do the cheesecake cups need to chill?
You should chill the cheesecake cups for at least 4 hours. Chilling helps the mixture set properly. For the best flavor and texture, I recommend refrigerating them overnight. This gives the flavors time to meld together.
What can I use instead of heavy cream?
If you need a substitute for heavy cream, you can use whipped topping. You can also try coconut cream for a dairy-free option. Just make sure to whip it to soft peaks, like you would with heavy cream.
Can I make these ahead of time?
Absolutely! These cheesecake cups are great for making ahead. You can prepare them a day or two before serving. Just keep them covered in the fridge until you are ready to enjoy them.
How do I ensure a smooth cheesecake mixture?
To get a smooth cheesecake mixture, make sure your cream cheese is at room temperature. Mix it well with the powdered sugar until there are no lumps. Fold in the whipped cream gently to keep it light and airy. This step is key for a creamy texture.
This guide covered the key steps for making no-bake cheesecake. We explored ingredients, tips, and different variations to try. I shared how to prepare the crust and mix the filling. You learned how to layer, chill, and serve the cheesecake.
In closing, these easy steps and tips will help you create a delicious treat. Get creative with flavors and toppings to make it your own. Enjoy your cheesecake journey!
