Easy Apple Crisp Bars Delicious and Homemade Treat

WANT TO SAVE THIS RECIPE?

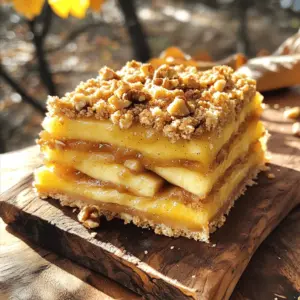
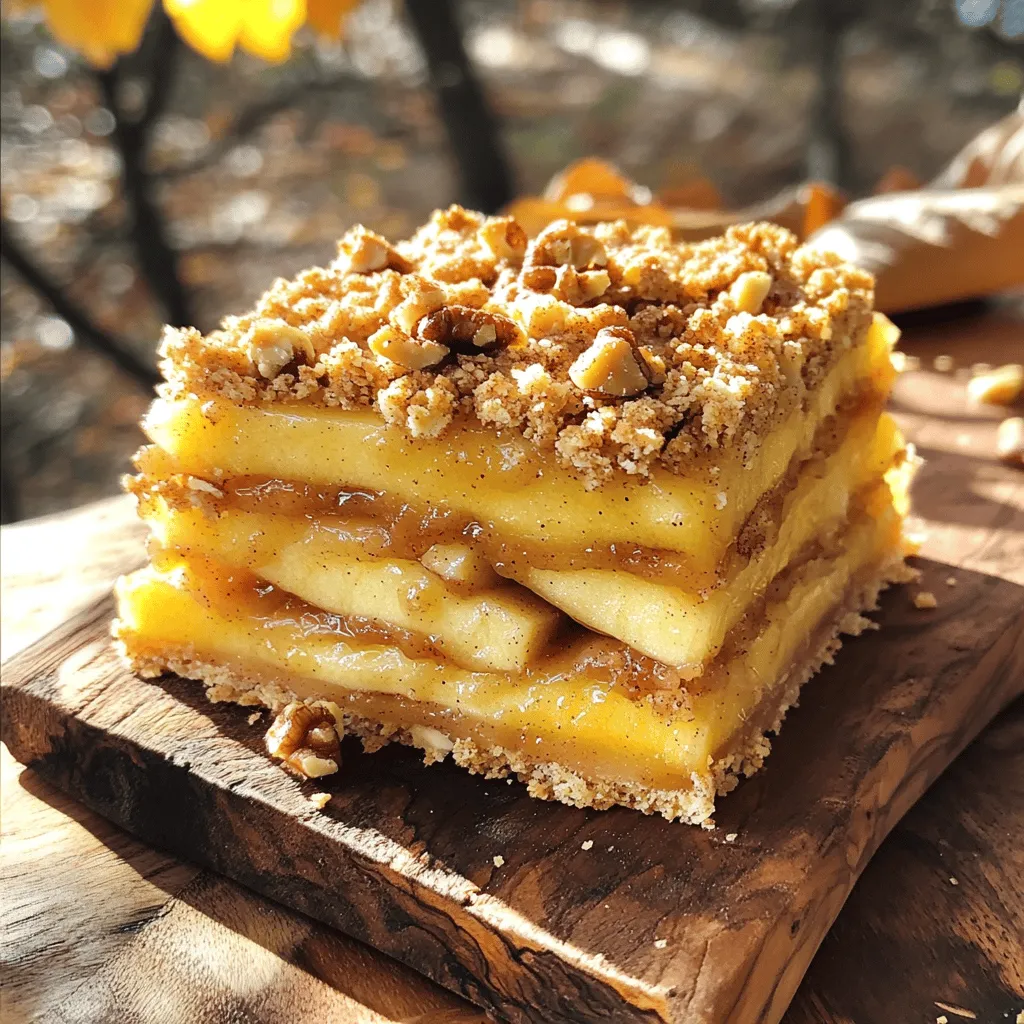
If you’re craving a warm, homemade treat, these Easy Apple Crisp Bars are just what you need. Imagine biting into a chewy oat crust, layered with sweet apples and a hint of spice. They’re simple to make and perfect for any occasion. Get ready to impress your family and friends with this delightful dessert that combines comfort and flavor. Let’s dive into the easy steps to create your new favorite treat!

Ingredients

Main Ingredients for Apple Crisp Bars

– 3 cups peeled and diced apples

– 1 tablespoon freshly squeezed lemon juice

– 1 teaspoon ground cinnamon

– ¼ teaspoon freshly grated nutmeg

Oat and Crust Ingredients

– 1 cup rolled oats (whole or gluten-free)

– ½ cup all-purpose flour (or gluten-free alternative)

– ½ cup packed brown sugar

– ½ cup unsalted butter, softened

– ¼ teaspoon sea salt

– Optional: 1 cup coarsely chopped walnuts or pecans

The apples are the star of this recipe. I love using Granny Smith or Honeycrisp apples. They strike a perfect balance between sweet and tart. The lemon juice adds brightness to the apples. It helps keep the apples fresh.

Cinnamon and nutmeg bring warmth and depth to the filling. These spices create a cozy flavor that makes the bars feel special.

For the crust, I combine oats, flour, and brown sugar. This mix creates a delicious base and a crunchy topping. If you want to add a bit of crunch, toss in some chopped walnuts or pecans. They add a nice texture.

Using unsalted butter is key. It lets you control the salt in the recipe. The sea salt enhances the sweetness of the bars.

By using gluten-free flour or oats, you can make this recipe accessible to everyone. This way, everyone can enjoy these tasty treats!

Step-by-Step Instructions

Preparing the Oven and Baking Pan

– Preheat the oven to 350°F (175°C).

– Line a 9×9 inch baking pan with parchment paper. Leave some paper hanging over the edges. This makes it easy to lift the bars out later.

Mixing the Apple Filling

– In a bowl, combine 3 cups of diced apples with 1 tablespoon of lemon juice.

– Add 1 teaspoon of ground cinnamon and ¼ teaspoon of freshly grated nutmeg.

– Toss the apples until they are evenly coated. Set this mixture aside for now.

Making the Oat Crust

– In another bowl, mix 1 cup of rolled oats, ½ cup of flour, and ½ cup of brown sugar.

– Add ½ cup of softened butter and ¼ teaspoon of sea salt.

– Blend these ingredients with your hands or a pastry cutter until the mixture looks crumbly.

– Set aside 1 cup of this oat mixture for the topping. Press the rest into the bottom of the lined pan to create a crust.

Assembling the Bars

– Pour the apple mixture evenly over the oat crust.

– Sprinkle the reserved oat topping over the apples. If you like, add some chopped walnuts or pecans for extra crunch.

Baking and Cooling

– Place the pan in your preheated oven. Bake for 30-35 minutes until the top is golden brown.

– Once done, let it cool in the pan for 10 minutes. After that, carefully lift the bars out using the parchment paper. Transfer them to a wire rack to cool completely before slicing.

Tips & Tricks

Selecting the Best Apples

When making apple crisp bars, choose apples that are crisp and flavorful. I recommend using Granny Smith or Honeycrisp apples. These apples give a great balance of tartness and sweetness. They hold their shape well when baked, which is key for a good texture.

Lemon juice is also important. It helps prevent the apples from browning and adds a nice zing to the flavor. Just one tablespoon mixed with your apples does wonders.

Customizing Your Apple Crisp Bars

Feel free to add your favorite spices to the filling. Ground ginger or allspice can enhance the flavor. You could also mix in other fruits, like sliced pears or berries, for added variety.

If you need gluten-free options, swap out regular flour for a gluten-free flour blend. You can use gluten-free oats to keep the recipe safe for those with gluten sensitivities.

Presentation Enhancements

For a delightful touch, serve the bars warm with a scoop of vanilla ice cream or a dollop of whipped cream on top. This contrast in temperature and texture is simply amazing.

To make your bars look fancy, dust them lightly with powdered sugar before serving. This gives a beautiful finish to your apple crisp bars, making them even more tempting.

Variations

Nut-Free Options

You can easily make these apple crisp bars nut-free. Just leave out the walnuts or pecans. You can also add seeds for texture. Sunflower seeds work great, or try pumpkin seeds for a fun twist.

Seasonal Fruit Variations

Feel free to switch up the fruit based on the season. You can use berries like blueberries or strawberries in spring and summer. For fall, consider adding sliced peaches or plums. Adjust your spices too! Use cardamom for a warm flavor in winter or lemon zest for brightness in summer.

Healthier Substitutions

Want a healthier version? Reduce the sugar by half. You can also use applesauce instead of butter. It keeps the bars moist while cutting down on fat. Just replace half of the butter with applesauce. This way, you can enjoy a delicious treat with less guilt!

Storage Info

How to Store Apple Crisp Bars

To keep your apple crisp bars fresh, follow these tips:

Cool Completely: Let the bars cool down fully before storing.

Use Airtight Containers: Store them in airtight containers to prevent drying out.

Layer with Parchment: If stacking, place parchment paper between layers to avoid sticking.

Keep in a Cool Place: Store in a cool, dry spot or the fridge for extra freshness.

Freezing for Later Use

Freezing is a great way to save apple crisp bars for later. Here are the steps to freeze:

1. Cool Bars First: Make sure the bars are completely cool.

2. Wrap Tightly: Wrap them in plastic wrap or aluminum foil.

3. Use Freezer Bags: Place the wrapped bars in freezer-safe bags.

4. Label and Date: Write the date on the bag so you remember when you froze them.

For thawing:

Thaw in the Fridge: The best way is to move them to the fridge for several hours or overnight.

Reheat for Warmth: If you want them warm, reheat in the oven at 350°F (175°C) for about 10 minutes.

These methods help maintain the flavor and texture of your delicious apple crisp bars!

FAQs

Can I make Apple Crisp Bars in advance?

Yes, you can make Apple Crisp Bars ahead of time. To do this, prepare the bars as instructed and let them cool completely. Once cooled, cut them into squares and store them in an airtight container. They will stay fresh for up to three days. You can also freeze the bars for up to three months. Just wrap them tightly in plastic wrap and place them in a freezer-safe bag. When you want to enjoy them, simply thaw in the fridge overnight.

How do I know when my bars are done baking?

To tell if your bars are done, look for a golden brown top. The apples should be soft but not mushy. You can also check by inserting a toothpick into the center. If it comes out clean or with a few crumbs, your bars are ready. The wonderful smell of baked apples and cinnamon will fill your kitchen, too!

Can I use other types of apples?

Absolutely! While Granny Smith and Honeycrisp are great choices, many apples work well in this recipe. Fuji, Gala, or Braeburn apples add sweetness and flavor. Mixing different apple types can create a more complex taste. Just make sure to peel and dice them before using.

What is the best way to cut and serve the bars?

To cut your bars neatly, let them cool completely on a wire rack. Use a sharp knife for clean slices. If you want to serve them warm, heat each piece in the microwave for a few seconds. Pair them with a scoop of vanilla ice cream or a dollop of whipped cream for a treat everyone will love! You can dust the top with powdered sugar for an extra touch.

You’ve learned how to create delicious apple crisp bars using simple ingredients and easy steps. By choosing the right apples and personalizing your mix, you can make a treat that suits your taste. Don’t forget to store leftovers properly or freeze them for later. Enjoy these bars on their own or with your favorite toppings. With these tips, you can impress friends and family. Bake a batch today and savor every bite. It’s a tasty way to enjoy apples!

- 3 cups peeled and diced apples - 1 tablespoon freshly squeezed lemon juice - 1 teaspoon ground cinnamon - ¼ teaspoon freshly grated nutmeg - 1 cup rolled oats (whole or gluten-free) - ½ cup all-purpose flour (or gluten-free alternative) - ½ cup packed brown sugar - ½ cup unsalted butter, softened - ¼ teaspoon sea salt - Optional: 1 cup coarsely chopped walnuts or pecans The apples are the star of this recipe. I love using Granny Smith or Honeycrisp apples. They strike a perfect balance between sweet and tart. The lemon juice adds brightness to the apples. It helps keep the apples fresh. Cinnamon and nutmeg bring warmth and depth to the filling. These spices create a cozy flavor that makes the bars feel special. For the crust, I combine oats, flour, and brown sugar. This mix creates a delicious base and a crunchy topping. If you want to add a bit of crunch, toss in some chopped walnuts or pecans. They add a nice texture. Using unsalted butter is key. It lets you control the salt in the recipe. The sea salt enhances the sweetness of the bars. By using gluten-free flour or oats, you can make this recipe accessible to everyone. This way, everyone can enjoy these tasty treats! - Preheat the oven to 350°F (175°C). - Line a 9x9 inch baking pan with parchment paper. Leave some paper hanging over the edges. This makes it easy to lift the bars out later. - In a bowl, combine 3 cups of diced apples with 1 tablespoon of lemon juice. - Add 1 teaspoon of ground cinnamon and ¼ teaspoon of freshly grated nutmeg. - Toss the apples until they are evenly coated. Set this mixture aside for now. - In another bowl, mix 1 cup of rolled oats, ½ cup of flour, and ½ cup of brown sugar. - Add ½ cup of softened butter and ¼ teaspoon of sea salt. - Blend these ingredients with your hands or a pastry cutter until the mixture looks crumbly. - Set aside 1 cup of this oat mixture for the topping. Press the rest into the bottom of the lined pan to create a crust. - Pour the apple mixture evenly over the oat crust. - Sprinkle the reserved oat topping over the apples. If you like, add some chopped walnuts or pecans for extra crunch. - Place the pan in your preheated oven. Bake for 30-35 minutes until the top is golden brown. - Once done, let it cool in the pan for 10 minutes. After that, carefully lift the bars out using the parchment paper. Transfer them to a wire rack to cool completely before slicing. When making apple crisp bars, choose apples that are crisp and flavorful. I recommend using Granny Smith or Honeycrisp apples. These apples give a great balance of tartness and sweetness. They hold their shape well when baked, which is key for a good texture. Lemon juice is also important. It helps prevent the apples from browning and adds a nice zing to the flavor. Just one tablespoon mixed with your apples does wonders. Feel free to add your favorite spices to the filling. Ground ginger or allspice can enhance the flavor. You could also mix in other fruits, like sliced pears or berries, for added variety. If you need gluten-free options, swap out regular flour for a gluten-free flour blend. You can use gluten-free oats to keep the recipe safe for those with gluten sensitivities. For a delightful touch, serve the bars warm with a scoop of vanilla ice cream or a dollop of whipped cream on top. This contrast in temperature and texture is simply amazing. To make your bars look fancy, dust them lightly with powdered sugar before serving. This gives a beautiful finish to your apple crisp bars, making them even more tempting. {{image_4}} You can easily make these apple crisp bars nut-free. Just leave out the walnuts or pecans. You can also add seeds for texture. Sunflower seeds work great, or try pumpkin seeds for a fun twist. Feel free to switch up the fruit based on the season. You can use berries like blueberries or strawberries in spring and summer. For fall, consider adding sliced peaches or plums. Adjust your spices too! Use cardamom for a warm flavor in winter or lemon zest for brightness in summer. Want a healthier version? Reduce the sugar by half. You can also use applesauce instead of butter. It keeps the bars moist while cutting down on fat. Just replace half of the butter with applesauce. This way, you can enjoy a delicious treat with less guilt! To keep your apple crisp bars fresh, follow these tips: - Cool Completely: Let the bars cool down fully before storing. - Use Airtight Containers: Store them in airtight containers to prevent drying out. - Layer with Parchment: If stacking, place parchment paper between layers to avoid sticking. - Keep in a Cool Place: Store in a cool, dry spot or the fridge for extra freshness. Freezing is a great way to save apple crisp bars for later. Here are the steps to freeze: 1. Cool Bars First: Make sure the bars are completely cool. 2. Wrap Tightly: Wrap them in plastic wrap or aluminum foil. 3. Use Freezer Bags: Place the wrapped bars in freezer-safe bags. 4. Label and Date: Write the date on the bag so you remember when you froze them. For thawing: - Thaw in the Fridge: The best way is to move them to the fridge for several hours or overnight. - Reheat for Warmth: If you want them warm, reheat in the oven at 350°F (175°C) for about 10 minutes. These methods help maintain the flavor and texture of your delicious apple crisp bars! Yes, you can make Apple Crisp Bars ahead of time. To do this, prepare the bars as instructed and let them cool completely. Once cooled, cut them into squares and store them in an airtight container. They will stay fresh for up to three days. You can also freeze the bars for up to three months. Just wrap them tightly in plastic wrap and place them in a freezer-safe bag. When you want to enjoy them, simply thaw in the fridge overnight. To tell if your bars are done, look for a golden brown top. The apples should be soft but not mushy. You can also check by inserting a toothpick into the center. If it comes out clean or with a few crumbs, your bars are ready. The wonderful smell of baked apples and cinnamon will fill your kitchen, too! Absolutely! While Granny Smith and Honeycrisp are great choices, many apples work well in this recipe. Fuji, Gala, or Braeburn apples add sweetness and flavor. Mixing different apple types can create a more complex taste. Just make sure to peel and dice them before using. To cut your bars neatly, let them cool completely on a wire rack. Use a sharp knife for clean slices. If you want to serve them warm, heat each piece in the microwave for a few seconds. Pair them with a scoop of vanilla ice cream or a dollop of whipped cream for a treat everyone will love! You can dust the top with powdered sugar for an extra touch. You've learned how to create delicious apple crisp bars using simple ingredients and easy steps. By choosing the right apples and personalizing your mix, you can make a treat that suits your taste. Don't forget to store leftovers properly or freeze them for later. Enjoy these bars on their own or with your favorite toppings. With these tips, you can impress friends and family. Bake a batch today and savor every bite. It’s a tasty way to enjoy apples!

Easy Apple Crisp Bars

Indulge in the deliciousness of Heavenly Apple Crisp Bars! With a perfect blend of tart apples, warm spices, and a crunchy oat topping, these bars are sure to please any crowd. Easy to make and perfect for gatherings or a cozy treat at home, you’ll love how quickly they come together. Click through to explore the full recipe and impress your family with this delightful dessert that combines comfort and flavor in every bite!

Ingredients
  

3 cups of peeled and diced apples (preferably Granny Smith or Honeycrisp for the perfect balance of tartness and sweetness)

1 tablespoon freshly squeezed lemon juice

1 teaspoon ground cinnamon

¼ teaspoon freshly grated nutmeg

1 cup rolled oats (use whole or gluten-free oats as desired)

½ cup all-purpose flour (or a gluten-free alternative)

½ cup packed brown sugar

½ cup unsalted butter, softened to room temperature

¼ teaspoon sea salt

1 cup coarsely chopped walnuts or pecans (optional for a delightful crunch)

Instructions
 

Begin by preheating your oven to 350°F (175°C). Line a 9x9 inch baking pan with parchment paper, leaving some overhanging on the sides to facilitate easy removal of the bars later.

    In a medium mixing bowl, combine the diced apples with the lemon juice, ground cinnamon, and freshly grated nutmeg. Gently toss the apples until they are evenly coated in the mixture, then set aside to allow the flavors to meld.

      In another bowl, mix the rolled oats, flour, brown sugar, softened butter, and sea salt. Using your hands or a pastry cutter, blend these ingredients together until the mixture resembles coarse crumbs.

        Take out about 1 cup of the oat mixture and set it aside for the topping. With the remaining mixture, firmly press it into the bottom of the lined baking pan to create an even and compact crust.

          Pour the prepared apple mixture evenly over the pressed crust, ensuring that the apples are spread out uniformly. Sprinkle the reserved oat mixture over the top of the apples. If desired, sprinkle the chopped nuts on top for a delightful crunch and added flavor.

            Bake in the preheated oven for 30-35 minutes, or until the top is beautifully golden brown and the apples have softened, filling your kitchen with an irresistible aroma.

              Once done baking, remove the pan from the oven and let it cool in the pan for at least 10 minutes. Once slightly cooled, carefully lift the bars out using the parchment paper and transfer them to a wire rack to cool completely before slicing into squares.

                - Prep Time: 15 minutes | Total Time: 50 minutes | Servings: 12 delightful bars

                  - Presentation Tips: For an extra touch, dust the cooled bars with a light sprinkle of powdered sugar and serve with a scoop of vanilla ice cream or a dollop of whipped cream on the side. Enjoy!

                    WANT TO SAVE THIS RECIPE?