Craving a dessert that’s easy to make and bursting with flavor? This Easy Pumpkin Pie Crisp will tick all your boxes! With a warm, spiced filling and a deliciously crunchy topping, it’s the perfect treat for any occasion. Whether you’re a novice baker or a seasoned pro, I promise you’ll love how simple it is to create this delightful dish. Let’s dive in and make some culinary magic happen!
Ingredients
Main ingredients required
To make a tasty pumpkin pie crisp, gather these main ingredients:
– 2 cups pumpkin puree
– 1 cup packed brown sugar
– 1 teaspoon vanilla extract
– 2 teaspoons pumpkin pie spice
– 1/4 teaspoon fine salt
– 1 cup rolled oats
– 1 cup all-purpose flour
– 1/2 cup unsalted butter, softened
These ingredients create a warm, sweet filling and a crunchy topping. The pumpkin puree gives the dish its rich flavor and smooth texture.
Optional ingredients for customization
You can add these optional ingredients to make your crisp even better:
– 1/2 cup chopped pecans
Adding pecans gives a nice crunch and a nutty flavor. Feel free to mix and match based on your taste.
Recommended serving suggestions
For serving, I suggest these delightful options:
– Whipped cream
– Vanilla ice cream
Both toppings add a creamy touch. They make the warm crisp even more enjoyable. For a fun twist, serve in individual ramekins. You can top each with a sprinkle of cinnamon or a drizzle of caramel sauce. This adds a special flair to your dessert!
Step-by-Step Instructions
Prepping the oven and baking dish
Start by preheating your oven to 350°F (175°C). A hot oven helps the crisp cook evenly. Next, greasing a 9×9-inch baking dish ensures the crisp does not stick. You can use butter or cooking spray for this.
Mixing the pumpkin filling
In a medium bowl, combine the pumpkin puree, brown sugar, vanilla, pumpkin pie spice, and salt. Use a whisk or spatula to mix these until the filling is smooth. This blend creates a rich, tasty layer for your crisp.
Preparing the crisp topping
In another bowl, mix the rolled oats, flour, softened butter, and chopped pecans (if you choose to use them). Use your fingers or a pastry cutter to combine these ingredients. You want a crumbly texture, like small pebbles. This topping gives the crisp its delightful crunch.
Assembling and baking the pumpkin pie crisp
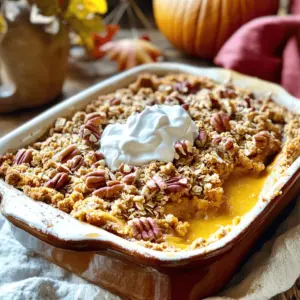
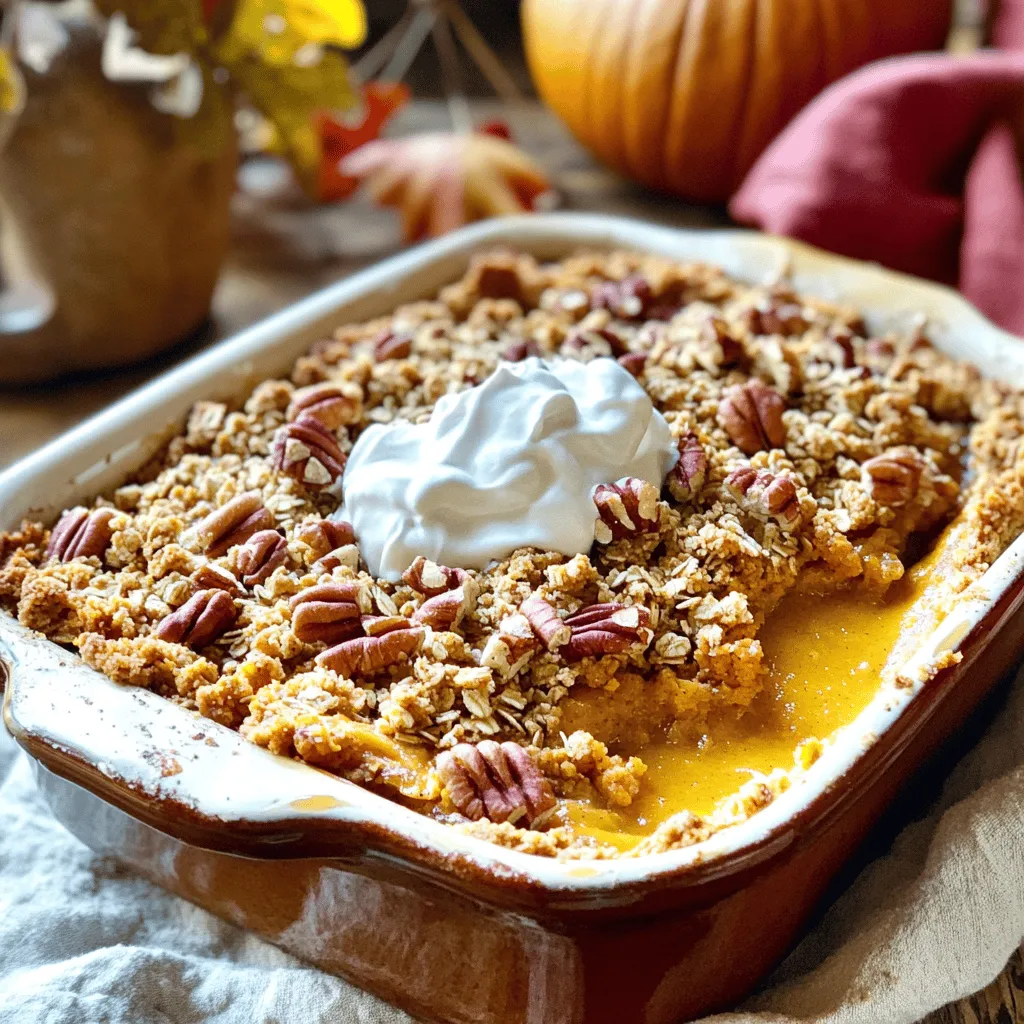
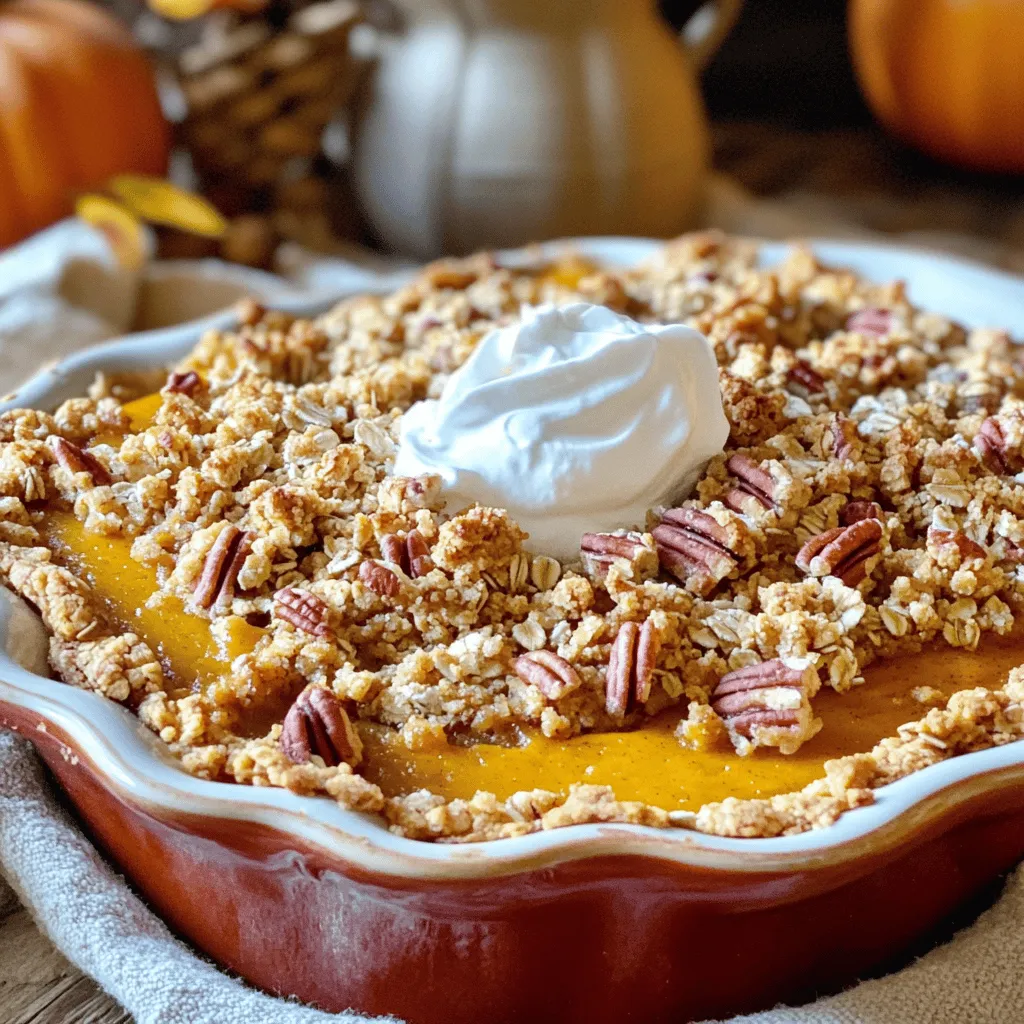
Pour the pumpkin mixture into the greased baking dish. Spread it evenly across the bottom. Next, sprinkle the oat mixture over the pumpkin layer. Make sure it covers the top well. Place the dish in the oven and bake for 30-35 minutes. Look for a golden brown topping and some bubbling around the edges.
Cooling and serving tips
Once baked, take the dish out and let it cool for about 10 minutes. This cooling time makes it easier to serve. Enjoy it warm, topped with whipped cream or vanilla ice cream for a sweet touch. For an extra flair, you can serve it in ramekins with a sprinkle of cinnamon and a drizzle of caramel.
Tips & Tricks
Common mistakes to avoid
When making pumpkin pie crisp, avoid overmixing the pumpkin filling. This can make it dense. Ensure you measure the ingredients correctly. Too much sugar can make it overly sweet. Don’t skip preheating your oven. A hot oven helps the crisp cook evenly. Also, let it cool before serving. This helps with slicing and serving.
How to achieve the perfect crisp topping
To get the best crisp topping, use cold butter. Cut it into the dry mix until it looks crumbly. If you want a crunchier texture, add chopped pecans. Make sure to spread the topping evenly over the pumpkin layer. This helps it bake uniformly. Bake until golden brown. This usually takes 30 to 35 minutes.
Enhancements for richer flavors
Enhance the flavor by adding a pinch of nutmeg. You can also use maple syrup instead of brown sugar for a unique taste. Experiment with extra spices like cinnamon or ginger. A splash of bourbon can also add depth. Lastly, serve it warm with whipped cream or ice cream. This adds creaminess and balances the flavors perfectly.
Variations
Gluten-free options
You can make this pumpkin pie crisp gluten-free with a few simple swaps. Use gluten-free rolled oats and a gluten-free flour blend instead of all-purpose flour. This way, you keep all the flavor but cater to those who need to avoid gluten. It’s easy and still tastes great.
Different nuts and toppings to try
The chopped pecans add a nice crunch, but feel free to experiment. Walnuts or almonds work well, too. For a sweeter touch, add chocolate chips or coconut flakes. You can even sprinkle some crushed graham crackers on top for that classic pie taste. Let your taste buds guide you!
Seasonal fruit additions
You can brighten this dish with fruit. Try adding sliced apples or pears to the pumpkin layer. For a tart twist, consider cranberries. These fruits pair wonderfully with pumpkin and add a pop of flavor. They make each bite even more exciting and seasonal.
Storage Info
Best methods for storing leftovers
To keep your pumpkin pie crisp fresh, store any leftovers in the fridge. Place it in an airtight container. This will stop it from drying out. You can also cover it tightly with plastic wrap or aluminum foil. It will stay good in the fridge for about 3-5 days.
How to reheat pumpkin pie crisp
When you want to enjoy your pumpkin pie crisp again, simply reheat it in the oven. Preheat your oven to 350°F (175°C). Place the crisp in an oven-safe dish. Heat it for about 15-20 minutes. This will warm it up nicely without making it soggy. If you prefer, you can also use the microwave. Heat it in short bursts of 30 seconds, checking often.
Freezing tips for longer storage
If you want to store your pumpkin pie crisp for a longer time, freezing is a great option. Cut it into portions and wrap each piece in plastic wrap. Then, place the wrapped pieces in a freezer bag. Make sure to remove as much air as possible. The crisp will stay fresh for up to 3 months in the freezer. When you’re ready to eat it, let it thaw in the fridge overnight before reheating.
FAQs
Can I use fresh pumpkin instead of canned?
Yes, you can use fresh pumpkin. First, cook the pumpkin until soft. Then, mash it well to get a smooth texture. This makes a tasty base for your crisp. Fresh pumpkin may have a brighter flavor, making your dish even better.
Is it possible to make this dish ahead of time?
Absolutely! You can prepare the crisp the night before. Mix the pumpkin filling and topping, then store them in separate containers. When you’re ready, layer them in the baking dish and bake. This saves time and makes serving easy.
What can I substitute for brown sugar?
If you don’t have brown sugar, you can use white sugar. To mimic the flavor, add a little molasses. Use 1 cup of white sugar and 1 tablespoon of molasses for the same sweetness. This keeps your dish tasty and sweet.
Can this recipe be made dairy-free?
Yes, you can make this recipe dairy-free. Use a dairy-free butter or coconut oil instead of unsalted butter. For the topping, choose a plant-based ice cream or skip it altogether. This way, everyone can enjoy a slice of pumpkin pie crisp!
This blog covered how to make a tasty pumpkin pie crisp. You learned about key ingredients and helpful tips. I shared simple steps, from mixing the filling to baking the dish. You also have ideas for variations and storage tips. Remember, practice makes perfect, so don’t hesitate to try new flavors. Enjoy your delicious pumpkin pie crisp with friends and family. Your kitchen will be the center of joy and warmth. Happy baking!