Get ready to impress your friends and family with Mini Apple Pies in the Shape of Pumpkins! These adorable treats not only taste amazing but also add a fun twist to your fall baking. I’ll guide you through each simple step—from crafting the perfect flaky crust to creating a delicious apple filling. Whether you’re hosting a party or just want to celebrate the season, these pumpkin-shaped pies are sure to delight! Let’s dive in!
Ingredients
Let’s get to the fun part—gathering all the goodies we need to make these mini apple pies! Here’s what you’ll need:
– 2 cups all-purpose flour
– ½ teaspoon salt
– 1 tablespoon granulated sugar
– 1 cup unsalted butter, cold and cubed
– 6-8 tablespoons ice water
– 3 large apples (Granny Smith or Honeycrisp), peeled and diced
– ⅓ cup packed brown sugar
– 1 teaspoon ground cinnamon
– ½ teaspoon ground nutmeg
– 1 tablespoon fresh lemon juice
– 1 tablespoon cornstarch
– 1 large egg (for egg wash)
– Orange food coloring (optional for coloring)
– Green fondant or marzipan for decorating leaves
You can find the full recipe at the end. Each ingredient plays a key role in making these pies not just tasty but also cute. The flour, salt, and sugar start our pie crust. The butter gives it that lovely flaky texture. The apples bring sweetness and tartness, which we balance with brown sugar and spices.
The egg wash gives the pies a golden shine, and the fondant adds a fun touch of color. So, grab these ingredients, and let’s get baking!
Step-by-Step Instructions
Making the Pie Crust
1. In a large bowl, mix 2 cups of all-purpose flour, ½ teaspoon of salt, and 1 tablespoon of granulated sugar.
2. Add 1 cup of cold, cubed unsalted butter. Use a pastry cutter or your fingers to blend until the mix looks like coarse crumbs.
3. Gradually add 6-8 tablespoons of ice water, one tablespoon at a time, until the dough just holds.
4. Shape the dough into a flat disk. Wrap it in plastic and chill for at least 30 minutes.
Preparing the Apple Filling
1. In a medium bowl, combine 3 large diced apples, ⅓ cup of brown sugar, 1 teaspoon of ground cinnamon, ½ teaspoon of ground nutmeg, 1 tablespoon of fresh lemon juice, and 1 tablespoon of cornstarch.
2. Toss to coat the apples well. Let this mixture sit for about 10 minutes. The flavors will blend during this time.
Shaping and Baking the Pies
1. Preheat your oven to 375°F (190°C).
2. Roll out the chilled dough on a lightly floured surface to about ¼-inch thick. Cut out circles, about 4 inches wide, to form the bases of your mini pies.
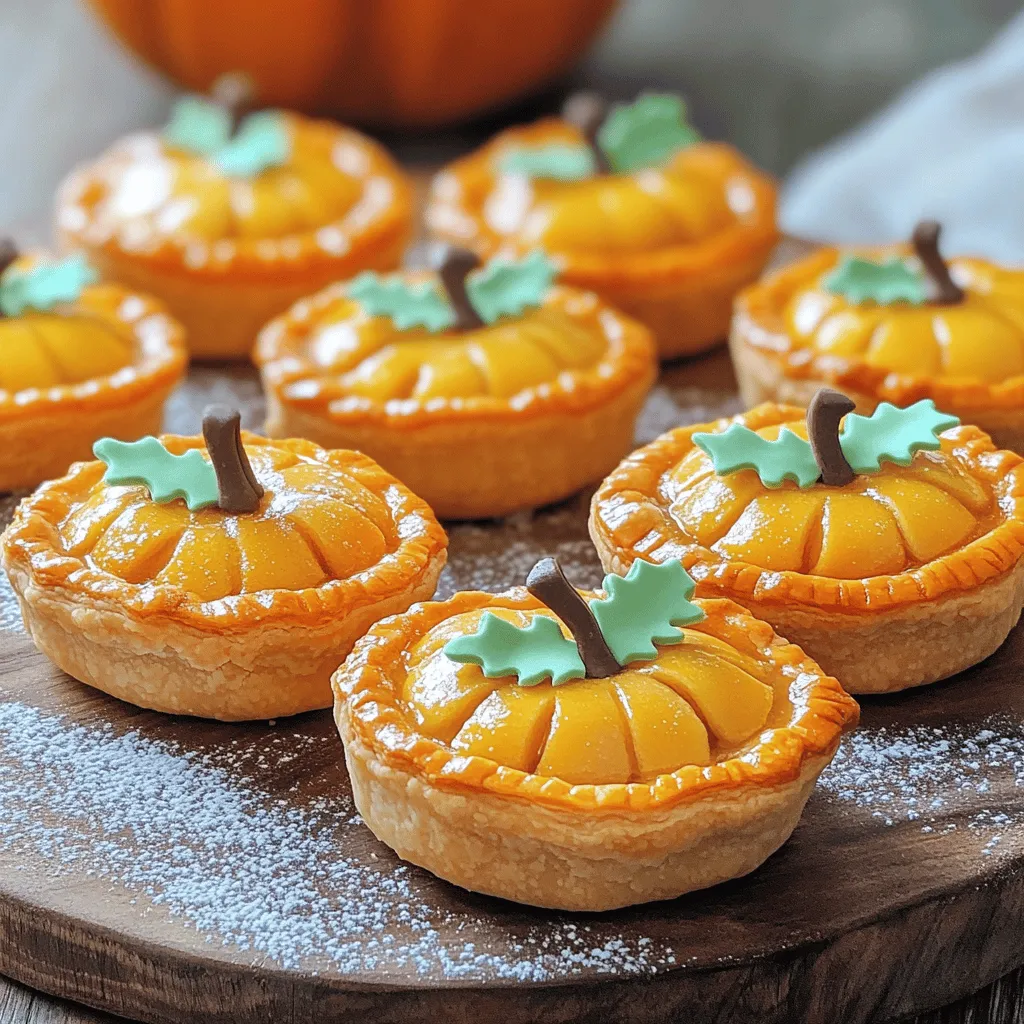
3. Take half of the dough circles and carve lines into each. This will give them a pumpkin-like texture.
4. On the plain dough circles, place a rounded tablespoon of apple filling in the center. Brush the edges with an egg wash.
5. Carefully lay the carved circles on top of the filling. Pinch the edges to seal the pies well.
6. For extra color, you can mix a few drops of orange food coloring into the egg wash and brush it over the tops of the pies.
7. Place the mini pies on a parchment-lined baking sheet. Bake for 20-25 minutes until golden brown and flaky.
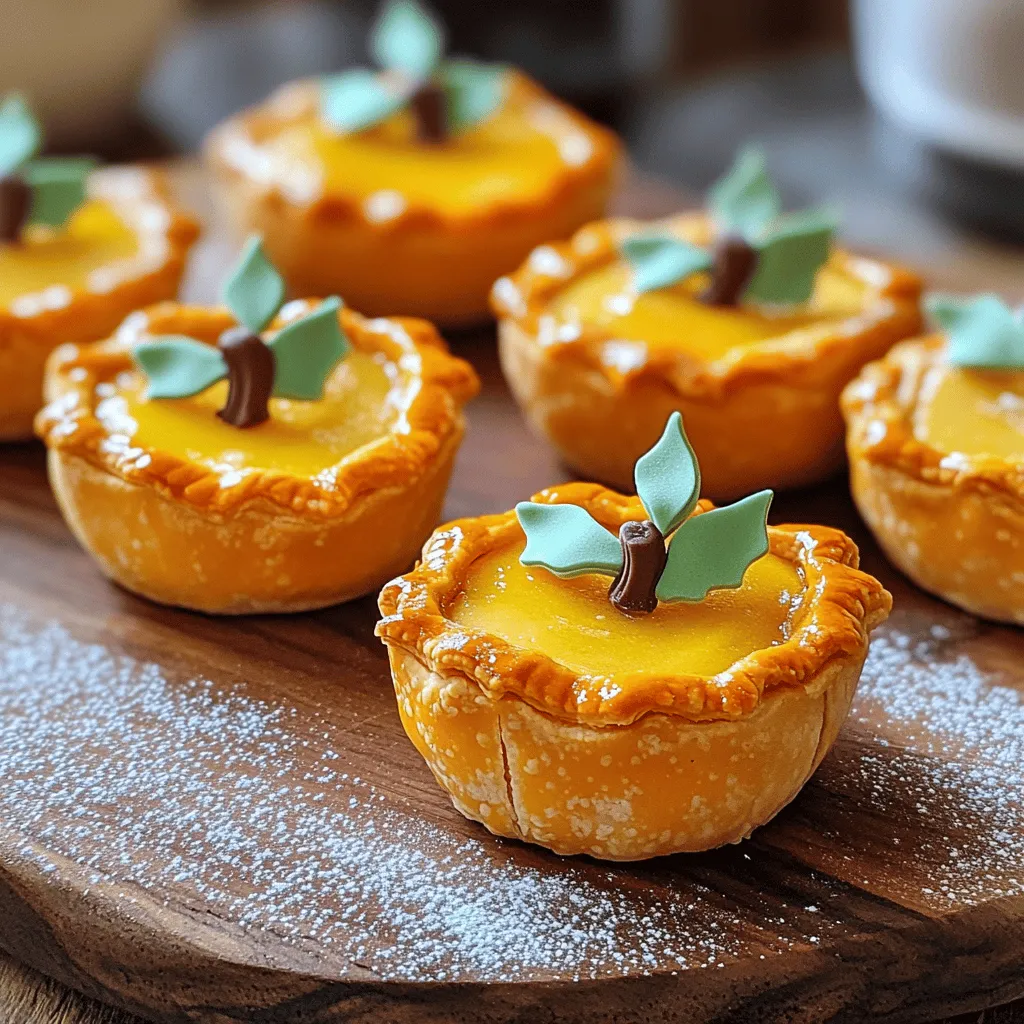
8. After baking, cool the pies on a wire rack. Decorate the tops with green fondant or marzipan leaves to look like pumpkin stems.
You can find the Full Recipe for a detailed guide. Enjoy creating these delightful treats!
Tips & Tricks
Perfecting the Crust
To make a great crust, you need the right texture. Your dough should feel smooth and cool. If it’s too sticky, add a bit more flour. If it’s too dry, add a little more ice water. When rolling the dough, use light pressure. This helps keep the crust flaky.
– Chill your tools: Use a cold rolling pin to help keep the dough firm.
– Roll from the center: Start in the middle and roll outward to keep it even.
– Dust with flour: Lightly flour your work surface to avoid sticking.
Flavor Enhancements
Choosing the right apple is crucial. Granny Smith apples are tart and hold their shape well. Honeycrisp apples add sweetness and crunch. Mixing both gives a lovely balance.
– For a sweeter filling, add more brown sugar.
– Spices make a big difference! Use cinnamon and nutmeg to enhance the flavor.
– Add a squeeze of lemon juice to brighten the taste.
Decorating the Pies
Make your mini pies pop with decorations! Green fondant or marzipan works great for leaves. You can also create stems from the same materials.
– Try using chocolate chips for cute eyes or a smiling face.
– Use colored icing for fun designs on top.
– If you want a simpler look, sprinkle some cinnamon sugar before baking for a sweet touch.
For the full recipe, check out the link included!
Variations
Different Filling Ideas
You can mix in other fruits for fun. Try using pears or berries. They add nice flavors. For spices, add ginger or allspice for warmth. If you love chocolate, use mini chocolate chips. Drizzle caramel on top for a rich taste. These changes keep the pies exciting and new!
Alternative Shapes for Other Occasions
Use cookie cutters to create fun shapes. You can make stars for a cozy night or hearts for Valentine’s Day. You can change the colors with food dye for each theme. During the holidays, add seasonal decorations. Use icing to create snowflakes or leaves. This makes each pie special for every occasion.
Gluten-Free and Vegan Options
For a gluten-free crust, swap all-purpose flour with a gluten-free blend. Make sure it has a good binding agent like xanthan gum. For a vegan crust, use coconut oil or vegan butter instead of regular butter. You can also use maple syrup or agave nectar for the filling. These simple swaps let everyone enjoy the pies.
For the full recipe, check the link provided in the article.
Storage Info
Best Practices for Storing Mini Pies
To keep your mini apple pies fresh, you can refrigerate or freeze them.
– Refrigerating: Place the pies in an airtight container. They will stay good for 3-4 days in the fridge.
– Freezing: For longer storage, freeze the pies. Wrap each pie in plastic wrap and then in foil. They can last up to 3 months.
To reheat, take them out of the fridge or freezer.
– From the fridge: Preheat the oven to 350°F (175°C). Place the pies on a baking sheet for about 10-15 minutes until warm.
– From the freezer: Bake them straight from the freezer. Heat for about 20-25 minutes.
Shelf Life
– At room temperature: Store your mini pies for up to 2 days. Keep them in a cool, dry place to avoid sogginess.
– Refrigerated storage: They will last longer in the fridge, keeping the crust crisp and the filling fresh.
FAQs
How do I make the crust flaky?
To make a flaky crust, keep your butter very cold. Use a pastry cutter to mix butter into the flour. You want small crumbs, not a paste. Add ice water slowly until it forms a dough. Chill the dough before rolling it out. This step helps create layers in your crust.
Can I use store-bought pie crust?
Yes, you can use store-bought pie crust. It saves time and still tastes good. Just make sure to roll it out to fit your mini pie shapes. Follow the same steps for filling and baking. This option is great for busy days.
What type of apples are best for mini apple pies?
I recommend using Granny Smith or Honeycrisp apples. They offer a nice mix of sweet and tart flavors. Their firm texture holds up well during baking. Feel free to mix different apple types for more depth in flavor.
Can I prepare the filling in advance?
Absolutely! You can make the apple filling a day ahead. Just store it in the fridge. Let it come to room temperature before using it in your pies. This way, the flavors have time to blend, giving you a more delicious filling.
How long do mini apple pies last after baking?
These mini apple pies last about 2-3 days at room temperature. If you keep them in the fridge, they can last up to a week. Just make sure to cover them well. For longer storage, stack them in a freezer-safe container and freeze.
Where to find the full recipe?
You can find the full recipe for Mini Apple Pies in the Shape of Pumpkins in the earlier sections of this article. Enjoy making these fun treats!
In this guide, we explored how to make mini apple pies from scratch. We covered key ingredients like apples, spices, and crust essentials. You learned step-by-step instructions and essential tips for perfecting your pies. We also shared creative variations and storage methods.
Mini apple pies are fun to make and share. Enjoy tweaking recipes to fit your taste. Remember, practice makes perfect. Happy baking!