![To make these No-Bake Pumpkin Cheesecake Balls, you need: - 1 cup cream cheese, softened to room temperature - 1 cup canned pumpkin puree - 1/2 cup powdered sugar - 1 teaspoon vanilla extract - 1 teaspoon ground cinnamon - 1/2 teaspoon ground nutmeg - 1/4 teaspoon ground ginger - 1 cup graham cracker crumbs - 1/3 cup chopped pecans (optional) - 1/2 cup white chocolate or dark chocolate chips You can add your own twist to these treats. Here are some ideas: - Use maple syrup instead of powdered sugar for a richer flavor. - Swap in almond flour for graham cracker crumbs for a nutty touch. - Try adding a pinch of salt for balance. - Use dark chocolate for a richer coating flavor. If you run out of an ingredient, here are some easy swaps: - Cream cheese can be replaced with mascarpone cheese for a creamier texture. - Canned pumpkin puree can be swapped with homemade pumpkin puree. - If you don’t have graham crackers, use crushed cookies or nuts as a base. - For a dairy-free option, use a plant-based cream cheese. These ingredients make your No-Bake Pumpkin Cheesecake Balls both simple and scrumptious. Each element adds to the flavor, so feel free to experiment a little! For the full recipe, check it out. Start by gathering your ingredients. You need cream cheese, pumpkin puree, and powdered sugar. Mixing these first gives you a smooth base. Use a large bowl and a hand mixer. Beat the cream cheese and pumpkin together until creamy. Make sure there are no lumps. Next, add powdered sugar, vanilla extract, and spices like cinnamon and nutmeg. Mix until fluffy and well combined. Adding spices brings warmth to the flavor. Finally, stir in graham cracker crumbs. This will thicken the mix and help shape your balls. If you like, add chopped pecans for crunch. Once the mixture is ready, it’s time to shape the balls. Use clean hands to scoop about a tablespoon of the mix. Roll it between your palms until it forms a smooth ball. This part is fun! Place each ball on a baking sheet lined with parchment paper. Keep rolling until you use all the mixture. This should give you 12 to 15 balls. After shaping, freeze them for about 30 minutes. Chilling makes the balls firm and easier to coat in chocolate. While the balls chill, melt your chocolate. You can use white or dark chocolate, depending on your taste. Place chocolate chips in a microwave-safe bowl. Heat in 30-second intervals, stirring in between. This ensures the chocolate melts evenly. After 30 minutes, take the cheesecake balls out of the freezer. Dip each ball into the melted chocolate, making sure to coat it fully. Let any extra chocolate drip off. Then place the coated balls back on the baking sheet. For a festive touch, sprinkle some graham cracker crumbs on top while the chocolate is still soft. Finally, chill the coated balls in the fridge for 15 minutes. This helps the chocolate set perfectly. Enjoy your delicious No-Bake Pumpkin Cheesecake Balls! For the full recipe, check [Full Recipe]. To make a smooth mixture, start with room-temperature cream cheese. Soft cream cheese blends easier with pumpkin puree. Use a hand mixer on medium speed to beat both together. Mix until there are no lumps. This ensures a creamy base for your cheesecake balls. Chilling is key for firmness. After rolling your mixture into balls, place them on a parchment-lined baking sheet. Freeze them for about 30 minutes. This makes them easier to coat in chocolate. If you skip this step, the balls might fall apart. To boost flavor, add spices like cinnamon and nutmeg. These spices bring warmth to your treats. For a pop of color, sprinkle extra graham crumbs on top of the chocolate coating. Drizzling melted chocolate over the balls adds elegance. This makes your pumpkin cheesecake balls fun and festive! You can find the full recipe [here]. {{image_4}} You can get creative with the coatings for your cheesecake balls. While I love using white or dark chocolate, you can try other options. Here are some ideas: - Chocolate Sprinkles: Roll the balls in colorful sprinkles for a fun look. - Crushed Nuts: Use walnuts or almonds for a crunchy texture. - Cocoa Powder: Dust the balls lightly for a rich chocolate flavor. - Coconut Flakes: Roll in unsweetened coconut for a tropical twist. You can add different flavors to make your cheesecake balls unique. Here are some options: - Maple Syrup: Swap some powdered sugar for maple syrup for a sweet twist. - Orange Zest: Add a bit of zest for a fresh, fruity flavor. - Chocolate Chips: Mix in mini chocolate chips for added sweetness. - Spices: Experiment with allspice or clove for a warmer taste. Customizing for dietary needs is easy with these adaptations: - Dairy-Free: Use vegan cream cheese and dairy-free chocolate for a dairy-free option. - Gluten-Free: Choose gluten-free graham crackers to keep this treat safe for all. - Nut-Free: Skip the nuts or use seeds like sunflower for a nut-free version. - Low Sugar: Use a sugar substitute like stevia to cut down on sugar content. These variations make the no-bake pumpkin cheesecake balls flexible and fun. You can mix and match to suit your taste or dietary needs. Enjoy making them your own! For the full recipe, check out the details above. To store leftover No-Bake Pumpkin Cheesecake Balls, place them in an airtight container. Layer them with parchment paper to avoid sticking. Keep the container in the fridge. They stay fresh and tasty for a few days. Enjoy them cold for a refreshing treat. You can freeze these cheesecake balls for longer storage. First, place them on a baking sheet in a single layer. Freeze them for about an hour until firm. Then, transfer the frozen balls into a freezer-safe bag or container. Label it with the date. They can last up to three months in the freezer. When ready to eat, thaw them in the fridge overnight. These pumpkin cheesecake balls are best enjoyed within a week when stored properly in the fridge. The flavors get better over time, but they may lose texture if left too long. For the best taste, enjoy them fresh. Avoid leaving them out at room temperature for too long to keep them safe and delicious. No-Bake Pumpkin Cheesecake Balls stay fresh for 3 to 5 days in the fridge. Store them in an airtight container. If you want to keep them longer, you can freeze them. They can last up to 3 months in the freezer. Just let them thaw in the fridge before serving. Yes, you can use fresh pumpkin. Just make sure to cook and puree it first. Drain any excess water to avoid a soggy mix. Canned pumpkin puree is easier, but fresh can add a nice flavor. It all depends on what you have on hand! These treat balls are perfect for parties or fall gatherings. You can serve them on a nice platter. Drizzle some melted chocolate or caramel sauce over them for a fun touch. Adding a sprinkle of cinnamon or graham cracker crumbs makes them look festive. You can also pair them with coffee or tea for a cozy treat. For the full recipe, check out the section above! In this post, we explored how to make no-bake pumpkin cheesecake balls. We covered ingredients, mixing, forming, and coating tips. You learned variations and storage methods to keep your treats fresh. Remember, you can adjust flavors and coatings to fit your taste. With these easy steps, you can create fun and tasty treats for any occasion. Enjoy making these delightful bites!](https://roastedflavors.com/wp-content/uploads/2025/07/c951cbdd-d9e8-4d3b-bc45-384edb7690cd.webp)
Fall is here, and it’s time for a tasty treat! No-bake pumpkin cheesecake balls are easy to make and packed with flavor. In this post, I’ll show you how to whip up these delightful bites that are perfect for gatherings or snacking at home. You’ll love how simple ingredients turn into a hit dessert. Let’s dive into the sweet world of pumpkin cheesecake!
Ingredients
List of Required Ingredients
To make these No-Bake Pumpkin Cheesecake Balls, you need:
– 1 cup cream cheese, softened to room temperature
– 1 cup canned pumpkin puree
– 1/2 cup powdered sugar
– 1 teaspoon vanilla extract
– 1 teaspoon ground cinnamon
– 1/2 teaspoon ground nutmeg
– 1/4 teaspoon ground ginger
– 1 cup graham cracker crumbs
– 1/3 cup chopped pecans (optional)
– 1/2 cup white chocolate or dark chocolate chips
Optional Ingredients for Customization
You can add your own twist to these treats. Here are some ideas:
– Use maple syrup instead of powdered sugar for a richer flavor.
– Swap in almond flour for graham cracker crumbs for a nutty touch.
– Try adding a pinch of salt for balance.
– Use dark chocolate for a richer coating flavor.
Common Substitutes
If you run out of an ingredient, here are some easy swaps:
– Cream cheese can be replaced with mascarpone cheese for a creamier texture.
– Canned pumpkin puree can be swapped with homemade pumpkin puree.
– If you don’t have graham crackers, use crushed cookies or nuts as a base.
– For a dairy-free option, use a plant-based cream cheese.
These ingredients make your No-Bake Pumpkin Cheesecake Balls both simple and scrumptious. Each element adds to the flavor, so feel free to experiment a little! For the full recipe, check it out.
Step-by-Step Instructions
Preparation and Mixing Tips
Start by gathering your ingredients. You need cream cheese, pumpkin puree, and powdered sugar. Mixing these first gives you a smooth base. Use a large bowl and a hand mixer. Beat the cream cheese and pumpkin together until creamy. Make sure there are no lumps.
Next, add powdered sugar, vanilla extract, and spices like cinnamon and nutmeg. Mix until fluffy and well combined. Adding spices brings warmth to the flavor. Finally, stir in graham cracker crumbs. This will thicken the mix and help shape your balls. If you like, add chopped pecans for crunch.
Forming the Cheesecake Balls
Once the mixture is ready, it’s time to shape the balls. Use clean hands to scoop about a tablespoon of the mix. Roll it between your palms until it forms a smooth ball. This part is fun! Place each ball on a baking sheet lined with parchment paper.
Keep rolling until you use all the mixture. This should give you 12 to 15 balls. After shaping, freeze them for about 30 minutes. Chilling makes the balls firm and easier to coat in chocolate.
Coating Tips for Chocolate
While the balls chill, melt your chocolate. You can use white or dark chocolate, depending on your taste. Place chocolate chips in a microwave-safe bowl. Heat in 30-second intervals, stirring in between. This ensures the chocolate melts evenly.
After 30 minutes, take the cheesecake balls out of the freezer. Dip each ball into the melted chocolate, making sure to coat it fully. Let any extra chocolate drip off. Then place the coated balls back on the baking sheet.
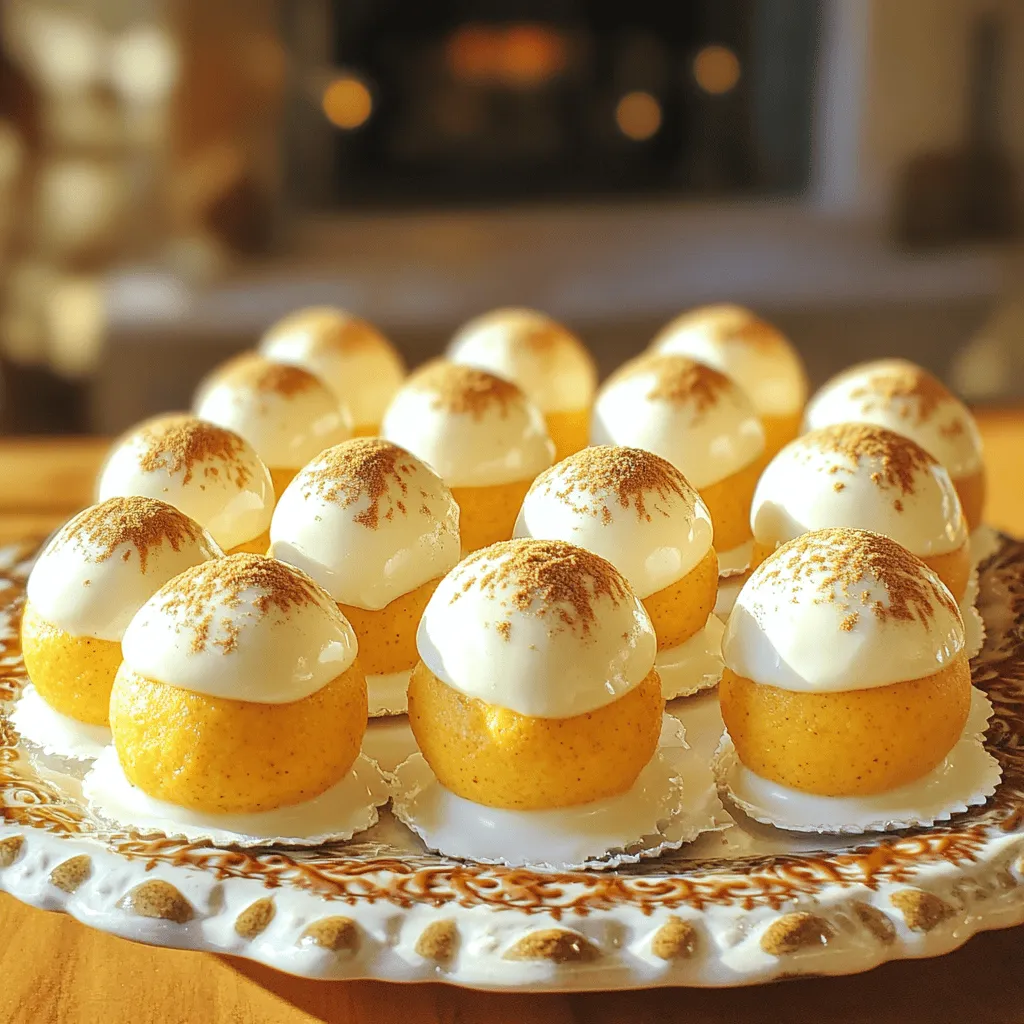
For a festive touch, sprinkle some graham cracker crumbs on top while the chocolate is still soft. Finally, chill the coated balls in the fridge for 15 minutes. This helps the chocolate set perfectly. Enjoy your delicious No-Bake Pumpkin Cheesecake Balls! For the full recipe, check [Full Recipe].
Tips & Tricks
Best Practices for a Smooth Mixture
To make a smooth mixture, start with room-temperature cream cheese. Soft cream cheese blends easier with pumpkin puree. Use a hand mixer on medium speed to beat both together. Mix until there are no lumps. This ensures a creamy base for your cheesecake balls.
Chilling Techniques for Firmness
Chilling is key for firmness. After rolling your mixture into balls, place them on a parchment-lined baking sheet. Freeze them for about 30 minutes. This makes them easier to coat in chocolate. If you skip this step, the balls might fall apart.
Enhancing Flavor and Presentation
To boost flavor, add spices like cinnamon and nutmeg. These spices bring warmth to your treats. For a pop of color, sprinkle extra graham crumbs on top of the chocolate coating. Drizzling melted chocolate over the balls adds elegance. This makes your pumpkin cheesecake balls fun and festive! You can find the full recipe [here].
Variations
Alternative Coatings
You can get creative with the coatings for your cheesecake balls. While I love using white or dark chocolate, you can try other options. Here are some ideas:
– Chocolate Sprinkles: Roll the balls in colorful sprinkles for a fun look.
– Crushed Nuts: Use walnuts or almonds for a crunchy texture.
– Cocoa Powder: Dust the balls lightly for a rich chocolate flavor.
– Coconut Flakes: Roll in unsweetened coconut for a tropical twist.
Flavor Enhancements
You can add different flavors to make your cheesecake balls unique. Here are some options:
– Maple Syrup: Swap some powdered sugar for maple syrup for a sweet twist.
– Orange Zest: Add a bit of zest for a fresh, fruity flavor.
– Chocolate Chips: Mix in mini chocolate chips for added sweetness.
– Spices: Experiment with allspice or clove for a warmer taste.
Dietary Adaptations
Customizing for dietary needs is easy with these adaptations:
– Dairy-Free: Use vegan cream cheese and dairy-free chocolate for a dairy-free option.
– Gluten-Free: Choose gluten-free graham crackers to keep this treat safe for all.
– Nut-Free: Skip the nuts or use seeds like sunflower for a nut-free version.
– Low Sugar: Use a sugar substitute like stevia to cut down on sugar content.
These variations make the no-bake pumpkin cheesecake balls flexible and fun. You can mix and match to suit your taste or dietary needs. Enjoy making them your own! For the full recipe, check out the details above.
Storage Info
Storing Leftovers
To store leftover No-Bake Pumpkin Cheesecake Balls, place them in an airtight container. Layer them with parchment paper to avoid sticking. Keep the container in the fridge. They stay fresh and tasty for a few days. Enjoy them cold for a refreshing treat.
Freezing Instructions
You can freeze these cheesecake balls for longer storage. First, place them on a baking sheet in a single layer. Freeze them for about an hour until firm. Then, transfer the frozen balls into a freezer-safe bag or container. Label it with the date. They can last up to three months in the freezer. When ready to eat, thaw them in the fridge overnight.
Shelf Life and Best Practices
These pumpkin cheesecake balls are best enjoyed within a week when stored properly in the fridge. The flavors get better over time, but they may lose texture if left too long. For the best taste, enjoy them fresh. Avoid leaving them out at room temperature for too long to keep them safe and delicious.
FAQs
How long do No-Bake Pumpkin Cheesecake Balls last?
No-Bake Pumpkin Cheesecake Balls stay fresh for 3 to 5 days in the fridge. Store them in an airtight container. If you want to keep them longer, you can freeze them. They can last up to 3 months in the freezer. Just let them thaw in the fridge before serving.
Can I use fresh pumpkin instead of canned?
Yes, you can use fresh pumpkin. Just make sure to cook and puree it first. Drain any excess water to avoid a soggy mix. Canned pumpkin puree is easier, but fresh can add a nice flavor. It all depends on what you have on hand!
What are some serving suggestions for these dessert balls?
These treat balls are perfect for parties or fall gatherings. You can serve them on a nice platter. Drizzle some melted chocolate or caramel sauce over them for a fun touch. Adding a sprinkle of cinnamon or graham cracker crumbs makes them look festive. You can also pair them with coffee or tea for a cozy treat. For the full recipe, check out the section above!
In this post, we explored how to make no-bake pumpkin cheesecake balls. We covered ingredients, mixing, forming, and coating tips. You learned variations and storage methods to keep your treats fresh.
Remember, you can adjust flavors and coatings to fit your taste. With these easy steps, you can create fun and tasty treats for any occasion. Enjoy making these delightful bites!
![To make these No-Bake Pumpkin Cheesecake Balls, you need: - 1 cup cream cheese, softened to room temperature - 1 cup canned pumpkin puree - 1/2 cup powdered sugar - 1 teaspoon vanilla extract - 1 teaspoon ground cinnamon - 1/2 teaspoon ground nutmeg - 1/4 teaspoon ground ginger - 1 cup graham cracker crumbs - 1/3 cup chopped pecans (optional) - 1/2 cup white chocolate or dark chocolate chips You can add your own twist to these treats. Here are some ideas: - Use maple syrup instead of powdered sugar for a richer flavor. - Swap in almond flour for graham cracker crumbs for a nutty touch. - Try adding a pinch of salt for balance. - Use dark chocolate for a richer coating flavor. If you run out of an ingredient, here are some easy swaps: - Cream cheese can be replaced with mascarpone cheese for a creamier texture. - Canned pumpkin puree can be swapped with homemade pumpkin puree. - If you don’t have graham crackers, use crushed cookies or nuts as a base. - For a dairy-free option, use a plant-based cream cheese. These ingredients make your No-Bake Pumpkin Cheesecake Balls both simple and scrumptious. Each element adds to the flavor, so feel free to experiment a little! For the full recipe, check it out. Start by gathering your ingredients. You need cream cheese, pumpkin puree, and powdered sugar. Mixing these first gives you a smooth base. Use a large bowl and a hand mixer. Beat the cream cheese and pumpkin together until creamy. Make sure there are no lumps. Next, add powdered sugar, vanilla extract, and spices like cinnamon and nutmeg. Mix until fluffy and well combined. Adding spices brings warmth to the flavor. Finally, stir in graham cracker crumbs. This will thicken the mix and help shape your balls. If you like, add chopped pecans for crunch. Once the mixture is ready, it’s time to shape the balls. Use clean hands to scoop about a tablespoon of the mix. Roll it between your palms until it forms a smooth ball. This part is fun! Place each ball on a baking sheet lined with parchment paper. Keep rolling until you use all the mixture. This should give you 12 to 15 balls. After shaping, freeze them for about 30 minutes. Chilling makes the balls firm and easier to coat in chocolate. While the balls chill, melt your chocolate. You can use white or dark chocolate, depending on your taste. Place chocolate chips in a microwave-safe bowl. Heat in 30-second intervals, stirring in between. This ensures the chocolate melts evenly. After 30 minutes, take the cheesecake balls out of the freezer. Dip each ball into the melted chocolate, making sure to coat it fully. Let any extra chocolate drip off. Then place the coated balls back on the baking sheet. For a festive touch, sprinkle some graham cracker crumbs on top while the chocolate is still soft. Finally, chill the coated balls in the fridge for 15 minutes. This helps the chocolate set perfectly. Enjoy your delicious No-Bake Pumpkin Cheesecake Balls! For the full recipe, check [Full Recipe]. To make a smooth mixture, start with room-temperature cream cheese. Soft cream cheese blends easier with pumpkin puree. Use a hand mixer on medium speed to beat both together. Mix until there are no lumps. This ensures a creamy base for your cheesecake balls. Chilling is key for firmness. After rolling your mixture into balls, place them on a parchment-lined baking sheet. Freeze them for about 30 minutes. This makes them easier to coat in chocolate. If you skip this step, the balls might fall apart. To boost flavor, add spices like cinnamon and nutmeg. These spices bring warmth to your treats. For a pop of color, sprinkle extra graham crumbs on top of the chocolate coating. Drizzling melted chocolate over the balls adds elegance. This makes your pumpkin cheesecake balls fun and festive! You can find the full recipe [here]. {{image_4}} You can get creative with the coatings for your cheesecake balls. While I love using white or dark chocolate, you can try other options. Here are some ideas: - Chocolate Sprinkles: Roll the balls in colorful sprinkles for a fun look. - Crushed Nuts: Use walnuts or almonds for a crunchy texture. - Cocoa Powder: Dust the balls lightly for a rich chocolate flavor. - Coconut Flakes: Roll in unsweetened coconut for a tropical twist. You can add different flavors to make your cheesecake balls unique. Here are some options: - Maple Syrup: Swap some powdered sugar for maple syrup for a sweet twist. - Orange Zest: Add a bit of zest for a fresh, fruity flavor. - Chocolate Chips: Mix in mini chocolate chips for added sweetness. - Spices: Experiment with allspice or clove for a warmer taste. Customizing for dietary needs is easy with these adaptations: - Dairy-Free: Use vegan cream cheese and dairy-free chocolate for a dairy-free option. - Gluten-Free: Choose gluten-free graham crackers to keep this treat safe for all. - Nut-Free: Skip the nuts or use seeds like sunflower for a nut-free version. - Low Sugar: Use a sugar substitute like stevia to cut down on sugar content. These variations make the no-bake pumpkin cheesecake balls flexible and fun. You can mix and match to suit your taste or dietary needs. Enjoy making them your own! For the full recipe, check out the details above. To store leftover No-Bake Pumpkin Cheesecake Balls, place them in an airtight container. Layer them with parchment paper to avoid sticking. Keep the container in the fridge. They stay fresh and tasty for a few days. Enjoy them cold for a refreshing treat. You can freeze these cheesecake balls for longer storage. First, place them on a baking sheet in a single layer. Freeze them for about an hour until firm. Then, transfer the frozen balls into a freezer-safe bag or container. Label it with the date. They can last up to three months in the freezer. When ready to eat, thaw them in the fridge overnight. These pumpkin cheesecake balls are best enjoyed within a week when stored properly in the fridge. The flavors get better over time, but they may lose texture if left too long. For the best taste, enjoy them fresh. Avoid leaving them out at room temperature for too long to keep them safe and delicious. No-Bake Pumpkin Cheesecake Balls stay fresh for 3 to 5 days in the fridge. Store them in an airtight container. If you want to keep them longer, you can freeze them. They can last up to 3 months in the freezer. Just let them thaw in the fridge before serving. Yes, you can use fresh pumpkin. Just make sure to cook and puree it first. Drain any excess water to avoid a soggy mix. Canned pumpkin puree is easier, but fresh can add a nice flavor. It all depends on what you have on hand! These treat balls are perfect for parties or fall gatherings. You can serve them on a nice platter. Drizzle some melted chocolate or caramel sauce over them for a fun touch. Adding a sprinkle of cinnamon or graham cracker crumbs makes them look festive. You can also pair them with coffee or tea for a cozy treat. For the full recipe, check out the section above! In this post, we explored how to make no-bake pumpkin cheesecake balls. We covered ingredients, mixing, forming, and coating tips. You learned variations and storage methods to keep your treats fresh. Remember, you can adjust flavors and coatings to fit your taste. With these easy steps, you can create fun and tasty treats for any occasion. Enjoy making these delightful bites!](https://roastedflavors.com/wp-content/uploads/2025/07/c951cbdd-d9e8-4d3b-bc45-384edb7690cd-300x300.webp)