Are you ready to create a delicious treat that warms the heart? In this guide, I’ll share my best traditional apple butter recipe, perfect for spreading on toast or giving as gifts. You’ll discover the best apple varieties, how to avoid common mistakes, and tips for adding your unique twist! Let’s dive into making sweet, spiced apple butter that you and your loved ones will cherish.
Ingredients
Main Ingredients List
– Apples: Use firm apples. Peel, core, and chop them into small pieces. This helps them cook well. I suggest using Granny Smith or Honeycrisp because they add great flavor.
– Sugar: Granulated sugar works best. You can use alternatives like honey or maple syrup, but they may change the taste. Granulated sugar gives a nice sweetness without altering the flavor much.
– Spices: Essential spices like cinnamon, nutmeg, allspice, and cloves give that warm taste. Each spice adds its special touch to the apple butter. You can adjust the amounts to fit your taste.
– Additional components: Lemon juice adds brightness. It helps balance the sweetness and keeps the color fresh. Vanilla extract gives a lovely scent and flavor.
Suggested Apple Varieties
– Best choices for flavor and texture: Granny Smith offers tartness, while Honeycrisp brings sweetness. A mix of these apples gives a great taste and smooth texture.
– Seasonal availability of apples: Apples are usually best in the fall. You can find fresh, local varieties at farmers’ markets during this season.
Measurement Tips
– Importance of accuracy in measurements: Accurate measurements matter a lot. They ensure your apple butter has the right taste and texture. Too much sugar can make it overly sweet, while too little may not thicken well.
– Recommended tools for measuring ingredients: Use dry measuring cups for solids like sugar and a liquid measuring cup for water. A kitchen scale can also help if you want precise measurements. This way, you get the best results every time.
You can find the full recipe to create this heartwarming apple butter in the earlier part of the article.
Step-by-Step Instructions
Preparation Steps
To make apple butter, you start with the apples. First, peel the apples. I find a good peeler works best. After peeling, core the apples. You want to remove the seeds and the tough center. Then, chop the apples into small pieces. Small pieces cook more evenly and blend better.
Next, you mix the initial ingredients. In a large pot, combine your chopped apples with water and lemon juice. The lemon juice adds a nice tang. Then, sprinkle in the granulated sugar. Stir well, so the sugar coats the apples evenly. This mix helps release the apples’ natural juices.
Cooking Process
Now, it’s time to cook the apples. Place the pot over medium heat. You want to bring the mixture to a gentle simmer. As the apples cook, stir them often. This helps prevent sticking to the pot. The goal is to soften the apples well.
After about 15-20 minutes, check the apples. When they are soft, it’s time to puree. You can use an immersion blender to blend the mixture until smooth. If you want some chunks, blend only part of it. A regular blender works too, but be careful with hot mixtures.
Finalizing the Apple Butter
Next, let’s finalize the apple butter. Return the smooth mixture to the heat. Stir in the spices: cinnamon, nutmeg, allspice, and cloves. Don’t forget the vanilla! This step adds a lovely aroma to your kitchen.
Now, lower the heat to a gentle simmer. Cook the apple butter uncovered for 1.5 to 2 hours. Stir it occasionally. This slow cooking thickens the mixture and deepens the flavors.
To check the thickness, place a spoonful on a plate. Let it sit for a moment. If it holds its shape, it’s ready. If not, keep simmering and check it again.
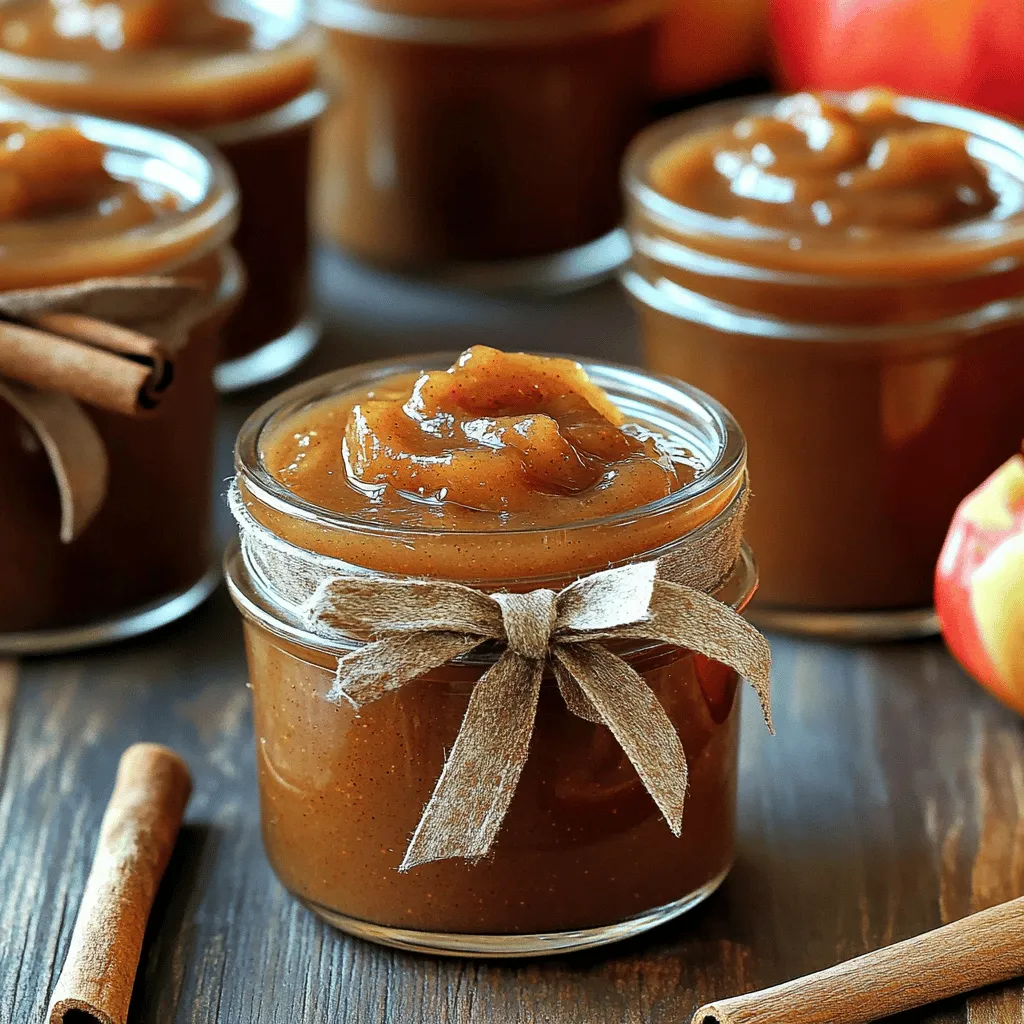
Once it’s thick enough, cool it slightly. Pour the warm apple butter into clean, sterilized jars. Seal them tightly and store in the fridge. Your homemade apple butter will last for weeks!
Tips & Tricks
Enhancing Flavor
To make your apple butter taste amazing, you can adjust spice amounts. If you love cinnamon, add a bit more for a stronger flavor. For nutmeg and cloves, a pinch can boost the warmth. Remember, always taste as you go!
For a smoother texture, use an immersion blender. This tool makes it easy to puree your apple mixture right in the pot. If you want some chunks, blend just half or use a regular blender in batches.
Common Mistakes to Avoid
One big mistake is overcooking or undercooking your apple butter. Overcooking can lead to a burnt taste, while undercooking leaves it too runny. Keep an eye on the clock! Aim for 1.5 to 2 hours of simmering.
Also, watch out for burning at the bottom. Stir often to prevent this. If you notice any sticking, lower the heat and add a bit more water.
Tools for Success
Using the right tools can make your cooking easier. A heavy-bottomed pot helps distribute heat evenly. This helps prevent burning and keeps your apple butter cooking smoothly.
An immersion blender is a must-have for pureeing. It saves time and makes cleanup simple. Don’t forget to sterilize your storage jars. This keeps your apple butter fresh longer and safe to eat.

Variations
Spice Variations
You can add unique flavors to your apple butter. Try adding cardamom for warmth or ginger for a zing. If you don’t have ground cloves, use more nutmeg instead. You can also swap out cinnamon for allspice if you want a different taste. Be brave and experiment with spices to find your perfect blend!
Fruit Add-Ins
Mixing in other fruits brings diversity to your apple butter. Pears or peaches pair well with apples. Cherries add a sweet-tart taste, while cranberries give a nice tang. Make sure to adjust the sugar level when you add fruits that are sweeter or more tart than apples. Each fruit adds its own charm!
Sweetness Levels
Adjusting sweetness is easy with apple butter. Start with the recipe’s sugar amount and taste as it cooks. If you want it sweeter, stir in more sugar in small amounts. You can also use honey or maple syrup as alternatives. These can add their own unique flavor, too! Remember, tasting is key to getting it just right.
Storage Info
Duration of Freshness
Apple butter lasts about 2 to 3 weeks in the fridge. Store it in a clean, sealed jar to keep it fresh. Look for signs of spoilage, like mold or off smells. If you see any discoloration or if the texture changes, it’s best to toss it out.
Freezing Apple Butter
You can freeze apple butter for up to a year. To freeze, follow these steps:
– Let the apple butter cool completely.
– Pour it into airtight containers, leaving space at the top for expansion.
– Seal tightly and label with the date.
When you’re ready to use it, thaw it in the fridge overnight. You can also thaw it in a pot over low heat. Stir well before serving to mix any separated liquid.
Jar Sealing Techniques
Proper sealing is key for long-term storage. Always use sterilized jars to prevent bacteria. Fill the jars with hot apple butter, leaving about 1/4-inch of space at the top. Wipe the rims before sealing to ensure a tight fit. Store sealed jars in a cool, dark pantry. Keeping them away from heat helps them last longer.
FAQs
What apples are best for apple butter?
For the best apple butter, I suggest using tart apples. Granny Smith and Honeycrisp are two great choices. These apples provide a nice balance of sweet and tart flavors. They also cook down well, creating a smooth texture. Other options include Jonathan, Fuji, and Braeburn. Each variety brings its unique taste, so feel free to mix and match for your perfect blend.
Can I reduce the sugar in apple butter?
Yes, you can reduce the sugar in apple butter. Start by cutting the sugar by one-third. Use natural sweeteners like honey or maple syrup. These options can keep the flavor rich without adding too much sweetness. You can also try adding more spices to enhance the taste. Just remember, less sugar may change the final texture a bit, making it less thick.
How do I know when my apple butter is done?
To test if your apple butter is done, use a spoon. Place a spoonful on a plate and let it sit for a minute. If it holds its shape and does not run, it is ready. If it looks too runny, continue to simmer and check every 10 minutes. The right consistency should be thick and spreadable. This process helps develop the rich flavors you want in your apple butter.
We explored how to make delicious apple butter using the right ingredients and techniques. From choosing the best apples to measuring your spices, each step is important. Remember to avoid common mistakes, like overcooking or burning. Consider variations to make your apple butter unique. Finally, store your creation correctly to enjoy it longer. With these tips, you can create tasty apple butter that’s perfect for sharing or savoring alone. Enjoy your cooking adventure!
