![- 4 medium-sized apples (Granny Smith or Honeycrisp recommended) - 1 cup rolled oats - ½ cup packed brown sugar - 1 teaspoon ground cinnamon - ¼ teaspoon ground nutmeg - A pinch of salt - ¼ cup all-purpose flour - ½ cup unsalted butter, melted - ½ cup chopped pecans or walnuts (optional) When choosing apples, I love using Granny Smith or Honeycrisp. They bring the right balance of tartness. The oats and brown sugar create a rich base for the filling. The spices like cinnamon and nutmeg add warmth and depth to each bite. For the topping, the melted butter combines with flour and nuts, giving it a crunchy texture. You can skip the nuts if you want a simpler version. I often prepare this recipe with kids, who love to help fill the apples. If you want to make it even more special, serve the baked apples with vanilla ice cream or whipped cream on the side. This adds creaminess that pairs well with the crisp. For the full recipe, check the detailed guide above. - Preheat the oven to 350°F (175°C). - Core the apples without cutting through the bottoms. This keeps the juice inside. Use a corer or a knife. Be careful not to cut too deep. Set the cored apples aside. - Combine oats, brown sugar, cinnamon, nutmeg, flour, and salt in a bowl. - Mix in melted butter and vanilla extract. Stir until it looks crumbly. If you want a crunch, add chopped pecans or walnuts here. - Fill each apple with the oat mixture. Press it down gently. This makes sure the filling stays in. - Add about ¼ cup of water to the baking dish. This helps steam the apples. Cover the dish tightly with foil. - Bake for 25 minutes covered. After that, remove the foil. Bake for another 15-20 minutes. The apples should feel tender, and the topping should be golden brown. These steps make a simple yet delicious dessert. Enjoy the warm, sweet goodness of your baked apples! For the complete recipe, check out the Full Recipe. For the best apple crisp baked apples, I often use Granny Smith or Honeycrisp apples. These types have a nice mix of sweet and tart flavors. They hold their shape well when baked, too. You want apples that are firm, not soft. Soft apples can turn mushy and ruin the dish. To make your baked apples special, consider adding spices. You can use nutmeg or allspice for extra warmth. You might also add raisins or cranberries for a pop of color and sweetness. I sometimes mix in a bit of orange zest for a fresh taste. This tiny tweak can really brighten the dish. The topping is key to a great apple crisp. Use rolled oats for a chewy texture and add a bit of flour for binding. To get that perfect crunch, make sure to mix in melted butter well. For added crunch, toss in chopped nuts. I like pecans or walnuts. Bake until golden brown. This gives you that delightful crunch that everyone loves. For the complete recipe, check out the Full Recipe. {{image_4}} You can switch up the nuts or fruits in your baked apples. Try adding almonds or hazelnuts for a new crunch. You can also mix in dried cranberries or raisins for a sweet touch. Each choice adds a unique flavor twist to your dish. Experiment with your favorite nuts to find the best combo. Want to make this dish gluten-free? Swap the all-purpose flour for almond flour or a gluten-free blend. For a vegan version, replace the butter with coconut oil and use maple syrup instead of brown sugar. You can also find vegan ice cream to serve on top. These changes let everyone enjoy this treat without worry. To make your dessert even better, serve it with a scoop of vanilla ice cream. The warm apples and cold ice cream mix perfectly. You can also add a drizzle of caramel sauce for extra sweetness. If you want a bit of spice, sprinkle more cinnamon on top. These ideas create a complete dessert experience that will impress your guests. You can find the full recipe for this delightful treat in the earlier sections. To keep your apple crisp baked apples fresh, place them in an airtight container. Store them in the fridge. They will stay good for about 3 to 4 days. When you want to enjoy them again, simply reheat in the oven. Preheat the oven to 350°F (175°C). Bake for about 10 minutes until warmed through. This keeps the topping crispy and delicious. You can freeze these baked apples for later enjoyment. Let them cool completely before freezing. Wrap each apple in plastic wrap, then place them in a freezer-safe bag. They can last up to 3 months in the freezer. When ready to eat, thaw them in the fridge overnight. Reheat them in the oven at 350°F (175°C) for about 15-20 minutes. In the fridge, expect your apple crisp baked apples to last 3 to 4 days. In the freezer, they can stay fresh for up to 3 months. Always check for signs of spoilage before consuming. Enjoy the tasty flavors at their best! Yes, you can prepare these baked apples in advance. Core the apples and mix the filling a day ahead. Keep them in the fridge until you’re ready to bake. This saves time and keeps the flavors fresh. Just remember to add a little water to the baking dish before baking. You can get creative with toppings! Instead of nuts, try using shredded coconut or sunflower seeds. You can also add a swirl of caramel sauce for extra sweetness. If you like chocolate, sprinkle some mini chocolate chips on top. Each option adds a fun twist to your baked apples. The apples are done when they are soft to the touch. You can poke them gently with a fork. The topping should be golden brown and crisp. If the apples feel firm, give them more time in the oven. Trust your senses for the best results! For a detailed recipe guide, visit [Full Recipe]. These baked apples are delicious and easy to make. We covered key ingredients, step-by-step instructions, and helpful tips to ensure success. You learned about variations, storage, and common questions. Now it's time for you to try this tasty treat. Enjoy every bite as warm flavors fill your home. Happy baking!](https://roastedflavors.com/wp-content/uploads/2025/07/9e34790b-ea15-4dcb-b82e-36d181bd3b88.webp)
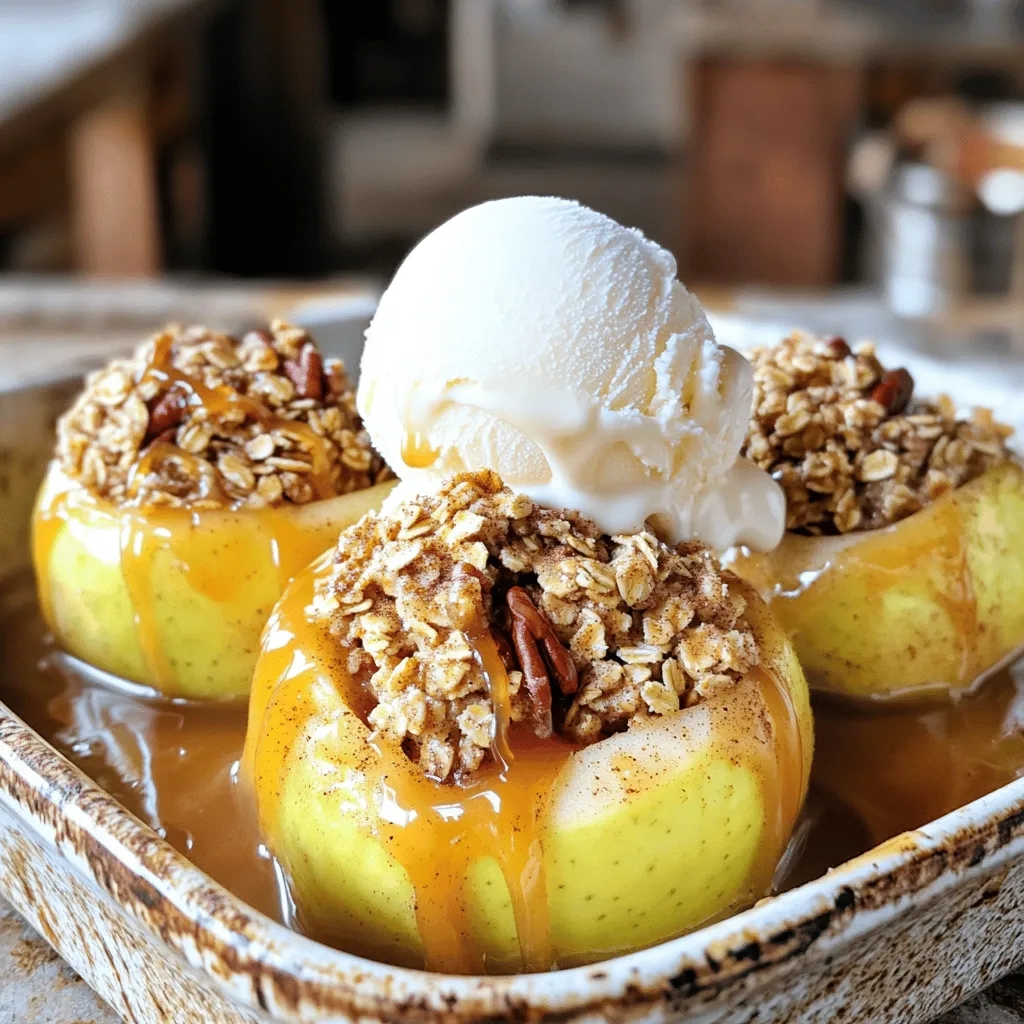
Looking for a warm and tasty dessert? Try my Savory Apple Crisp Baked Apples! These sweet treats blend tender apples with a crunchy oat topping, creating a perfect mix of flavors and textures. Using simple ingredients like oats, brown sugar, and spices, this delightful dish is easy to make and will impress everyone. Let’s dive in and discover how to create this cozy dessert that’s sure to become a favorite!
Ingredients
Main Ingredients
– 4 medium-sized apples (Granny Smith or Honeycrisp recommended)
– 1 cup rolled oats
– ½ cup packed brown sugar
Additional Flavors
– 1 teaspoon ground cinnamon
– ¼ teaspoon ground nutmeg
– A pinch of salt
Topping Components
– ¼ cup all-purpose flour
– ½ cup unsalted butter, melted
– ½ cup chopped pecans or walnuts (optional)
When choosing apples, I love using Granny Smith or Honeycrisp. They bring the right balance of tartness. The oats and brown sugar create a rich base for the filling. The spices like cinnamon and nutmeg add warmth and depth to each bite.
For the topping, the melted butter combines with flour and nuts, giving it a crunchy texture. You can skip the nuts if you want a simpler version. I often prepare this recipe with kids, who love to help fill the apples.
If you want to make it even more special, serve the baked apples with vanilla ice cream or whipped cream on the side. This adds creaminess that pairs well with the crisp. For the full recipe, check the detailed guide above.
Step-by-Step Instructions
Preparing the Apples
– Preheat the oven to 350°F (175°C).
– Core the apples without cutting through the bottoms. This keeps the juice inside. Use a corer or a knife. Be careful not to cut too deep. Set the cored apples aside.
Making the Crisp Mixture
– Combine oats, brown sugar, cinnamon, nutmeg, flour, and salt in a bowl.
– Mix in melted butter and vanilla extract. Stir until it looks crumbly. If you want a crunch, add chopped pecans or walnuts here.
Assembling and Baking
– Fill each apple with the oat mixture. Press it down gently. This makes sure the filling stays in.
– Add about ¼ cup of water to the baking dish. This helps steam the apples. Cover the dish tightly with foil.
– Bake for 25 minutes covered. After that, remove the foil. Bake for another 15-20 minutes. The apples should feel tender, and the topping should be golden brown.
These steps make a simple yet delicious dessert. Enjoy the warm, sweet goodness of your baked apples! For the complete recipe, check out the Full Recipe.
Tips & Tricks
Choosing the Right Apples
For the best apple crisp baked apples, I often use Granny Smith or Honeycrisp apples. These types have a nice mix of sweet and tart flavors. They hold their shape well when baked, too. You want apples that are firm, not soft. Soft apples can turn mushy and ruin the dish.
Enhancing Flavor
To make your baked apples special, consider adding spices. You can use nutmeg or allspice for extra warmth. You might also add raisins or cranberries for a pop of color and sweetness. I sometimes mix in a bit of orange zest for a fresh taste. This tiny tweak can really brighten the dish.
Perfecting the Crisp Topping
The topping is key to a great apple crisp. Use rolled oats for a chewy texture and add a bit of flour for binding. To get that perfect crunch, make sure to mix in melted butter well. For added crunch, toss in chopped nuts. I like pecans or walnuts. Bake until golden brown. This gives you that delightful crunch that everyone loves.
For the complete recipe, check out the Full Recipe.
Variations
Flavor Variations
You can switch up the nuts or fruits in your baked apples. Try adding almonds or hazelnuts for a new crunch. You can also mix in dried cranberries or raisins for a sweet touch. Each choice adds a unique flavor twist to your dish. Experiment with your favorite nuts to find the best combo.
Dietary Adjustments
Want to make this dish gluten-free? Swap the all-purpose flour for almond flour or a gluten-free blend. For a vegan version, replace the butter with coconut oil and use maple syrup instead of brown sugar. You can also find vegan ice cream to serve on top. These changes let everyone enjoy this treat without worry.
Serving Suggestions
To make your dessert even better, serve it with a scoop of vanilla ice cream. The warm apples and cold ice cream mix perfectly. You can also add a drizzle of caramel sauce for extra sweetness. If you want a bit of spice, sprinkle more cinnamon on top. These ideas create a complete dessert experience that will impress your guests.
You can find the full recipe for this delightful treat in the earlier sections.
Storage Info
Storing Leftovers
To keep your apple crisp baked apples fresh, place them in an airtight container. Store them in the fridge. They will stay good for about 3 to 4 days. When you want to enjoy them again, simply reheat in the oven. Preheat the oven to 350°F (175°C). Bake for about 10 minutes until warmed through. This keeps the topping crispy and delicious.
Freezing Instructions
You can freeze these baked apples for later enjoyment. Let them cool completely before freezing. Wrap each apple in plastic wrap, then place them in a freezer-safe bag. They can last up to 3 months in the freezer. When ready to eat, thaw them in the fridge overnight. Reheat them in the oven at 350°F (175°C) for about 15-20 minutes.
Shelf Life
In the fridge, expect your apple crisp baked apples to last 3 to 4 days. In the freezer, they can stay fresh for up to 3 months. Always check for signs of spoilage before consuming. Enjoy the tasty flavors at their best!
FAQs
Can I make these Apple Crisp Baked Apples ahead of time?
Yes, you can prepare these baked apples in advance. Core the apples and mix the filling a day ahead. Keep them in the fridge until you’re ready to bake. This saves time and keeps the flavors fresh. Just remember to add a little water to the baking dish before baking.
What other toppings can I use?
You can get creative with toppings! Instead of nuts, try using shredded coconut or sunflower seeds. You can also add a swirl of caramel sauce for extra sweetness. If you like chocolate, sprinkle some mini chocolate chips on top. Each option adds a fun twist to your baked apples.
How do I know when the apples are done baking?
The apples are done when they are soft to the touch. You can poke them gently with a fork. The topping should be golden brown and crisp. If the apples feel firm, give them more time in the oven. Trust your senses for the best results!
Full Recipe
For a detailed recipe guide, visit [Full Recipe].
These baked apples are delicious and easy to make. We covered key ingredients, step-by-step instructions, and helpful tips to ensure success. You learned about variations, storage, and common questions.
Now it’s time for you to try this tasty treat. Enjoy every bite as warm flavors fill your home. Happy baking!
![- 4 medium-sized apples (Granny Smith or Honeycrisp recommended) - 1 cup rolled oats - ½ cup packed brown sugar - 1 teaspoon ground cinnamon - ¼ teaspoon ground nutmeg - A pinch of salt - ¼ cup all-purpose flour - ½ cup unsalted butter, melted - ½ cup chopped pecans or walnuts (optional) When choosing apples, I love using Granny Smith or Honeycrisp. They bring the right balance of tartness. The oats and brown sugar create a rich base for the filling. The spices like cinnamon and nutmeg add warmth and depth to each bite. For the topping, the melted butter combines with flour and nuts, giving it a crunchy texture. You can skip the nuts if you want a simpler version. I often prepare this recipe with kids, who love to help fill the apples. If you want to make it even more special, serve the baked apples with vanilla ice cream or whipped cream on the side. This adds creaminess that pairs well with the crisp. For the full recipe, check the detailed guide above. - Preheat the oven to 350°F (175°C). - Core the apples without cutting through the bottoms. This keeps the juice inside. Use a corer or a knife. Be careful not to cut too deep. Set the cored apples aside. - Combine oats, brown sugar, cinnamon, nutmeg, flour, and salt in a bowl. - Mix in melted butter and vanilla extract. Stir until it looks crumbly. If you want a crunch, add chopped pecans or walnuts here. - Fill each apple with the oat mixture. Press it down gently. This makes sure the filling stays in. - Add about ¼ cup of water to the baking dish. This helps steam the apples. Cover the dish tightly with foil. - Bake for 25 minutes covered. After that, remove the foil. Bake for another 15-20 minutes. The apples should feel tender, and the topping should be golden brown. These steps make a simple yet delicious dessert. Enjoy the warm, sweet goodness of your baked apples! For the complete recipe, check out the Full Recipe. For the best apple crisp baked apples, I often use Granny Smith or Honeycrisp apples. These types have a nice mix of sweet and tart flavors. They hold their shape well when baked, too. You want apples that are firm, not soft. Soft apples can turn mushy and ruin the dish. To make your baked apples special, consider adding spices. You can use nutmeg or allspice for extra warmth. You might also add raisins or cranberries for a pop of color and sweetness. I sometimes mix in a bit of orange zest for a fresh taste. This tiny tweak can really brighten the dish. The topping is key to a great apple crisp. Use rolled oats for a chewy texture and add a bit of flour for binding. To get that perfect crunch, make sure to mix in melted butter well. For added crunch, toss in chopped nuts. I like pecans or walnuts. Bake until golden brown. This gives you that delightful crunch that everyone loves. For the complete recipe, check out the Full Recipe. {{image_4}} You can switch up the nuts or fruits in your baked apples. Try adding almonds or hazelnuts for a new crunch. You can also mix in dried cranberries or raisins for a sweet touch. Each choice adds a unique flavor twist to your dish. Experiment with your favorite nuts to find the best combo. Want to make this dish gluten-free? Swap the all-purpose flour for almond flour or a gluten-free blend. For a vegan version, replace the butter with coconut oil and use maple syrup instead of brown sugar. You can also find vegan ice cream to serve on top. These changes let everyone enjoy this treat without worry. To make your dessert even better, serve it with a scoop of vanilla ice cream. The warm apples and cold ice cream mix perfectly. You can also add a drizzle of caramel sauce for extra sweetness. If you want a bit of spice, sprinkle more cinnamon on top. These ideas create a complete dessert experience that will impress your guests. You can find the full recipe for this delightful treat in the earlier sections. To keep your apple crisp baked apples fresh, place them in an airtight container. Store them in the fridge. They will stay good for about 3 to 4 days. When you want to enjoy them again, simply reheat in the oven. Preheat the oven to 350°F (175°C). Bake for about 10 minutes until warmed through. This keeps the topping crispy and delicious. You can freeze these baked apples for later enjoyment. Let them cool completely before freezing. Wrap each apple in plastic wrap, then place them in a freezer-safe bag. They can last up to 3 months in the freezer. When ready to eat, thaw them in the fridge overnight. Reheat them in the oven at 350°F (175°C) for about 15-20 minutes. In the fridge, expect your apple crisp baked apples to last 3 to 4 days. In the freezer, they can stay fresh for up to 3 months. Always check for signs of spoilage before consuming. Enjoy the tasty flavors at their best! Yes, you can prepare these baked apples in advance. Core the apples and mix the filling a day ahead. Keep them in the fridge until you’re ready to bake. This saves time and keeps the flavors fresh. Just remember to add a little water to the baking dish before baking. You can get creative with toppings! Instead of nuts, try using shredded coconut or sunflower seeds. You can also add a swirl of caramel sauce for extra sweetness. If you like chocolate, sprinkle some mini chocolate chips on top. Each option adds a fun twist to your baked apples. The apples are done when they are soft to the touch. You can poke them gently with a fork. The topping should be golden brown and crisp. If the apples feel firm, give them more time in the oven. Trust your senses for the best results! For a detailed recipe guide, visit [Full Recipe]. These baked apples are delicious and easy to make. We covered key ingredients, step-by-step instructions, and helpful tips to ensure success. You learned about variations, storage, and common questions. Now it's time for you to try this tasty treat. Enjoy every bite as warm flavors fill your home. Happy baking!](https://roastedflavors.com/wp-content/uploads/2025/07/9e34790b-ea15-4dcb-b82e-36d181bd3b88-300x300.webp)