![- 1 cup almond flour - 1/4 cup unsweetened shredded coconut - 3 tablespoons coconut oil, melted - 2 tablespoons honey or maple syrup (for crust) - 1 cup low-fat cream cheese, softened - 1/2 cup Greek yogurt - 1/4 cup honey or maple syrup (for filling, additional) - 2 large eggs - 1 teaspoon vanilla extract - 1/2 teaspoon coconut extract - Pinch of salt Using low-fat ingredients helps keep these cheesecake bars lighter. Low-fat cream cheese and Greek yogurt reduce calories. They still give you that creamy taste you love. This means you can enjoy dessert without the guilt. You can satisfy your sweet tooth and feel good about it too. Plus, using natural sweeteners like honey or maple syrup adds flavor without excess sugar. If you want to switch things up, there are easy swaps. You can use oat flour instead of almond flour for a different texture. If you're not a fan of coconut, try crushed nuts for the crust. You can also use a dairy-free cream cheese for a vegan option. Maple syrup can be replaced with agave nectar if desired. These simple substitutions keep the recipe flexible and fun! Start by preheating your oven to 325°F (160°C). This helps the cheesecake bake evenly. Next, grab an 8x8 inch baking pan. Line it with parchment paper. Make sure you leave some overhang on the sides. This will help you lift the bars out later. In a medium mixing bowl, combine these ingredients: - 1 cup almond flour - 1/4 cup unsweetened shredded coconut - 3 tablespoons coconut oil, melted - 2 tablespoons honey or maple syrup Mix everything well until it looks crumbly. Then, press this mixture firmly into the bottom of your lined pan. Make sure it’s even and compact. In a large mixing bowl, beat 1 cup of softened low-fat cream cheese with a hand mixer. Mix until it is smooth and free of lumps. Next, add: - 1/2 cup Greek yogurt - 1/4 cup honey or maple syrup (additional) - 2 large eggs - 1 teaspoon vanilla extract - 1/2 teaspoon coconut extract - A pinch of salt Beat these ingredients together on medium speed until the mixture is creamy and well-combined. Pour the cheesecake filling over your cooled crust. Use a spatula to spread it evenly. Place the pan back in the oven. Bake for 25-30 minutes. The filling should set but still jiggle slightly in the center. Avoid overbaking to keep it creamy. Once baked, let the bars cool at room temperature for about 1 hour. After that, transfer the pan to the fridge. Chill for at least 4 hours or overnight. This helps the flavors blend and the texture firm up. When you’re ready to serve, lift the bars out using the parchment overhang. Place them on a cutting board and slice into squares. For a nice touch, you can dust the tops with extra shredded coconut before serving. Enjoy your Skinny Coconut Cheesecake Bars! To create a great crust, use almond flour. It gives a nice nutty flavor. Mix it with shredded coconut for added texture. Mix the dry ingredients with melted coconut oil and honey until crumbly. Press it into your pan firmly. This helps it hold together. Bake it until light golden. This gives the crust a crisp edge. Let it cool before adding the filling. Cooling helps the crust stay firm. For a creamy filling, use softened low-fat cream cheese. Beat it until smooth with a mixer. This makes sure there are no lumps. Add Greek yogurt for a tangy taste and extra creaminess. Mix in honey or maple syrup for sweetness. Add eggs one at a time while mixing. This helps the filling blend well. Finally, add vanilla and coconut extracts for flavor. Don’t over-mix once you add the eggs; just blend until combined. This keeps the filling light and fluffy. Make your bars look great by dusting them with extra shredded coconut. A sprinkle of coconut adds a nice touch. You can also add a sprig of fresh mint for color. For a sweet finish, drizzle honey or maple syrup on top. Slice the bars into squares for easy serving. Serve them chilled for the best taste. Pair these bars with fresh fruit for a refreshing contrast. Enjoy your beautiful, tasty Skinny Coconut Cheesecake Bars! For the complete recipe, check the Full Recipe. {{image_4}} You can play with flavors in these bars. Try adding chocolate for a rich treat. Just mix in chocolate chips or a swirl of melted chocolate. Citrus flavors also work well. A little lemon or lime zest can brighten the taste. You might also enjoy adding a dash of almond extract for a unique twist. If you have dietary needs, there are many swaps. For a vegan option, replace eggs with flaxseed or chia seeds mixed with water. Use a plant-based cream cheese and yogurt for a creamy texture. If you’re avoiding sugar, use stevia or a sugar alternative in place of honey. These changes keep the bars tasty while fitting your diet. These cheesecake bars are already gluten-free thanks to almond flour. If you want more options, you can use coconut flour or oat flour. Just remember to adjust the amount, as these flours absorb moisture differently. Always check your labels to ensure all ingredients are gluten-free. This way, everyone can enjoy the treat! For the full recipe, check out [Full Recipe]. To keep your Skinny Coconut Cheesecake Bars fresh, store them in the fridge. Use an airtight container to prevent any odors from other foods. You can also cover the bars tightly with plastic wrap. Make sure they are completely cool before storage. This helps maintain their creamy texture and flavor. When stored properly, these cheesecake bars can last about 5 to 7 days in the refrigerator. If you want to keep them longer, freezing is a great option. Always check for any signs of spoilage before eating, even if they are within the time frame. To freeze your cheesecake bars, cut them into squares first. Wrap each square in plastic wrap, then place them in a freezer-safe bag or container. You can freeze them for up to 3 months. When you’re ready to eat, just thaw in the fridge overnight. This keeps them tasty and prevents freezer burn. For the best results, enjoy them within a month of freezing. Yes, you can use regular cream cheese. I prefer low-fat cream cheese for a lighter dessert. It helps keep the calorie count lower and still gives a rich flavor. If you want a creamier texture, regular cream cheese works just fine. You’ll know the cheesecake is done when it’s set but still has a slight jiggle in the center. This means it’s creamy and not overbaked. A good test is to gently shake the pan. If the edges are firm but the middle wobbles, it’s ready to come out. Absolutely! Toppings can make your cheesecake bars even more fun. Some tasty choices include fresh fruit, whipped cream, or extra shredded coconut. You can also drizzle honey or chocolate on top for added sweetness. Be creative with your toppings! Each bar is a treat that balances flavor and health. On average, one bar contains about 120 calories, 8 grams of fat, and 5 grams of protein. This means you can enjoy a sweet dessert without too much guilt. For the full nutritional breakdown, check out the Full Recipe. In this post, we explored making delicious low-fat cheesecake bars. We covered ingredients, step-by-step baking methods, tips for a perfect texture, and storage options. Remember, you can substitute ingredients based on your needs and try new flavors for added fun. These bars are versatile and storage-friendly. Enjoy making a tasty treat that fits your lifestyle. With these tips, you’ll impress everyone with your cheesecake skills!](https://roastedflavors.com/wp-content/uploads/2025/06/ddf8ea89-471e-453d-a61c-ad82af42bc2e.webp)
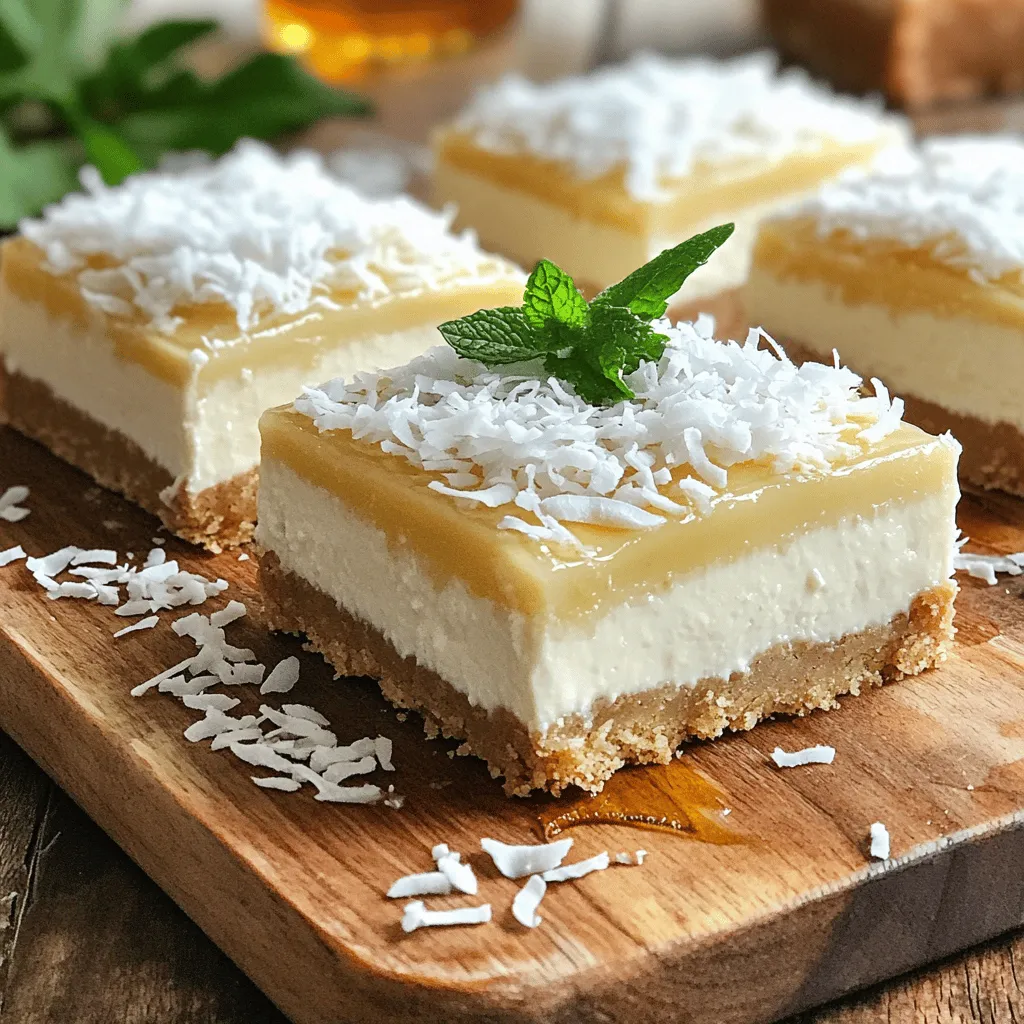
Are you craving a tasty dessert that won’t derail your healthy eating? Look no further than my Skinny Coconut Cheesecake Bars! These simple and delicious treats are packed with coconut flavor and low in fat, making them a guilt-free indulgence. In this guide, I’ll share easy steps, ingredient tips, and creative variations so you can enjoy these bars at home. Let’s dive into this sweet adventure!
Ingredients
List of Ingredients
– 1 cup almond flour
– 1/4 cup unsweetened shredded coconut
– 3 tablespoons coconut oil, melted
– 2 tablespoons honey or maple syrup (for crust)
– 1 cup low-fat cream cheese, softened
– 1/2 cup Greek yogurt
– 1/4 cup honey or maple syrup (for filling, additional)
– 2 large eggs
– 1 teaspoon vanilla extract
– 1/2 teaspoon coconut extract
– Pinch of salt
Importance of Low-Fat Ingredients
Using low-fat ingredients helps keep these cheesecake bars lighter. Low-fat cream cheese and Greek yogurt reduce calories. They still give you that creamy taste you love. This means you can enjoy dessert without the guilt. You can satisfy your sweet tooth and feel good about it too. Plus, using natural sweeteners like honey or maple syrup adds flavor without excess sugar.
Suggested Substitutions
If you want to switch things up, there are easy swaps. You can use oat flour instead of almond flour for a different texture. If you’re not a fan of coconut, try crushed nuts for the crust. You can also use a dairy-free cream cheese for a vegan option. Maple syrup can be replaced with agave nectar if desired. These simple substitutions keep the recipe flexible and fun!
Step-by-Step Instructions
Prepping the Oven and Baking Pan
Start by preheating your oven to 325°F (160°C). This helps the cheesecake bake evenly. Next, grab an 8×8 inch baking pan. Line it with parchment paper. Make sure you leave some overhang on the sides. This will help you lift the bars out later.
Making the Crust
In a medium mixing bowl, combine these ingredients:
– 1 cup almond flour
– 1/4 cup unsweetened shredded coconut
– 3 tablespoons coconut oil, melted
– 2 tablespoons honey or maple syrup
Mix everything well until it looks crumbly. Then, press this mixture firmly into the bottom of your lined pan. Make sure it’s even and compact.
Preparing the Cheesecake Filling
In a large mixing bowl, beat 1 cup of softened low-fat cream cheese with a hand mixer. Mix until it is smooth and free of lumps. Next, add:
– 1/2 cup Greek yogurt
– 1/4 cup honey or maple syrup (additional)
– 2 large eggs
– 1 teaspoon vanilla extract
– 1/2 teaspoon coconut extract
– A pinch of salt
Beat these ingredients together on medium speed until the mixture is creamy and well-combined.
Baking and Cooling the Bars
Pour the cheesecake filling over your cooled crust. Use a spatula to spread it evenly. Place the pan back in the oven. Bake for 25-30 minutes. The filling should set but still jiggle slightly in the center. Avoid overbaking to keep it creamy.
Once baked, let the bars cool at room temperature for about 1 hour. After that, transfer the pan to the fridge. Chill for at least 4 hours or overnight. This helps the flavors blend and the texture firm up.
When you’re ready to serve, lift the bars out using the parchment overhang. Place them on a cutting board and slice into squares. For a nice touch, you can dust the tops with extra shredded coconut before serving. Enjoy your Skinny Coconut Cheesecake Bars!
Tips & Tricks
Perfecting the Crust Texture
To create a great crust, use almond flour. It gives a nice nutty flavor. Mix it with shredded coconut for added texture. Mix the dry ingredients with melted coconut oil and honey until crumbly. Press it into your pan firmly. This helps it hold together. Bake it until light golden. This gives the crust a crisp edge. Let it cool before adding the filling. Cooling helps the crust stay firm.
Achieving Creamy Filling Consistency
For a creamy filling, use softened low-fat cream cheese. Beat it until smooth with a mixer. This makes sure there are no lumps. Add Greek yogurt for a tangy taste and extra creaminess. Mix in honey or maple syrup for sweetness. Add eggs one at a time while mixing. This helps the filling blend well. Finally, add vanilla and coconut extracts for flavor. Don’t over-mix once you add the eggs; just blend until combined. This keeps the filling light and fluffy.
Presentation and Serving Suggestions
Make your bars look great by dusting them with extra shredded coconut. A sprinkle of coconut adds a nice touch. You can also add a sprig of fresh mint for color. For a sweet finish, drizzle honey or maple syrup on top. Slice the bars into squares for easy serving. Serve them chilled for the best taste. Pair these bars with fresh fruit for a refreshing contrast. Enjoy your beautiful, tasty Skinny Coconut Cheesecake Bars! For the complete recipe, check the Full Recipe.
Variations
Flavor Additions
You can play with flavors in these bars. Try adding chocolate for a rich treat. Just mix in chocolate chips or a swirl of melted chocolate. Citrus flavors also work well. A little lemon or lime zest can brighten the taste. You might also enjoy adding a dash of almond extract for a unique twist.
Ingredient Swaps for Dietary Preferences
If you have dietary needs, there are many swaps. For a vegan option, replace eggs with flaxseed or chia seeds mixed with water. Use a plant-based cream cheese and yogurt for a creamy texture. If you’re avoiding sugar, use stevia or a sugar alternative in place of honey. These changes keep the bars tasty while fitting your diet.
Gluten-Free Options
These cheesecake bars are already gluten-free thanks to almond flour. If you want more options, you can use coconut flour or oat flour. Just remember to adjust the amount, as these flours absorb moisture differently. Always check your labels to ensure all ingredients are gluten-free. This way, everyone can enjoy the treat!
For the full recipe, check out [Full Recipe].
Storage Info
Best Practices for Storing Cheesecake Bars
To keep your Skinny Coconut Cheesecake Bars fresh, store them in the fridge. Use an airtight container to prevent any odors from other foods. You can also cover the bars tightly with plastic wrap. Make sure they are completely cool before storage. This helps maintain their creamy texture and flavor.
How Long They’ll Last
When stored properly, these cheesecake bars can last about 5 to 7 days in the refrigerator. If you want to keep them longer, freezing is a great option. Always check for any signs of spoilage before eating, even if they are within the time frame.
Freezing Instructions
To freeze your cheesecake bars, cut them into squares first. Wrap each square in plastic wrap, then place them in a freezer-safe bag or container. You can freeze them for up to 3 months. When you’re ready to eat, just thaw in the fridge overnight. This keeps them tasty and prevents freezer burn. For the best results, enjoy them within a month of freezing.
FAQs
Can I use regular cream cheese?
Yes, you can use regular cream cheese. I prefer low-fat cream cheese for a lighter dessert. It helps keep the calorie count lower and still gives a rich flavor. If you want a creamier texture, regular cream cheese works just fine.
How do I know when the cheesecake is done?
You’ll know the cheesecake is done when it’s set but still has a slight jiggle in the center. This means it’s creamy and not overbaked. A good test is to gently shake the pan. If the edges are firm but the middle wobbles, it’s ready to come out.
Can I add toppings to the cheesecake bars?
Absolutely! Toppings can make your cheesecake bars even more fun. Some tasty choices include fresh fruit, whipped cream, or extra shredded coconut. You can also drizzle honey or chocolate on top for added sweetness. Be creative with your toppings!
What are the nutritional values of Skinny Coconut Cheesecake Bars?
Each bar is a treat that balances flavor and health. On average, one bar contains about 120 calories, 8 grams of fat, and 5 grams of protein. This means you can enjoy a sweet dessert without too much guilt. For the full nutritional breakdown, check out the Full Recipe.
In this post, we explored making delicious low-fat cheesecake bars. We covered ingredients, step-by-step baking methods, tips for a perfect texture, and storage options. Remember, you can substitute ingredients based on your needs and try new flavors for added fun. These bars are versatile and storage-friendly. Enjoy making a tasty treat that fits your lifestyle. With these tips, you’ll impress everyone with your cheesecake skills!
![- 1 cup almond flour - 1/4 cup unsweetened shredded coconut - 3 tablespoons coconut oil, melted - 2 tablespoons honey or maple syrup (for crust) - 1 cup low-fat cream cheese, softened - 1/2 cup Greek yogurt - 1/4 cup honey or maple syrup (for filling, additional) - 2 large eggs - 1 teaspoon vanilla extract - 1/2 teaspoon coconut extract - Pinch of salt Using low-fat ingredients helps keep these cheesecake bars lighter. Low-fat cream cheese and Greek yogurt reduce calories. They still give you that creamy taste you love. This means you can enjoy dessert without the guilt. You can satisfy your sweet tooth and feel good about it too. Plus, using natural sweeteners like honey or maple syrup adds flavor without excess sugar. If you want to switch things up, there are easy swaps. You can use oat flour instead of almond flour for a different texture. If you're not a fan of coconut, try crushed nuts for the crust. You can also use a dairy-free cream cheese for a vegan option. Maple syrup can be replaced with agave nectar if desired. These simple substitutions keep the recipe flexible and fun! Start by preheating your oven to 325°F (160°C). This helps the cheesecake bake evenly. Next, grab an 8x8 inch baking pan. Line it with parchment paper. Make sure you leave some overhang on the sides. This will help you lift the bars out later. In a medium mixing bowl, combine these ingredients: - 1 cup almond flour - 1/4 cup unsweetened shredded coconut - 3 tablespoons coconut oil, melted - 2 tablespoons honey or maple syrup Mix everything well until it looks crumbly. Then, press this mixture firmly into the bottom of your lined pan. Make sure it’s even and compact. In a large mixing bowl, beat 1 cup of softened low-fat cream cheese with a hand mixer. Mix until it is smooth and free of lumps. Next, add: - 1/2 cup Greek yogurt - 1/4 cup honey or maple syrup (additional) - 2 large eggs - 1 teaspoon vanilla extract - 1/2 teaspoon coconut extract - A pinch of salt Beat these ingredients together on medium speed until the mixture is creamy and well-combined. Pour the cheesecake filling over your cooled crust. Use a spatula to spread it evenly. Place the pan back in the oven. Bake for 25-30 minutes. The filling should set but still jiggle slightly in the center. Avoid overbaking to keep it creamy. Once baked, let the bars cool at room temperature for about 1 hour. After that, transfer the pan to the fridge. Chill for at least 4 hours or overnight. This helps the flavors blend and the texture firm up. When you’re ready to serve, lift the bars out using the parchment overhang. Place them on a cutting board and slice into squares. For a nice touch, you can dust the tops with extra shredded coconut before serving. Enjoy your Skinny Coconut Cheesecake Bars! To create a great crust, use almond flour. It gives a nice nutty flavor. Mix it with shredded coconut for added texture. Mix the dry ingredients with melted coconut oil and honey until crumbly. Press it into your pan firmly. This helps it hold together. Bake it until light golden. This gives the crust a crisp edge. Let it cool before adding the filling. Cooling helps the crust stay firm. For a creamy filling, use softened low-fat cream cheese. Beat it until smooth with a mixer. This makes sure there are no lumps. Add Greek yogurt for a tangy taste and extra creaminess. Mix in honey or maple syrup for sweetness. Add eggs one at a time while mixing. This helps the filling blend well. Finally, add vanilla and coconut extracts for flavor. Don’t over-mix once you add the eggs; just blend until combined. This keeps the filling light and fluffy. Make your bars look great by dusting them with extra shredded coconut. A sprinkle of coconut adds a nice touch. You can also add a sprig of fresh mint for color. For a sweet finish, drizzle honey or maple syrup on top. Slice the bars into squares for easy serving. Serve them chilled for the best taste. Pair these bars with fresh fruit for a refreshing contrast. Enjoy your beautiful, tasty Skinny Coconut Cheesecake Bars! For the complete recipe, check the Full Recipe. {{image_4}} You can play with flavors in these bars. Try adding chocolate for a rich treat. Just mix in chocolate chips or a swirl of melted chocolate. Citrus flavors also work well. A little lemon or lime zest can brighten the taste. You might also enjoy adding a dash of almond extract for a unique twist. If you have dietary needs, there are many swaps. For a vegan option, replace eggs with flaxseed or chia seeds mixed with water. Use a plant-based cream cheese and yogurt for a creamy texture. If you’re avoiding sugar, use stevia or a sugar alternative in place of honey. These changes keep the bars tasty while fitting your diet. These cheesecake bars are already gluten-free thanks to almond flour. If you want more options, you can use coconut flour or oat flour. Just remember to adjust the amount, as these flours absorb moisture differently. Always check your labels to ensure all ingredients are gluten-free. This way, everyone can enjoy the treat! For the full recipe, check out [Full Recipe]. To keep your Skinny Coconut Cheesecake Bars fresh, store them in the fridge. Use an airtight container to prevent any odors from other foods. You can also cover the bars tightly with plastic wrap. Make sure they are completely cool before storage. This helps maintain their creamy texture and flavor. When stored properly, these cheesecake bars can last about 5 to 7 days in the refrigerator. If you want to keep them longer, freezing is a great option. Always check for any signs of spoilage before eating, even if they are within the time frame. To freeze your cheesecake bars, cut them into squares first. Wrap each square in plastic wrap, then place them in a freezer-safe bag or container. You can freeze them for up to 3 months. When you’re ready to eat, just thaw in the fridge overnight. This keeps them tasty and prevents freezer burn. For the best results, enjoy them within a month of freezing. Yes, you can use regular cream cheese. I prefer low-fat cream cheese for a lighter dessert. It helps keep the calorie count lower and still gives a rich flavor. If you want a creamier texture, regular cream cheese works just fine. You’ll know the cheesecake is done when it’s set but still has a slight jiggle in the center. This means it’s creamy and not overbaked. A good test is to gently shake the pan. If the edges are firm but the middle wobbles, it’s ready to come out. Absolutely! Toppings can make your cheesecake bars even more fun. Some tasty choices include fresh fruit, whipped cream, or extra shredded coconut. You can also drizzle honey or chocolate on top for added sweetness. Be creative with your toppings! Each bar is a treat that balances flavor and health. On average, one bar contains about 120 calories, 8 grams of fat, and 5 grams of protein. This means you can enjoy a sweet dessert without too much guilt. For the full nutritional breakdown, check out the Full Recipe. In this post, we explored making delicious low-fat cheesecake bars. We covered ingredients, step-by-step baking methods, tips for a perfect texture, and storage options. Remember, you can substitute ingredients based on your needs and try new flavors for added fun. These bars are versatile and storage-friendly. Enjoy making a tasty treat that fits your lifestyle. With these tips, you’ll impress everyone with your cheesecake skills!](https://roastedflavors.com/wp-content/uploads/2025/06/ddf8ea89-471e-453d-a61c-ad82af42bc2e-300x300.webp)