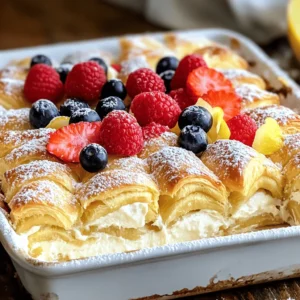
If you crave a sweet treat that’s simple yet delicious, you’ve found it! This Cheesecake Crescent Rolls Casserole is my go-to dessert, combining soft crescent rolls and rich cheesecake filling. Perfect for brunch or a cozy night in, it’s an easy recipe you can whip up in no time. Ready to impress your family and friends? Let’s dive into the tasty details!
Ingredients
Main ingredients needed
– 2 cans (8 oz each) crescent roll dough
– 16 oz cream cheese, softened to room temperature
– 1 cup granulated sugar
– 3 large eggs, room temperature
The main ingredients for the Cheesecake Crescent Rolls Casserole are simple and easy to find. You need crescent roll dough for a flaky base. The cream cheese creates a rich filling. Granulated sugar adds sweetness to the mix. Finally, eggs bring everything together and help set the filling.
Optional garnish ingredients
– Fresh berries
– Powdered sugar
For a lovely touch, consider adding fresh berries. They add color and taste. You can use strawberries, blueberries, or raspberries. A quick dusting of powdered sugar gives a sweet finish. These garnishes make your casserole look beautiful and inviting.
For the Full Recipe, check the details above.
Step-by-Step Instructions
Preparation of the baking dish
Start by preheating your oven to 350°F (175°C). This temperature helps the casserole bake evenly. Next, grab a 9×13 inch baking dish. Grease it well with cooking spray or a thin layer of butter. This step prevents the casserole from sticking, making it easier to serve later.
Assembling the layers
Now, open one can of crescent roll dough. Unroll it carefully and lay it flat in the greased baking dish. Be sure to press the seams together. This creates a solid base for your casserole.
Next, let’s make the cheesecake filling. In a large bowl, mix the softened cream cheese, granulated sugar, vanilla extract, and lemon zest. Use a hand mixer on medium speed to blend these ingredients until smooth. Then, add the eggs one by one, mixing well after each addition. This ensures a creamy filling. Finally, gently fold in the sour cream until there are no lumps.
Now, pour the cheesecake mixture over the crescent roll layer in the baking dish. Spread it out evenly with a spatula.
Take the second can of crescent roll dough. Unroll it and tear it into smaller pieces. Scatter these over the cheesecake layer. This gives your casserole a rustic look and helps it bake evenly.
Baking process
Place the baking dish in your preheated oven. Bake for 35-40 minutes. Look for a golden brown top and a filling that is set and not jiggly.
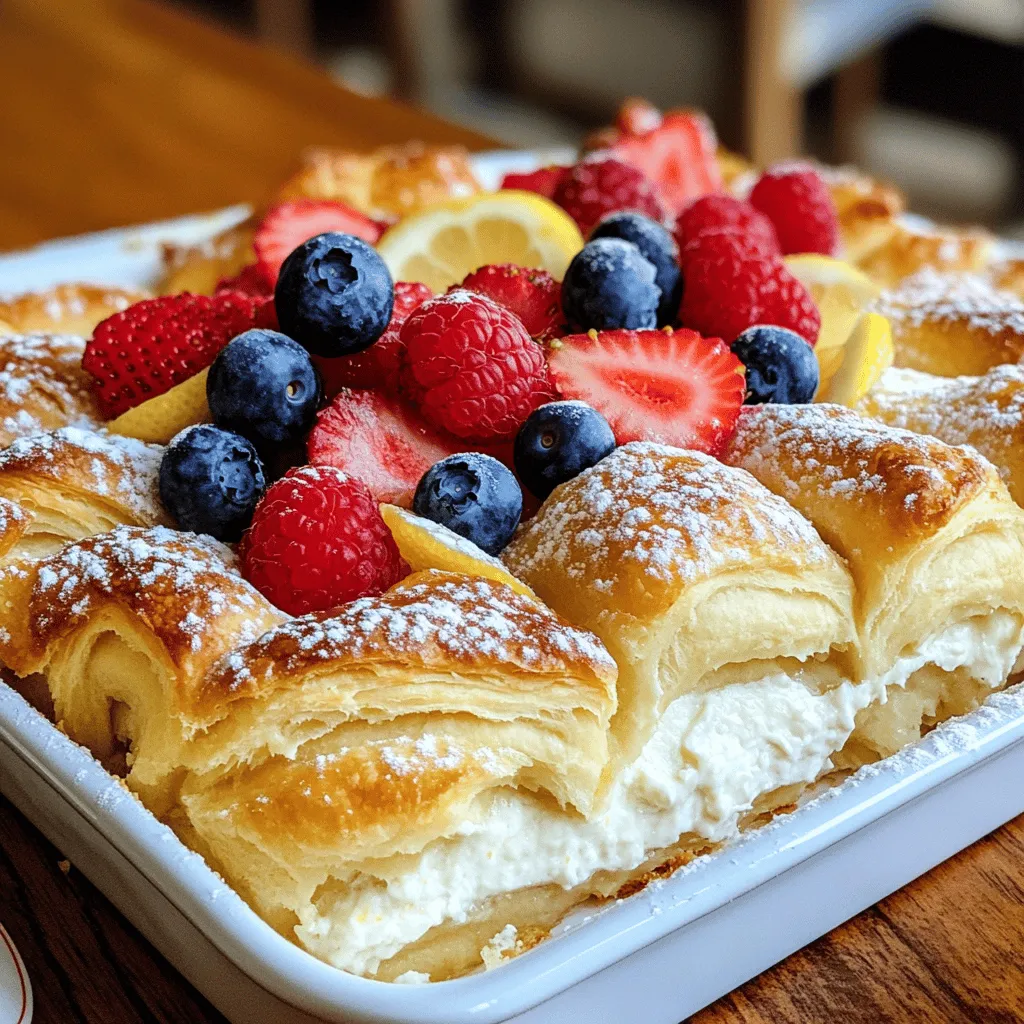
Once baked, remove it from the oven. Let it cool for at least 10 minutes. This cooling time helps the casserole firm up. Before serving, dust the top lightly with powdered sugar for added sweetness. Enjoy your delicious Cheesecake Crescent Rolls Casserole warm or chilled, topped with fresh berries for a burst of flavor. For the complete recipe, check the Full Recipe.
Tips & Tricks
Achieving the perfect cheesecake texture
To get the best cheesecake texture, follow these simple steps. First, mix the cream cheese well. Use a hand mixer to beat it until smooth. This helps break up lumps. You want a creamy base for your filling.
Next, use room temperature ingredients. Cold cream cheese can be hard to mix. It may lead to a lumpy texture. Let your cream cheese and eggs sit out for about 30 minutes before you start. Room temperature eggs blend better too.
Enhancing flavor and presentation
You can add fun flavors to your cheesecake. Try mixing in chocolate or fruit purees. Adding a bit of almond or coconut extract can change the taste too. This makes your casserole special.
For a great look, garnish your dish. Fresh berries add color and taste. Use strawberries, blueberries, or raspberries on top. A light dusting of powdered sugar gives it a sweet touch. It makes the casserole look more inviting.
For the full recipe to create this delicious Cheesecake Crescent Rolls Casserole, check out the main article.
Variations
Flavor variations to try
You can mix things up with your cheesecake casserole by adding new flavors. Try adding chocolate or fruit purees. For chocolate, melt some dark chocolate and swirl it into the cheesecake filling before baking. This makes it rich and tasty.
For fruit purees, blend fresh berries or peaches until smooth. You can mix these into the filling or drizzle them on top after baking. The fruit gives a nice touch and a burst of flavor.
You can also experiment with different extracts. While vanilla is classic, almond or lemon extract can give a fun twist. Just use a small amount to start, as some extracts are strong.
Dietary adaptations
If you need gluten-free options, you can use gluten-free crescent roll dough. Many brands offer tasty alternatives that work well. Just check the packaging to ensure it fits your needs.
For low-sugar alternatives, swap granulated sugar for a sugar substitute like stevia or erythritol. These sweeteners can help cut calories without losing flavor. Always check the package for the right amount to use.
By making these simple changes, you can enjoy this cheesecake crescent rolls casserole in many ways. Whatever your taste or diet, there’s a version just for you. For the complete recipe, check out the Full Recipe.
Storage Info
How to properly store leftovers
To keep your cheesecake crescent rolls casserole fresh, you should refrigerate it. Place any leftovers in an airtight container. This helps it stay moist and tasty. It can last for about 3 to 5 days in the fridge.
If you want to keep it longer, freezing is a great option. Slice the casserole into portions for easy use later. Wrap each piece tightly in plastic wrap, then in aluminum foil. This prevents freezer burn. You can freeze it for up to 2 months.
Reheating guidelines
When it’s time to enjoy your leftovers, the best method is to reheat in the oven. Preheat your oven to 350°F (175°C). Place the casserole in an oven-safe dish and cover it with foil. Heat for about 15 to 20 minutes.
You can also use a microwave for quick reheating. Heat on low power in 30-second bursts. Check often to avoid overheating.
To keep the texture nice, avoid high heat. This helps maintain that creamy filling and soft crescent dough. Enjoy your delicious treat again!
FAQs
Common questions about Cheesecake Crescent Rolls Casserole
Can I use different types of cheese?
Yes, you can! Cream cheese is best for a rich taste. However, you can mix in mascarpone or ricotta for a twist. These cheeses can add unique flavors and textures. Just ensure they blend well with your other ingredients.
How do I know when it’s done baking?
The casserole is done when the top turns golden brown. The filling should not jiggle when you shake the dish. A toothpick inserted in the center should come out clean. This means the cheesecake is set and ready to enjoy.
Ingredients substitutions
What can I use instead of sour cream?
Greek yogurt is a great substitute for sour cream. It adds creaminess and a slight tang. You can also use plain yogurt or cottage cheese. Just blend it well to keep the right texture.
Alternatives for crescent roll dough?
If you want a different dough, puff pastry works well. You can also try phyllo dough for a lighter texture. Just be sure to layer it properly so it holds the filling.
Serving suggestions
Best toppings and pairings
Top your casserole with fresh berries like strawberries or blueberries for a fruity kick. A drizzle of chocolate sauce or caramel can also enhance the dish. You can even add a dollop of whipped cream for extra indulgence.
How to serve for special occasions
For special events, serve the casserole warm right out of the oven. Dust it with powdered sugar for elegance. You can also arrange the berries in a nice pattern on top for a beautiful presentation. Guests will love this tasty treat!
For the Full Recipe, check out the detailed instructions and enjoy making this delightful dish!
This blog post covered everything you need for making Cheesecake Crescent Rolls Casserole. We discussed key ingredients like crescent roll dough and cream cheese. You learned how to prepare your baking dish and assemble the layers. I shared tips for a creamy texture and fun flavor variations. Plus, we explored storage and reheating methods.
Now, you can easily enjoy this dessert any time. Have fun making it your own!