If you love crunchy and flavorful snacks, you’ll want to dive into my Bite-Sized Blooming Onions recipe. These tasty treats are perfect for sharing or enjoying on your own. With the right mix of seasonings and a crisp coating, they bring fun to any table. Get ready for a step-by-step guide that caters to all tastes, whether you crave classic flavors or need a vegan option. Let’s get cooking!
Ingredients
Key Ingredients for Bite-Sized Blooming Onions
To make bite-sized blooming onions, you need a few key ingredients. Here’s what you’ll need:
– 2 medium onions
– 1 cup all-purpose flour
– 1 cup buttermilk (or plant-based milk with 1 tablespoon of vinegar for a vegan option)
– 1 cup breadcrumbs (choose between plain or seasoned)
– 1 tablespoon paprika
– 1 teaspoon garlic powder
– 1 teaspoon onion powder
– 1/2 teaspoon cayenne pepper (adjust according to your spice preference)
– Salt and pepper to taste
– Oil for frying (vegetable or canola oil recommended)
These ingredients work together to create a crispy and tasty treat.
Alternative Ingredients for Dietary Preferences
If you have specific dietary needs, you can make some easy swaps. Try these options:
– Use gluten-free flour instead of all-purpose flour.
– Substitute buttermilk with a plant-based milk option.
– Choose gluten-free breadcrumbs for a gluten-free version.
These alternatives help everyone enjoy this dish.
Recommended Seasonings and Dipping Sauces
Seasoning makes a big difference in flavor. Here are some great options:
– Add more paprika for heat.
– Mix in some dried herbs like oregano or thyme.
– Try dipping sauces like ranch dressing or spicy mayo.
These dips enhance your blooming onions and make them even more delicious. For the full recipe, check out the complete instructions above.
Step-by-Step Instructions
Preparing the Onions
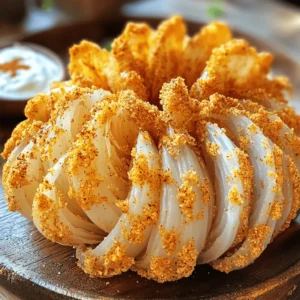
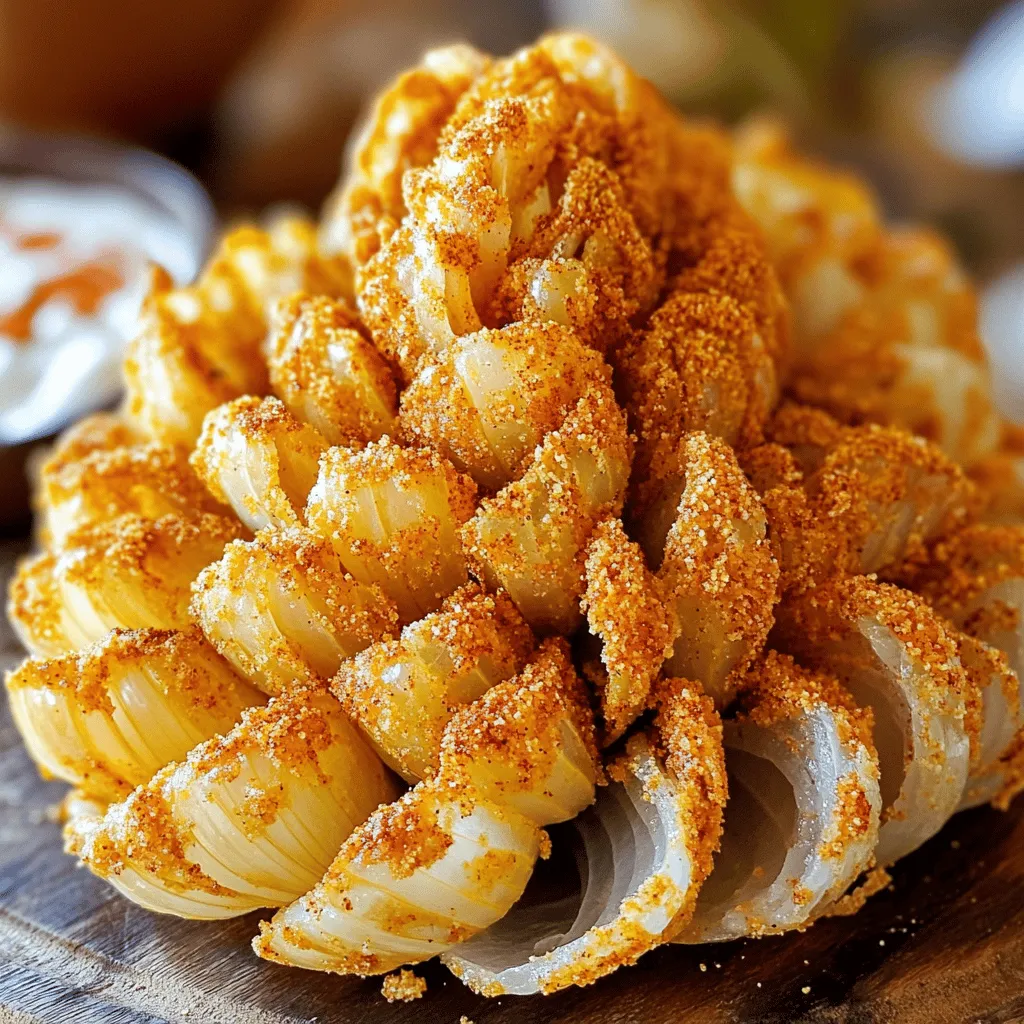
First, take two medium onions. Cut off the top inch of each onion. Remove the outer skin carefully. Make a deep X-shaped cut in each onion. Aim for about 16 petal-like segments. Be careful not to cut all the way through. The bottom should stay intact to hold the petals together.
Mixing the Coating
In a medium bowl, whisk together the flour, paprika, garlic powder, onion powder, cayenne pepper, and a pinch of salt and pepper. This mix will be your dry coating. Make sure it is uniform and well blended.
Coating and Frying Process
Now, let’s coat the onions. Dip each prepared onion into the flour mixture. Make sure every petal is covered. Gently shake off any extra flour. Next, immerse the onion in the buttermilk. Let any excess drip back into the bowl. Coat it well. After that, roll the onion in the breadcrumbs. Press down lightly so they stick.
Heat oil in a deep fryer or pot to around 350°F (175°C). Carefully lower each coated onion into the hot oil. Fry them for about 4-5 minutes. They should turn a nice golden brown and get crispy. Turn them occasionally for even frying. Once done, place the onions on a plate with paper towels to soak up excess oil.
Serving Suggestions
Serve these warm with your favorite dipping sauce. Ranch dressing works great, or try a spicy mayo for extra flavor! Arrange the blooming onions on a platter. Garnish with fresh herbs like parsley. Place small bowls of sauce around for an inviting look. Enjoy your crunchy and flavorful treat! For the full recipe, check the instructions above.
Tips & Tricks
Achieving the Perfect Crunch
To get that perfect crunch, follow a few simple steps. First, make sure the oil is hot. Aim for 350°F (175°C). Use a kitchen thermometer to check. A hot oil helps create a crispy outer layer. Next, coat each onion well. The flour, buttermilk, and breadcrumbs need to stick. Press the breadcrumbs firmly for the best results. Lastly, fry in small batches. This keeps the temperature steady and ensures even cooking.
Common Mistakes to Avoid
A few mistakes can ruin your blooming onions. Don’t skip the flour coating. It helps the buttermilk and breadcrumbs stick well. Avoid crowded frying. Too many onions at once can lower the oil temperature. This leads to soggy onions. Also, be careful with the cuts. If you cut too deep, the petals will separate. Keep the base intact to hold them together.
How to Maintain Flavor and Texture
To keep your blooming onions flavorful and crisp, store them properly. If you have leftovers, place them in an airtight container. When you want to eat them, reheat in an oven instead of a microwave. The oven keeps them crispy. For extra flavor, try adding herbs to your breadcrumbs. Fresh or dried herbs can boost taste. You can also experiment with different spices in your flour mix for unique flavors. For the full recipe, check below.
Variations
Vegan and Gluten-Free Options
You can make bite-sized blooming onions vegan and gluten-free. For vegan options, use plant-based milk with vinegar instead of buttermilk. For the flour, substitute all-purpose flour with gluten-free flour. This way, everyone can enjoy this tasty treat!
Different Flavor Profiles (Spicy, Herb-infused)
To change the flavor, add spices to your coating mix. For a spicy kick, increase the cayenne pepper or add chili powder. If you prefer herbs, mix in dried oregano, thyme, or rosemary. These add depth and make each bite exciting!
Serving Ideas for Different Occasions
Bite-sized blooming onions are perfect for any event. Serve them at parties with a variety of dipping sauces. For game day, pair them with spicy mayo or ranch dressing. At family dinners, set them alongside burgers or sandwiches for a fun twist. You can also use them as appetizers for special occasions. They are sure to impress your guests! Check out the Full Recipe for more ideas.
Storage Info
How to Store Leftover Bite-Sized Blooming Onions
To store leftover bite-sized blooming onions, let them cool first. Place them in an airtight container. You can keep them in the fridge for up to three days. If you stack them, put parchment paper between layers to avoid sticking.
Reheating Instructions for Optimal Crispiness
To reheat your blooming onions, preheat your oven to 375°F (190°C). Place the onions on a baking sheet. Bake them for about 10-12 minutes until they are hot and crispy again. Avoid using the microwave, as it can make them soggy.
Freezing and Thawing Guidelines
You can freeze blooming onions for later use. Wrap each onion in plastic wrap, then put them in a freezer bag. They can last up to three months in the freezer. To thaw, take them out the night before and place them in the fridge. Reheat as mentioned above for best results.
For the full recipe, check the details shared earlier.
FAQs
How do you make the best dipping sauce for blooming onions?
To make a great dipping sauce, mix ranch dressing with some hot sauce. This gives you a creamy and spicy kick. You can also try mixing yogurt with herbs for a fresh flavor. For a zesty option, combine mayo with lemon juice and garlic. Each sauce enhances the onion’s flavor and adds fun to your meal.
Can you prepare bite-sized blooming onions in advance?
Yes, you can prepare bite-sized blooming onions ahead of time. Slice and coat the onions as per the recipe, then store them in the fridge. They can sit for a few hours before frying. However, it is best to fry them just before serving. This keeps them crispy and fresh.
Where can I buy pre-made bite-sized blooming onions?
You can find pre-made bite-sized blooming onions at grocery stores or online. Many frozen food sections carry them. Check local restaurants too, as some may sell them for takeout. Always read reviews to find the best options near you.
What type of oil is best for frying?
For frying bite-sized blooming onions, use vegetable or canola oil. These oils have a high smoke point and are perfect for deep frying. Peanut oil is another great choice. It adds a slight nutty flavor. Make sure the oil is hot enough before frying to ensure a crunchy texture.
You learned how to make bite-sized blooming onions from scratch. We explored key ingredients, cooking steps, and tips for perfect crunch. I also shared variations for different diets and flavor tastes. Remember to store any leftovers well to keep them crunchy. With the right dips and sauces, these make great snacks or party treats. Enjoy your cooking and impress your friends with this fun dish!