ROASTED FLAVORS
Where bold flavors meet everyday meals. Warm, vibrant, and made to share. 🔥🥗🍴
BEST CATEGORIES
TRENDING
![To make fluffy blueberry zucchini muffins, you will need the following ingredients: - 1 medium zucchini, grated - 1 cup fresh blueberries (or frozen, if preferred) - 1 ½ cups all-purpose flour - ½ cup granulated sugar - ½ cup packed brown sugar - 1 teaspoon baking powder - ½ teaspoon baking soda - ½ teaspoon salt - ½ teaspoon ground cinnamon - 2 large eggs - ½ cup vegetable oil - 1 teaspoon vanilla extract - ½ cup Greek yogurt Measuring your ingredients correctly makes a big difference. Use dry measuring cups for flour and sugars. For liquids, use a clear liquid measuring cup. When measuring flour, spoon it into the cup and level it off with a knife. This prevents too much flour in your mix. For brown sugar, pack it tightly into the cup. This ensures you get the right amount. Accurate measurements keep your muffins fluffy and tasty. These muffins are not only delicious but also nutritious. Each muffin has about: - Calories: 180 - Protein: 4g - Fat: 7g - Carbohydrates: 28g - Fiber: 1g - Sugars: 10g Zucchini adds moisture and fiber without many calories. Blueberries provide antioxidants. Greek yogurt adds protein and creaminess. This makes your treat a bit healthier! You can enjoy these muffins guilt-free. For the full recipe, check out the instructions above. Start by getting your kitchen ready. Preheat your oven to 350°F (175°C). This helps the muffins bake evenly. Grab a muffin tin and line it with paper liners or grease it well. This will stop the muffins from sticking. In a big bowl, mix the wet ingredients. Add the grated zucchini, granulated sugar, brown sugar, eggs, vegetable oil, vanilla extract, and Greek yogurt. Use a whisk or a wooden spoon to blend everything together. Aim for a smooth mix. This creates a moist base for your muffins. Now, let's prepare the dry ingredients. In another bowl, whisk together the all-purpose flour, baking powder, baking soda, salt, and ground cinnamon. Make sure everything is well mixed. Breaking up any lumps helps your muffins rise better. Next, combine the wet and dry mixes. Gradually add the dry mix to the wet mix. Stir gently with a spatula or wooden spoon. Stop mixing when the dry ingredients are just combined; a few lumps are okay. Now fold in the blueberries carefully. Spoon the batter into the muffin cups, filling them about three-quarters full. Bake in your preheated oven for 18-22 minutes. Check with a toothpick; if it comes out clean, your muffins are ready. Let them cool in the tin for about 5 minutes. Then, move them to a wire rack to cool completely. For the full recipe, refer to the detailed instructions above. To keep your muffins fluffy, avoid overmixing. When you add dry ingredients to wet ones, mix just until combined. A few lumps are okay! Also, make sure your baking powder and baking soda are fresh. Old leavening agents can lead to dense muffins. Lastly, don't skip the Greek yogurt; it adds moisture and lightness. One common mistake is not measuring ingredients accurately. Use a kitchen scale or measuring cups. Too much flour makes muffins heavy. Another mistake is opening the oven door while baking. This can cause muffins to sink. Finally, be careful with baking time. Check them a few minutes before the timer goes off. Spices can elevate your muffins. Ground cinnamon is a great start. It pairs well with blueberries and zucchini. You can also try adding nutmeg or a pinch of ginger for warmth. If you like a bit of zest, add lemon or orange zest. These flavors brighten each bite! For the full recipe, refer to the earlier section. {{image_4}} You can easily change some ingredients in this recipe. If you want to use whole wheat flour, go ahead. It adds more fiber and a nice flavor. You can also swap granulated sugar for coconut sugar. This makes the muffins a bit healthier. If you don’t have Greek yogurt, regular yogurt works as well. Adding flavors makes these muffins even better. Try mixing in chopped walnuts or pecans for a crunchy bite. You can also add zest from a lemon or orange for a fresh twist. This bright flavor pairs well with blueberries. If you like spices, a bit of nutmeg can add warmth. To make vegan muffins, replace eggs with flax eggs. Mix one tablespoon of ground flaxseed with three tablespoons of water. Let it sit for a few minutes until it thickens. For gluten-free muffins, use a gluten-free all-purpose flour blend. Just ensure it has xanthan gum for the right texture. These simple swaps keep the muffins delicious for everyone. For the complete recipe, check out the [Full Recipe]. To keep your muffins fresh, store them in an airtight container. This will help maintain their moisture. Place a paper towel at the bottom of the container to absorb excess moisture. You can also add another paper towel on top before sealing. This method keeps muffins soft and fluffy for about three days at room temperature. Freezing is a great way to save leftover muffins. First, let the muffins cool completely. Then, wrap each muffin in plastic wrap or foil. Next, place the wrapped muffins in a freezer-safe bag or container. Label the bag with the date. They can last in the freezer for up to three months. When you want one, just take it out and let it thaw at room temperature. To enjoy warm muffins again, reheat them in the oven. Preheat your oven to 350°F (175°C). Place the muffins on a baking sheet and cover them loosely with foil. Heat for about 10 minutes. You can also use a microwave. Just warm one muffin for 15-20 seconds. This will keep them soft and tasty, just like when they were fresh. For the full recipe, be sure to check the detailed instructions! Yes, you can use frozen zucchini. Just make sure to thaw and drain it first. Frozen zucchini may have more water than fresh. This can make your muffins too wet. After draining, squeeze out any extra moisture. This keeps the muffins nice and fluffy. Check your muffins after 18 minutes. Insert a toothpick into the center of a muffin. If it comes out clean or with a few crumbs, they are done. If the toothpick has wet batter, bake for a few more minutes. Keep an eye on them to avoid overbaking. These muffins pair well with many things. You can serve them with butter or cream cheese. A drizzle of honey adds a sweet touch. For a fun twist, serve with yogurt and fresh fruit. You can also enjoy them with a cup of tea or coffee. In this post, we covered how to make tasty blueberry zucchini muffins. We discussed ingredients, measuring tips, and nutritional info. You learned how to prep your kitchen and mix the batter perfectly. I shared tips to keep your muffins fluffy and avoid common mistakes. We explored fun variations and gave storage info, including freezing and reheating. Making these muffins can be easy and fun. Enjoy your baking and share your creations!](https://roastedflavors.com/wp-content/uploads/2025/07/b80f9526-e026-4085-98eb-01effc9dc647.webp)
![- 1 pound shrimp, peeled and deveined - 1 cup buttermilk (or dairy-free alternative) - 8 small corn tortillas - 1/2 cup mayonnaise (or vegan mayo) - 2 tablespoons sweet chili sauce - 1 tablespoon sriracha - Juice of 1 fresh lime - 1 cup shredded cabbage - 1/2 cup diced fresh tomatoes - 1/4 cup chopped fresh cilantro - Lime wedges for serving To make these tacos pop, you need the right ingredients. Start with fresh shrimp. They should be peeled and deveined for the best texture. Buttermilk gives the shrimp a tender bite. Use small corn tortillas for the perfect taco base. The Bang Bang sauce is key. Combine mayonnaise with sweet chili sauce, sriracha, and lime juice for a creamy and spicy kick. You can use vegan mayo if you prefer a plant-based option. For garnishing, fresh cabbage adds crunch. Diced tomatoes bring color and sweetness. Cilantro adds a fresh touch. Don't forget lime wedges! They add a burst of flavor when squeezed on top. This recipe is easy to follow. You can find the Full Recipe for all the steps and details you need to make these delicious tacos. Get ready to impress your friends and family! Combine the mayonnaise, sweet chili sauce, sriracha, honey, and lime juice in a bowl. Whisk until smooth. This sauce packs a punch and adds great flavor. Submerge the peeled and deveined shrimp in buttermilk. Make sure they are fully covered. Cover the bowl and refrigerate for at least 15 minutes. This step makes the shrimp tender and flavorful. In another bowl, mix the flour, cornstarch, smoked paprika, garlic powder, cayenne pepper, salt, and black pepper. Remove the shrimp from the buttermilk, letting excess drip off. Dredge the shrimp in the flour mix. Make sure they are well coated. Heat oil in a skillet over medium-high heat. Fry the shrimp in batches for 2-3 minutes on each side. They should be golden brown and crispy. Warm the corn tortillas in a skillet for about 30 seconds on each side. Layer shredded cabbage on each tortilla. Add 2-3 pieces of crispy shrimp on top. Sprinkle diced tomatoes and drizzle with the Bang Bang sauce. Finish with fresh cilantro. This creates a colorful and tasty taco that is hard to resist. For the complete recipe, check the [Full Recipe]. Make sure your oil is hot enough before frying. This step is key for getting crispy shrimp. If the oil is too cool, the shrimp will absorb oil and become soggy. I usually heat the oil until it shimmers. A good test is to drop a small piece of the batter in. If it bubbles up right away, the oil is ready. You can adjust the sriracha in the sauce to control the heat. Want it milder? Use less sriracha. If you prefer a lighter version, swap out the mayonnaise for yogurt. This change gives it a creamy texture with fewer calories. Trust me, both options taste great. For a fun twist, add avocado slices or mango salsa to your tacos. The avocado adds creaminess, while the mango brings a sweet flavor. These extras make your tacos more colorful and exciting. You can even drizzle extra Bang Bang sauce on top for a flavor boost. {{image_4}} You can switch up the taco shells for more fun. Use flour tortillas for a softer bite. If you want a low-carb choice, try lettuce wraps. They add a nice crunch and keep things fresh. Not a shrimp fan? No worries! You can swap shrimp with chicken or tofu. Chicken gives a hearty flavor, while tofu brings a nice texture. Both options work great with the Bang Bang sauce. Want to kick up the taste? Add some spices to the coating. Cumin or chili powder can add a warm touch. Just sprinkle them in the flour mix, and you’re good to go. These small changes can make your tacos truly unique. For the full recipe, check out the detailed instructions above. Store leftover tacos in an airtight container for up to 2 days. This keeps them fresh and tasty. Make sure the tacos cool down before sealing them. You can freeze fried shrimp separately from toppings. They will stay good for about 1 month. When ready, just thaw the shrimp in the fridge. To reheat shrimp, use the oven for 5-7 minutes. This helps them stay crispy. Avoid using the microwave, as it can make them soggy. Enjoy your Bang Bang Shrimp Tacos later by following these steps! Substitute all-purpose flour with a gluten-free flour blend. This swap keeps the tasty crunch and flavor. Yes, you can store the sauce in the fridge for up to 3 days before serving. This makes meal prep easier. Fresh or frozen shrimp works well; ensure they are peeled and deveined. This step is key for taste and texture. The spice level can be adjusted by varying the amount of cayenne pepper and sriracha used in the sauce. Start small and taste as you go. Use plant-based shrimp alternatives, vegan mayo, and agave syrup for the sauce. This way, everyone can enjoy these tacos! Bang Bang Shrimp Tacos are a joy to make and eat. You need just a few simple ingredients like shrimp, tortillas, and the tasty Bang Bang sauce. Remember to marinate the shrimp and fry them until golden. You can customize the sauce and toppings for your perfect taco. Store leftovers carefully, and enjoy them within a couple of days. Whether you stick to shrimp or try chicken or tofu, these tacos will satisfy your cravings. Now it's time for you to create your own delicious Bang Bang Shrimp Tacos at home!](https://roastedflavors.com/wp-content/uploads/2025/05/1b764d74-413b-4cf0-bb32-3ffe751bce03.webp)
NEW RECIPES
Air Fryer Orange Chicken Bites Flavorful and Easy Meal
Looking for a tasty meal that’s easy to make? Let me introduce you to Air Fryer Orange Chicken Bites! This simple dish combines juicy chicken,
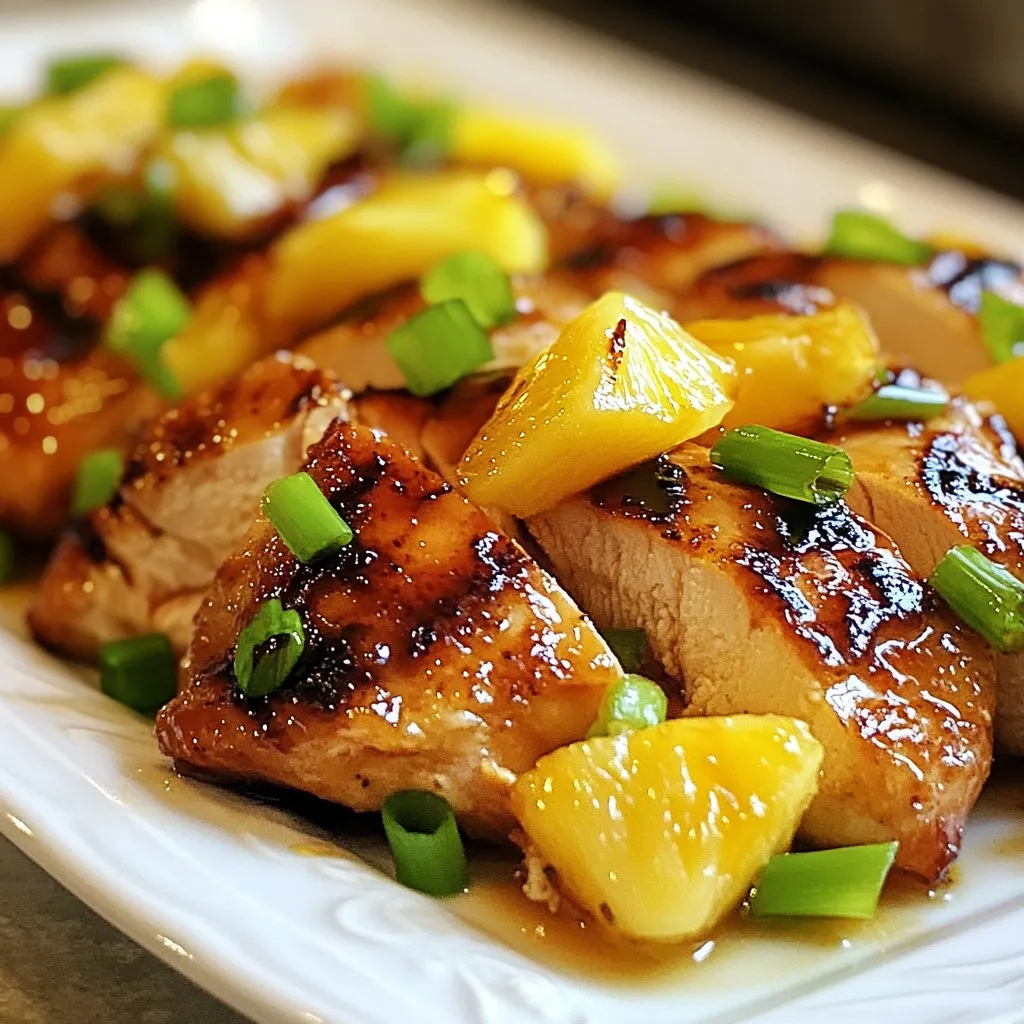
Brown Sugar Pineapple Chicken Flavorful Grilled Dish
Are you ready to elevate your grilling game? Brown Sugar Pineapple Chicken is a sweet and savory dish that stands out at any cookout. Using
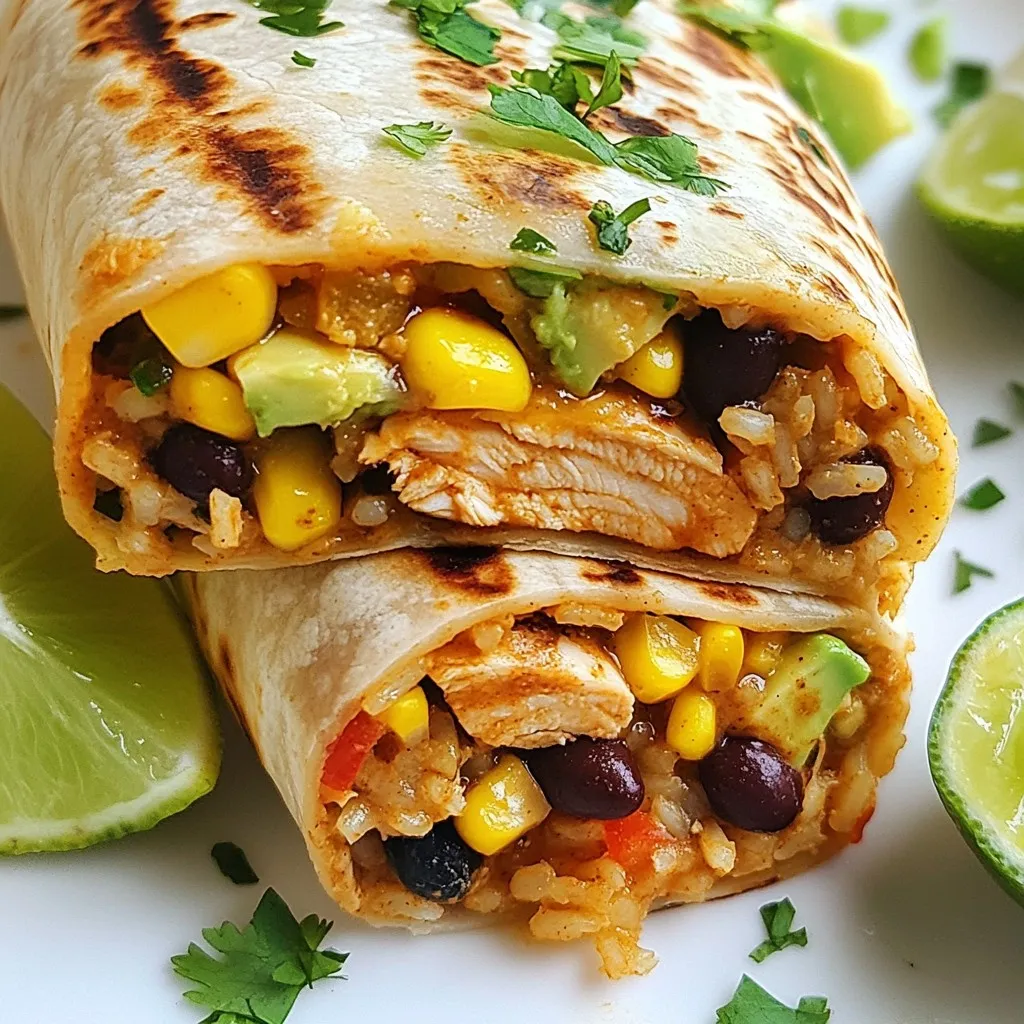
Chipotle Ranch Chicken Burritos Flavorful Meal Prep
Are you ready for a tasty meal that’s easy to prep? Chipotle Ranch Chicken Burritos bring bold flavors to your lunch or dinner. You’ll enjoy
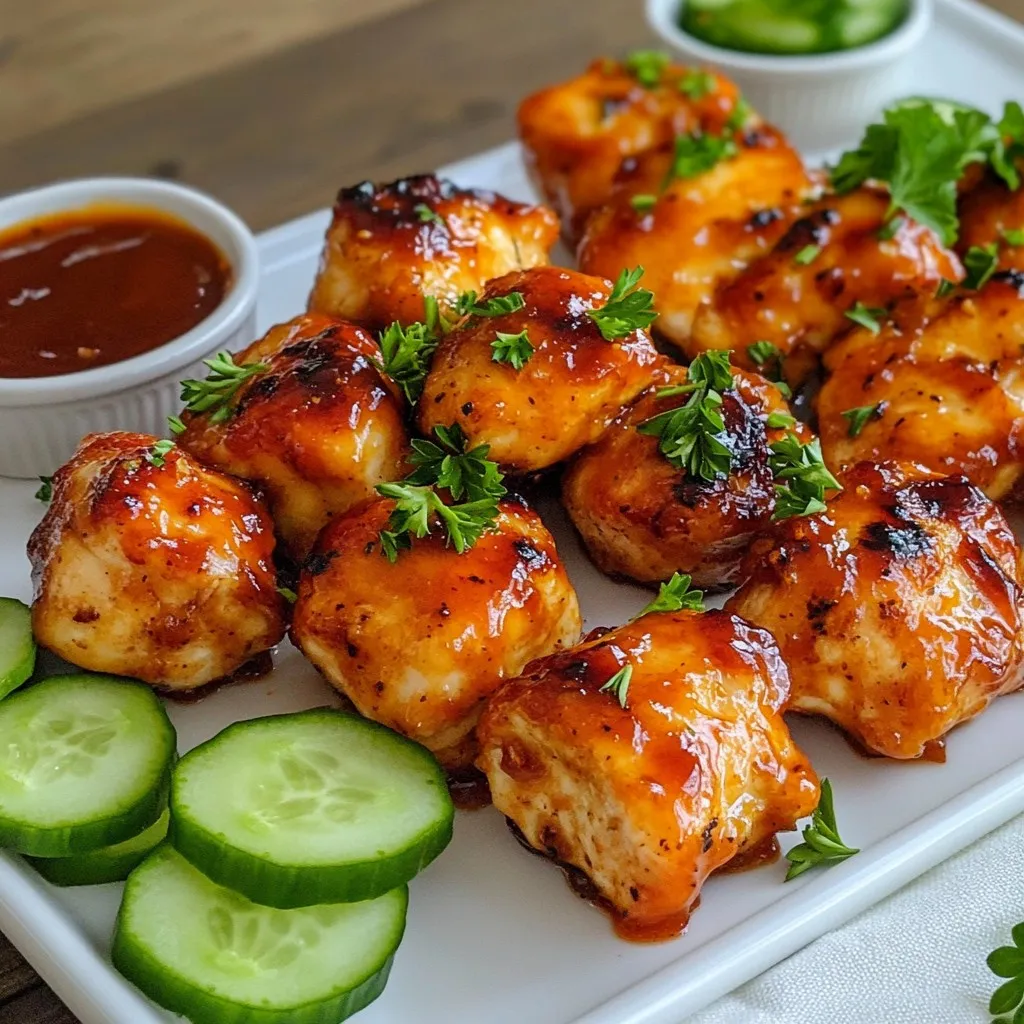
Honey BBQ Chicken Bites Flavorful and Simple Recipe
If you’re craving a delicious and easy meal, you’ll love my Honey BBQ Chicken Bites! This simple recipe transforms basic chicken into a flavorful dish

Cheddar Garlic Herb Potato Soup Hearty and Flavorful
Looking for a warm hug in a bowl? My Cheddar Garlic Herb Potato Soup is hearty and flavorful, perfect for chilly days. With simple ingredients

Meal Prep Teriyaki Chicken Bowls Packed with Flavor
Ready to spice up your week with meal prep? These Meal Prep Teriyaki Chicken Bowls are packed with flavor and will keep your taste buds
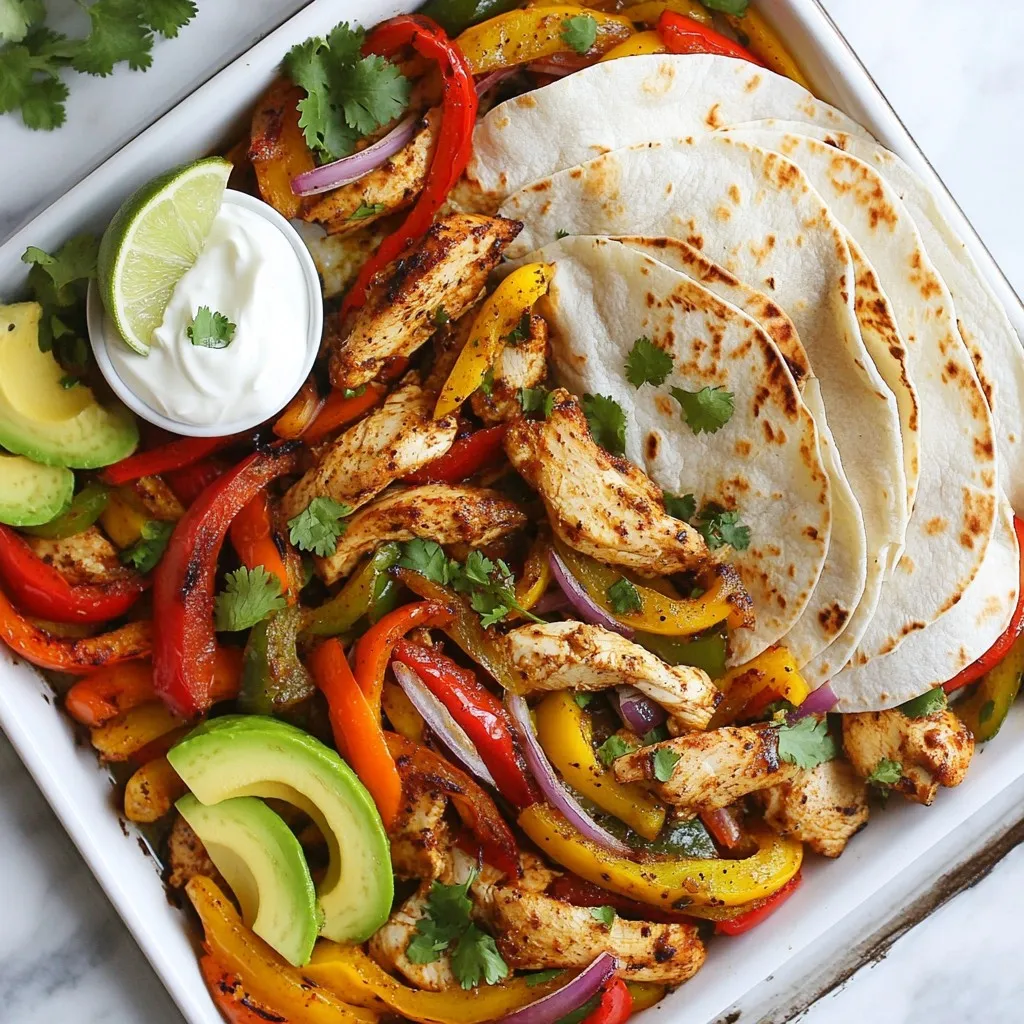
Sheet Pan Chicken Fajitas Flavorful and Easy Dinner
Looking for a quick dinner idea that packs a punch of flavor? Try my Sheet Pan Chicken Fajitas! This easy meal takes just a few
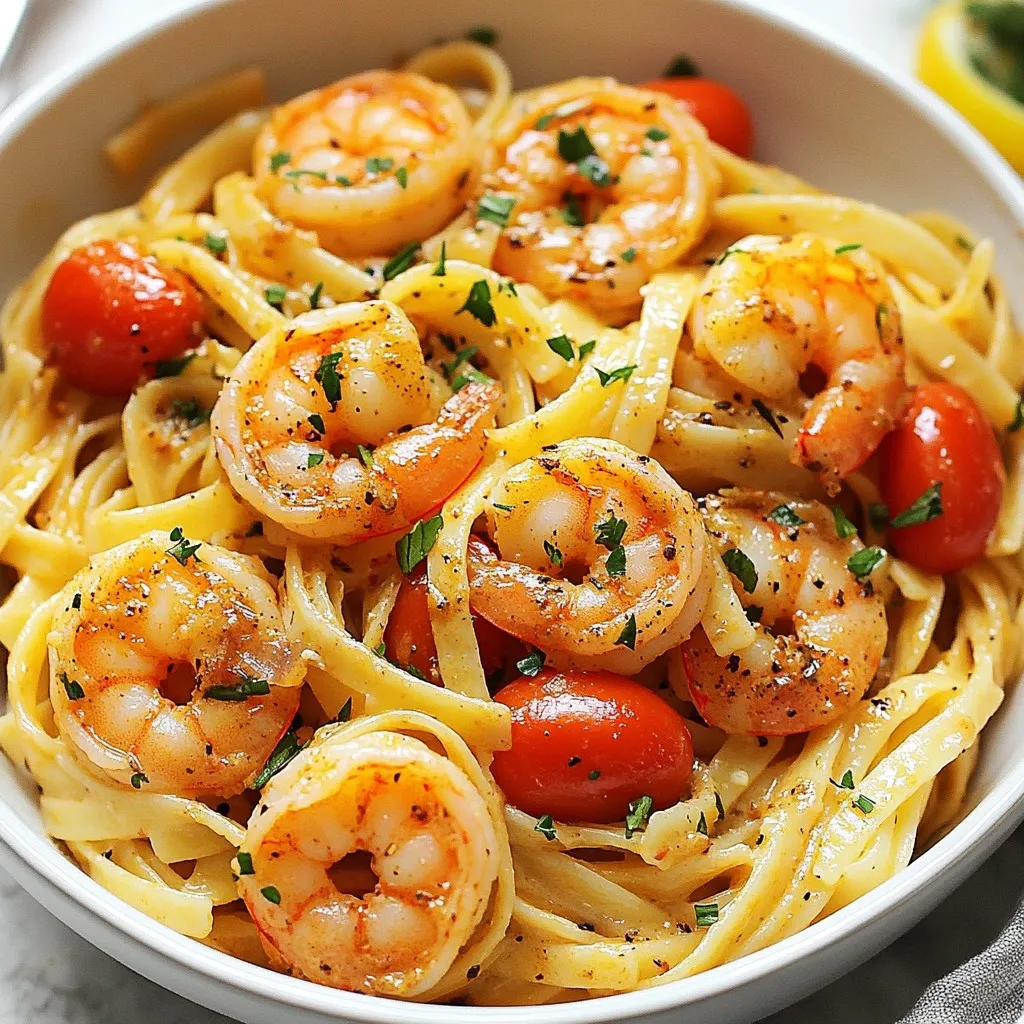
Minute Cajun Shrimp Pasta Quick and Easy Recipe
Are you ready to spice up your dinner routine? My Minute Cajun Shrimp Pasta recipe is here to save the day! This dish is quick,